
Fine line aesthetics are all over feeds right now, but they do not always survive day-to-day wear the way people expect. Lines that look featherlight on an iPhone still blur if they sit on high-movement zones or if spacing is too tight. Think about placement, line weight, and realistic touch-up timelines before you pick a design, and the first idea below shows how to make a small wrist skull last longer.
1. Fine Line Geometric Skull on the Inner Wrist

I recommend this for first-timers who want a tiny, architectural skull that reads delicate but can be scaled later. Fair warning, the inner wrist moves constantly which speeds fading, so ask your artist for slightly heavier linework than the ultra-micro look you saved. During consultation, request a clear grid or stencil check before inking so angles land perfectly. Expect a quick session around 30 to 60 minutes and a touch-up at 12 to 18 months if you wear the area daily. For showing this off, pair it with a thin leather bracelet on the opposite wrist so the tattoo stays visible without overcrowding the hand.
2. Mandala-Framed Geometric Skull on the Shoulder Blade
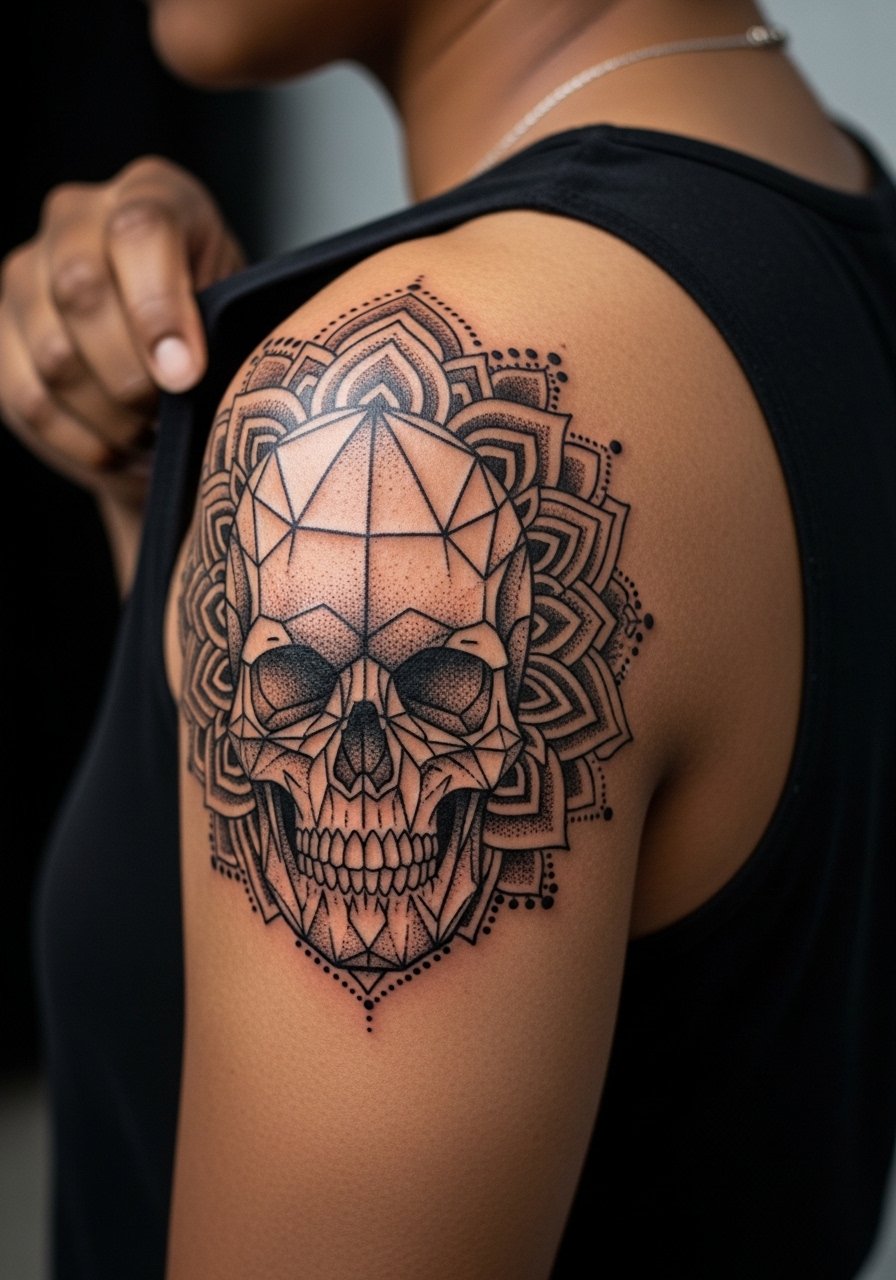
I've seen mandala frames age well when they're given breathing room and dotwork spacing. The shoulder blade is a forgiving canvas because it moves less than the ribcage, which keeps stipple shading crisp for years. Tell your artist you want open petal spacing and less density near the jawline of the skull so the dots do not merge over time. A typical session runs one to two hours depending on size. Expect soreness when sleeping on that side during the first week. For respect toward its origins, consider subtle pattern changes rather than a direct cultural replica.
3. Dotwork Faceted Skull with Angular Facets on the Thigh

This is a go-to for collectors who want hypnotic depth without heavy linework on high-movement skin. The thigh gives room for tight stipple and layered facets that read almost three dimensional on curved muscle. During consult, point to photos that show the exact density you want and ask about session layout if you plan to expand into a leg piece. The session is comfortable compared with ribs and can take two to three hours for a medium composition. For summer reveal, pair the piece with black athletic shorts so the pattern sits just above the hem and reads balanced.
4. Symmetrical Blackwork Skull on the Outer Forearm

There's a clear trade-off here. Solid black fills read boldly for years and obscure small tweaks, but they require a steady hand and exact stencil placement. If you sit with this stencil in place, ask the artist to stand back and check symmetry under natural light before starting. Expect two sessions for medium-large sizes because saturation takes time. The forearm is visible and durable, though heavy sun exposure will lighten fills over time so sunscreen after healing is important. The session feel is moderate and manageable, and a touch-up at year two can restore saturation if you spend a lot of time outdoors.
5. Tessellated Skull Across the Collarbone
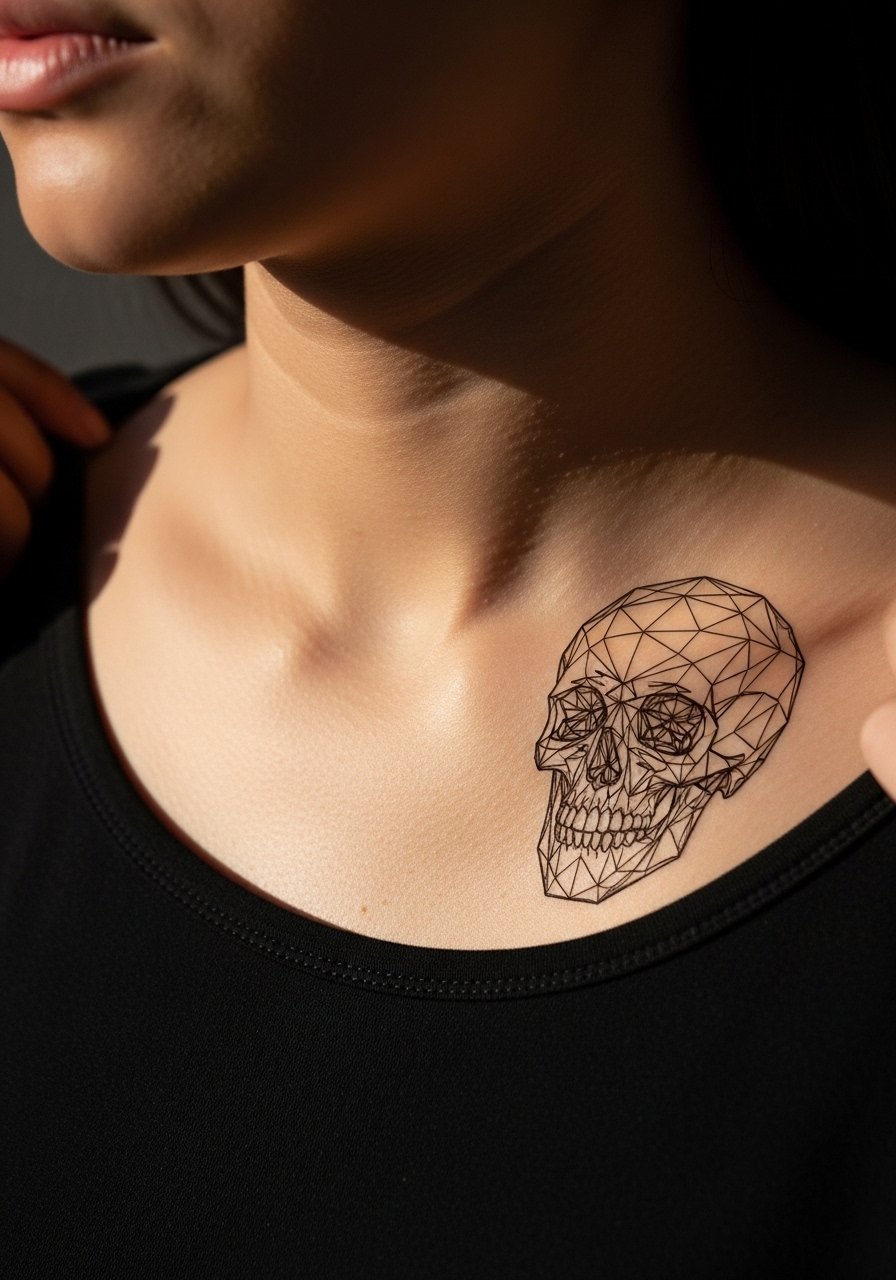
A tessellated layout hides the skull at a glance and rewards close inspection, which makes it a clever option for people who want subtlety and complexity. The collarbone area shows contours, so suggest polyhedron-inspired facets to the artist so the pattern follows bone lines instead of fighting them. This placement needs careful spacing because too-small tessellation will soften into blur. For showing it off, a simple v neck t shirt men frames the collarbone while keeping the design readable without competing prints.
6. Hyper-Minimal Polyhedron Skull Behind the Ear and Neck Edge

Small polyhedral skulls behind the ear are discreet and suit people who want tiny geometry without constant display. The area is delicate so find an artist experienced with micro placements. There is a debate about fine line longevity in tiny spots, and artists split into two camps. One camp says these micro lines blur sooner on high-motion or thin skin areas. The other camp says careful depth and spacing help them settle clean. Ask where your artist stands and request healed portfolio pictures on similar placements. Session time is short, but healing can feel odd because the spot rubs against collars and hair.
Studio Day Picks
The first six designs include delicate wrists, shoulder blades, and neck areas, so a small kit for transfer checks, comfort, and clean healing smooths the session and the week after.
-
Stencil transfer paper kit. Lets you preview exact line placement on wrist and collarbone pieces before any needle touches skin.
-
Topical numbing cream. Useful for rib or inner bicep sessions to reduce sharp sensitivity without altering how the artist layers dotwork.
-
Thin protective film roll. Helps wrist and finger tattoos survive the first week of washing and friction from daily use.
-
Fragrance-free gentle body wash. Cleans healing collarbone and shoulder blade areas without stripping delicate dotwork.
-
Aquaphor healing ointment. A thin layer in the first days keeps micro line channels hydrated while you follow your studio's heal plan.
7. Ornamental Geometric Skull Mandala Along the Spine
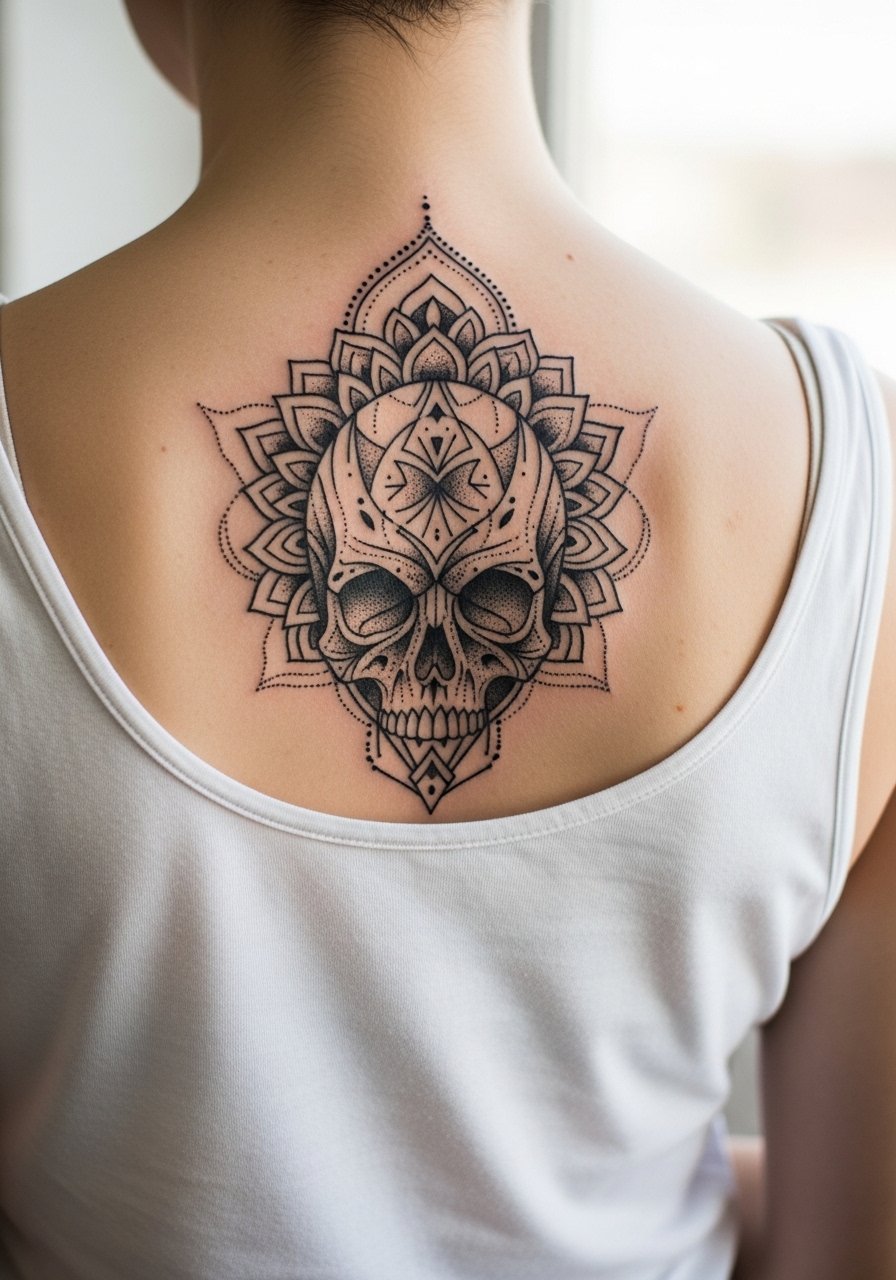
Spine work demands patience, both from you and the artist. When sized and spaced correctly, vertical mandala framing accents the natural column and creates a meditative center. Tell your artist if you plan to expand into a shoulder or full back piece because that changes how they pace the stencil. Expect a two-session plan for a medium-sized center design and some tenderness when sitting or leaning during the first week. For cultural sensitivity, consider motifs inspired by geometry rather than copying sacred symbols outright.
8. Angular Negative Space Skull on the Outer Forearm

Negative space works especially well on darker skin because contrast pops without relying on ultra-fine lines. The outer forearm has less stretch than the inner wrist which helps angles stay crisp. During consultation, ask the artist to map the negative areas on your skin tone so they are truly legible from a distance. Sessions are usually a single block for medium sizes and healing is straightforward if you avoid heavy sun while the area settles. For styling, a slim silver cuff bracelet on the opposite arm balances metallic accents without covering the tattoo.
9. Faceted Solid Blackwork Skull for Thigh or Back Panel
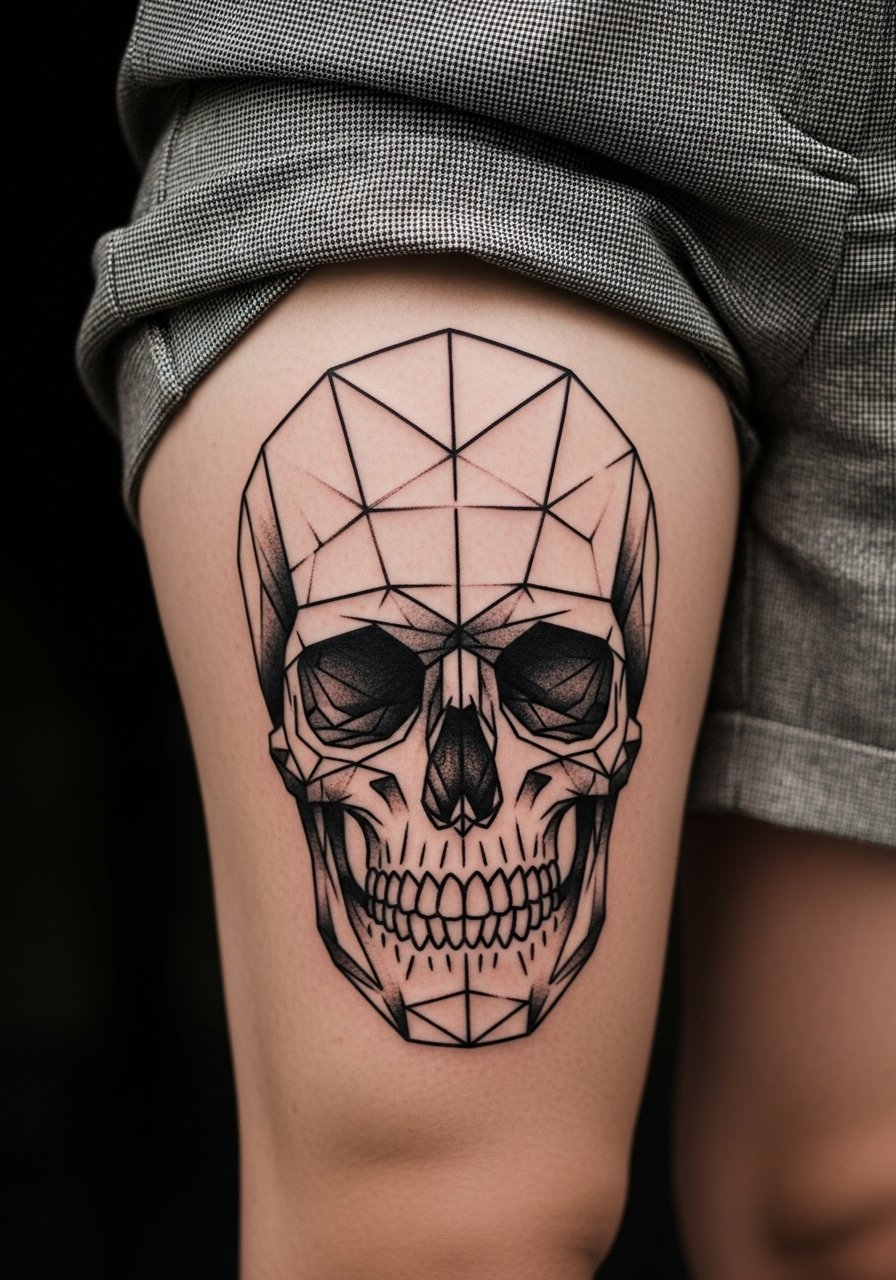
Solid faceted blackwork reads as a strong design that ages with relatively low maintenance because there is less micro detail to soften. The thigh is an ideal canvas for large fills because it handles saturation well and stretches predictably with muscle. Discuss expansion plans with your artist because heavy black areas should flow into future elements to avoid awkward edges. Expect two sessions if the piece is large and heavy. For casual showing, tailored shorts highlight the upper thigh art and keep the silhouette clean. Consider a planned touch-up a year out if you do a lot of squats or weight fluctuation.
10. Geometric Skull with Longhorn Motif on the Upper Chest

This neo-traditional meet-geometry hybrid reads masculine without relying on color. The upper chest is a broad surface that lets horns sweep naturally with clavicle lines, but it is also exposed to sun, so plan for ongoing SPF once healed. Tell your artist how much horn detail you want versus faceting so the piece does not become visually crowded up close. Sessions usually cover multiple passes for shading and definition, which raises the need for clear session quotes. For the appointment wear, a loose button-down you can pull aside helps access while preserving modesty.
11. Hyper-Minimal Polyhedron Micro Skull on the Inner Bicep
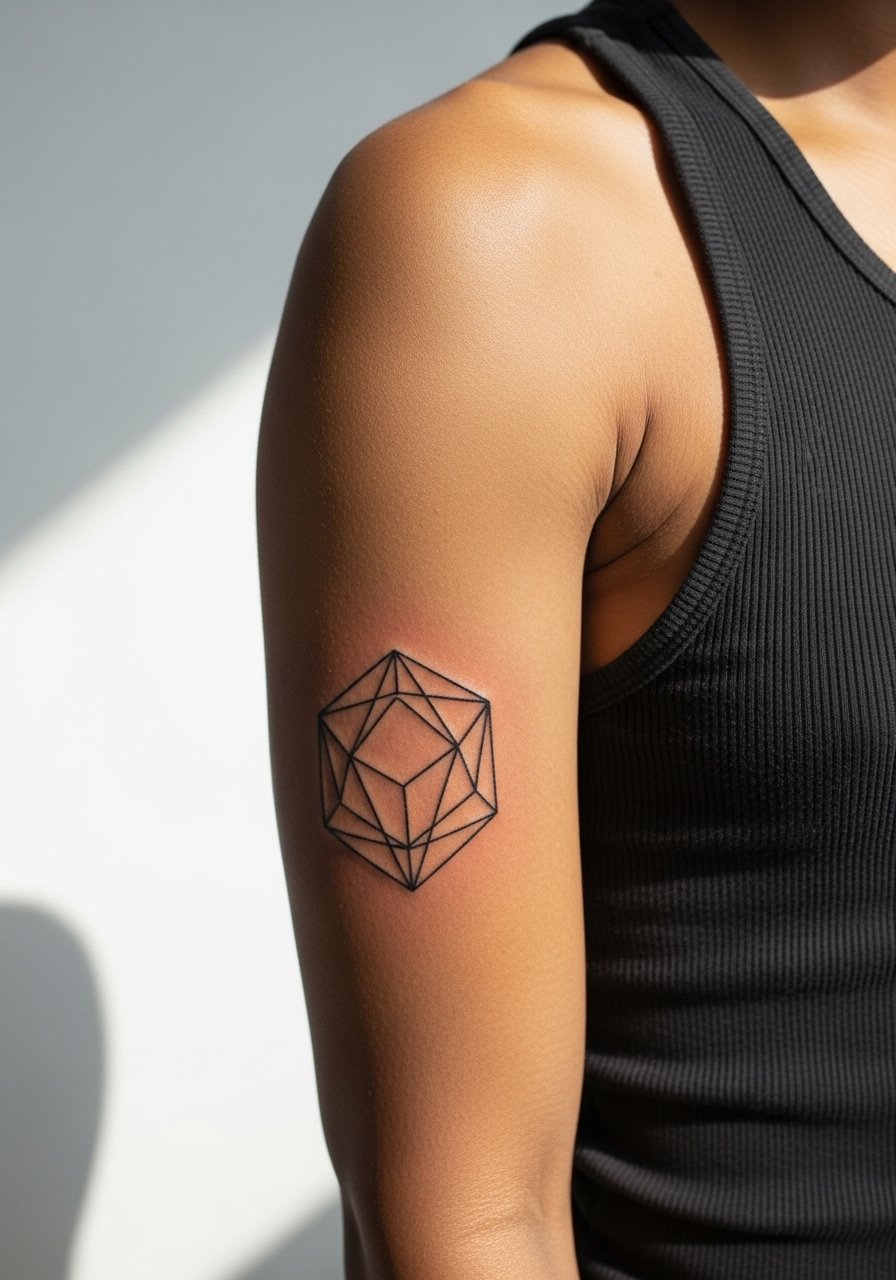
Inner bicep skin is softer and more prone to slight swelling during healing, which can affect tiny line clarity. The micro polyhedron reads technical and modern when placed high on the arm, and it makes a great starter if you plan a sleeve. Be explicit with the artist about needle depth so the line lays at steady saturation without sitting too high in the dermis. Expect a short, possibly uncomfortable session because the area is sensitive, and plan to avoid rubbing from shirt seams for two weeks. If you want the piece visible for workouts, pick sleeveless tops for the reveal day.
12. Scalable Facet Cluster That Starts on the Outer Forearm
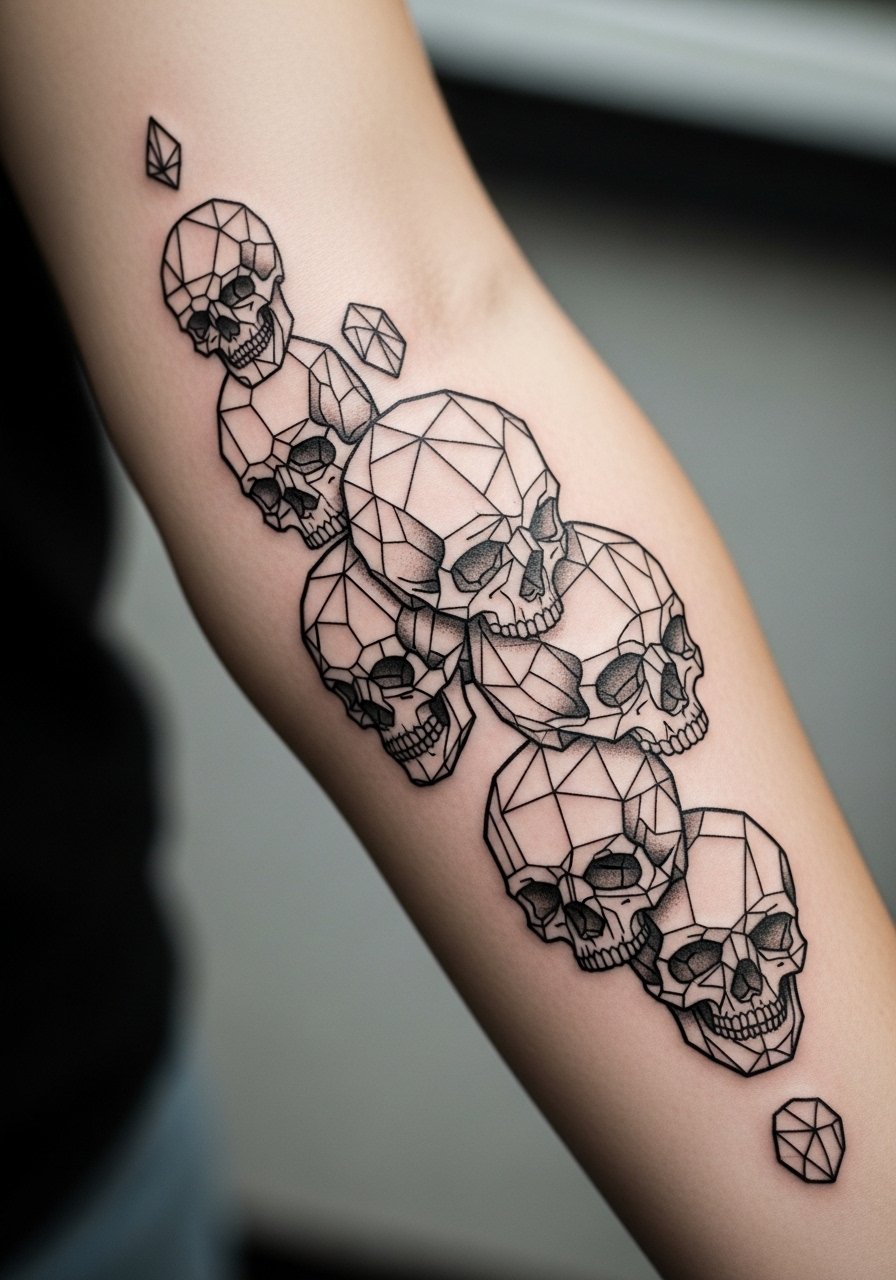
This is a starter approach for people who want a sleeve that grows. Begin with a bold cluster of facets and leave breathing room to add complementary elements later. The outer forearm handles expansion well and lets the artist align future pieces to muscle flow. During consult, request a growth map so new additions do not force awkward negative shapes. Sessions for the starter cluster usually run one to two hours. For the session wear, bring a loose fit tank top so the artist can roll sleeve areas without binding.
13. Tessellated Optical-Illusion Skull That Moves From Collarbone to Ribcage
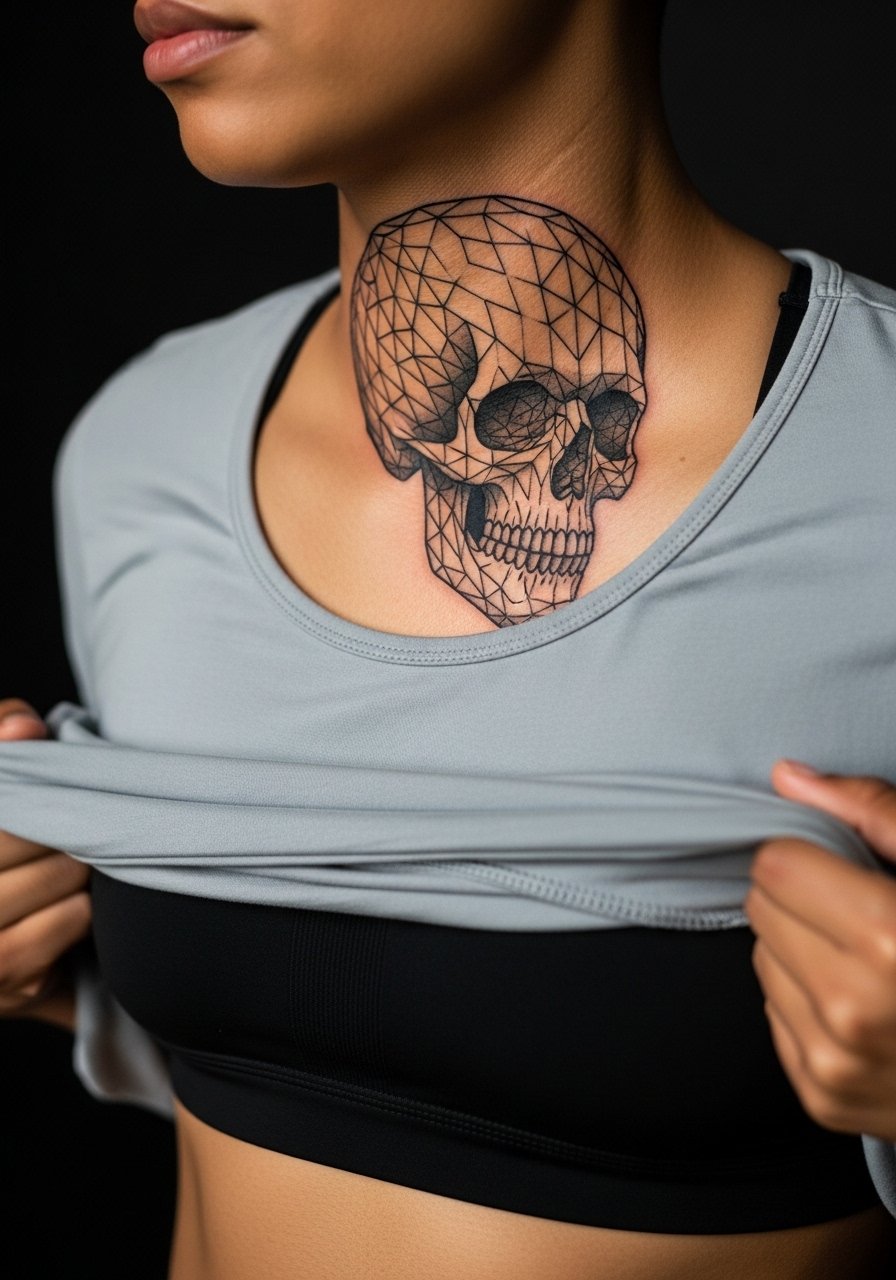
Optical tessellation on the ribcage creates a dramatic reveal but carries more risk of distortion with weight changes. If you plan significant body changes, discuss scaling and placement so facets do not sit across stretch-prone zones. The rib area is a higher pain site and usually needs multiple shorter sessions. There is also a debate about Saniderm versus dry healing for detailed work, with one camp favoring the protective film for crisp results and another warning about trapping moisture on delicate dotwork. Ask the studio how they handle detailed rib pieces and what healed photos they can show from similar placements.
14. Micro Skull and Dotwork Stack on the Fingers

Finger placements heal under constant friction and are infamous for faster fade. I advise making micro skulls slightly larger than the smallest mockup you like so the lines do not fully disappear after a year. Touch-ups are often part of the plan for finger work, typically at the 12 to 18 month mark. For the session, avoid jewelry and wear short sleeves so the hand is fully accessible. A thin stack on the opposite wrist can balance the look and keep your fingers from feeling visually cluttered, so try a minimalist leather wrap on the other arm.
15. Crystal Polyhedron Shading That Pops on the Collarbone
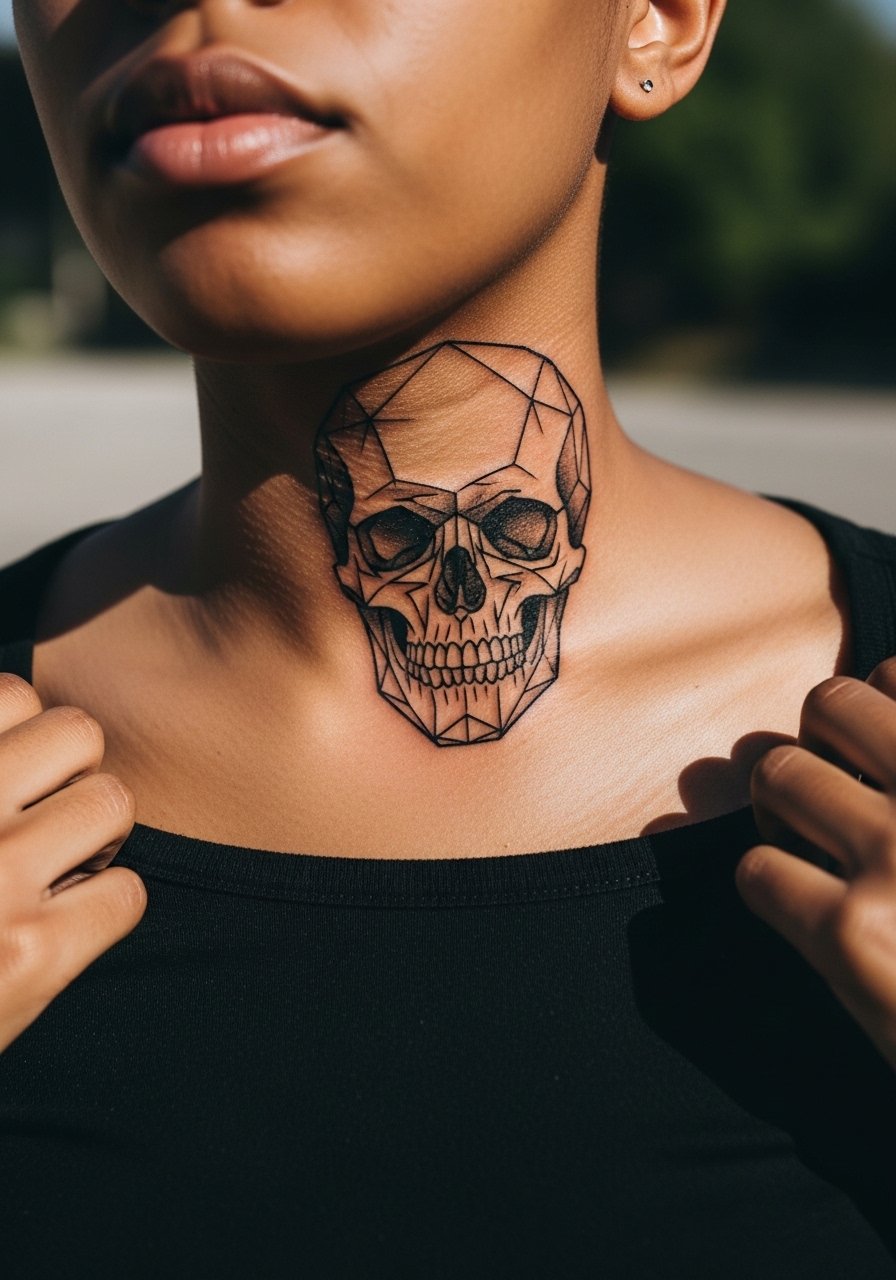
Pairing polyhedral shading with collarbone placement gives an almost sculptural effect because the facets catch shadow over bone. Ask the artist to use subtle shifts in stipple and thin shading rather than dense saturation near the bone edge. This avoids muddy areas as the piece heals and settles. Session pace is steady and requires good breaks for the artist to check symmetry. For an elegant finish, wear a thin chain pendant necklace that sits above the tattoo so the jewelry complements the geometry rather than competes with it.
16. Hidden Micro Tessellation Behind the Ear
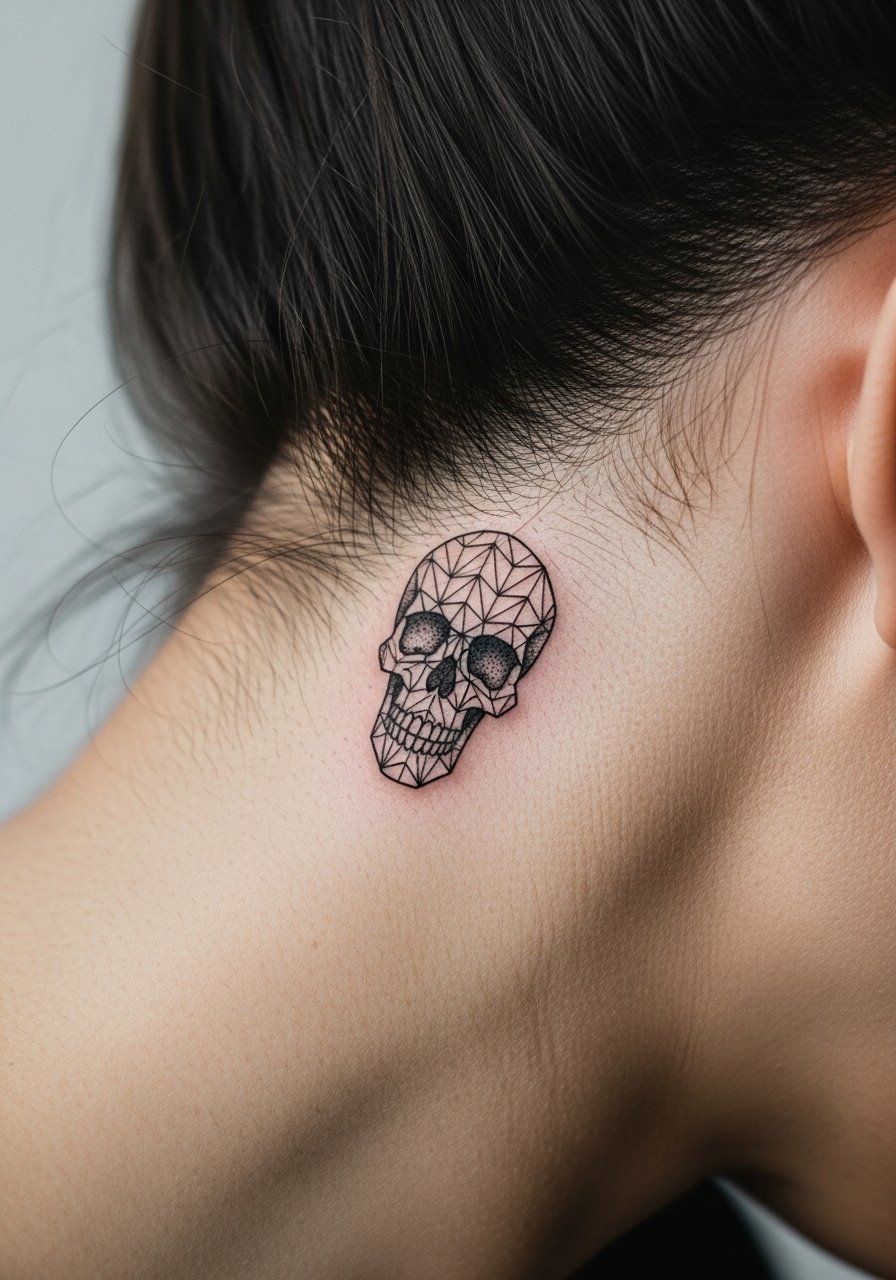
Behind-the-ear placements are discreet and often chosen by people who want a private motif. The area is small and moves with hair and collars so spacing must be intentional. Ask for a tiny stencil check and healed examples on similar placements. Sessions are quick but the spot can itch as it heals because of hair rubbing. If you plan to expose the area, consider a short haircut for initial healing and a small stud or two rather than heavy earrings.
17. Calf Geometric Skull Built for Movement
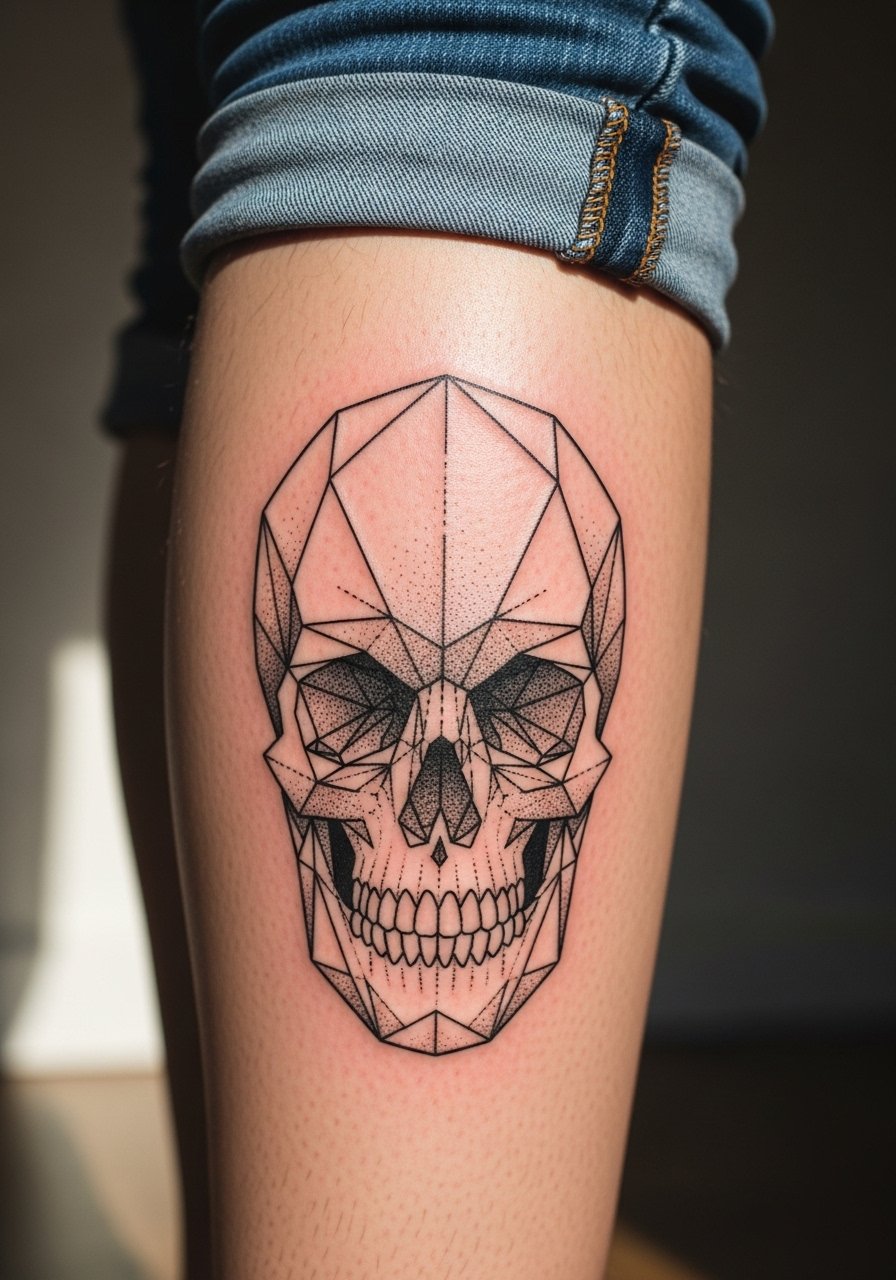
Calf placements are forgiving for geometric pieces because they age with fewer distortion issues than thighs during weight fluctuation. The outer calf lets the artist use slightly more detail without worrying about constant friction. Sessions are comfortable and often allow for longer single sittings. For post-heal visibility in everyday wear, roll a pair of dark wash bootcut jeans at the hem or wear ankle boots so the tattoo shows when you walk.
Frequently Asked Questions
Q: Will a fine line geometric skull fade faster on my wrist than on my forearm?
A: Yes, from what I have seen the wrist tends to fade faster because of constant movement and washing. Choose slightly heavier linework for wrist placements and plan a touch-up at around 12 to 18 months. If you want a low-maintenance option, move the design to the outer forearm where angles hold better.
Q: How do I find an artist who keeps geometric angles precise without traveling to a major city?
A: Search hashtags like #GeometricSkullTattoo and #DotworkSkull with your city name, and check healed portfolios rather than just fresh photos. Apps that list guest spots and verified portfolios also help. Ask for healed photos on skin tones like yours during consultation so you know how their work settles.
Q: Is negative space better than filled blackwork for dark skin tones?
A: Negative space often reads very well on darker skin because contrast is immediate and does not rely on subtle shading. Ask the artist to plan larger negative areas so the silhouette reads clearly in photos and from a distance.
Q: Should I expect extra pain or different healing for a ribcage tessellation versus a thigh faceted skull?
A: Ribs are usually more painful and need shorter sessions than thighs, and the rib skin stretches differently so tessellation requires more spacing. Thigh work tolerates longer sessions and heavier saturation, which makes it easier to preserve fine stipple over time.
Q: What should I wear to a chest or collarbone session so the artist has access but I stay covered?
A: Wear a loose button-down shirt you can pull aside during the session. It keeps the area accessible while you stay comfortable and avoids fabric rubbing the new work afterward.
Q: How often do geometric skulls need touch-ups compared with traditional skulls?
A: It depends on placement and line weight. Fine line and intricate dotwork usually need touch-ups sooner, perhaps at year one to two for high-wear spots. Solid blackwork often keeps a cleaner look longer and may only need refreshing every few years. Ask for a realistic touch-up timeline in your consult.
