
Fine line trends look great on a feed but a back piece faces constant friction from clothing and movement. Over the long run, heavy blackwork and carefully spaced geometry often read cleaner after two years, while tiny fine-line fills can blur. These 27 geometric tattoo designs on the back balance visual impact with longevity, plus what to ask for at consults and how to dress on session day.
1. Geometric Mandala Spine Piece
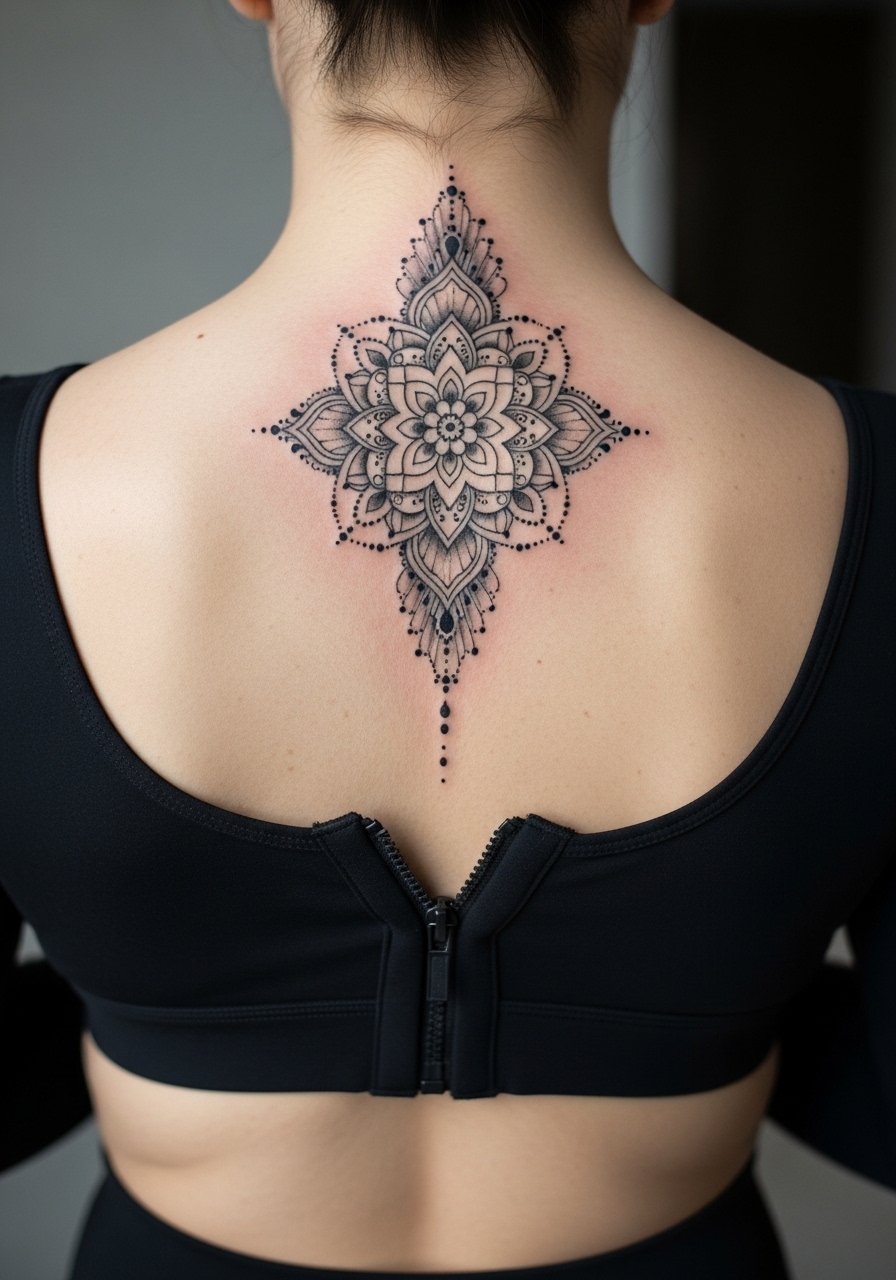
A spine mandala elongates the back and reads meditative when scaled tall. Pick bold linework with stipple shading rather than ultra-fine fills if you want the pattern to stay legible at the two and five year marks. Tell your artist to space rings for breathing room and to plan sessions down the spine to check symmetry after each heal. Fair warning, the spine is a sensitive zone so expect longer breaks and 2 to 4 sessions for a full piece. A common mistake is shrinking the mandala to fit a mood board image. On petite frames, scale down the complexity but keep line weight strong so the pattern does not merge with time. For sessions wear a front-zip sports bra so the artist can access the spine without full exposure.
2. Hexagon Cluster Between Shoulder Blades
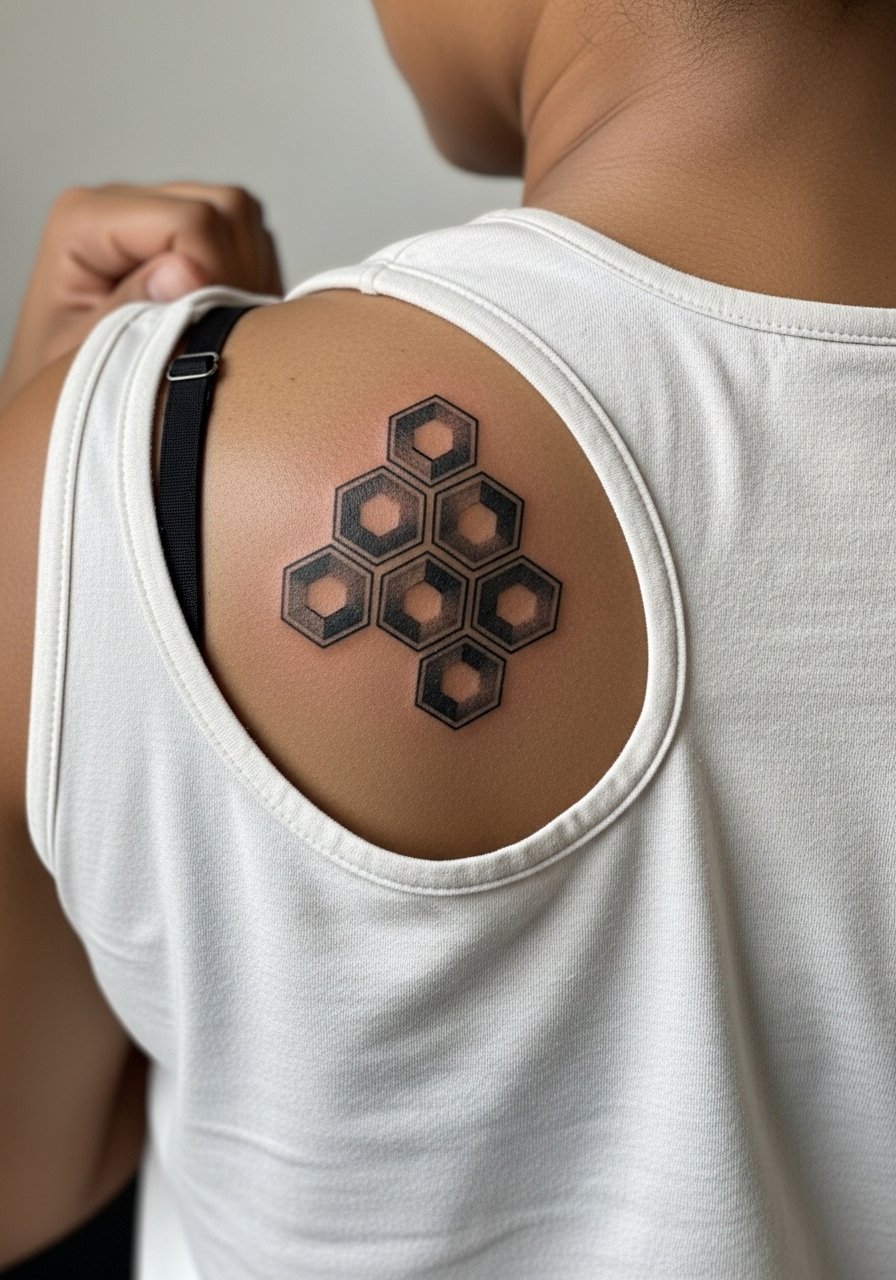
This honeycomb motif frames the upper back like natural armor and moves with the shoulder blades when you flex. Ask for alternating filled and open hexes to keep detail readable at distance. Upper back placement is forgiving for touch-ups but can show stretching if done right at the waistline. Expect two to three sessions and moderate discomfort while lying prone. Don't go for ultra-thin connecting lines here, since the area faces shoulder friction from straps and backpacks. For showing it off choose an off-shoulder crop that sits below the shoulders and keeps the pattern visible.
3. Overlapping Sacred Geometry Across Shoulders
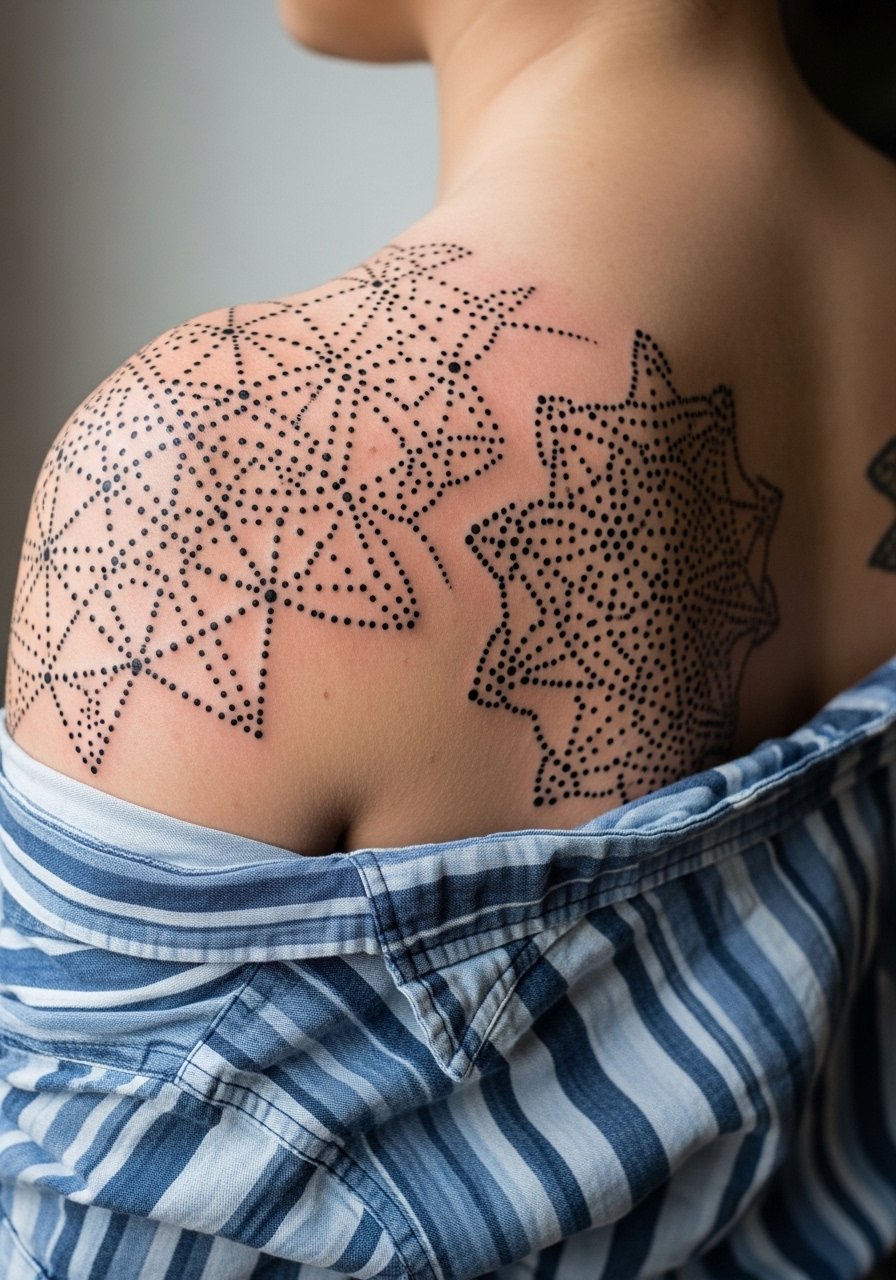
Overlapping sacred shapes read spiritual and architectural at once when executed with dot work and fine stippling. In consultation ask for clear guides on how shapes will extend onto the shoulders so the pattern aligns with muscle contours. Artists are split on fine line here. One camp warns that fine line on broad shoulder surfaces softens within two years. The other camp maintains that precise dot work with careful depth holds much better. If you plan layered shoulder exposure, pick a heavier stipple density to reduce early fade. Session wear can be a loose button-down shirt you can slide aside for both shoulders.
4. Red and Black Line Circles Wrapping the Upper Back
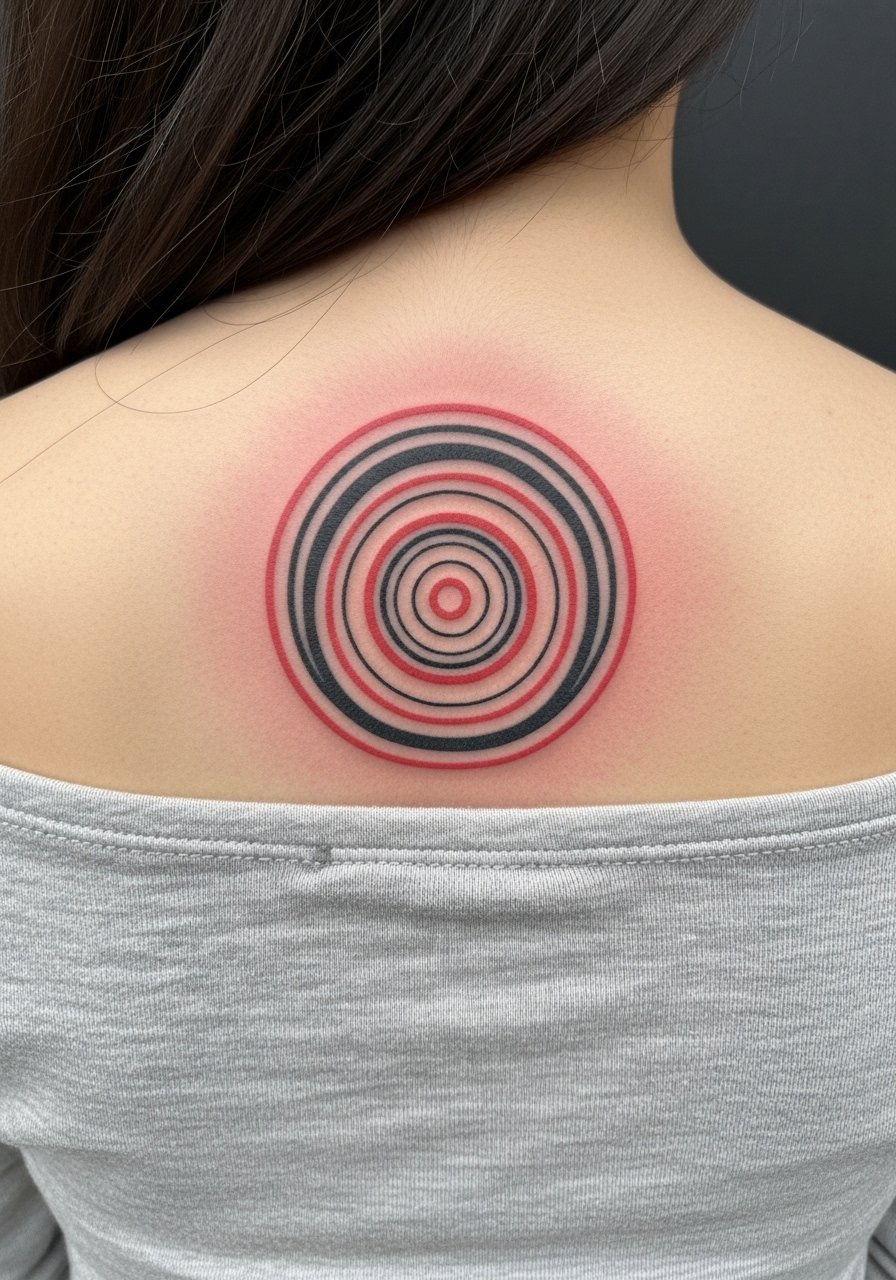
This color-accented design creates motion when you move. Red combined with black reads dynamic but needs strong saturation and clean edges to avoid early bleeding of color. Ask the artist about pigment layering and how they plan to balance line weight in red areas. The most common error is under-saturating the red, which turns patchy after six months. Expect two sessions and higher sensitivity near the shoulder joints. Style it with a boat neck top that frames the circles without covering the wrap.
5. Intricate Hexagon Panel, Full Upper-to-Mid Back
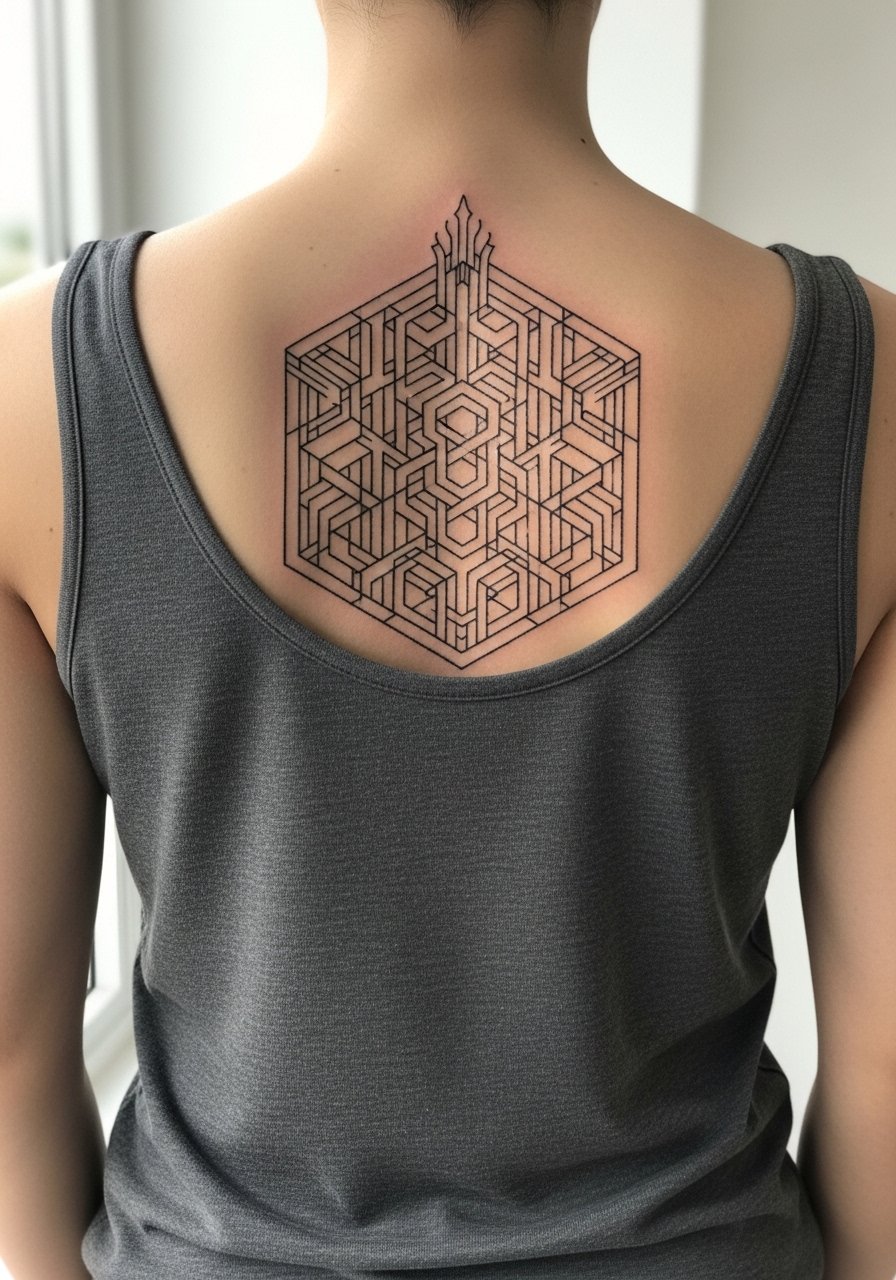
A full back hexagon puzzle rewards viewers who step closer. For longevity choose slightly heavier linework in outer hexes and reserve ultra-fine internal lines for negative space detail. This is a multi-session piece that calls for 4 to 6 sittings and steady touch-ups during the first year. Expect a longer booking window and clear contingency planning if a guest artist cancels. Artists also split on aftercare for large panels. Some recommend protective second-skin films for the first 48 hours to cut friction. Others prefer traditional dry care to avoid maceration. Name both approaches when you ask about healing so you and the artist align on a plan. For show nights pair the panel with a backless halter top that keeps the center open and the pattern visible.
6. Organic Geometric Animal Fusion at the Lower Back
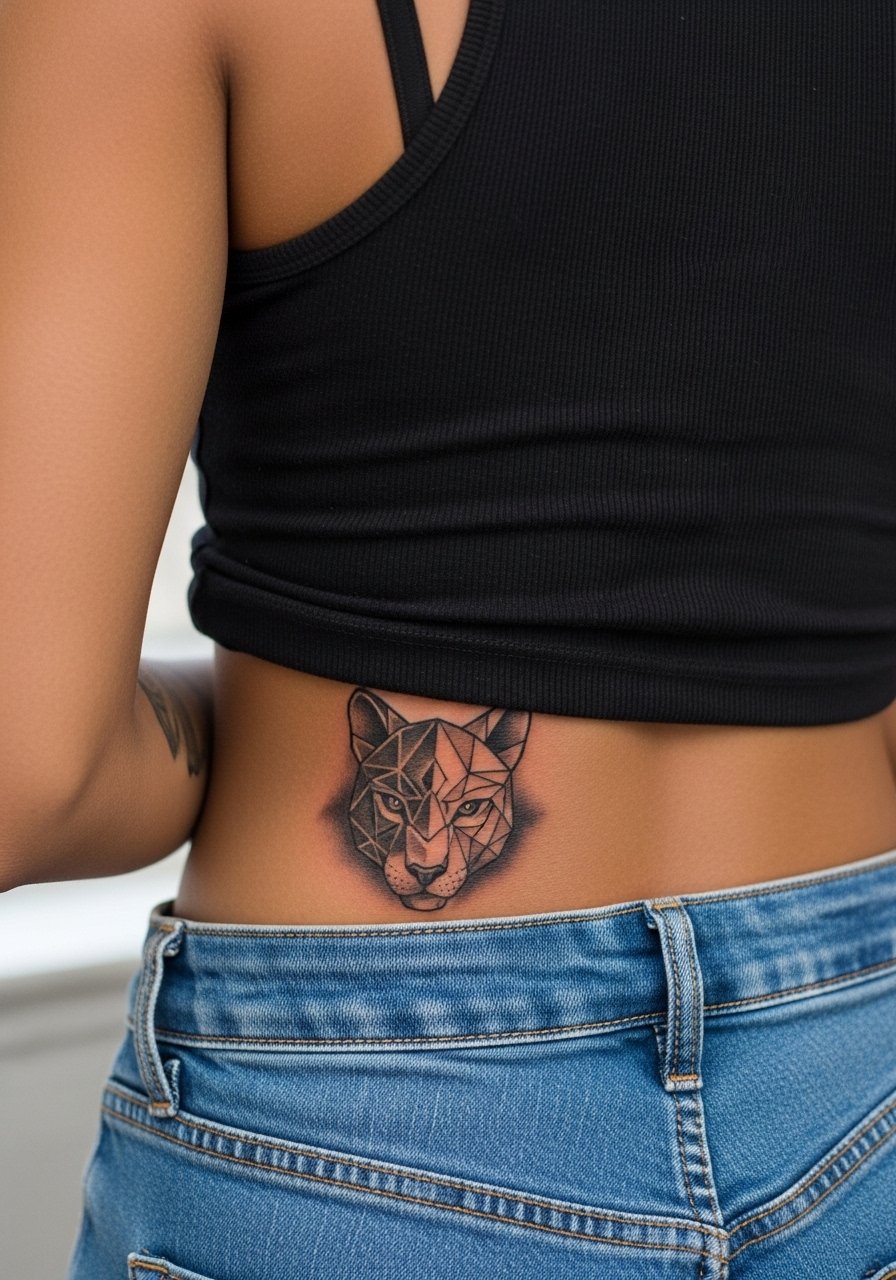
Blending an animal silhouette with sharp polygons gives lower back pieces personality while keeping the design grounded. For people worried about weight fluctuation, place the design just above the waistband and avoid tight rows crossing the belt line. Tell your artist to leave breathing space around areas that expand with movement. The lower back can be less painful than the spine but expect increased friction during the first week from waistbands. A common mistake is compressing the artwork into the waistband zone, which causes distortion when bodies change shape. For session comfort wear high-waisted pants and a loose top you can drop slightly so the artist can access the area without belts.
Studio Day Picks
These items smooth the kinds of sessions above, from spine mandalas to full upper-back panels.
-
Australian tattoo salve search. Lighter balms from small Aussie brands tend to breathe better on warm skin and can reduce the greasy feel on large back panels.
-
Breathable second-skin alternatives. For large sessions that rub against clothing, a thin breathable film can protect lines during the first two days.
-
Rice bran tattoo balm. A less greasy option that some people find faster-absorbing during hot, humid healing periods.
-
Thin protective film roll. Useful for cutting custom sizes for awkward back zones, especially when sleeping on your side is unavoidable.
-
Aquaphor healing ointment. A common thin-layer option for the first few days to lock in moisture without clogging detailed work.
7. Symmetrical Cube Grid Across the Back
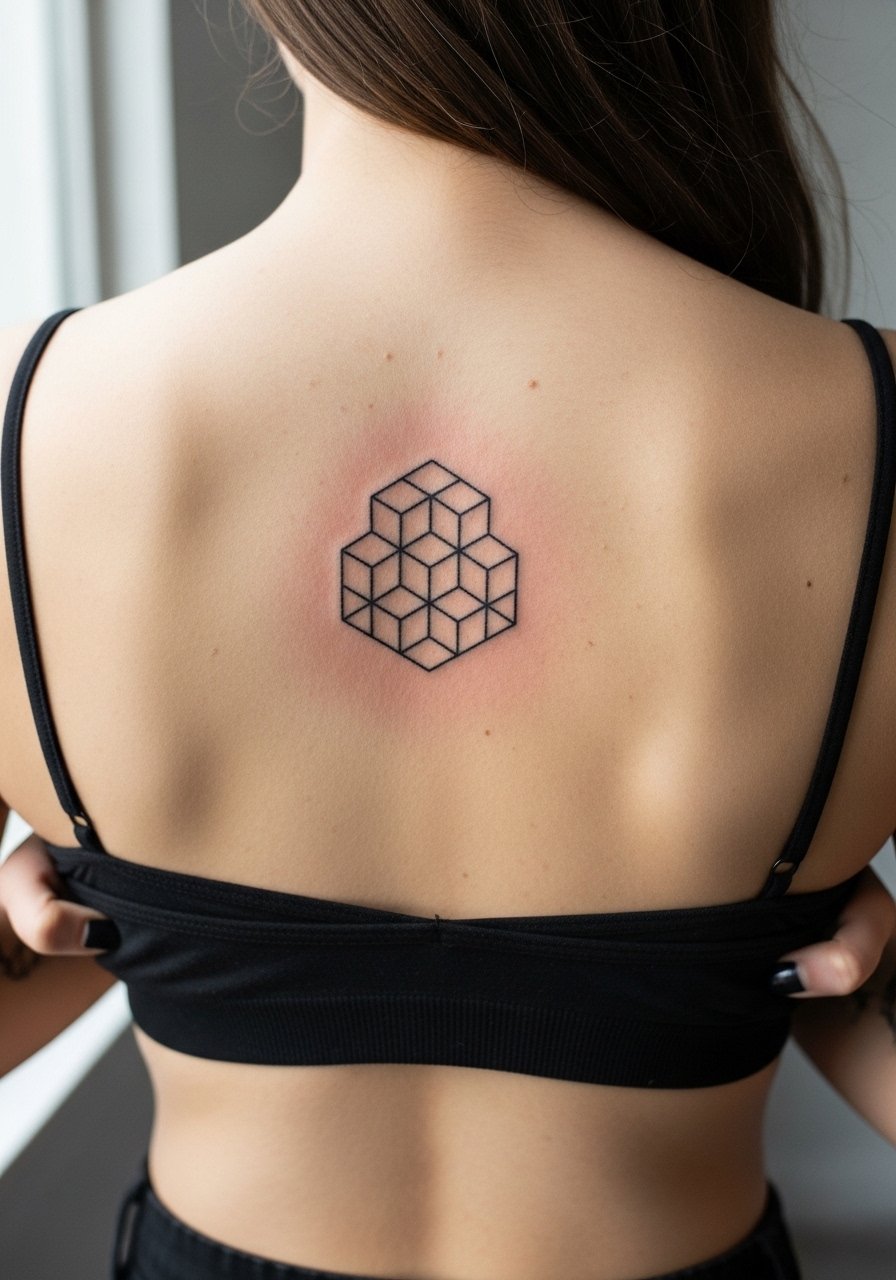
This architectural grid plays with perspective and scales easily from a mid-back square to a full panel. Ask for consistent spacing and a mockup on your back with temporary transfers so you can check how the grid interacts with shoulder blades. Grids show blowout quickly if the lines are too close on moving skin. If you want a 3D effect ask for subtle gray shading between cubes rather than tiny cross-hatching. Sessions are straightforward, usually one to three sittings depending on size. Pair the grid with a strappy bralette for evenings out so the back remains the focal point.
8. Floral Geometric Overlap at Mid-Back
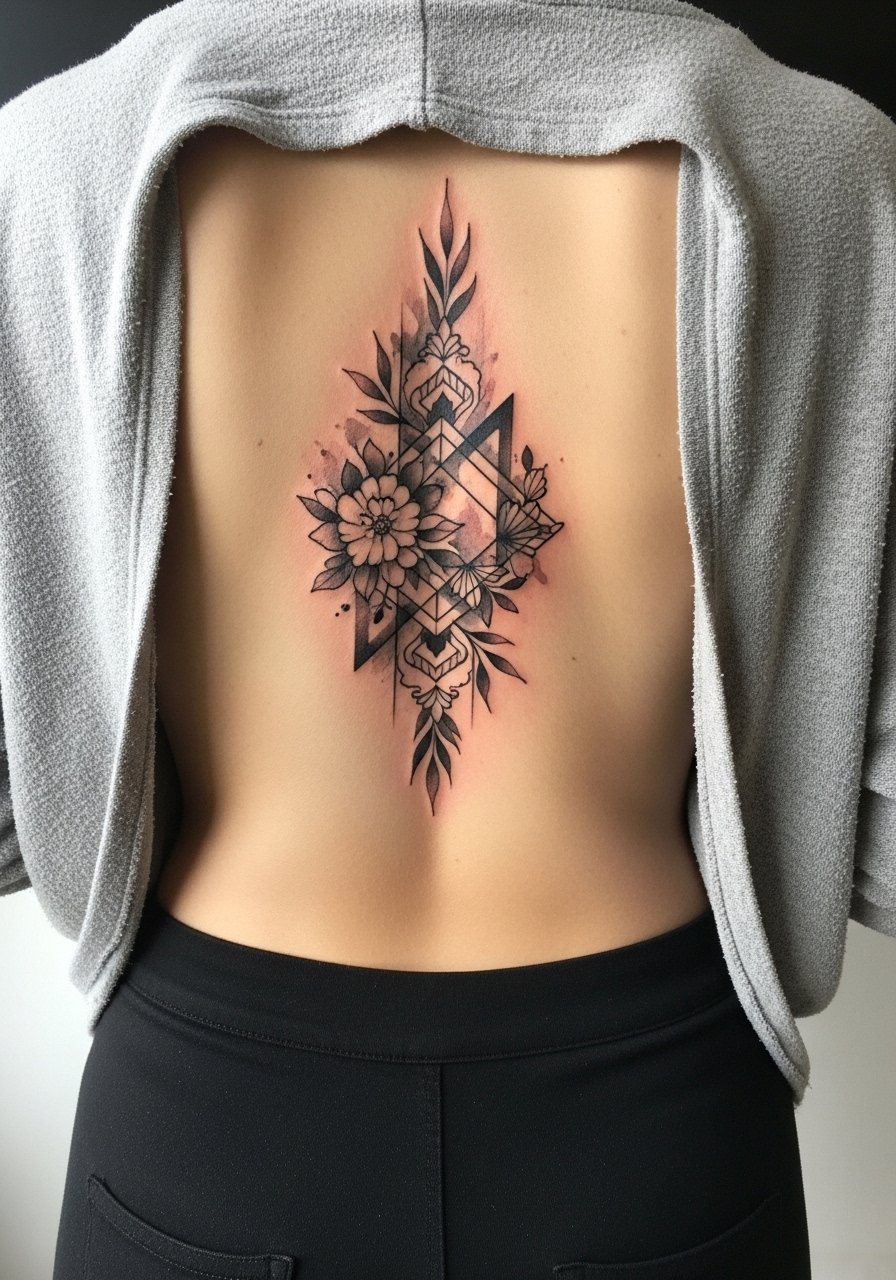
Soft petals integrated into rigid geometry warm up a centered mid-back piece and flatter many body types. Ask your artist to anchor petals with bold black outlines so the color washes do not blur the geometry over time. A frequent error is placing too much delicate color in high-friction zones, which leads to patchy healing. Expect three sessions if you want both black base and color hints. Wear a wide-neck shirt you can pull aside so the artist reaches the center without removing your top.
9. Metatron’s Cube Full Back Panel

This sacred geometry panel is for people who want esoteric density across a large canvas. It demands careful planning and multiple proofing sessions to maintain radial balance. Expect five or more sittings and scheduled touch-ups at year one. Avoid squeezing it into a single heavy session, since symmetry checks between heals matter. The controversy over fine line versus bold occurs here too. One side argues that fine line sacred geometry captures nuance. The other side says heavier blackwork keeps the pattern readable after two years. Ask your artist which side of that split they work from and why.
10. Triangle Wave Pattern on Shoulder Blades
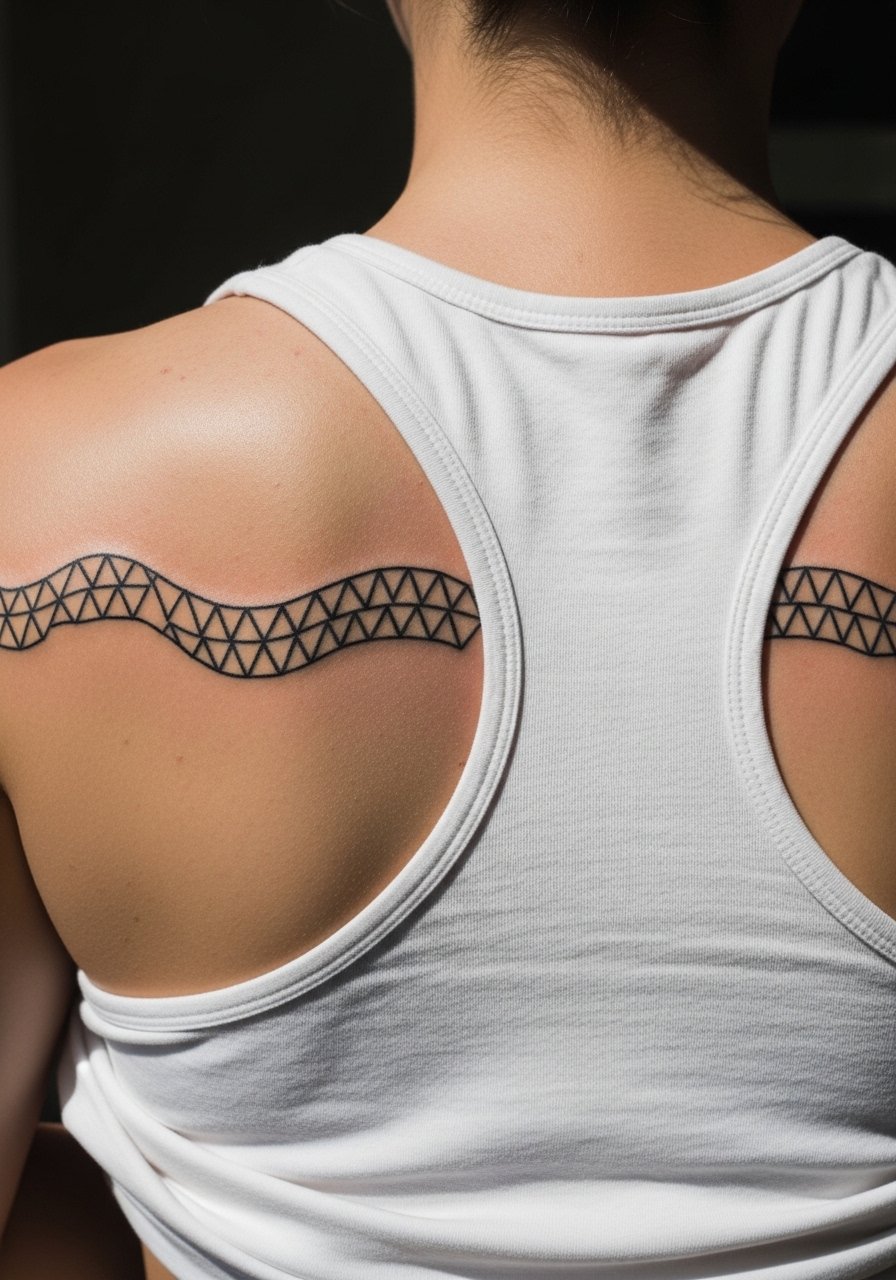
Triangle waves follow muscle contours and create flow with shoulder movement. Ask your artist to map the arcs over the scapula when you flex so the waves look intentional during motion. A common mistake is starting waves too close to the spine where soft tissue causes the lines to compress. Sessions are usually two sittings for medium complexity. For showing off, a racerback tank keeps the blades visible while staying casual.
11. Polygonal Flower of Life Down the Spine
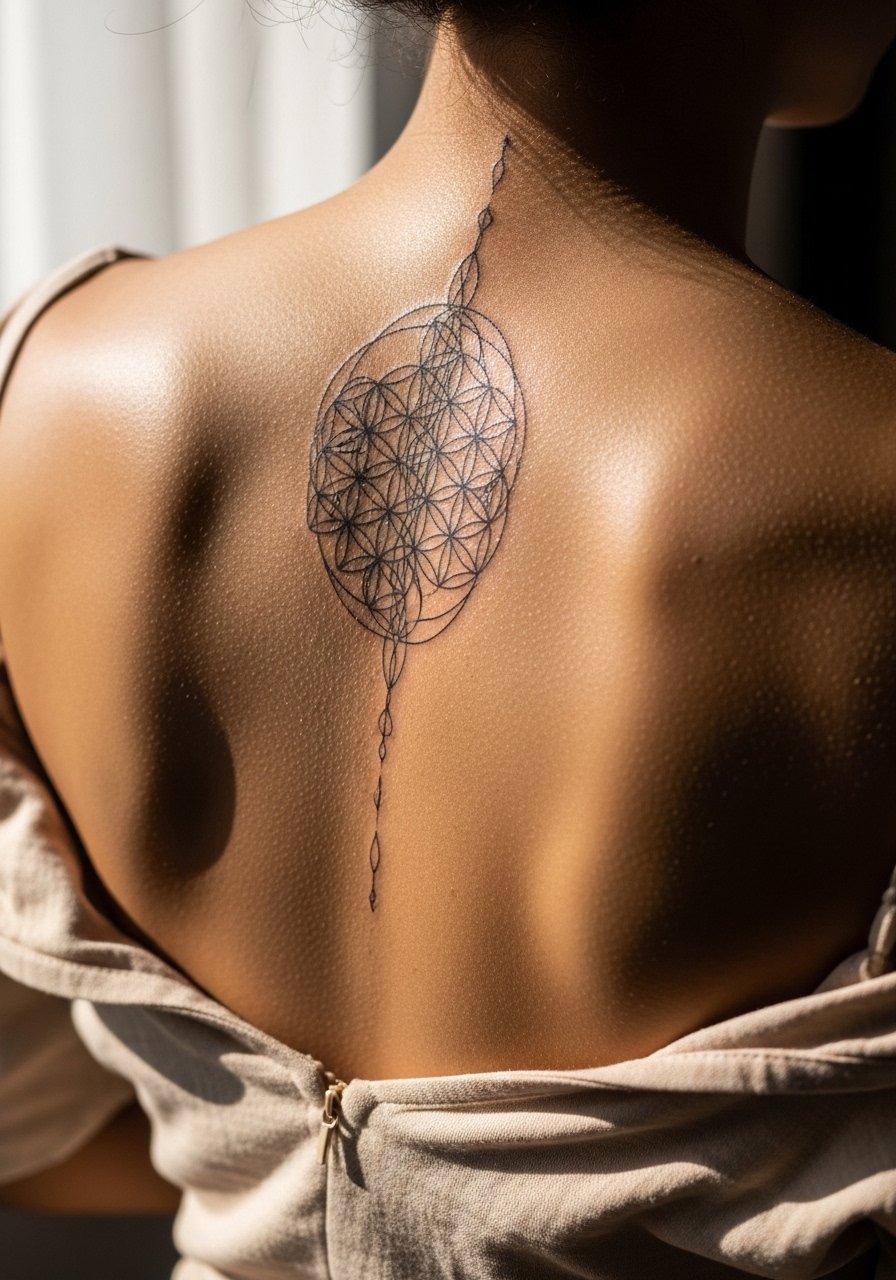
A vertical Flower of Life reads as both delicate and symbolic when spaced correctly. If you prefer that fine line look, ask for wider gaps between repeated nodes so the pattern avoids early merging. The spine is sensitive and requires prone positioning for long periods, so plan breaks every 45 to 60 minutes. There is a healing debate worth knowing. Some artists recommend second-skin coverings briefly for spine runs to protect against rubbing from clothing. Others argue dry healing prevents soft scabbing and improves line clarity. Bring up both approaches at your consult and decide which aligns with your daily routine. For date nights choose a low back dress that lets the pattern breathe.
12. Layered Prism Shapes Upper Back
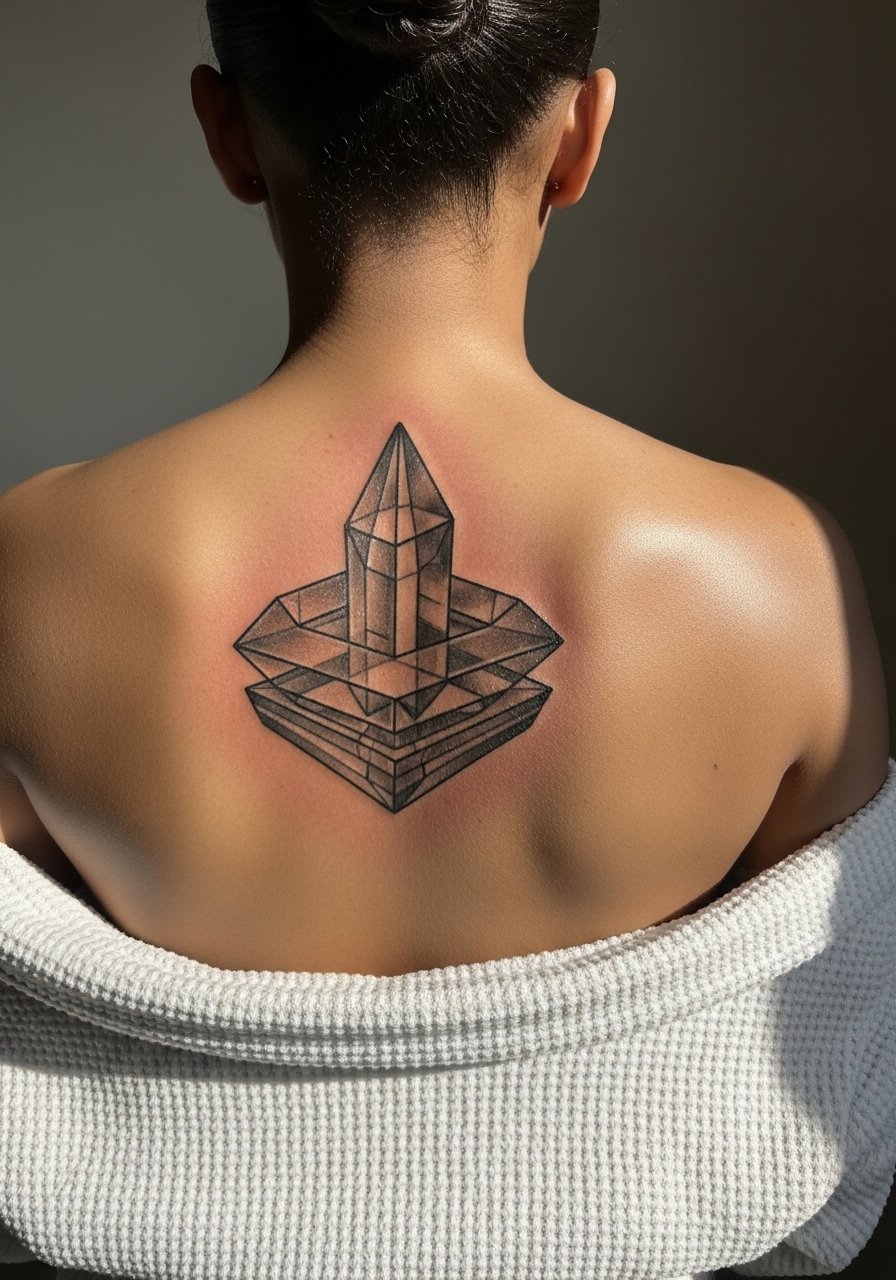
Prism illusions use overlapping shapes and soft shading to simulate depth. Pick black and gray gradients rather than tiny color transitions for longevity on the back. The trick is avoiding overly small highlights that wash out after a year. Sessions usually span three sittings to build depth gradually. If you want a 3D look from across the room, request stronger contrast in the first pass and refinement on follow-up sessions. Pair the prism with a gold body chain when you want a subtle accessory that tracks the geometry.
13. Micro Hex Cluster Along the Lower Spine

Small hex clusters can be striking when placed directly above the waistband. The danger is going too tiny. Micro hexes require clear spacing to avoid merging with motion and fabric friction. Recommend a slightly stronger line weight and minimal stippling inside each cell. This placement can tolerate fewer sessions, usually one to two, but expect a touch-up within a year if you favor micro detail. Wear high-waisted bottoms during sessions so the artist can see the exact waistline and avoid stitching the design into a shifting seam.
14. Asymmetrical Geometric Wave on One Shoulder Blade
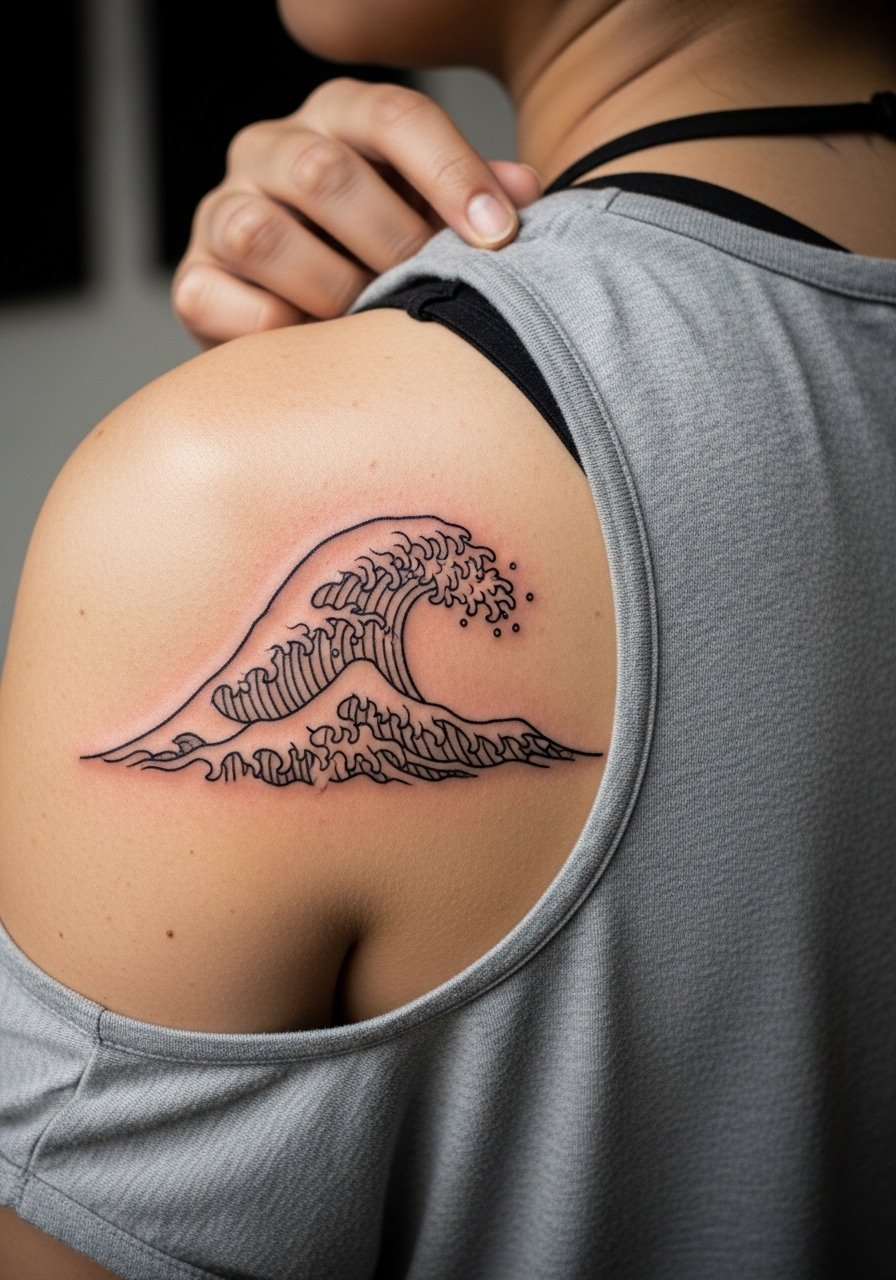
Going unilateral makes a design feel deliberate instead of incomplete. Asymmetry works especially well when the wave follows muscle motion and stops before the spine. In consults ask the artist to mirror how that shoulder moves so the piece looks balanced from a distance. A frequent error is trying to force symmetry where none belongs, which reads odd with torso movement. Sessions are shorter, usually a single booking, and pain is moderate. For the appointment select a loose tank top that gives the artist clear access without full undressing.
15. Circular Orbit Motif Across the Mid-Back
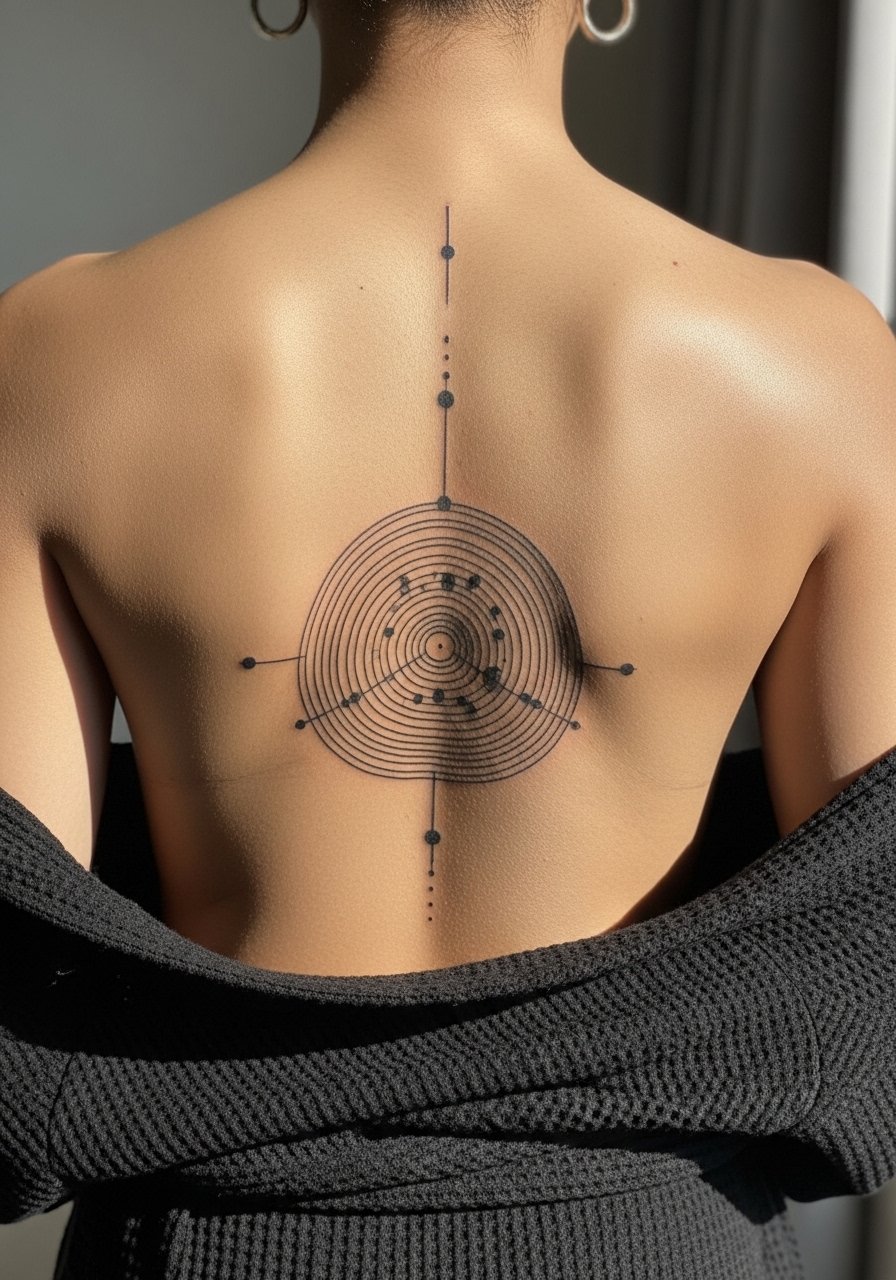
Orbit motifs read like kinetic art when spaced to avoid dense fills. Tell your artist to set outer rings wider and inner rings tighter to preserve the focal center over time. The mid-back is a stable canvas, so blowout risk is lower than near the spine. Sessions vary by size, often two sittings for a medium panel. A typical mistake is overfilling negative spaces which flattens the radial illusion. Style with a backless halter top to keep attention on the central orbit.
16. Minimalist Cube Row Along the Upper Spine
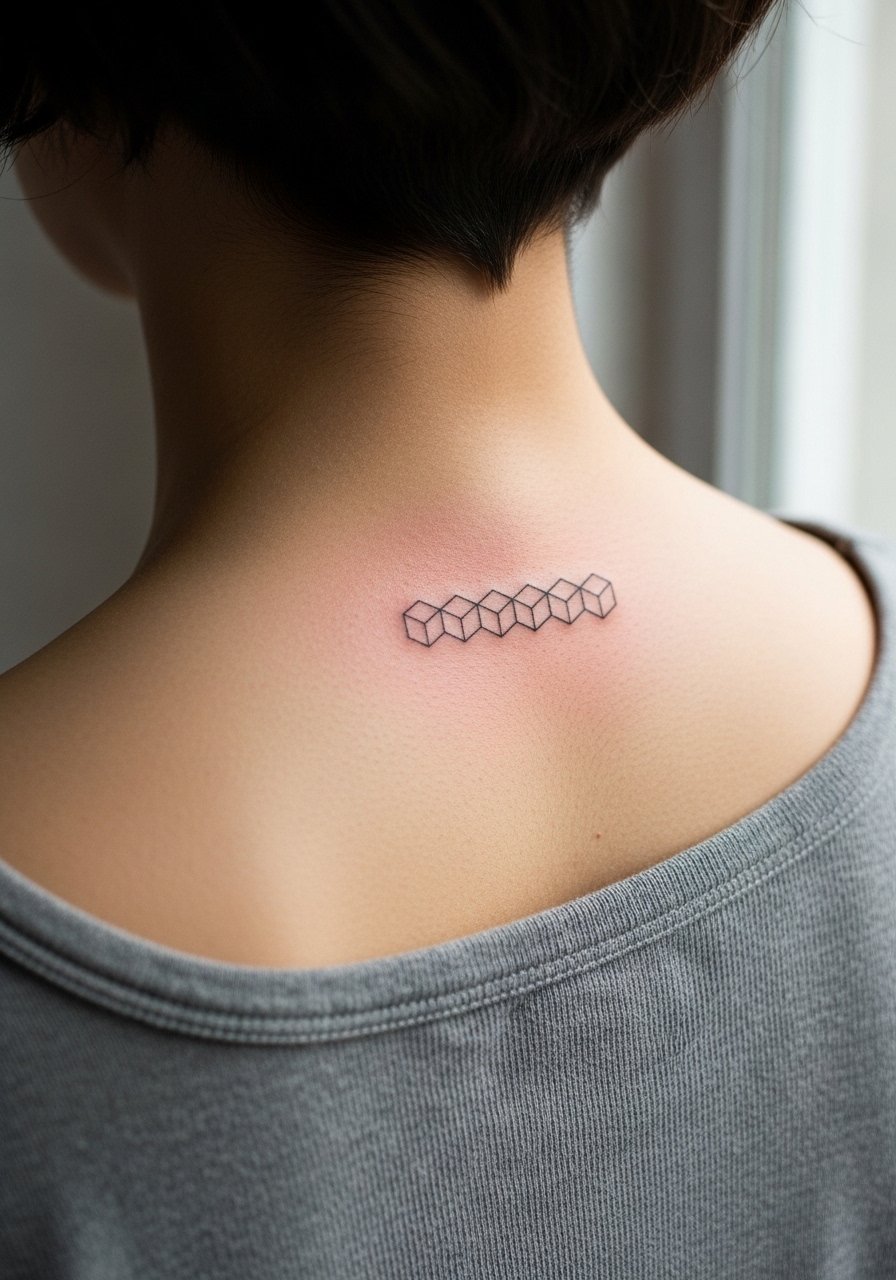
A minimalist cube line is low fuss and ages well if you avoid crowding multiple cubes too close. Ask for slightly heavier edges on the cubes that sit near the shoulder blades. Small, repeated geometric elements can blur if placed directly on areas that stretch with movement, so map them with the artist while standing and flexing. Sessions are short and usually one sitting for compact rows. For an appointment, a wide-neck shirt you can pull aside is ideal.
17. Fractal Triangle Panel Across the Mid-Back

Fractal repeats look hypnotic from afar and rewarding up close. To avoid merging, request that the artist increases negative space each generation so inner details have breathing room. This design can require two to three sessions depending on scale. A typical mistake is packing too many generations into a small area, which causes visual muddiness after a year. For session comfort aim for a loose tank top so the artist can access the panel without tugging.
18. Sacred Compass Star at the Nape
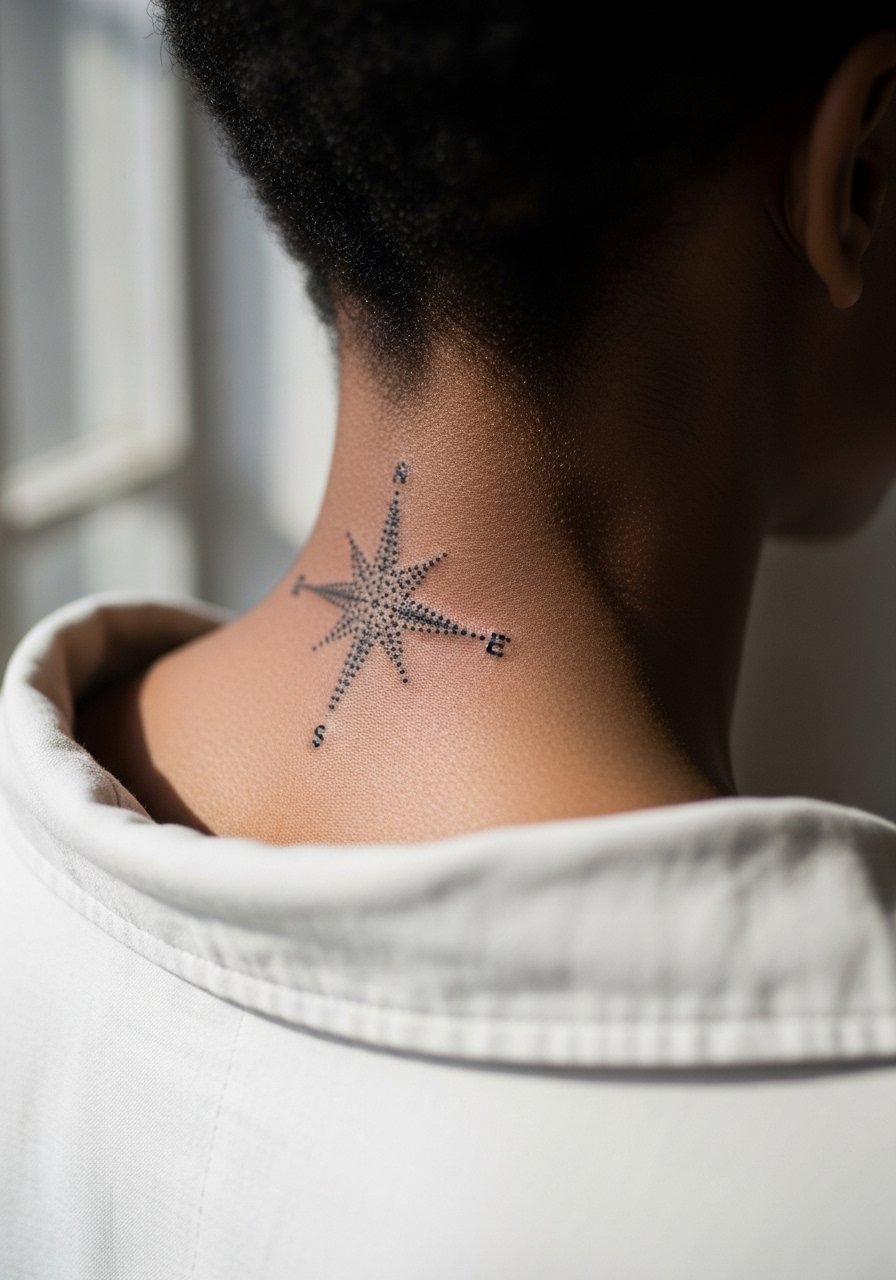
A nape compass reads like a private anchor when tucked under the hairline. Ask for denser dotwork in the center with softer outer stippling to preserve readability as hair and collar friction interact. This placement has brief but sharp sensitivity. Session time is usually short and focused. A common error is making the piece too large for the nape, which forces it into shoulder territory and increases healing friction. For the session wear a wide-neck shirt you can shift to expose only the nape.
19. Organic Polygonal Tree Across Mid to Lower Back
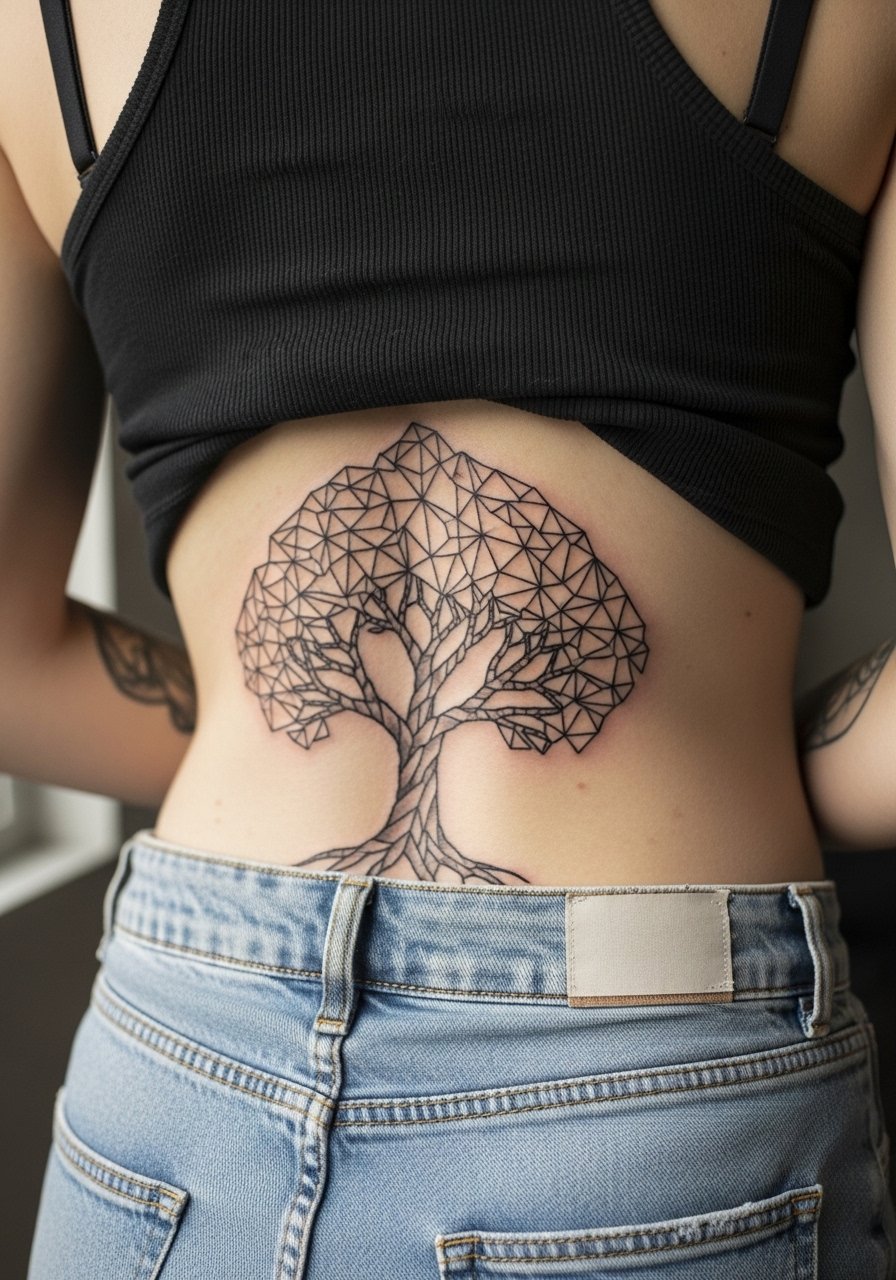
This hybrid mixes nature with geometry so the shapes feel rooted instead of clinical. Ask your artist how branches will interact with the waistline and how polygons will flex when you bend. Lower-mid back sections can tolerate larger fields of shading but watch for friction from belts. Sessions often run two to three sittings. The most common mistake is tight tessellation near the waistline, which can warp with body changes. For show-offs pick a crop top high waist look that exposes the art cleanly.
20. Stipple Shaded Hex Spiral at the Upper Mid-Back
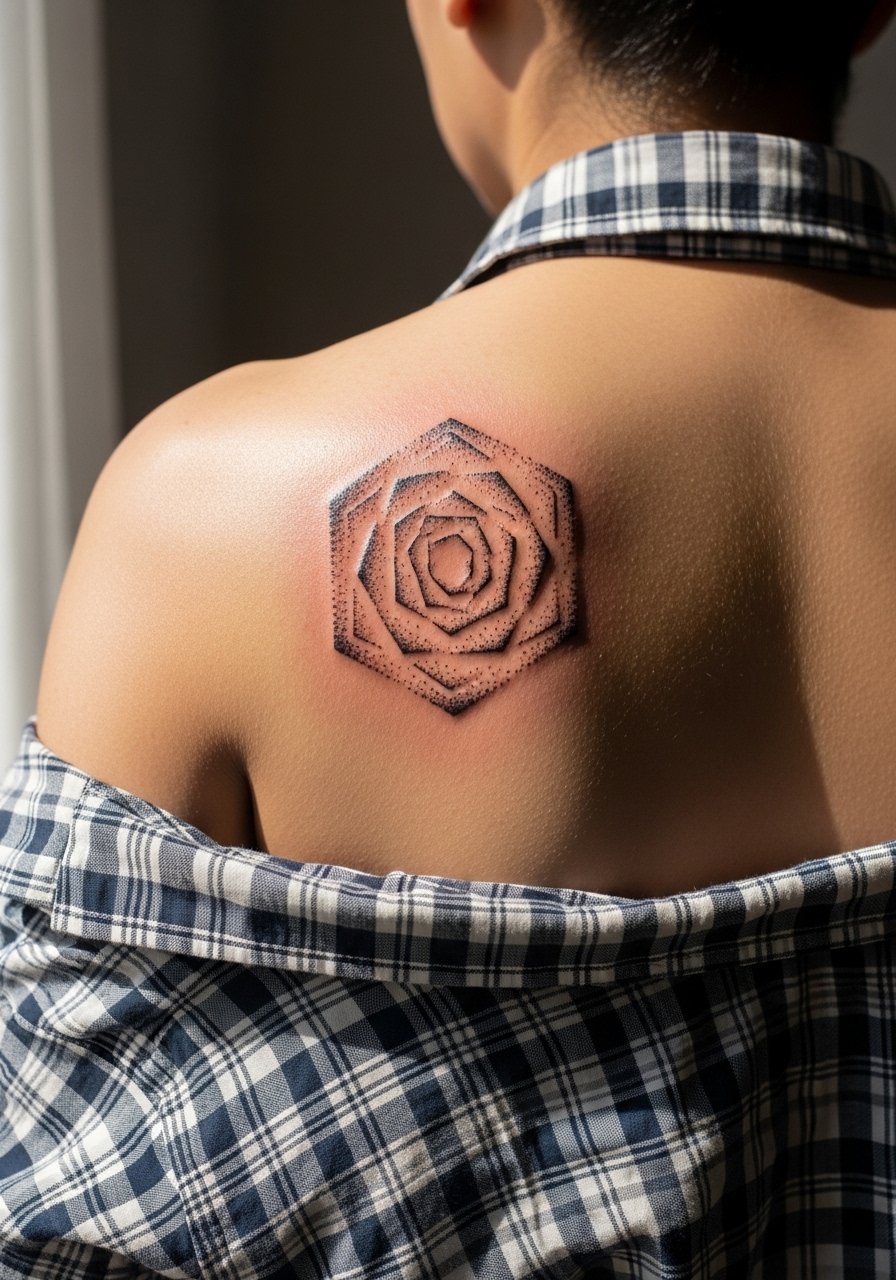
Stipple spirals build depth through dot density rather than heavy lines. For longevity ask for moderate dot density so the mid tones age gracefully without forming solid blocks. The upper mid-back is forgiving for detail but still benefits from staged sessions to check healing progress. A typical oversight is asking for extremely dense stippling in one pass, which can cause prolonged irritation. Wear a short sleeve button-down you can slide to the side for clean access.
21. Geometric Sunburst Between the Shoulder Blades

Sunbursts read bold and radiate across the upper back when the points are spaced to avoid merging. Ask the artist to render primary rays thicker and secondary rays lighter so the center holds. Major mistakes include overpopulating the center with tiny rays that blur in a year. Sessions are typically two sittings for medium sunbursts. For social wear, an off-shoulder crop frames the rays without covering them.
22. Negative Space Geometric Chevron Panel
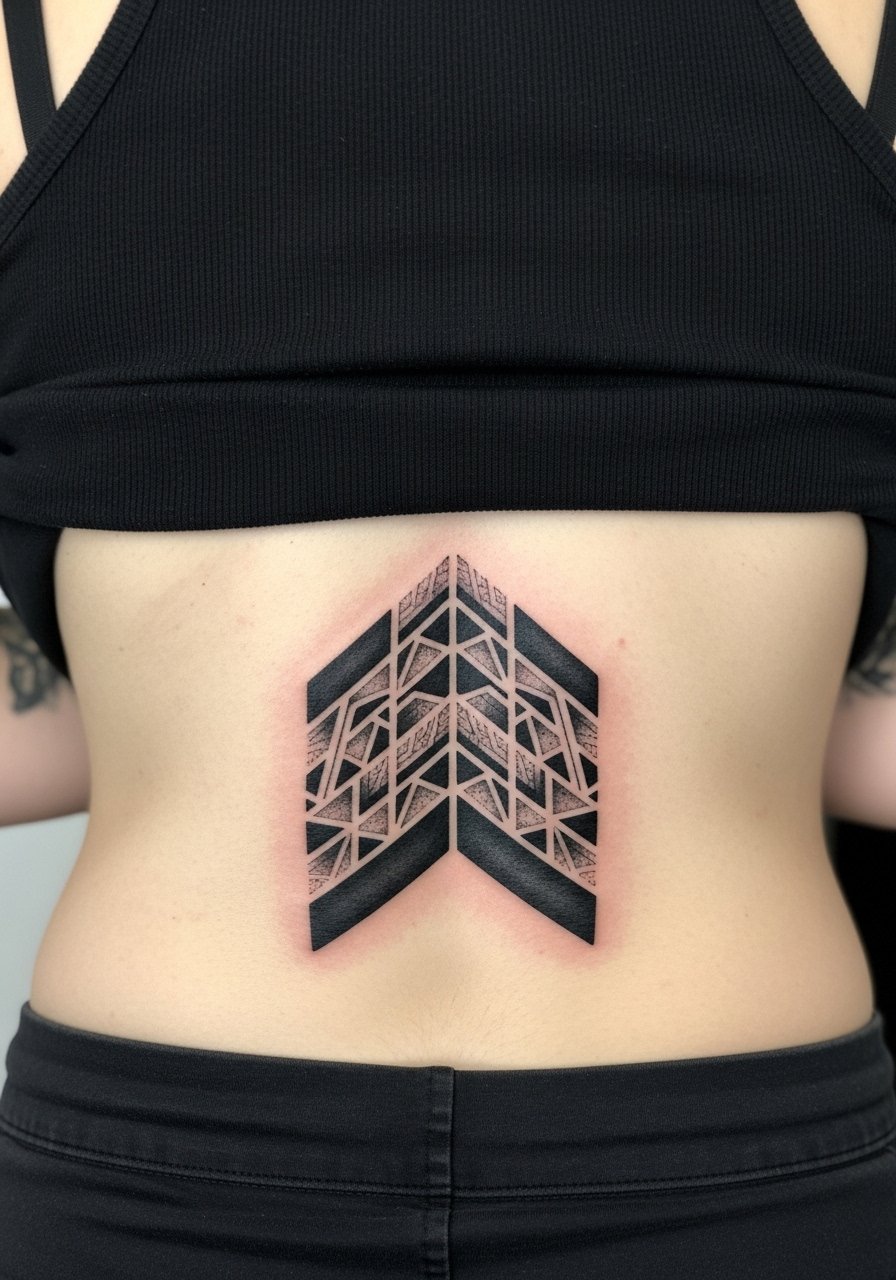
Negative space chevrons create crisp contrast when the artist plans the black fill around the skipped areas. Make sure the negative zones are generous enough to remain obvious as the piece heals. Small gaps are the biggest risk for visual loss over time. Expect two sessions for medium panels, with a likely touch-up at six to twelve months. For the session choose a loose tank top to give unobstructed access.
23. Interlocking Rings Across the Upper Back

Rings crossing over muscles can look fluid or clumsy depending on line weight. Tell your artist to prioritize clean overlaps and avoid tiny inner ring spacing that will fill in. If the design crosses the shoulder joint, expect slight distortion on movement. Sessions vary by count of rings and usually need two sittings for medium complexity. For everyday wear a loose tank top keeps the pattern visible without restricting motion.
24. Wireframe Animal Silhouette Centered on the Upper Back
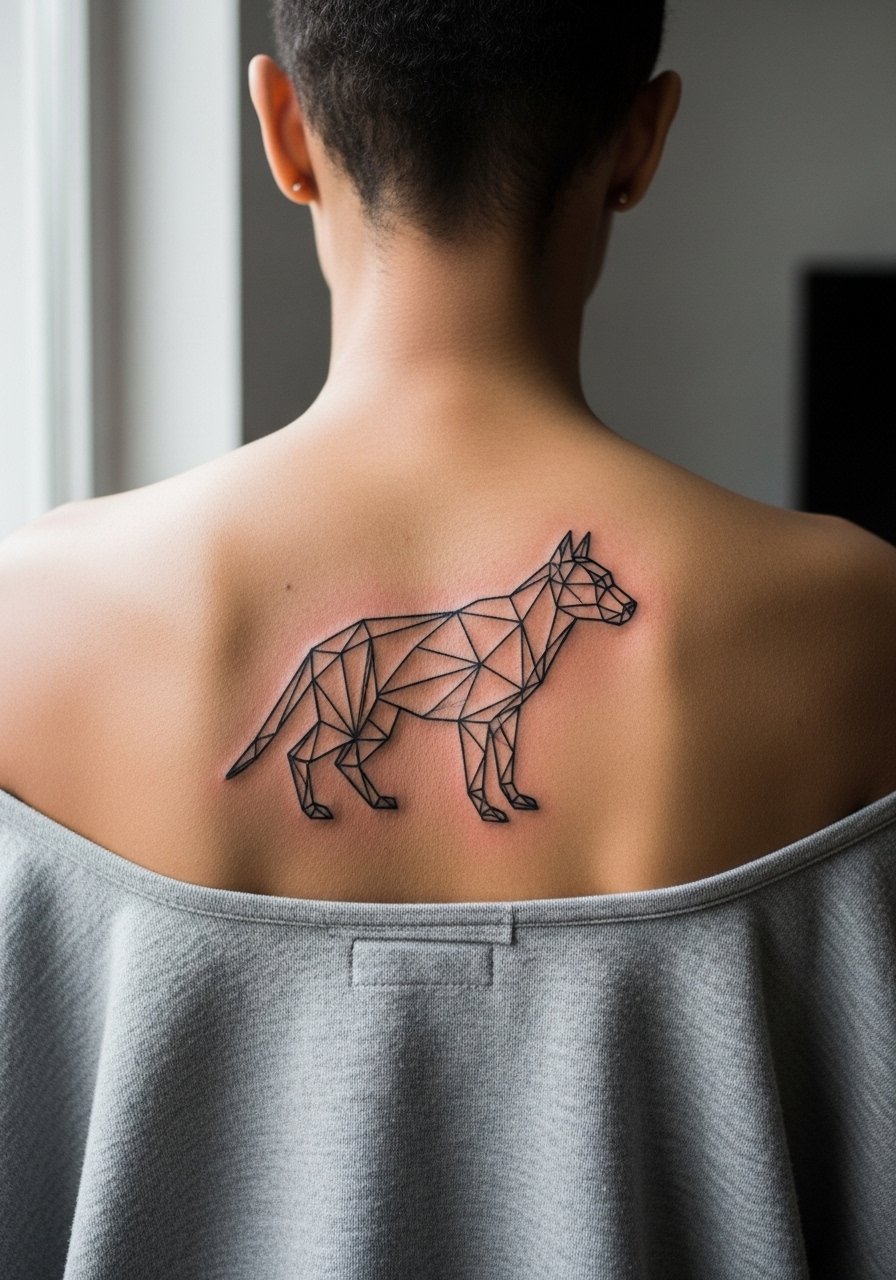
Wireframe animals read modern and flat in a way that accentuates muscle tone. Request slightly heavier anchor lines along the silhouette to prevent early loss of shape. A common mistake is over-detailing the animal interior with micro-hatching that merges after a year. Sessions are usually one to two sittings. Bring a wide-neck shirt for the session so the artist can access the center of the back.
25. Lower Back Geometric Fusion That Survives Weight Fluctuation
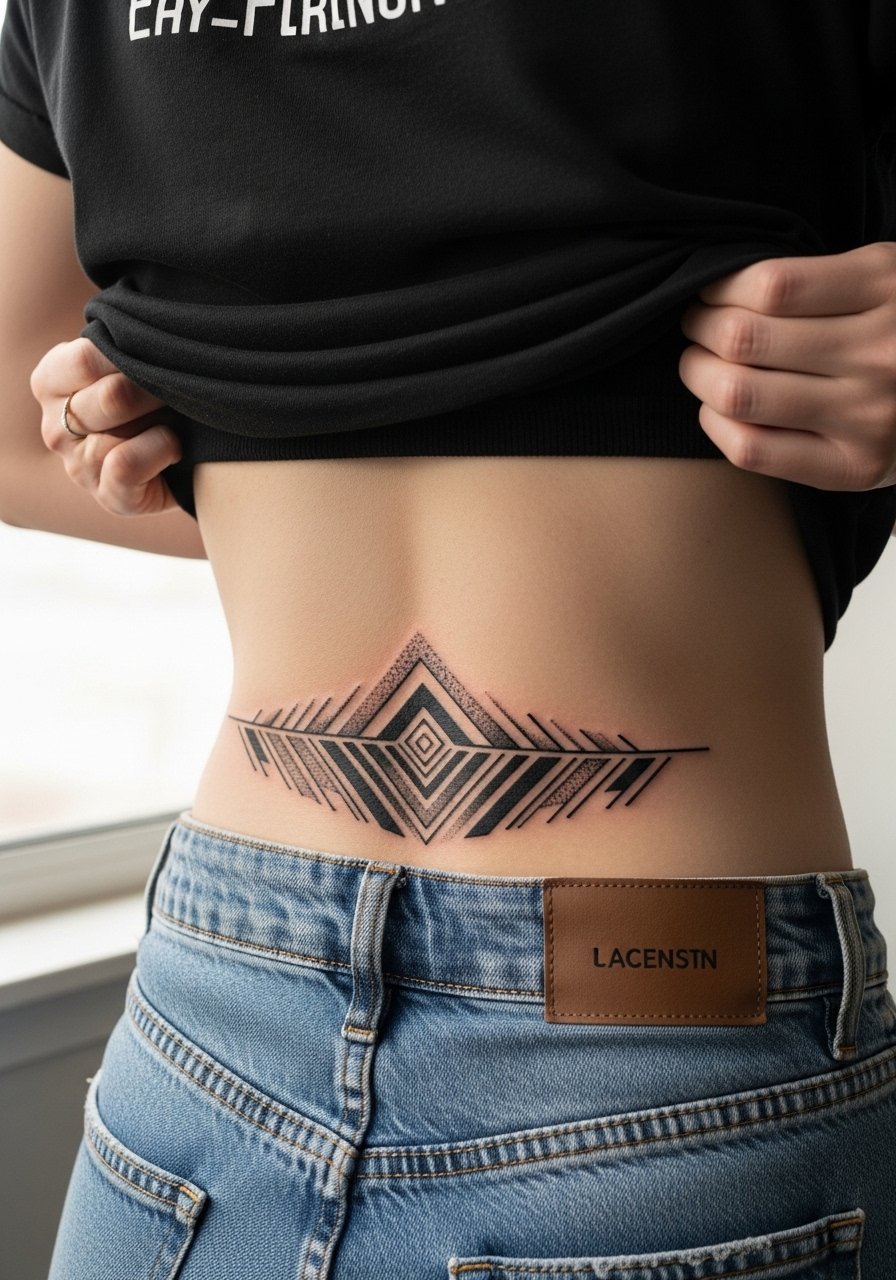
Designing for the lower back means planning for expansion and contraction. Keep major junctions above the true waistline and avoid tight tessellation over the belt seam. Ask for slightly looser geometry near the edges so the central motif keeps its proportions if you gain or lose inches. Sessions typically two to three sittings and a touch-up discussion at the consult. During the appointment wear drawstring pants so the artist can adjust the waistband without pressure.
26. Red-Black Concentric Bands Over the Shoulders
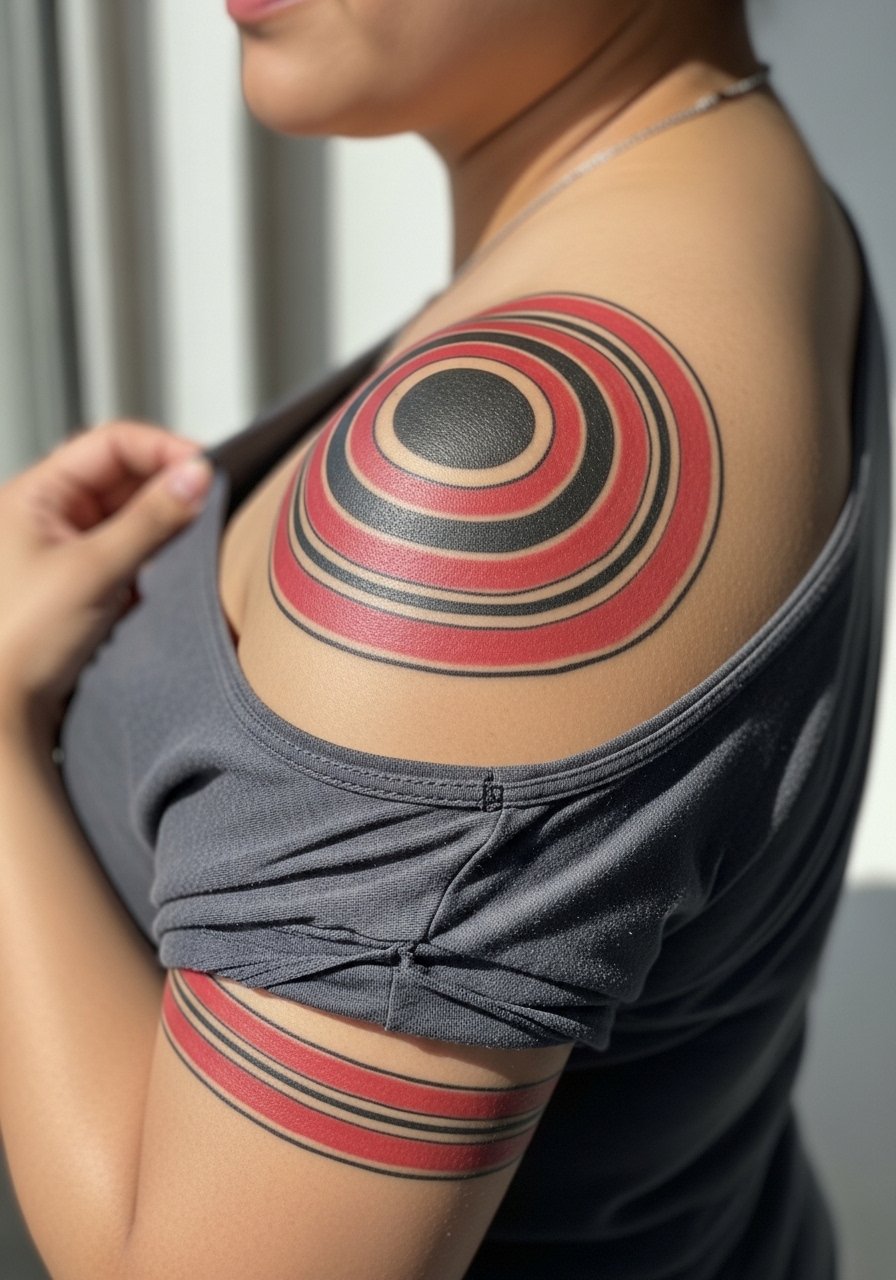
Color bands take motion well when the edges are solid and saturation is strong. Ask the artist about color layering and how red will age on your skin tone. The common error is faint red under-saturation, which leads to a blotchy appearance after a season. Sessions are usually two sittings for color balance. Style the finished piece with a boat neck top that frames the shoulder bands without covering them.
27. Asymmetrical Polygonal Wave Tailored for Petite Backs
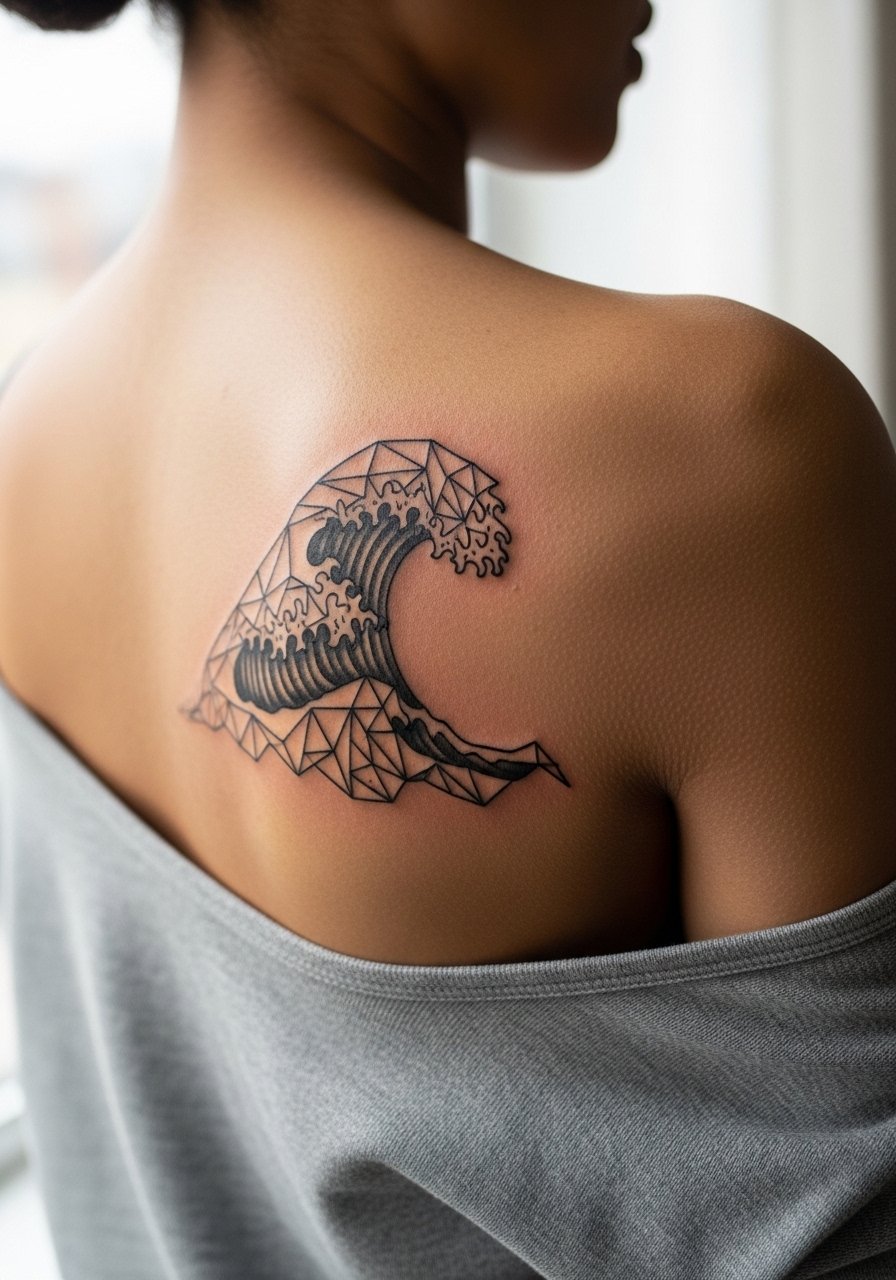
Scaling for smaller frames is an underused skill. For petite backs ask the artist to compress overall height while keeping line weight consistent so the pattern reads cleanly rather than cramped. Avoid repeating the full-size reference without asking for a proportion mock-up on your back. Sessions tend to be shorter and focus on precise placement. For the appointment wear a racerback tank that lets a single-sided piece sit visibly while you move.
Frequently Asked Questions
Q: Will a fine line spine mandala blur faster than a blackwork one on the same spot?
A: It depends on spacing and depth. Fine line can blur sooner on high-movement zones like the spine unless the artist increases negative space and uses denser dot work. If longevity is the priority ask for slightly heavier outer rings and staged sessions so the piece heals and the artist can adjust spacing.
Q: Should I use a protective film or dry healing for a large full-back geometric panel?
A: Both camps make good points. Protective film reduces friction and keeps clothing from rubbing fresh ink. Dry healing supporters say less moisture reduces scabbing and maceration. Discuss your daily routine and climate with the artist and pick the approach you can follow consistently.
Q: How should I prepare clothing-wise for a multi-session back tattoo appointment?
A: Bring tops that the artist can slide aside without full undressing, like a loose tank or a button-down you can pull to one side. For lower back pieces choose drawstring pants so you can lower the waistband without pressure on the area.
Q: What touch-up timeline should I expect for detailed hexagon panels versus larger blackwork mandalas?
A: Smaller detailed hexagons often need touch-ups within the first 12 to 18 months, especially if placed near seams or high-friction zones. Larger blackwork mandalas can hold longer and often only need a single touch-up in the first two years to refresh saturation.
Q: How do I find an artist who actually does precise geometric back work?
A: Search the hashtags #geometricbacktattoo and #blackworkback on portfolio platforms, filter by city, and look for healed photos rather than fresh-only shots. Also check process videos so you can see symmetry checks and staged sessions. Booking locally can cut down on guest spot cancellations and simplify aftercare logistics.
