
Fine line white ink can look like a whisper on dark skin, but it behaves very differently than the same design on lighter tones. Placement, spacing, and how dense you ask the artist to pack the white all change longevity and visibility. Below are 27 geometric white tattoo ideas tailored for darker skin tones, with what to ask for in consults, how they age, and how to style them so the shapes read clearly over time.
1. Fine Line Chevron on Inner Forearm
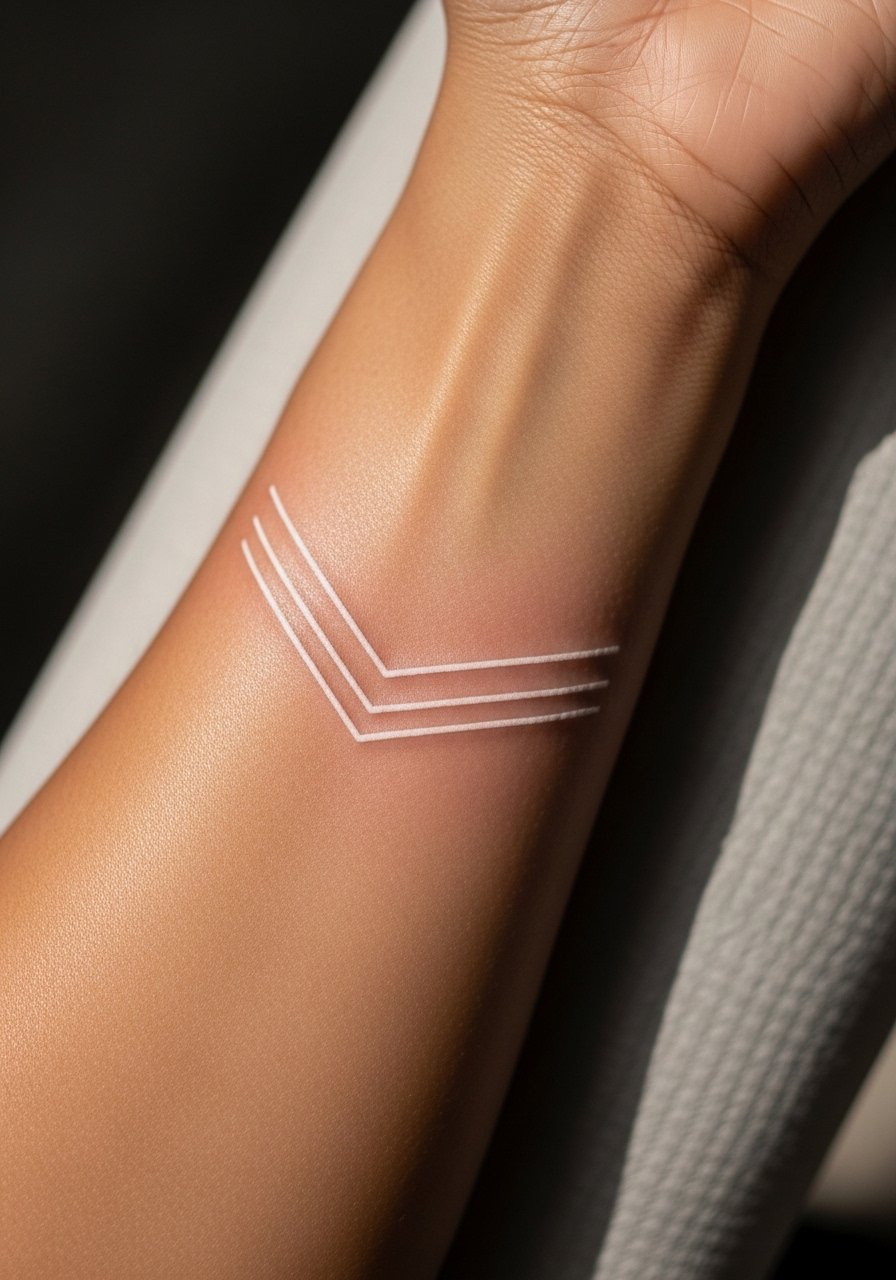
This small chevron band reads crisp on darker skin when the spacing between lines is increased slightly. I recommend asking your artist to space lines more than they would for black ink so the white has breathing room as it settles. Expect a low to medium pain level on the inner forearm and a short session time. A common mistake is requesting razor-thin lines packed tightly. That looks sharp fresh and then merges at year two. For the session, wear a loose linen button-down so the artist can roll the sleeve up without rubbing the area.
2. White Dot Constellation on Wrist
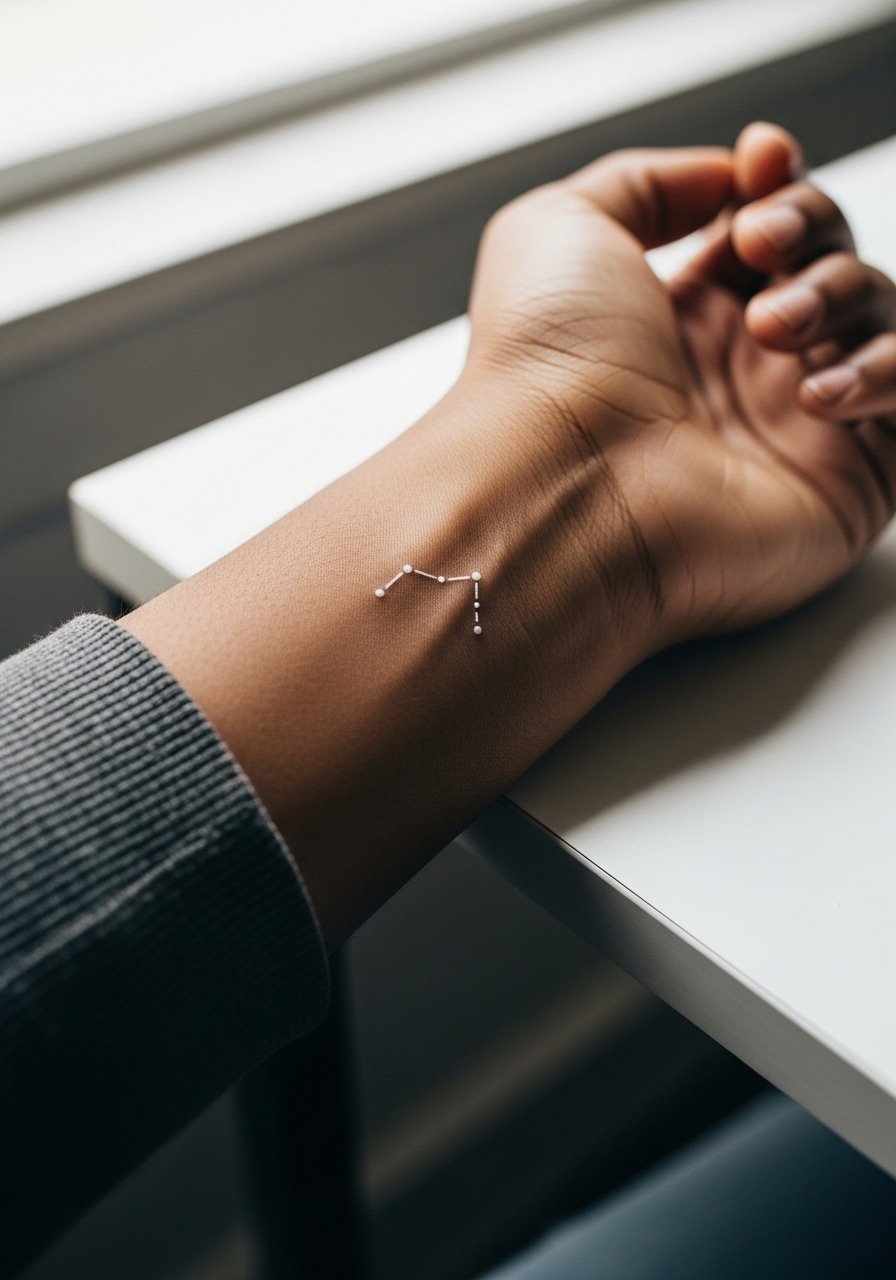
Wrist constellations are show-off pieces but they live in a high-friction zone. Tell your artist you want slightly larger dots with stipple spacing around them to avoid early fading from washing and bracelets. Pain is mild, session under an hour. Expect visible crispness at six months and gradual softening by year two. The biggest mistake is making dots too small. Pair the wrist piece with a thin chain bracelet when showing it off so the white reads like a deliberate accent.
3. Stacked Triangles on the Side Ribcage
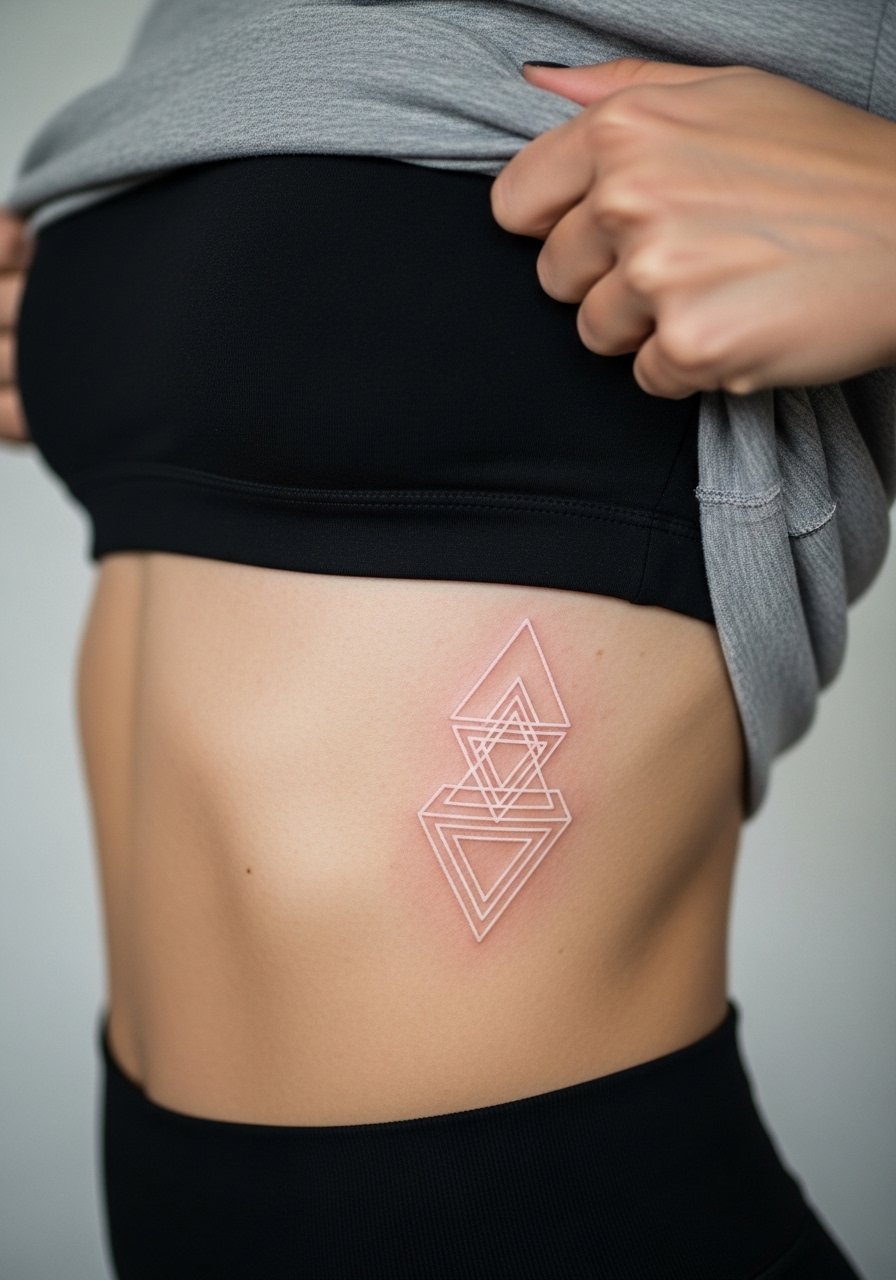
Ribcage work shows off geometry but it is also one of the higher pain placements. Expect a multi-hour session and the need to shift positions. Artists split on whether white settles reliably on ribs. One camp says the skin stretch and movement blur thin white lines within two years. The other camp argues that with deliberate spacing and moderate saturation, white holds up. Ask your artist which side they take and why. A real mistake is insisting on ultra-fine lines there. For session comfort, wear a loose cropped tee you can pull up without exposing more than the area being worked on.
4. Narrow Mandala at the Collarbone

A collarbone mandala reads like a frame for necklaces when placed carefully. This placement is moderately visible and ages better than sternum or ribs. Tell the artist to keep center density low and favor radial spacing so the negative skin around the white helps the pattern stay defined. Watch for the common error of packing too many concentric rings. That can blur at year three. For evenings out, pair this with an open collar blouse to let the shapes show without competing jewelry.
5. Micro Geometric Ring Around the Ankle
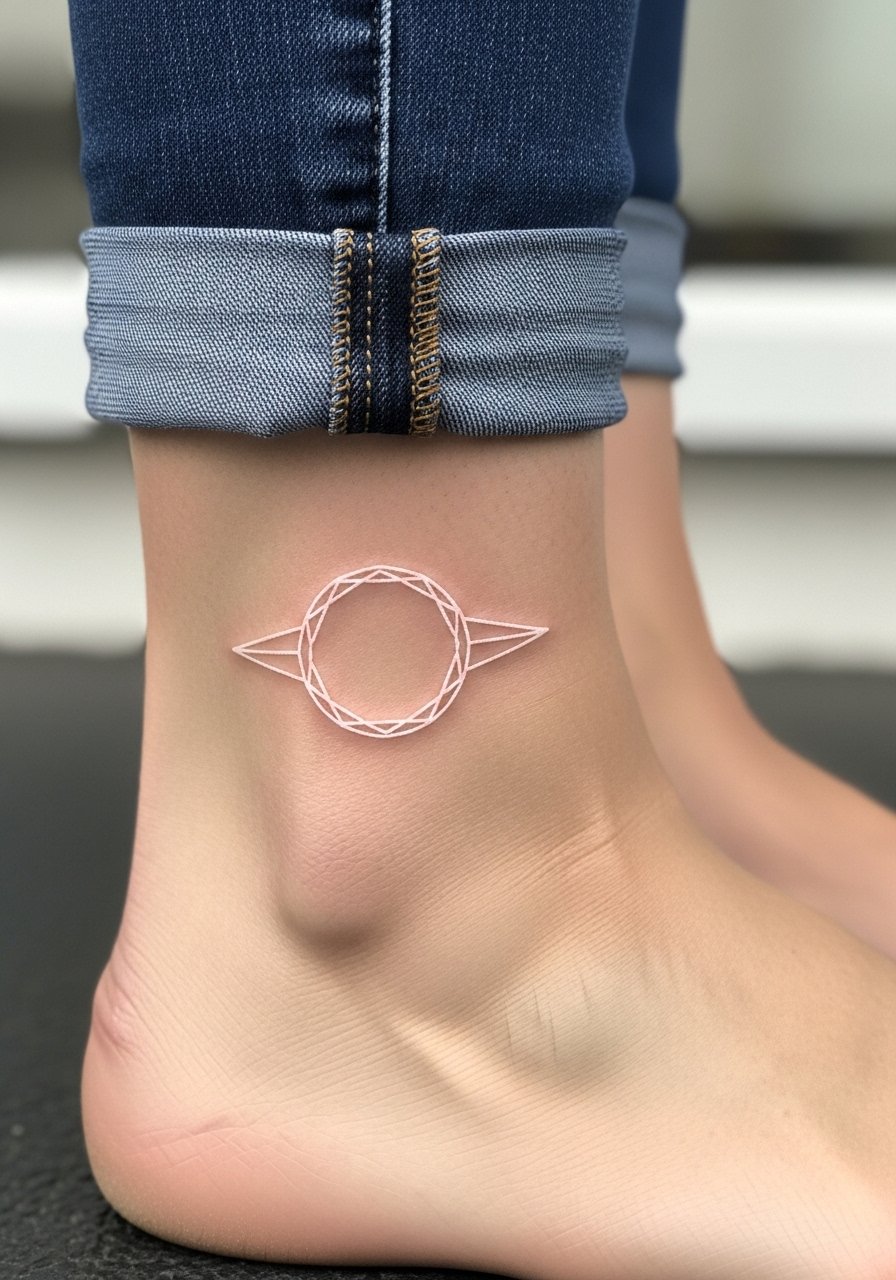
Ankle rings are delicate but face constant abrasion from socks and shoes. Ask your artist to make the band slightly thicker than you think you need. That helps maintain readable geometry after the initial healing. Pain is low to medium and sessions are quick. The usual mistake is asking for near-microscopic detail. Plan touch-ups earlier for ankle work because friction speeds fading. When you want to show it off, sandals and a simple ankle chain complement the white without covering it.
6. Symmetric Dot Work on the Back of Hand
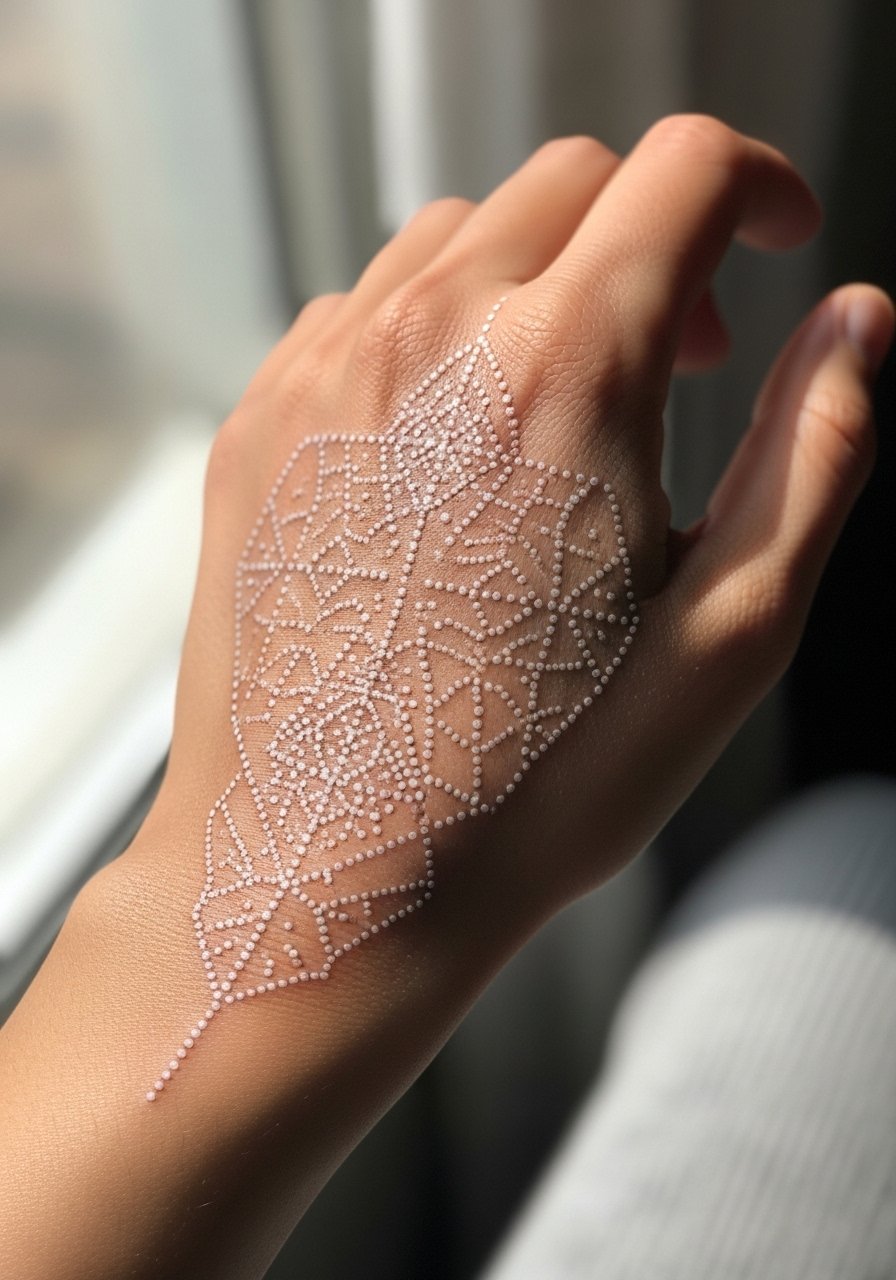
Hand tattoos are visible and they fade faster. For white dot work on the hand, ask for slightly deeper placement and larger dot spacing to reduce blowout risk. The session feels sharp near knuckles and the healing window is tricky because hands wash constantly. Many people miss how much daily life grinds these pieces down. If you want to show it off without overexposure to soap, wear a minimalist ring set that draws attention but lets the dot work sit in the background.
Pack Smart
The wrist and hand pieces above heal under heavy use, so a few session-day and healing items make the first week easier.
-
Stencil transfer paper kit. Lets you preview the placement on skin before the first needle, which matters for small wrist and hand geometry.
-
Topical numbing cream. Use as directed before rib or sternum sessions to reduce the edge for longer placements.
-
Thin protective film roll. Helps protect ankle and hand pieces from friction during the first days of healing.
-
Fragrance-free gentle body wash. Cleans the area without irritating delicate white linework that fine geometry depends on.
-
Aquaphor Healing Ointment. A thin layer in the first 48 hours can keep newly tattooed skin supple while you follow your artist's care plan.
7. Micro Hex Grid on the Upper Arm

Upper arm geometry is forgiving. The skin there holds white ink better than thin skin zones. Ask your artist for moderate saturation and slightly increased spacing between hexes so the pattern reads clearly at arm movement and in sunlight. This placement is lower pain and often done in a single session. A common mistake is compressing the grid too tight for a small area. Pair the piece with rolled sleeves and a classic short-sleeve tee to show the pattern without covering it.
8. Thin White Lines Along the Spine

Spine geometry looks striking when scaled for the contour of the back. Pain varies by level along the spine and sessions can be split. Tell your artist to keep vertical spacing deliberate so the white lines do not merge when the skin flexes. The mistake is asking for hairline spacing between lines there. That reads clean fresh and then blends as the skin moves. For show-off looks, backless tops or a simple halter dress frame the vertical geometry.
9. Mini Geometric Cluster Behind the Ear
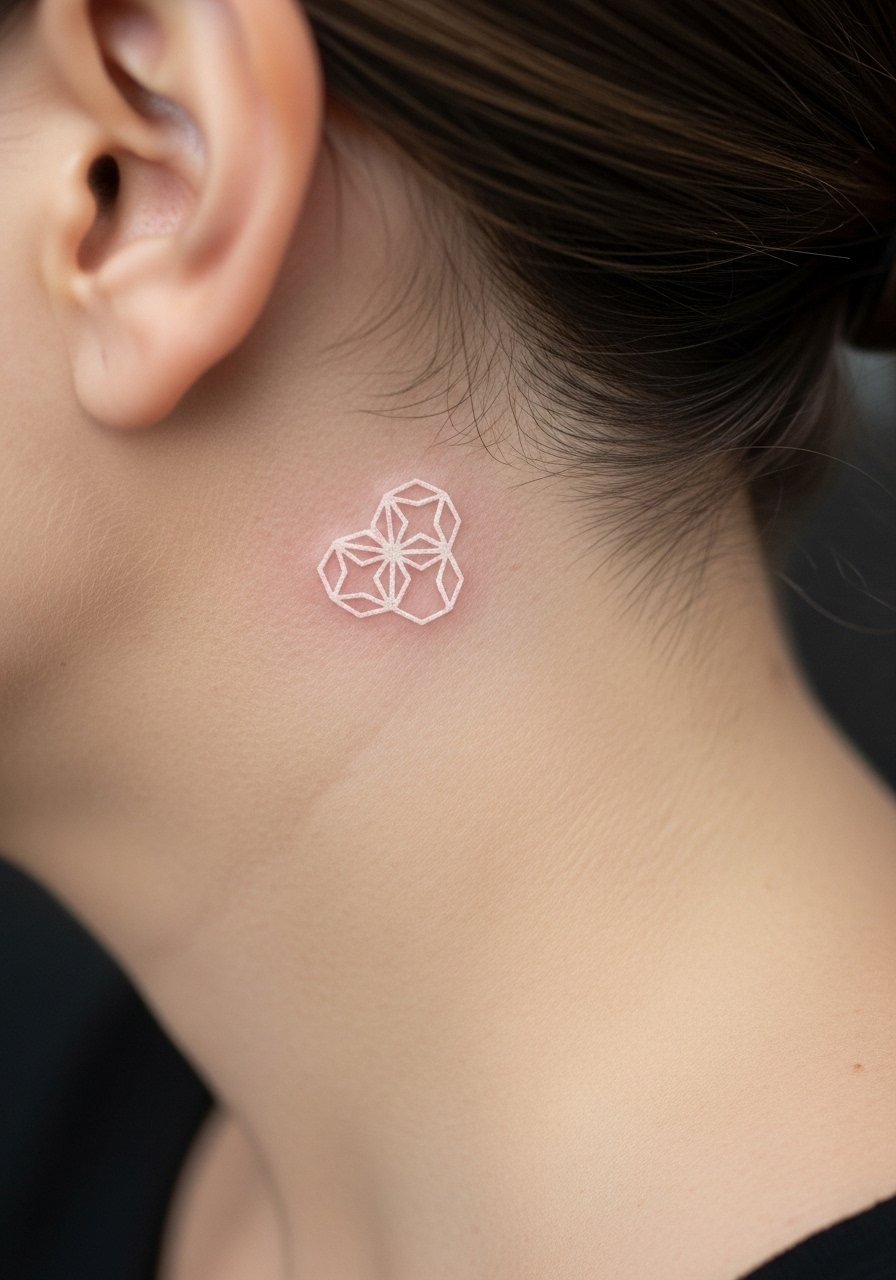
Behind-the-ear spots are subtle reveal tattoos and require careful stenciling. Ask for low-density white so it reads like light against darker skin rather than a block of ink. Pain is mild and sessions are quick. One mistake is pushing for too much symmetry in a tiny zone. For visibility without full exposure, pair it with an updo or a silk scrunchie that lifts hair away.
10. Geometric Sternum Burst

Sternum geometry is intimate and dramatic, but it lives on skin that moves a lot. Expect a painful session and multiple passes. Artists are split on white on sternum. One group worries about uneven healing and yellowing. Another group says careful depth and patch testing fix most problems. Ask the artist about prior white ink sternum experience and insist on test swatches where possible. For session comfort, a zip-up hoodie or sports bra that you can shift is better than removing too much clothing. When showing it off, straps like a bandeau top highlight the geometry.
11. Symmetric Compass on the Upper Chest
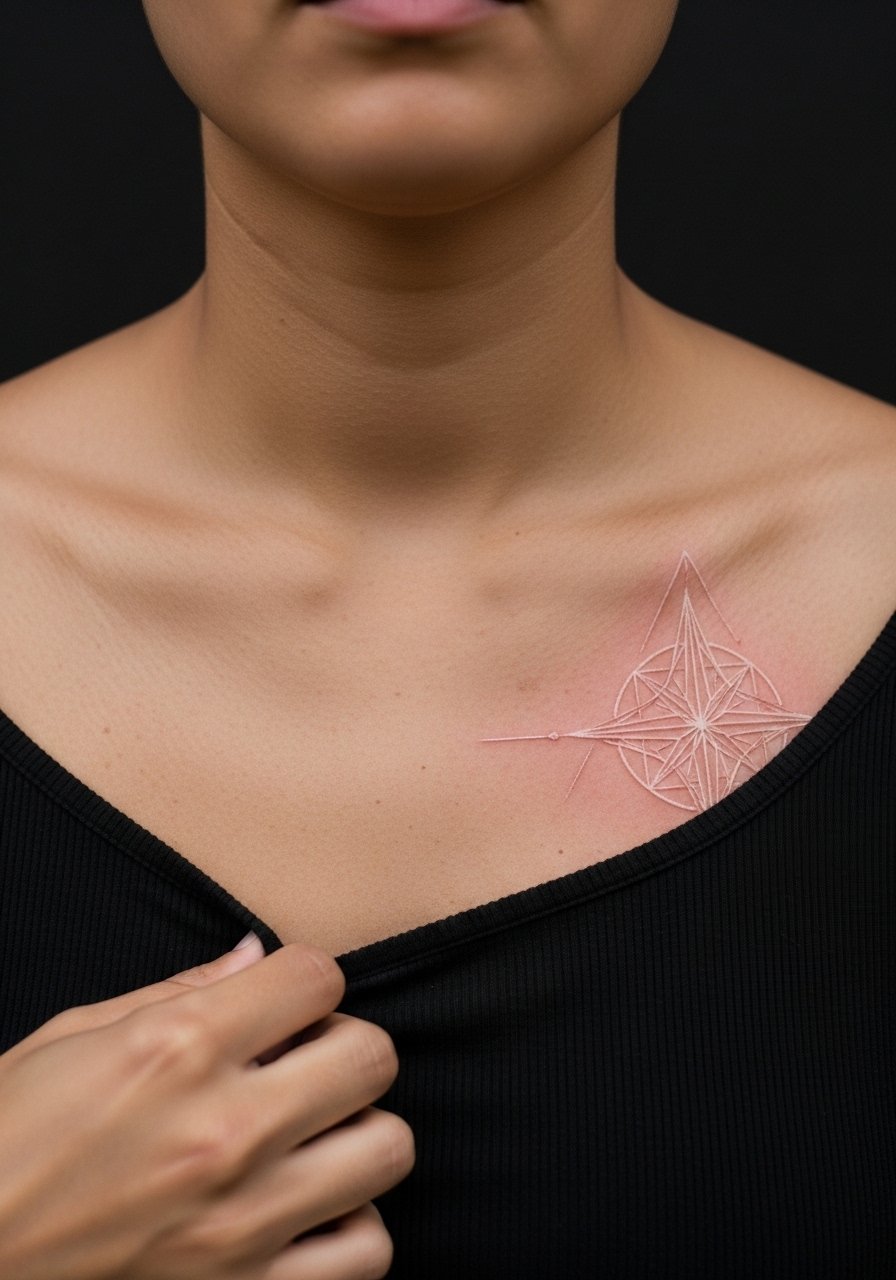
A symmetric compass sits where necklaces usually live. Keep the center area less dense so skin contrast lets the white read properly. Chest skin tolerates white better than lower ribs. Pain is moderate and healing a bit slower due to movement. A common mistake is over-detailing the central point. For nights out, pair with a thin chain pendant that sits above the tattoo rather than across it.
12. Linked Geometric Bands on the Thigh
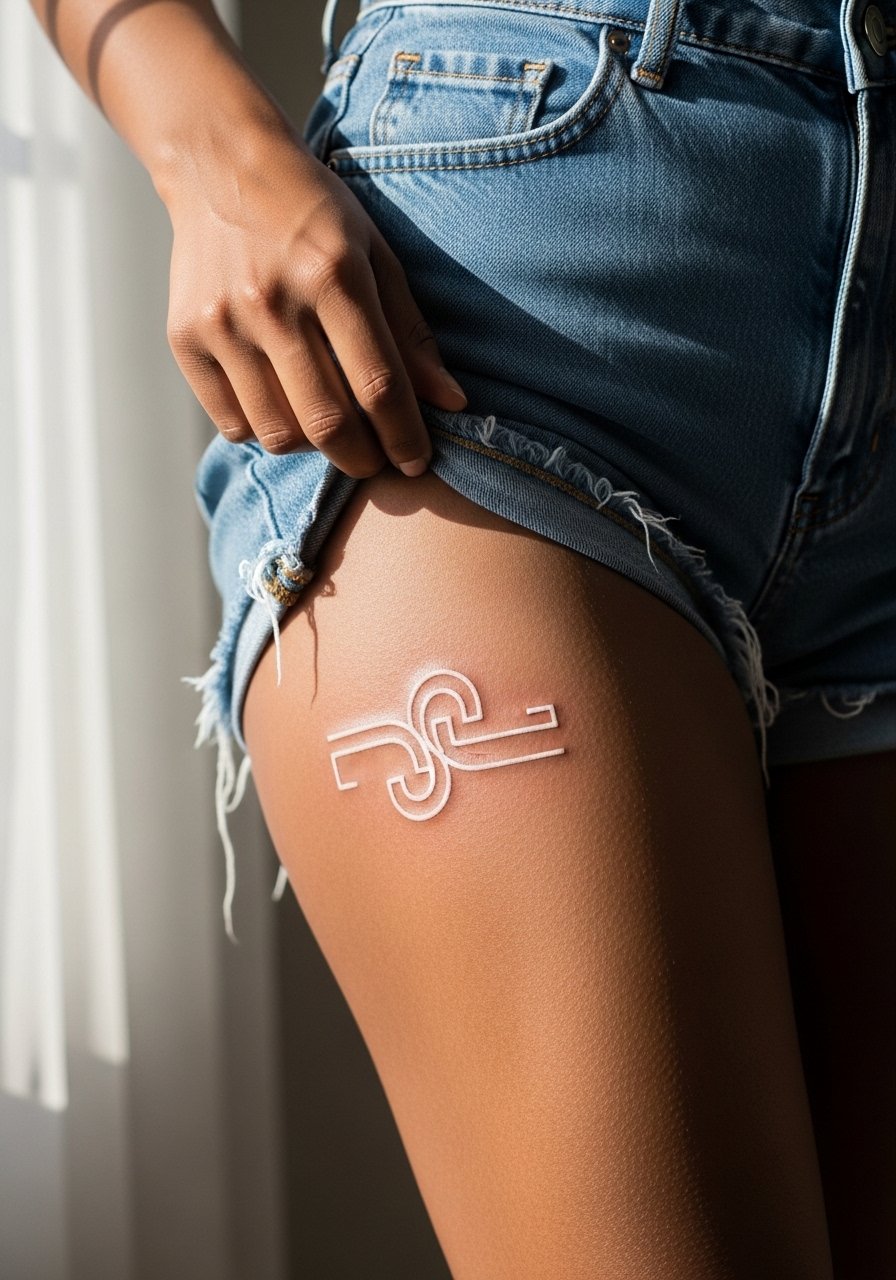
Thigh bands can be bold without being visible all the time. The skin on the thigh accepts white well but is affected by clothing friction. Ask the artist to place bands where seams of shorts or underwear do not rub during healing. Sessions are comfortable and can be longer. A mistake is placing bands where waistbands cut across them. For the session, wear loose drawstring shorts so the artist can expose the area without pressure.
13. Negative Space Geometric Sleeve Accent

White used as negative space inside blackwork gives a carved look. In consults, specify that you want the white to sit as accents rather than as a base layer. This avoids saturation battles and keeps touch-ups straightforward. Expect a longer session if combined with blackwork. A real mistake is asking for white overlays over dense black without planned contrast. Pair sleeve accents with rolled sleeves and a lightweight denim jacket to reveal the interplay.
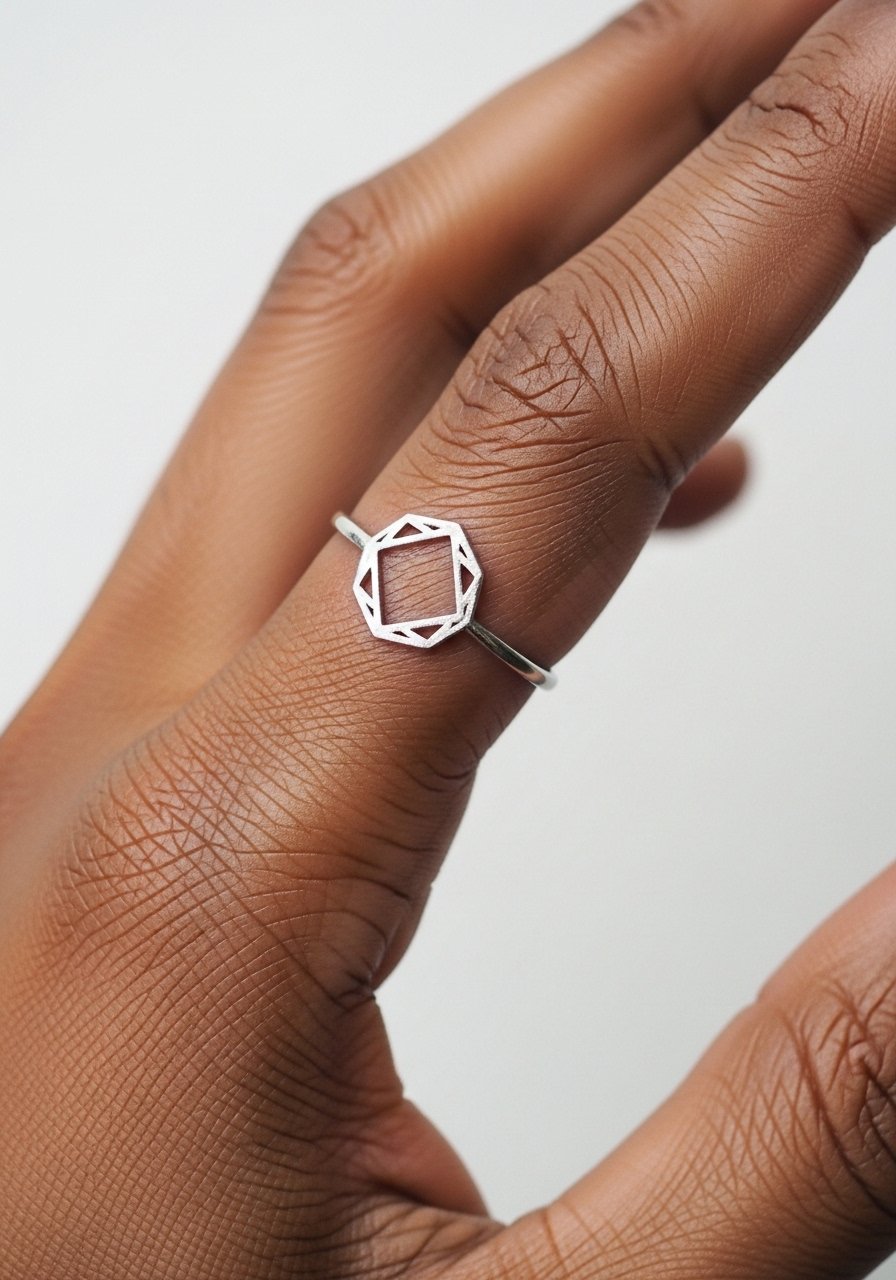
14. Tiny Geometric Points on the Fingers

Fingertip and finger-side geometry fade fastest. Tell your artist you accept a higher touch-up timeline and consider spacing the dots more generously. Sessions are quick but expect faster loss of crisp edges. The most common mistake is requesting fine, dense patterns on the fingers. For subtle presentation, choose stacking rings or a thin band ring to complement the points without rubbing them.
15. Chevron Spine Accent Between Shoulder Blades

Between the shoulder blades gives geometry a centered backdrop that peeks out through open backs. The skin here is forgiving and white ink can hold well if the artist spaces chevrons. Sessions are moderate in time and pain. Common errors include making the chevrons too close together. For show-off outfits, choose a back-cut top or a strappy tank that frames the design without covering it.
16. Minimal Polygon on the Nape of the Neck

Nape pieces are subtle and easy to hide. Ask the artist to keep edges slightly thicker so movement and hair do not make the shape vanish over time. Pain is mild and the session is short. A mistake is demanding hairline thin borders that blur when hair rubs the area. For styling, a low ponytail or a wide neck tee puts the polygon on display without full exposure.
17. Radiant Sunburst on the Outer Calf

Outer calf pieces read well with movement and often last longer than foot or hand work. Ask for graduated spacing in the rays so the outermost tips are not razor fine. Sessions are moderate and healing is straightforward. The usual mistake is placing the most delicate details on the edge where socks rub. Show it with cropped trousers and a casual slip-on shoe to keep the geometry visible.
18. Interlocking Diamonds on the Lower Back
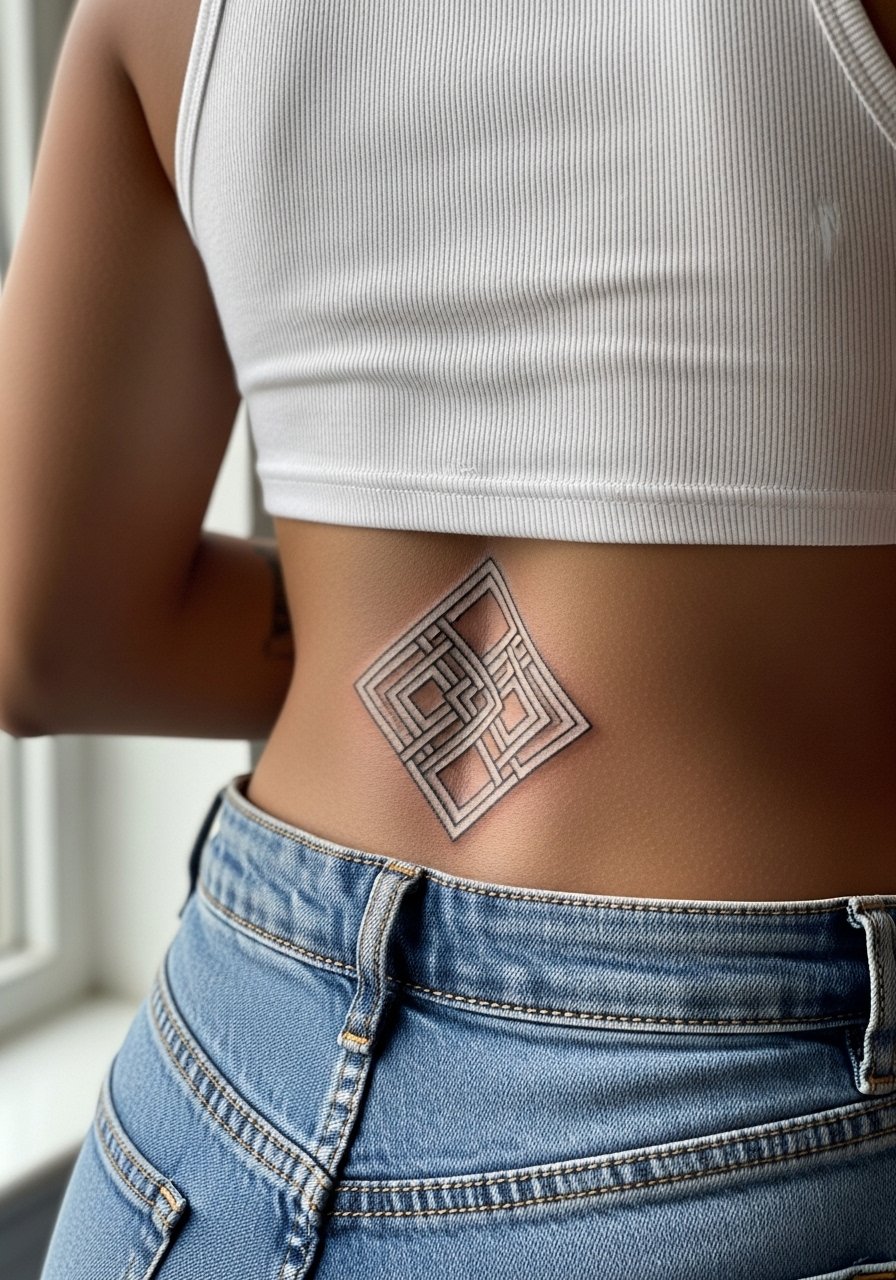
Lower back geometry is private and forgiving. Tell the artist to keep diamonds slightly larger than you think, as skin tension and clothing can soften edges. Sessions are medium length and pain is moderate. A frequent mistake is requesting ultra-dense lattices that fade into a whitewash across time. For an evening look, a low-rise skirt with a cropped blouse frames the pattern subtly.
19. Micro Maze on the Inner Bicep

Inner bicep skin is softer and can blur fine white details. When you bring maze references, ask for a simplified version and for the artist to mark spacing on the stencil. Expect a ticklish feeling during the session and a need to avoid tight sleeves while healing. The common error is overcomplicating the maze. For the session, wear a sleeveless tank so the artist can access the area cleanly.
20. White Ink Compass on the Side Thigh

Side thigh pieces rest in a low-friction zone and can be bold. Ask for crisp negative space around the compass so the white shines without crowding. Sessions are comfortable and often done in one block. The mistake is underestimating how clothing seams will sit during healing. For the appointment, wear high-waisted shorts so the area is exposed without shifting fabric.
21. Geometric Half-Moon on the Ankle Side
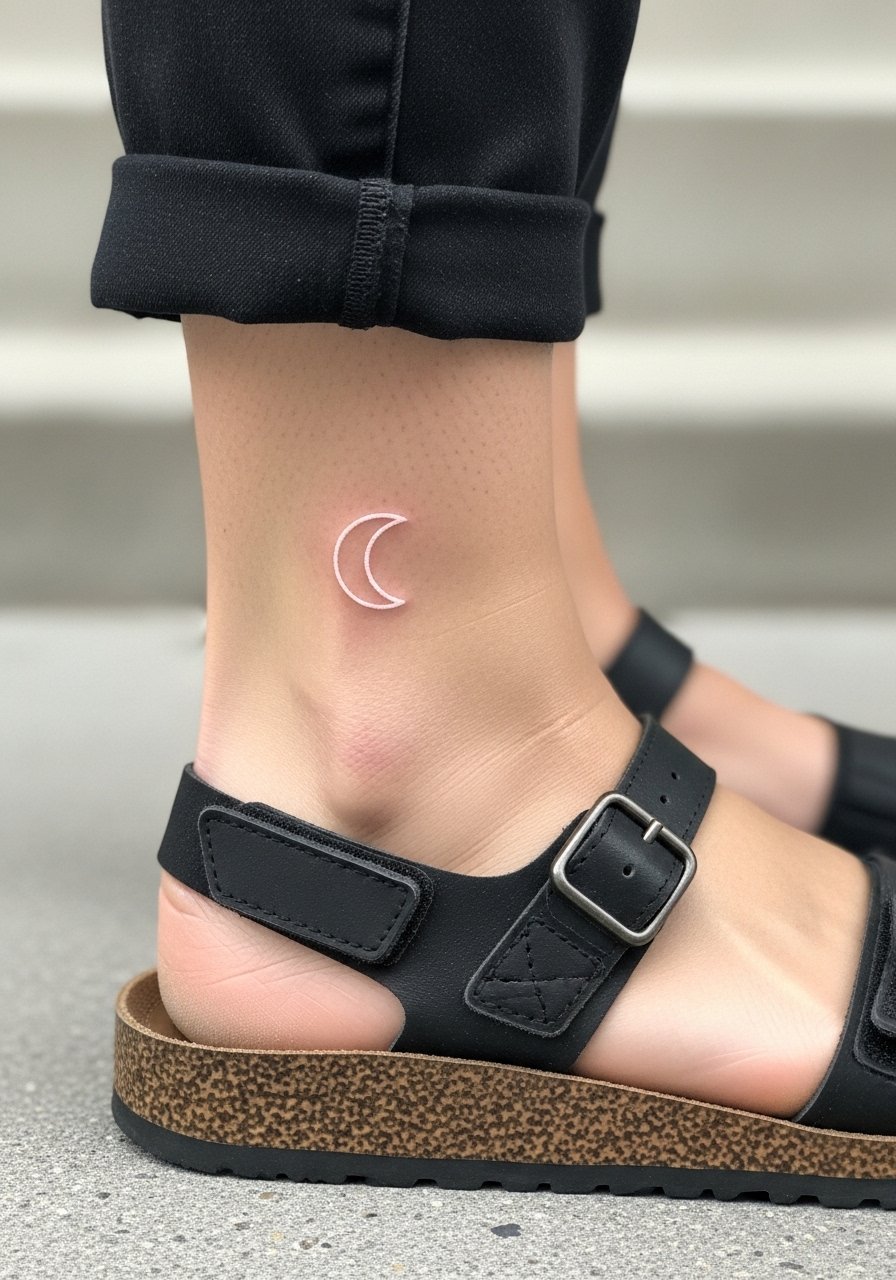
The outer ankle is visible and vulnerable to wear from footwear. Ask for slightly thicker arches in the half-moon so the silhouette remains clear after weeks of walking. Sessions are short but expect sooner touch-ups. A common mistake is choosing hairline arcs that disappear after a few months. When you want to show it, pair with sandals and an ankle strap sandal that frames without rubbing the tattoo.
22. Radial Dot Work Around the Knee Cap

Knee-area geometry must account for constant bending. Ask the artist to build radial dots with scaling from center outward so movement does not collapse the pattern. Pain is higher near the joint and sessions might be broken up. A mistake is compressing dots too tightly near the crease. For the session, shorts you can adjust like athletic shorts are best so the artist can reach the area without pinching.
23. White Ink Ring on the Thumb Web
The thumb web area sees a lot of motion and washing. Ask for a ring with slightly wider band and fewer fine details. Sessions are short but expect fading faster than forearm work. The mistake is wanting a filigree band there. For discrete styling, a matching minimalist ring on the finger can balance the thumb web without adding friction.
24. Concentric Squares on the Upper Thigh

Upper thigh skin holds white well and allows larger geometry that reads from a distance. Ask the artist to scale the squares so inner lines are not hairline thin. Sessions are moderate with good comfort. People often make the error of placing the tightest details at the smallest square. For beach season, pair with a high-cut swim bottom that shows the central geometry.
25. Interlaced Lines Across the Collarbone

Interlaced collarbone geometry benefits from asymmetry and negative skin channels. Tell the artist you want a little breathing room at each intersection. Pain is mild and healing is consistent. The typical mistake is insisting on every intersection be micro-sized. For styling, layer with a thin choker necklace to add contrast without competing.
26. Geometric Crescent Along the Rib Side

Rib-side crescents are elegant but sit on moving skin. Expect a painful session and a strategy for depth and spacing. Artists differ on how white behaves on ribs. One camp sees frequent softening and advises against fine white there. Another camp thinks modest density and proper depth make it viable. Ask the artist their experience with white on rib-side and whether they do test spots. For the session, wear a sports bra or cropped top that gives access without exposing more than needed.
27. Geometric Halo Around a Small Scar

Using white ink to frame or distract from a small scar can work well if the scar has settled and the skin texture is even. Ask your artist to evaluate the scar in person and to place the halo so it evens out contrast rather than covering the scar directly. Expect varied healing over scar tissue and possible need for touch-ups. A common mistake is assuming white will fully hide raised texture. For session-day clothing, choose a short-sleeve tee so the artist can access the forearm without rubbing the fresh ink.
Frequently Asked Questions
Q: Will white ink show up on very dark skin and still look crisp over time?
A: White can be visible and gorgeous on dark skin when the artist spaces lines and uses conservative density. Over time white tends to soften, so expect some fading and possibly a touch-up at year two to three depending on placement and sun exposure. Ask your artist to show healed examples on similar skin tones during the consultation.
Q: Do geometric white tattoos need different touch-up timelines than black linework?
A: Yes, white typically needs touch-ups sooner. Black saturates and holds contrast while white relies on optical contrast with surrounding skin. High-friction zones and frequent sun exposure shorten the time between touch-ups. Plan for realistic maintenance and ask the artist about typical timelines for your placement.
Q: How should I prepare clothing-wise for a sternum or ribcage white ink session?
A: Bring a fitted sports bra or a cropped top you can shift so the artist has clean access without exposing more than the area being worked on. A zip-up hoodie is also useful for travel to and from the studio. These small choices reduce irritation and simplify healing.
Q: Are there design choices that reduce blowout risk for white ink on soft skin areas?
A: Yes. Larger spacing between lines, slightly thicker linework, and avoiding hairline density help reduce blowout. Techniques like stipple shading and dot work with room between elements often age better than tightly packed, continuous fine lines.
Q: How do I find an artist who has experience with white ink on dark skin without naming anyone?
A: Look for healed portfolio photos under hashtags and directory listings, and filter for healed images on the artist's shop profile. Visit conventions and ask to see healed examples in person. You can also ask shops for references who had similar skin tones. That hands-on diligence tells you more than flash photos alone.
Q: Should I worry about white ink yellowing over time on darker tones?
A: Some people report slight discoloration in certain lighting and with sun exposure. The risk depends on pigment formulation and aftercare, so discuss pigment history with your artist and follow sun protection guidance for the healed tattoo.
