
Fine line Naruto motifs look gorgeous in photos but they age differently on skin than on screens. Fans often ask for exact panel replicas, only to find detail softens into a wash by year three. If you want illustrative Naruto work that still reads five years in, think scale, negative space, and where the piece sits on your body. The first idea below starts with a tiny emblem that proves the point.
1. Minimal Uzumaki Spiral on Inner Wrist

A tiny Uzumaki spiral on the inner wrist reads like a discreet nod to the series. Fair warning, wrists experience a lot of washing and friction so the smallest lines can blur faster than thicker linework. Tell your artist you want slightly bolder outer linework with open interior negative space to preserve definition. Session time is short and the pain is mild. Expect a touch-up around year two unless the line weight is given room to breathe. For showing it off, roll sleeves up and wear a thin chain bracelet that frames the spiral without crowding it.
2. Konoha Leaf Emblem on Upper Forearm
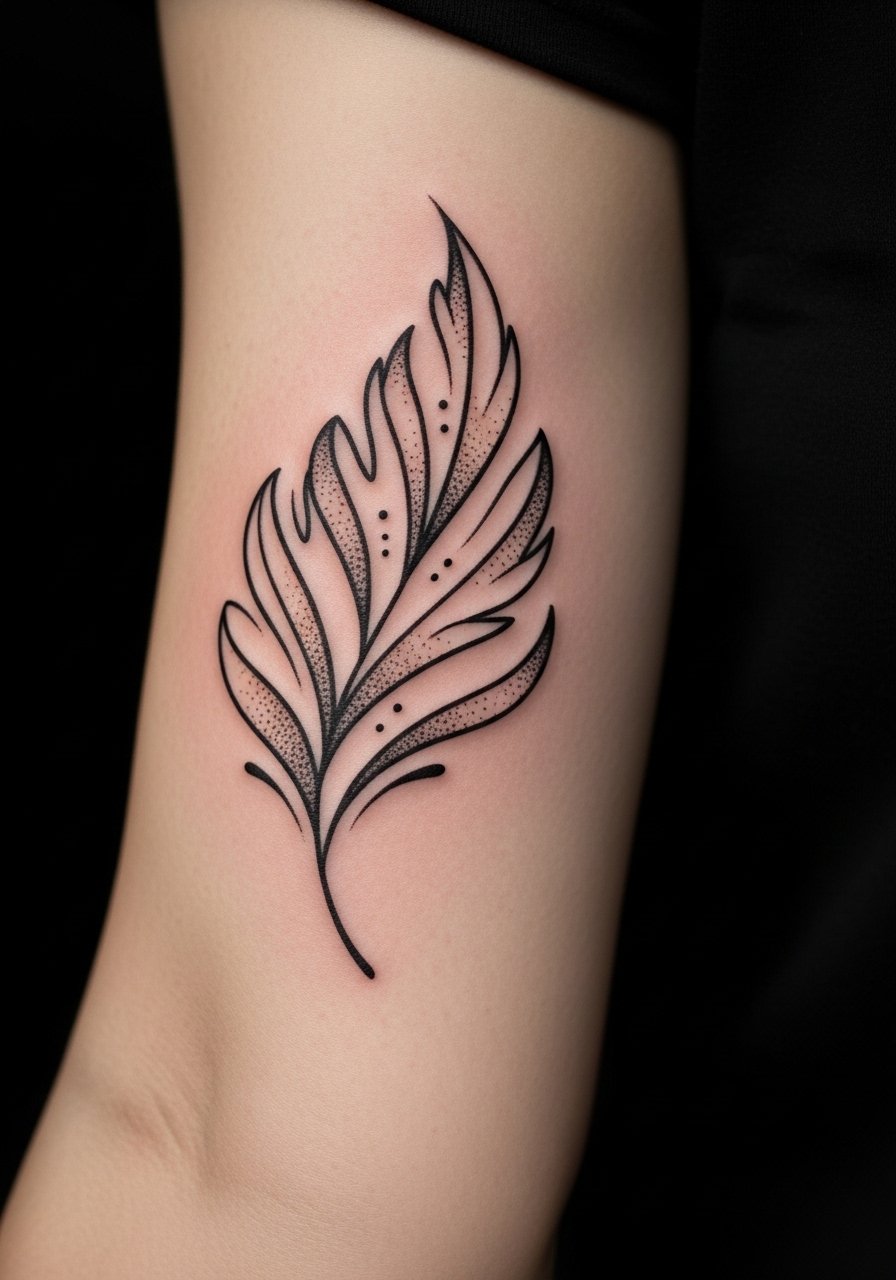
The Konoha leaf plays well as a small to mid-sized forearm piece because the arm gives the artist room to space lines. I suggest asking for stipple shading behind the emblem rather than heavy fills. That keeps the emblem readable at six months and at five years. Common mistake is shrinking the emblem too small on the inner forearm where blowout risk is higher. Session feels straightforward and usually finishes in under two hours. Pair this with rolled-up sleeves or a casual linen shirt to show the emblem without over-accessorizing.
3. Naruto Running Silhouette Mid-Bicep
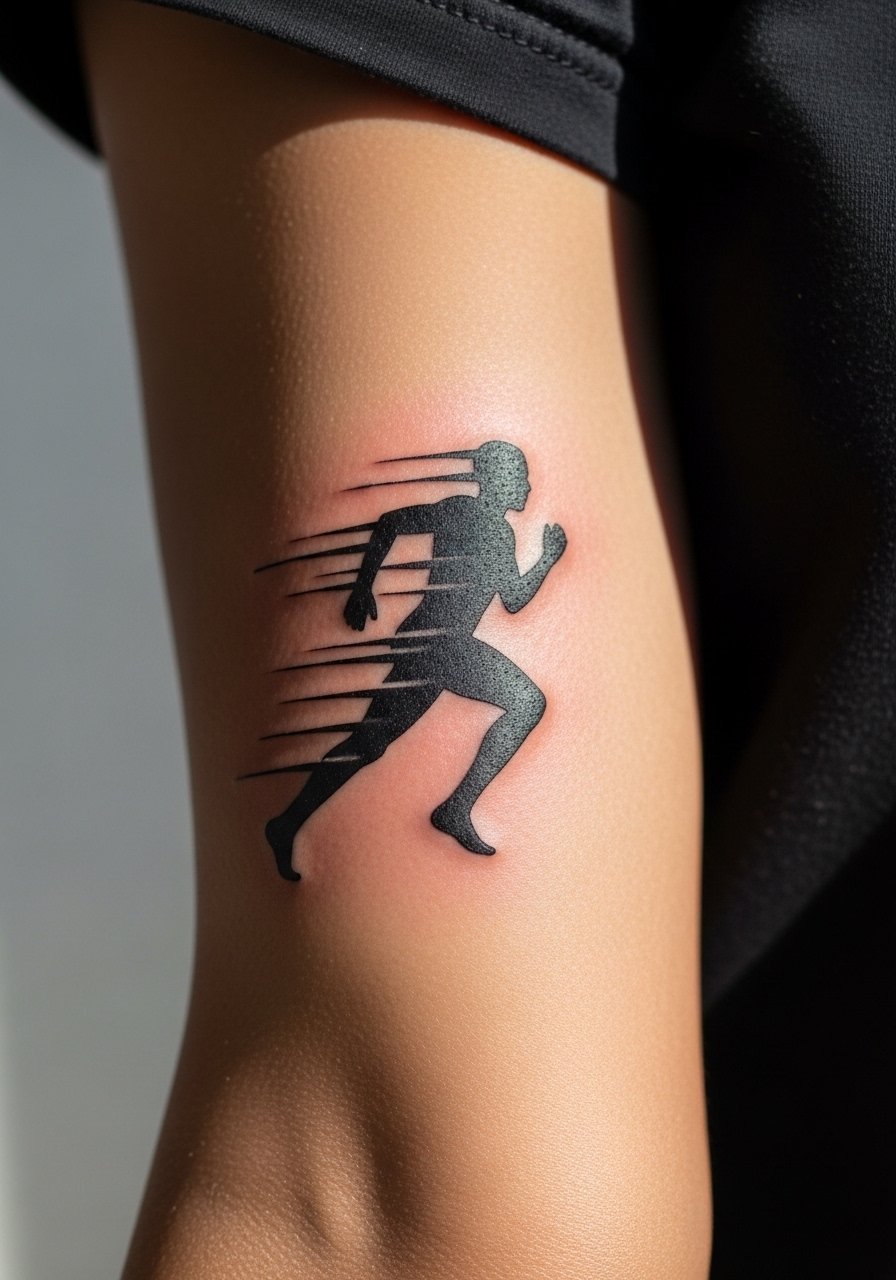
A running silhouette reads dynamic when placed on the mid-bicep because the muscle movement adds subtle life to motion lines. If you want it to age well, ask the artist for a stronger outline and minimal micro-detail. Tiny facial features tend to soften and become muddled by year three on rounded musculature. The session is medium pain and usually under two hours. Wear a sleeveless tank top to the appointment so the artist has clear access without awkward adjustments. Expect a touch-up at two to four years for crisp edges.
4. Chibi Ramen Bowl Near the Ankle
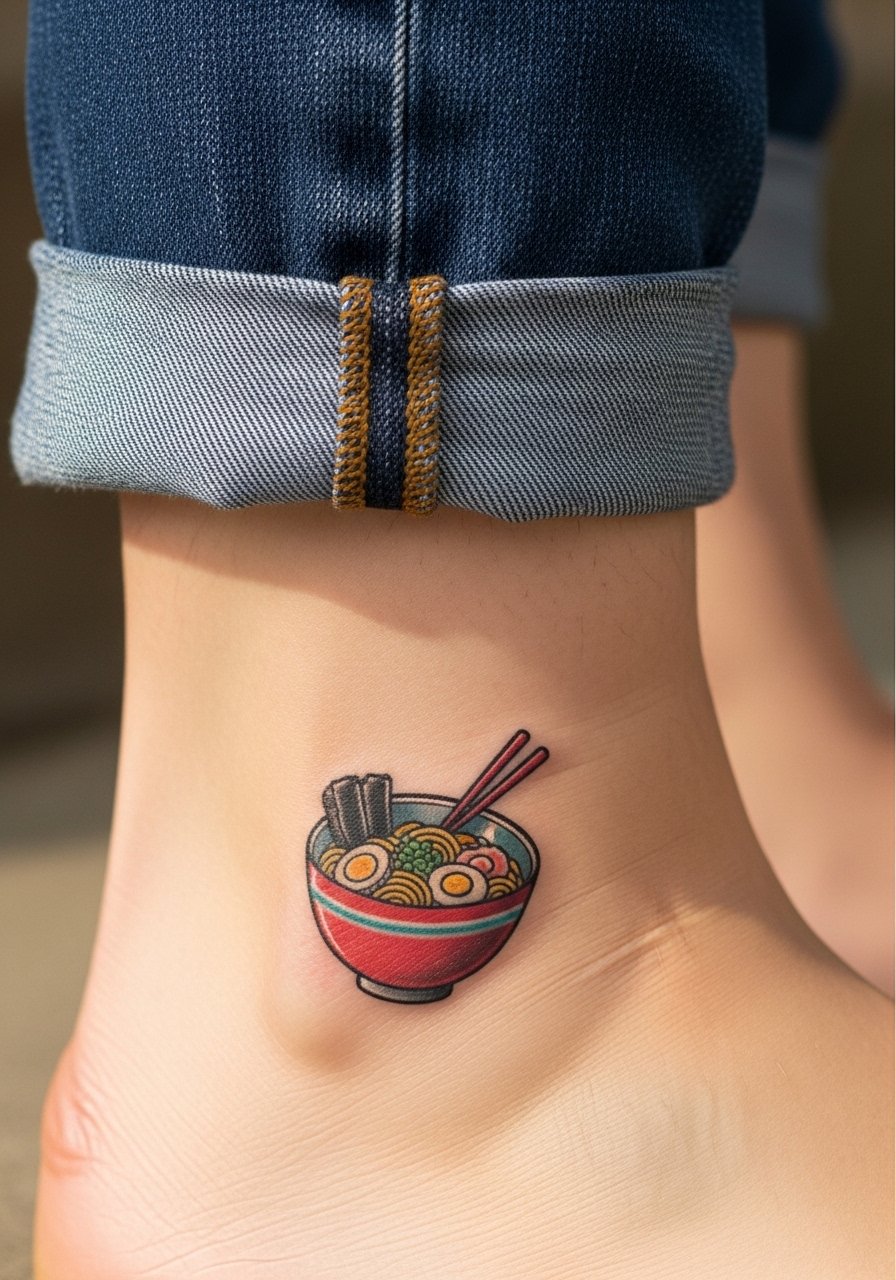
A playful ramen bowl on the ankle is great for fans who want something subtle and cute. Ankles take more friction from socks and shoes so saturation matters more than fine detail. Tell the artist to favor saturated color blocks over tiny linework. The pain is higher than forearm pieces but brief. One mistake is placing it too low on the foot where shoes rub constantly. For showing it off, roll jeans or wear minimalist sandals that keep attention on the tattoo without covering it. Expect color to need refreshment sooner than black linework.
5. Illustrated Naruto Headband Ribbon Behind Ear

A tiny headband ribbon placed just behind the ear is a subtle way to carry fandom without shouting it. Behind-ear placements can blur from hair oils and shampoo, so the safer route is slightly thicker linework and modest spacing. This area hurts less than ribs but more than the forearm. Bring up exactly how you want the knot and any kanji rendered so the artist can stencil carefully. For appointment comfort, wear hair up in a loose bun so the area is accessible. Keep in mind that behind-ear work sometimes needs technical expertise, so seek someone experienced with small anatomy placement.
6. Watercolor Rasengan Mid-Shoulder Blade

A watercolor Rasengan looks organic on the shoulder blade because the skin there takes color softly. The controversy around watercolor and longevity matters here because some artists say watercolor never holds, while others argue that strategic line anchors and subtle saturation make it last. Name your preference during consult and ask for a thin line perimeter to protect the color field. Shoulder blade sessions are moderate pain and can run one to three hours depending on size. For after-session showing, open-back tops frame the piece, and for the appointment wear a loose tank top.
Studio Day Picks
These first six placements range from ankle to shoulder blade, and a few need different prep and protection during the first week.
-
Stencil transfer paper kit. Lets you preview placement and line weight on skin before the needle touches the area, especially useful for small wrist and behind-ear pieces above.
-
Topical numbing cream. Applied per instructions about 45 minutes before can ease the sting in sensitive zones like ribs and ankles.
-
Thin protective film roll. Keeps tattoos on hands and fingers safe from friction during the first days of healing.
-
Fragrance-free body wash. Cleanses healing areas, which matters for fine line work on wrists and forearms that will see frequent contact.
-
Aquaphor healing ointment. Thin application protects delicate lines while allowing the skin to breathe during the initial healing window.
7. Kurama Half-Face on Lateral Ribcage
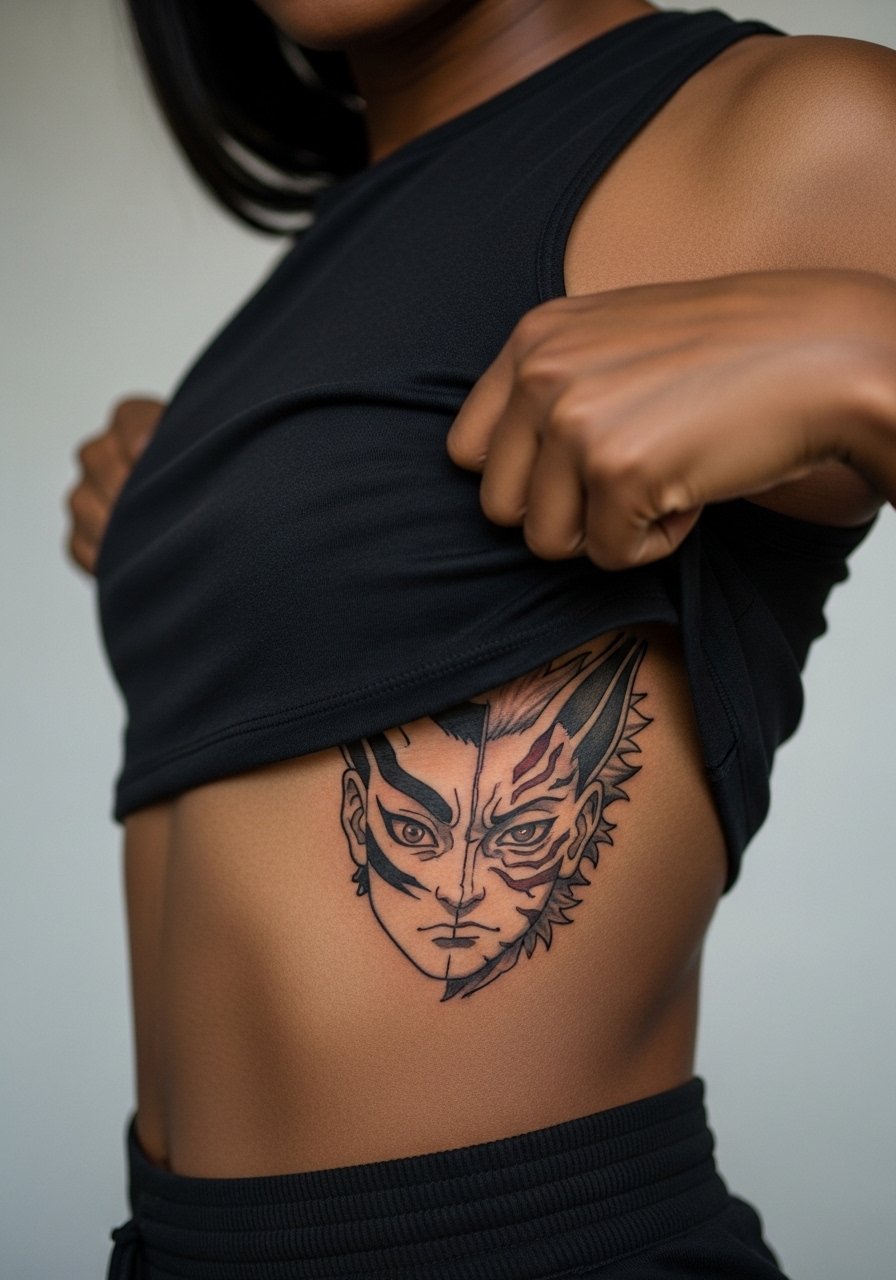
A Kurama half-face on the ribs is dramatic and rewards size with readable detail. There is a real debate in the fan community. One camp wants exact character replicas and thinks fidelity honors the source. The other camp favors illustrative reinterpretations to avoid copyright and creative stagnation. State during consult whether you want faithful likeness or an original illustrative take. Rib tattoos are painful and take longer per session. The biggest mistake is insisting on tiny facial detail in a high-stretch area that will blur. Expect a touch-up at year two to keep contrasts strong.
8. Sasuke-Style Sharingan Trio on Back of Arm

A trio of eye emblems suits the back of the upper arm because it offers a flat canvas for circular shapes. Ask for moderate spacing and a slightly thicker outer ring so the circles do not bleed into one another over time. Session pain is moderate and usually tolerable in one sitting for this size. Common mistake is compressing the three too close which accelerates visual merging. For the appointment, wear a loose button-down shirt you can pull aside to expose the triceps cleanly. Plan for a possible touch-up after two to three years.
9. Illustrated Naruto Jacket Patch on Upper Back

A jacket patch motif on the upper back reads like wearable fan art. This placement ages well because the skin there is less exposed to the sun. Tell your artist you want bold outlines with textured internal shading so the patch reads from a distance. Session feels medium and may require two sittings if you want color saturation. A common error is placing the patch too low where clothing rubs. For showing it off, open-back garments frame the design; a simple open-back midi dress works for evenings.
10. Illustrated Chidori Lightning on Forearm Sleeve Edge

A Chidori-style lightning bolt that wraps the forearm edge makes a great sleeve anchor. Ask for whip shading and dot work to suggest energy without tiny details that age poorly. Forearm skin holds linework well, but thin lightning forks can blur if they are too fine. Sessions vary by length but this motif often fits into a single two-hour block. The mistake is loading the bolt with micro-flourishes that become noise with time. Pair it with rolled sleeves or a racerback tank for casual show-off looks.
11. Kakashi Mask Line Art at Nape of Neck
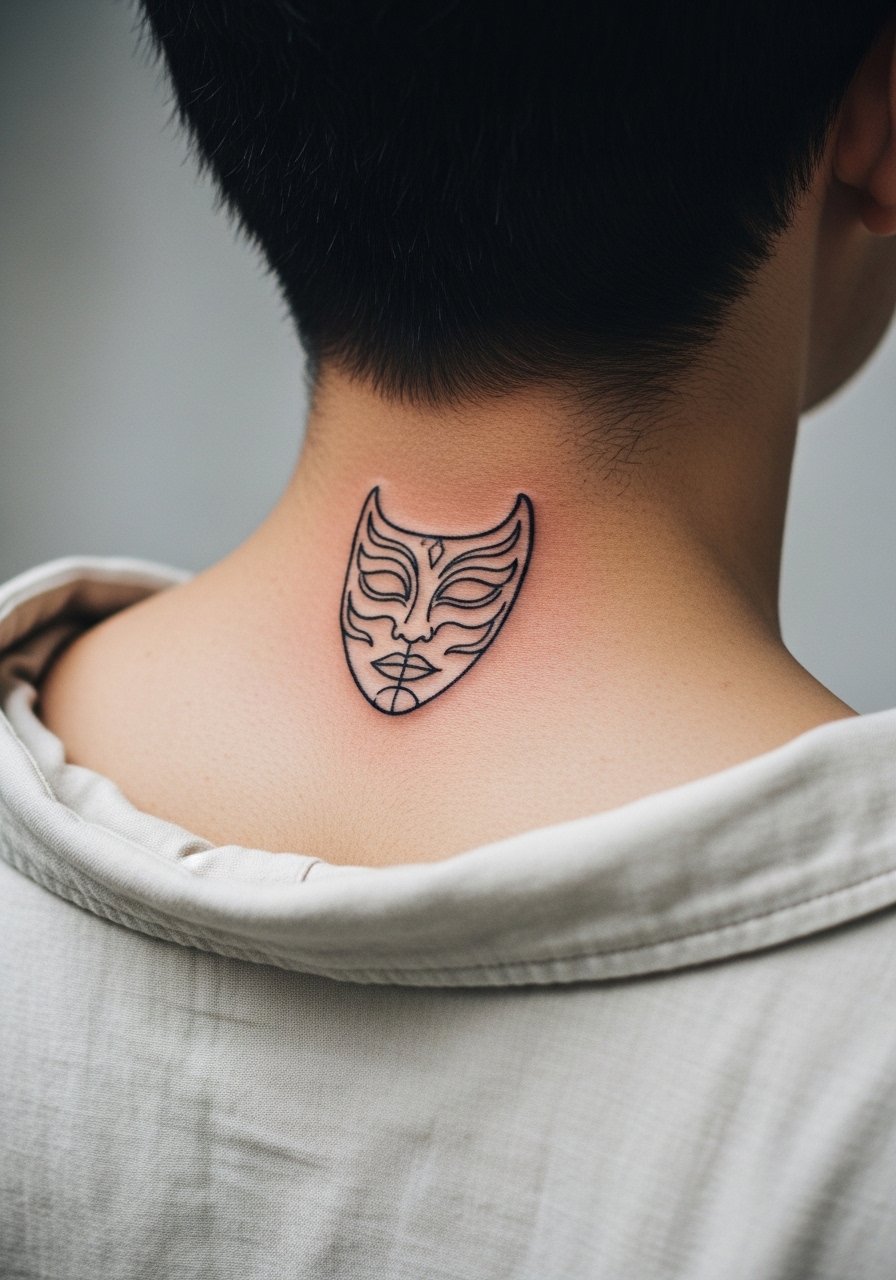
A minimal Kakashi-inspired mask at the nape reads private until you pull your hair up. Neck placements demand careful consultation because the skin moves and stretches. One common mistake is using ultra-fine linework there. Ask for moderate line weight and clear spacing so the shape holds. Pain is moderate and healing requires avoiding tight collars. For the appointment, choose a loose button-down shirt you can slide aside. Consider career visibility since neck tattoos can be noticeable with certain hairstyles.
12. Itachi Crow Flock Along Collarbone

A line of crows along the collarbone carries movement in a small area. Collarbone skin is thin and the linework can feel crisp at six months but may soften if anchored poorly. Tell the artist you want slightly spaced silhouettes and light stippling rather than tiny feathers. Sessions are short and the pain is moderate. The most frequent error is cramming too many tiny crows into a short span. For evening wear, a thin chain pendant necklace helps draw attention to the area without covering the art.
13. Illustrated Nine-Tails Tail Wrap on Calf

A tail wrap circling the calf benefits from scale and bold lines so the twists read over time. Calf skin holds saturation well but can be on the heavier side of pain if the piece nears the bone. Ask for negative space between tail segments to prevent merging with age. The mistake is trying to put excessive micro-detail in the curls. For the session wear, bring loose drawstring shorts so you can roll the leg without constricting circulation. Expect strong color longevity here compared with ankles.
14. Illustrated Hinata Gentle Fist Palm Symbol on Inner Hand

Inner hand placements show quickly but can fade and blur faster because of constant washing and use. For a palm-side symbol, push for bold simplified forms and accept that touch-ups may be frequent. Tell the artist you understand the trade-off and want the lines spaced for repeatable maintenance. Sessions are stingy and quick. The usual mistake is expecting the same longevity as forearm work. Hand placements can also affect some hiring prospects, so weigh visibility before booking.
15. Illustrated Shikamaru Shadow Puppet on Inner Bicep
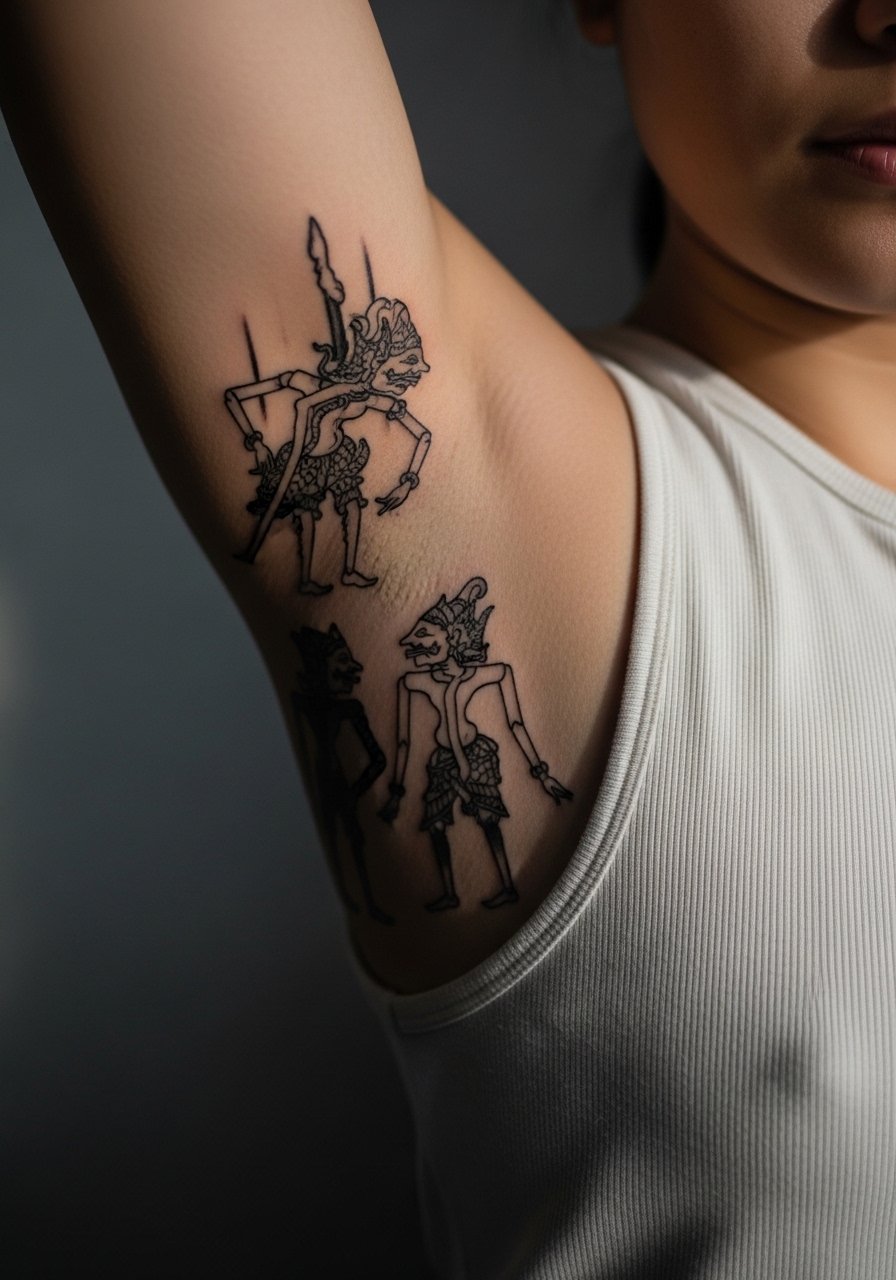
An inner bicep shadow puppet plays to subtlety because the piece is visible when you lift your arm. Inner bicep skin is softer and can blur if lines are too tight. I recommend stipple shading and moderate line weight. Pain leans toward the higher side because of thin skin, but sessions are bearable. Common mistake is compressing dark areas next to thin lines. For comfort, wear a loose tank top so the artist can access the spot without awkward adjustments.
16. Illustrated Anime Panel Strip Along Ribcage

A panel strip along the ribs creates a narrative read when you move. Ribs are high on pain and on movement so plan for multiple short sessions. The biggest mistake is packing too many micro-panels into a narrow rib span which leads to blended detail with healing. Ask your artist to prioritize strong borders and to space panels generously. This placement often needs a touch-up at year two. For the appointment, a fitted sports bra helps access without full exposure.
17. Illustrated Kunai Cluster on Thigh

A kunai cluster on the thigh is forgiving because thigh skin takes saturation well. This placement is great if you want larger work later that ties into a leg sleeve. Keep the kunai moderately sized and spaced so they age as crisp silhouettes. Sessions are lower on pain and can be long if you expand the design. Mistake to avoid is forcing extreme micro-detail which looks busy on larger limbs. For the session wear, bring breathable loose shorts so the artist can shift fabric without discomfort.
18. Illustrated Edo Tensei Scroll Script Along Spine
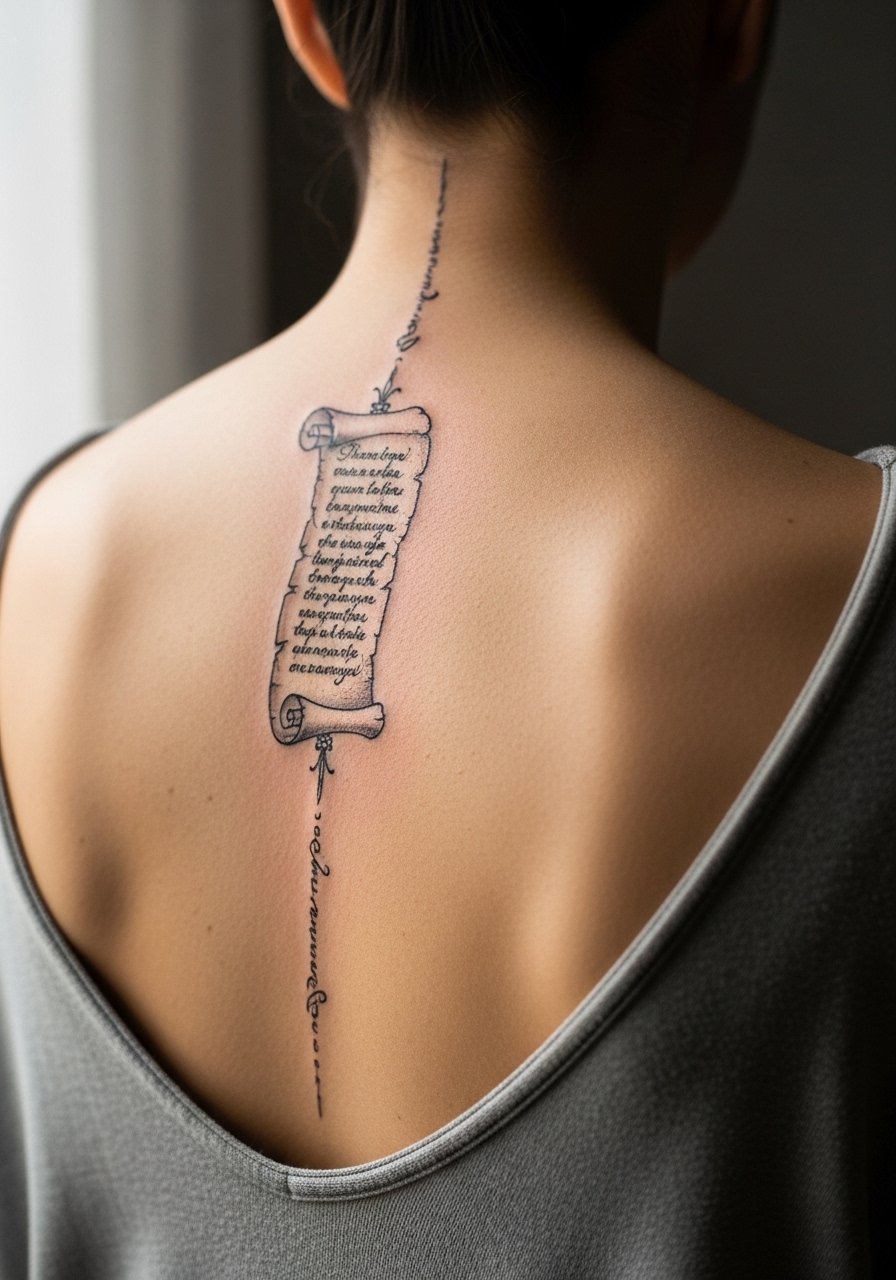
Vertical script along the spine looks elegant when the letterforms are spaced and bold enough to survive shifting. Spine placements can be painful and sensitive to movement during healing. Ask for slightly thicker letterforms with clean negative space so the script reads at a distance. A common error is requesting hairline scripts that disappear over time. Open-back clothing shows this best. Because this placement is central, mention any future plans for larger back pieces during consult.
19. Illustrated Masked Character Bust on Chest

A chest bust works well above the heart line or near the sternum but requires attention to curvature. Chest skin moves and stretches, and the common contest here is fidelity versus stylized abstraction. One camp requests exact character faces to match reference panels. The other camp prefers stylized busts that avoid portrait-level detail that will soften. Discuss which route you prefer before booking. Pain is variable and often higher. Wear a sports bra you can shift to expose just the area the artist needs.
20. Illustrated Naruto Headband on Finger Side

Side-of-finger tattoos are bold statements but they fade quickly. The skin here renews fast and rubbing causes early loss of detail. Ask your artist for simplified forms and accept touch-ups may be yearly. Session time is short and pain is sharp but brief. A frequent mistake is wanting tiny engraved detail that cannot last on the finger. For showing off, a slim minimalist ring can complement without crowding the tiny emblem.
21. Illustrated Tailed Beast Silhouette Across Shoulder Cap
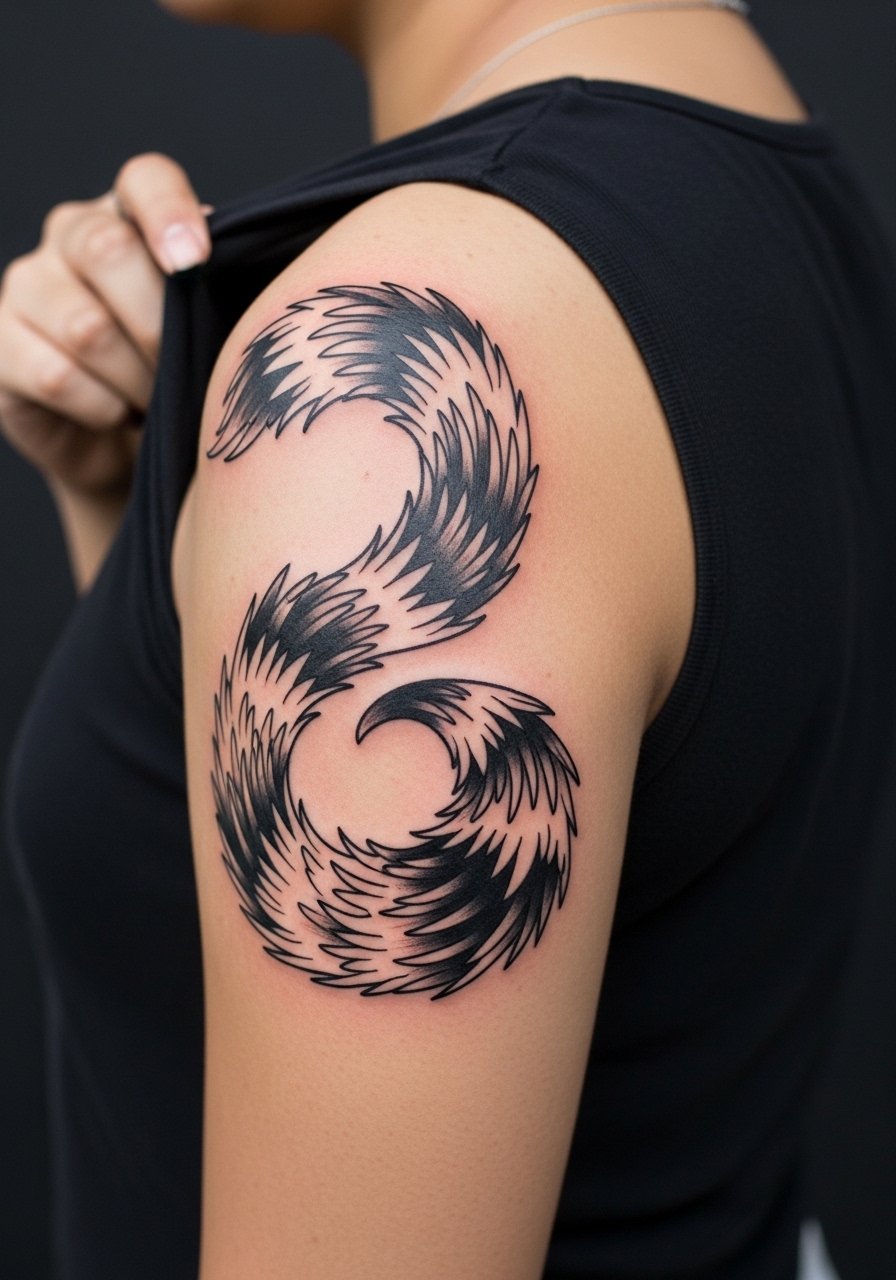
A shoulder cap silhouette suits strong, simplified shapes that hold over time. I often recommend bold negative space inside the silhouette so it keeps definition rather than relying on tiny internal texture. Sessions are moderate and you can usually finish in one sitting for this scale. The mistake is adding intricate internal detail in a curved area which will fade unevenly. For the appointment, wear a loose button-down shirt you can slide off one shoulder for access.
22. Illustrated Anbu Mask Small on Upper Arm
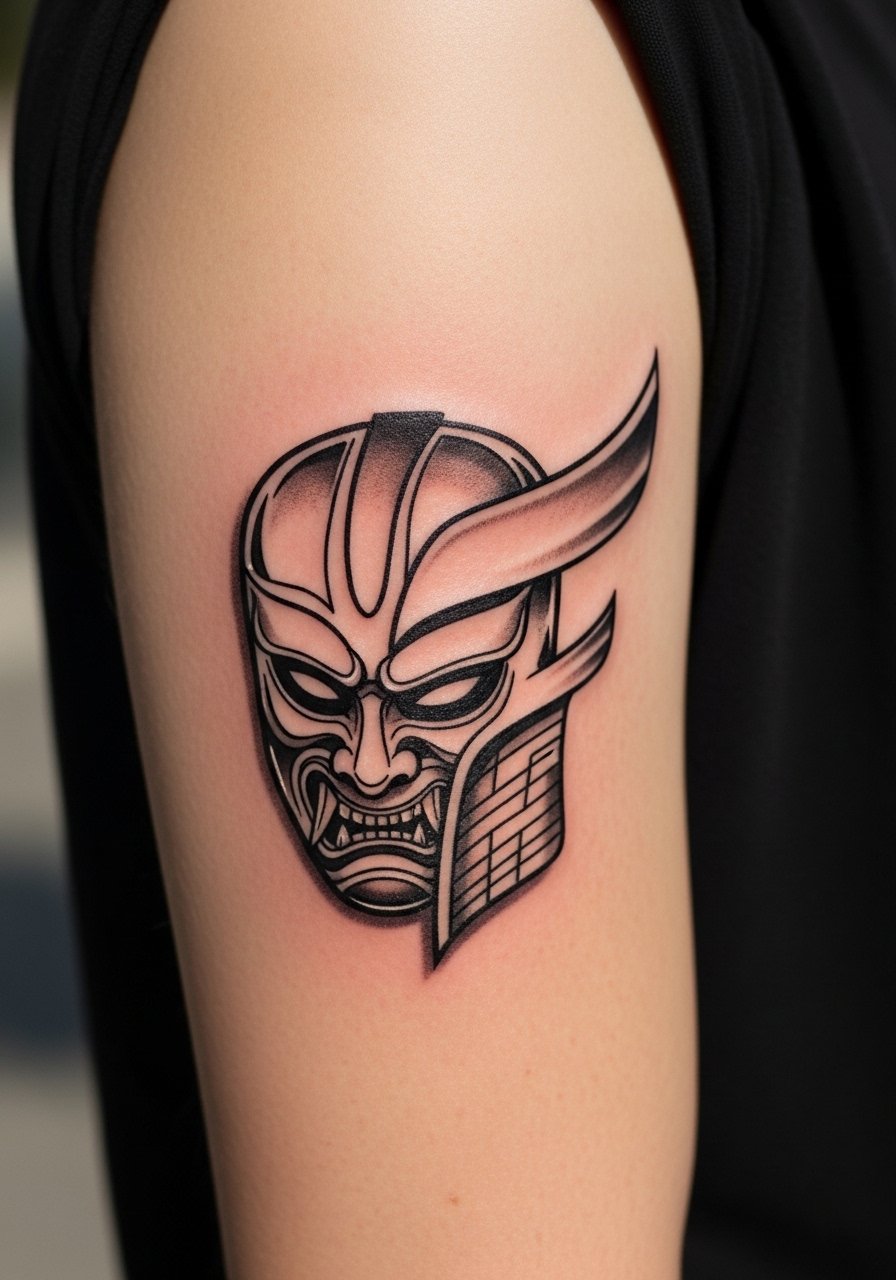
An Anbu mask motif fits the upper arm where you can have enough scale to show shape without fine detail. The arm tends to preserve contrast well, so ask for crisp outlines and modest shading. A common mistake is insisting on minute facial textures that look muddy after healing. Session time is short and pain is low. For showing it off pair with short sleeves or a fitted tee that frames the bicep without covering it.
23. Illustrated Leaf Village Map on Back Shoulder Blade
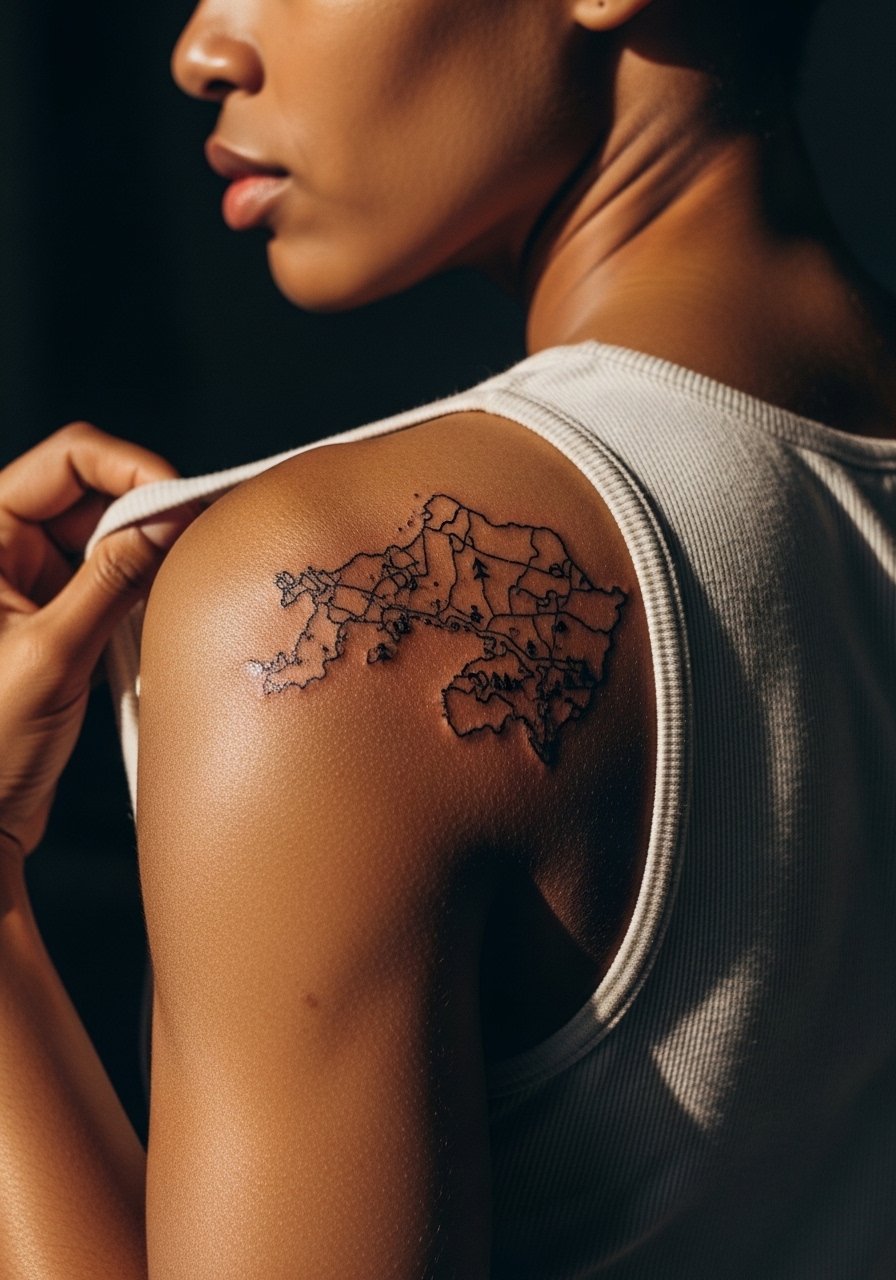
A small map motif placed near the shoulder blade benefits from wider spacing and moderate line weight. This area resists sun exposure better than the chest, so lines can stay readable longer. Tell the artist you want simplified icons rather than dense topography. A common mistake is cramming labeled elements that read cluttered. For after-session comfort, bring a button-down shirt you can slip on without rubbing the fresh piece.
24. Illustrated Scroll Tattoo Along Rib to Hip Curve
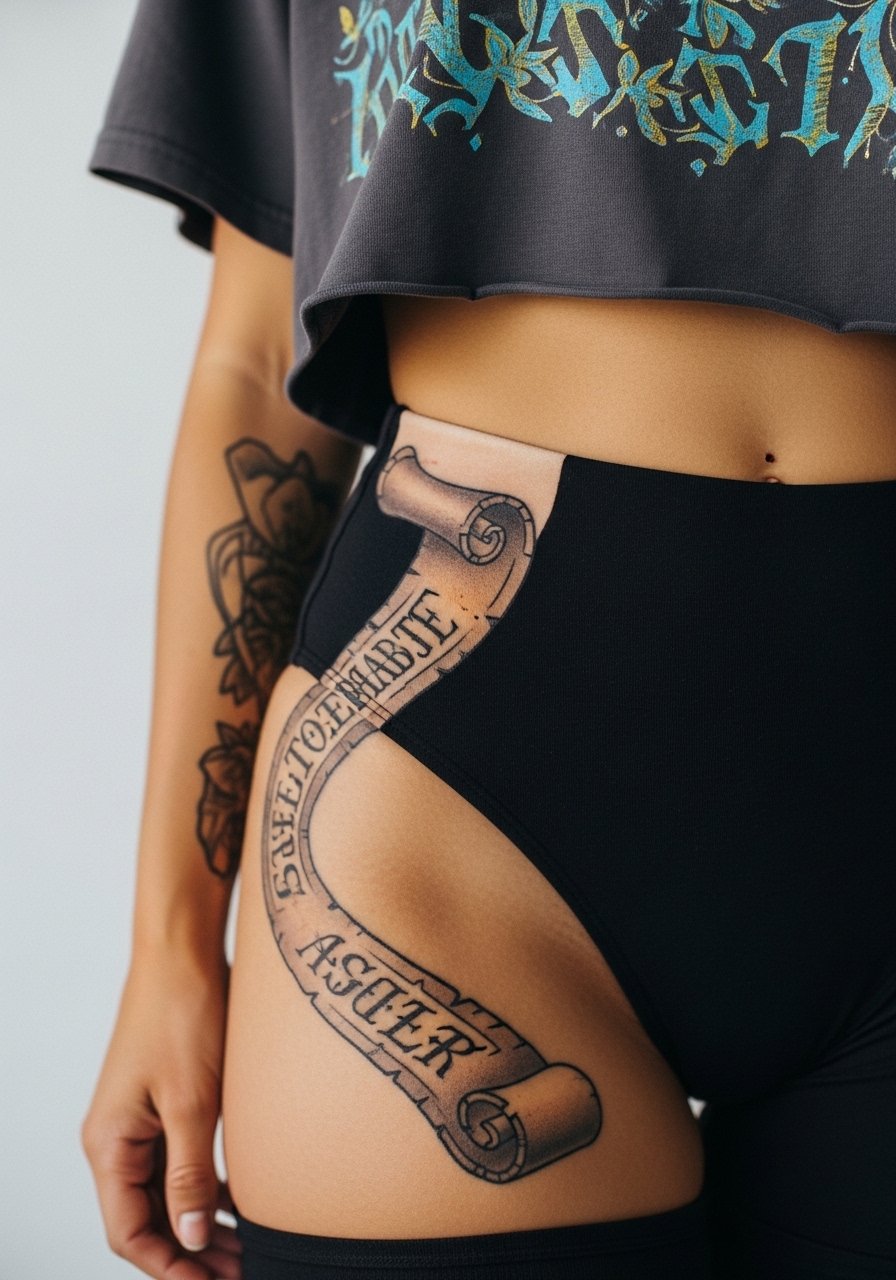
Long scroll lines along the side torso look elegant but the area stretches with movement and weight changes. Ask for bold anchors spaced evenly so the scroll reads from a distance. This is a sensitive zone and the session will be more painful than arm work. A frequent error is compressing script into the scroll rather than keeping aria of blank space. For the appointment, wear high-waisted bottoms and a cropped top that lets the artist access the strip without full exposure.
25. Illustrated Character Silhouette Inside Elbow Pit

Inner elbow placements are tricky because the skin folds during both application and healing. Silhouettes with clear negative space tend to hold better there. Tell your artist you understand movement will soften lines and you prefer fewer details. Sessions can feel more uncomfortable when the arm is flexed. The common mistake is asking for dense shading that puckers and heals unevenly. For the session, a short-sleeve cotton tee you can push up comfortably is ideal.
26. Illustrated Spiral Seal on Sternum
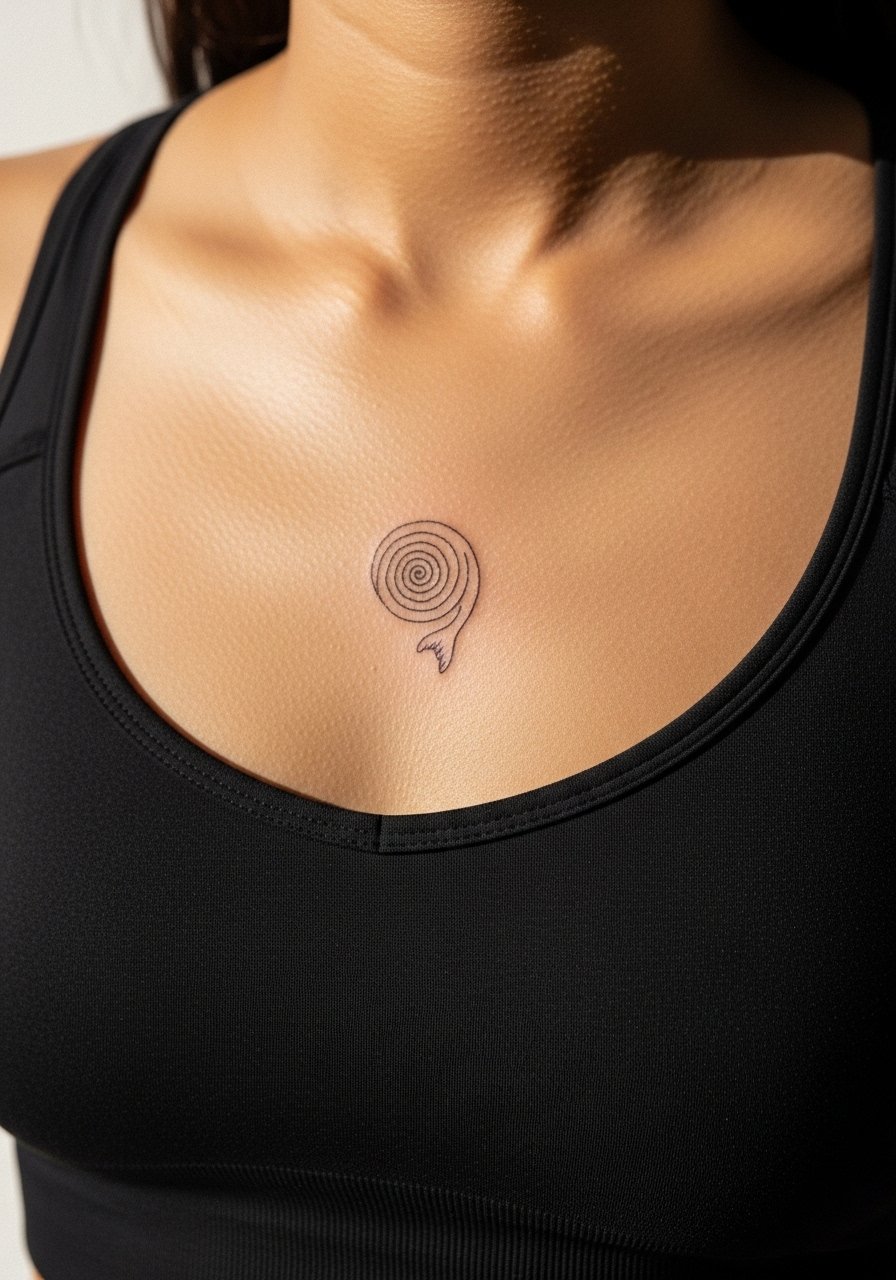
Sternum work looks striking but requires planning because the area is sensitive and stretches with breath. Artists split on very fine lines here. One group cautions that thin scripts and tiny seals will blur quickly. The other group argues that with controlled needle depth and spacing, sternum linework can remain sharp. Balance your aesthetic with pragmatic spacing. Expect a painful session and a slower healing period. Wear a fitted sports bra or zip-up hoodie you can move for access.
27. Illustrated Minimalist Kyuubi Paw on Side of Foot

Side-of-foot tattoos are charming but take a beating from shoes and socks. Keep the paw minimalist with bold contours rather than tiny etched lines. The area is painful because of thin skin and proximity to bone, and healing requires careful footwear choices. A common mistake is expecting the same longevity as calf work. For the session, choose open footwear like casual sandals to avoid rubbing during early healing.
Frequently Asked Questions
Q: Will small illustrative Naruto symbols like the Uzumaki spiral hold up on the wrist over time?
A: In my experience, tiny wrist symbols can soften faster because of washing and friction. If you want longevity, ask for a slightly bolder outer line, open negative space inside, and expect a possible touch-up around year two to three depending on daily wear.
Q: Are chest or sternum illustrative portraits riskier to get than forearm pieces?
A: Yes, chest and sternum placements move with breath and can stretch, which affects fine facial detail. Some artists avoid micro-portrait fidelity in that zone. If you insist on a portrait, plan for larger scale and accept a higher pain and touch-up likelihood.
Q: How often will hand and finger Naruto motifs need touch-ups?
A: From what I've seen, hand and finger work often requires maintenance every one to two years because of constant washing and abrasion. Choosing simplified shapes and thicker lines reduces the frequency but does not eliminate refresh needs.
Q: Should I ask for exact character likeness or a stylized illustrative take for a Kurama or Naruto portrait?
A: Both approaches have advocates. One camp wants exact likeness for authenticity. The other prefers stylized interpretations to avoid overly fine detail that fades. Be explicit with your artist and review healed portfolio pieces to see which route aligns with their technique.
Q: What should I wear to a ribcage session featuring an illustrative panel strip?
A: Wear a fitted sports bra or a cropped athletic top you can lift just enough to expose the rib strip without full torso exposure. Comfortable clothing that allows adjustments helps the artist and keeps you from chilling during breaks.
Q: Can watercolor-style Naruto energy effects age well?
A: Watercolor can be durable if anchored by thin linework and placed in low-sun areas like the shoulder blade. For longevity, ask for muted anchors and accept that watercolor will usually need color refreshes sooner than bold blackwork.
