
The shop smelled like saline and rubbing alcohol, the stencil gleamed on the forearm and the client straightened twice before the needle started. Trends have a way of looking perfect in a feed and different on skin under studio lights. This list pulls the practical from the pretty, showing versions of "The World Is Yours" that hold up, what to say in consults, and how to style the finished piece.
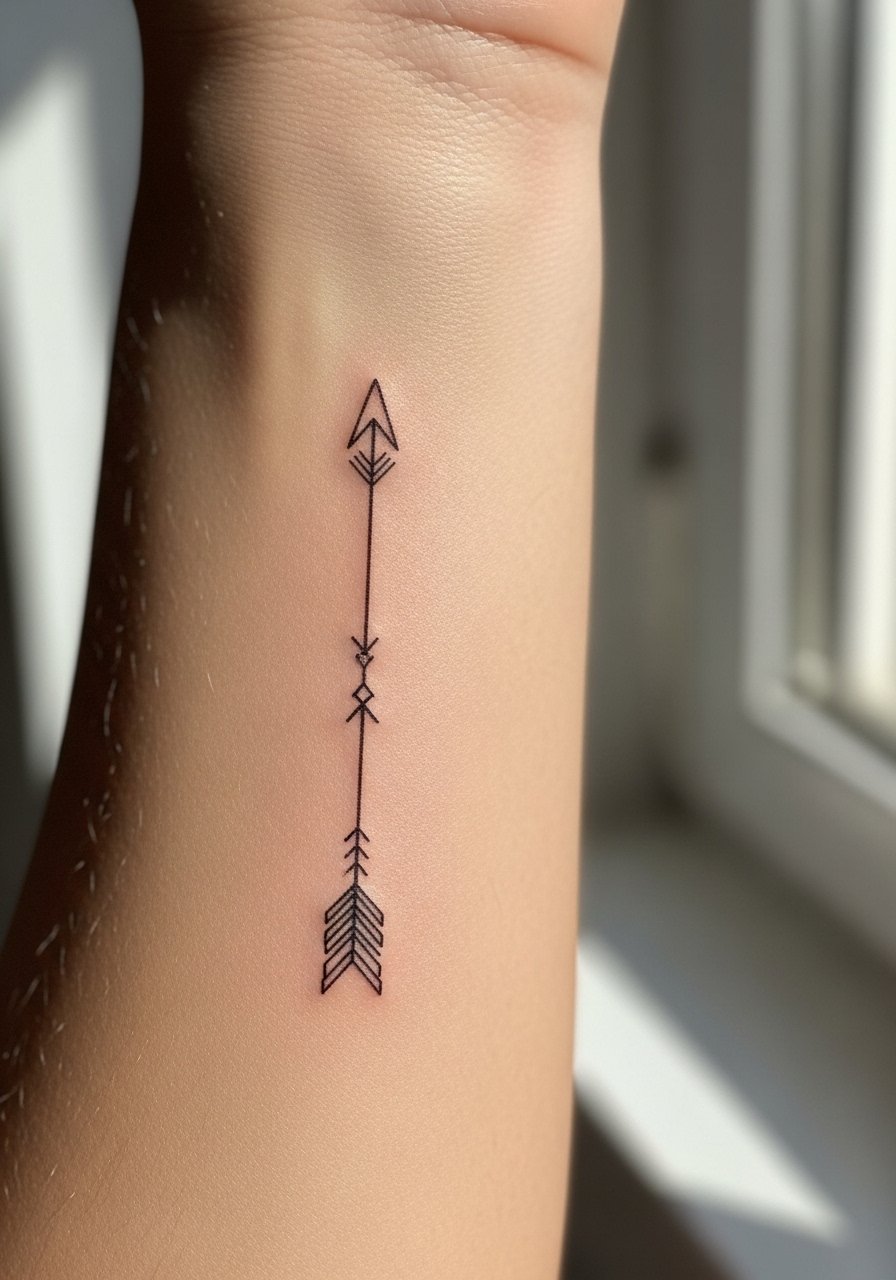
1. Fine Line Arrow on Inner Forearm
I've seen this exact placement work for people who want a discreet travel note without a heavy commitment. Request slightly thicker single-needle linework and ask the artist to leave more space between contour lines so the design does not blur into a solid within a few years. Expect a pain level of 3 to 4 out of 10 and a single session under an hour. Common mistakes are making the arrow too thin or placing it where wrist movement causes early blurring. Pair it with rolled sleeves and a loose button-down shirt to show the forearm without hiding the linework.
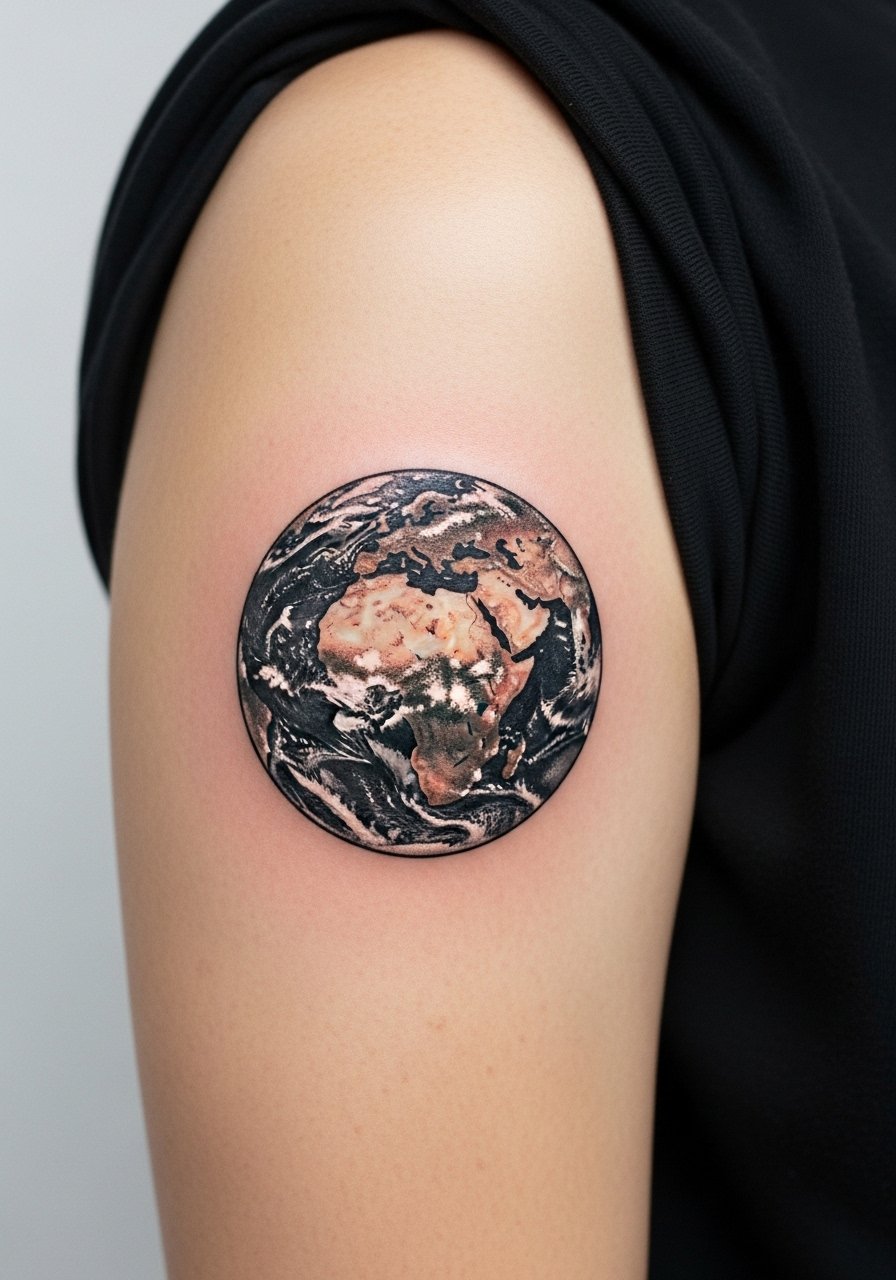
2. Micro-Realism Globe on Upper Arm
Fair warning: the outer upper arm takes saturation well but can feel buzzy during the session. The globe works best scaled to palm-size so micro shading reads as texture instead of muddiness. Tell your artist you want stipple shading for oceans and tiny dot-work for land edges to keep contrast over time. Session time is typically 1.5 to 3 hours depending on detail. Expect touch-ups around year three if you live in a sunny climate. This placement pairs with sleeveless tops during warm months but needs a solid sunscreen habit afterward.
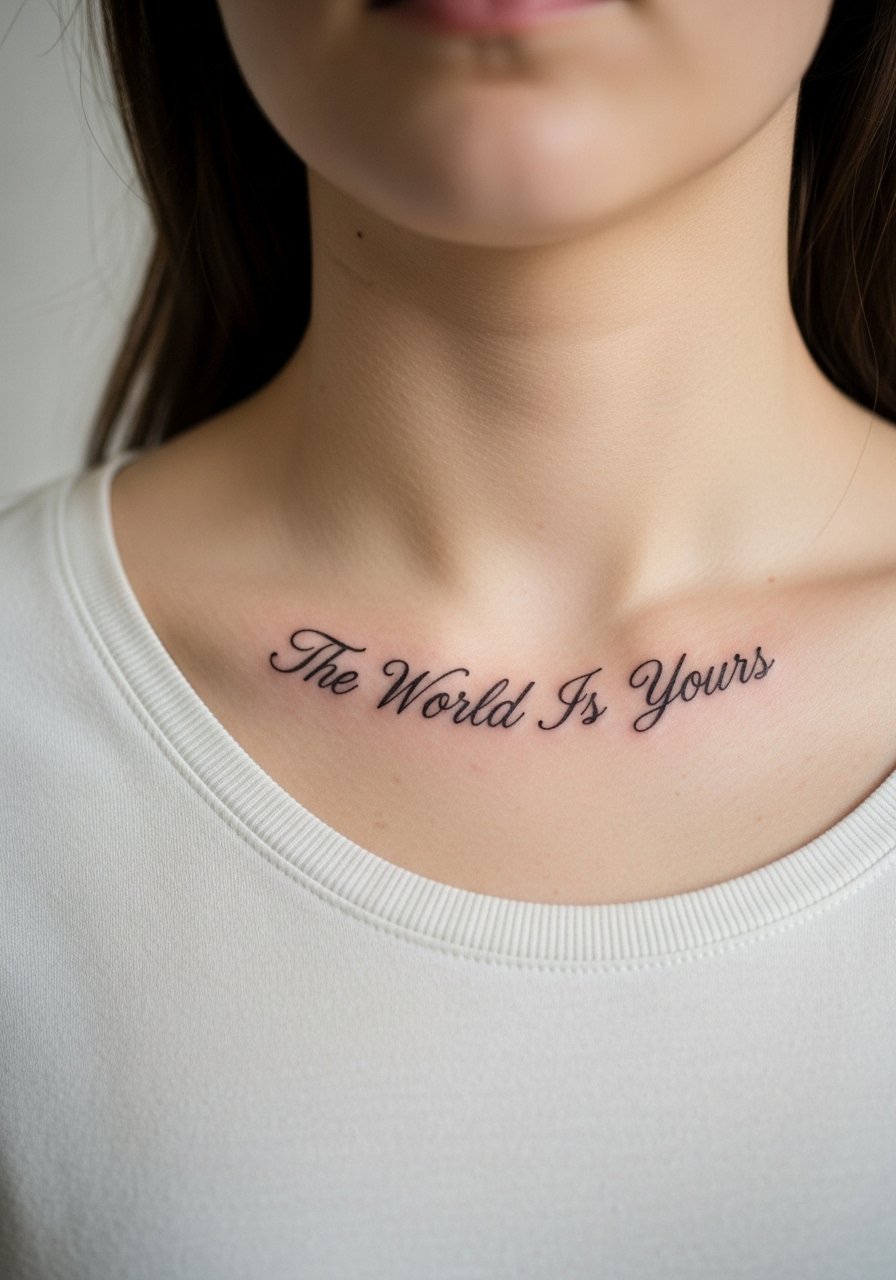
3. Vintage Script Collarbone "The World Is Yours"
When you sit down for this one, bring examples showing line weight in collarbone placements specifically. The collarbone skin moves with breath and can troutline if the script is too tight to the bone. Aim for medium-weight script letters and place the small globe slightly off-center so it reads naturally above clothing. Pain sits at about 5 out of 10. For showing it off, a thin chain pendant necklace sits just above the script without competing for attention.
4. Minimalist Map Ankle
Most minimalist ankle maps age well if you avoid ultra-thin contour lines that the foot's movement will stretch. Plan for a 30–60 minute session and expect higher friction during daily life, which can lighten tiny details. The biggest mistake is too much negative space in compact designs, which makes the map read like a smudge after two years. For the appointment, roll up jeans or wear sandals so the artist can access the area cleanly and you can test how the piece looks with footwear.

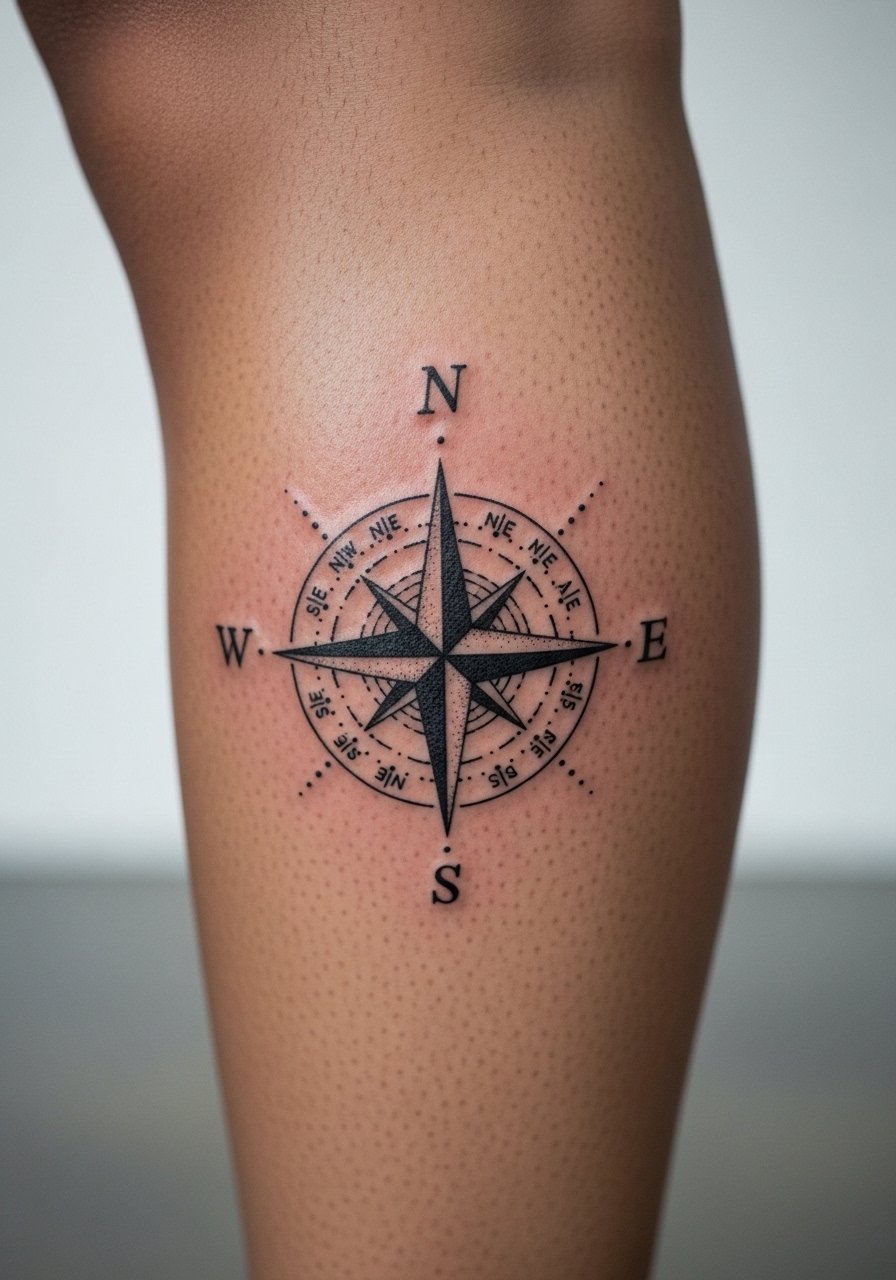
5. Stipple-Shaded Compass on Calf
There is something about stipple shading and negative space on the calf that reads clearly from across a room. I recommend a slightly larger compass face so the dot work keeps separation as the calf shifts over time. Sessions run one to two hours depending on how dense you make the stipple. Watch for the common error of compressing too many tiny labels into the compass face; it looks crowded at six months. Calf work pairs easily with cropped trousers and can be shown off with loose drawstring linen pants rolled up at the hem.
6. Watercolor World Blot on Shoulder Blade
The shoulder blade accepts color beautifully and gives watercolor a soft drape if the artist keeps linework as a subtle anchor. A common debate surrounds watercolor pieces and longevity. One camp says the wash fades fast and looks patchy after two years. The other camp argues that when color is layered with proper saturation and sealed with careful aftercare, it holds as an expressive piece. I recommend asking your artist about saturation layers and planning for a lighter touch-up at year two. For the session, wear a loose button-down shirt you can pull aside so the area is exposed without full upper-body exposure.
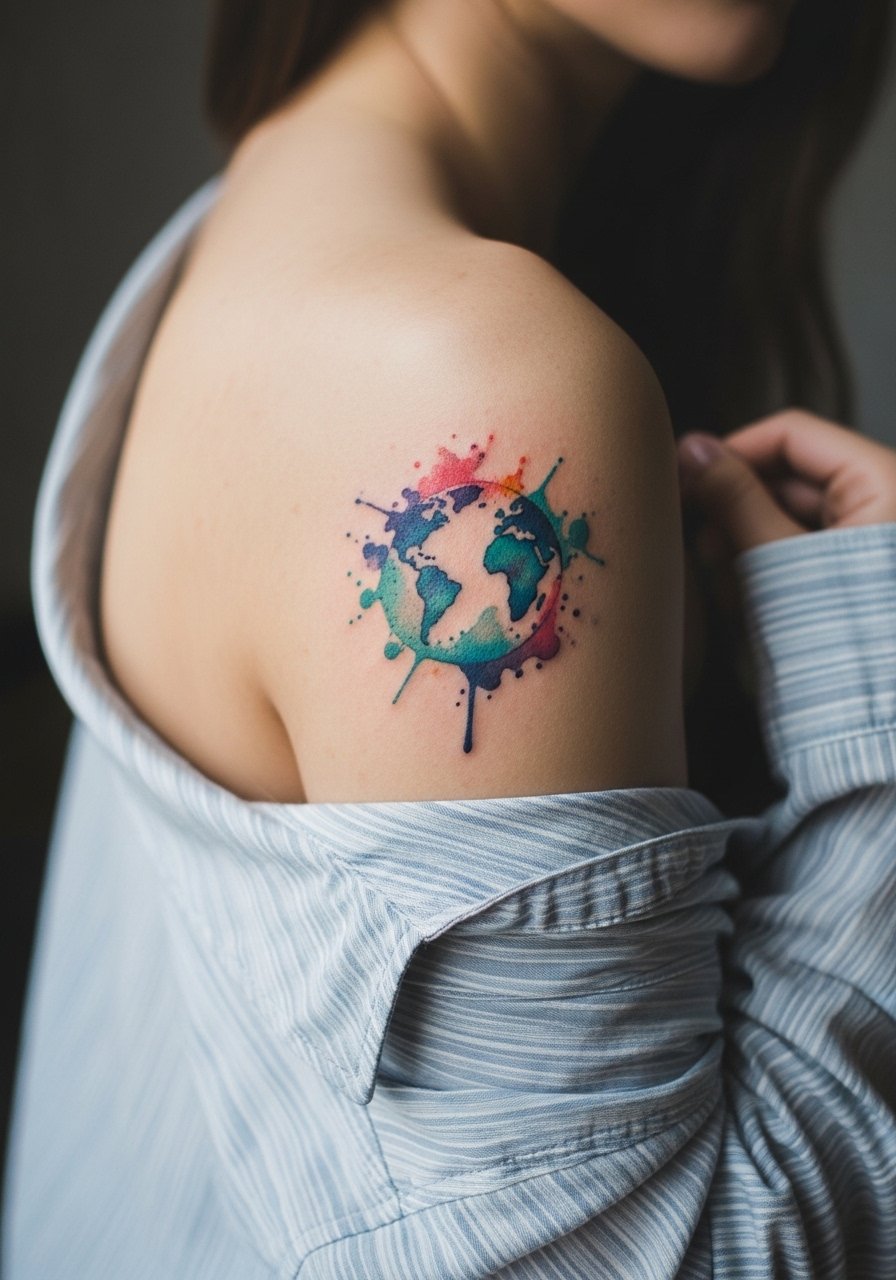
Studio Day Picks
The shoulder blade, calf, and forearm pieces above all ask for slightly different prep and first-week protection.
-
Stencil transfer paper kit. Lets you preview placement on skin before needle time, which helps with collarbone and wrist pieces that read differently in person.
-
Topical numbing cream. Applied per the product instructions it softens edge pain on sensitive zones like the ankle and ribs.
-
Thin protective film roll. Helpful for small wrist or finger tattoos that face constant washing and typing in the first week.
-
Fragrance-free gentle body wash. Cleanses healing areas without irritating fine line work on the forearm.
-
Aquaphor healing ointment. Thin layers in the first days lock in moisture around delicate single-needle lines without clogging pores.
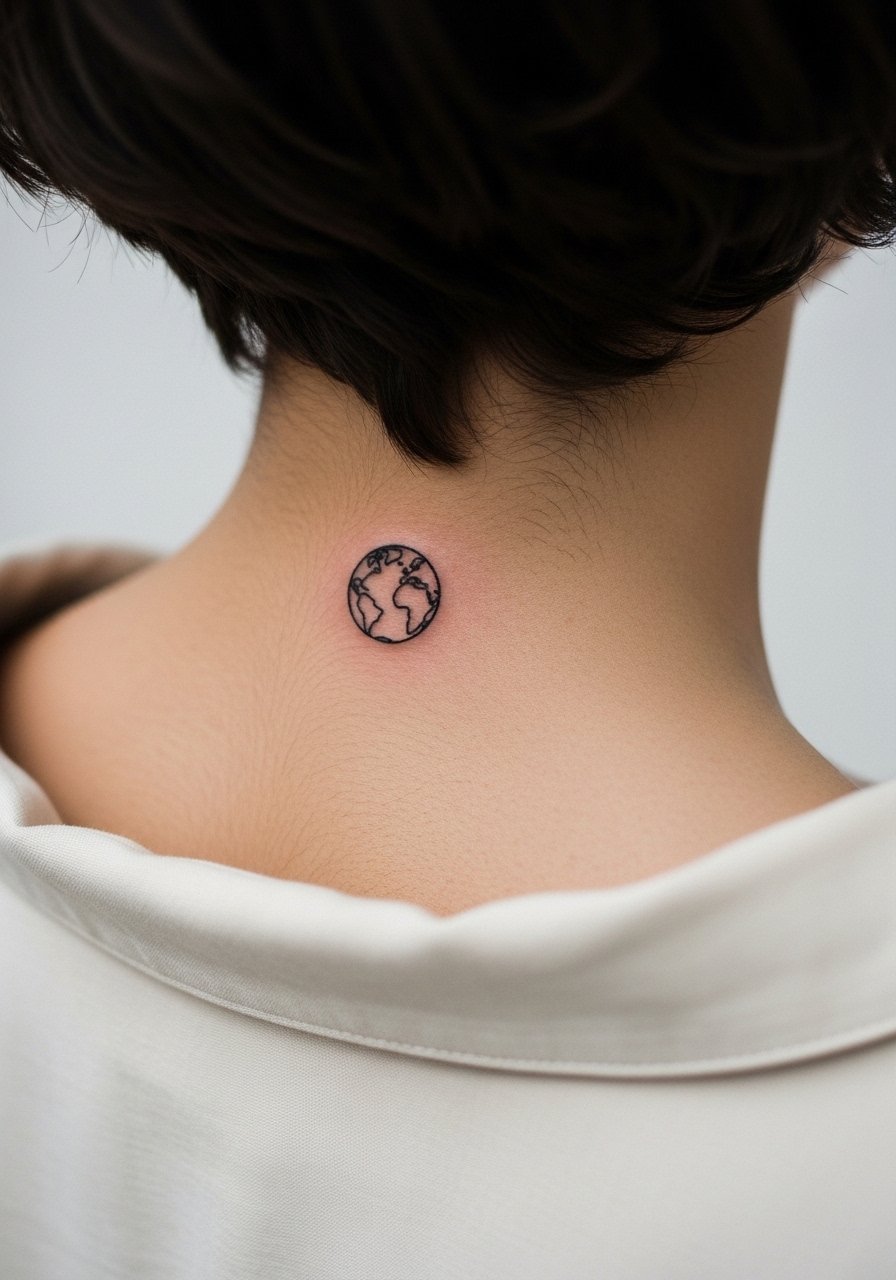
7. Tiny Globe at the Nape
This spot looks minimal but reads bold when cropped by short hair or a high collar. For the nape, wear a wide-neck shirt you can pull slightly aside for the session. Pain is moderate and sessions are quick, often under 45 minutes. A common mistake is asking for micro-lettering around the globe, which becomes illegible with hair growth and movement. When showing it off, a cropped jacket or a high bun frames the nape without exposing large areas. Keep the globe around coin size to avoid blowout risk from shallow needle depth.
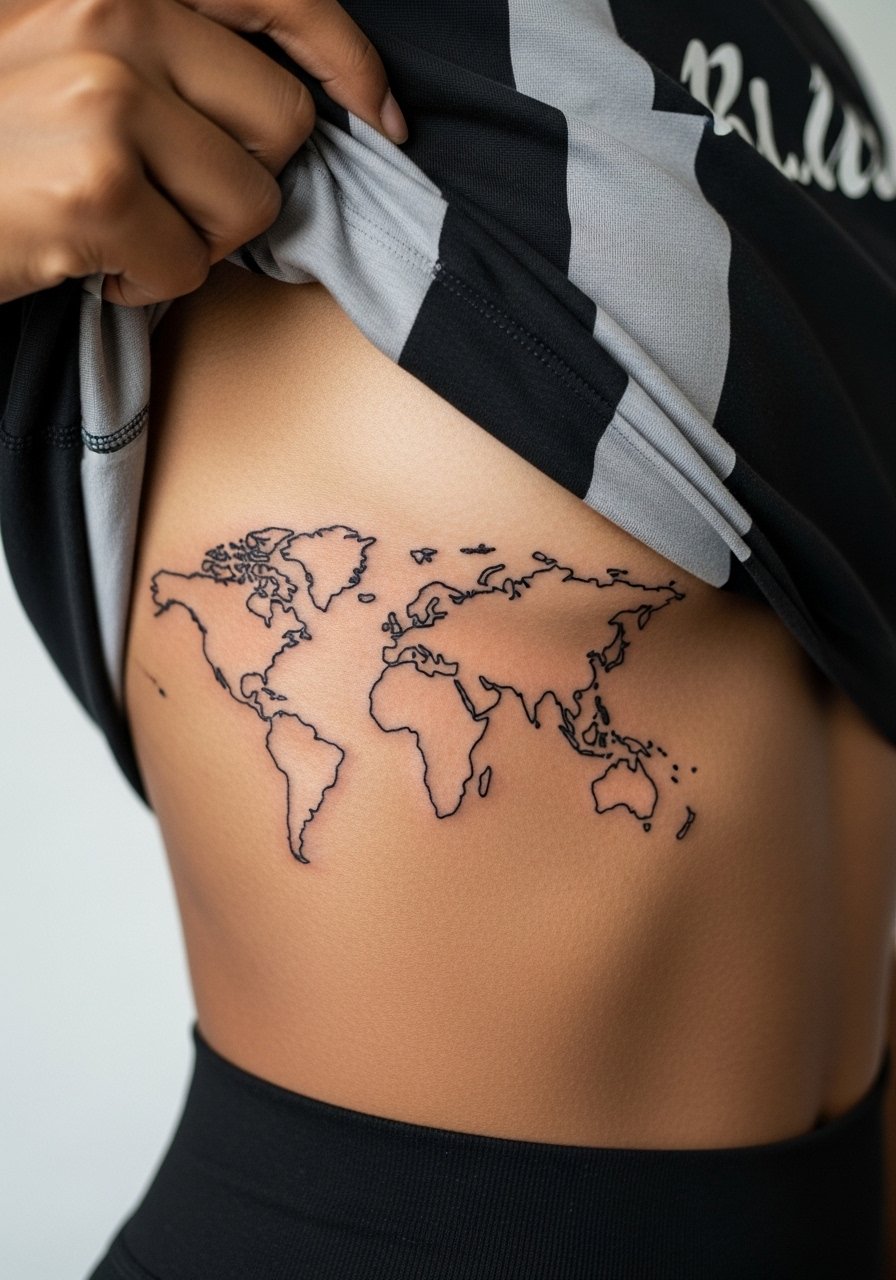
8. Ribcage Line-Work World Map
Artists split on fine line on the ribs. One camp says the stretch and thin skin blur lines quickly and lead to soft edges within two years. The other camp says with correct needle depth and spacing, fine line can settle cleanly on the ribcage. If you favor detail, ask for slightly bolder contour lines and more spacing between islands of ink. Pain is a 7 or 8 out of 10, sessions can be long, and touch-ups are common. For privacy and healing, plan downtime after a rib session and avoid tight clothing that rubs the area.
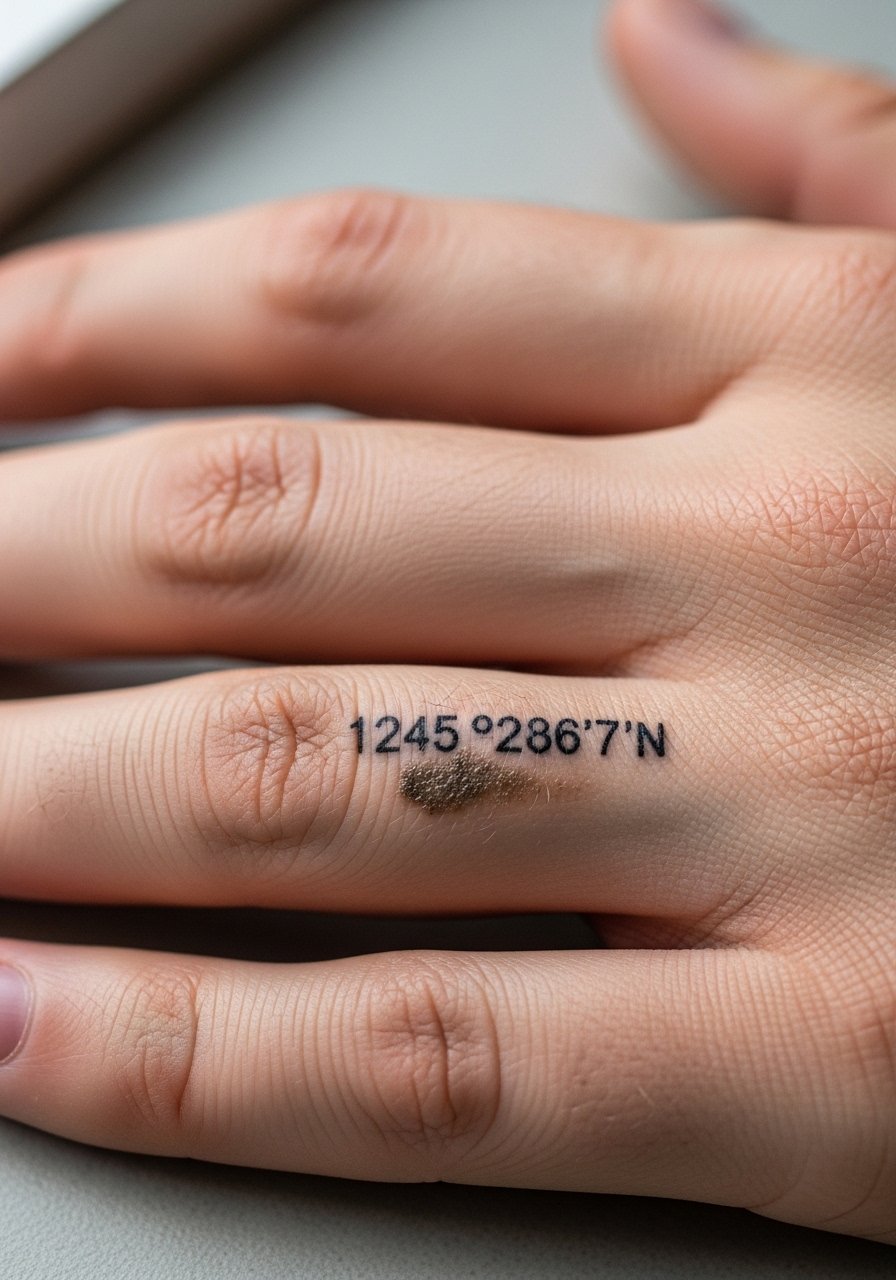
9. Tiny Coordinates on a Finger
I've noticed finger coordinates become sentimental anchors, but they face constant abrasion. Ask for slightly thicker strokes and expect a touch-up within 12 to 18 months. Sessions are very short but painful, rated around 6 out of 10, with real risk of shallow ink loss from typing and frequent handwashing. A frequent mistake is asking for micro serif lettering that fills with oil over time. Show the piece with stacked rings or a set of thin stacking rings so the finger art reads intentional, not accidental.
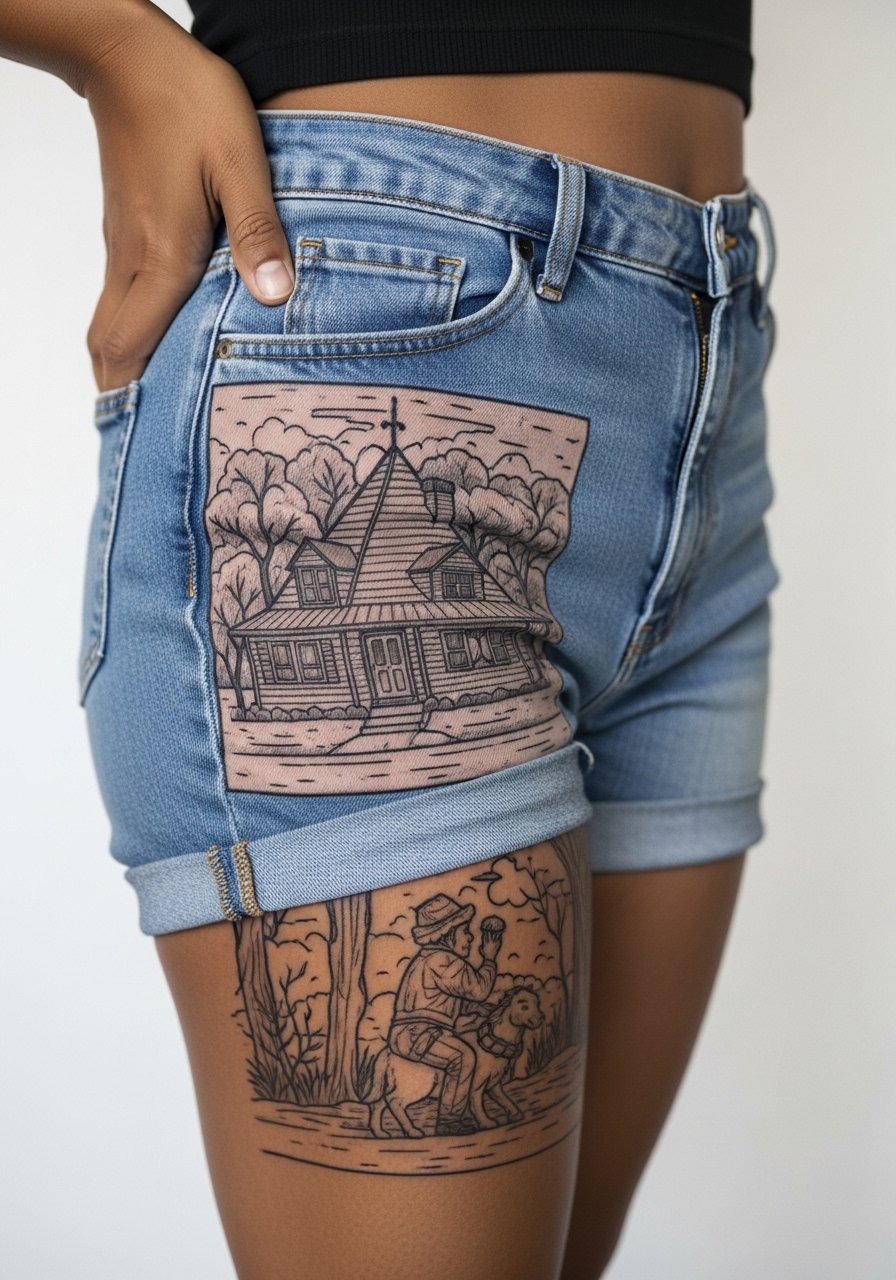
10. Thigh Illustration Panel
Fair warning: the outer thigh is forgiving for saturation but the inner thigh is not. The illustration panel works best on the outer or upper thigh where movement and friction from clothing are lower. Sessions are comfortable and can be long, often two to four hours for detailed narrative scenes. Tell your artist about any weight fluctuation so they can plan flow and negative space. For the appointment, wear high-waisted bottoms and a loose drawstring linen pant you can slide down slightly without pressure on the area.
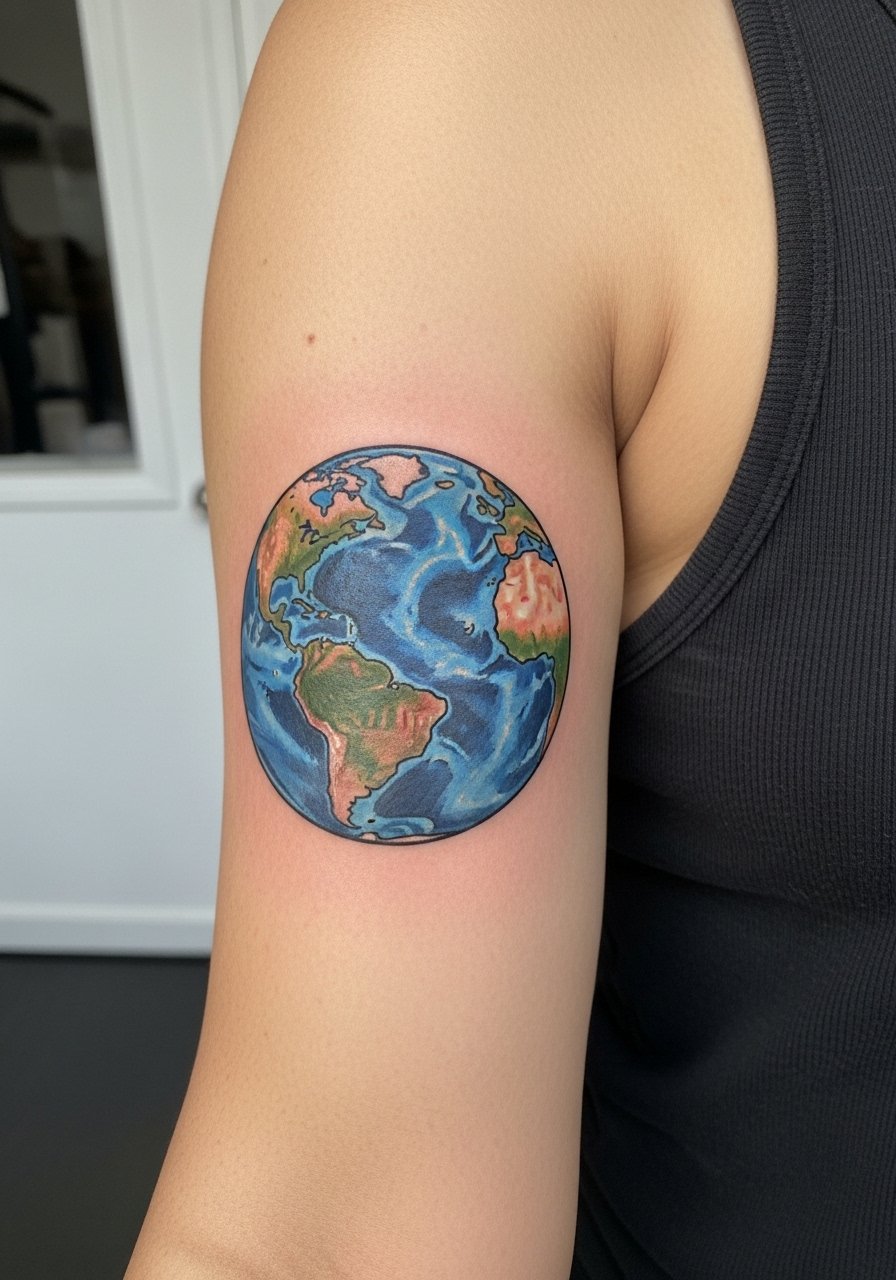
11. Inner Bicep Micro Globe
When you sit for inner bicep work, bring a few photos that show exact line weight and shading examples. The inner bicep can swell during long sessions, so plan breaks. Pain sits around 6 out of 10 and sessions are usually under two hours for a small globe. A common mistake is packing too much micro detail into a small inner bicep piece which leads to early muddiness. Wear a loose tank top so the artist can access the area without discomfort.
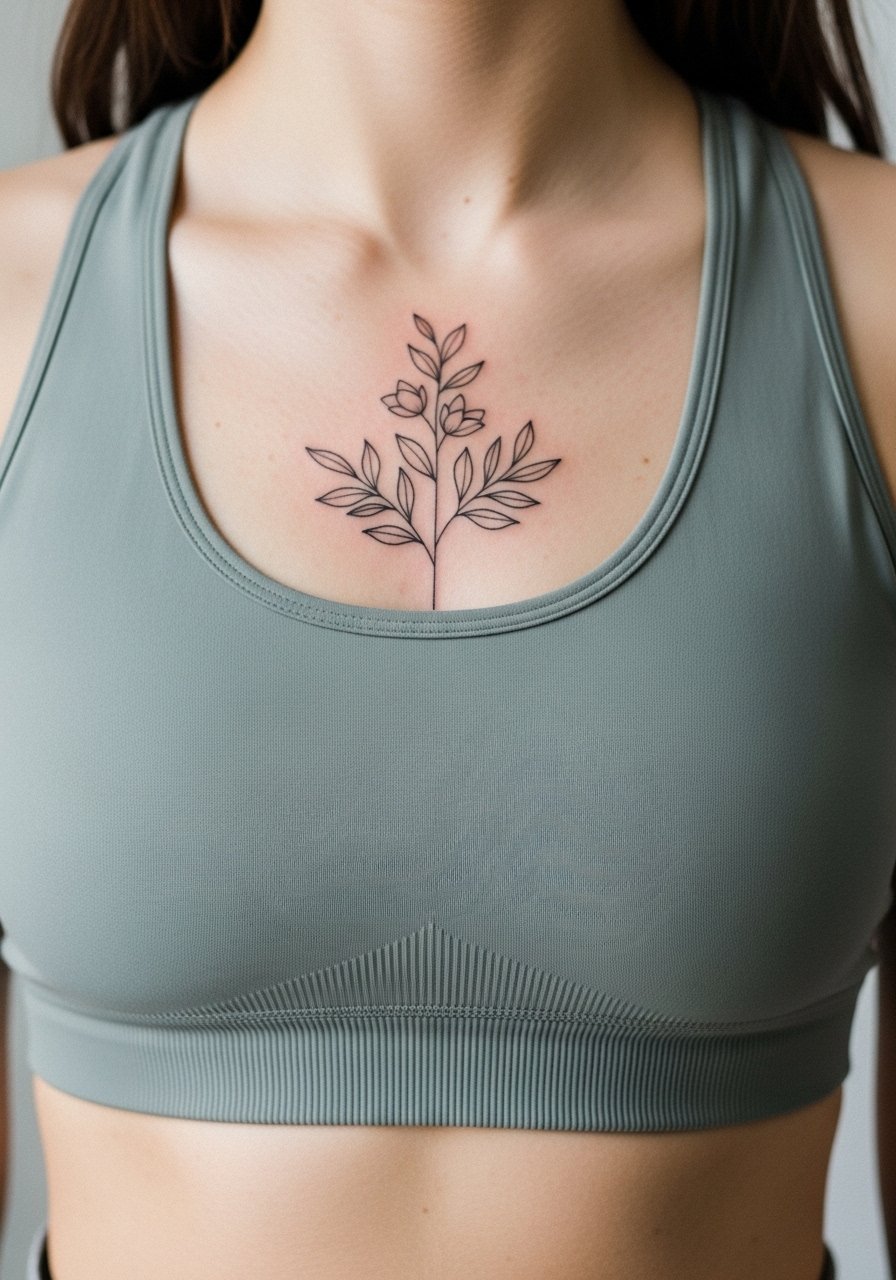
12. Sternum Script with Small Globe
Most sternum script needs careful placement relative to the rib curve. Small globes centered above the sternum can look elegant but require a steady hand and attention to spacing. Expect a pain level of 7 and shorter sessions split across appointments for larger scripts. The biggest aging issue is traction from clothing and the natural movement of the chest. For professionalism, choose a shop with experience in sternum pieces. Wear a fitted sports bra to the appointment so the artist can access the area safely.
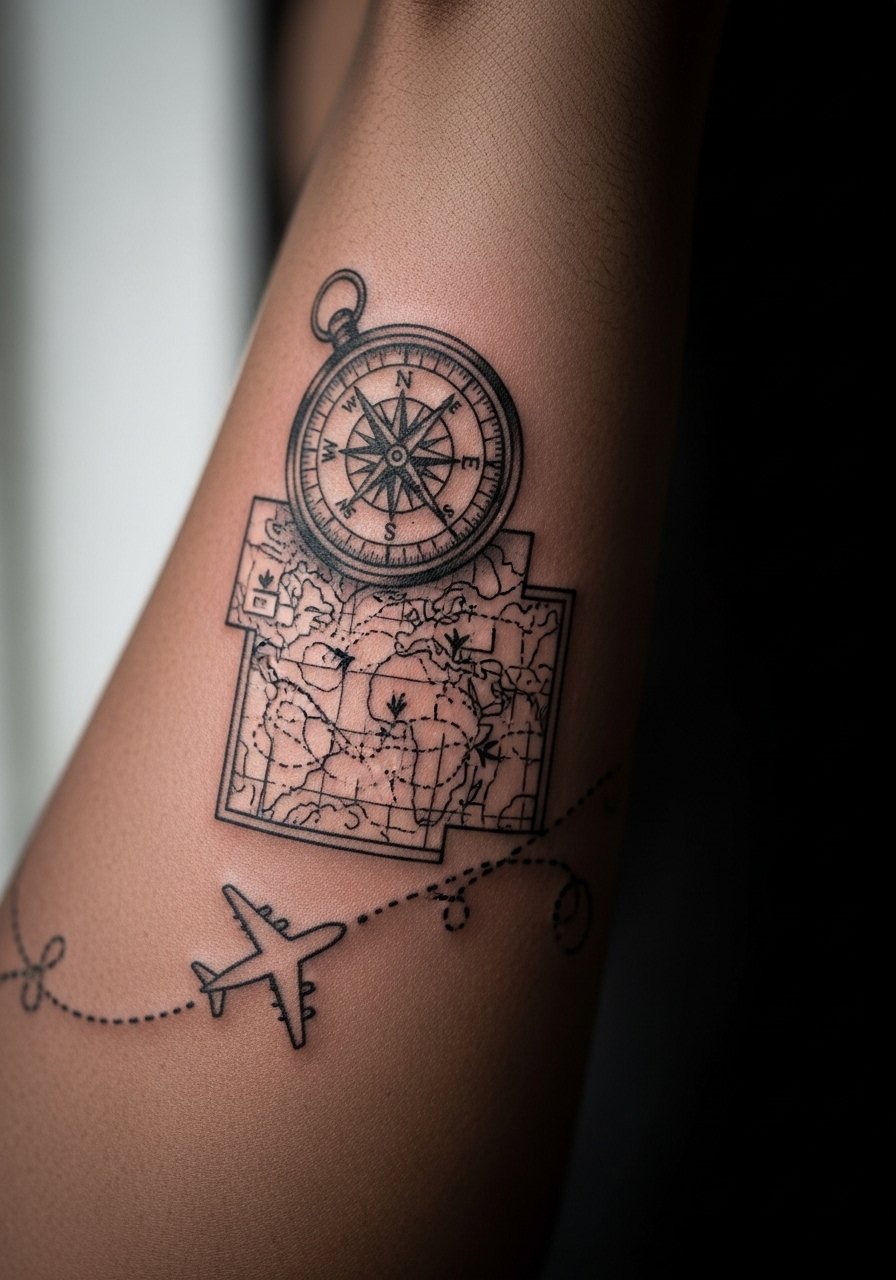
13. Forearm Sleeve Collage: World Elements
There is visual payoff in grouping travel icons into a forearm collage, but avoid cramming. I recommend a mix of bold anchors and delicate filler pieces so the overall saturation stays balanced as the skin ages. Sessions will be multiple and scheduling wise expect two to six hours per appointment depending on how extensive the collage is. A common error is asking for too many dense shaded areas next to fine line work, which makes the latter disappear over time. Pair with rolled-up sleeves and a loose button-down shirt to show the sleeve without overexposure.
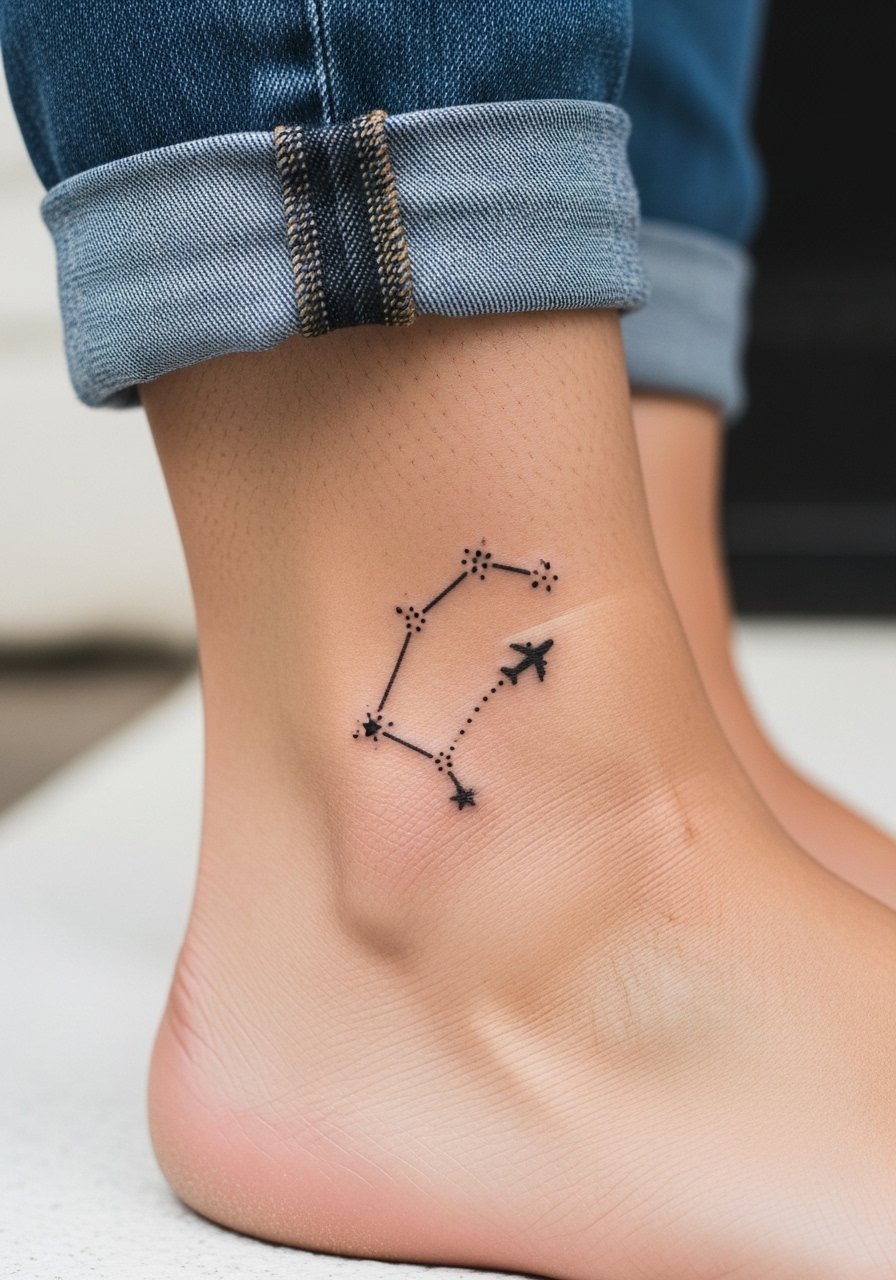
14. Ankle Constellation Plane
The ankle is ideal for tiny motifs that hint at a larger story. Keep the design crisp and avoid micro lettering. Expect a 30 to 45 minute session and frequent light touch-ups due to constant movement and footwear friction. One real mistake is placing the plane exactly where socks rub. For show-off looks, wear sandals or roll hems so the ankle piece becomes part of your day-to-day outfit.
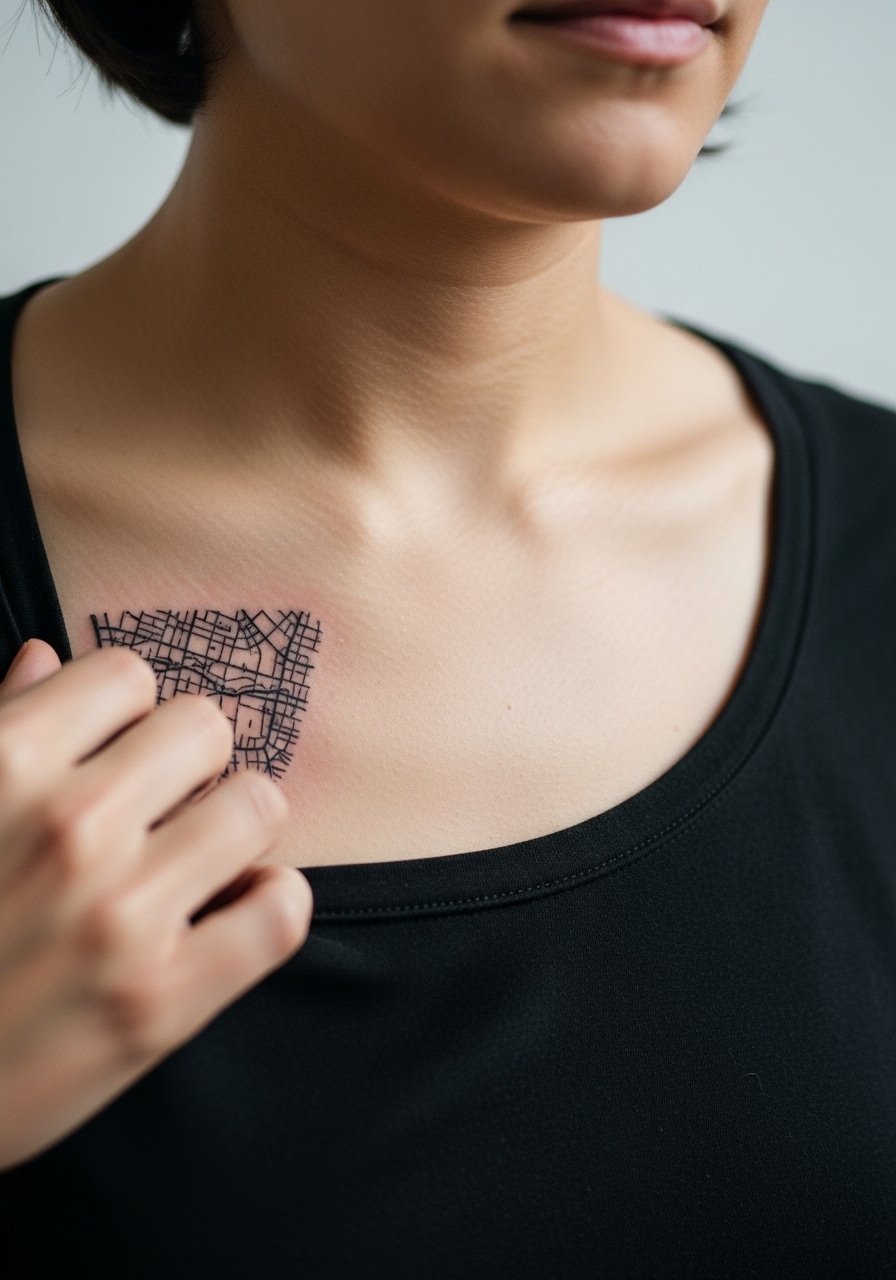
15. Over-Heart Mini Map
Artists and clients sometimes debate whether chest pieces should be centered or intentionally offset. For an over-heart mini map, asymmetry can read more natural on the body. Pain is moderate to high and sessions can be short if the piece is tiny. Think about clothing exposure and workplace norms before booking. This design sits well with a thin chain or pendant, so consider a thin chain pendant necklace when showing it off. If the map borrows motifs from another culture, opt for respectful variation rather than direct copies.
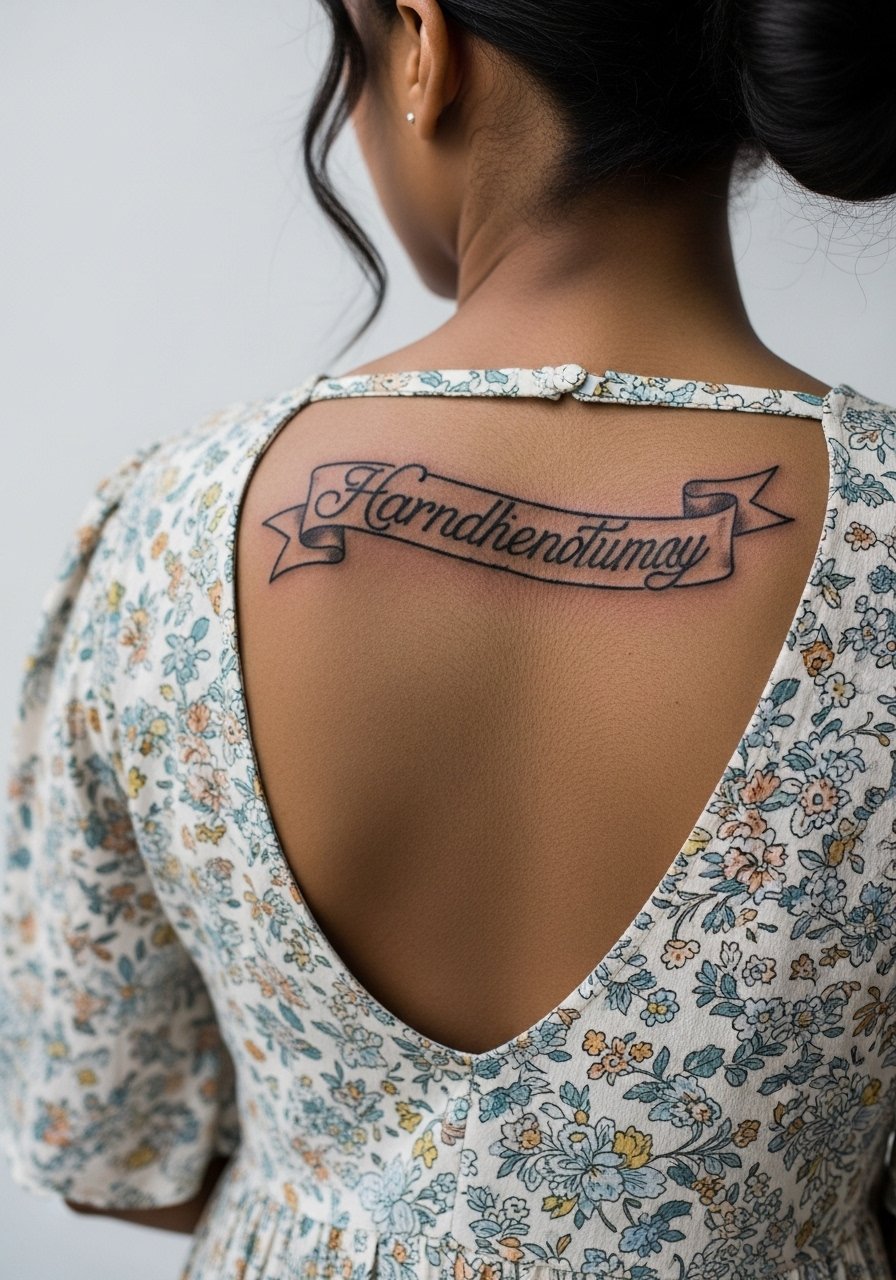
16. Open-Back Large Script Banner
A large back banner reading "The World Is Yours" framed by illustrative flora plays well with eveningwear that reveals the upper back. Sessions are long and usually done in segments. The lower back can be sensitive to clothing friction during healing, so plan wardrobe accordingly. Bring references showing how the banner curves with the spine so the artist knows flow. For evenings, an open-back midi dress highlights the banner without exposing more than intended.
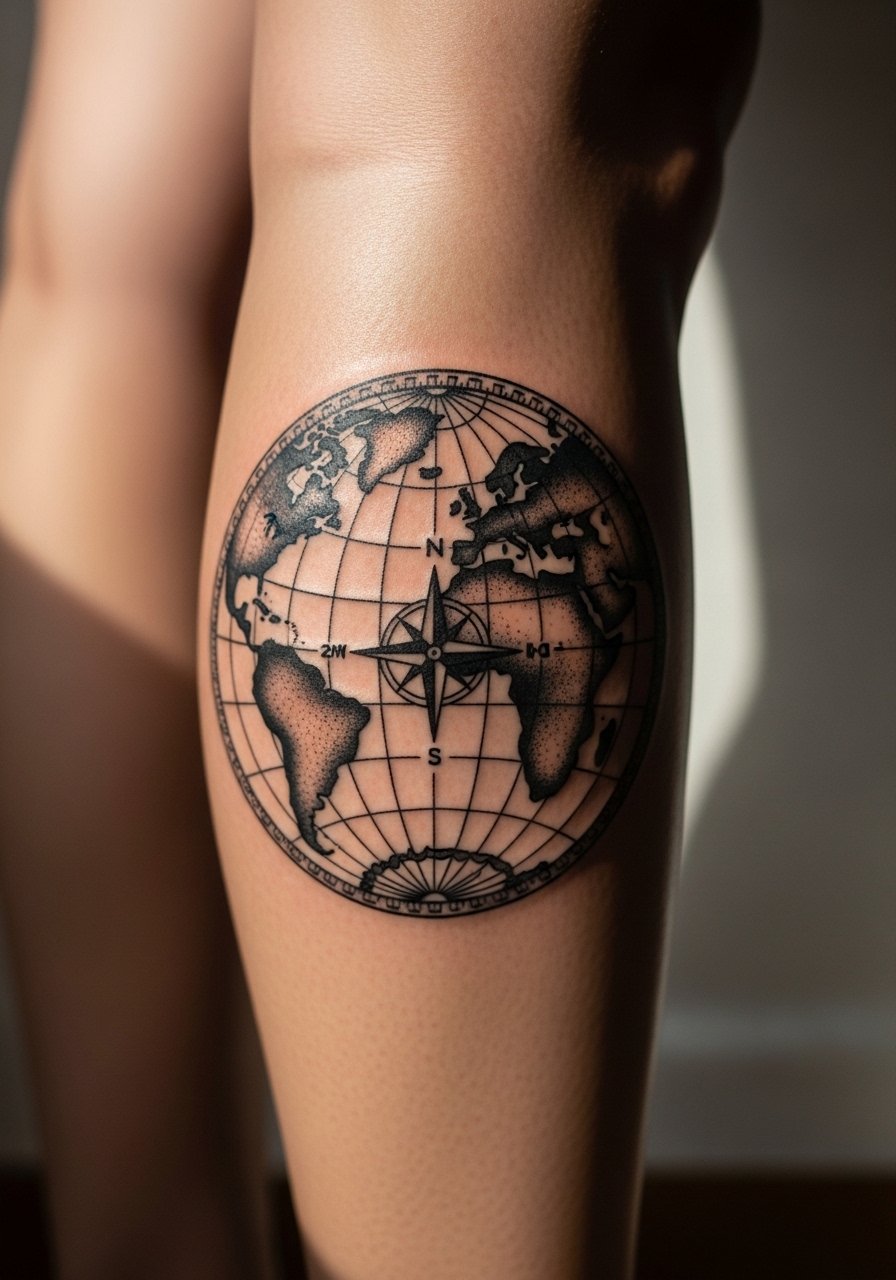
17. Calf Blackwork Globe
I've seen blackwork globes hold up best when the compass lines are bold and the negative space is intentional. Calf tissue keeps saturation stable and the area tolerates heavier black without blowout risk. Sessions are comfortable and usually one to two hours. A mistake is overworking tiny interior details that do not read at walking distance. Show it off with rolled trousers or shorts rather than tight leggings which can press on fresh ink.
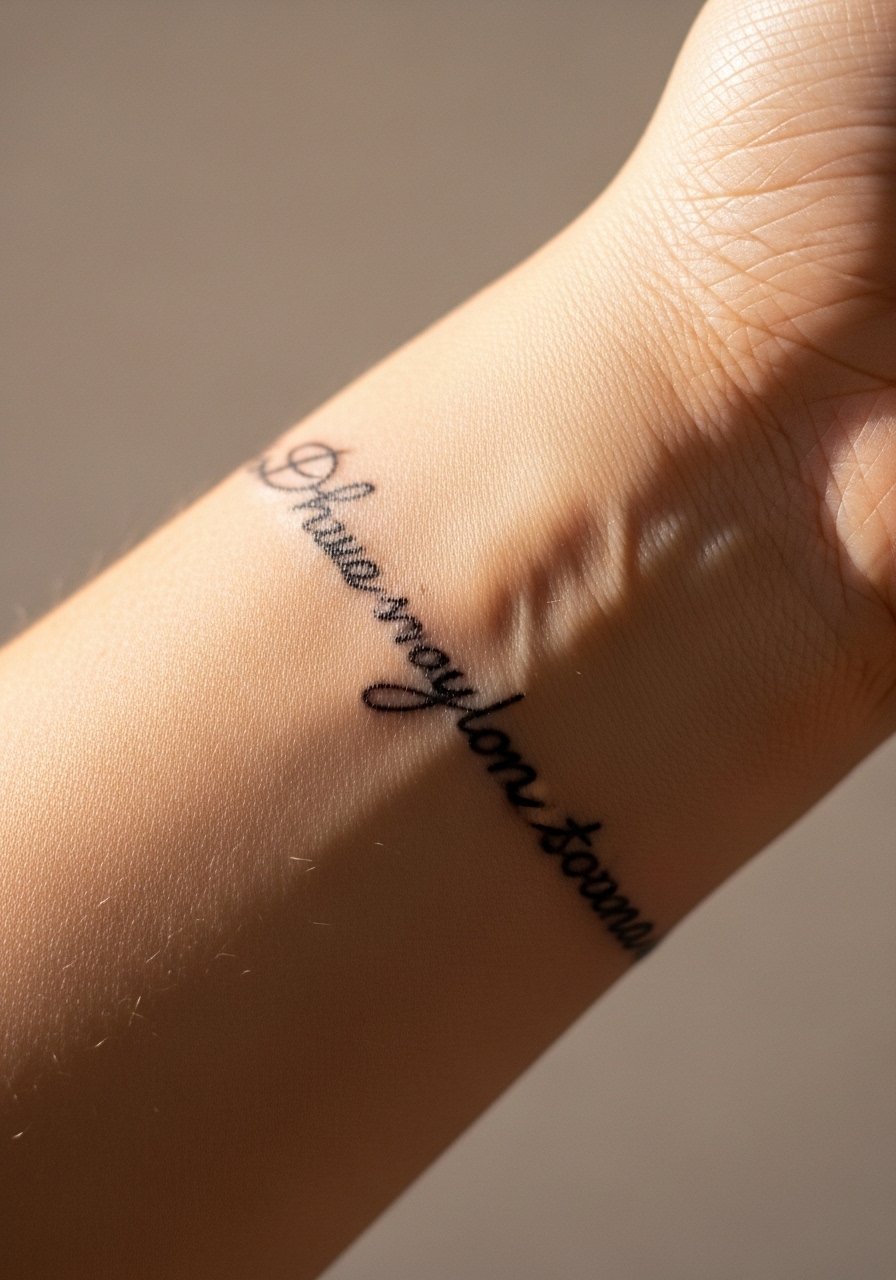
18. Wrist Script Wrap
There is real charm in a small script wrap circling the wrist but the area is unforgiving for thin, tight letters. Pain is low to moderate and sessions are brief. Ask your artist to leave slightly wider spacing and avoid hairline strokes that will blur. A common oversight is neglecting how watches or bracelets interact with the ink during healing. Pair the wrist script with a minimalist watch or dainty bracelets that do not rub the fresh area.
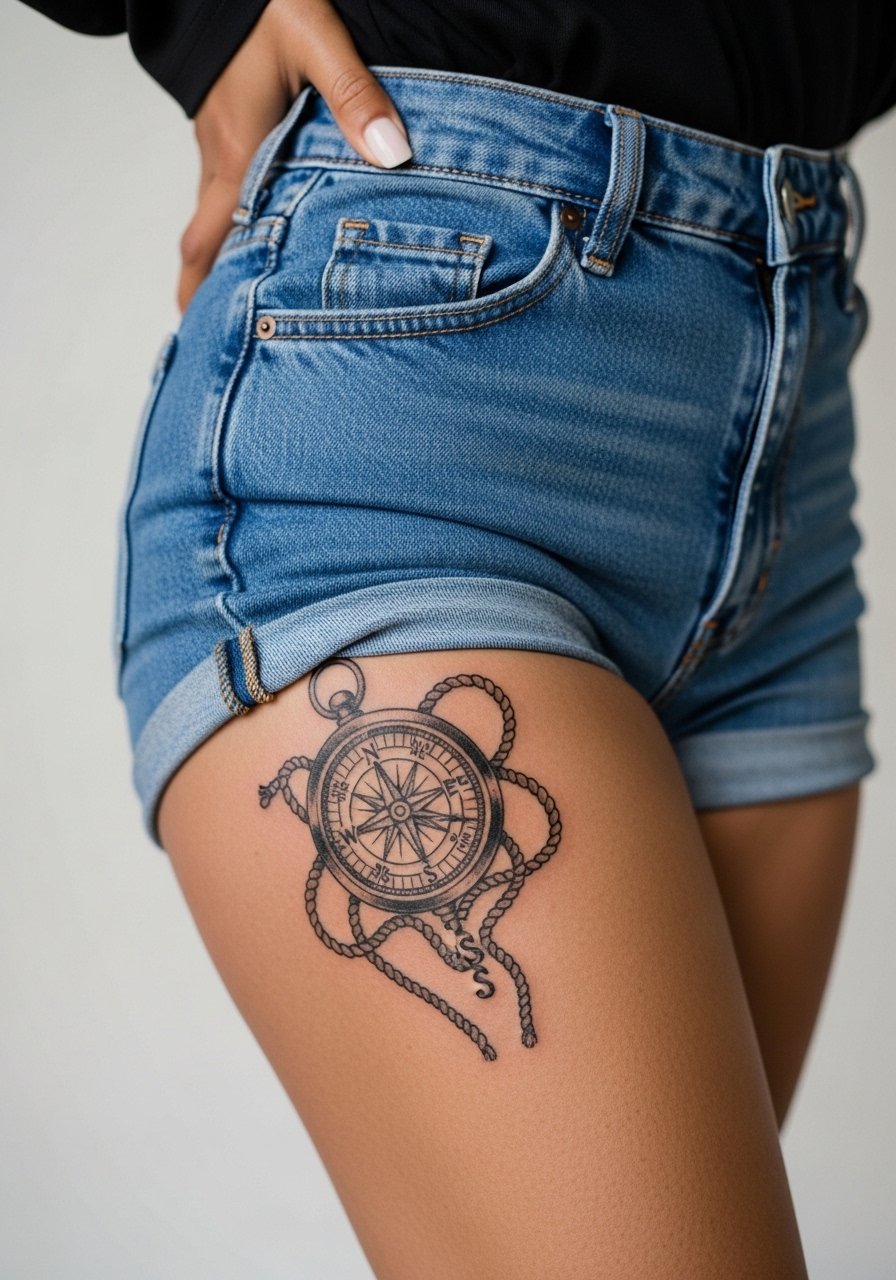
19. Upper Thigh Antique Compass with Rope
When you plan an upper thigh compass, expect the design to interact with clothing and body shape. The outer thigh is forgiving, while the inner thigh needs extra spacing and a cautious approach to needle depth. Sessions vary from one to three hours for intricate compasses. The main mistake is compressing ornamental rope work into too small a scale. Wear high-waisted shorts to the appointment and plan for a few days without tight underwear.
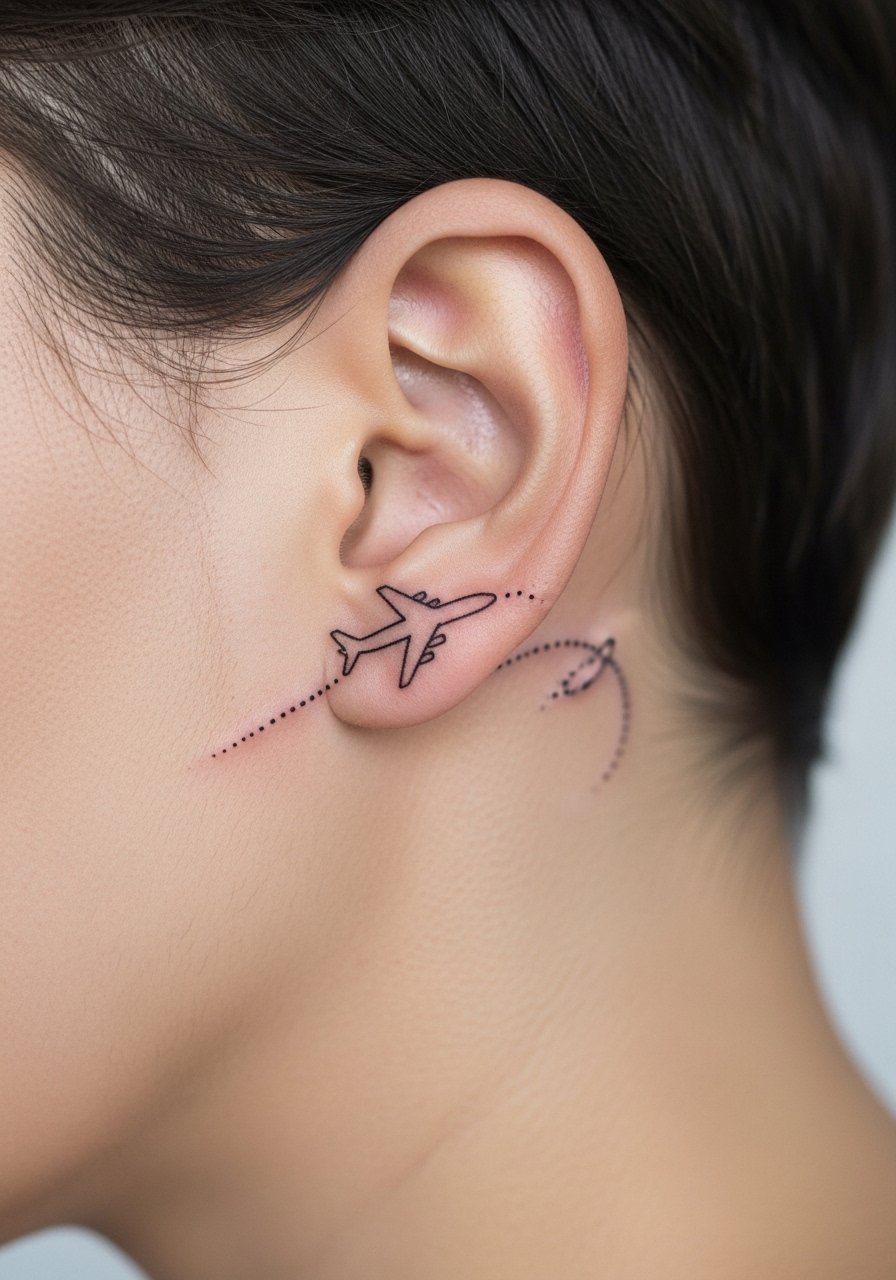
20. Tiny Plane Behind the Ear
Small tattoos behind the ear need precise placement and a tiny footprint. Pain is short and sharp but sessions are quick. Never ask for overcomplicated shading in this zone because the skin is thin and the result can spread. For the image prompt and the session, frame it as on the skin behind the ear, below the hairline on the neck, and plan hair styling to either hide or reveal the piece. A subtle plane symbol reads like an inside nod when paired with short hair or a low bun.
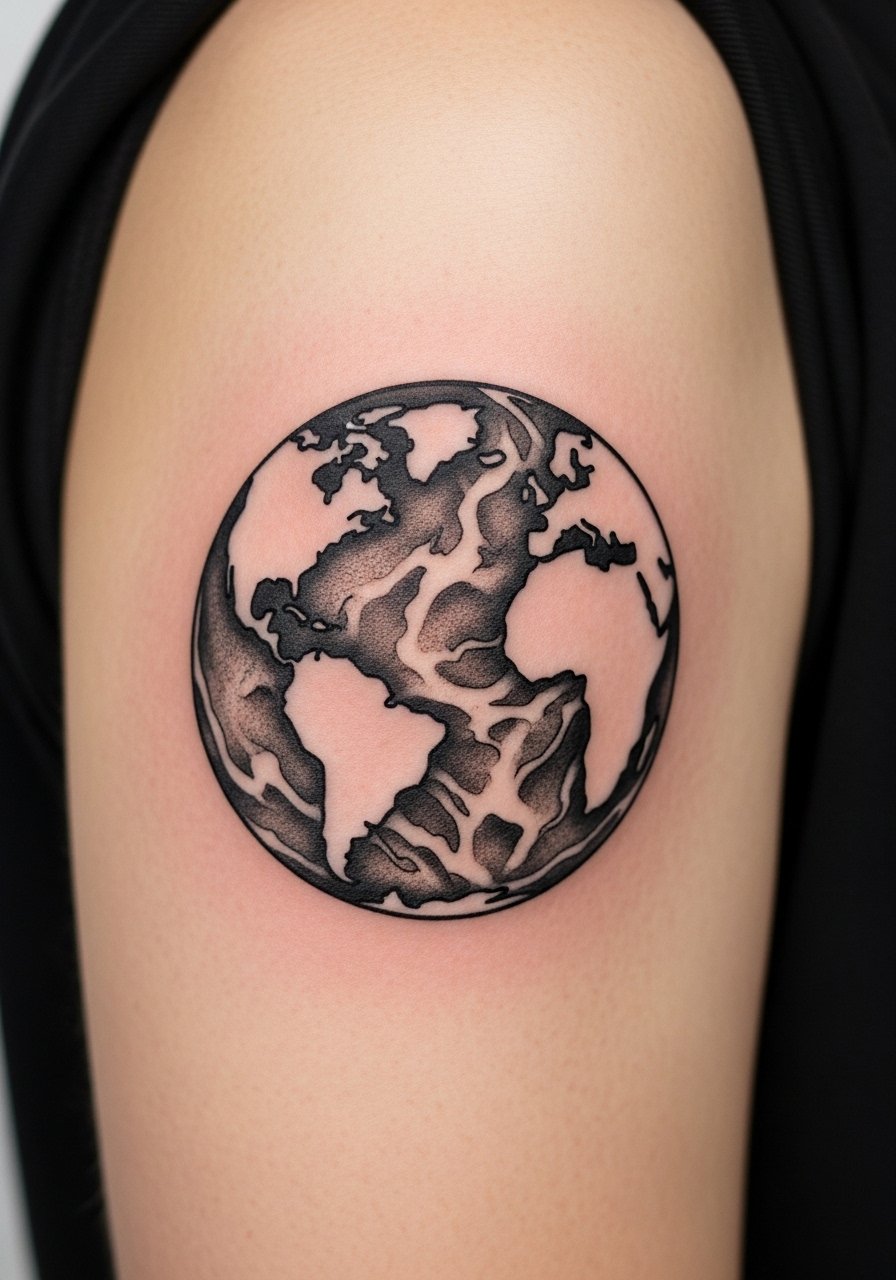
21. Upper Arm Negative Space Globe
The upper arm negative space globe uses skin tone as part of the design, so ask for clear stenciling that maps where the ink stops and the skin shows through. Sessions are comfortable and usually one to two hours. A common mistake is making the negative shapes too thin which fills in over time. This placement pairs well with casual sleeveless tops and a racerback tank top for the session so the artist can access the area without tugging.
Frequently Asked Questions
Q: Will fine line elements in a sleeve collage blur faster than the bolder anchors?
A: Fine line sections will generally blur quicker if they sit next to heavy saturation, because the eye reads the bold areas first and the thin lines can lose contrast. Ask your artist to plan spacing and to use slightly stronger line weight for pieces you want to remain crisp. Expect targeted touch-ups rather than a full redo.
Q: How often should delicate ankle or finger work expect a touch-up?
A: For high-friction spots like fingers and ankles, plan realistically for a touch-up within 12 to 24 months. Constant washing and footwear abrasion are the main culprits. Thicker lines and simplified shapes extend longevity, so discuss durability during the consultation.
Q: If I want watercolor color on the shoulder blade, how should I balance saturation and longevity?
A: Watercolor can look beautiful on the shoulder blade but needs thoughtful saturation. Ask the artist about layering color in controlled washes and schedule a lighter touch-up at year two if you want the wash to stay vivid. Sunscreen and clothing choices after healing are part of the longevity plan.
Q: Are there wardrobe tips for showing off a collarbone script without risking irritation while it heals?
A: Yes. Wear wide-neck shirts or loose button-downs during the first two weeks so fabric does not rub the area. For going out after healing, a thin pendant or open-neck dress highlights the collarbone without pressing on the script.
Q: Should I worry about cultural sensitivity when using maps or symbols from other traditions?
A: It depends on the symbol. If a motif has clear cultural or religious origin, consider subtle variations and have a respectful conversation with your artist about provenance. Many people opt for original compositions that nod to a tradition instead of direct replication.
Q: How do I choose an artist without relying on social handles or influencer names?
A: Use discovery pathways like local shop directories, convention artist lists, community forums, and tagged work on marketplace platforms. Look for portfolio images showing healed work, not just fresh sessions. Ask studios about healed-photo references and touch-up policies before booking.
