
Fine line tattoos dominate Pinterest and Reels, but the pieces that age best are rarely the flashiest ones. A lot comes down to where the ink sits on your arm, how the line weight relates to movement, and whether the design lets space breathe as the body changes. Read these inner arm tattoo designs with an eye for how they feel in the chair, how they look at six months, and what to ask your artist during the consult.
1. Fine Line Script Quote on Inner Bicep
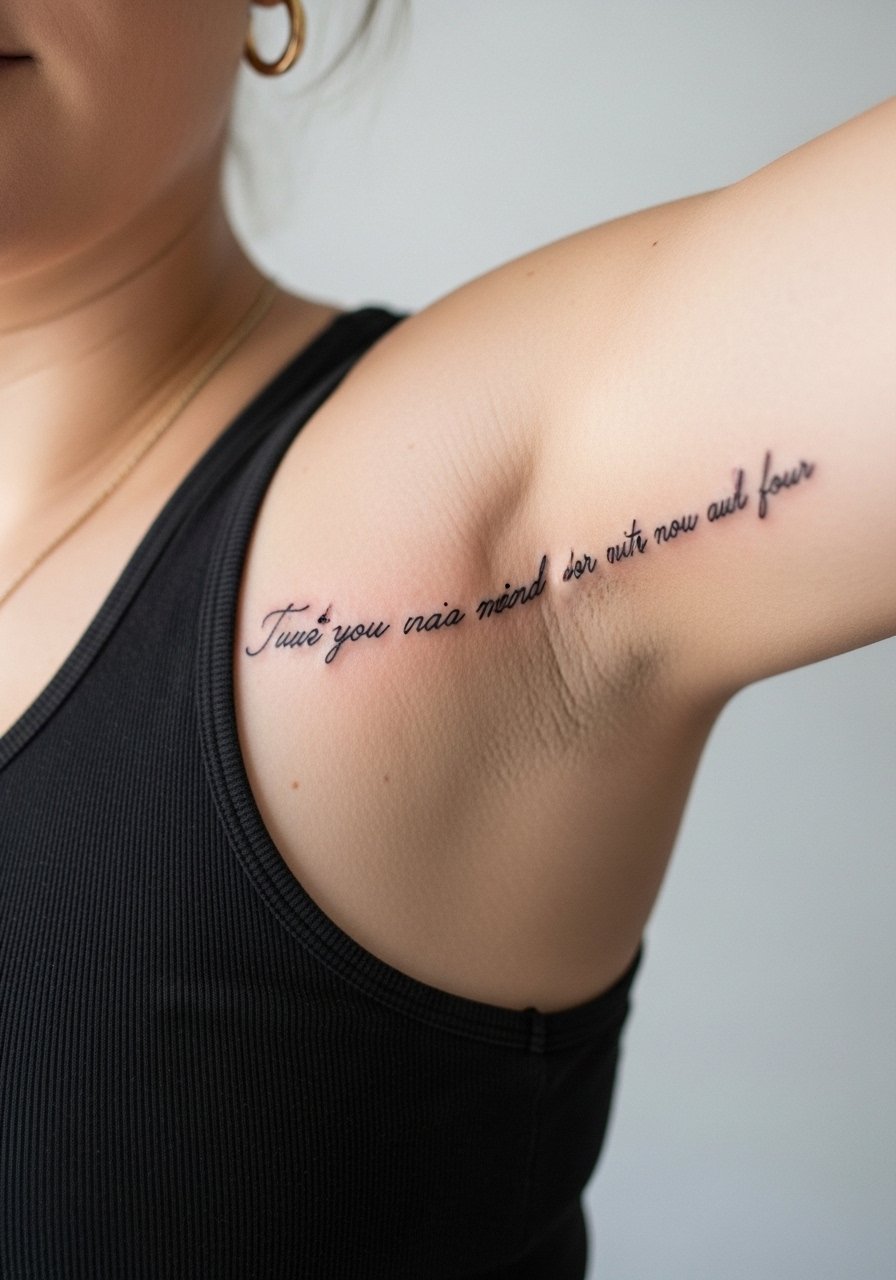
I recommend this when you want a private line that curves with the bicep. Tell your artist to map the quote along the muscle curve and to thicken the thinnest strokes slightly so the letters hold for years. A common mistake is asking for the faintest single-needle cursive because it looks fragile fresh. That version often needs a touch-up in a year. Expect moderate pain when the needle grazes the inner bicep. Plan for a single session under two hours. For showing it off, sleeveless fitted tanks frame the curve well, so bring a sleeveless tank women for aftercare photos.
2. Minimalist Geometric Symbols on Inner Forearm
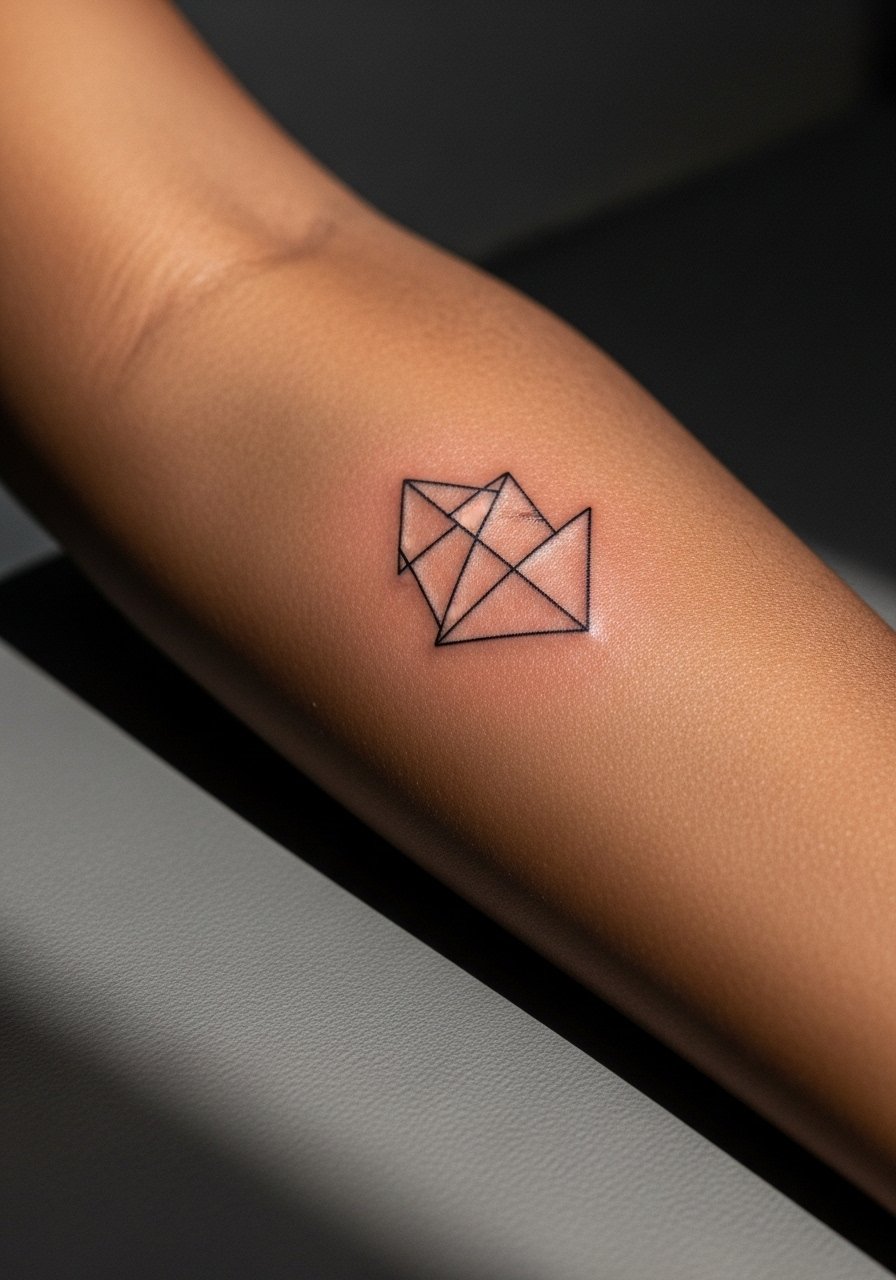
I've seen these hold up when artists give the shapes breathing room rather than packing lines closely together. In consultation, ask for 1.5 to 2 millimeter line weights in the densest areas to avoid merging over time. The inner forearm takes decoration well and rates low on most pain maps. The session usually fits a single hour. A mistake is scaling the geometry too small. At six months the crisp edges still read sharp if spacing was respected. Wear a rolled cuff chambray shirt roll cuff to frame the design when you want it visible.
3. Delicate Floral Arrangement on Inner Bicep
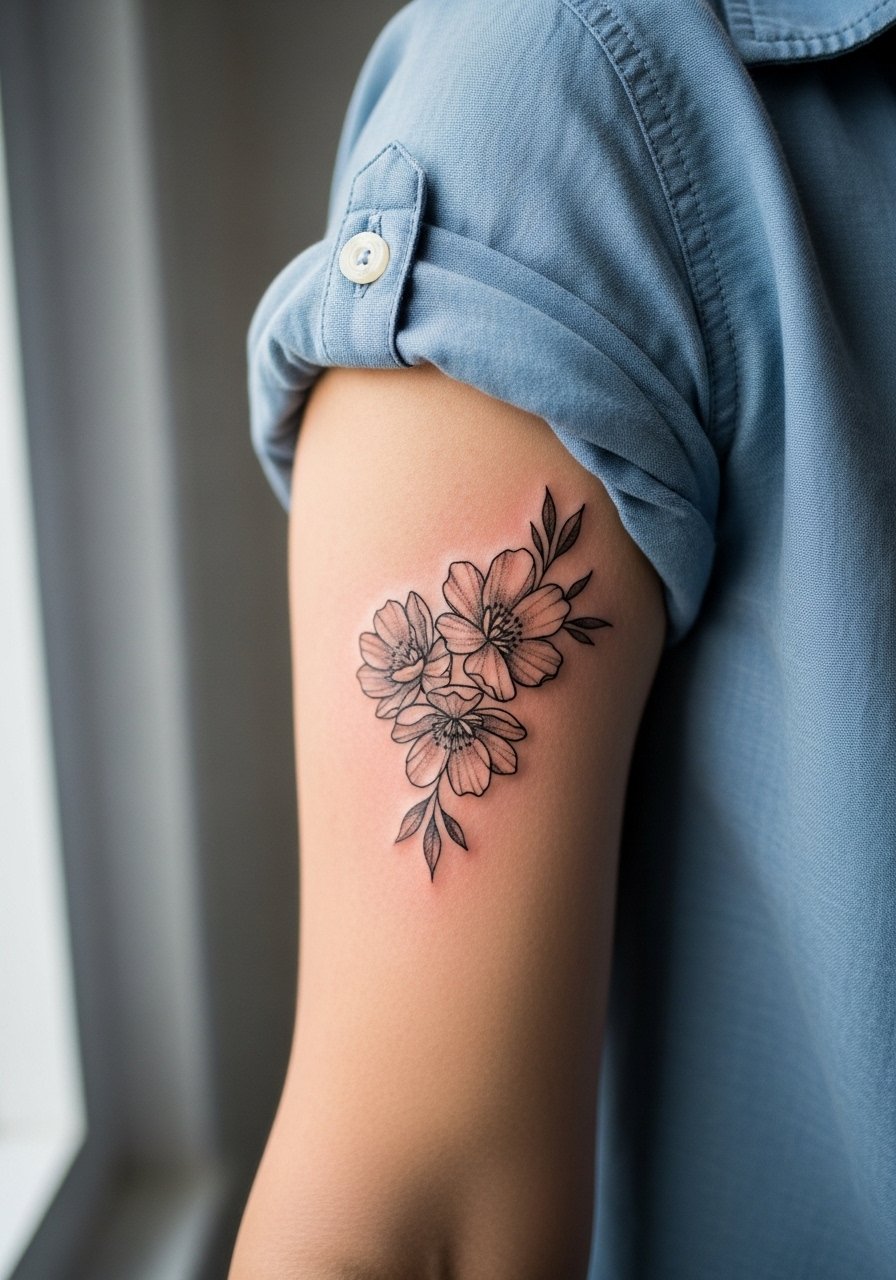
Most people think more petals equal more elegance. I recommend elongated compositions that follow the arm rather than wrapping too wide. Tell the artist to keep petal edges slightly bolder near shadowed areas to prevent fading into a gray wash. The inner bicep can sting when the needle hits near the crease. Plan one to two sessions depending on color accents. A common regret is over-coloring bright tones in areas that sweat in summer because color can bleed. For evenings out try a loose button up shirt you can pull aside to show the piece.
4. Butterfly Outline in Fine Line on Inner Arm
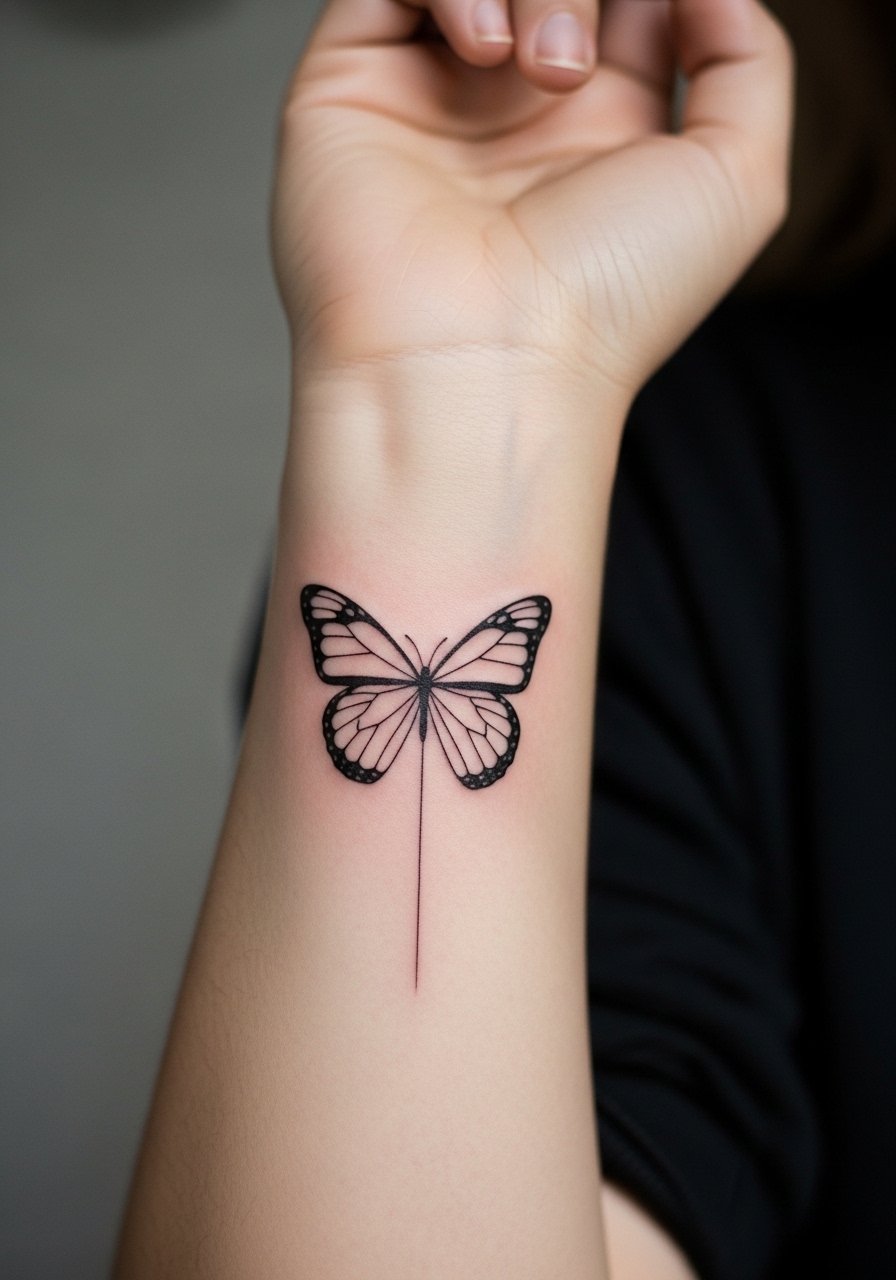
If transformation imagery appeals but you want low commitment, this outline reads light and airy without heavy saturation. During consults, request a slightly larger wingspan than your phone mockup to avoid fine details merging in two years. Fine line butterflies can fade faster on warm, sweaty skin. Typical session time is under an hour and pain is low on the forearm. Avoid asking for tiny filigree inside the wings if you want longevity. Pair it with a thin silver cuff on the opposite arm to balance simplicity, and consider a thin silver cuff bracelet for photos.
5. Celestial Motifs on Inner Bicep
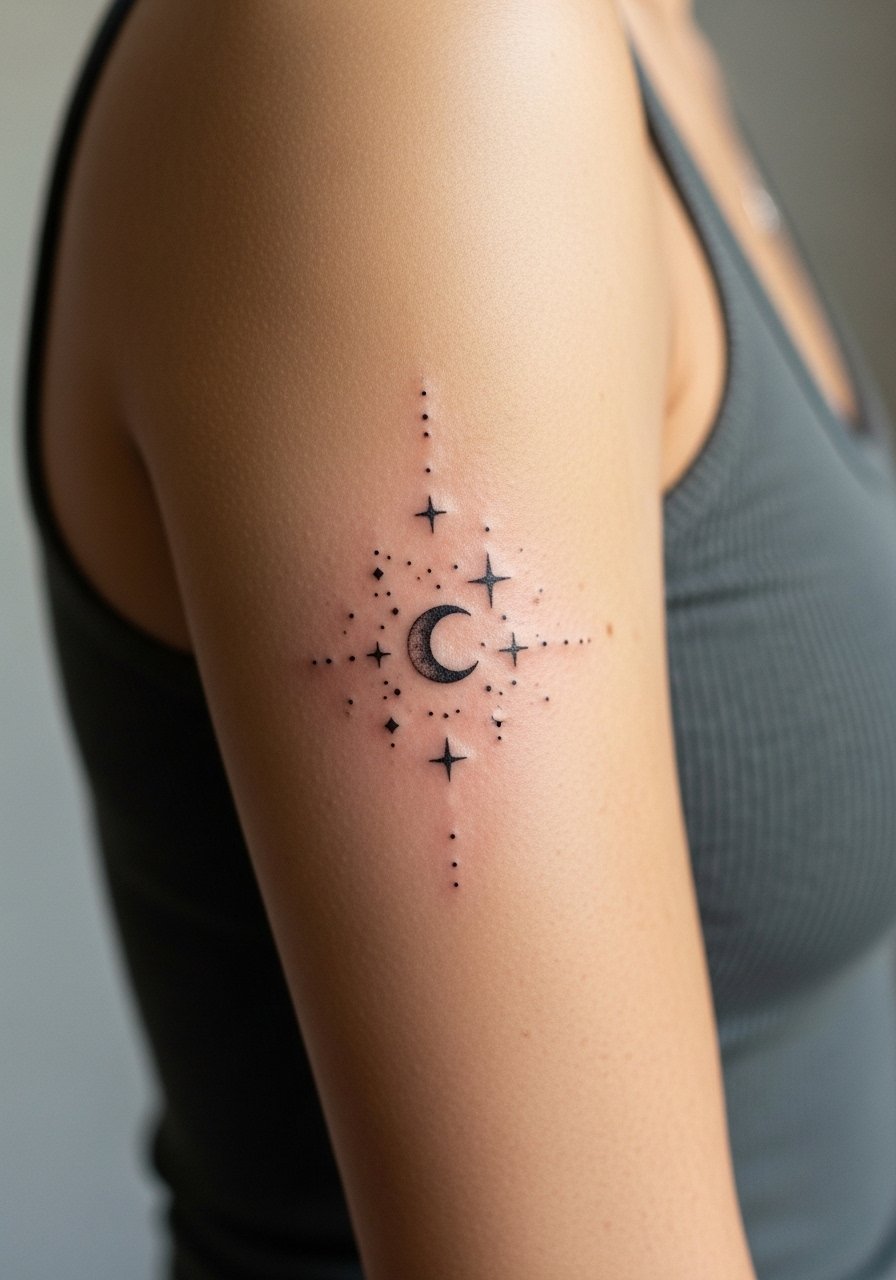
Celestial symbols work vertically along the bicep curve and are great for people who want symbolic pieces without heavy color. A common aging problem is packing tiny stars too close to a shaded moon, which can blur into a smudge. Ask for spacing and slight dot work around larger elements to preserve contrast. Two short sessions usually cover a small constellation and shaded moon. The inner bicep can sting near the armpit crease. For summer visibility try a racerback tank that frames the motif.
6. Ornamental Mandala Pattern on Inner Forearm
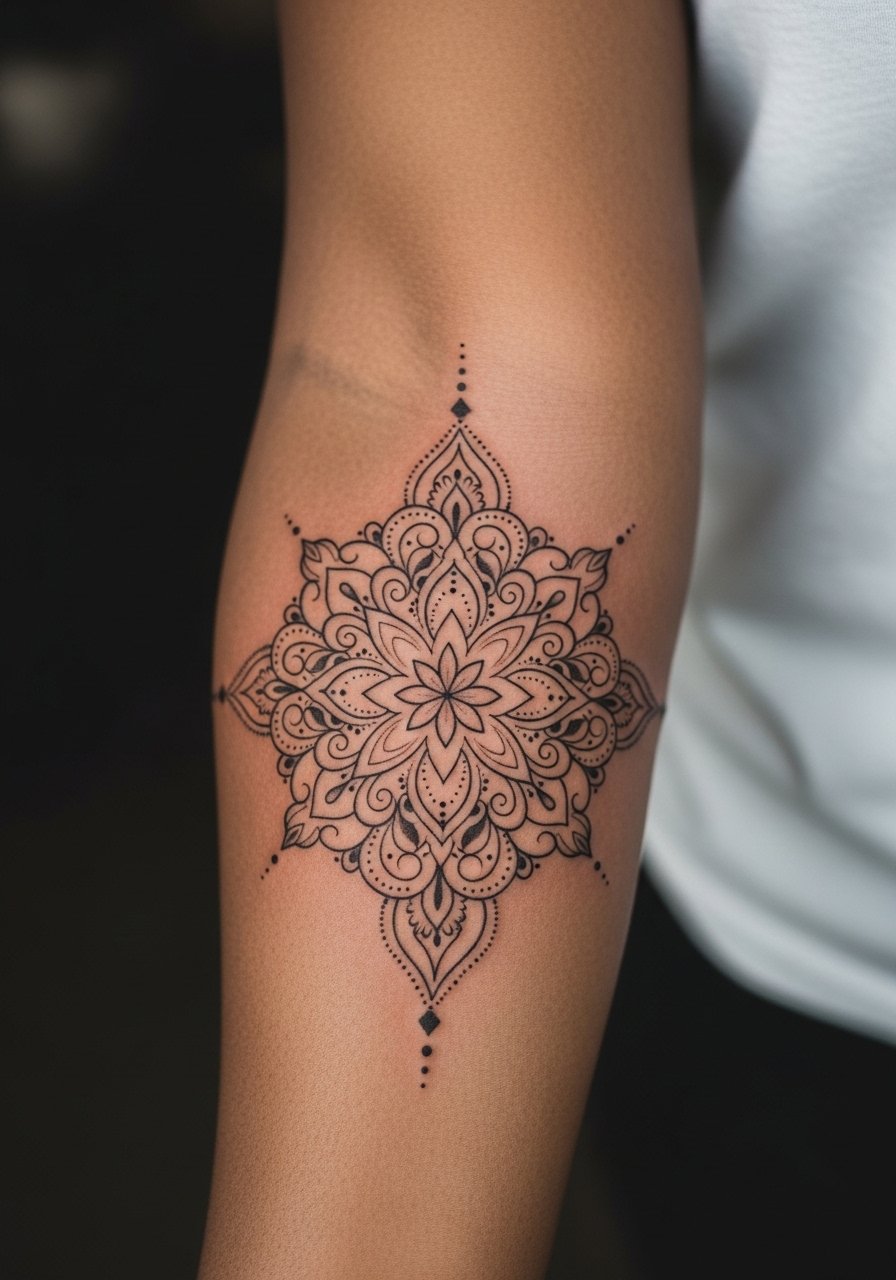
Mandala patterns elongate the forearm visually when spaced correctly. The biggest mistake is shrinking the central details too much. I tell clients to let the central sections be slightly open and to allow outer rings more negative space. Expect two sessions for a detailed four-inch mandala and moderate pain near the inner elbow. Dotwork and stipple shading hold nicely if the artist spaces dots deliberately. For casual wear a rolled-up sleeve or short sleeve button down helps reveal the symmetry without crowding it.
Studio Day Picks
Those inner forearm and bicep pieces above need different prep than wrist-only work, so a few targeted items smooth the session day and the first week.
-
Hustle Butter Deluxe. A non-greasy balm many people prefer for keeping inner arm skin supple without heavy shine during healing.
-
Indie Ink Balm. Breathable balms get praise for humid climates and reduce milia risk on active areas like the inner bicep.
-
Frida Skin Balm. Lightweight formula that soothes fine line work without adding a glossy film that ruins early photos.
-
Australian Tea Tree Salve. A gentle anti-itch option some people use for the first itchy week without heavy petroleum residue.
-
Saniderm protective film. Useful for inner arm pieces that experience friction from clothing during the initial days when extra protection helps.
7. Roman Numeral Dates on Inner Bicep
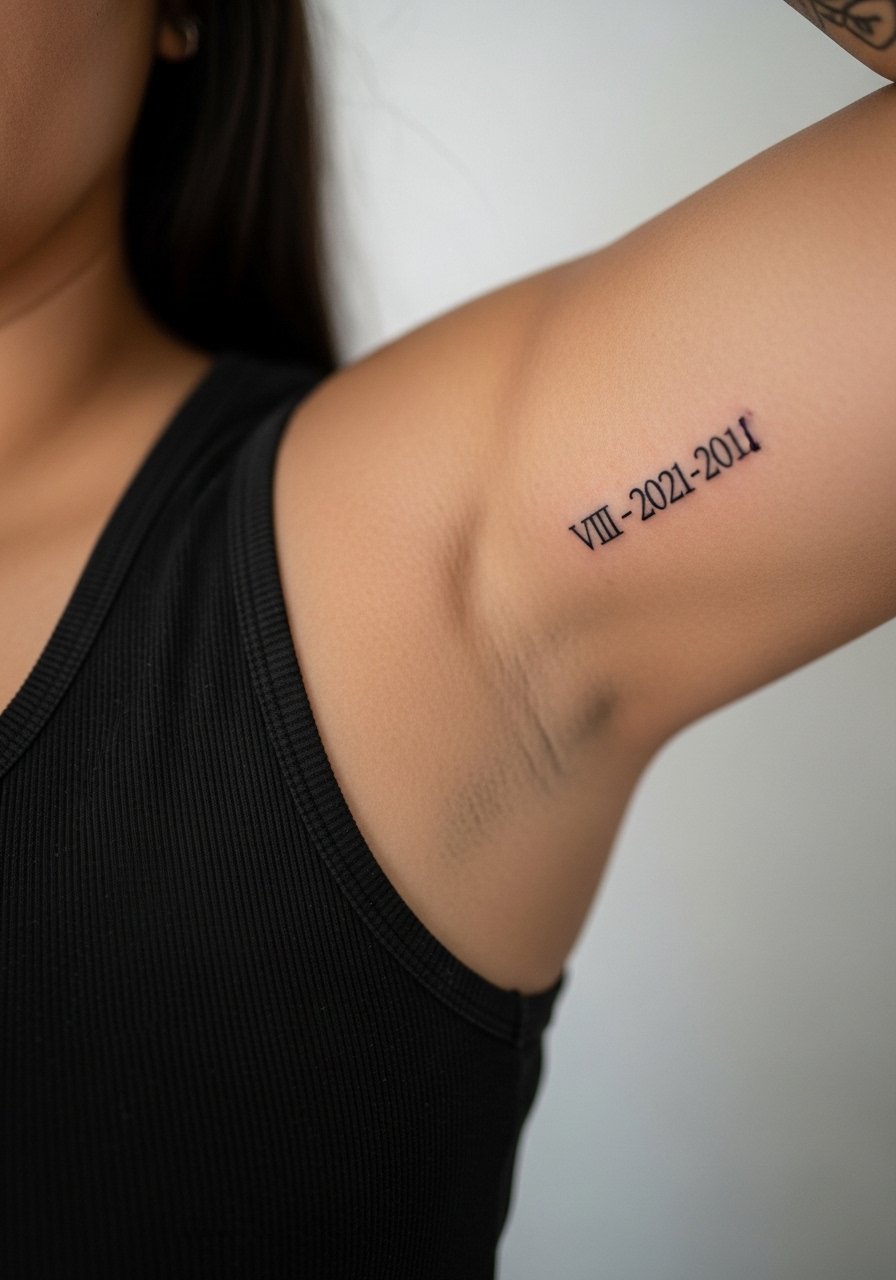
For memorial dates you want clarity over flourish. Ask your artist for slightly increased line weight compared with your initial mockup so numbers remain legible in photos. The inner bicep keeps numerals discreet but visible when you lift your arm. Expect a quick one-hour session and mild discomfort near the crease. A real mistake is stacking too many numerals in one tight column because small serif strokes can merge. Try framing the date with minimal space and consider a slim thin chain pendant necklace that sits above the bicep in some outfits.
8. Tiny Heart or Initials in Micro-Realism on Inner Wrist
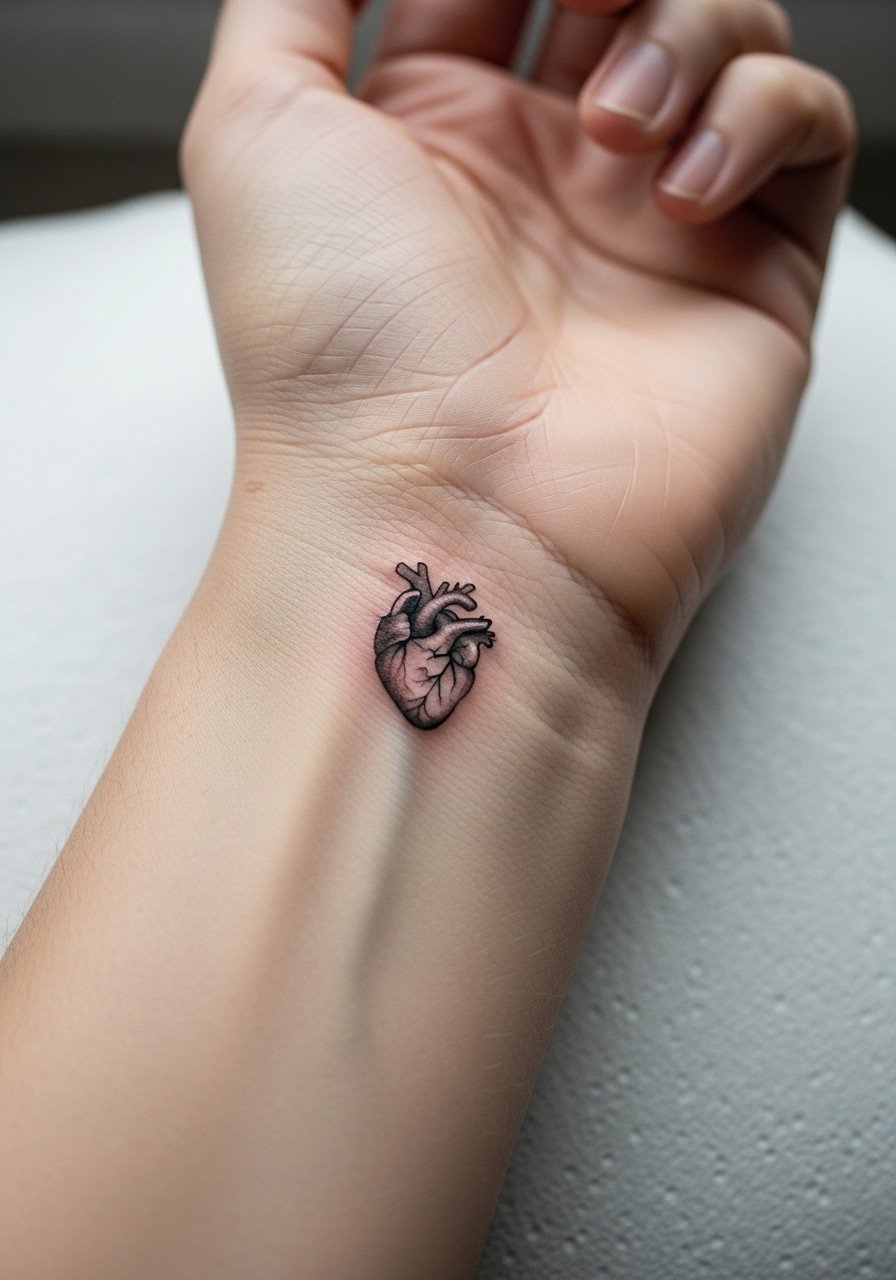
Micro-realism on the inner wrist is ideal for first tattoos because sessions are short and touch-ups are straightforward. Tell the artist you want simple shaded depth rather than tiny textured detail that can go muddy. The wrist is a high-friction zone from watches and bracelets so plan to remove jewelry during healing. Pain is moderate due to proximity to bone. Expect a single short session. For showing off a cuff the piece works with a gold cuff bracelet on the same wrist when healed.
9. Cursive Handwriting Tribute Along the Inner Forearm
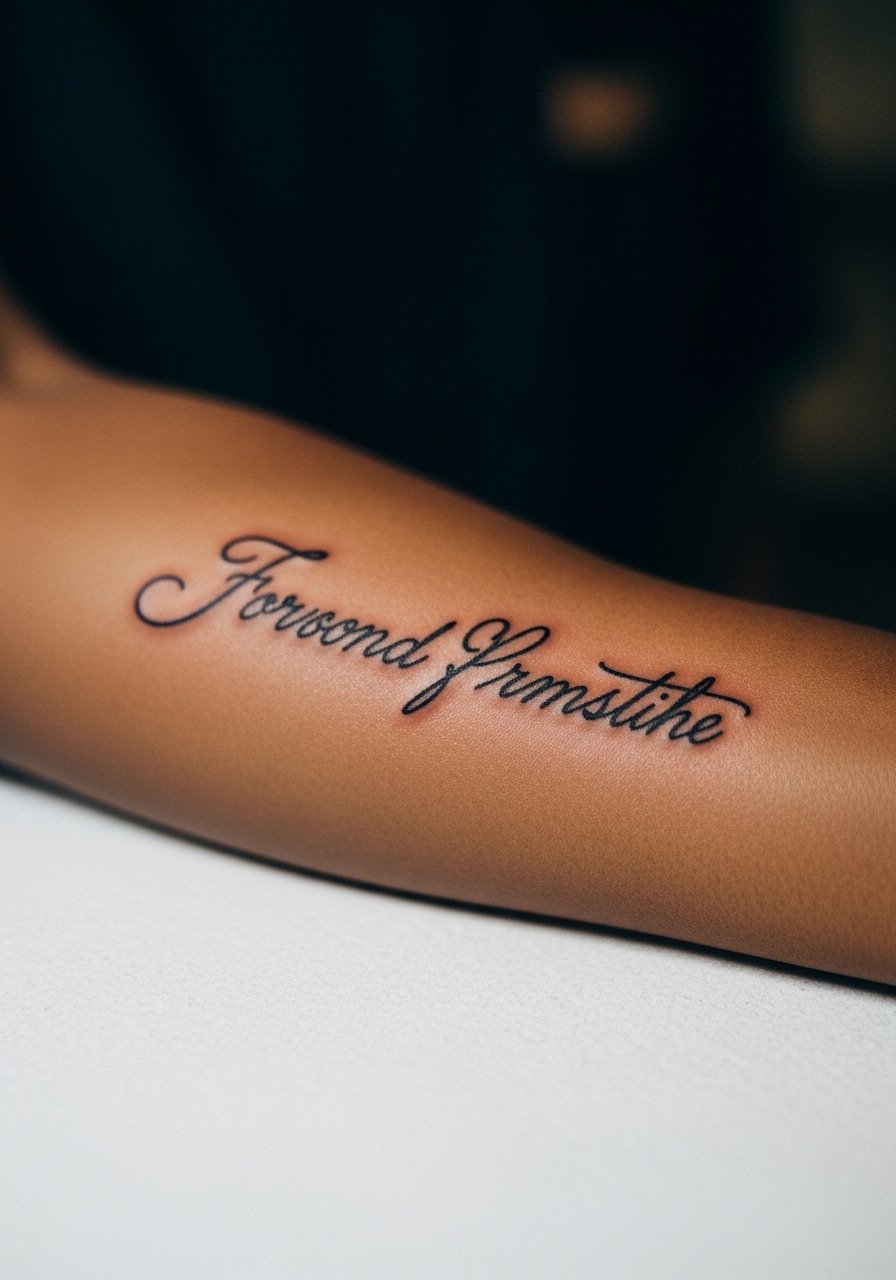
Using a scanned handwriting sample gives authenticity. Bring the exact handwriting you want and ask the artist for a stencil preview on your arm to check scale and curvature. The forearm tolerates long script well and pain is low. A common error is shrinking handwriting to fit a space and losing the individuality of the strokes. At two years the script reads best if the artist preserved natural gaps and used slight line weight variation. For casual wear rolled cuffs and thin leather bracelets set off the script, so try a thin leather bracelet stack.
10. Abstract Linework Waves on Inner Bicep
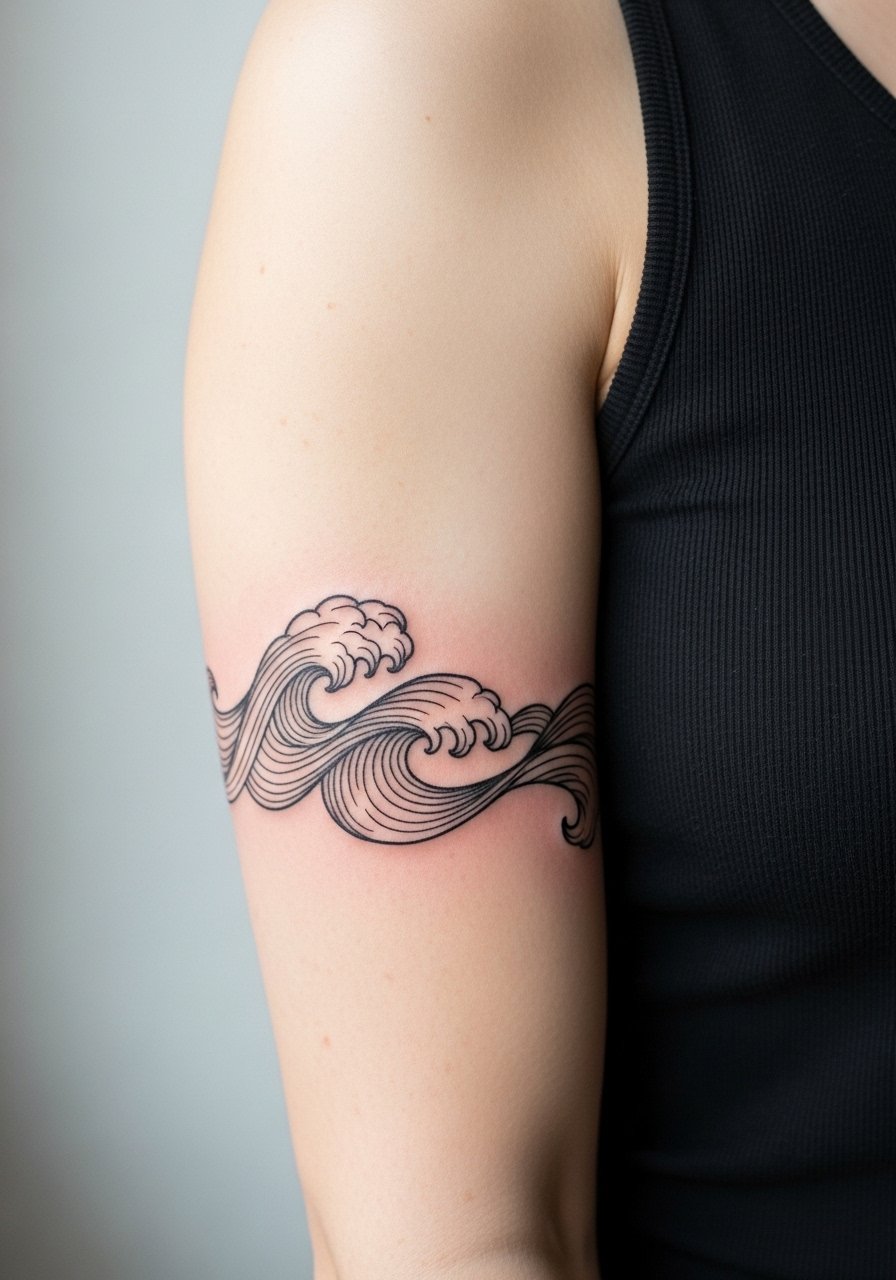
People love waves because they move with the muscle. The trick is to map the lines so they flow with flex rather than buckling when you tense. In consults, ask the artist to test the stencil while you flex. The inner bicep can spread ink slightly if lines are too tight. Expect a one to two hour session depending on length, and intermittent stinging near the crease. A mistake is trying to squeeze too many parallel lines into a narrow band. For styling a simple sleeveless tank women shows movement when you flex.
11. Blackwork Dotwork Mandala on Full Inner Forearm
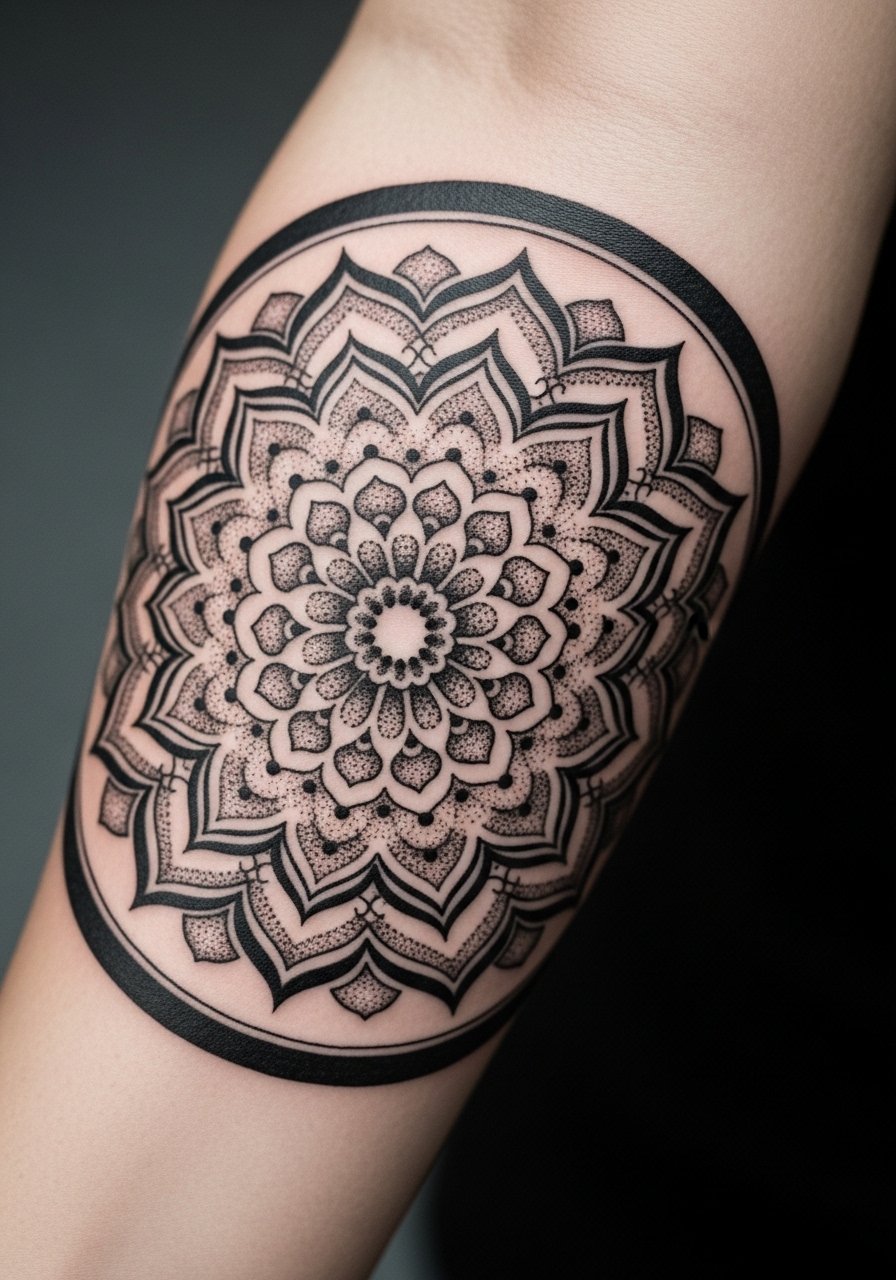
Dotwork mandalas require deliberate spacing to avoid dense areas becoming a single dark mass as they age. Ask for stipple shading that gives the eye depth and for outer rings to have more negative space. These pieces usually take multiple sessions and can feel long because of the repetitive dotting technique. Pain is moderate and focused. A common issue is underestimating session time. For display roll sleeves or wear a fitted long sleeve black rolled to mid-forearm to alternate between concealing and revealing.
12. Neo-Traditional Rose with Thorn Vine on Inner Arm
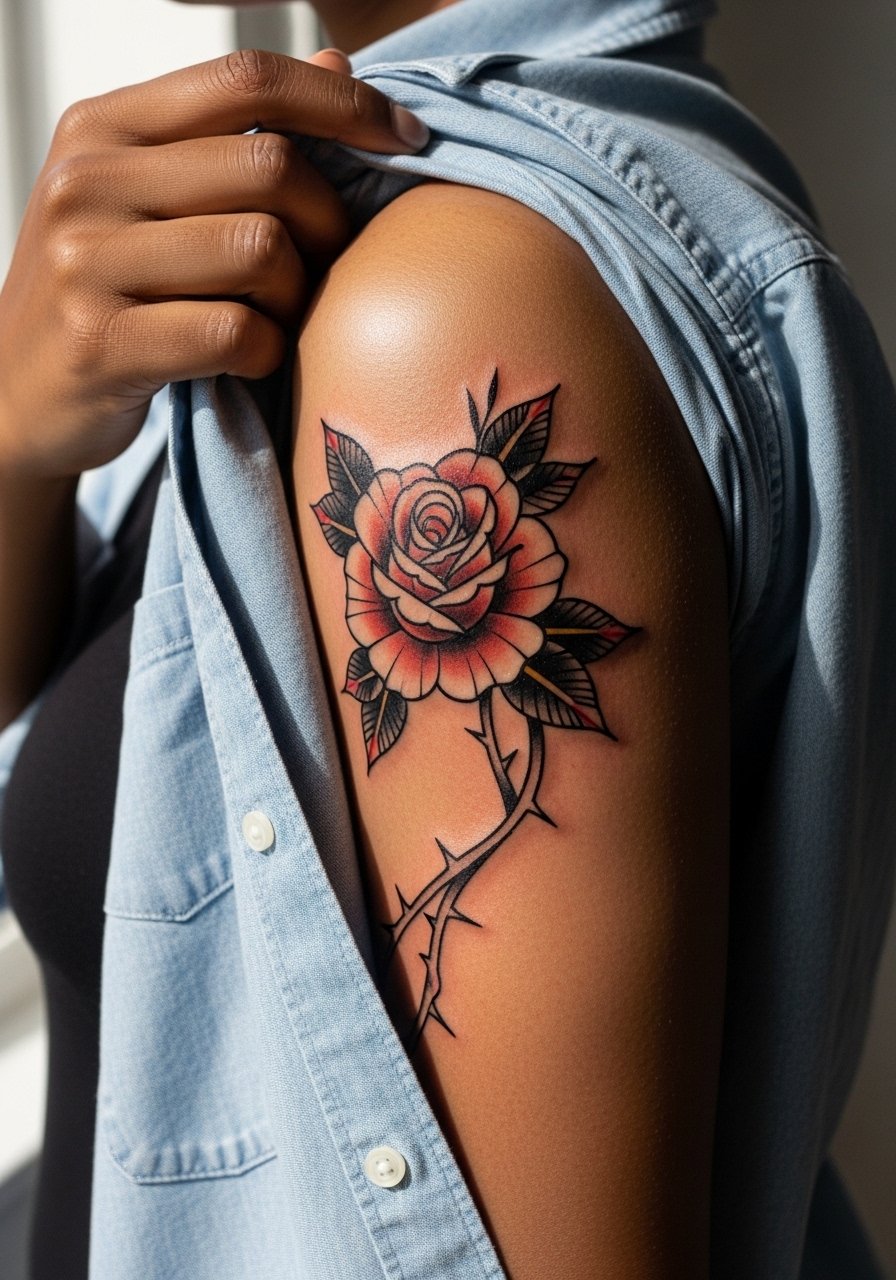
Neo-traditional pieces bring strong outlines and saturated color that age into bold shapes. For inner arm vines avoid very thin stems that can break up with body movement. Ask for solid black outlines and measured saturation at the edge of petals. This design usually needs two to three sessions depending on size and color. The inner arm can be tender along the vine where it crosses creases. A common regret is oversaturating bright colors in high-friction zones because they can shift in summer. Pair the look with a thin silver cuff bracelet for a mixed feminine and tough aesthetic.
13. Micro-Realism Animal Paw on Inner Wrist
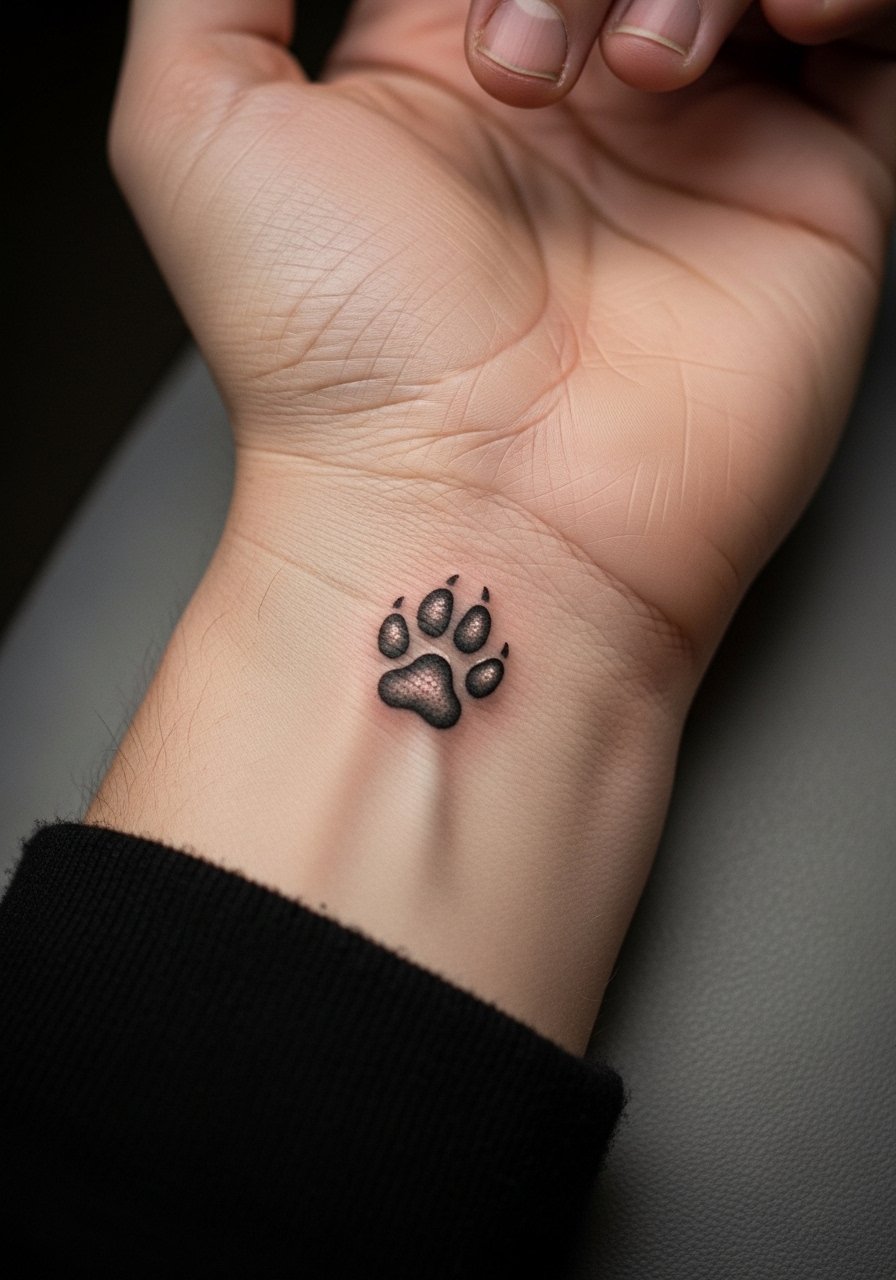
Tiny realistic motifs like a paw print are quick and emotional. For the wrist, request simplified contrast rather than heavy texture so the shape remains legible. The wrist is prone to rubbing from clothing and watches so plan to remove accessories during healing. One short session typically does the job and pain is mild. Mistakes include asking for extreme micro detail at extremely small sizes. Show-off pairing includes cuff bracelets, and a gold cuff bracelet can accent the piece without competing.
14. Linear Constellation Along Inner Forearm
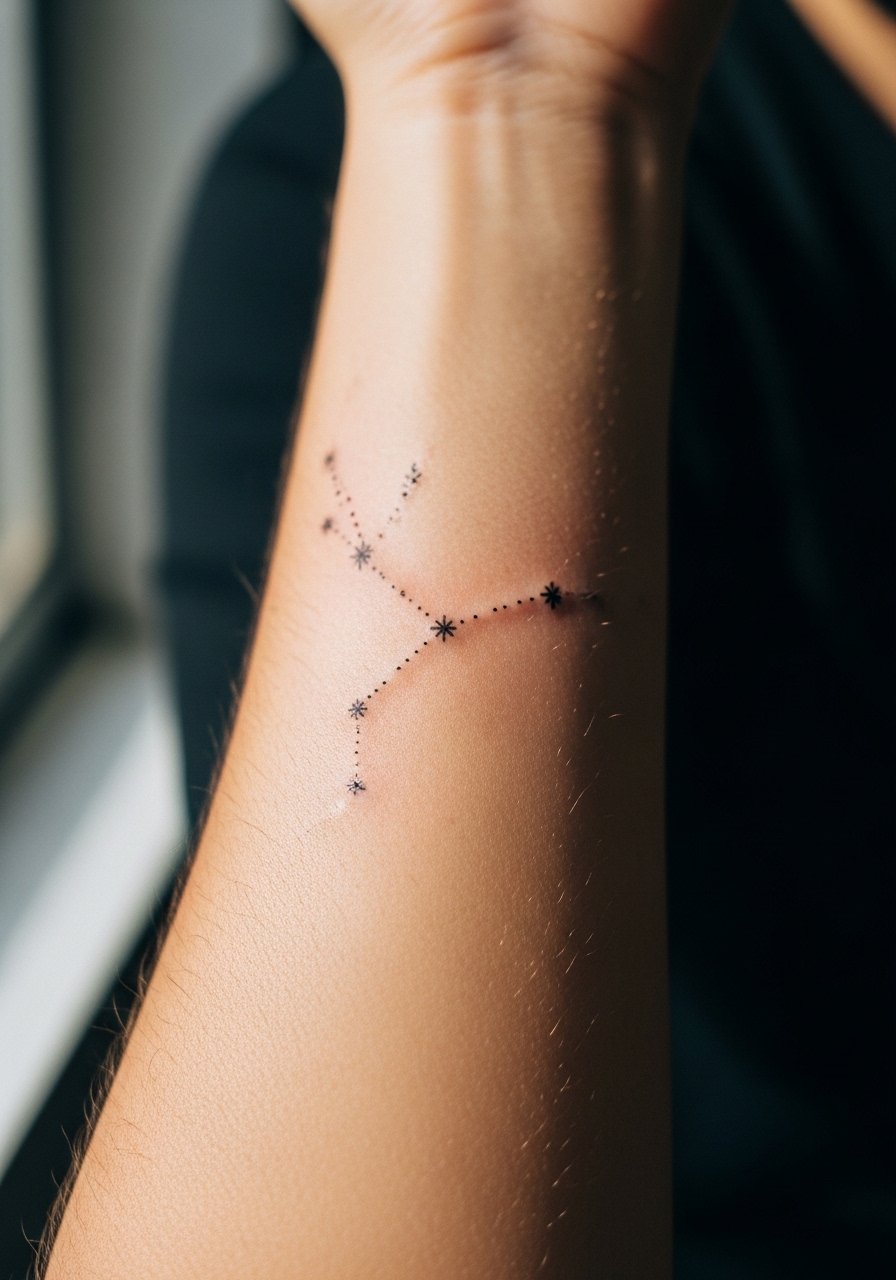
Constellation pieces are subtle but need careful spacing to avoid tiny stars merging with time. Ask the artist to use slightly varied dot sizes and to space connector lines with small gaps. The forearm tolerates this well and pain is low. A mistake is compressing many stars into a tiny area. At two years expect the connecting lines to soften but the dots to remain distinct if spacing was generous. Roll a sleeve or wear a short sleeve button down to reveal the pattern selectively.
15. Ornamental Vine Transitioning to Inner Elbow
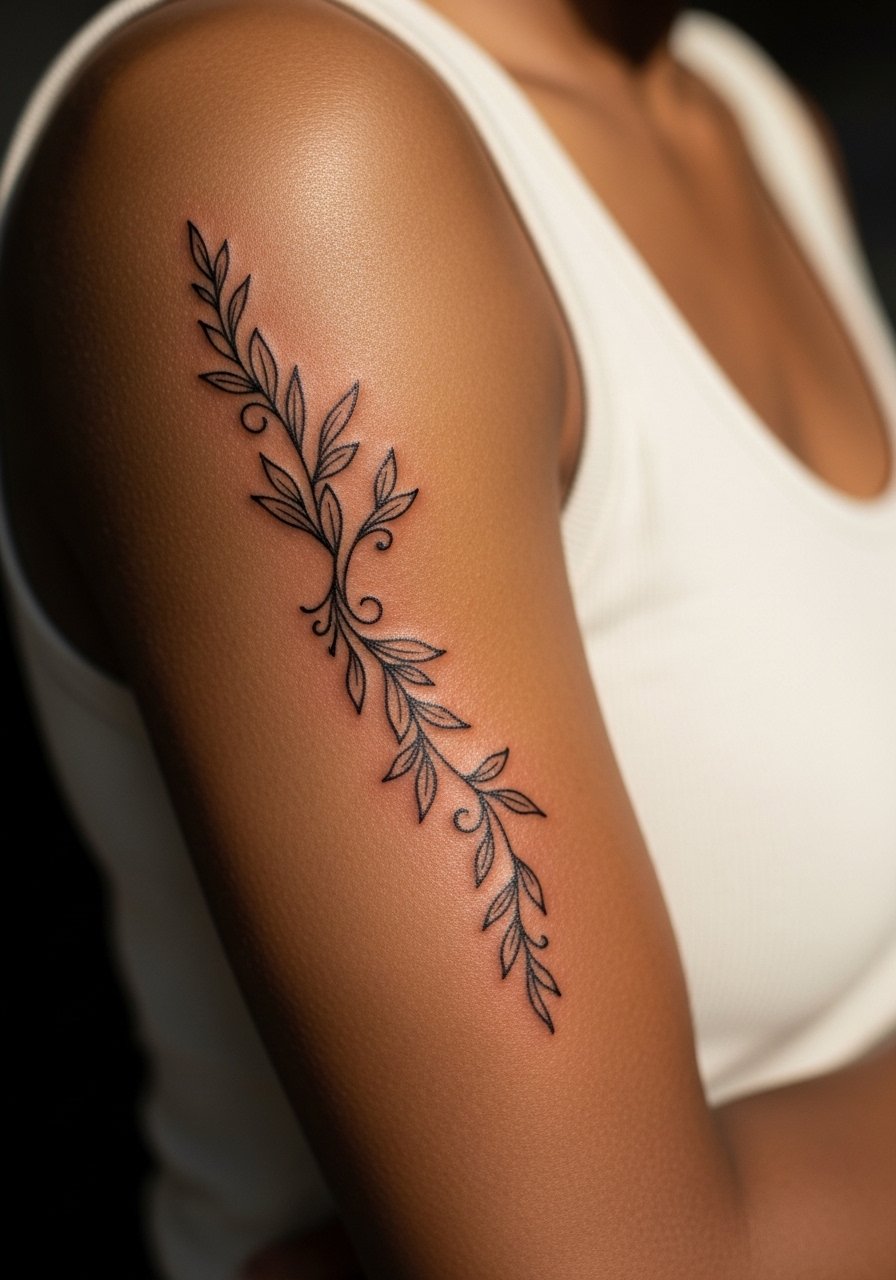
Vines that cross the inner elbow ask for flexible composition because the area bends constantly. I tell clients to expect some distortion when the arm is fully bent. Ask the artist to keep the vine elongated so curves stretch rather than bunch. Sessions can be longer because the artist needs to work around the bend carefully. Pain spikes near the crease. A common mistake is ending thick stems right on the fold which leads to faster wear. For showing it off try an asymmetrical sleeve or an asymmetrical sleeve shirt.
16. Single-Line Face Silhouette on the Inner Forearm
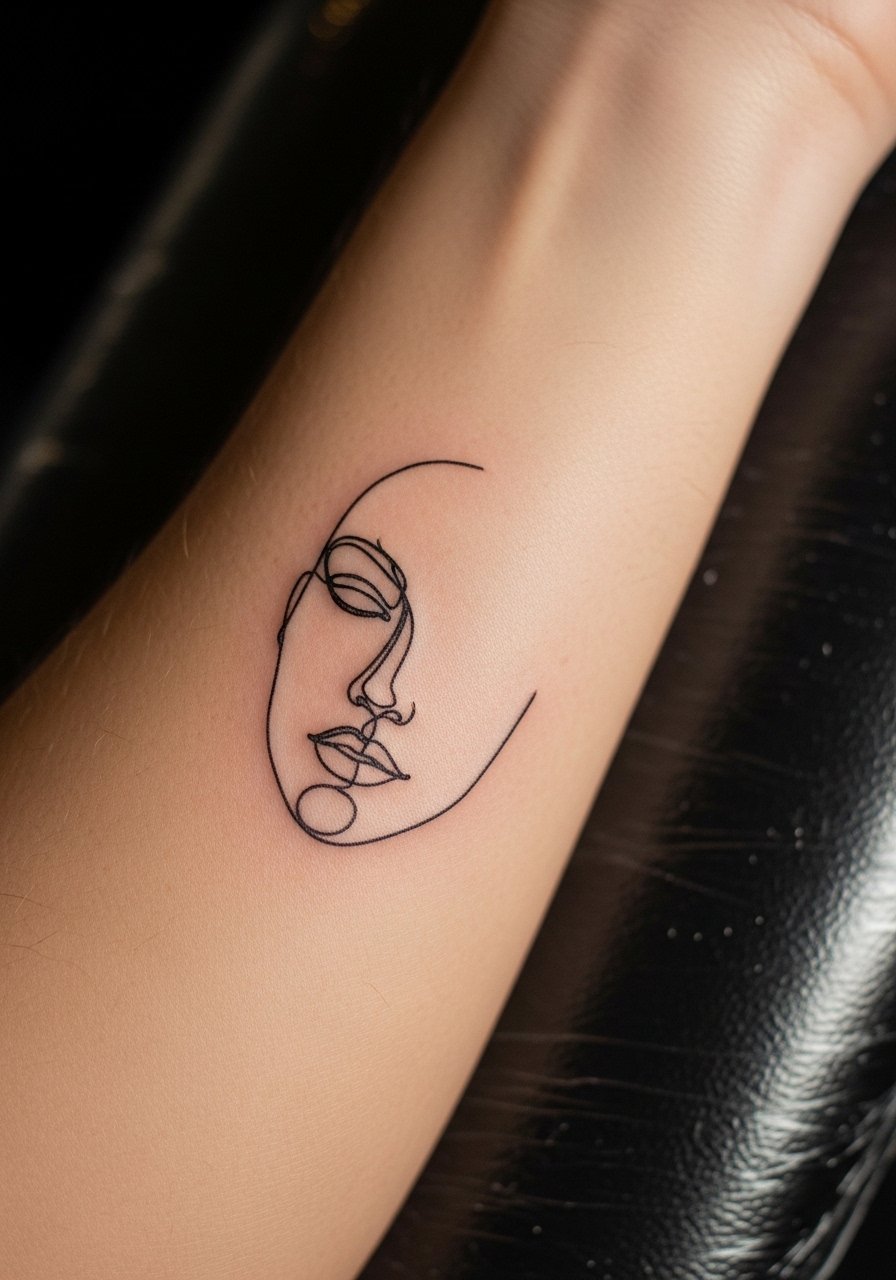
Single-line portraits read modern and graphic, but the approach needs confident strokes. Ask for a slightly bolder continuous stroke where facial features concentrate to avoid ambiguity as it heals. The inner forearm is forgiving for this style and pain is low. The session is usually short if the piece is small. A mistake is overcomplicating the line with too many loops which ruins the intended simplicity. For outfits, a rolled-up linen shirt or a chambray shirt roll cuff shows off the minimalist silhouette.
17. Small Geometric Cluster Near Inner Wrist
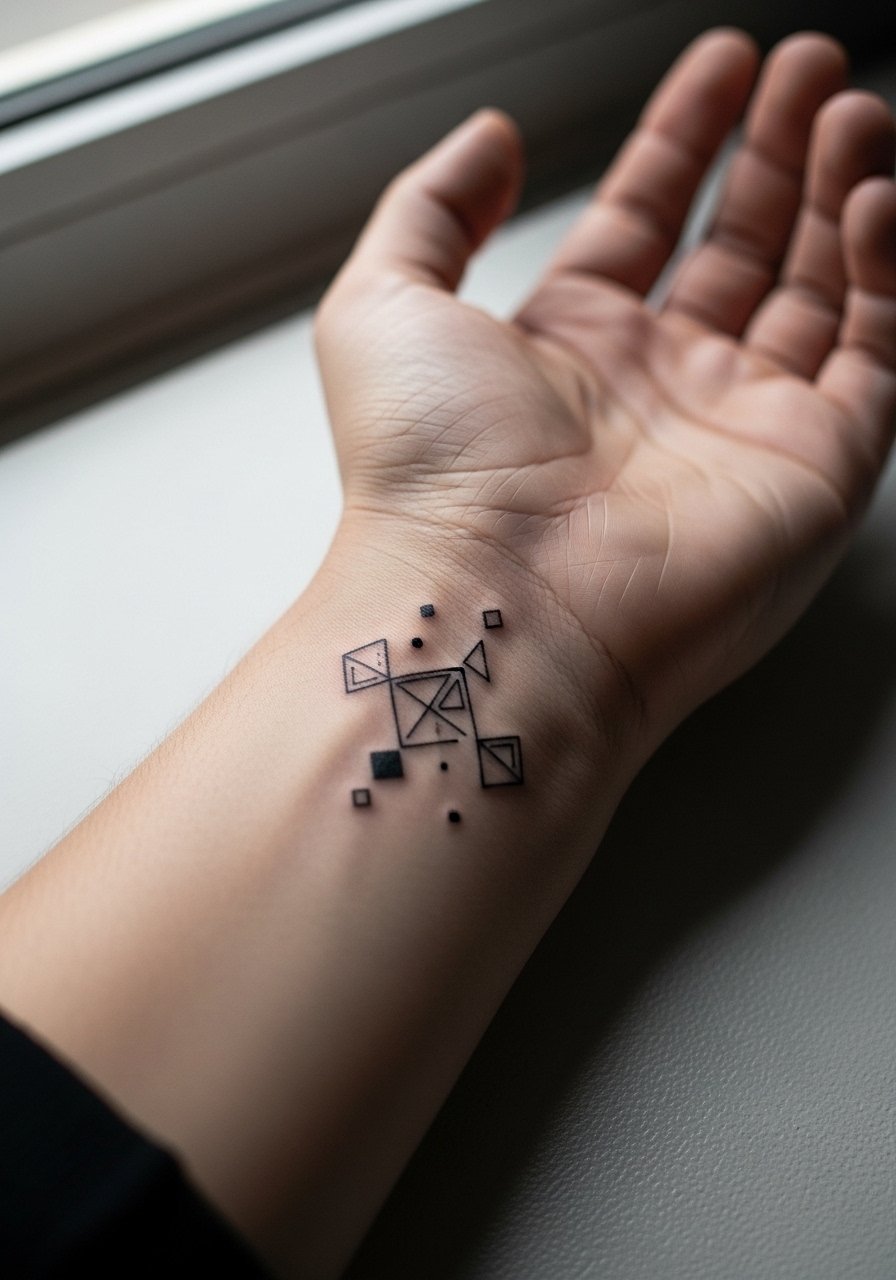
Clusters of small geometric shapes look crisp when the artist keeps spacing consistent. The wrist is a high-use area so expect gentle fading from handwashing and friction. Ask for slightly larger triangles or circles than your phone reference to maintain definition. One short session covers this and pain is moderate. A typical mistake is requesting filled blocks that sit too close to each other. For evening wear try a slim gold cuff bracelet or stacked dainty bracelets on the opposite wrist.
18. Wave of Tiny Stars Along the Inner Bicep
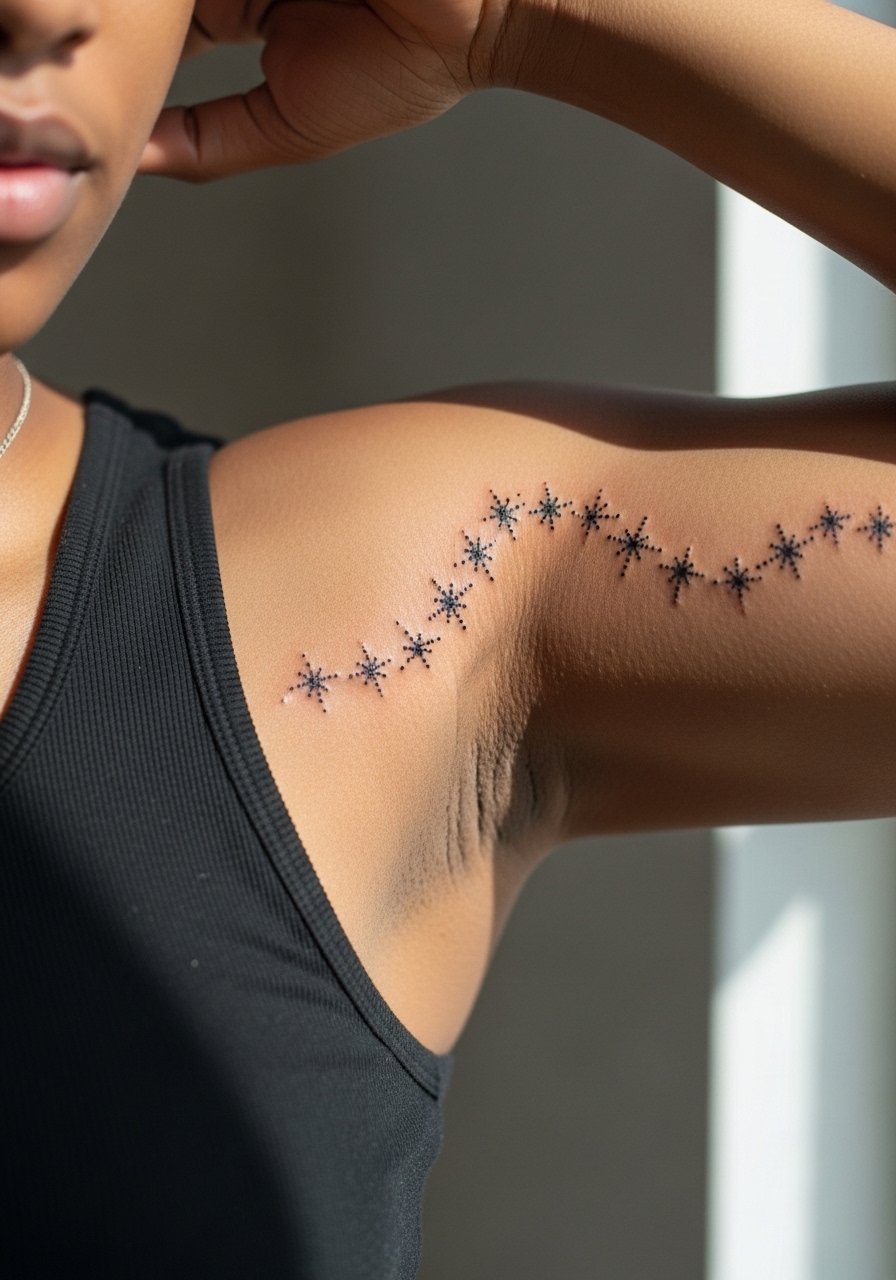
A flowing chain of stars reads delicate when the dots are varied in size and spaced deliberately. On the inner bicep you want the line to follow muscle curvature so it reads continuous when you flex. Sessions are short and pain moderate near thicker tissue. The main error is packing too many tiny stars close together which merges over time. For a casual reveal the piece pairs with a sleeveless tank women or a racerback top to frame the arc.
19. Minimalist Arrow Along the Inner Forearm
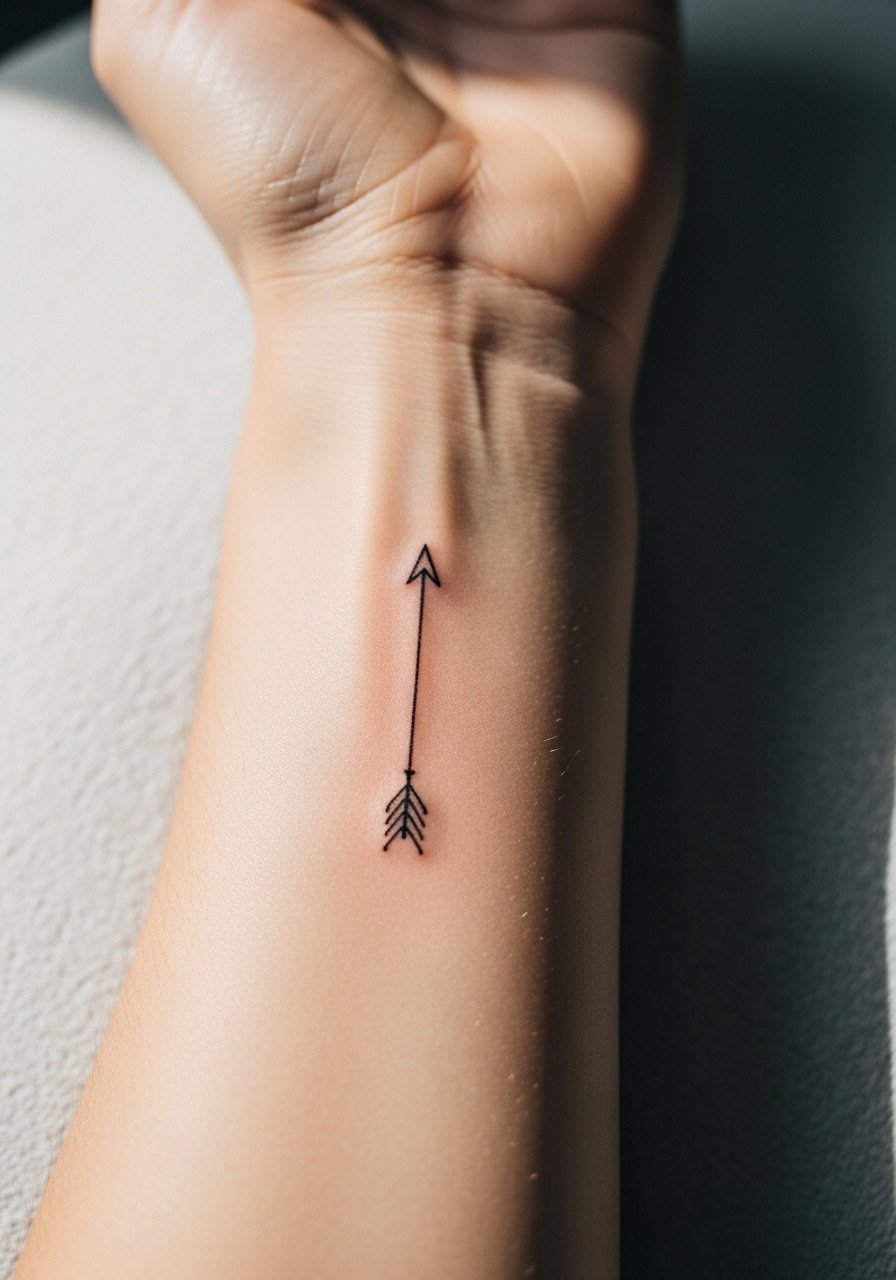
Arrows are classic and low commitment when scaled correctly. I suggest asking for a modestly thicker shaft than the finest needle to preserve the arrowhead detail. The forearm handles this well and sessions are quick. A common mistake is tiny fletching that turns into a smudge. For casual looks try a rolled cuff or wear a short sleeve button down to show it off in a subtle way.
20. Botanical Sleeve Starter on Full Inner Arm
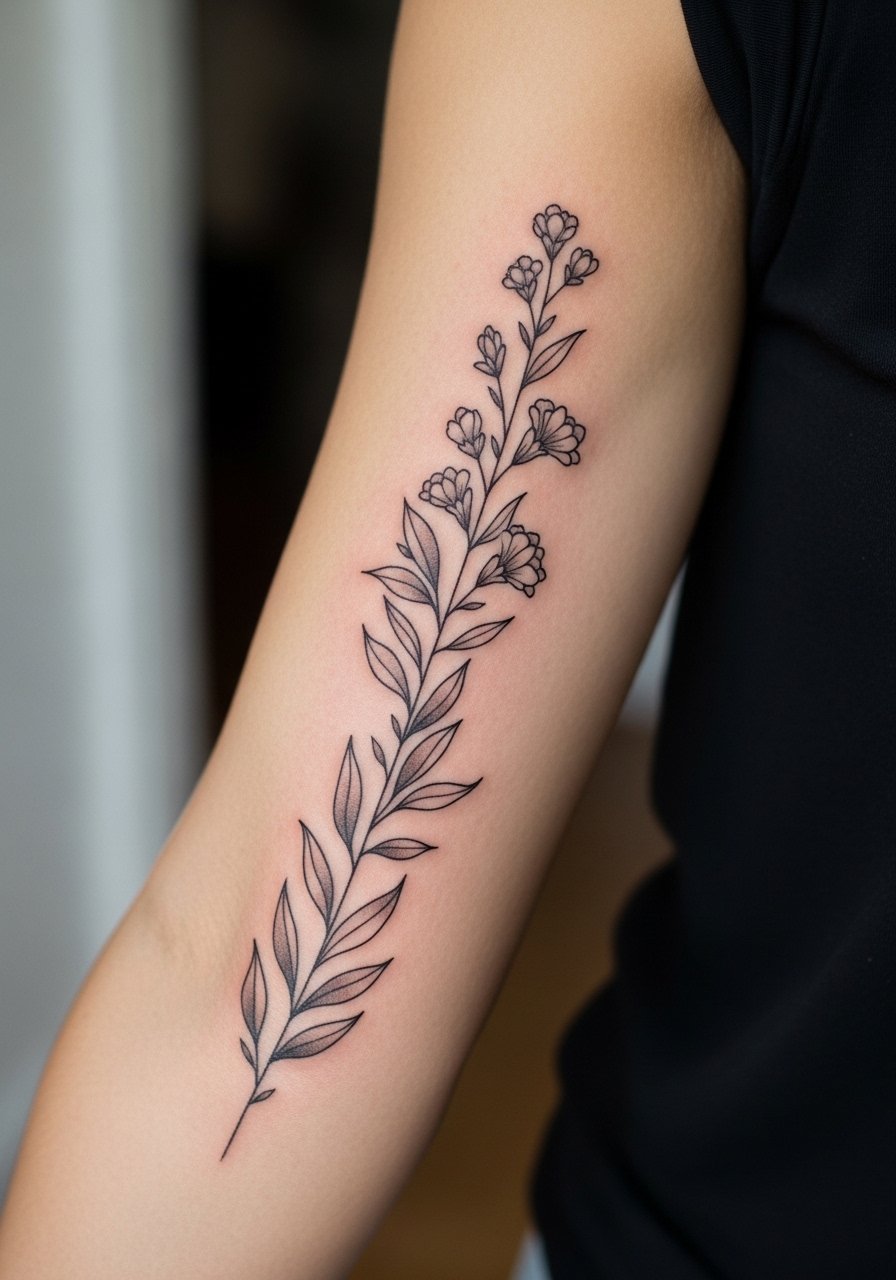
If you want to build a sleeve over time, start with vertical stems and leaves spaced as future pieces will connect. During consults ask for placement mockups and flex tests so future additions align with muscle movement. These come in multiple sessions and feel progressively more intense as coverage grows. Mistakes include placing dense shading that limits future contrast. For showing off early stages a fitted long sleeve rolled to mid-forearm in black balances coverage and reveal, so consider a fitted long sleeve black for photos.
21. Stipple Shaded Moon Phases on Inner Forearm
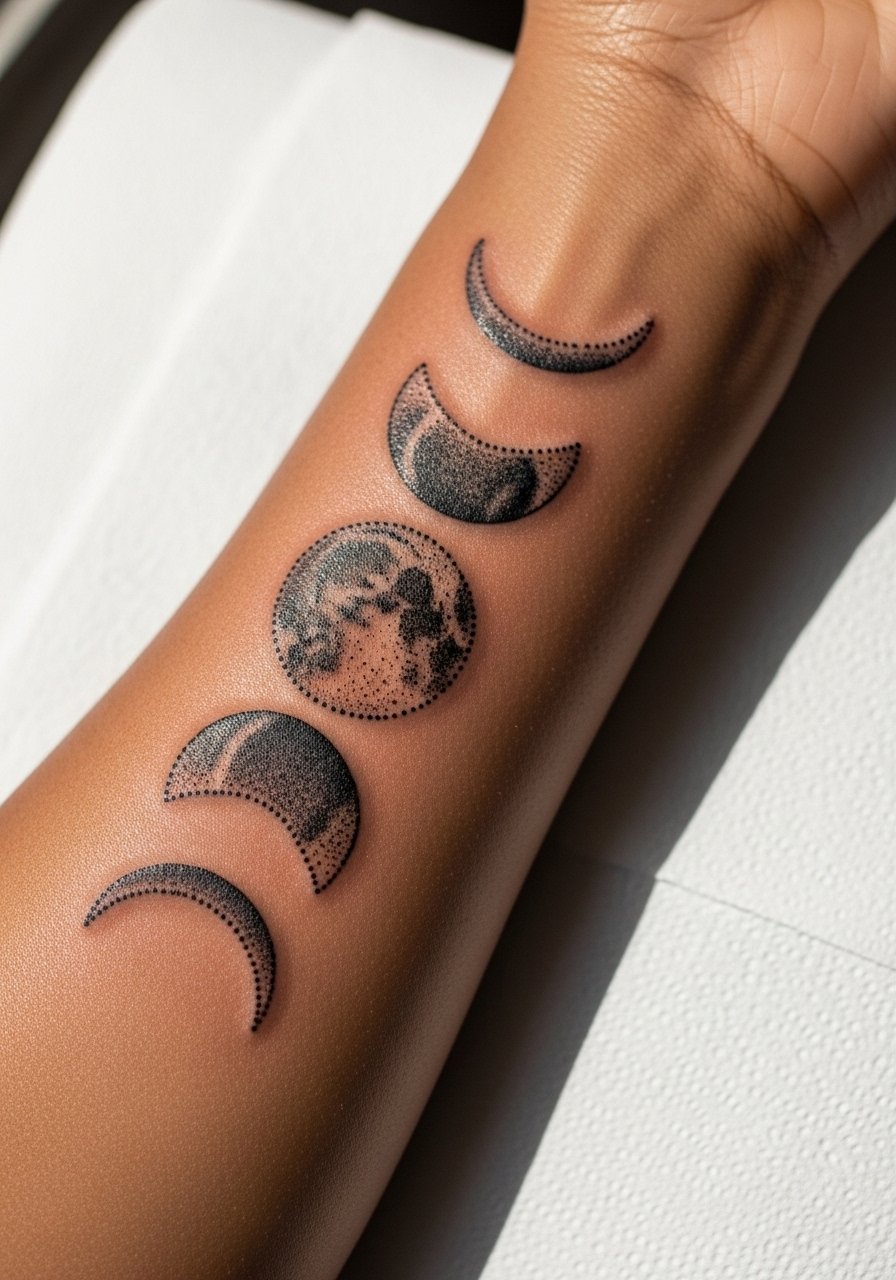
Moon phases benefit from stipple shading to suggest texture without heavy fill. I recommend varying dot density so the crescents and full moon read distinct even as the dots soften. The forearm is a forgiving canvas and pain is low. A mistake is using heavy gray fill which can blur in two years. Expect one to two sessions depending on size. For casual styling rolled sleeves draw attention to the sequence, and a short sleeve button down works well.
22. Fine Line Compass on Inner Bicep
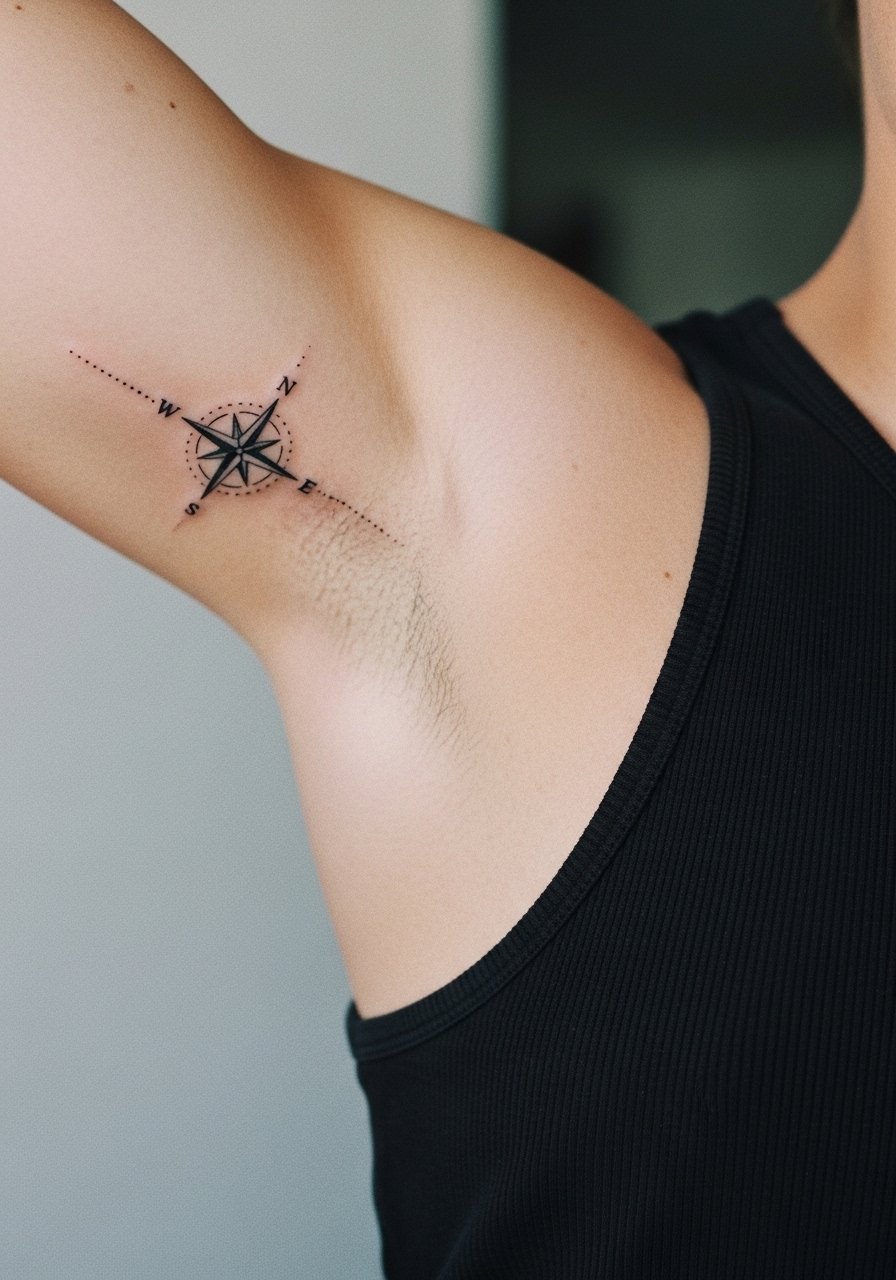
Compasses look crisp when the cardinal points are bold enough to survive touch-ups over the years. Ask your artist to strengthen the primary directional lines while keeping decorative flourishes light. The inner bicep is a controlled spot with moderate pain. One session usually does it. The common mistake is adding too many tiny ornaments that blur. For outfits, a racerback or sleeveless top frames the round motif nicely, so wear a racerback tank when you want it visible.
23. Scripted Single Word on Inner Wrist
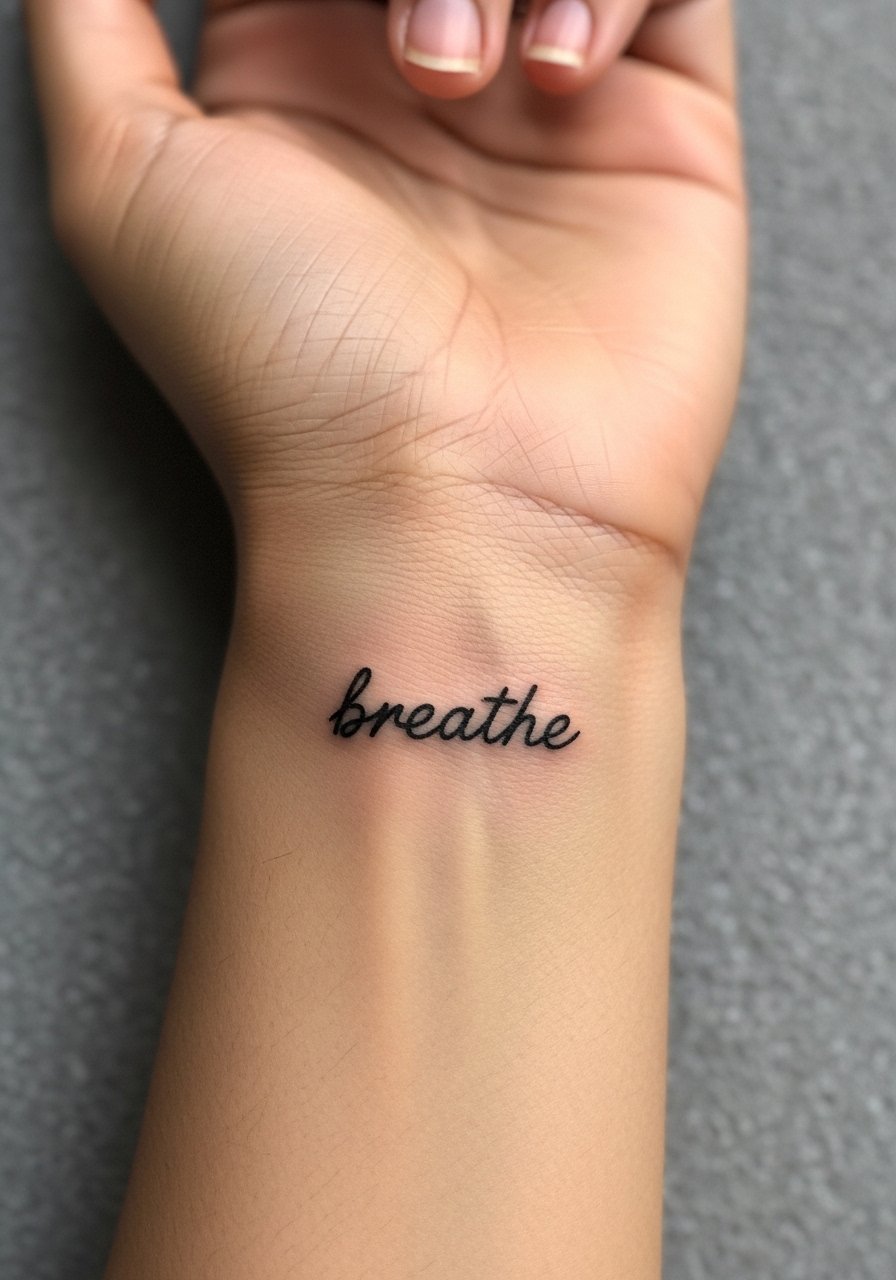
A single word can be powerful but only if it stays legible. Ask for slightly heavier downstrokes than your reference so thin upstrokes do not vanish. The wrist is sensitive and the session is short. The main regret is choosing a script with too many loops for the small space. Expect touch-up sooner than forearm pieces because of friction. Pair the word with a gold cuff bracelet when healed for a minimal jewelry look.
24. Botanical Inner Elbow Transition Piece
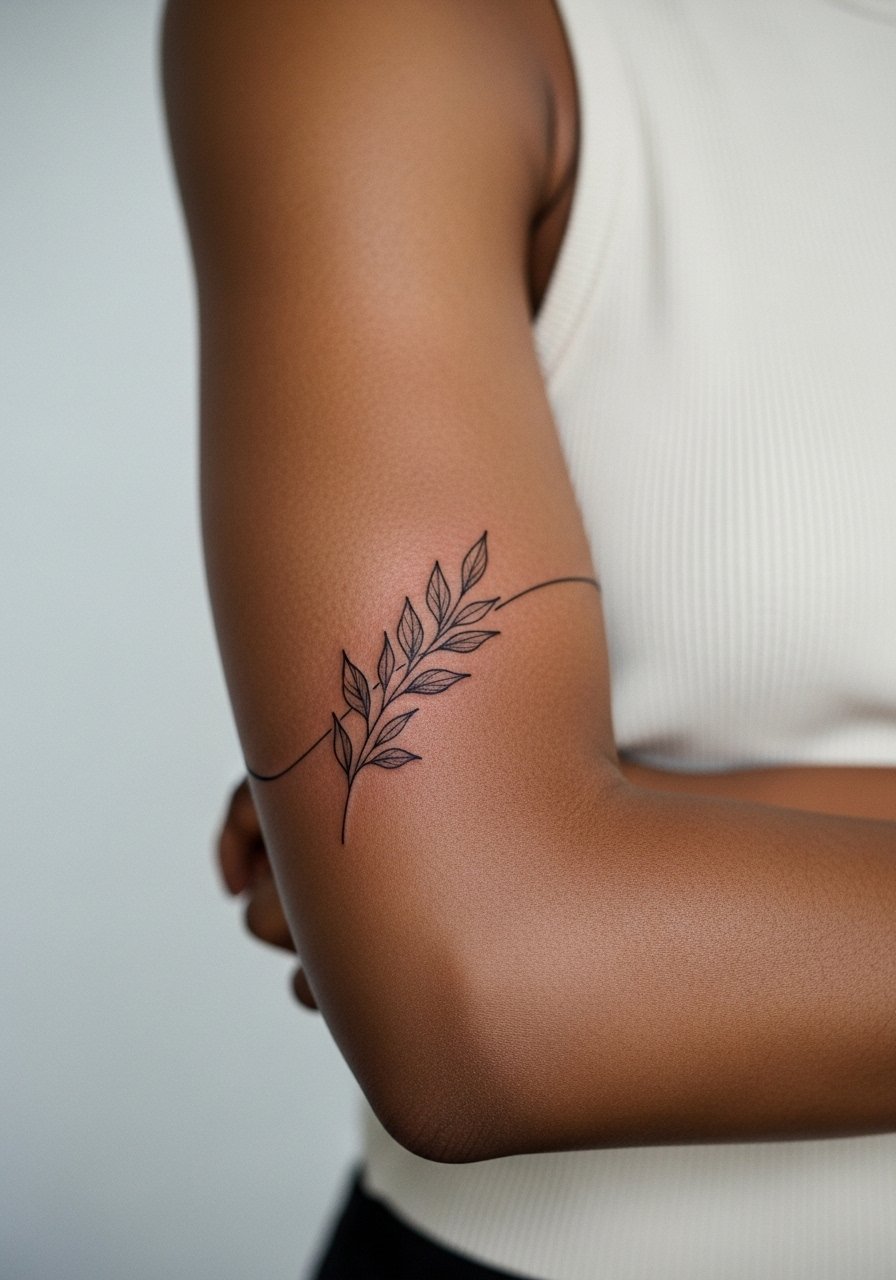
Transition pieces that approach the inner elbow must respect the crease. I advise elongated leaves and thin stems that avoid crossing the fold directly. The elbow crease is one of the more painful spots so prepare for brief sharp sensitivity. Multiple short sessions work better than a single long one. The error is placing dense shading right on the crease. For session wear bring a sleeveless top and a towel for padding, and consider an sleeveless wrap top you can adjust for comfort.
25. Micro Geometric Band Around Inner Forearm
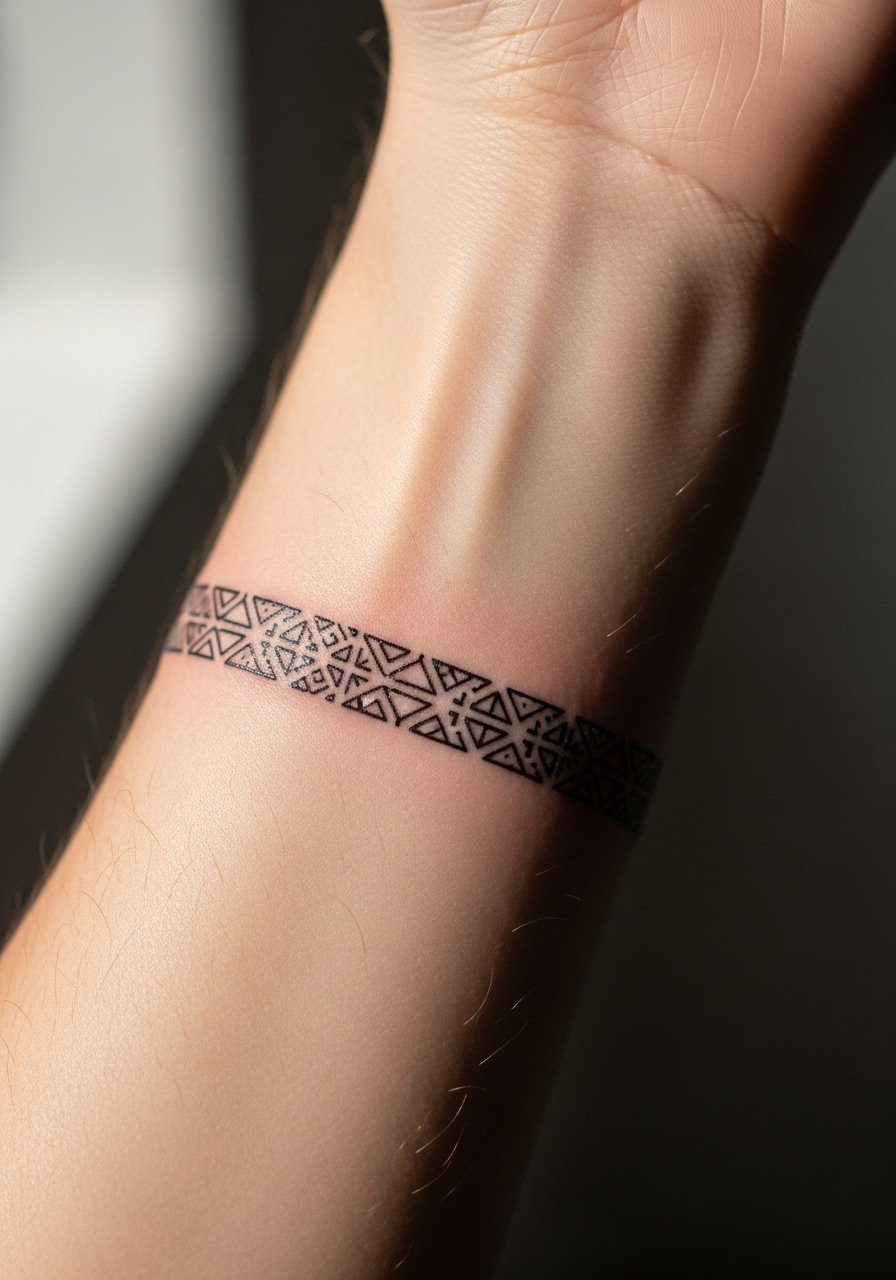
Bands look bold when spacing and symmetry are precise. Ask the artist to stencil the band and to check circumference while you hold your arm relaxed. Small misalignments show immediately so plan a careful mapping session. Pain is low but the feel can be repetitive. A mistake is making the band too thin which causes early softening. For clothing, a rolled sleeve or a short sleeve button down keeps attention on the circle.
26. Tiny Botanical Sprig at Inner Wrist
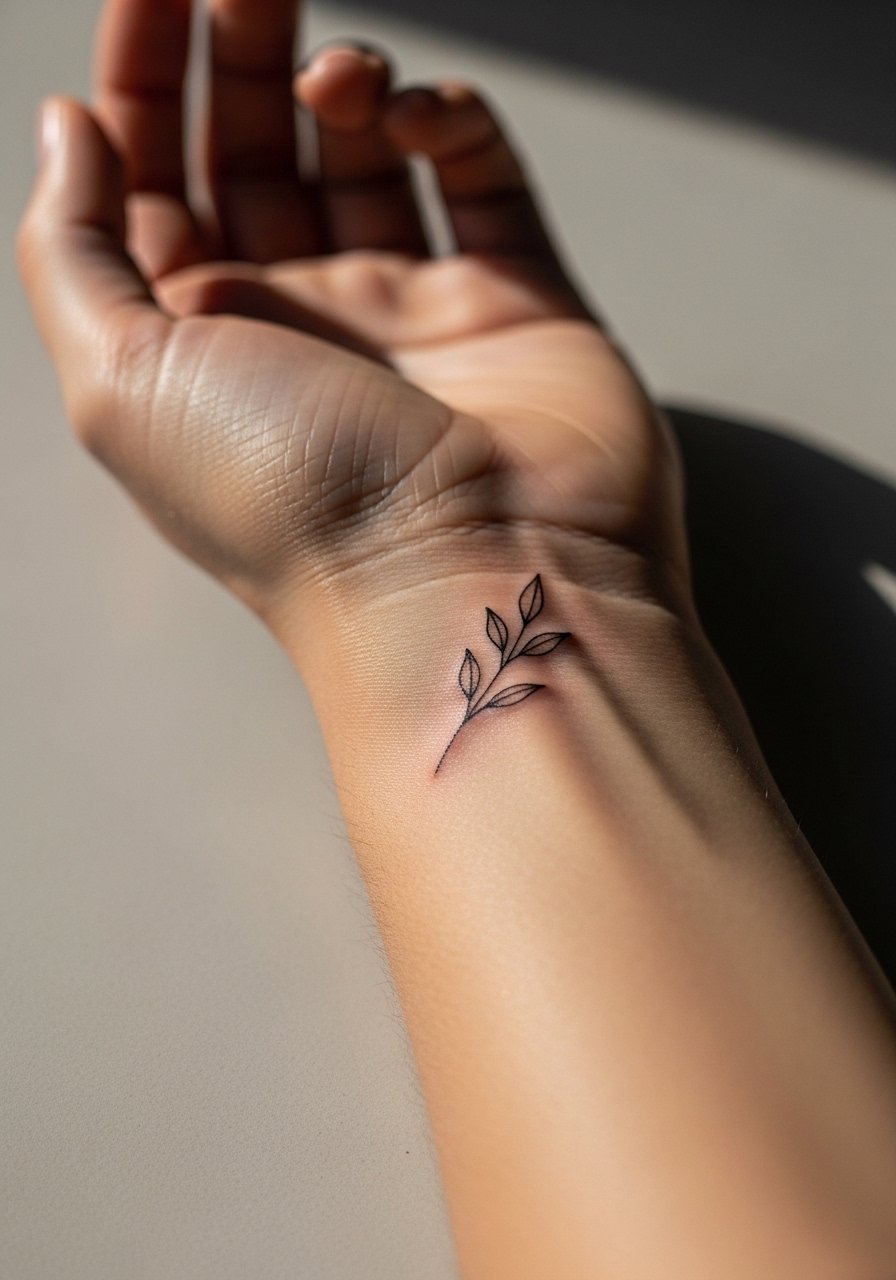
Sprigs are quick and clean if the leaf details are simplified. On the wrist keep the stem slightly thicker than the thinnest leaf veins to prevent early loss of definition. Plan a short session and expect low to moderate pain. The common mistake is over-detailing at very small scale. For display pair it with an oversized blouse sleeve pushed up, and try an oversize blouse women when you want a softer contrast.
27. Coordinated Pairing: Inner Arm and Opposite Wrist Link
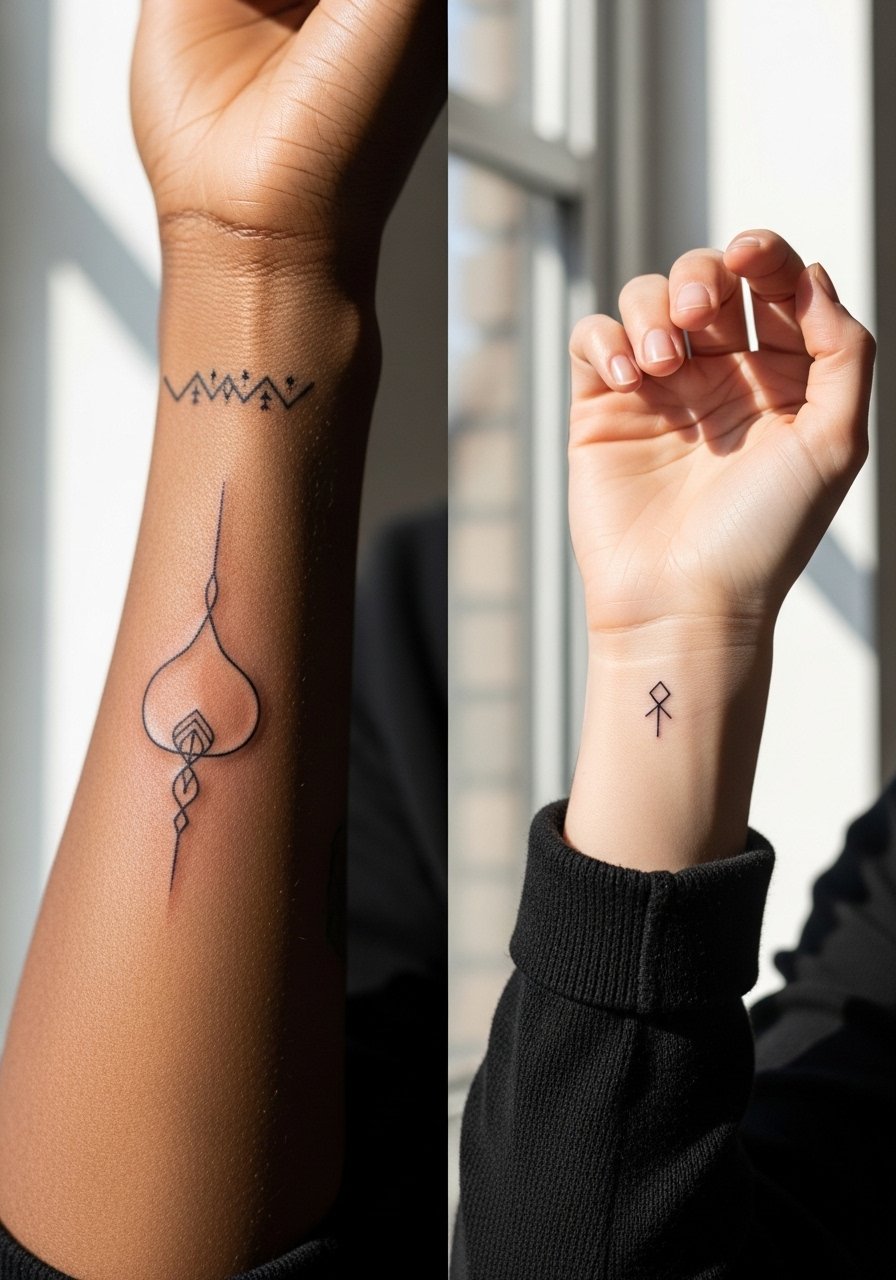
A two-piece approach where the inner arm holds a primary motif and the opposite wrist carries a related token can read intentional without full sleeves. Plan the scale relationship in a consult so the wrist piece does not compete with the inner arm element. Expect separate sessions and staggered healing. A common mistake is matching line weight exactly between two different canvas sizes instead of adjusting for scale. For outfit harmony wear a thin leather wristband on the opposite arm or a wide leather wristband to balance visual weight.
Frequently Asked Questions
Q: Will fine line script on the inner bicep blur faster than a bolder version?
A: From what I've seen, thin single-needle script softens sooner especially on warmer skin or areas that flex. The trade-off is subtlety up front versus touch-ups later. Ask your artist to increase the thinnest strokes slightly and to show you healed references on similar skin tones.
Q: Is Saniderm better than dry healing for inner arm pieces with a lot of movement?
A: Artists and clients split into two camps here. One camp likes protective film because it reduces scabbing and keeps friction down in high-movement zones. The other camp prefers dry healing to let scabs fall naturally and avoid trapping moisture. Decide with your artist based on your skin type and activity level.
Q: How should I dress for a full inner arm tattoo session that will span several hours?
A: Comfort and access matter most. Pick button-front shirts you can open or a loose tank so the artist can work without fabric dragging. For longer sessions bring breathable layers and a towel. A loose button up shirt makes it easy to adjust.
Q: How often do inner forearm dotwork mandalas need a touch-up compared with simpler linework?
A: Dotwork mandalas usually need touch-ups less often if the dots were spaced correctly and the artist used proper stippling technique. Dense dot fields can soften and sometimes need refreshes at year two to three. Simpler linework can sometimes need touch-ups sooner if it was done very fine.
Q: What should dark skin tones consider when choosing fine line inner arm designs?
A: On medium to dark skin I recommend slightly bolder lines or blackwork conversions for fine details so contrast reads in photos and from a distance. Ask for healed photos on similar skin tones during consults and request a mockup to assess visibility before booking.
