
Fine line trends dominate feeds, but what actually holds up on the lower back is about placement, line weight, and how you move. I have seen matching waist pieces at conventions and in five shops across Brooklyn, and the recurring issues are the same: waistbands rubbing fresh ink, designs that disappear as the hips change, and the pain of trying to check a healing tattoo alone. Below are practical matching lower back tattoo designs and the wardrobe and session tips that make them last.
1. Waist-Hugging Neotribal Mirror
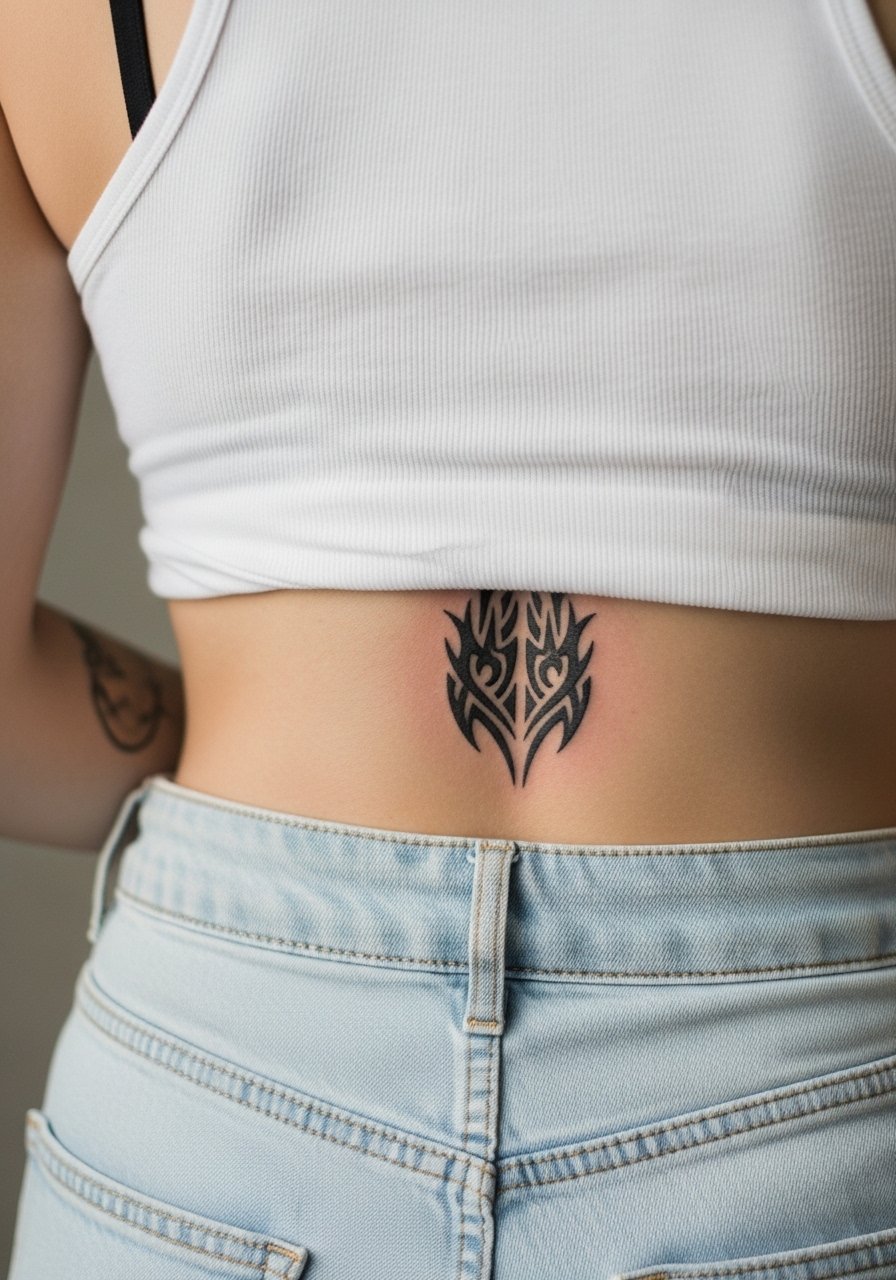
I open with this one because neotribal is what I see most when people want a waist-flattering matching set. Fair warning, thin tapered ends look delicate at first and then vanish if the line weight is too fine. Tell your artist you want tapered curves with a slightly heavier outside outline so the arcs hug the lumbar dip and survive stretch. Session time is usually one short appointment and pain is low for the prone lower back position. A common mistake is asking for tiny filigree across the hips, which ages into blur. For showing it off, pair with a high cut crop top and low-rise jeans for symmetry that reads whether you are sitting or standing.
2. Mirrored Cyber Sigil Outlines
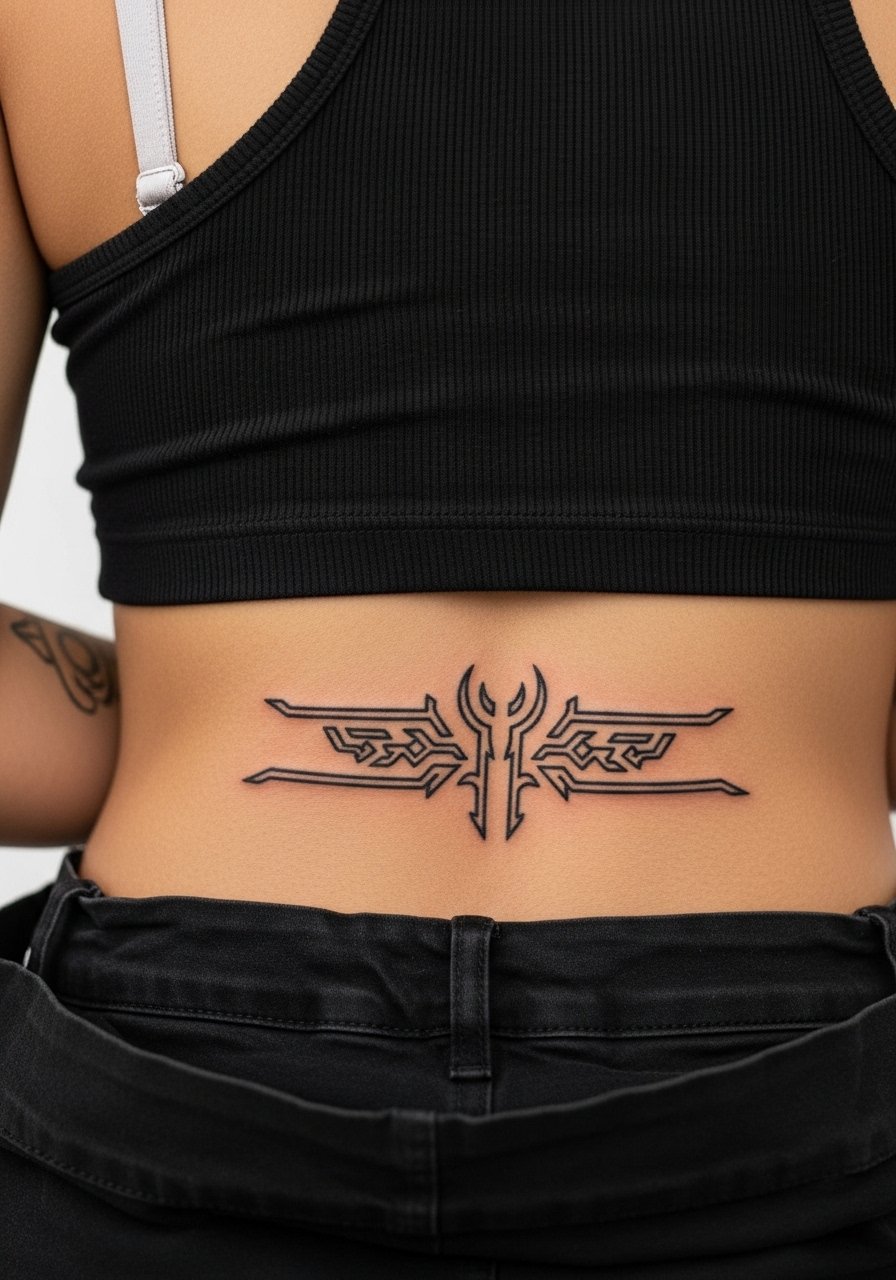
Most people pick cyber sigils when they want futuristic symmetry without busy fills. In consultation, bring mirrored references and ask the artist to show the negative space plan so both sides reflect perfectly across the spine. Expect a single session with moderate discomfort as the needle threads wide horizontals. The real mistake is overcomplicating the center axis, which makes matching awkward if a partner's piece is slightly off. These read well under metallic accessories, and for session comfort wear disposable shorts or loose boxer-style bottoms so the waistband does not press on fresh ink.
3. Organic Butterfly Duo Over the Dimples
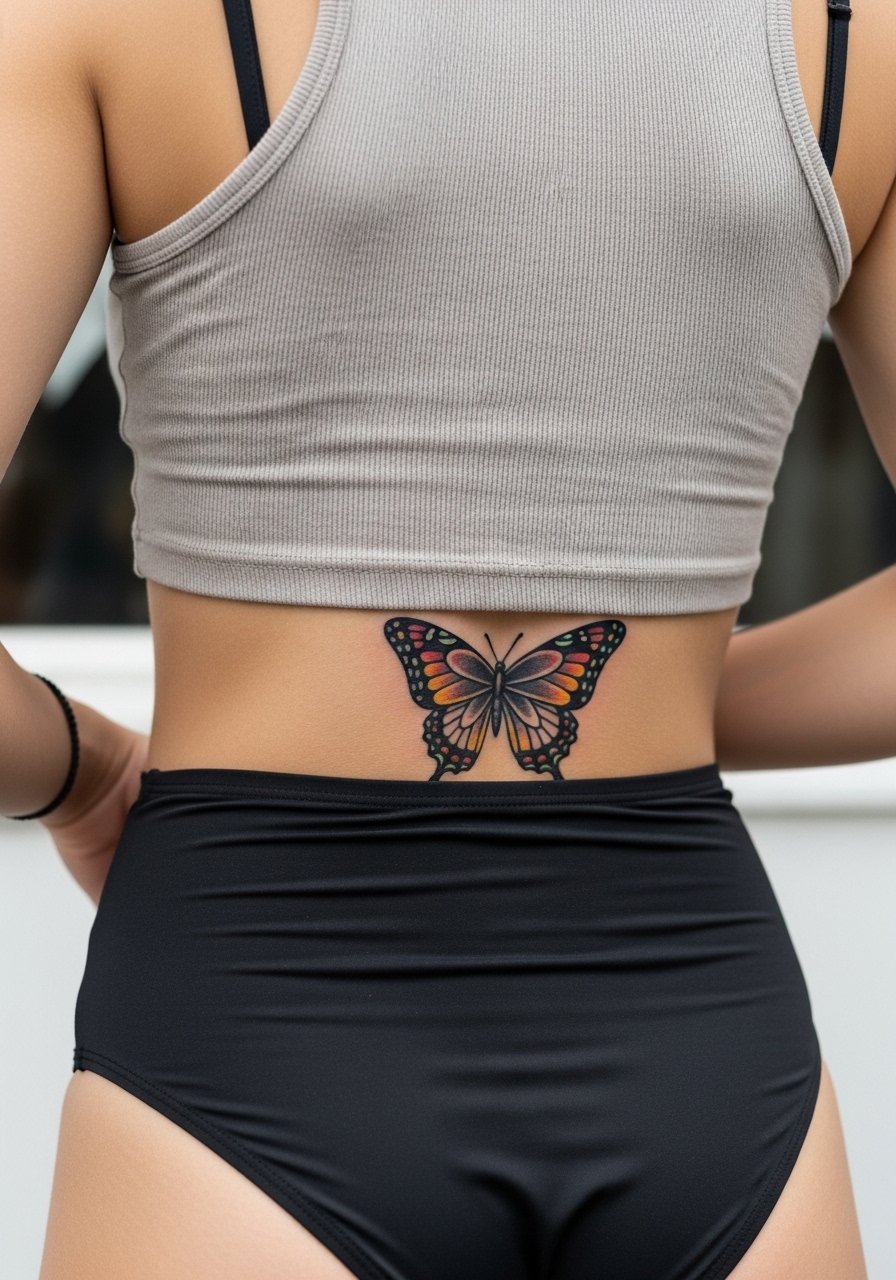
If you want a pair that feels like jewelry for two people, mirror butterfly wings so each person carries one flank. I have seen the organic curve option age better than tiny, super-detailed butterflies because the wings are scaled to the dimple area. Tell the artist to keep color accents limited and the black base slightly bolder than a typical fine-line butterfly so photos keep contrast over time. Session usually finishes in one appointment and pain stays moderate. For outfits, consider flared yoga pants or side-slit skirts that reveal the wing flow without cutting the visual curve.
4. Heart with Neotribal Branching Wings
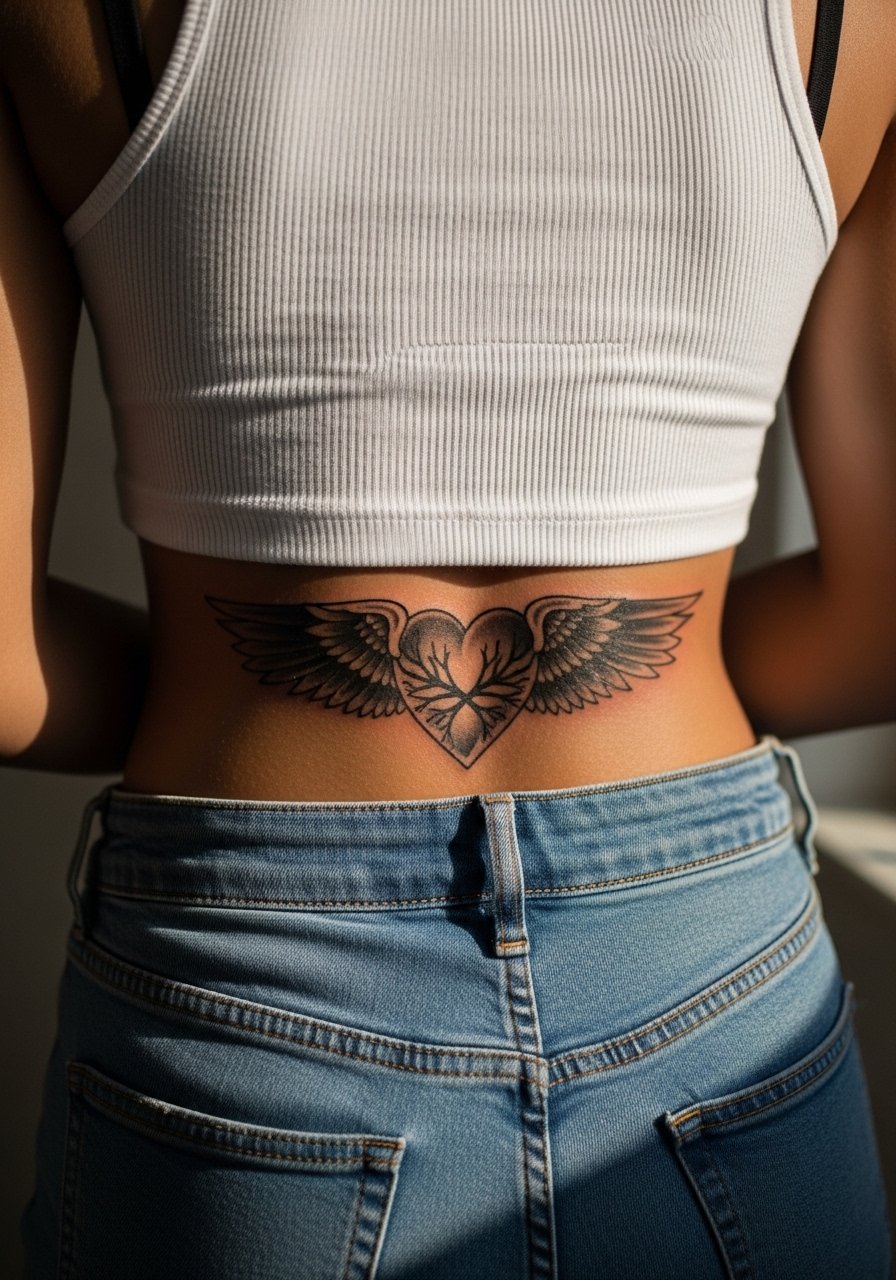
This hybrid solves a scale problem for couples who want a small sentimental motif that still fills the lower back. Start the consultation by specifying how wide you want the wing spread so the heart does not feel lost between hips. The common aging error is keeping all shading too subtle, which flattens against movement. Expect one to two sessions and mild discomfort in the lumbar curve. For evenings out pair the piece with back dip high waist shorts or bikini-style harnesses to frame the dimple area.
5. Ornamental Symmetry Across the Waist
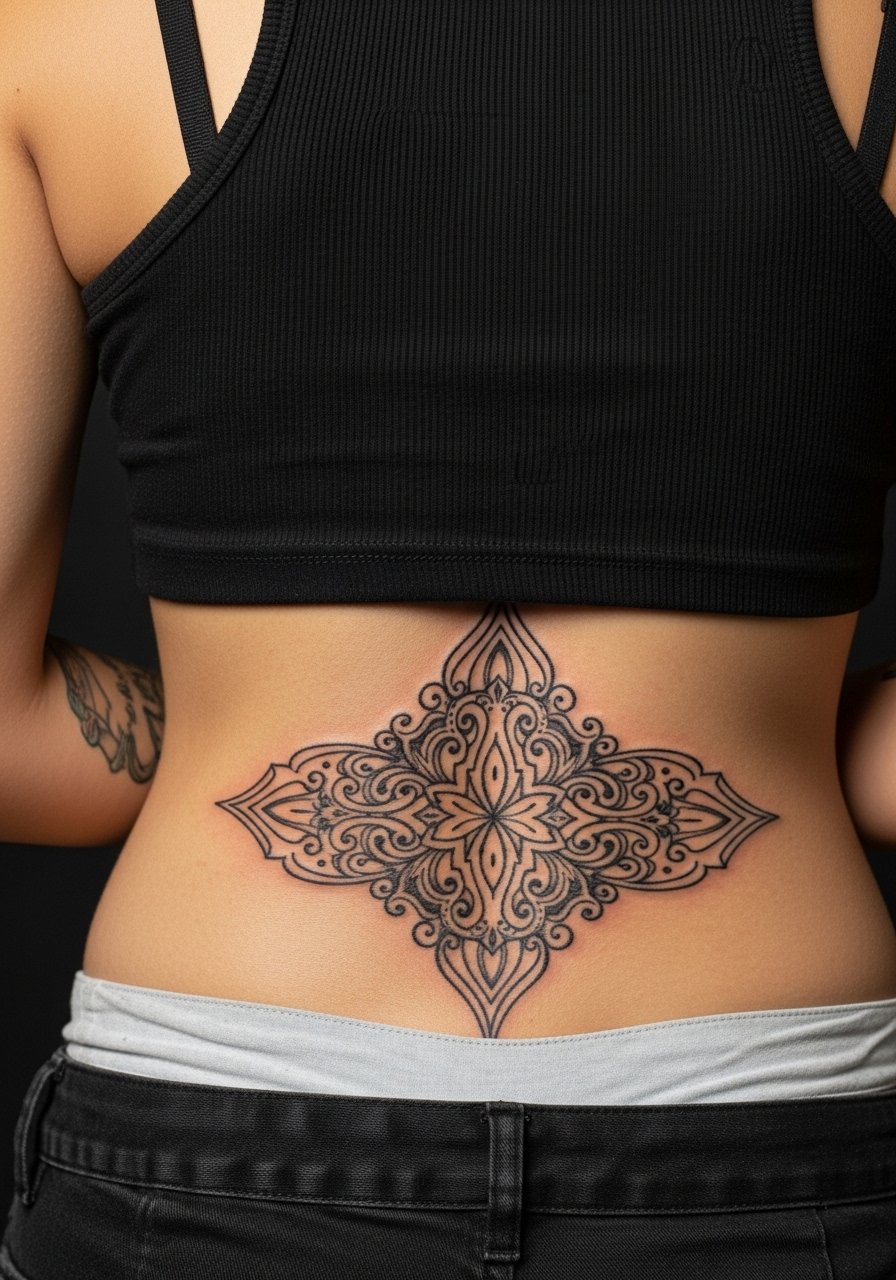
This is where classic decorative repetition gets a tasteful refresh for matching pairs. My observation is that ornamental fills need breathing room to avoid density turning into a single dark patch after a few years. Ask for crisp blackwork outlines with intentional negative space so the pattern keeps clarity. Sessions usually span two sittings for larger widths and pain is distributed across the prone posture. A frequent mistake is trying to cram tiny filigree across the entire panel. Wear a strappy bralette to show off symmetry without competing prints.
6. Bold Tribal Curves for Long-Term Readability
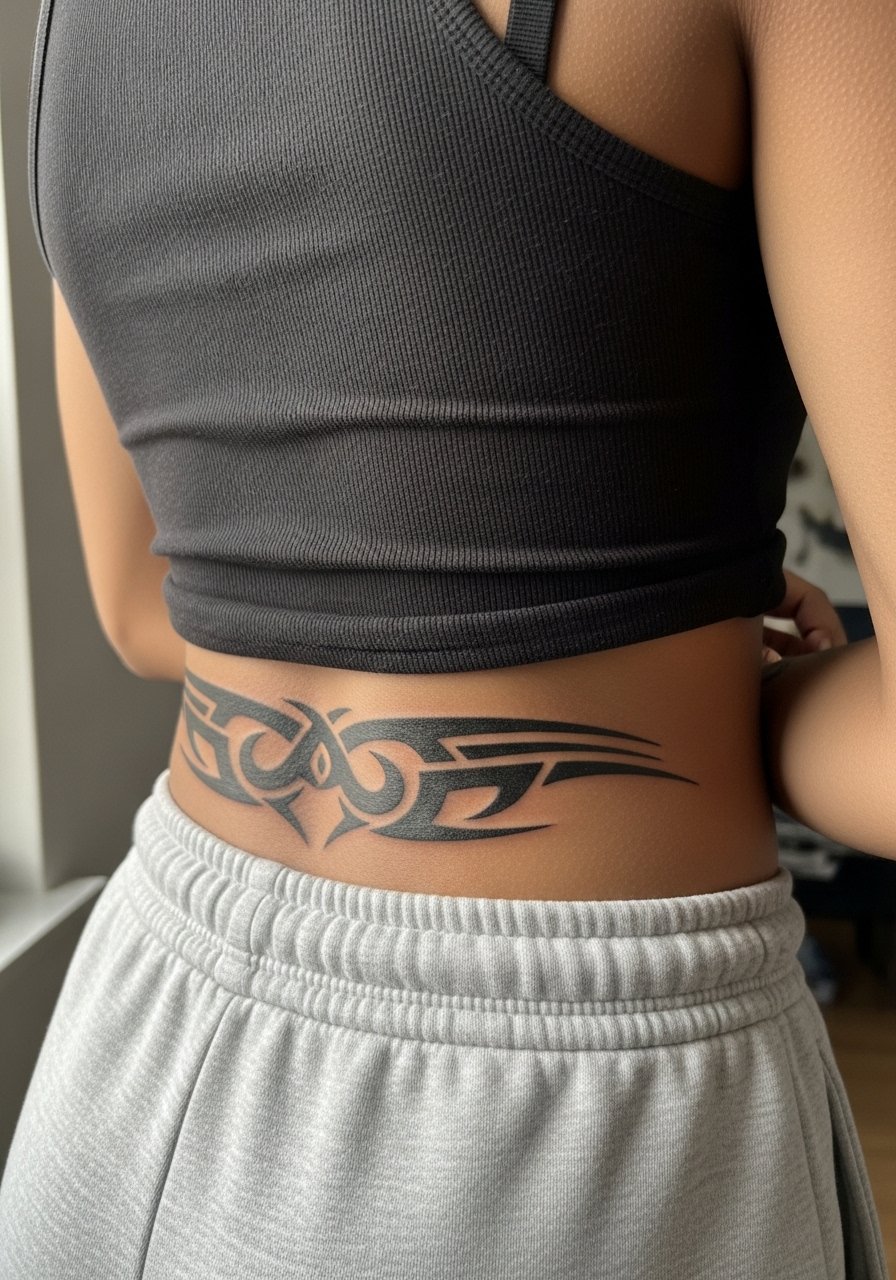
Fair warning, thick tribal curves are often chosen for longevity. Artists split on adhesive coverings during healing in high-friction spots. One camp favors protective film to shield the area from waistbands, the other argues that dry healing reduces trapped sweat and lowers infection risk. For a longer-lasting result, request bold outlines and tapered ends that follow the waist curve so the pattern breathes as hips change. Sessions can run longer and pain is low to moderate while prone. For the appointment bring loose drawstring sweatpants so the waistband does not rub fresh ink.
Studio Day Picks
The lower back designs above can rub against waistbands and need easy session access, so a few items smooth the appointment and the first week.
-
Stencil transfer paper kit. Lets you test exactly where the mirrored curves fall on both partners before the needle starts, which is crucial for matching symmetry.
-
Topical numbing cream. Applied as directed before the session eases the discomfort of longer lower back sits without changing linework.
-
Thin protective film roll. Useful if you prefer covering the waist area for the first 24 to 48 hours to prevent clothing friction.
-
Fragrance free gentle body wash. Cleanses the healing zone without irritating delicate linework while showers are unavoidable.
-
Aquaphor healing ointment. A thin protective layer for the first few days helps manage dryness in tight blackwork areas without clogging.
7. Abstract Cyber-Butterfly Fusion
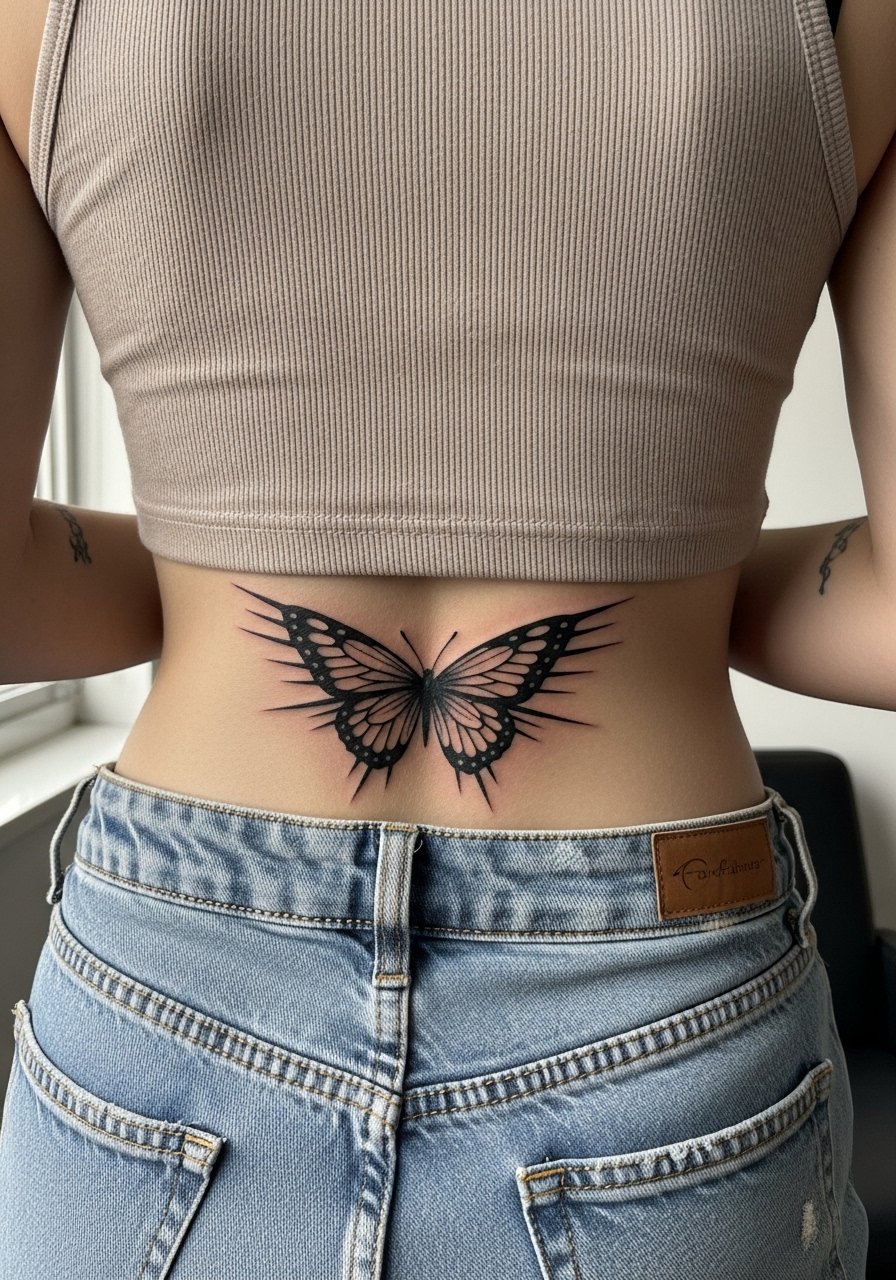
This hybrid is ideal when both partners want something unique that still reads as a pair. When you sit with the artist, show a few cyber and butterfly references and ask them to blend spikes into natural wing curves so the design stays original without copying. The session often fits into one appointment and pain is moderate. A common misstep is over-detailing the center, which makes mirror-matching error-prone. For a night out try a sheer mesh bodysuit or chain belts that let a subtle glow of the design peek through.
8. Decorative Sigil Chains that Link
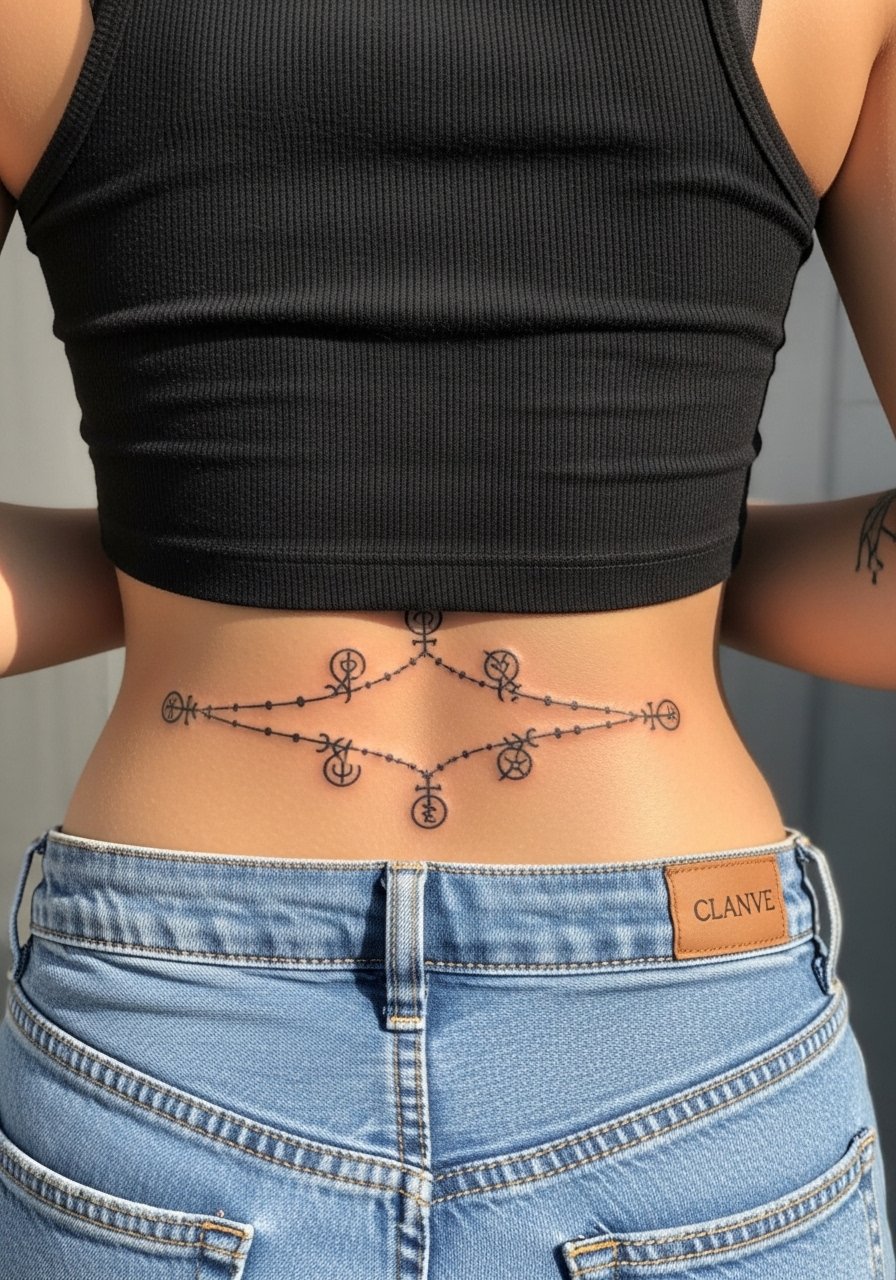
Sigil chains work well as matching motifs because each person can take one half or mirror the entire band. I advise asking for clear connection points over the spine so two separate pieces read like one continuous chain when you stand next to each other. These take one session and have low pain in the lower back region. A mistake is making chain links too tight. For show-off looks use a backless halter top and a subtle waist chain.
9. Minimalist Waist Sigils for Subtle Matches
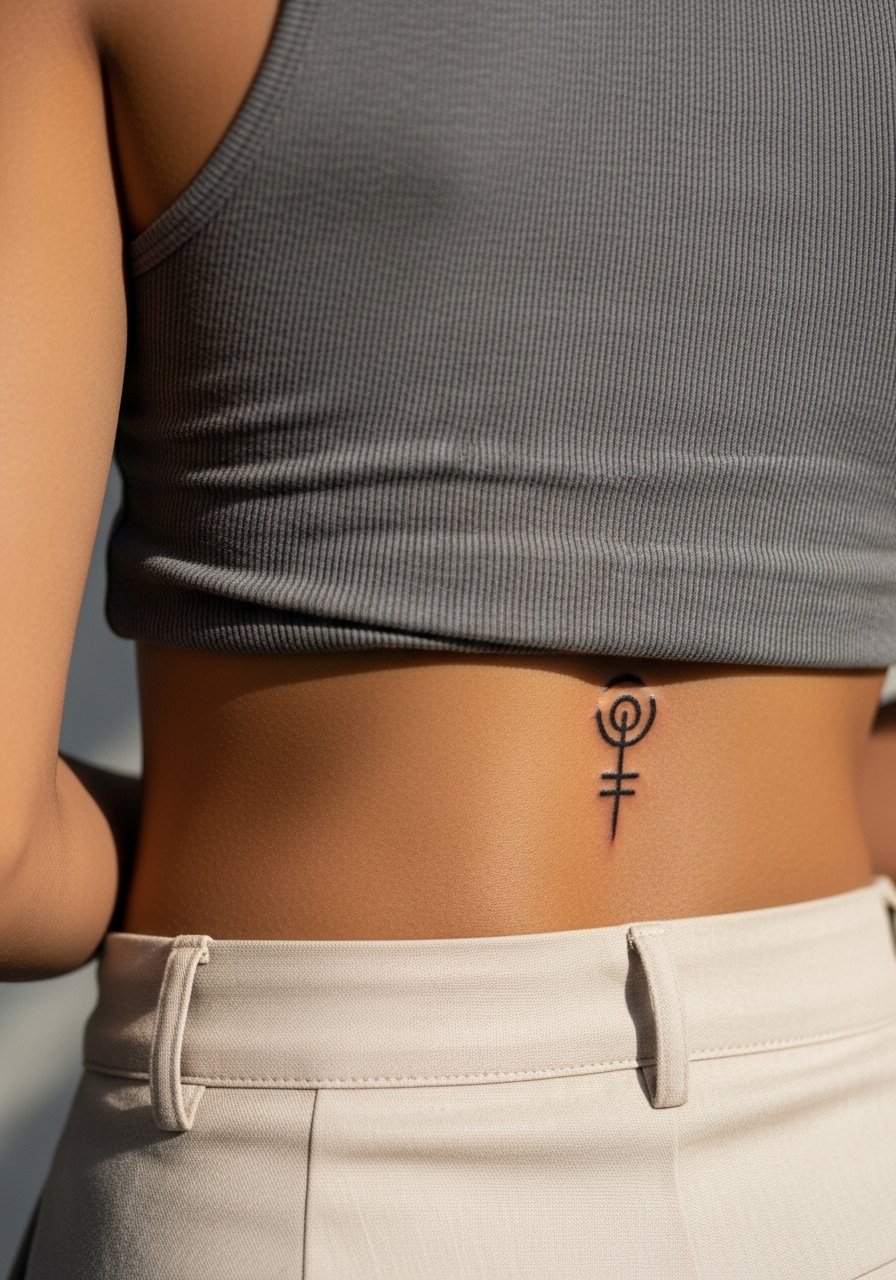
This is for partners who want matching lower back designs that read only up close. Artists disagree about fine line durability. One group says fine line fades fast on the lower back and needs touch-ups around year two, the other group says careful needle depth and spacing keep lines crisp. If you choose this, tell the artist you prefer a slightly heavier single-needle footprint so the sigil survives hip movement. Expect a short session and mild pain. For evenings pick an open back dress that frames the central sigil without distraction.
10. Symmetrical Heart-Sword Outline Along the Spine
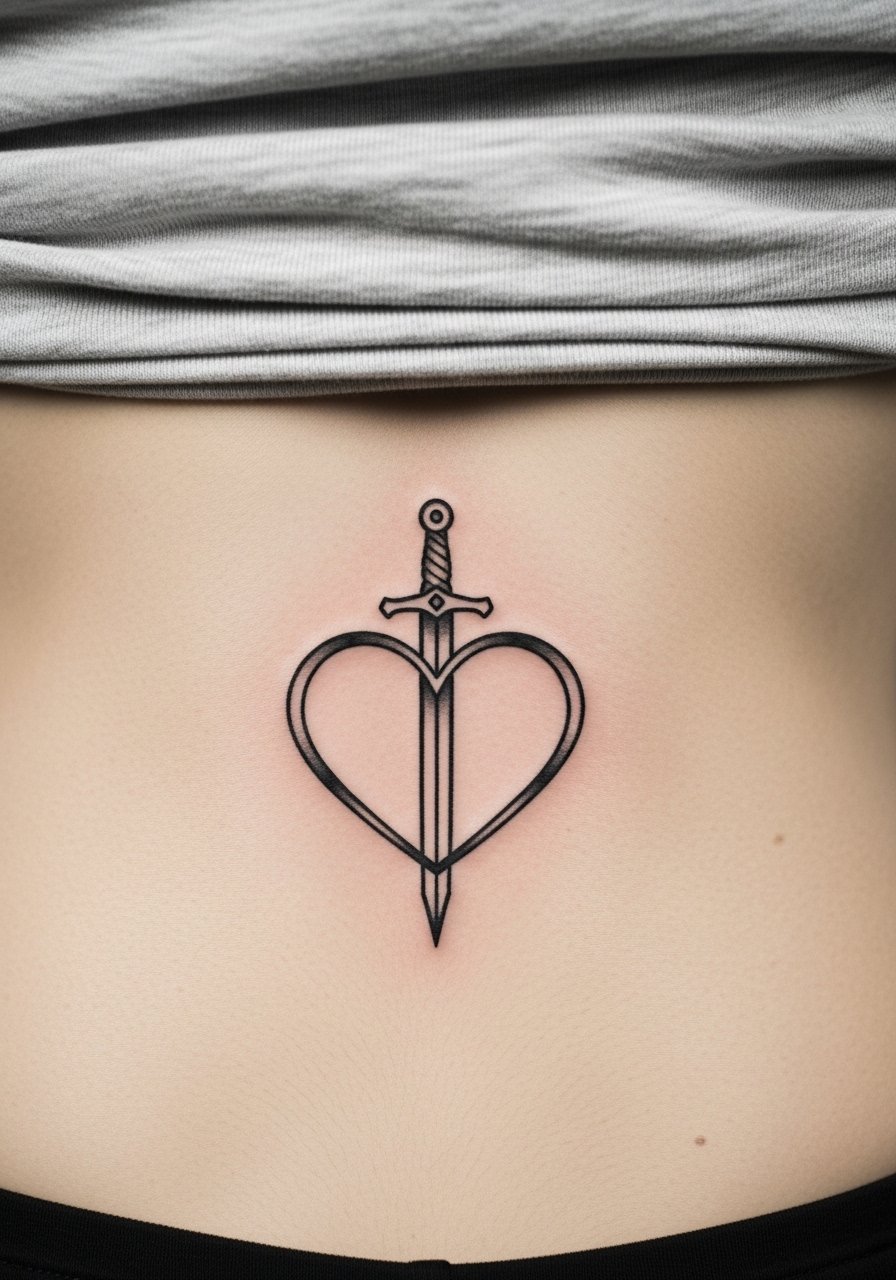
The spine-aligned heart-sword balances sentiment with edge for couples who want a centerline axis. In consultation, confirm exact vertical placement because a few centimeters off will throw mirror matching into misalignment. Session time is usually one appointment and sensations are concentrated but not severe when prone. A common mistake is making the sword too tall for the lumbar curve, which compresses proportions as the body moves. Pair this with open-back styles or a racerback tank for symmetry that reads when you walk away.
11. Nas Dynasty Style Ornamental Panel
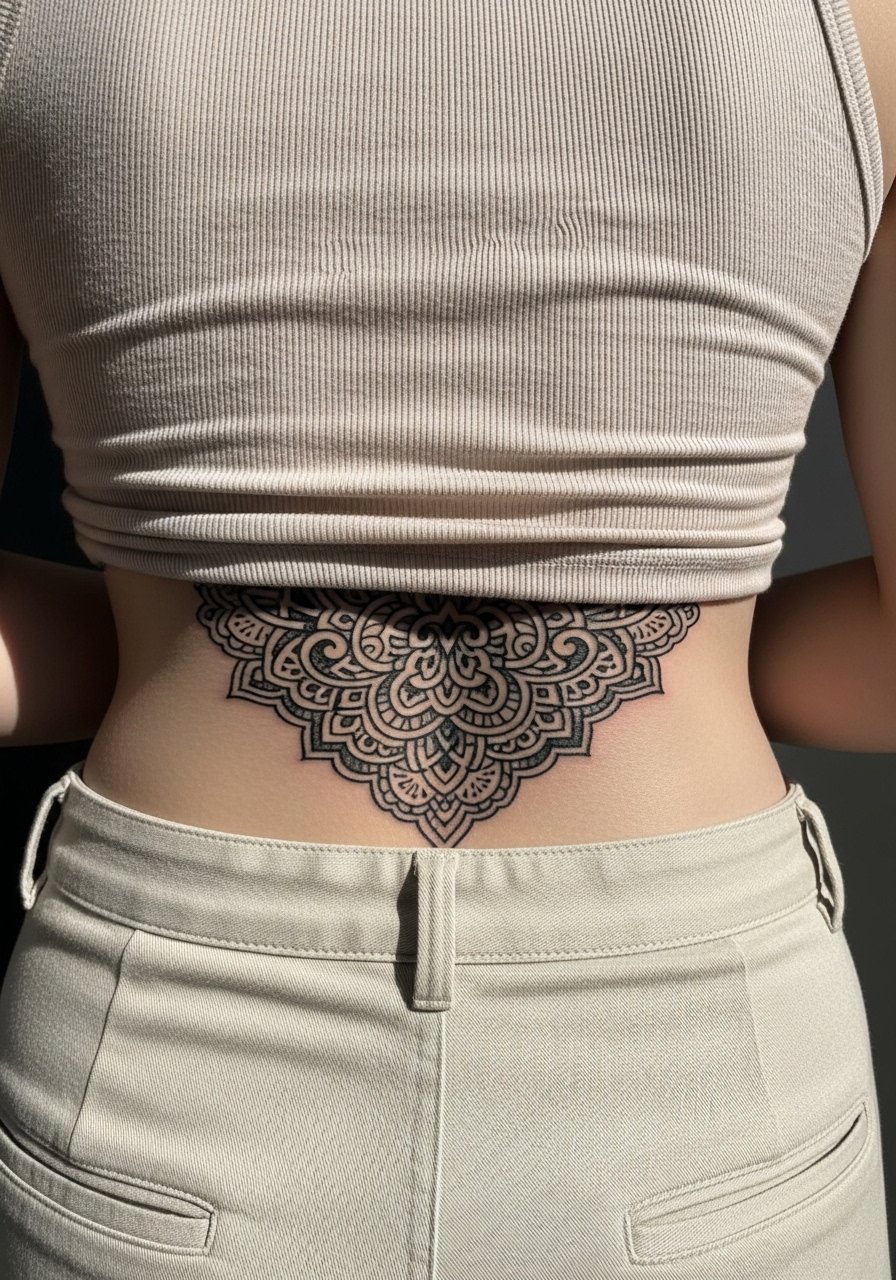
When you want maximum impact for matching, a full panel in dense blackwork can be dramatic for two people who plan to stand side by side. Be frank in consultation about long sessions and breath breaks. This style usually needs multiple sittings and higher tolerance for pain in longer sessions. The frequent error is asking for too much density without negative space, which can age into a heavy block. For nights out consider a backless jumpsuit so the entire panel is visible without competing patterns.
12. Sumi-e Flowing Curves That Mimic the Waist
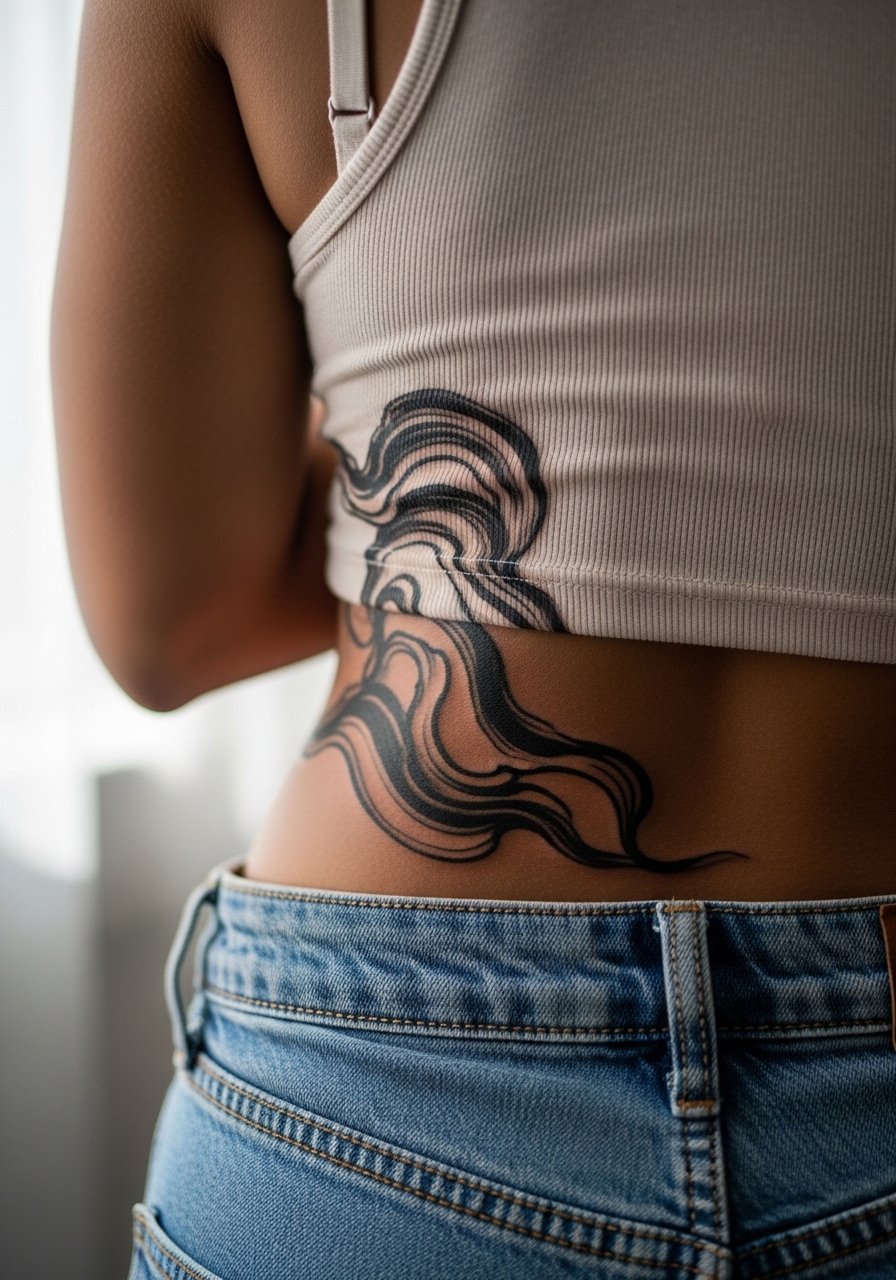
Sumi-e style uses ink wash effects to echo the spine dip, which helps paired designs feel organic rather than forced. My observation is to keep washes broad and uncomplicated so they do not fade into patchiness. Tell your artist you want wash contrast planned with negative space so two matching pieces still read together when photographed. Sessions take two sittings for heavier washes and moderate pain is expected during longer work. A typical mistake is over-detailing the wash edges. For showing off choose neutral tones in clothing so the subtle ink washes stay the visual focus.
13. Mirrored Halves That Connect in the Middle
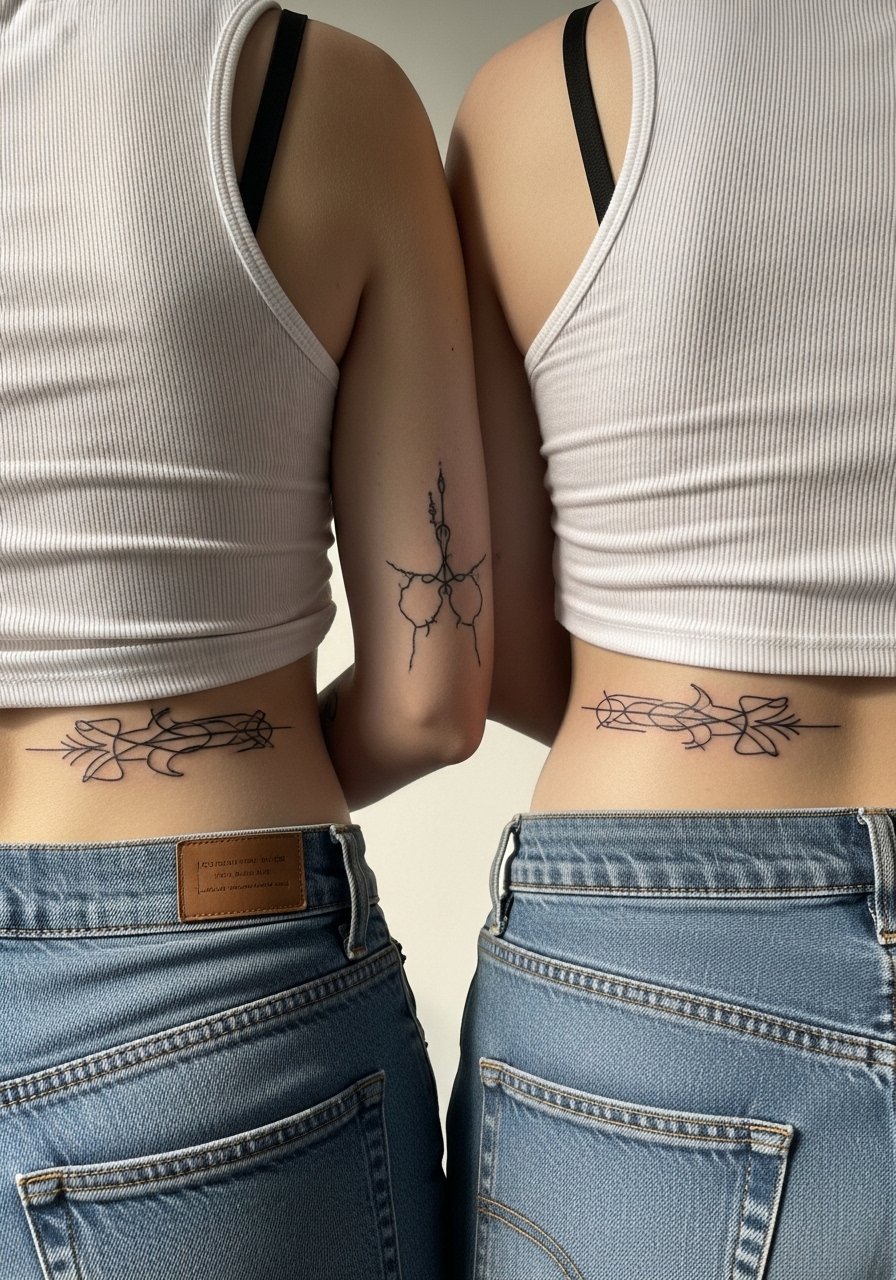
This approach is literal matching for couples who want a single composition split across two bodies. When you plan it, use precise stencils and take photos of your stances so the artist can map where the halves link when you stand side by side. Sessions are usually short per person but travel coordination matters if you and your partner book different shops. The usual mistake is trusting memory for alignment instead of measuring. For casual days wear low rise baggy jeans so the joining point sits exactly where you want it.
14. Split Panel That Connects When Seated Together
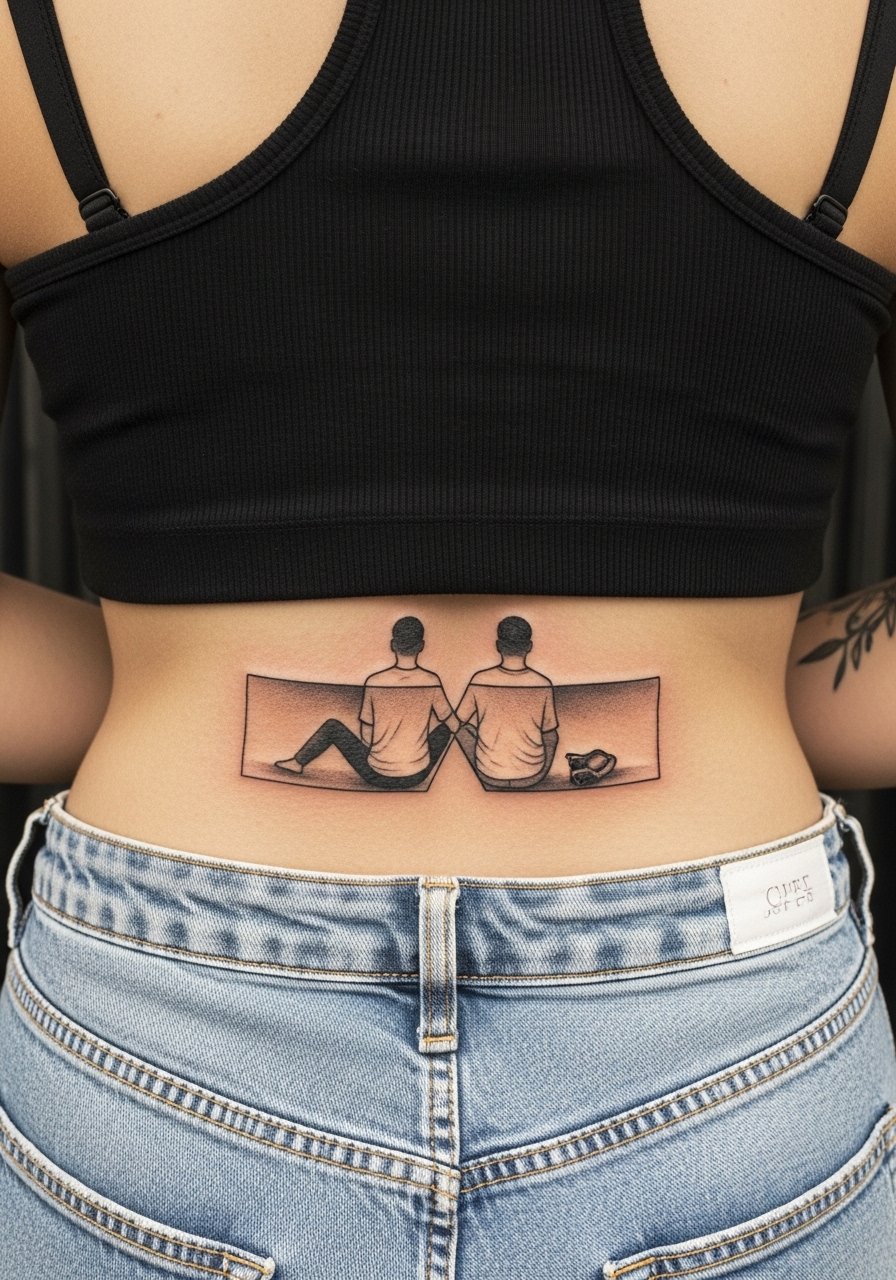
This design idea leans into interaction, so planning posture and common seats matters. In consultation discuss how you normally sit next to your partner so the artist sketches for the most common alignment. Expect one session per person and mild to moderate discomfort. The frequent error is not accounting for clothing lines at the waist, which can hide the connection. For finishing looks pick fabrics that sit below the dimple line so the panel remains visible when you sit.
15. Negative-Space Crescent Pairs
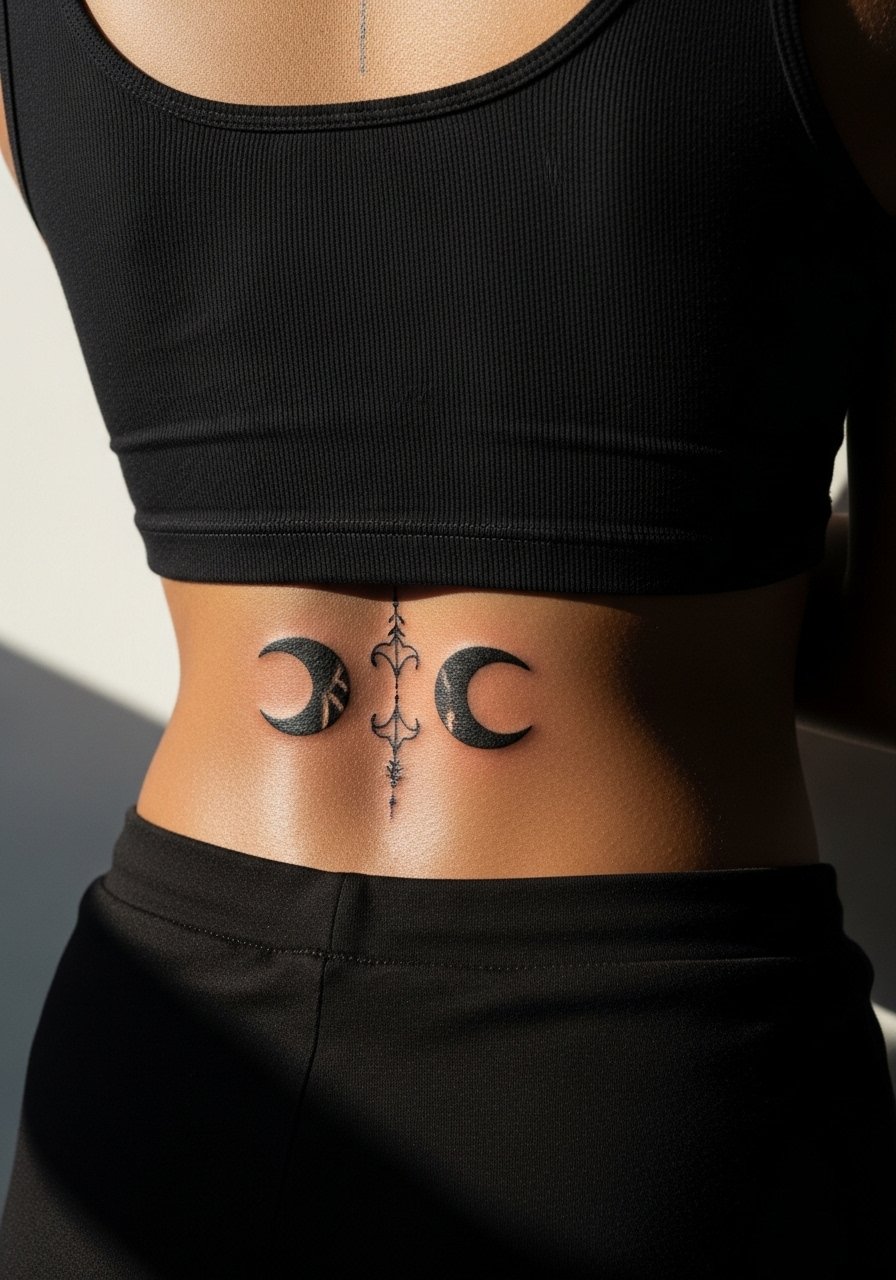
Negative-space motifs keep a design readable on darker skin tones and in photos. Tell your artist to plan the black surrounds so the crescents pop instead of relying on thin lines that may blur. These are quick sessions and pain is low relative to denser fills. A common mistake is shrinking the crescents too small, which makes the negative space vanish. For styling, a cutout crop top can frame the moons without competing with the back curve.
16. Dual-Color Mirrored Florals
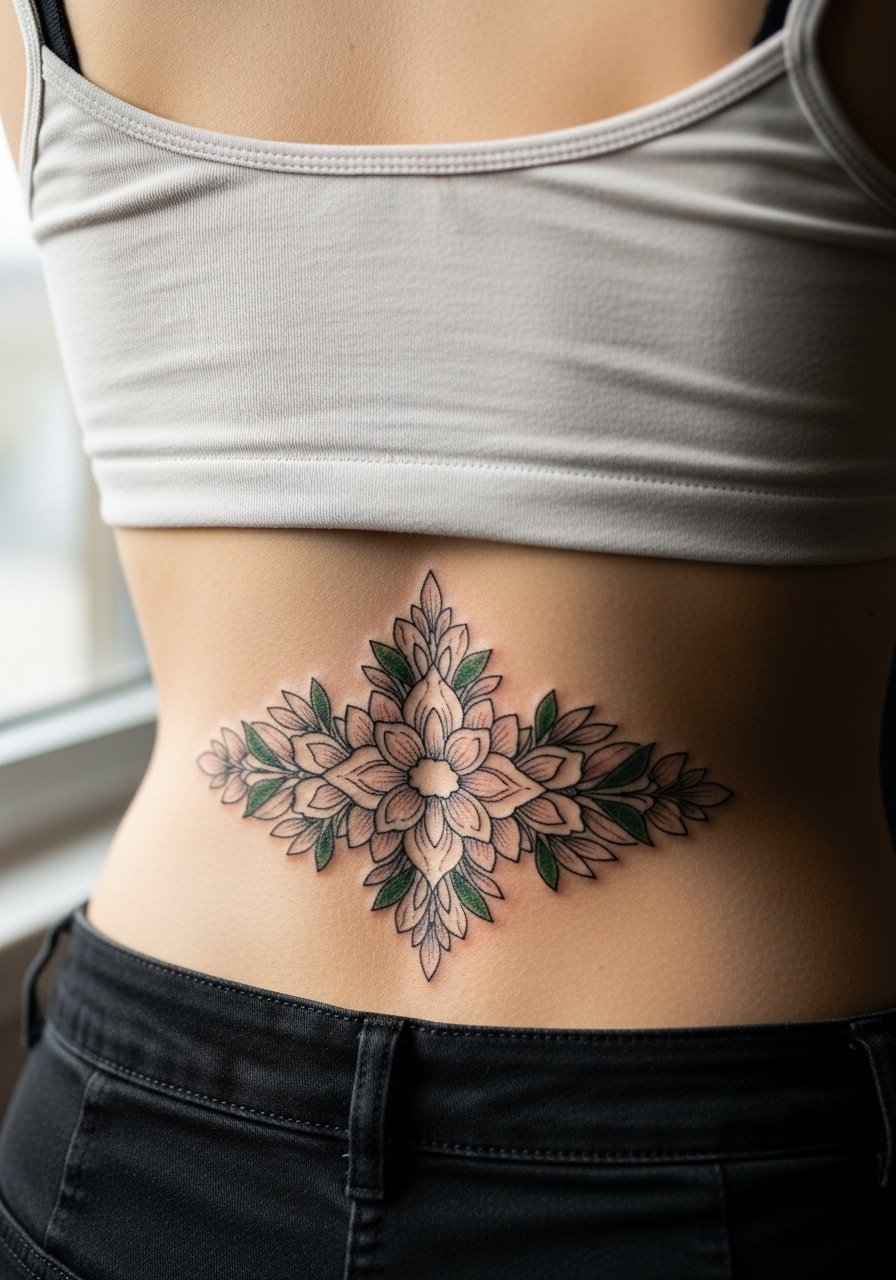
If both partners want color without losing readability, use a restrained palette and strong black outlines. In consultation pick two tones that contrast with both skin tones so photos of each person retain vibrancy. Sessions can fit into one appointment with touch-up discussion, and pain remains moderate. The mistake is over-saturating many hues, which fades unevenly. For show-off wear minimal prints so the floral accents remain the eye-catcher.
17. Spine-Aligned Twin Sigils for Exact Matching
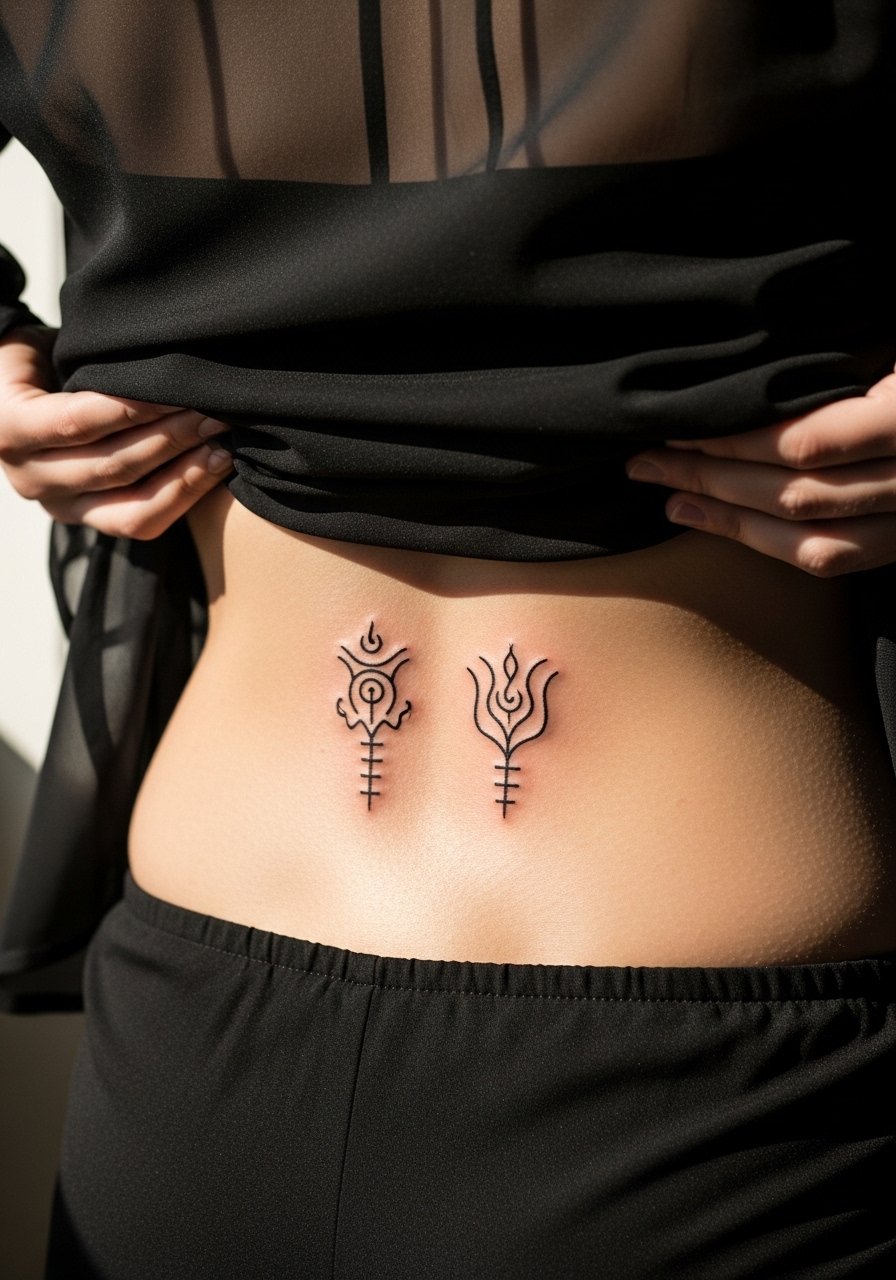
This is a precision option for partners focused on axis-perfect matching. When you book, ask the artist to mark the spine dip and photograph it from multiple angles so both pieces align when compared. The session is short and pain is mild in the lower back. The common mistake is assuming a stencil placed while standing will match when sitting. For evening looks a sheer blouse or open-back top emphasizes the centerline without covering the sigils.
Frequently Asked Questions
Q: Will a lower back tattoo stretch if I gain weight around the hips?
A: It can. Designs with lots of dense fills are more likely to blur when the skin stretches. Opt for flowing neotribal curves or planned negative space so the composition adapts, and ask your artist to show a scaled mockup for a range of sizes during consultation.
Q: Should couples get their matching lower back tattoos on the same day at the same shop?
A: Doing both sessions together ensures stencils align and color matches, but it is not always practical. If schedules differ, use the same stencil measurements, share clear photos, and book the second session with the original artist if you can.
Q: Does covering fresh lower back ink with a film help or hurt healing?
A: Artists are split. One side recommends protective film to stop waistbands rubbing fresh ink, the other warns that film can trap sweat in this area and increase infection risk. Talk to your artist about your sweat profile and summer plans before choosing a method.
Q: How often will fine-line lower back sigils need touch-ups?
A: Fine-line sigils can need touch-ups sooner than bold blackwork, often in a couple of years depending on sun exposure and friction. If longevity matters pick slightly heavier single-needle work or plan for a light touch-up around year two or three.
Q: What should I wear to the appointment for a lower back session?
A: For easy access wear loose or adjustable garments that expose only the lower back, like a tank top with high-waisted pants you can slide down slightly. If you plan to show the healed piece, a simple open back dress or low-rise jeans are reliable options.
Q: Are there designs I should avoid if I plan to have children later?
A: Tiny, highly detailed lower back work that sits over the dimple area can change with pregnancy and postpartum body shifts. Choose designs with bold outlines and room for negative space if you want them to age through body changes.
