
Fine line micro goth looks dominate feeds, but the reality is different once ink heals. Fine detail on fingers and wrists often softens into a smudge, guest-spot bookings vanish when artists cancel, and blackwork on darker skin can lose contrast if you skip bold saturation. This list leans practical, with micro goth tattoo ideas that read dark today and hold up for years, starting with a forearm staple.
1. Micro Crow Silhouette on Forearm
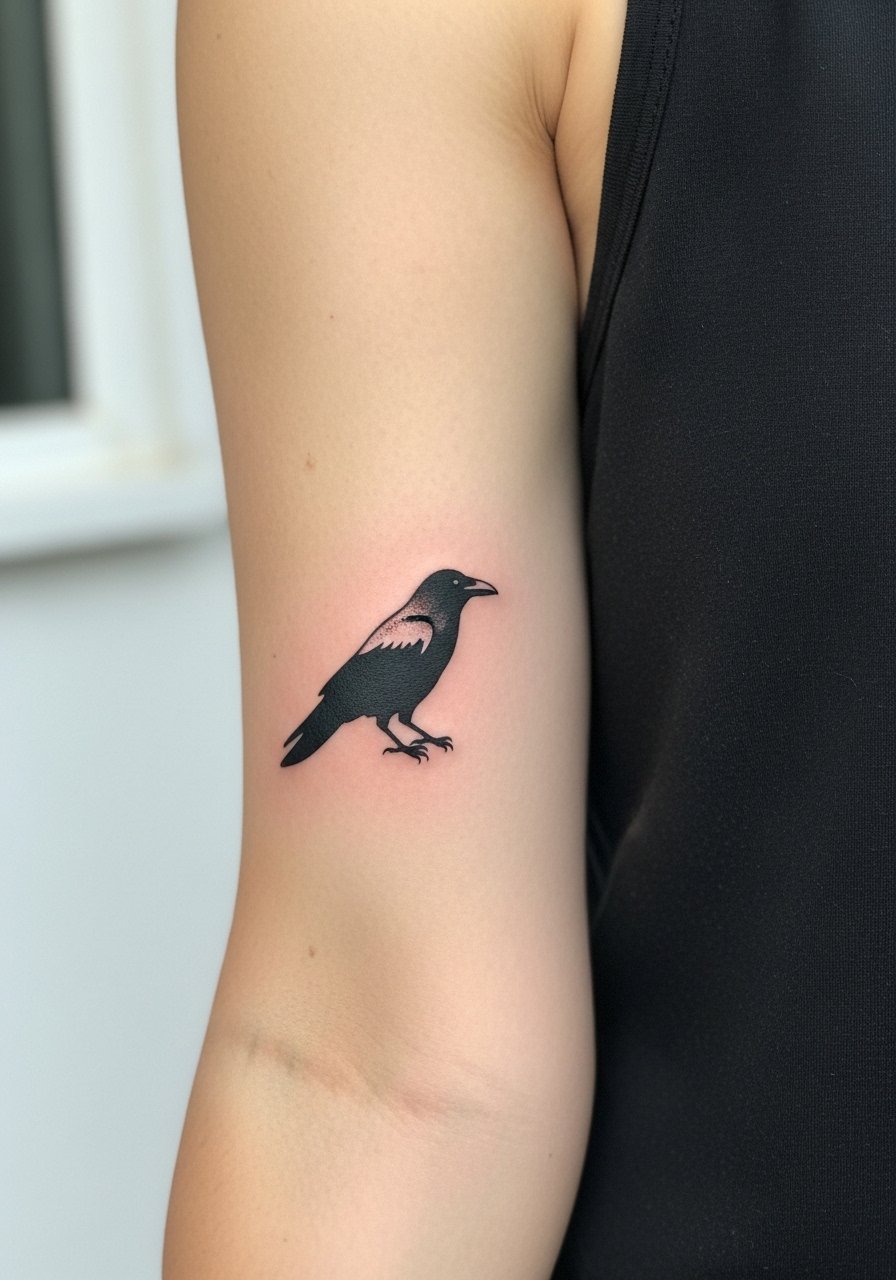
I see crow silhouettes hold up because they rely on bold filled shapes rather than fragile hairlines. Ask your artist for a slightly thicker outline and tight saturation so the silhouette keeps contrast as it settles. Expect the session to be quick, around 30 to 60 minutes, and mild to moderate pain on the forearm. The common mistake is asking for feather-level detail at 1 inch, which blurs after a year. For showing it off, pair the piece with rolled black cotton tees or fishnet arm sleeves, both frame the forearm without competing with the silhouette.
2. Dark Moth Outline on Lower Arm
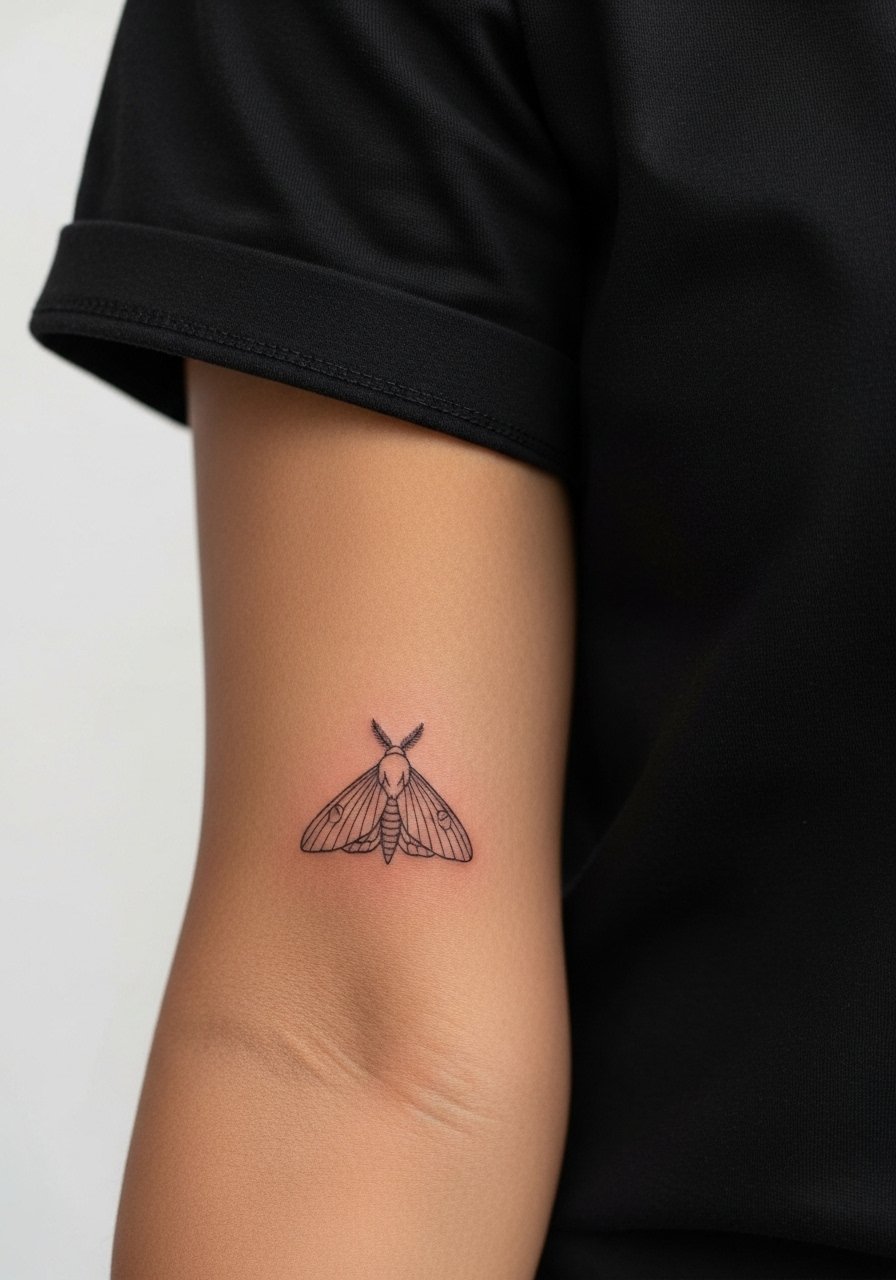
Fair warning: the lower arm sees more scrapes and sun exposure, so line weight matters. Pick a moth design that uses slightly heavier linework and selective internal streaks rather than ultra-fine veins. In consultation, ask for spacing between wing lines and stippling for texture. The session usually takes under an hour and feels like a steady buzz. A mistake is requesting extremely thin realism on the lower arm. That version fades into a gray smear by year two. For show-off styling, try a silver studded cuff on the opposite wrist to balance the insect motif.
3. Crescent Moon with Drips on Inner Wrist
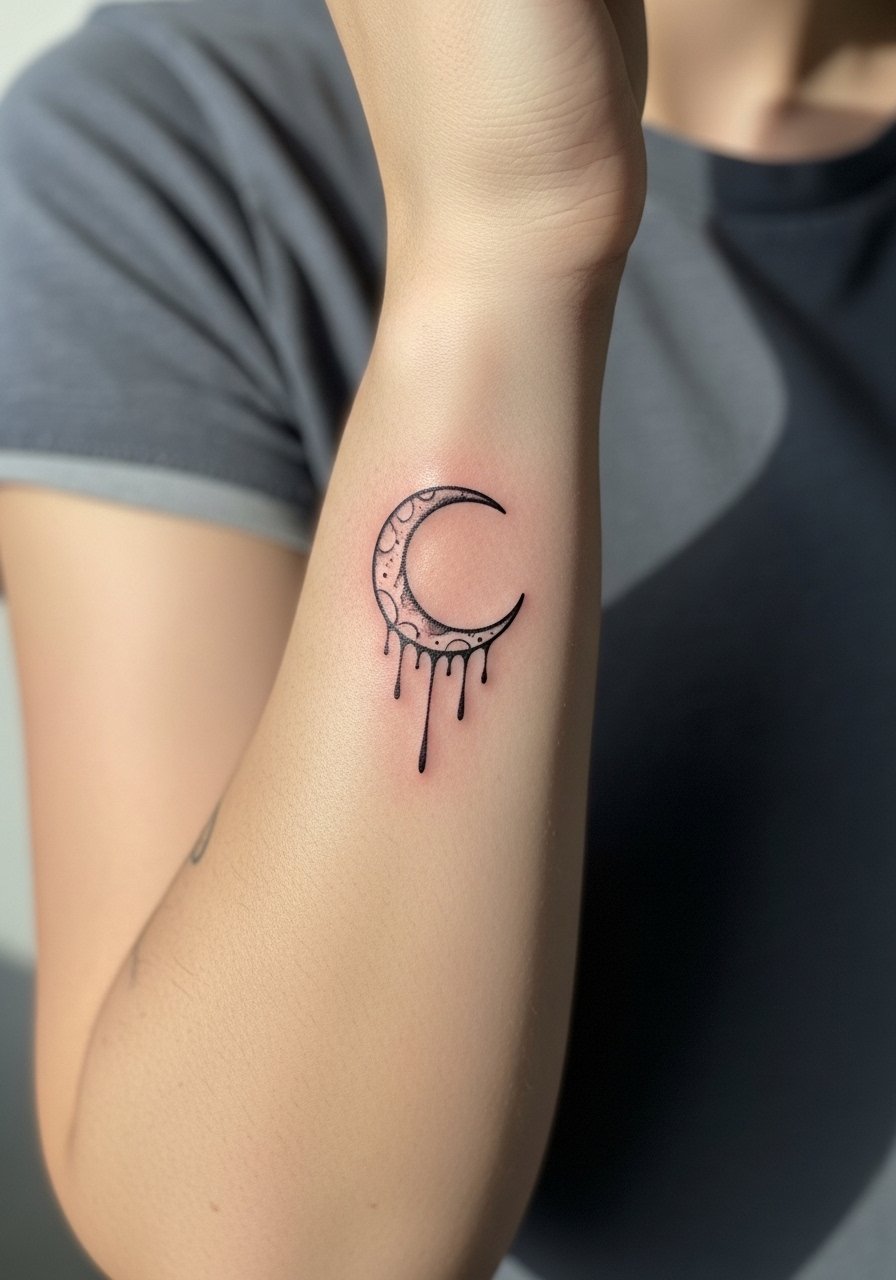
Most people want an inner wrist moon for visibility, but wrists hate ultra-fine gaps. I recommend negative-space crescent with bold drip accents and open areas so the drip reads even as lines soften. Tell your artist you want the drips heavier at the tip and a subtle stipple fill behind them. Expect a 30 to 45 minute session and sensitive scratching during healing. The common regret is asking for micro script around it; stacked tiny text competes and blurs. Style it with a thin silver chain bracelet opposite the tattoo to keep attention on the moon.
4. Tiny Spiderweb on Finger or Neck

Mistake warning: fingers are a brutal place for fine line. If you want a spiderweb there, choose a slightly bolder outline and accept yearly touch-ups. For neck placement, get the web small and placed where clothing won't constantly rub it. The session for fingers is very short but healing is fussy because of washing and friction. Blowout risk increases on fleshy or high-movement fingers, so pick a clean, simple layout not a dense web. If you plan to wear rings and cropped sleeves, the finger web shows as a subtle accent.
5. Skull and Rose Stipple on Wrist or Forearm
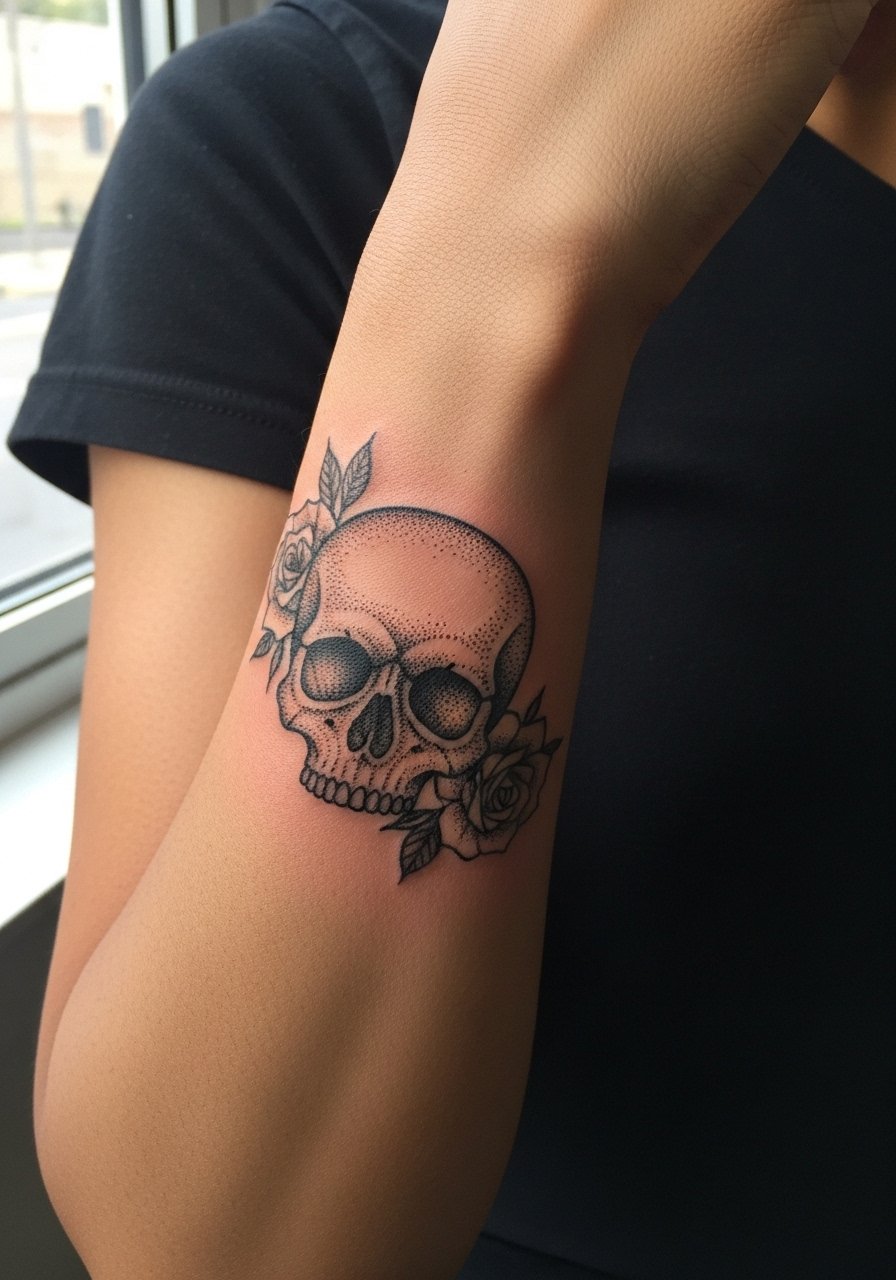
Stipple shading adds depth without heavy realism, which helps micro skulls keep shape on medium to dark skin. In consultation, say you want dot work for shadowing rather than soft gray washes. That approach preserves contrast over time. Sessions are commonly 45 to 90 minutes depending on stipple density and feel like precise tapping. A common error is asking for dense gray fills at small scale. Those lose definition faster than dot work. For a night-out look, layer a couple of thin chain bracelets opposite the piece so the skull reads like an intentional focal point.
6. Bat Wing Micro Outline at Ankle or Collarbone
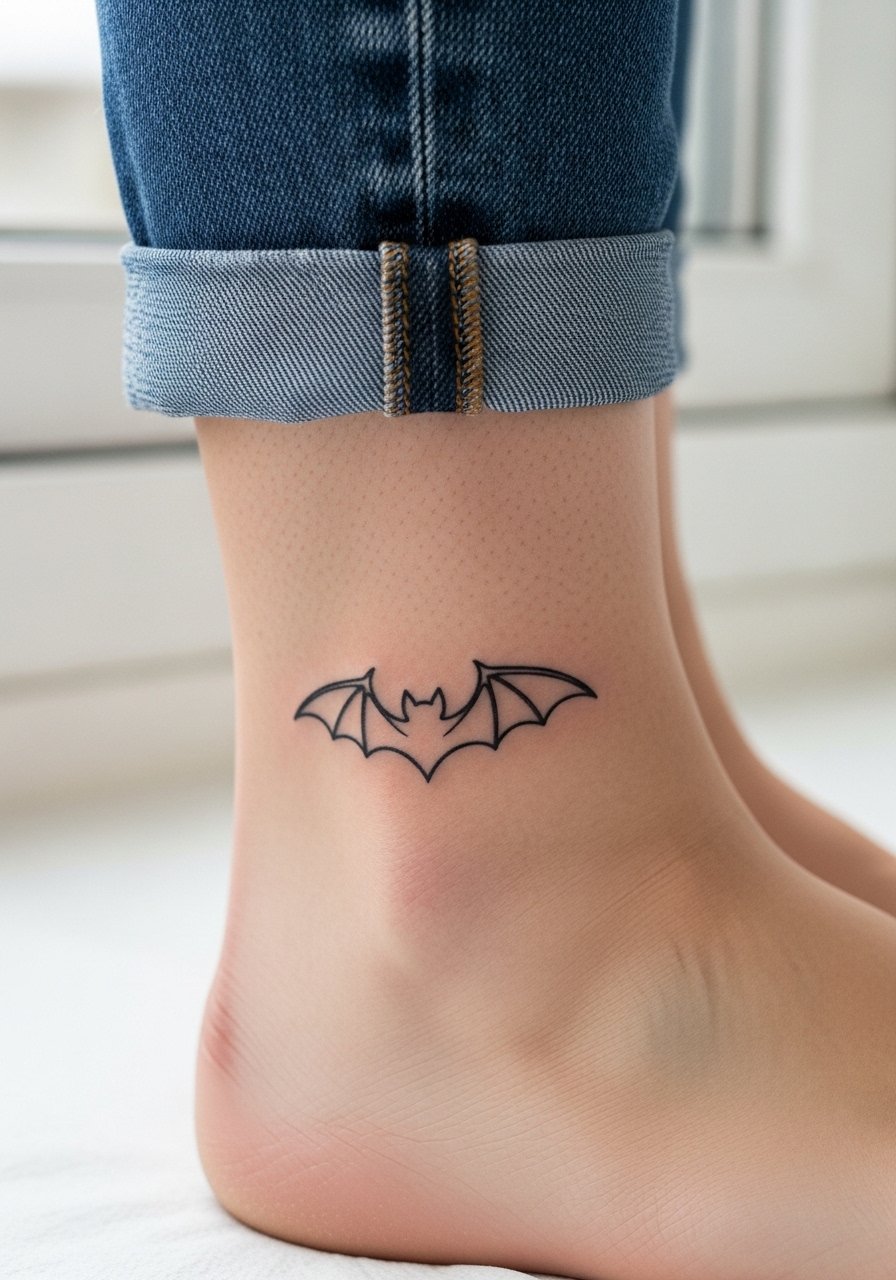
Ankle bat outlines are playful and session time is short, but the ankle heals slowly if footwear rubs the spot. For collarbone placement follow the chest safety rules and ask for a shallow placement that sits above the clavicle line. The big mistake is going too tiny on the wing tips. Tiny wing tips vanish into skin texture within a year. Pain on the ankle is moderate, on the collarbone it is variable and often sharper. For showing it off, slip into strappy ankle boots or wear an off shoulder black top to frame the area.
Pre-Session Essentials
The wrist and ankle pieces above heal differently from larger forearm work, so a few key items smooth the session and the first week.
-
Frida Kahlo Ink Balm. A thinner balm that breathes on humid days, useful for the stippled skull and ankle bat where heavy petroleum can feel greasy.
-
Tattoo Goo. A non-greasy daily balm that absorbs fast on micro areas like wrist moons and small moths so bracelets do not stick.
-
Coco Butter Sticks. Handy for quick reapplication on ankles and thighs during cold months when skin tightness can make touch-ups look uneven.
-
Second Skin Lite. Breathable protective film that reduces scabbing issues on high-friction spots like fingers and wrists.
-
Aquaphor Healing Ointment. Thin layers in the first 48 hours help lock in moisture for fine line work while you monitor for reactions.
7. Eye in Pyramid Micro Behind Ear or Wrist

Controversy lead: fine line fans want ultra-tiny detail for occult motifs, while the bold line camp insists small geometric eyes need strong outlines to avoid blurring. Both camps have points. If you prefer longevity, ask for a bold outer triangle with thinner internal lashes, not hairline rays everywhere. Behind the ear the session is quick and itching during healing is common. For wrist placement, expect a higher chance of blur and plan on a touch-up by year two.
8. Raven Feather Detail on Spine or Calf
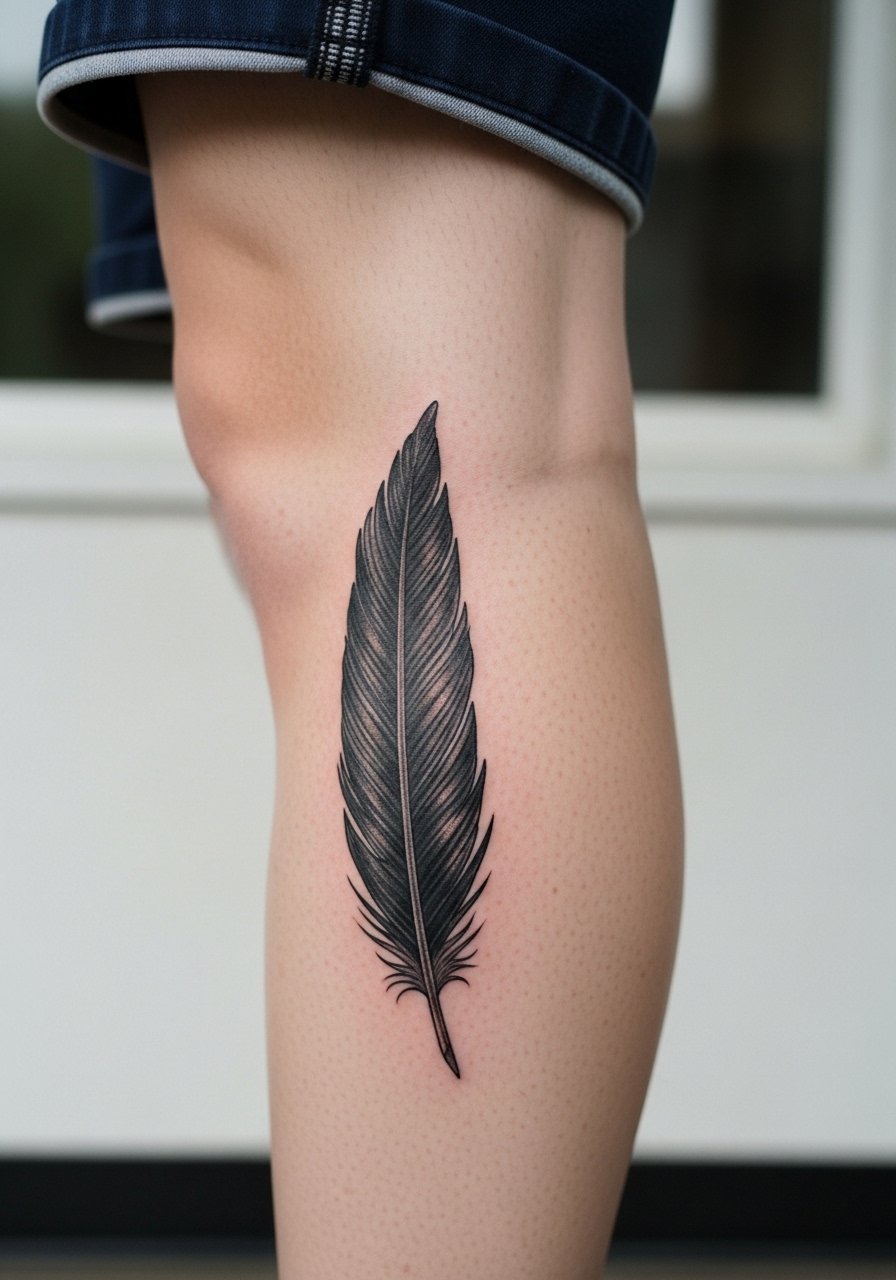
Visual impact lead: a slender feather works because the negative space creates motion even at small scale. On the calf it reads elongated and can be 2 to 3 inches to preserve the barbs. Tell your artist you want tapered barbs with selective stipple and a reinforced quill line to avoid blowout as the skin stretches. The calf tolerates saturation well and usually feels moderate during the session. Pair this with combat boots or roll up bootcut pants to show the shaft cleanly.
9. Heart with Thorns Outline on Thigh or Ribcage

Decision note: thighs handle small detail better through body changes than wrists. If you want a delicate thorn heart that survives weight fluctuation, place it on the outer thigh and ask for slightly bolder thorn points and consistent spacing. The ribcage reads amazing but is a high-pain zone and breath movement can affect placement during the session. For session wear, bring high waist black shorts so the artist can roll fabric down without discomfort.
10. Wilted Rosebud on Ankle or Collarbone
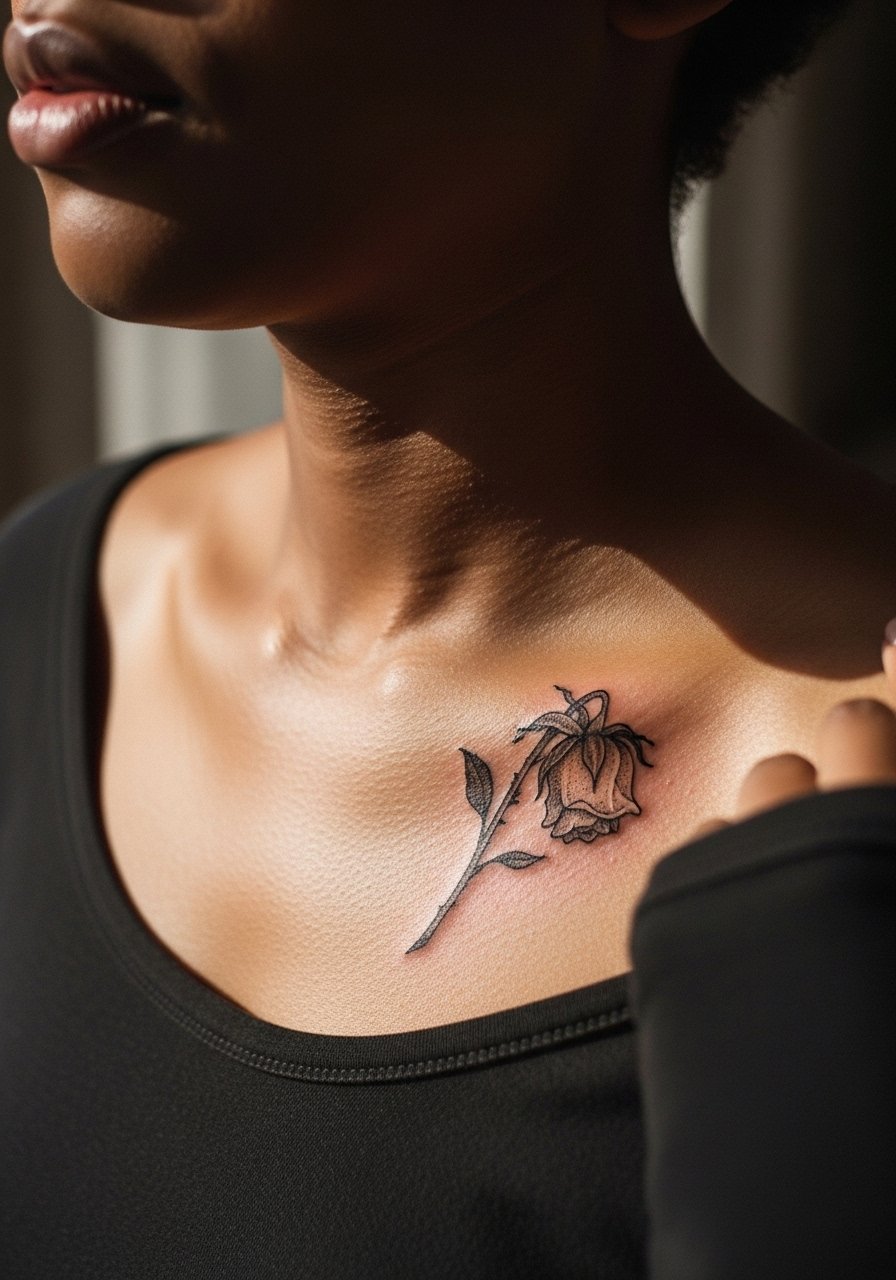
Aging lead: tiny rosebuds with stipple hold up better than shaded miniature realism. Stipple provides contrast without dense washes that sink into dark skin. Ask for a defined calyx and an open negative-space petal to keep shape. Collarbone placement can be dramatic, though healing in summer with friction from straps is a consideration. For show-off looks, layer a goth choker necklace or a velvet ribbon choker that sits above the rosebud.
11. Mini Gothic Girl Portrait for Upper Arm
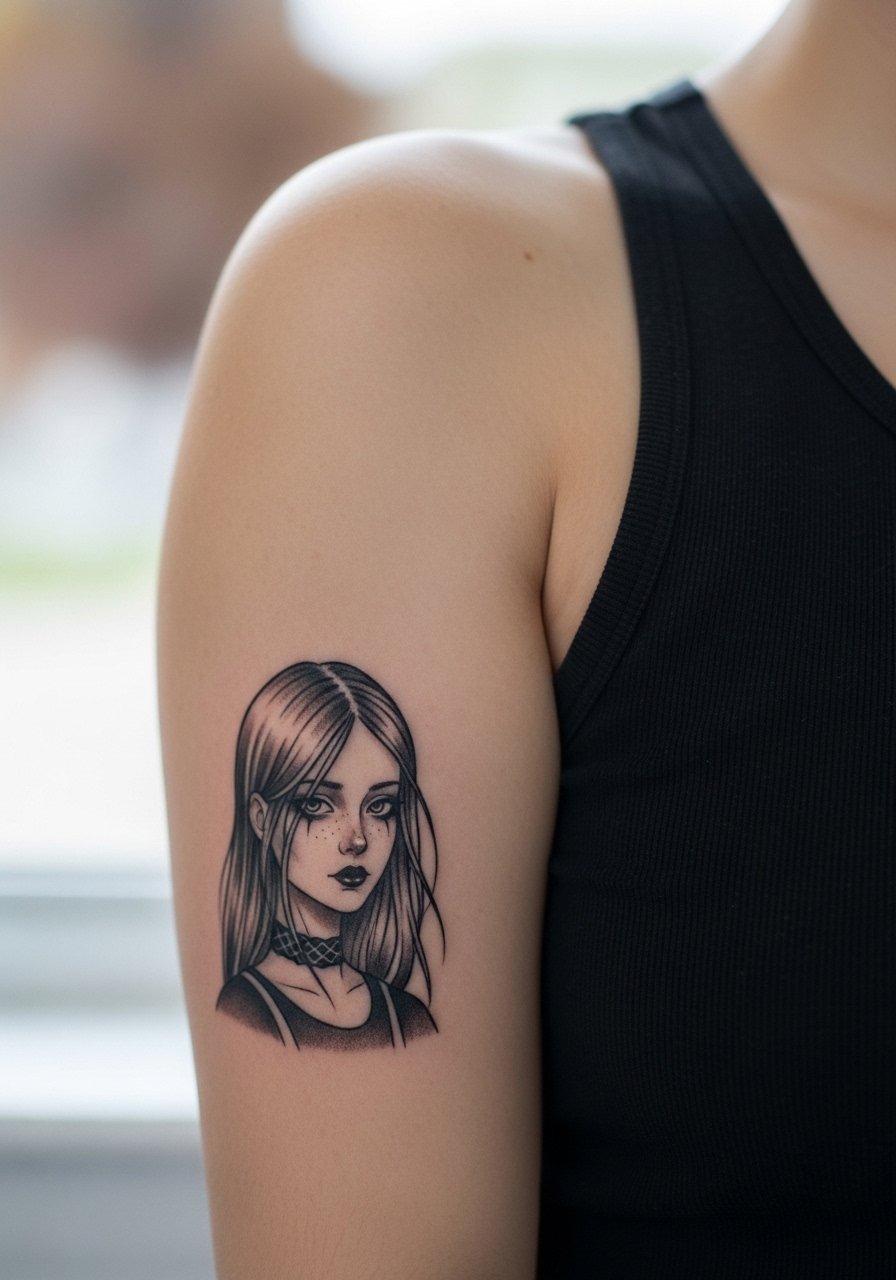
Consultation lead: portraits demand scale. If you want a micro girl with dark liner makeup and a discreet tear, make the piece at least 2 to 3 inches. Smaller than that and facial features will merge over time. Mention to your artist that you prefer stylized features rather than photorealism so the elements read clearly as the tattoo ages. Upper arm sessions are comfortable and forgiving for touch-ups if needed. This is best for someone who wants an emotive piece rather than a tiny accent.
12. Cross with Vines on Shoulder or Back
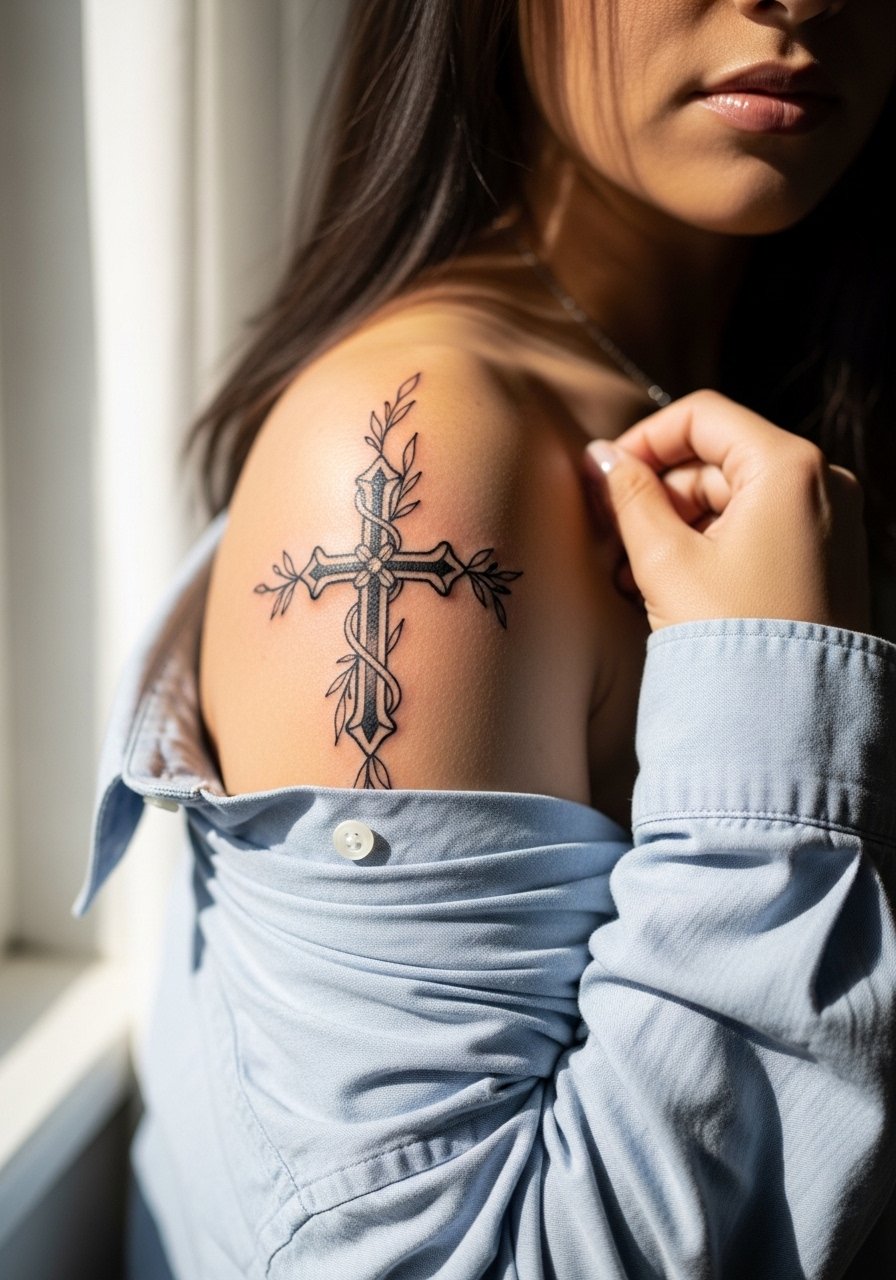
Styling lead: shoulder pieces work with sleeveless tops and cropped jackets. Tell your artist you want the vines to avoid dense micro leaves at tiny scale. Large negative space around the cross keeps it legible and reduces blowout risk near the deltoid. Sessions vary but most micro cross-and-vine work fits into a single appointment under 90 minutes. Put on a loose button-down shirt to give the artist unobstructed access and to protect the area immediately after.
13. Negative Space Feather Wrap Around a Joint
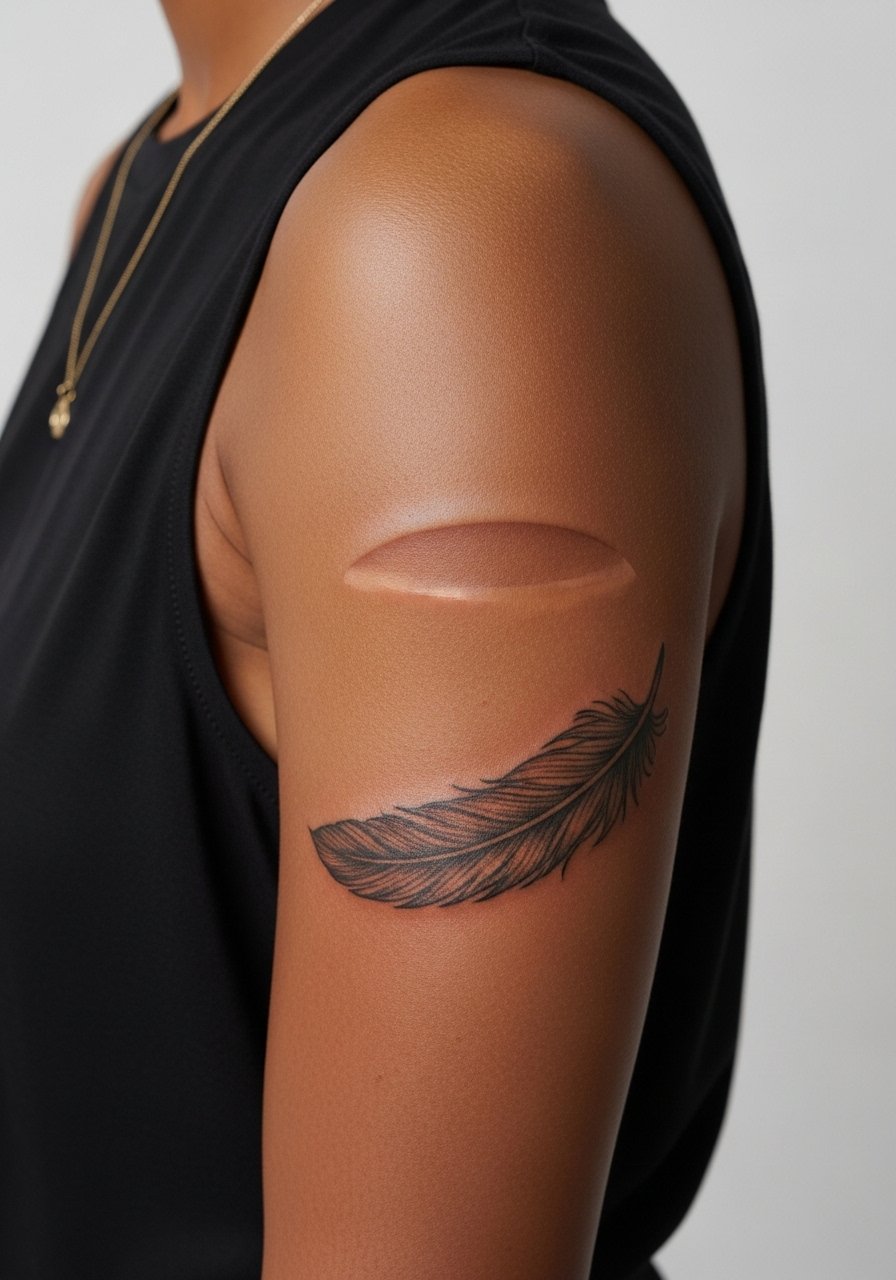
Mistake lead: wrapping joints with dense detail fails when the skin flexes. I prefer negative space feathers around knees or elbows because the empty areas maintain shape as the joint moves. Ask for a clear quill line and open barbs so the feather lives through motion. Joint sessions can be pricier because artists adjust for curvature and healing takes longer if friction is present.
14. Stipple Micro Skull Built for Dark Skin on Hip

Aging and skin tone note: stipple dot work can produce excellent contrast on darker tones when dots are spaced to allow skin highlights. For hips, ask for contrast with small negative spaces in the eye sockets and nasal cavity instead of gray fills. The hip tolerates detail and body changes reasonably well, but plan clothing that avoids constant belt rubbing during the first weeks. Sessions are forgiving and the area often needs just one touch-up at the six to twelve month mark.
15. Drip-Accent Minimal Moons Cluster on Collarbone
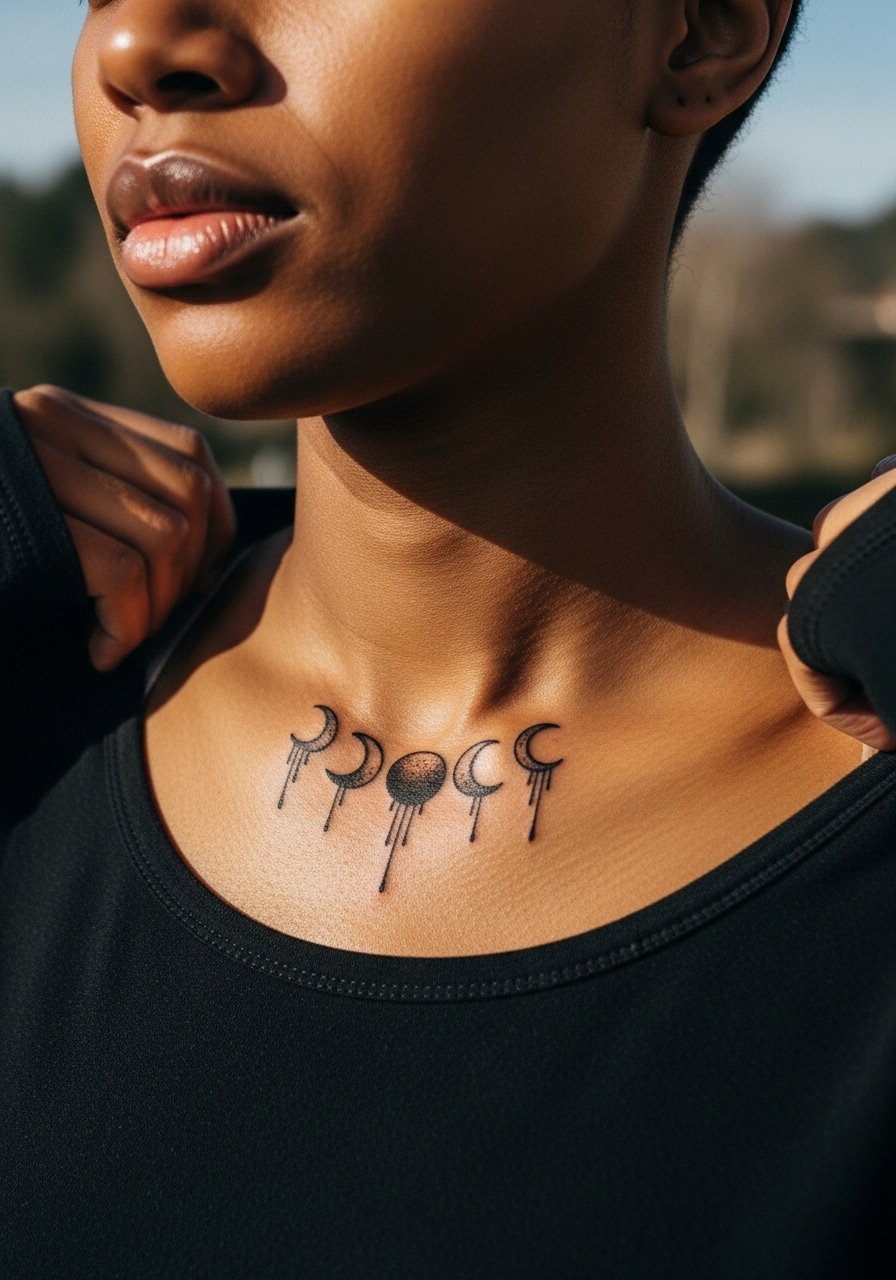
Trend-versus-reality lead: drip accents look dramatic on camera but can merge if drips are hairline thin. Ask for a varied drip width and built-in spacing so each moon keeps its identity as it softens. Collarbone heals slowly with movement from shoulders and often shows scabbing if straps rub. For showing it off, a simple off shoulder black top makes the cluster read as a deliberate styling choice.
16. Thorn Vines Linking Micro Pieces Along the Thigh

Consultation lead: thorn vines are a smart way to plan future patchwork because they connect pieces without overwhelming each small motif. Tell your artist you want room for later additions and avoid super-tight spirals that make touch-ups fiddly. Thigh sessions are relatively low pain for many and they survive weight fluctuation better than wrists. For session comfort wear loose shorts you can adjust without fuss.
17. Micro Moth Cluster for Patchwork on Calf
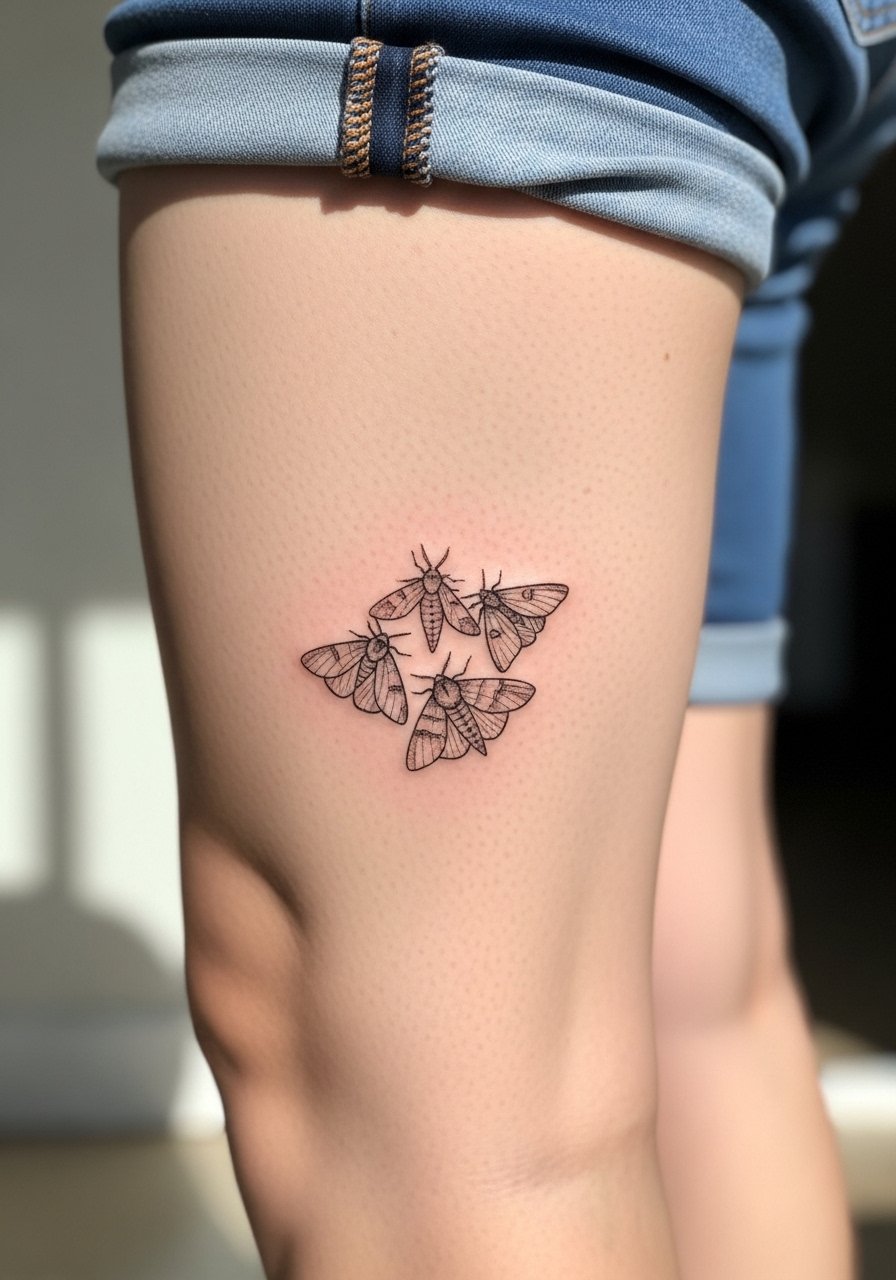
Personal observation lead: clusters age better than single micro insects because they read as a pattern even as individual lines soften. Ask for slightly varied sizes between moths and a mix of filled wings and outlined shells for depth. The calf lets you space pieces at scale and reduces blowout risk compared with fingers or hands. Sessions can be split into two short visits or done in one longer block depending on your tolerance. Combat boots rolled down show the cluster without covering it.
Frequently Asked Questions
Q: Will a fine line micro goth tattoo on my wrist blur faster than one on my forearm?
A: Yes, wrists generally blur faster because of constant washing and motion. If you want a wrist piece to last, choose bolder outlines, leave breathing room around dense areas, and expect a touch-up by year two. For forearm pieces stick with slightly heavier linework for better long-term saturation.
Q: I have darker skin. Which micro goth designs show best and which should I avoid?
A: High-contrast blackwork and stipple dot work read nicely on darker skin when artists avoid subtle gray washes at tiny scale. Avoid ultra-fine hairline shading in micro pieces. Ask for bold silhouettes, negative space, or stipple shading during consultation so the design keeps its shape as it heals.
Q: Artists canceled my booking before. How do I reduce ghosting and rescheduling risk?
A: Book through reputable platforms and ask about deposit refund policies before paying. Confirm guest spots in writing and choose studios with clear cancellation windows. If you travel for a guest artist, get an explicit schedule and backup window in case of travel delays.
Q: Should I use protective film or dry healing for a micro wrist tattoo?
A: Artists split into two camps on this. One camp says breathable protective films speed clean healing and reduce scabbing. The other camp prefers dry healing to avoid adhesive reactions and to encourage stronger saturation. Try a short patch test or discuss your skin sensitivity with the artist before deciding.
Q: How often will micro goth tattoos need touch-ups?
A: It depends on placement and technique. Fingers and wrists often need touch-ups every one to two years. Forearms and calves can go longer, often three to five years if well saturated and protected from sun. Expect finer pieces to require touch-ups sooner than bold blackwork.
Q: What should I wear to a collarbone or shoulder session to make the appointment easier?
A: Wear a wide-neck top or a loose button-down so the artist can expose only the area needed. A loose tank top works for shoulders. If you plan for collarbone work, bring a strapless or wide-neck option so fabric does not press on the fresh ink while you travel home.
