
Fine line trends look great on a grid, but what actually keeps a tiny arm piece readable after years in real life is placement, line weight, and honest expectations. I watch people pick designs from feeds that flatten movement and skin texture. The right micro idea for your arm starts with asking where you flex, how often you wash that spot, and whether you want to build later. Below are 17 compact arm designs with pointers on how they age, what to ask your artist, session wear, and wardrobe pairings that make each piece sing.
1. Fine Line Snake Wrapping the Forearm
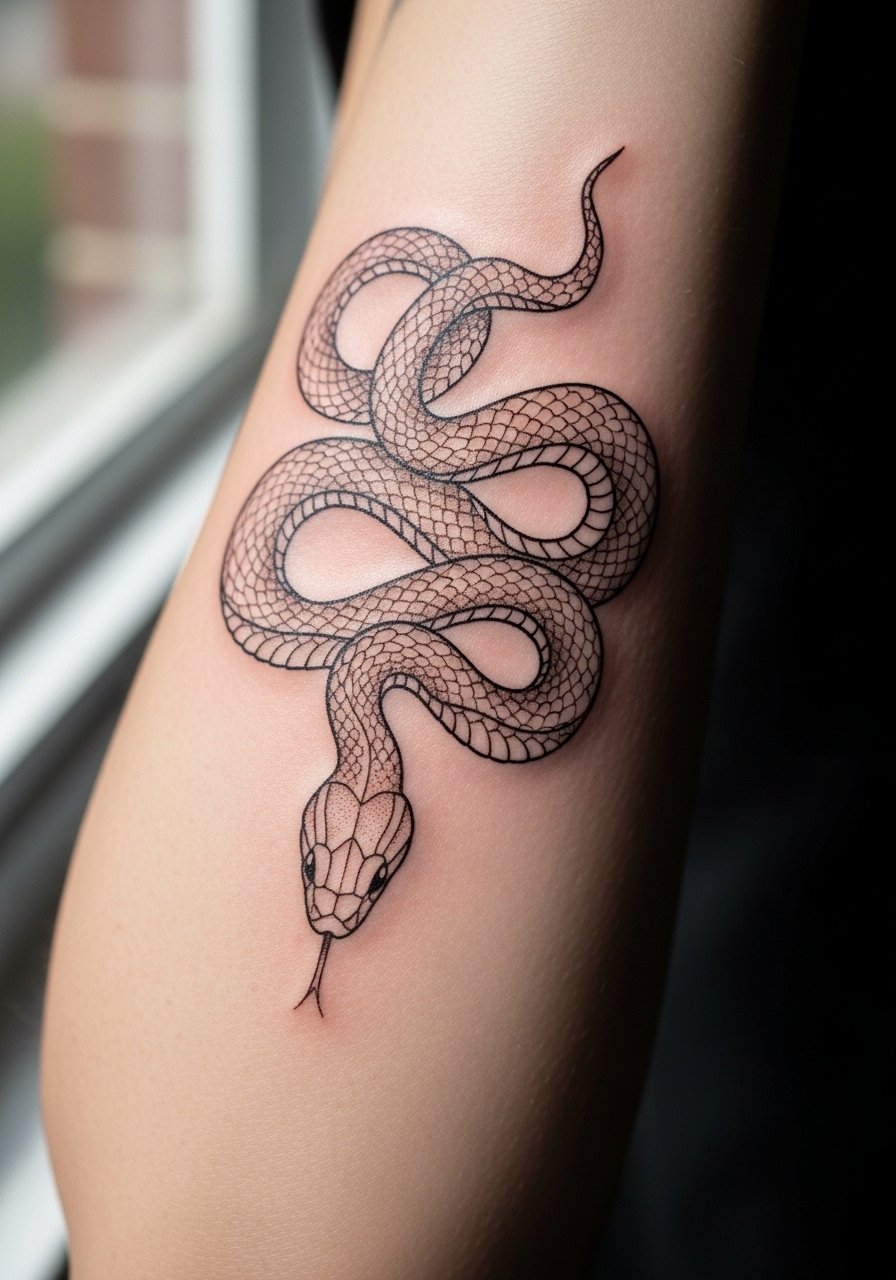
A slender snake that curves with the forearm reads masculine without taking over the arm. I suggest 1.5 to 2 inches of uninterrupted curve so the design breathes when you flex. Tell your artist you want slightly thicker single-pass linework rather than hair-thin lines, and ask for light stipple shading to hold contrast at year two. Artists split on fine line longevity. One camp says fine line fades fast and needs regular touch-ups. The other camp says correct depth and spacing keep the design crisp. Pain is mild on the outer forearm and a single session of 30 to 45 minutes usually gets it done. For showing it off, pair with a rolled cuff chambray shirt and a slim leather cuff on the opposite wrist.
2. Minimalist Dagger on the Wrist
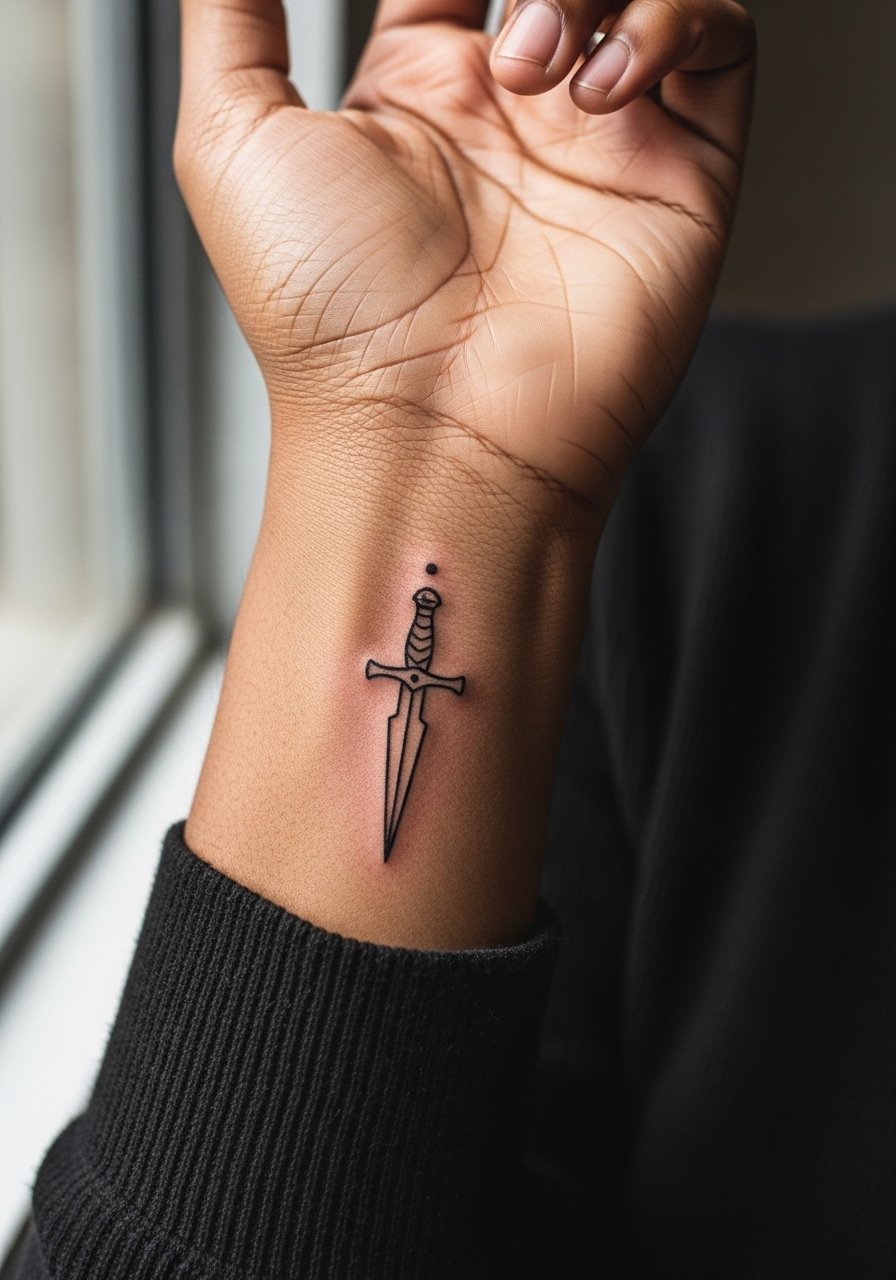
A one-inch dagger on the wrist works as a compact symbol of protection and grit. The wrist sits near bone and tendons so expect sharper pain for 10 to 20 minutes. Ask the artist to keep the blade narrow but avoid hairline lines that vanish at year one. Common mistakes include cramming script into the blade or placing it too close to the crease, which blurs with hand movement. Plan touch-up around month six to refresh contrast. For the session wear a short sleeve button shirt so you can roll sleeves back and keep the area accessible. Numbing cream is an option for this tender spot. One camp treats it as a helpful tool for first-timers. The other camp worries it hides pain cues. Ask the artist if they allow it before you buy.
3. Blackwork Armband on the Upper Arm

A solid black cuff around the bicep reads bold with minimal upkeep. This style needs clean edges and strong saturation so the fill ages as a solid shape rather than patchy gray. Tell your artist you want a clear demarcation line and consistent saturation across the wrap. Mistakes include underfilled bands or uneven line weight where muscle curves, which show as gaps after healing. Pain is moderate on muscle, session time is typically 45 to 90 minutes depending on width. Pair the armband with a fitted muscle tank when you want the shape to pop in summer. If you plan a future sleeve, leave spacing for connectors rather than burying other pieces into the band.
4. Geometric Triangle on the Inner Arm

A single triangle on the inner arm reads modern and balances well with motion. Inner-arm placement reduces flex distortion compared with the outer forearm, but hair and sweat can affect how crisp lines heal. Ask for slightly more spacing between inner strokes and request a touch-up window at six to twelve months. The biggest mistake is making the triangle too small. Lines need room to stay separate at year three. Expect pain to climb to a 5 out of 10 when the needle hits soft, thin skin. For session comfort wear an athletic tank top so the artist can raise the arm without fabric bunching. If you plan to add small geometric pieces later, map them out in the consultation.
5. Micro-Realism Lion Portrait on the Bicep
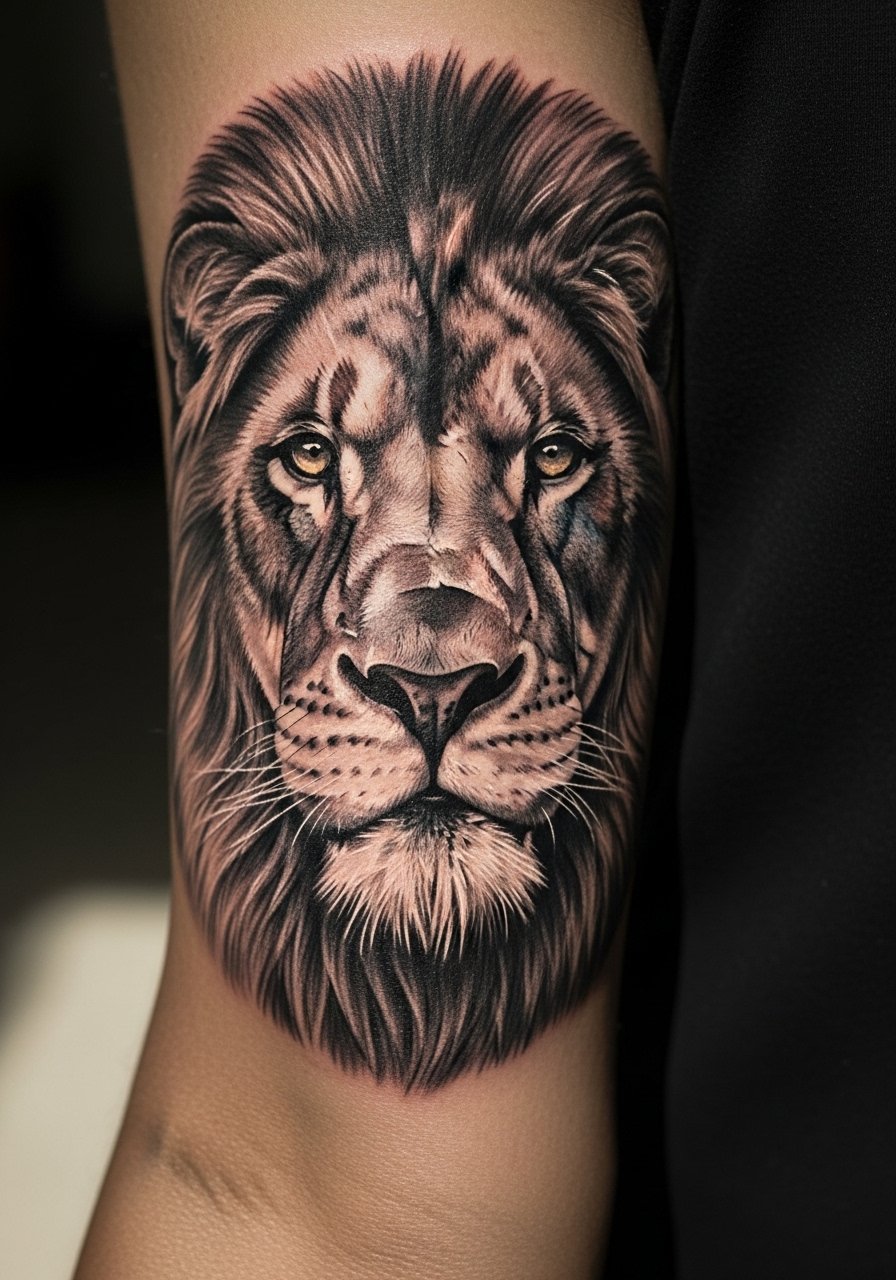
A tiny lion on the upper arm packs expression into a 2 to 3 inch piece and becomes the anchor for future work. Micro-realism needs crisp contrasts and shallow shading that reads at small scale. Tell the artist you want black-and-gray with higher contrast around the eyes and mane. Common errors include oversaturating fine textures so they blend together after healing. Expect one to two sessions totaling 60 to 120 minutes. Pain is on the lower side thanks to muscle mass. For show-off styling pick a subtle chain necklace men or a fitted black tee to keep attention on the bicep when you flex. Plan a touch-up at the one-year mark for facial detail.
6. Traditional Rose with Skull Forearm Filler
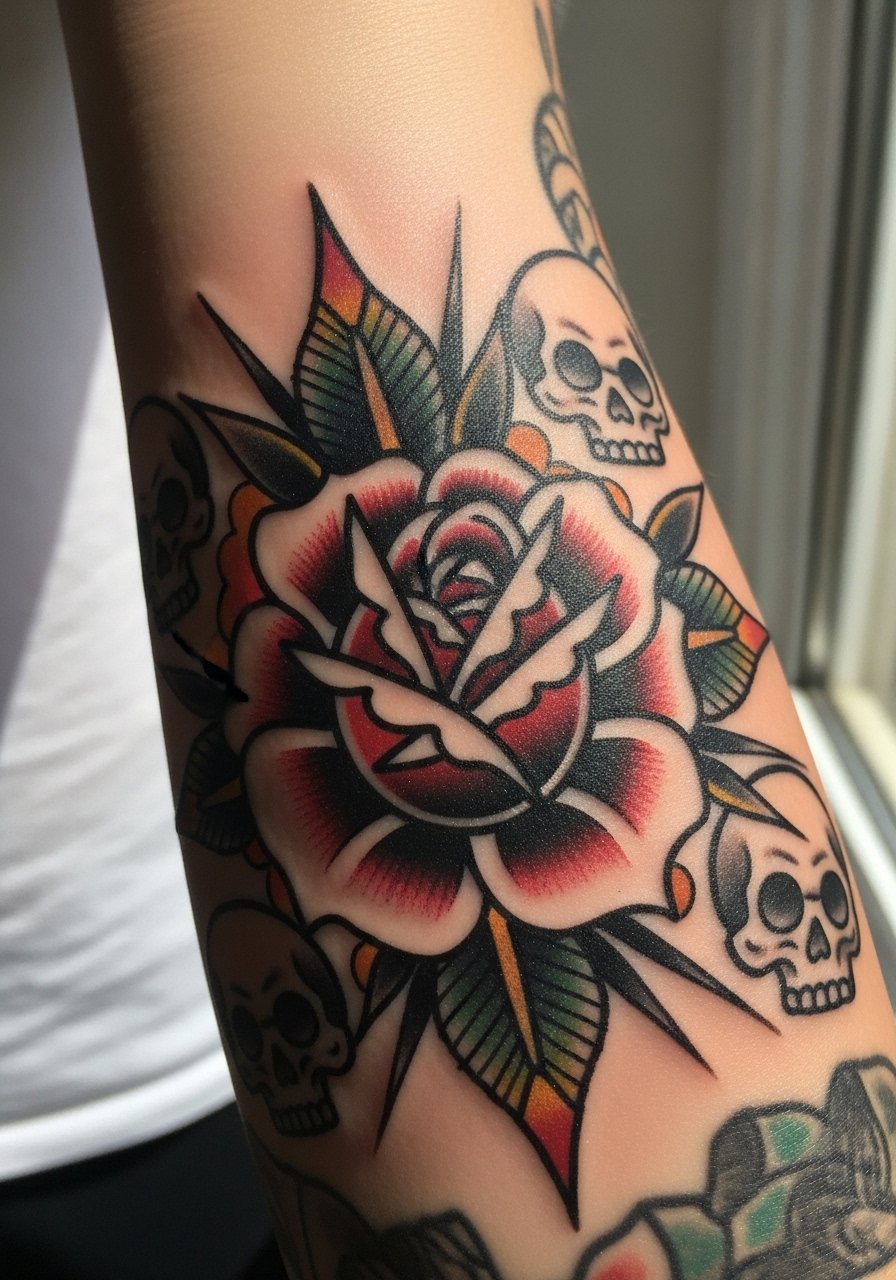
Classic American traditional elements scaled down to forearm filler age remarkably well when outlines are strong. Ask for clean, slightly thicker outlines and modest color saturation so the petals hold shape as skin changes. A common version that ages poorly uses too many tiny color gradients that mush together. This piece usually takes two shorter sessions or one longer session around 90 minutes. Outer forearm pain is manageable and healing tends to be straightforward. For session wear bring a sleeveless performance tank you do not mind staining. If you want this to become a centerpiece for a half-sleeve later, leave negative space around the skull for connecting elements.
Studio Day Picks
That forearm and bicep work above needs different prep than wrist and inner-arm pieces, so a small kit smooths the session and the first week.
-
Stencil transfer paper kit. Lets you preview exact placement on skin and test how the design sits with muscle flex, which helps avoid repositions after the stencil goes on.
-
Topical numbing cream. Applied 45 minutes before eases wrist and inner-arm sensitivity for people who want a calmer first session, but confirm artist approval first.
-
Thin protective film roll. Useful for small wrist or finger pieces that face constant hand washing and friction during the first few days.
-
Fragrance-free body wash. Gentle cleansing helps prevent irritation on fresh forearm linework without stripping natural oils the skin needs to heal.
-
Aquaphor healing ointment. A thin layer in the first 48 hours keeps fine line work from drying into scabs that pull ink out during peeling.
7. Illustrative Mandala Half-Sleeve Starter
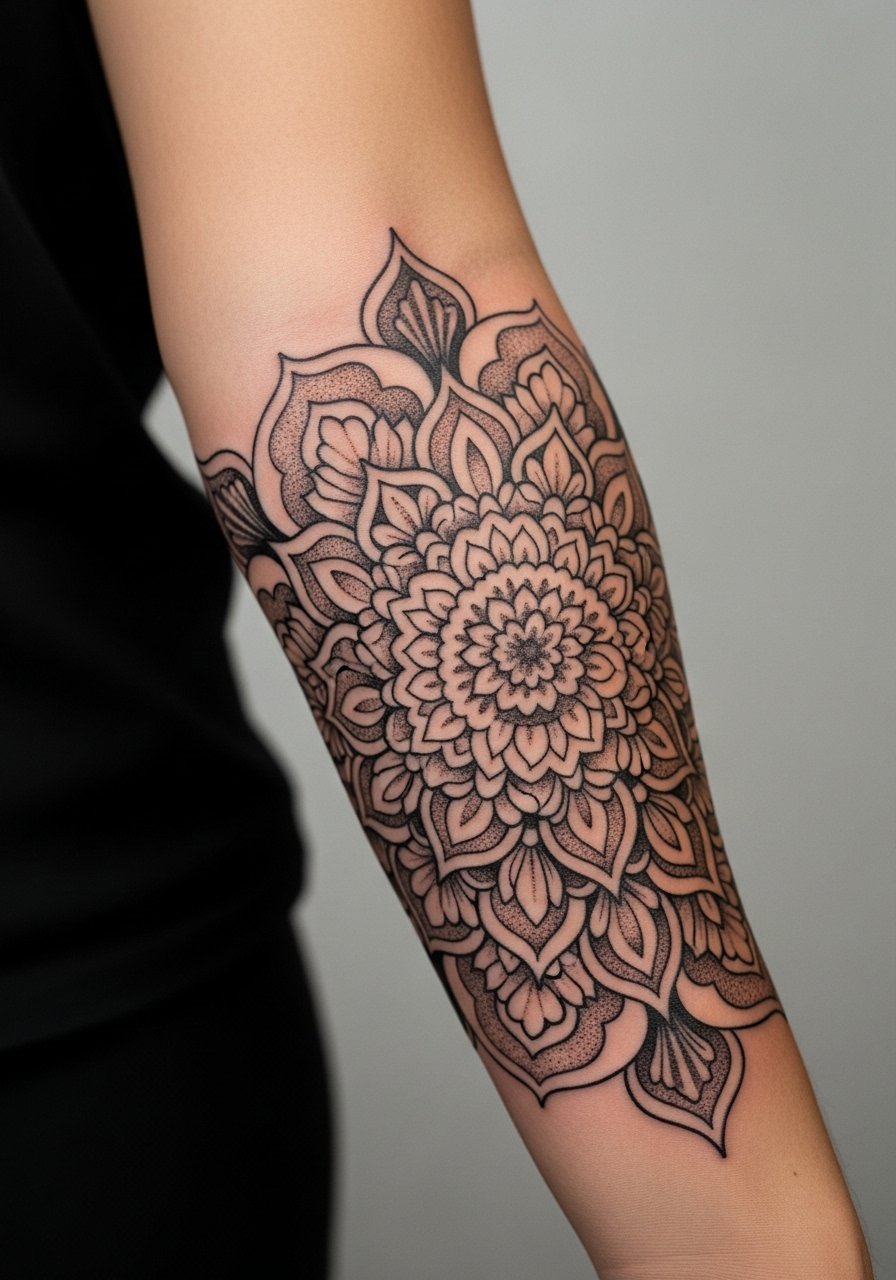
A mandala that begins at the elbow and falls toward the wrist gives you a modular half-sleeve you can expand over years. Build it in 2 to 3 sessions and treat the first session as a map for negative space and density. The common mistake is compressing too many petals into a small circle, which causes dense areas to merge at year two. For longevity ask for consistent stipple shading and slightly wider spacing in the center. Elbow-to-wrist work takes 60 to 120 minutes per session and the elbow itself will be a higher pain point. Pair the finished start with a three quarter sleeve henley to show the symmetry without covering it up. If you plan an eventual full sleeve, keep connector motifs simple so later additions read clearly.
8. Line Art Butterfly on the Lower Arm
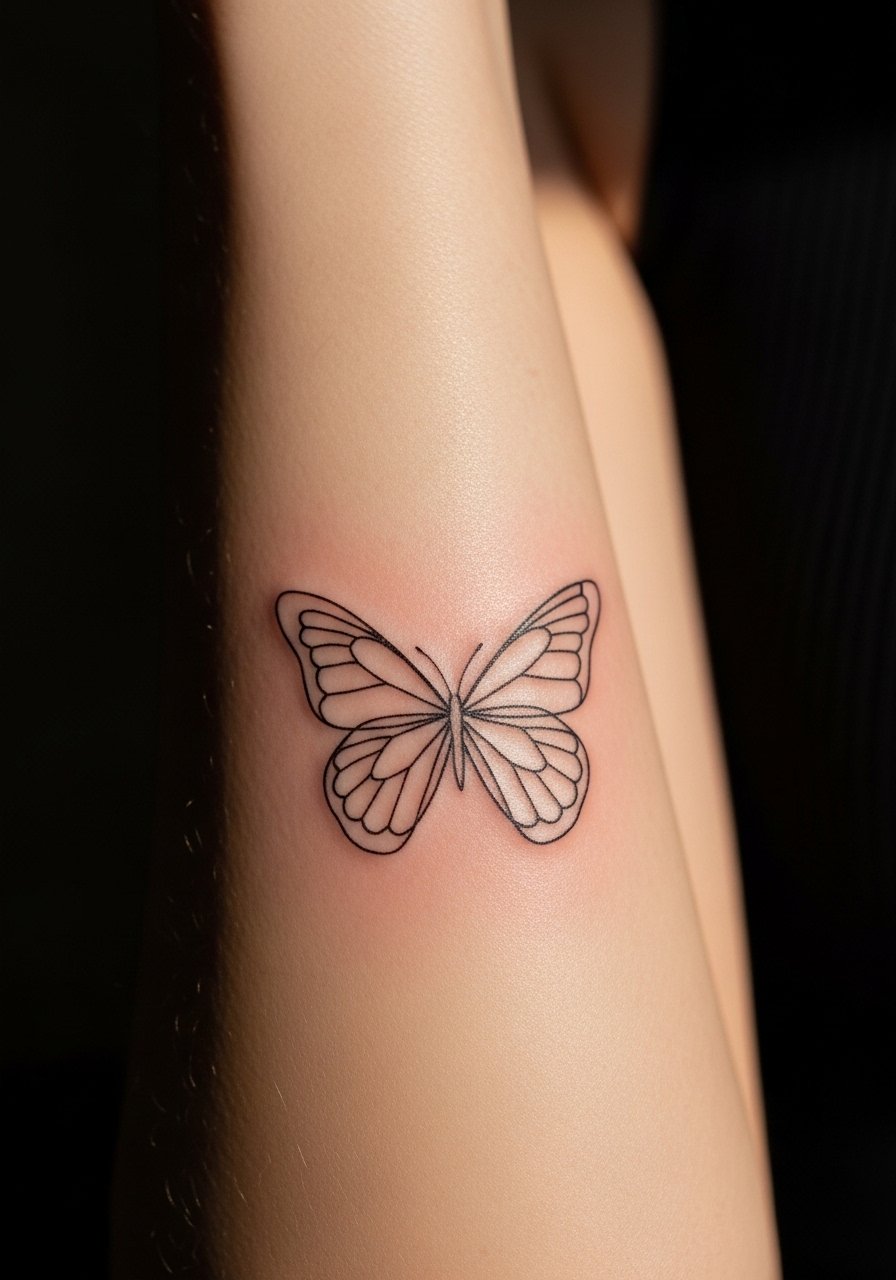
A minimalist butterfly in line art is surprisingly robust when you prioritize a clean contour and modest interior detail. Lower forearm placement moves less than the wrist so the wings stay defined. Tell your artist you prefer a single-line approach but with a 0.25 millimeter line weight to avoid premature fading. The typical mistake is using hair-fine lines that soften into blur at year two. Expect 30 to 45 minutes of work and light pain. For evening wear try a slim fit polo shirt with rolled sleeves so the wing sits neatly against the forearm. A six-month touch-up often preserves wing detail.
9. Biomechanical Gear on the Inner Bicep
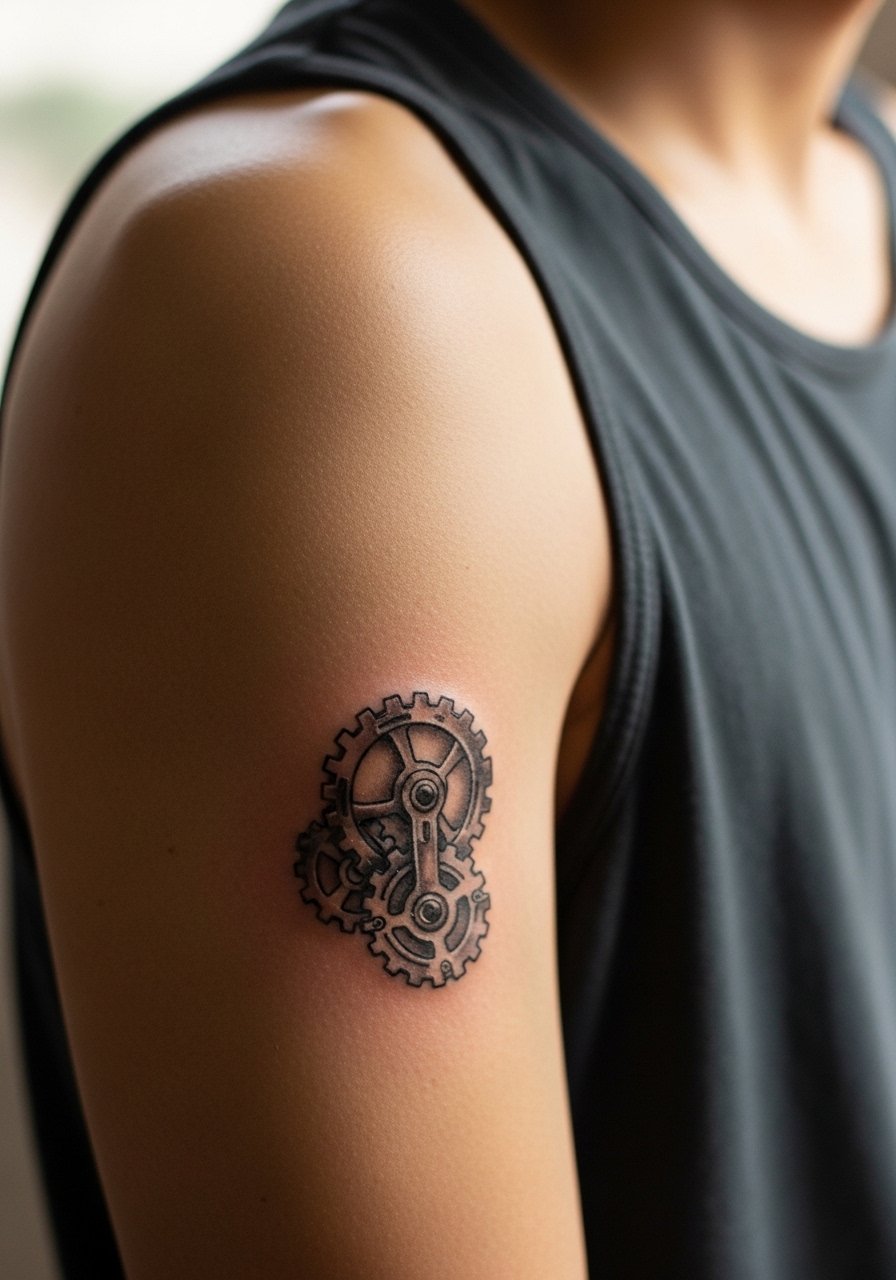
Biomechanical motifs on the inner bicep pair interestingly with muscle contours but require careful placement. Inner bicep skin is softer and stretches when you flex so small gears can deform if placed across a muscle crease. During consultation point to the exact muscle orientation and ask the artist to follow the natural curve rather than forcing a symmetrical gear. Pain is higher here than outer bicep and sessions run 45 to 90 minutes. A common error is over-detailing tiny cogs that blur into texture after healing. Skip excessive dot work in favor of clear silhouette and plan a touch-up at one year if needed. For the session wear an athletic tank top so you can lift the arm without fabric rubbing the area.
10. Script Quote Banner on the Forearm

A short quote in fine script on the forearm makes for a daily reminder that reads best at 2 to 3 inches. Ask for reference fonts and request the artist stencil the exact spacing so you can see how the letters sit on the curve of the arm. Common mistakes include cursive that is too tight and letters merging as the skin settles. Expect 30 to 60 minutes and light to moderate pain. If the script contains meaningful text, specify exact punctuation and capitalization to avoid surprises. For showing off pair the finished piece with a thin silver chain bracelet on the opposite wrist. Plan a touch-up at six to twelve months to keep the counters open and legible.
11. Tribal Pattern Armband with Modern Twist
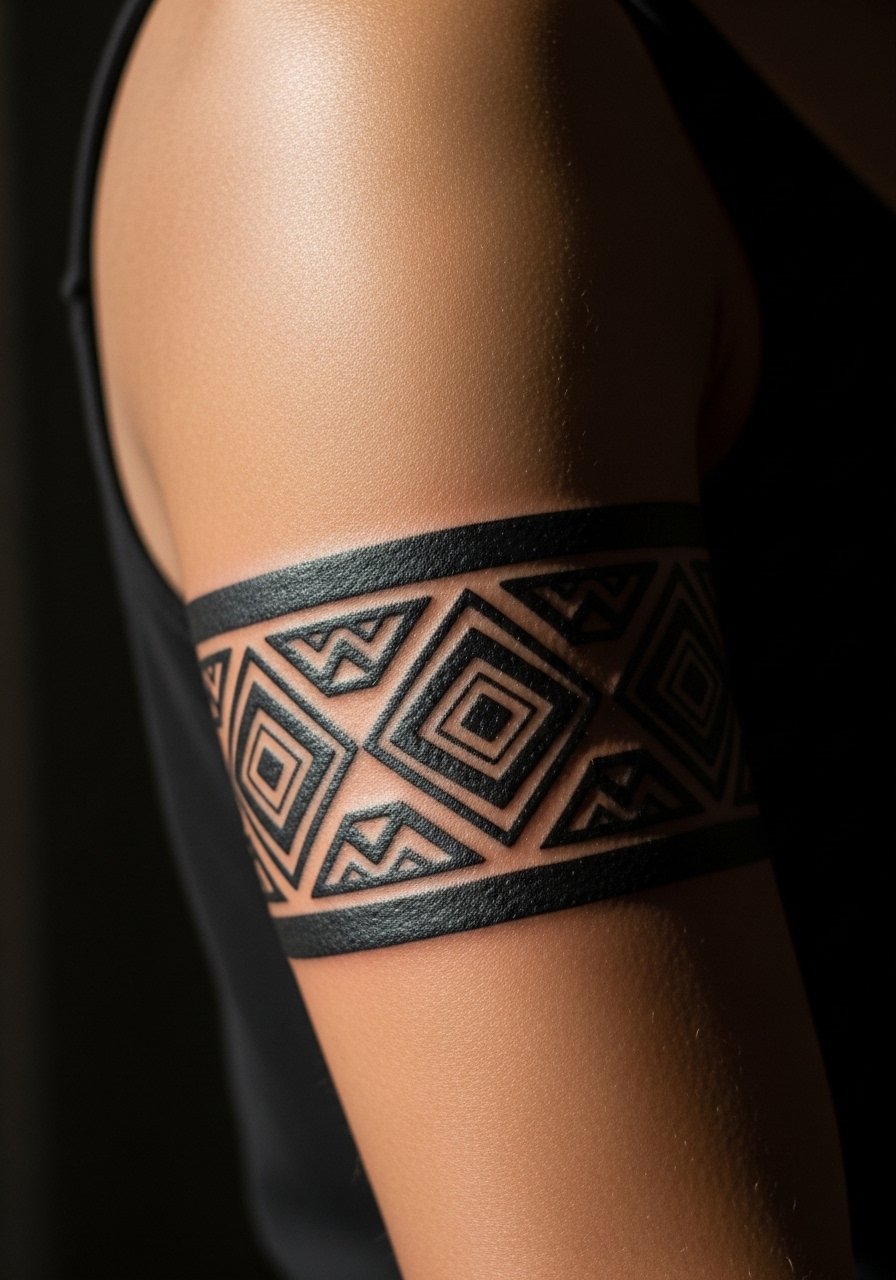
A tribal-inspired armband that trades tribal motifs for modern geometry gives bold contrast with less cultural baggage when you use abstract elements. Keep the band about two inches wide and insist on even negative space so the muscle curve does not break the pattern. The main mistake is copying traditional symbols without understanding origin, so opt for abstract repeats or adapt motifs respectfully. This work takes 45 to 90 minutes and sits comfortably on the outer bicep with moderate pain. For summer wear a fitted muscle tank to emphasize the wrap. If you may need concealment for work, place the band high enough to hide under short sleeves when required.
12. Treble Clef Musical Note on the Wrist
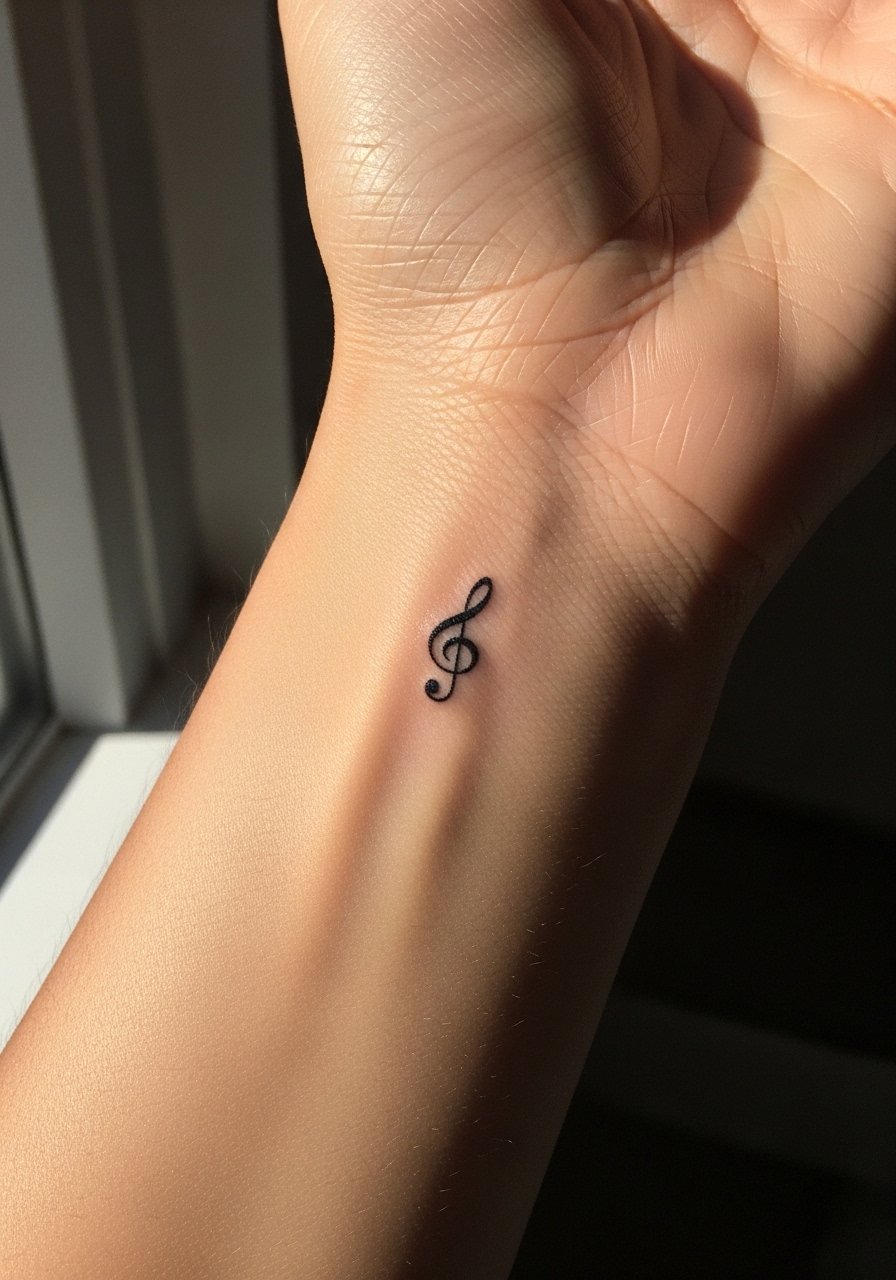
A micro treble clef is a quiet way to carry music without dominating the arm. Wrist placement means lots of washing and movement, so ask for reinforced line weight and a plan for a six-month touch-up. The common error is choosing a white ink highlight inside such a small symbol; it often disappears. Expect 10 to 20 minutes of work and sharper pain because the wrist sits over bone. For dressing choose a minimalist leather watch on the opposite wrist so your musical mark has room to breathe. If you type a lot or play an instrument, mention that during consultation to account for friction zones.
13. Minimalist Mountain Range on Outer Forearm

A tiny mountain silhouette across the outer forearm uses negative space to read clearly from a distance and stays stable when placed along the bone ridge. Ask for a slightly bolder single pass line rather than whisper-thin strokes so the peaks remain crisp at year three. The mistake people make is compressing too many peaks into a short span, which reads like clutter once healed. Expect a 20 to 40 minute session with light pain. For a casual look, roll up a loose button down shirt sleeve to frame the design. If you want to add small nature icons later, leave margin space to separate motifs.
14. Tiny Compass on the Inner Wrist

A compact compass works well for people who travel or want a subtle nod to direction. Inner wrist skin moves a lot so request a clear circular boundary and slightly heavier points for the cardinal markers. The usual error is making the compass smaller than one inch, which sacrifices legibility quickly. Session time is brief at 15 to 30 minutes. Pain is higher near bone and tendons. For the appointment wear a short sleeve button shirt so you can roll sleeves up neatly. Plan a touch-up once the swelling settles to sharpen cardinal points.
15. Single-Line Anchor Near the Elbow

An anchor placed just above the elbow leans nautical and pairs with existing sleeve starters. The elbow area is tricky because skin creases and the joint moves. Ask for the anchor to sit on a flatter strip above the crease and avoid placing the shank directly over the joint. A common mistake is centering the design on the crease, which leads to distortion when you bend the arm. Expect moderate pain and a 30 to 45 minute session. Wear a sleeveless performance tank for easy access. If this becomes a connector piece later, keep the shape simple to avoid competing textures.
16. Micro Roman Numerals on the Inner Forearm
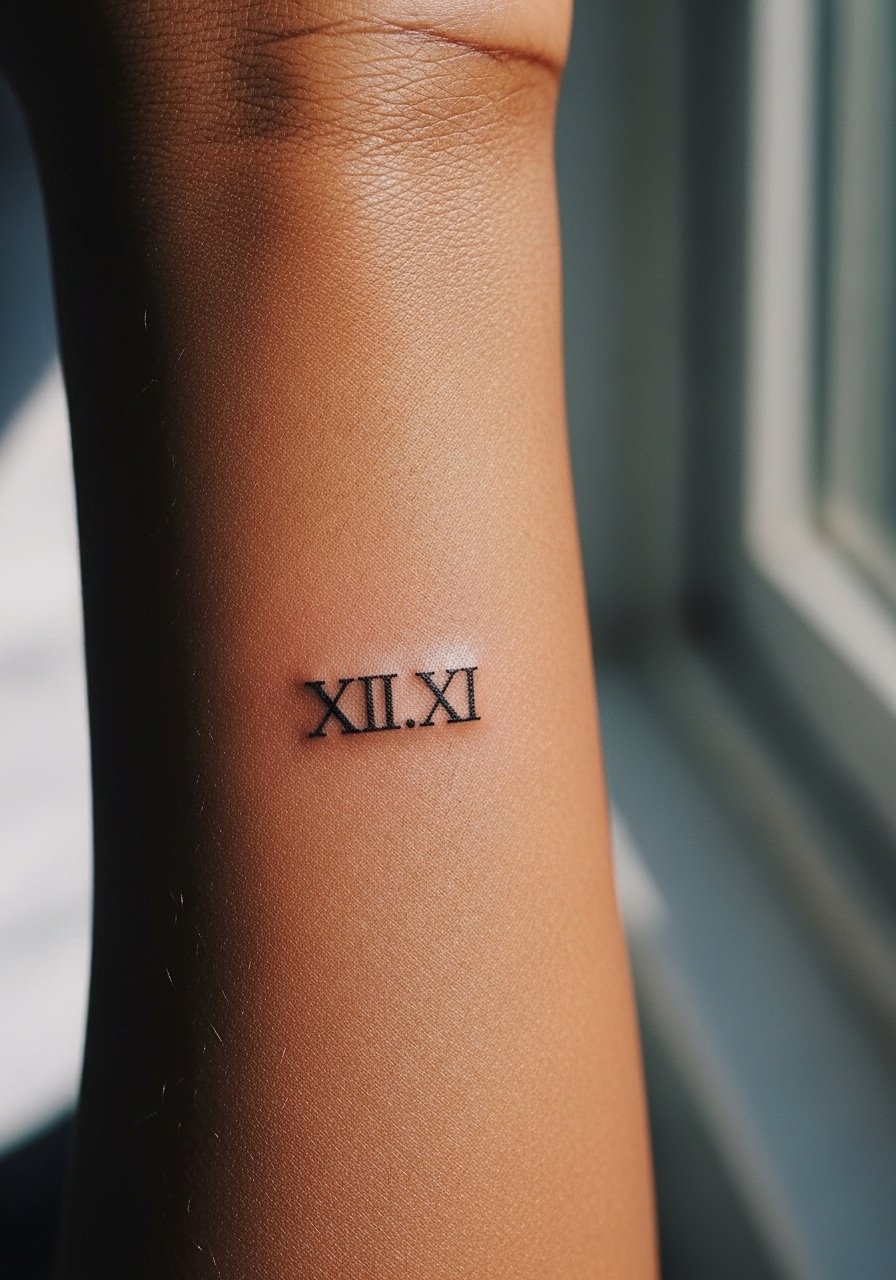
Tiny Roman numerals are crisp when letterforms have clear counters and spacing. Because text needs breathing room, request a serif or slightly wider typeface that keeps numerals distinct at small scale. People often choose condensed fonts that blur as skin settles, which is the main error. Inner forearm placement makes touch-ups convenient and pain minimal. Expect 20 to 40 minutes. For the session wear a v neck fitted tee so the artist can rotate the arm easily. Confirm the exact numerals and punctuation with the stencil before the needle comes out.
17. Repeating Chain-Link Armband Hybrid
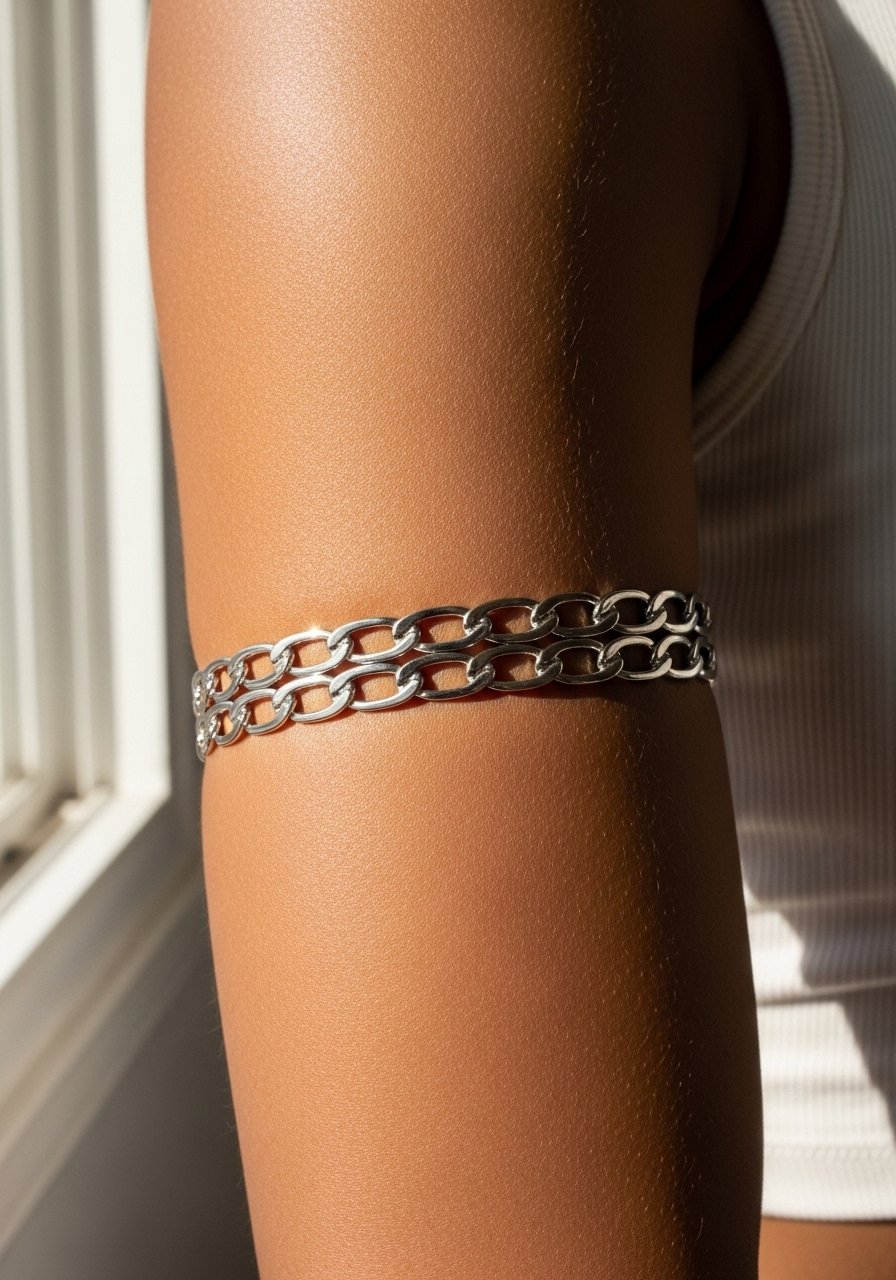
A chain-link band that alternates open links and solid elements feels modern and gives visual texture while staying bold enough to age well. Ask the artist to map the repeat across your bicep circumference so the links meet cleanly on both sides. The error to avoid is uneven link spacing that becomes obvious after healing. This runs 45 to 75 minutes with moderate pain on the muscular upper arm. For show-off styling, choose a subtle chain necklace men and a fitted tee to keep the focus on the wrap. If you might add a sleeve later, reserve one side as a planned connector.
Frequently Asked Questions
Q: Will fine line tattoos on the forearm need touch-ups sooner than bold pieces?
A: Fine line work often needs a touch-up earlier because the thin strokes lose contrast faster. One approach is to request slightly thicker single-pass line weight and schedule a touch-up at six to twelve months. The decision comes down to how much maintenance you want and the artist's comfort with fine lines.
Q: How should I prepare for a wrist tattoo if I type and wash my hands a lot?
A: For wrist work expect extra friction during the first two weeks. Bring clothing that avoids rubbing the area during the session and ask your artist about protective film for the initial 24 to 48 hours. Plan a touch-up window at month six since constant washing can fade delicate linework.
Q: Does inner bicep placement distort with muscle growth?
A: Inner biceps can change with hypertrophy and flexing, so talk to your artist about how the design will sit when the arm is both relaxed and flexed. Placing motifs along the natural curve rather than across the peak reduces visible distortion as you gain or lose muscle.
Q: Are armband blackwork wraps harder to conceal for work?
A: Upper-arm wraps can usually be hidden under short sleeves depending on sleeve length and your workplace dress code. If concealment matters in summer, position the band slightly higher on the bicep so typical short sleeves cover it.
Q: Where do I look to find artists who specialize in these micro arm styles?
A: Search hashtags like #finelinetattoo and #microarmtattoo on image platforms, filter local results, and check booking apps for "small arm tattoo" listings. Also ask in community forums for recent guest spots or conventions near you so you can preview healed work in person.
