
Fine line sleeves look effortless in photos, and they can feel that way in real life if you plan for how they age. Trends push ultra-thin strokes right now, but the sleeves that read clean after five years usually start with smart spacing, deliberate line weight, and placement that avoids friction zones. Below are 21 minimal line ideas tailored for a female sleeve, with what to ask your artist and how to style each look.
1. Single-Strike Arrow on Inner Forearm

I like this as the opening element for a sleeve because it reads clean at arm-rest angles and helps with composition when you add more pieces later. Tell your artist you want a slightly bolder shaft than a hairline so the arrow still reads at year three, and show a photo of how it should align with the wrist crease. The inner forearm is low on blowout risk, but avoid packing tiny crosshatching close to the arrow. Expect a single short session that is low to moderate in pain. For showing it off, rolled sleeves or a linen button-down frame the linework without competing.
2. Continuous Botanical Vine Wrapping the Arm

A winding vine is a classic sleeve connector, and I recommend it when you want flow without heavy shading. Ask for variable spacing between leaves so dense areas do not fuse over time, and tell the artist to keep leaf tips open rather than filled. This design ages well if the leaves are given breathing room, and the session feels meditative rather than intense. To style it, short-sleeve tees and a thin chain bracelet highlight the vine without crowding the wrist.
3. Staggered Dot-Work Moon Phases Along the Outer Sleeve
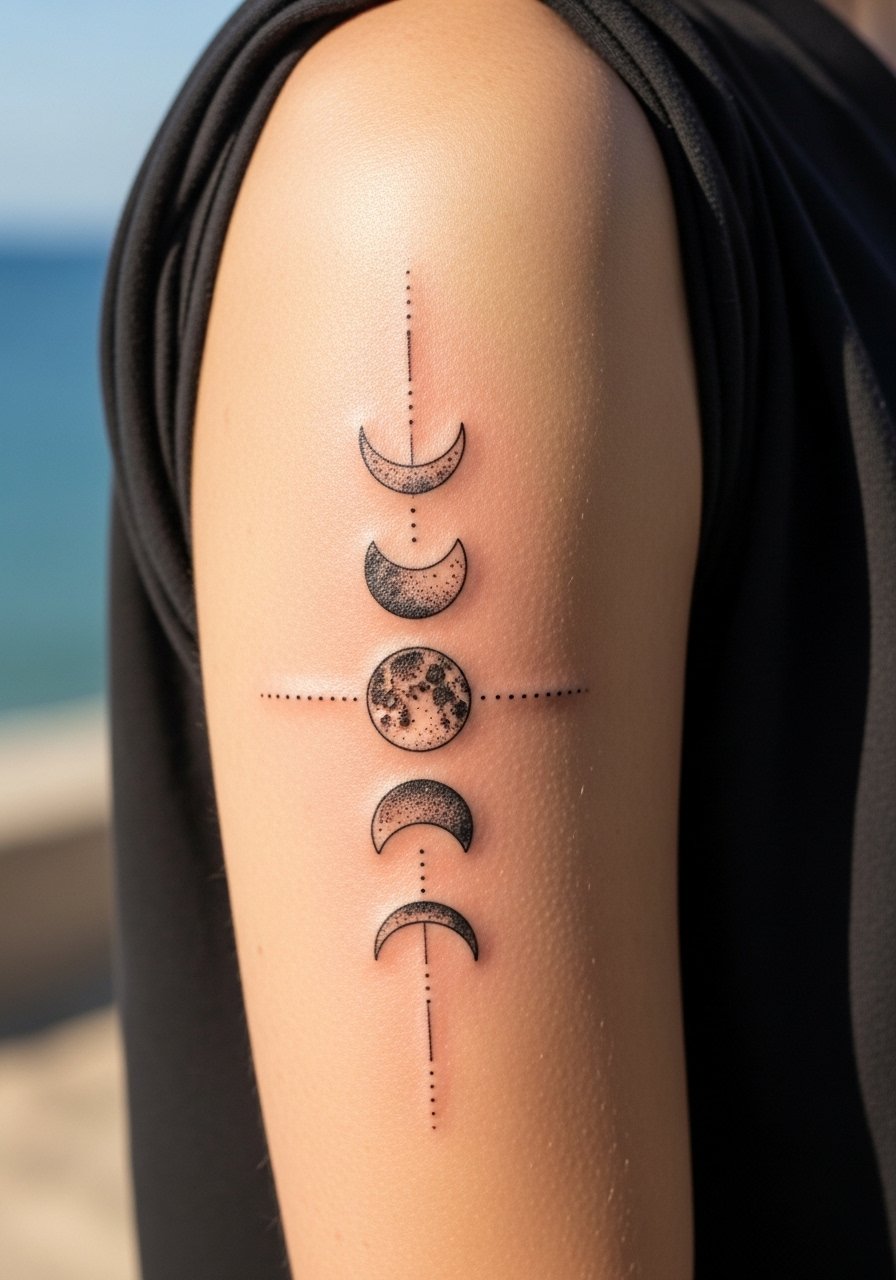
Moon phases in dot work are great when you want rhythm on a sleeve. Tell your artist to space the phases for the arm curvature, and ask for a slightly larger crescent than you might pick online to avoid merging. The dot technique avoids heavy saturation, so the piece tends to soften gracefully. Sessions are quick but require steady handwork, and you might plan a touch-up in two to four years. Pair this with a stackable ring set when the sleeve hits the wrist, so the moons and rings catch the eye together.
4. Single-Line Continuous Face Portrait on Upper Arm
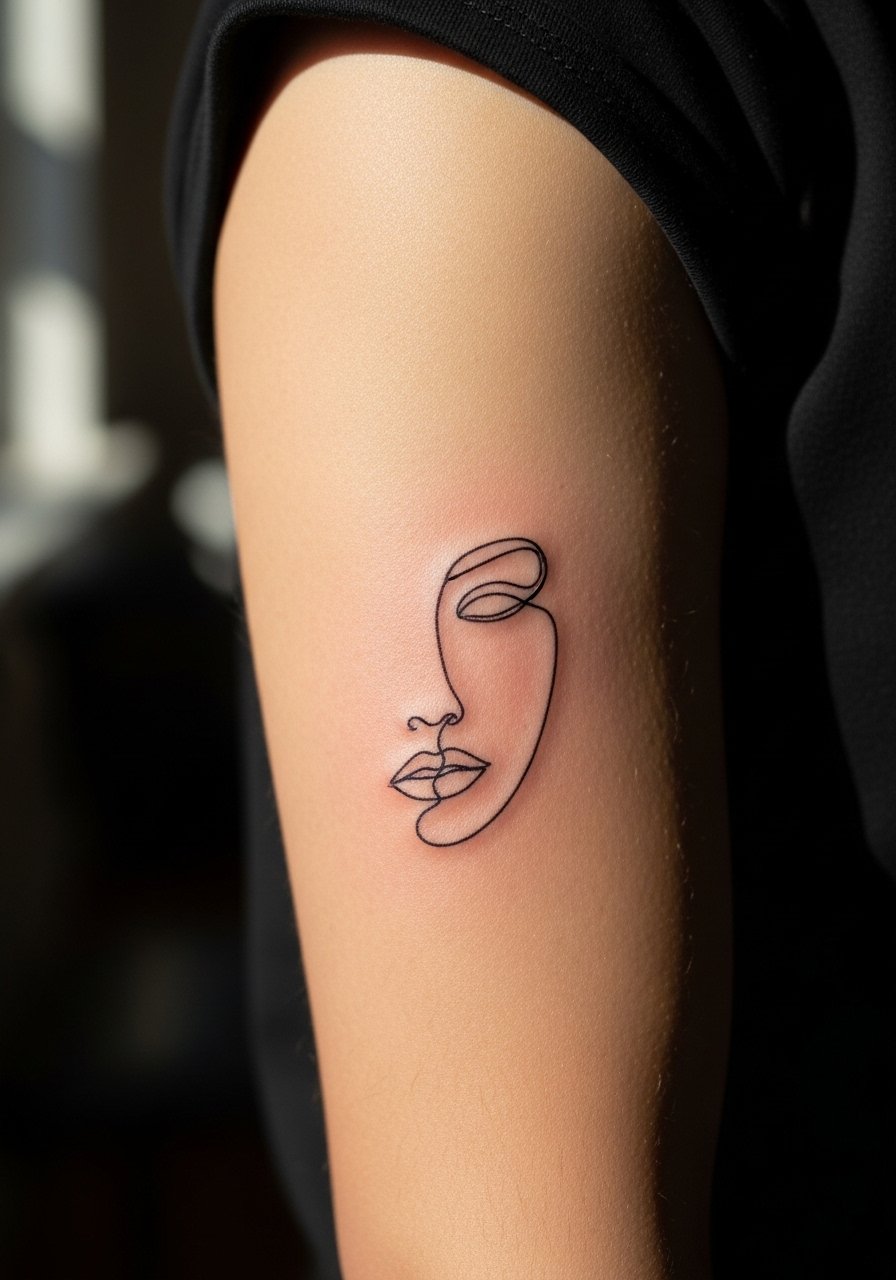
A continuous line face reads as artful and minimal when scaled to cover a good portion of the upper arm. The main mistake is going too small, which makes facial features indistinct as it heals. Ask the artist for a single pass outline with intentional gaps for negative space. Pain is mild on the outer arm, and the session often runs medium length because of careful linework. This design pairs well with sleeveless tops that let the negative space breathe, such as an open-back midi dress.
5. Micro-Realism Tiny Bird Near the Elbow

A tiny bird placed near the elbow gives a lift between upper and lower sleeve pieces, but the elbow is a tricky spot for movement. Tell the artist you want simplified features and stipple shading to avoid dense black that can crease. Expect a higher pain level right over the joint and a short session with careful positioning. The common mistake is over-detailing, so keep the bird slightly stylized. For evenings out, wear short-sleeve structured tops or a rolled sleeve linen shirt that showcases the elbow artwork.
6. Thin Script Band Circling the Wrist
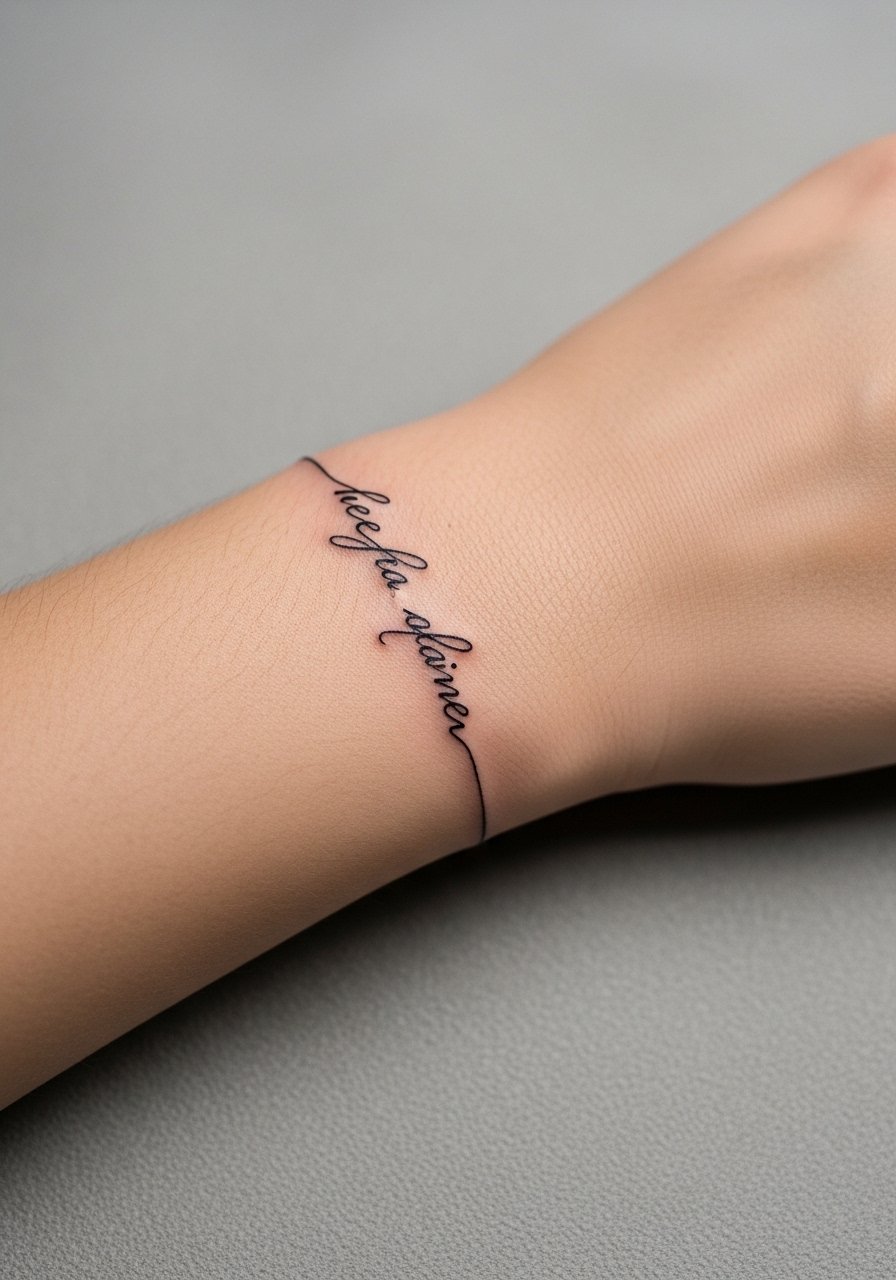
A script band reads like jewelry and can anchor a sleeve at the wrist. Ask for simple lowercase lettering and specific spacing across the band so letters do not compress. The wrist is moderately sensitive, so the session is short but precise. Beware of too-tight scripts; words need room to maintain legibility over time. For a jewelry-like finish, pair with a minimalist watch that sits above the band without rubbing the ink.
Studio Day Picks
Those first six arm pieces include wrist and elbow work that behave differently from upper-arm fills, so a few practical items smooth the session and the first week.
-
Stencil transfer paper kit. Lets you check how the line flow sits on your arm before the needle touches skin, which is helpful for the script and vine pieces above.
-
Topical numbing cream. Applied before the appointment it eases sensitivity around the wrist and elbow without dulling the artist's perception of skin texture.
-
Thin protective film roll. Useful for wrist bands and forearm pieces that face rubbing from clothing in the first days.
-
Fragrance-free gentle body wash. Keeps the healing linework clean during showers without added irritants.
-
Aquaphor healing ointment. A thin layer in the first 48 hours helps retain moisture for fine line work while the skin starts to scab.
7. Negative Space Floral Cluster on Outer Forearm
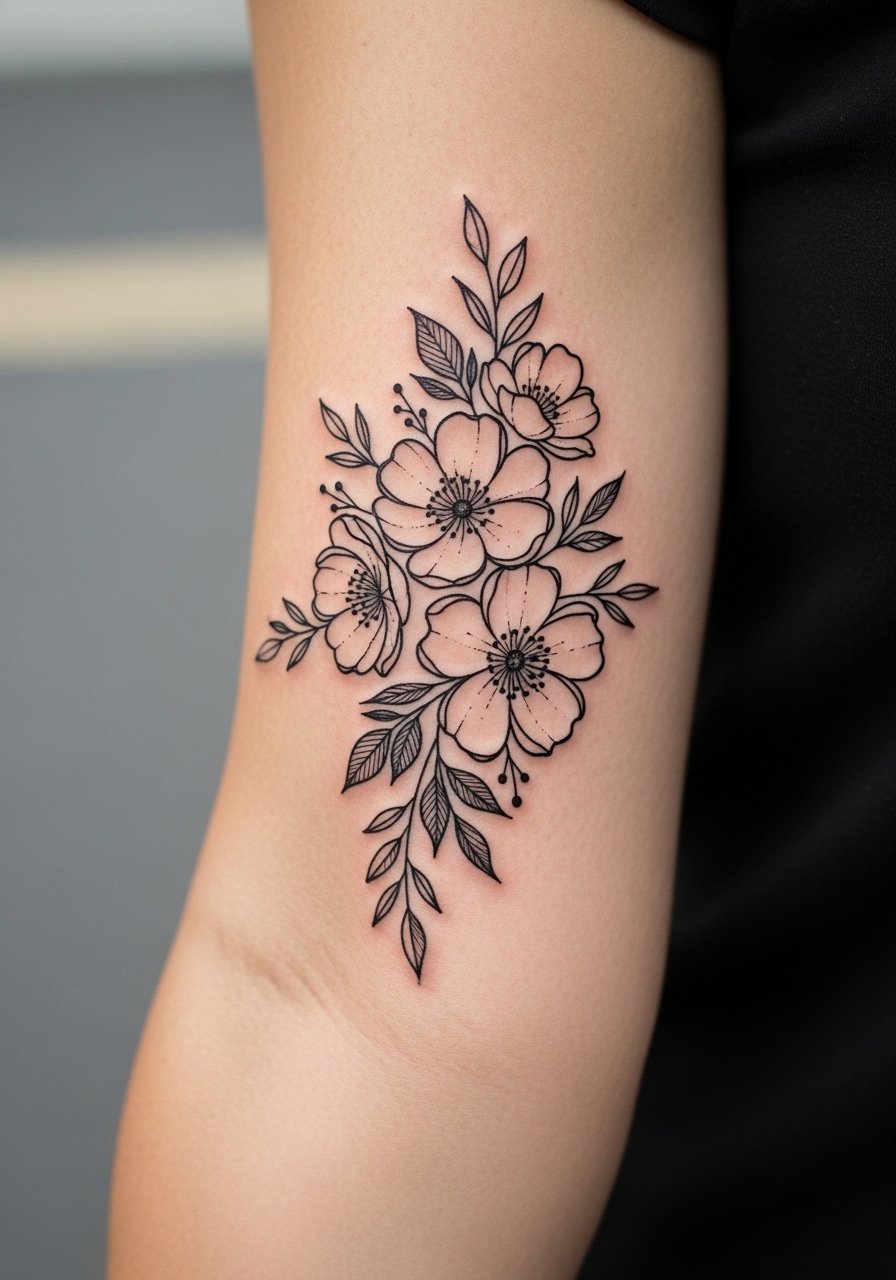
Negative space florals use skin as part of the design and they age well when the white space is left clear. During consultation, point to which petals you want kept open so the artist avoids filling them in. The outer forearm tolerates linework well and the session feels steady. A common error is compacting too many blooms into a small patch. For a casual look, roll up a slouchy button-down shirt to highlight the cluster.
(Note: link above contains an accidental duplicate parameter, correct format should be: https://www.amazon.com/s?k=slouchy+button+down+shirt&tag=inkobsessed-20. Replace if needed.)
8. Minimal Geometric Band Crossing the Bicep
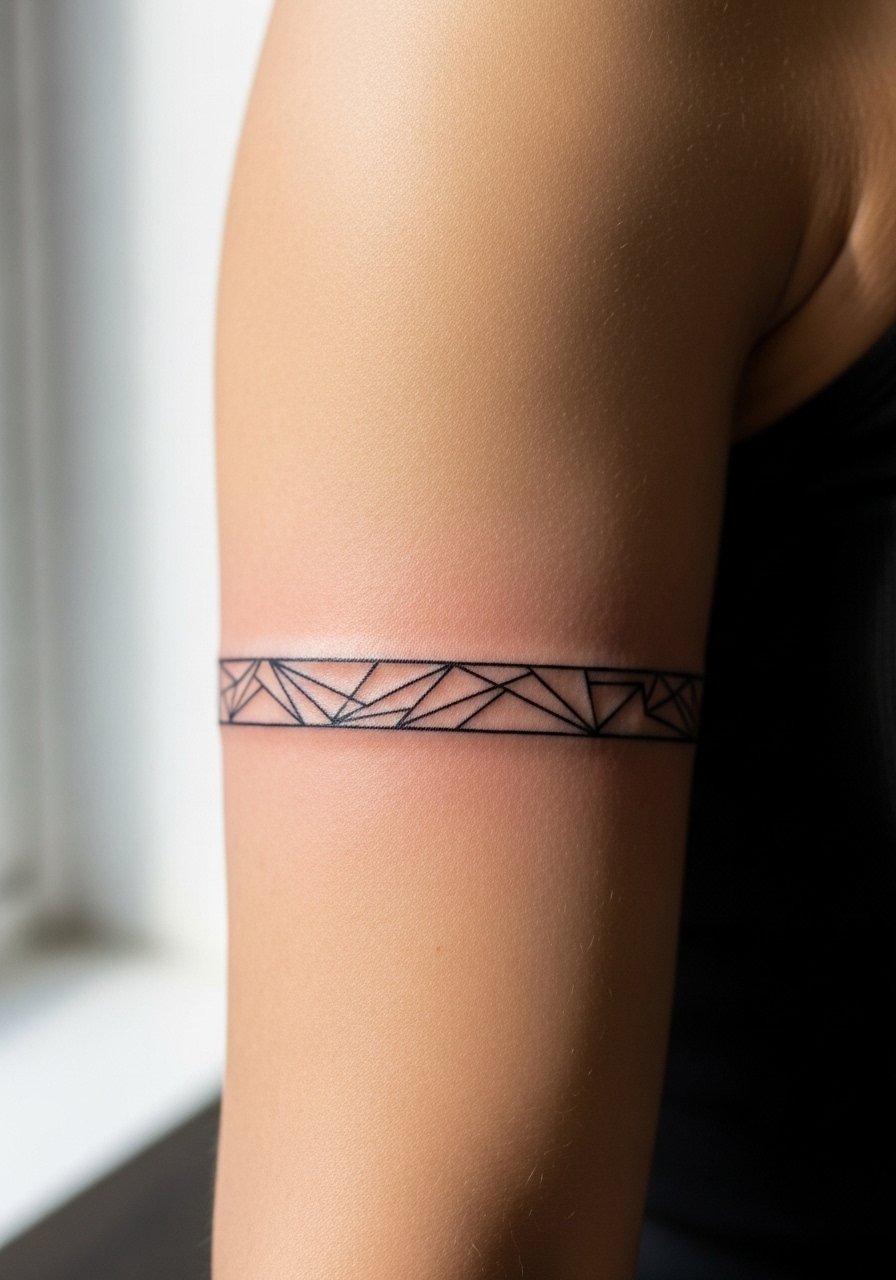
A geometric band gives structure to the upper sleeve when you plan larger elements below. Ask for slightly thicker primary lines with thinner secondary lines so the band keeps contrast as it heals. The bicep is one of the more forgiving areas for touch-ups and the session pain is low. Avoid overlapping the band with high-saturation fills later, as that can reduce its clarity. Wear a loose tank top the day of the session so the artist has clean access without fabric rubbing.
9. Ribcage-Inspired Minimal Leaf Sprig

Ribcage placements are divisive. One camp says the skin there stretches and fine line blurs within two years. The other camp argues that with correct needle depth and spacing, fine line settles fine on ribs. If you choose this for a sleeve extension, tell your artist you want the sprig spaced and slightly larger than photo references. Expect higher pain and longer session time. The common mistake is shrinking the sprig too small. For session wear choose a cropped top you can lift easily so the artist can work without disrupting the rest of your clothing.
10. Tiny Constellation Cluster Along the Inner Wrist

Constellations are delicate and very visible, so spacing is key. Ask for slightly larger dots and airy connectors, because tiny stars can blur with constant hand washing. The wrist is sensitive, so sessions are short but require precision. A common oversight is leaving the stars too close together. Pair this with a racerback tank for days you want the wrist visible without long sleeves.
11. Thin Wave Line Wrapping the Forearm

A single wave line gives motion to a sleeve without heavy shading. Tell the artist you want consistent line depth and a slightly bolder crest so the curve keeps shape after a few years. Forearm placement is forgiving, with low blowout risk when the needle is set shallow enough for surface detail. Sessions are quick and low to moderate pain. The most common mistake is trying to fit too many peaks into a short stretch.
12. Micro Script Phrase Along the Inner Arm
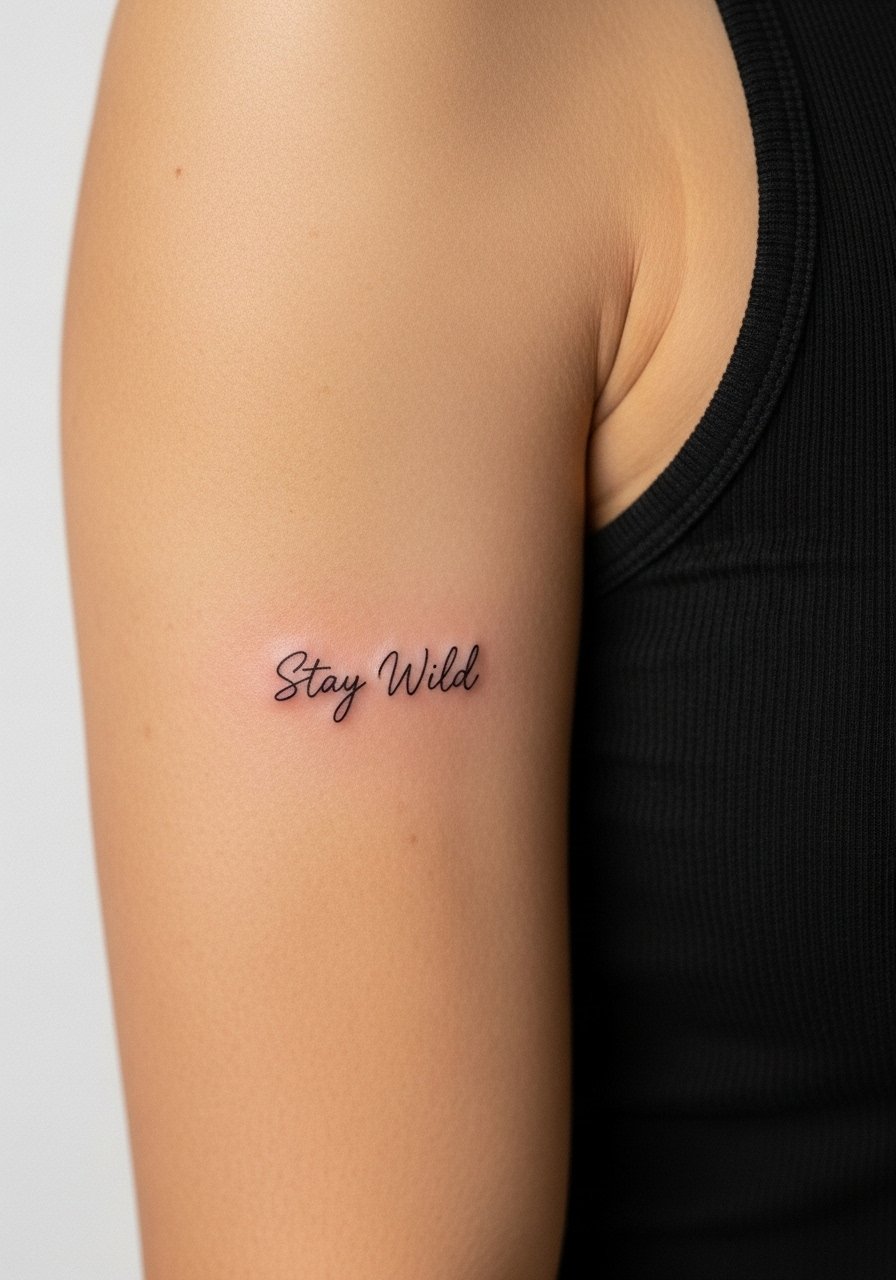
Micro script works well that reads like a whisper on a sleeve when the letters are spaced thoughtfully. In consultation, show the exact font and ask the artist to stencil it so you can stand and move before inking. Inner arm skin shifts with motion, so sizing up by 10 to 20 percent helps with longevity. The session feels moderate and precise. Try an outfit with a loose button-down shirt you can slip off or pull aside for easy access.
13. Chain-Link Bracelet That Connects to Wrist Band
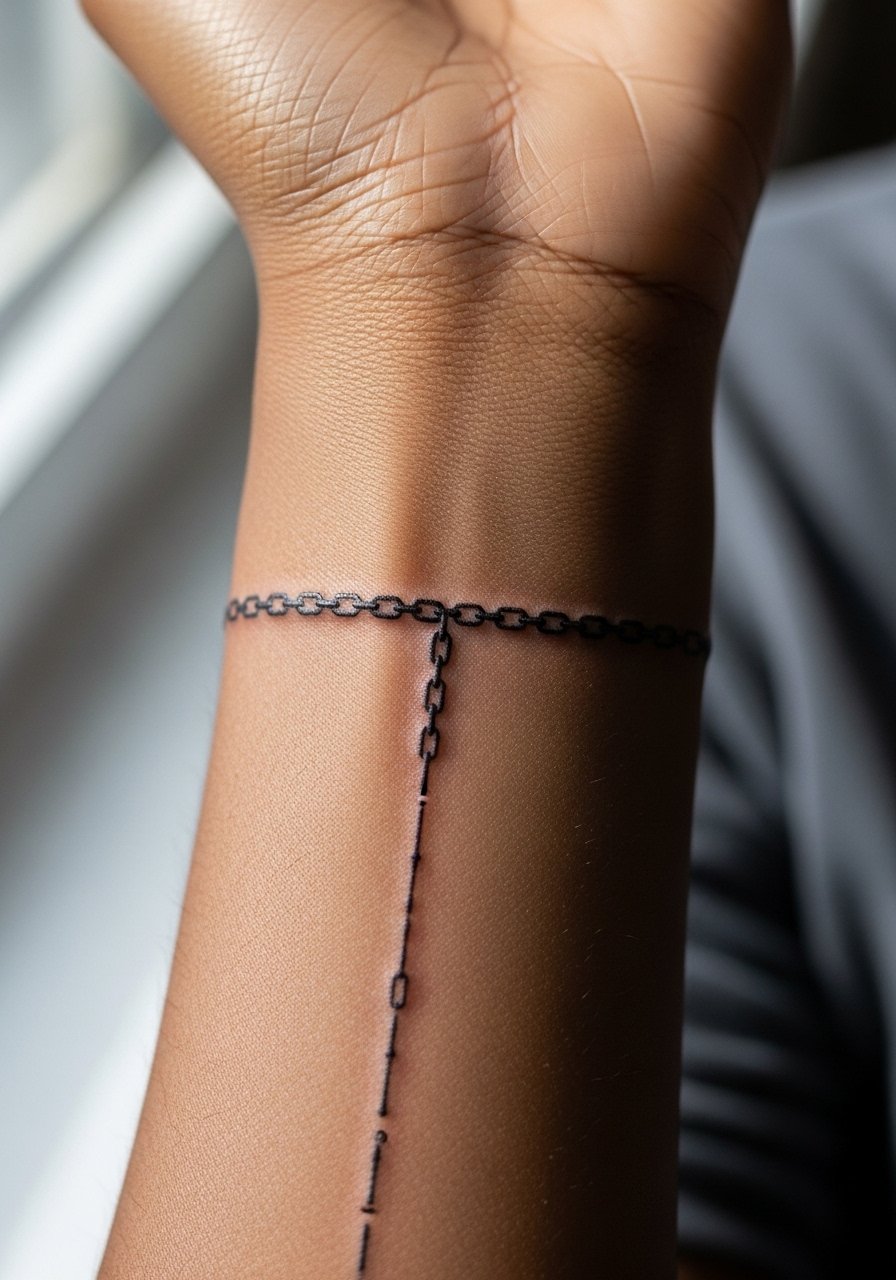
Chain-link bands give a jewelry illusion and help anchor sleeve elements. Ask your artist for slight gaps in the links so they do not merge as the skin ages. The wrist's friction zones increase the chance of softening, so plan for a touch-up in a few years. Sessions are short but placed near high-use areas. A styling tip is to wear a delicate pendant necklace that balances the wrist focus when you are wearing short sleeves.
14. Minimalist Mountain Range Along the Outer Forearm
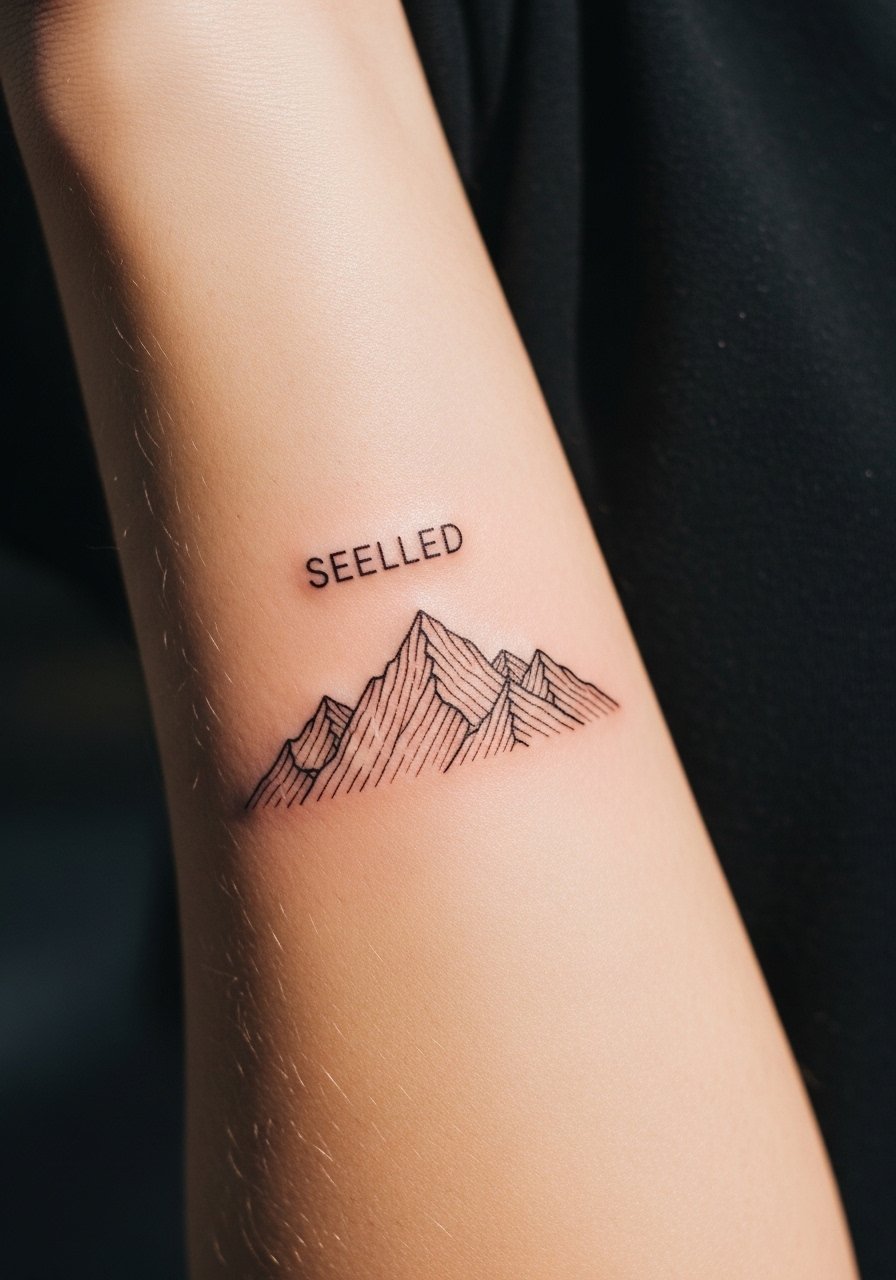
A tiny mountain range creates a horizon line that guides sleeve composition. Request slightly angular peaks with clean negative valleys so the design does not flatten when it softens. The outer forearm is low on blowout risk, and the session runs short. New artists sometimes pack texture into the valleys, which can muddle the minimal intent. Pair this with a rolled cuff denim jacket for casual outfits that echo the rugged geometry.
15. Stippled Fern Accent Along the Inner Elbow

Stippled fern accents add texture between linear pieces on a sleeve. Right over the inner elbow the skin flexes, so keep the fern small and avoid dense black. Ask for dot shading rather than solid fills for longevity. Pain spikes on the inner elbow make this a spot for short breaks. The typical mistake is trying to scale it too big, which invites blurring.
16. Minimal Geometric Anchor on the Upper Arm
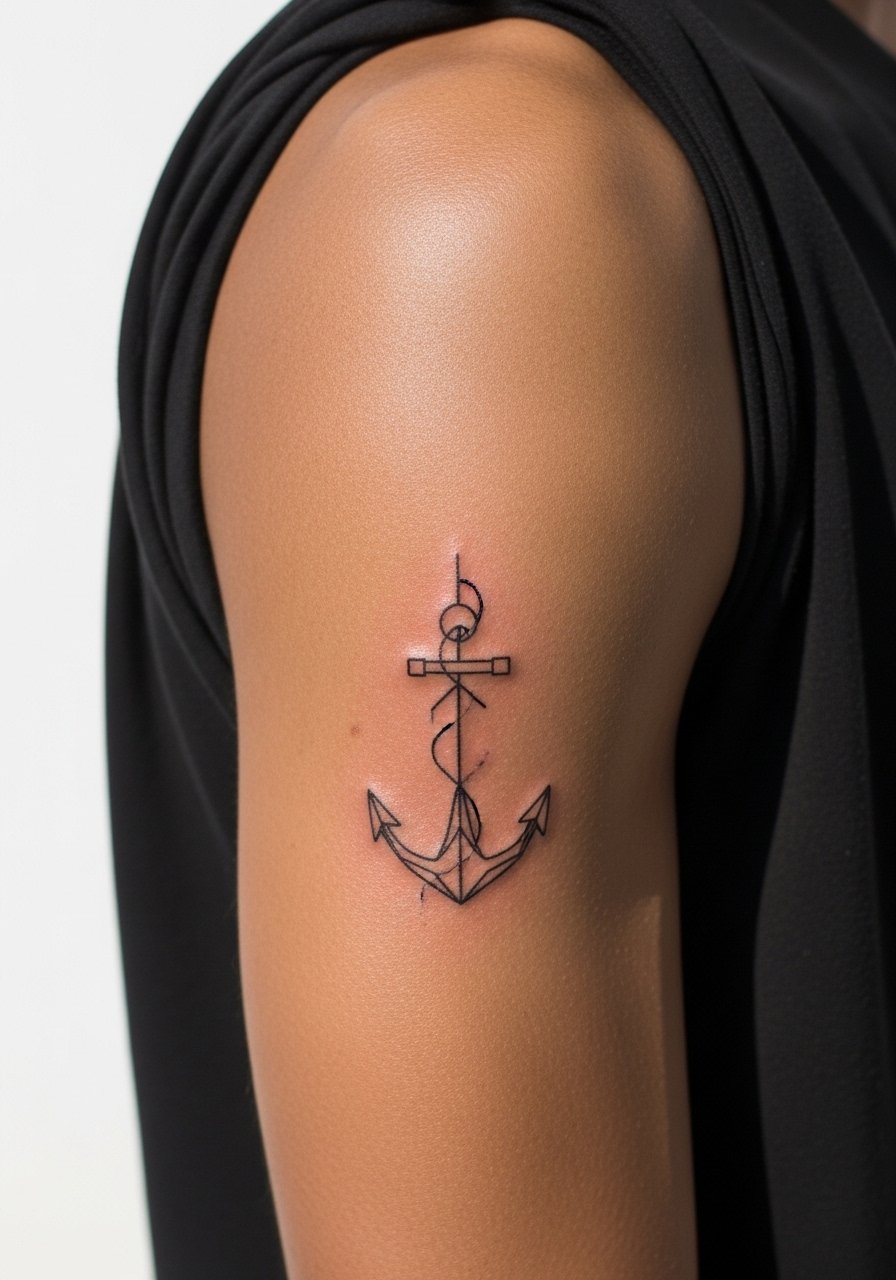
An anchor or compact geometric can act as the sleeve's focal point. In consultation, specify line width hierarchy so thicker contours hold and thinner internal lines add detail. The upper arm tolerates heavier contrast, and sessions are moderate in length. Avoid cramming too many interior lines or the piece will lose definition as it heals. For a night out, sleeveless tops or an open-back dress let that anchor breathe.
17. Linear Arrow Cluster Leading to the Elbow
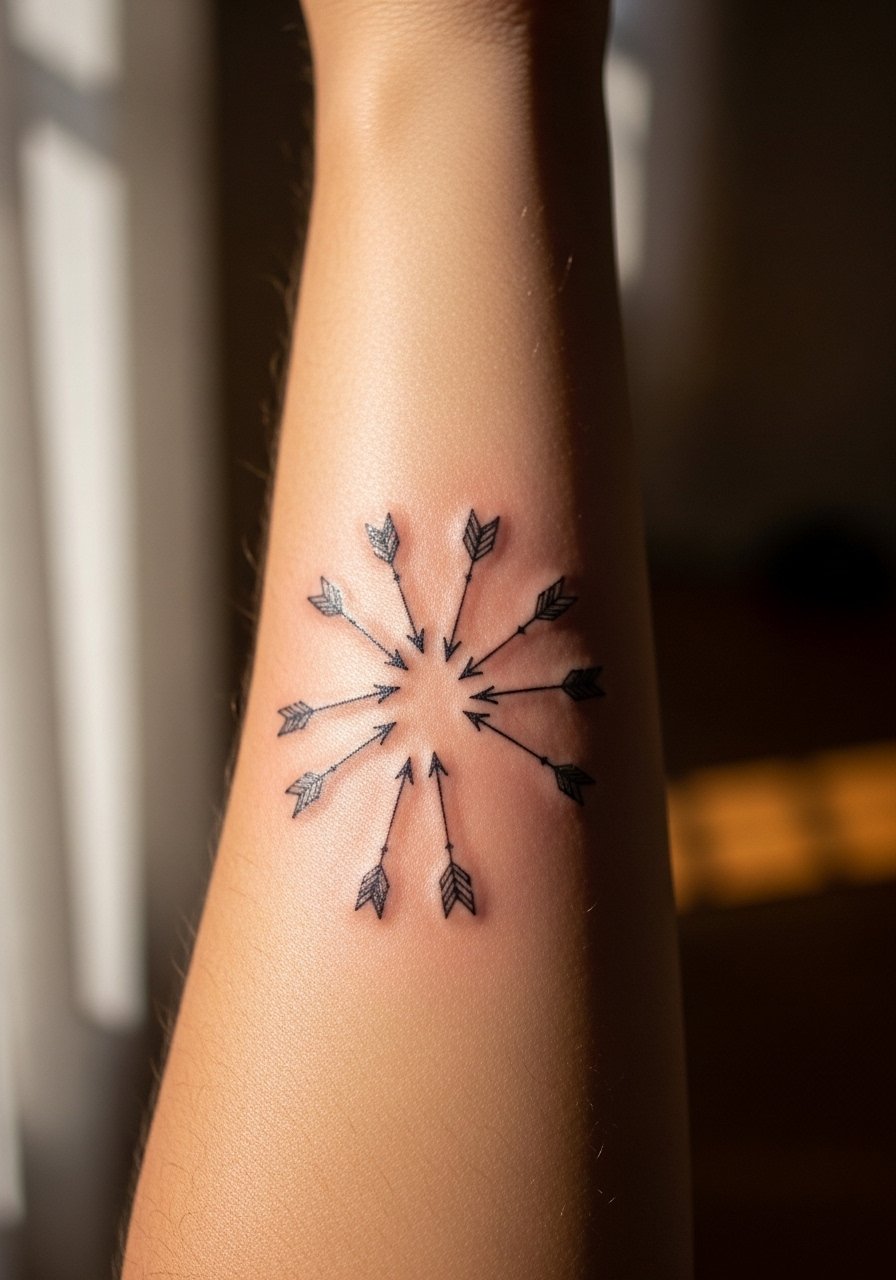
Arrow clusters guide the eye along the sleeve and are useful for connecting larger motifs. Tell your artist which direction you want the visual pull so the arrows do not fight each other. Small arrowheads can blur, so favor open negative tips. Sessions are short and focused. The typical error is overlapping arrows at different angles which confuses the composition.
18. Delicate Lace Cuff Around the Wrist
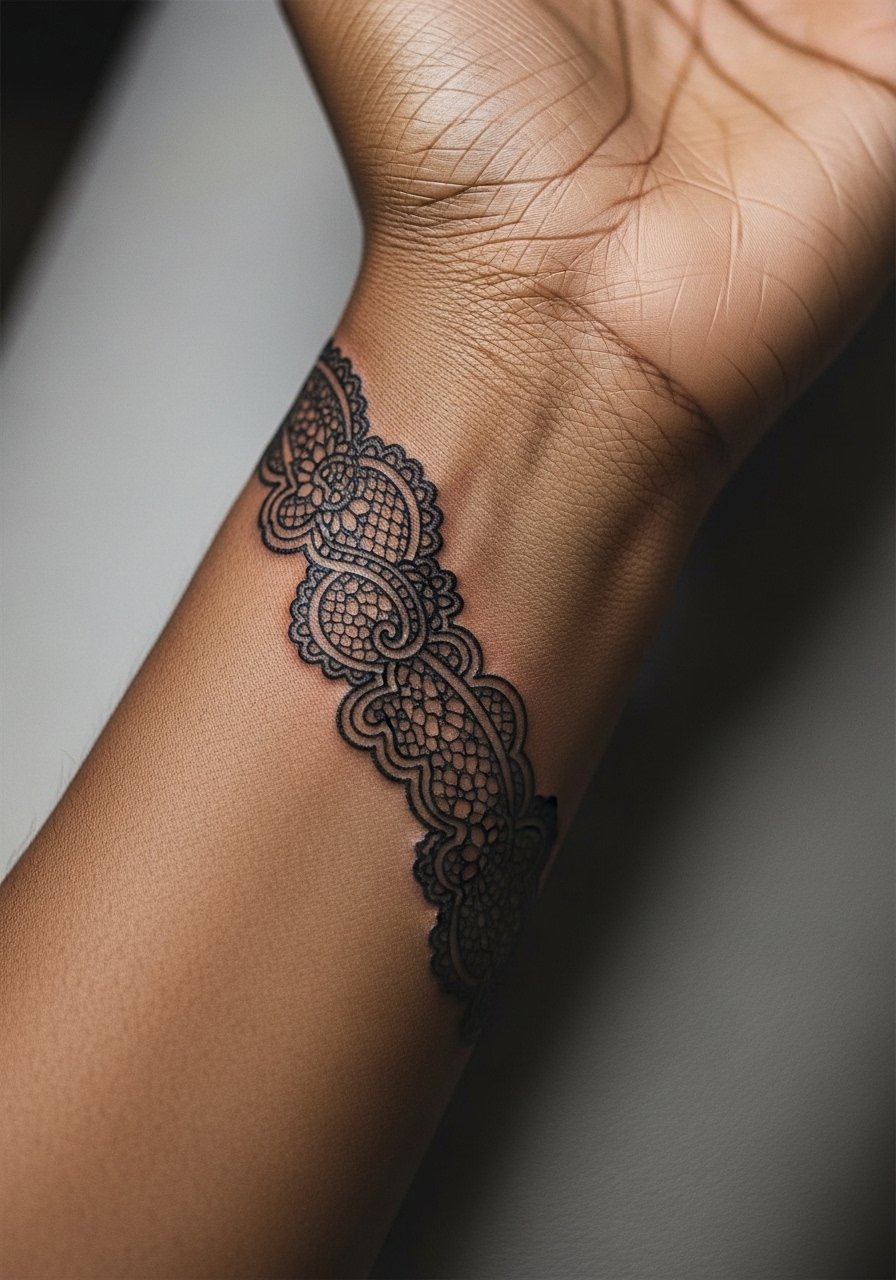
Lace cuffs are ornamental and photograph like jewelry, but the wrist is a friction zone. Ask for thinner outer lines and open internal loops to preserve the lace pattern over time. Expect short sessions and a likely touch-up by year three. When considering career visibility, know that hand and wrist tattoos still matter in some industries. Show it off with a minimalist bangle bracelet worn above the cuff.
19. Tiny Animal Silhouettes Staggered Up the Arm

A run of tiny silhouettes can tell a story along a sleeve without heavy saturation. Keep each silhouette slightly larger than thumbnail size to reduce loss of detail over years. Session time is cumulative if you add many animals, so plan multiple short sittings rather than one long marathon. The common mistake is crowding them too close. For casual days, wear a short sleeve tee that reveals the staggered sequence.
20. Minimal Mandala Half-Panel at the Upper Arm

A simplified mandala gives a decorative anchor without heavy fill. Tell your artist you want clear radiating gaps and modest dot work rather than dense black centers. The upper arm can handle slightly more complexity, but scale matters. Sessions take medium time and you may want a light touch-up later. If this pattern draws from a cultural form, consider asking for subtle variations out of respect for the original context.
21. Fine Line Lace Panel That Tapers Toward the Wrist
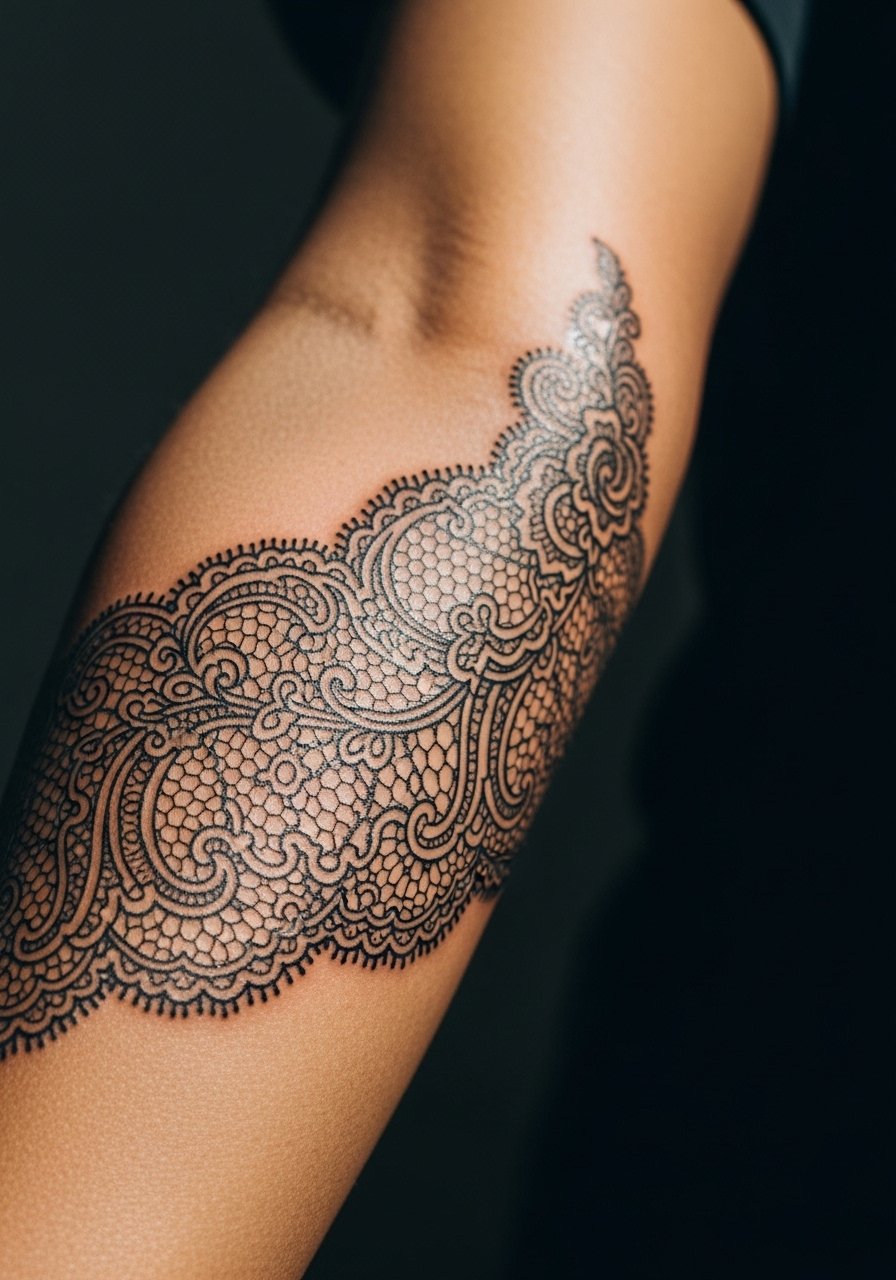
A tapering lace panel provides a feminine finish to a sleeve and works well as a final piece. Ask your artist to scale the pattern so details increase toward the upper arm and simplify near the wrist. The forearm feels moderate for this work, and the session can be split into two sittings to maintain precision. The biggest mistake is keeping the same level of detail across the taper, which makes the lower portion fuzzy over time. Pair it with an open cuff bracelet to amplify the lace effect when you wear short sleeves.
Frequently Asked Questions
Q: Will fine line elements blur together if I get a full sleeve of minimal line work?
A: It depends on spacing, placement, and your skin. If lines sit too close across curved zones like the inner elbow or wrist, they can merge as the ink spreads. Ask for generous spacing and slightly varied line weights so the sleeve reads even as detail softens.
Q: How often should I expect to need touch-ups on a minimal sleeve?
A: From what I have seen, many minimal sleeves benefit from a light touch-up around year three to five, depending on exposure and friction. Areas like the wrist and inner elbow usually fade faster than the upper arm.
Q: Are there specific pieces from this list you should avoid if you work in a conservative office?
A: Hand and wrist tattoos are the most visible and still affect hiring in some fields. Consider placing focal elements higher on the upper arm where they can be covered by sleeves during work hours. A forearm vine or upper-arm mandala gives similar impact while staying concealable.
Q: How should I dress for a multi-hour sleeve session so the artist has access and I stay comfortable?
A: Wear easy-to-remove layers that reveal the arm without full disrobing, like a loose button-down shirt or a tank with a cardigan. That way you can keep warm between passes without tugging at the tattooed area.
Q: Do certain skin tones affect how fine line holds up?
A: Line clarity depends more on line weight and spacing than skin tone. That said, contrast behaves differently across tones, so an artist experienced with varied skin will advise on ideal line thickness and spacing during consultation.
Q: What questions should I ask during my consultation to make sure the sleeve fits together?
A: Ask how the artist plans to connect individual pieces, what line weight they recommend for each placement, and how they handle spacing on flex points like the elbow or wrist. Request a mock stencil applied to your arm so you can move and check proportions before inking.
