
Fine line trends look gorgeous on a saved board, but what holds up on skin is a different story. I keep seeing three repeat problems in consultations: tiny scripts that fade into a smudge, wrist placements that warp with everyday motion, and surprise pricing for “mini” work. Read on for 21 careful, minimal designs and exactly what to ask, wear, and expect so your ink ages the way you want.
1. Fine Line "Mom" / "Dad" Stack on Inner Wrist
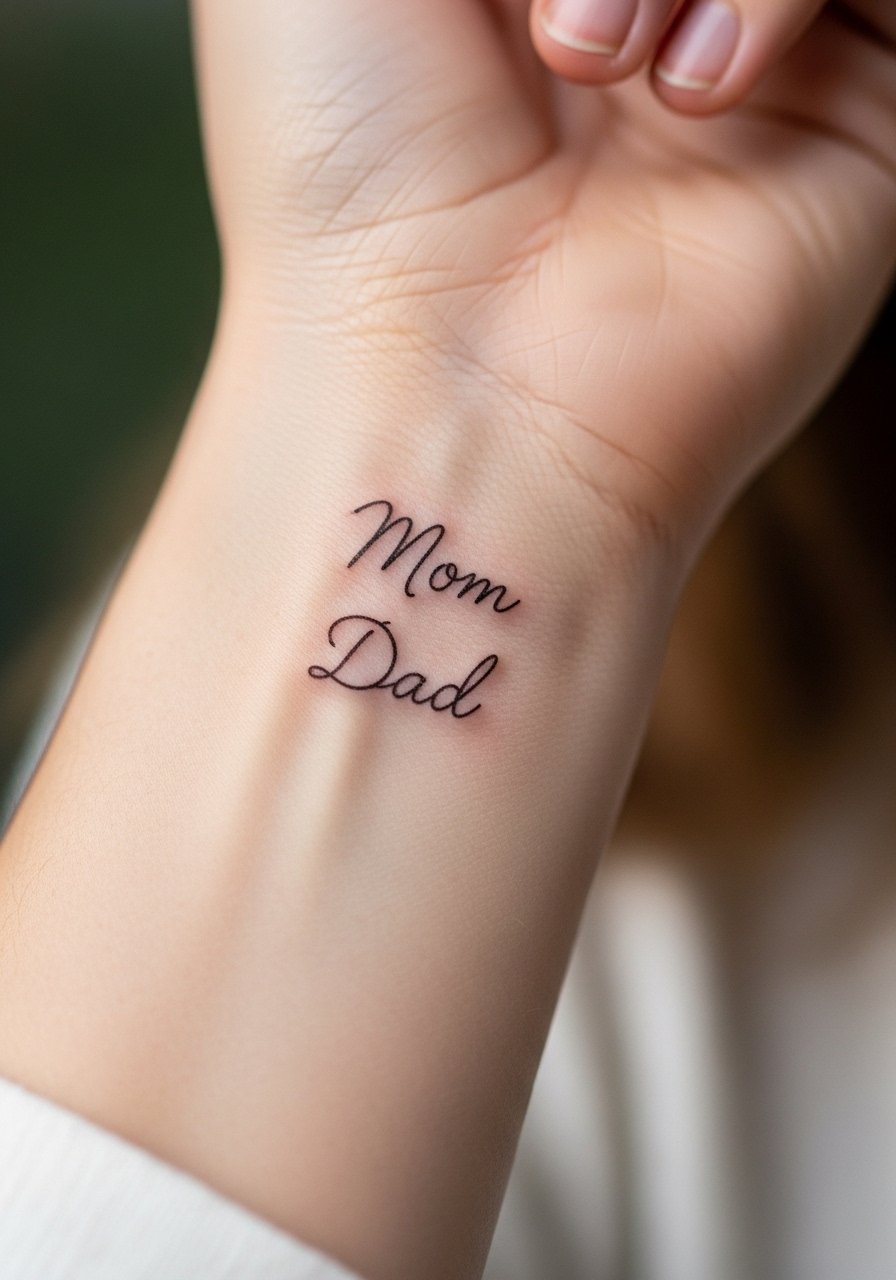
I've seen this stacked script on first-timers who want a tiny, readable marker of family. Fair warning, the wrist is a high-movement zone so lines can blur or warp over time. Tell your artist you want slightly heavier single-needle work and a little breathing room between letters so the script keeps shape at year two and beyond. For the session wear a sleeveless tank so the artist can access the wrist cleanly, and if you like bracelets, layer a thin gold chain bracelet on the opposite wrist to frame the piece without rubbing it. Expect a 30 to 45 minute session and a possible touch-up around year two.
2. Minimalist Heartbeat Line with Initials on Inner Forearm
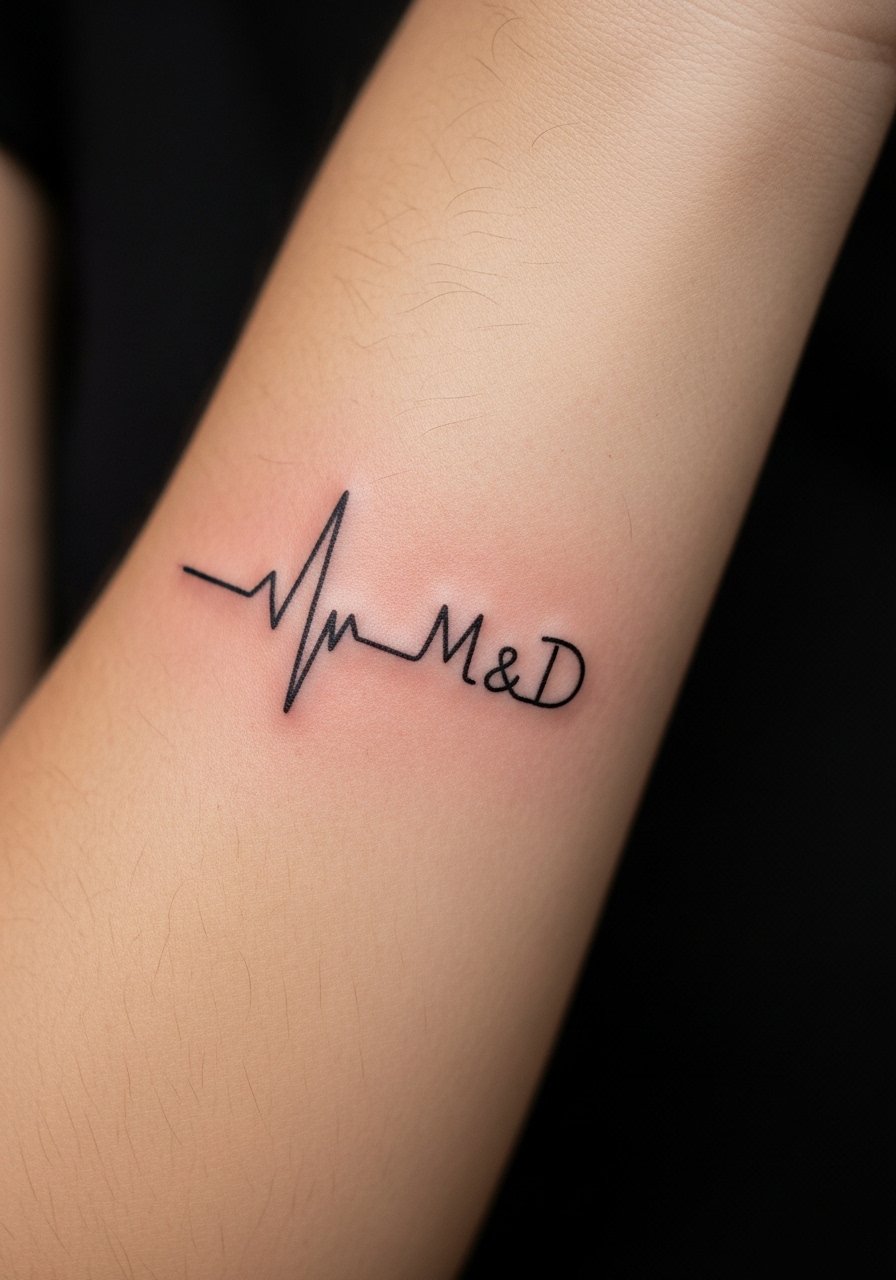
This elongated design benefits from forearm placement because the skin moves less than the wrist. When you discuss it, specify exact initial placement and overall length so the rhythm does not look cramped. The main mistake is making the peaks too tight, which merges after healing. Expect a one-session piece that runs 45 to 90 minutes depending on length. For showing it off, roll a linen button down shirt sleeve and add a minimalist ring set on the opposite hand to balance attention. Fine line here may need a light touch-up at 12 to 24 months.
3. Blackwork Infinity with Embedded Names at Ankle
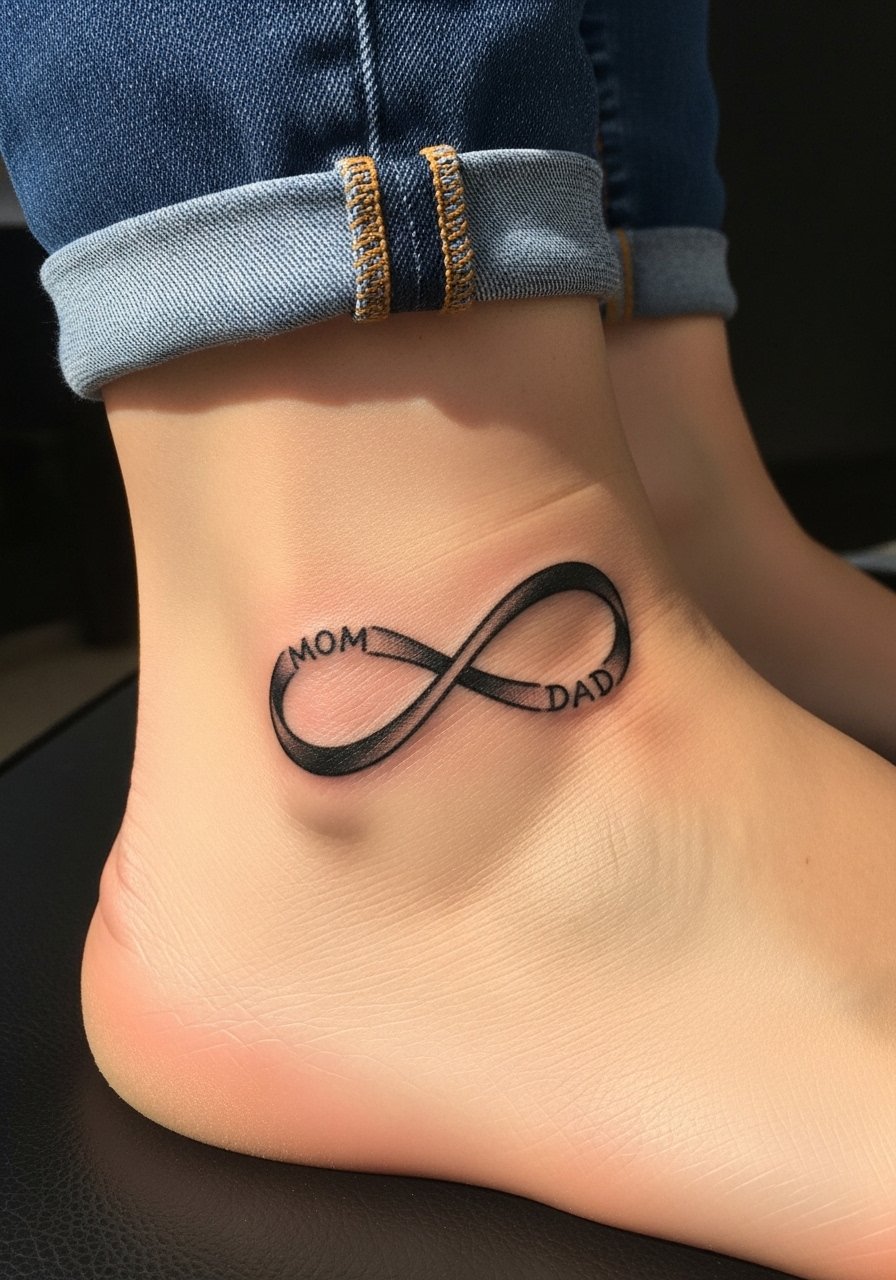
Ankle work reads bold when the lines are saturated. The common error is too-small script inside the loop, which becomes illegible as the skin rubs. Ask for slightly thicker lettering and solid black fill where needed so the names remain distinct. Session time is usually under an hour. Pair with strappy flat sandals and cropped jeans to show the loop without crowding, and roll pants during the session so the artist has clear access. Touch-ups at two to three years are common for ankle pieces because of friction from footwear.
4. Micro-Realism Parent Silhouettes on Upper Arm
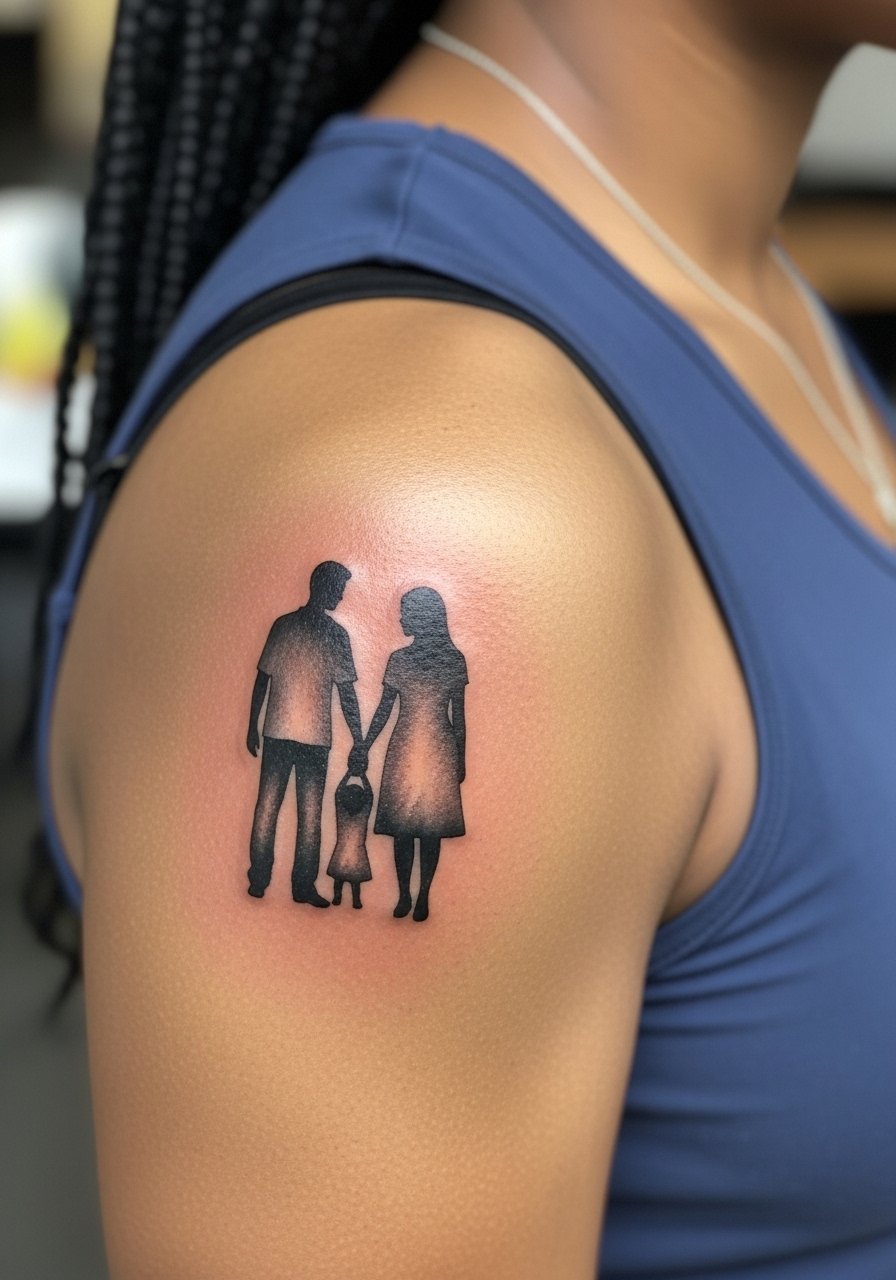
Micro-realism needs an experienced hand for tiny figures, and it shows best on the upper arm where movement is moderate. A real mistake is pushing for photographic detail at a scale too small to resolve, which softens into gray mass. Tell the artist you want simplified silhouettes with defined edges and subtle shading rather than tiny facial detail. Pain is moderate. For session wear, a sleeveless black tank is ideal so the artist has full access. Expect one to two sessions depending on shading, and plan for a touch-up if fine shading softens after a year or two.
5. Ornamental Mandala with Embedded M and D on Thigh

Mandala geometry needs room. The biggest mistake is compressing dense mandala detail into too small a diameter. On the thigh you can scale it to three inches or larger, which keeps dots and stipple shading crisp as it heals. In consultation, point to line weight you like and ask for spacing between radial lines. Session wear should be loose shorts so the artist can lift fabric without pinching. Because this sits on fleshier tissue, pain is lower and the piece ages well if you avoid tight waistbands rubbing the edges during healing.
6. Neo-Traditional Split Heart with Arrow and Anchor on Outer Forearm
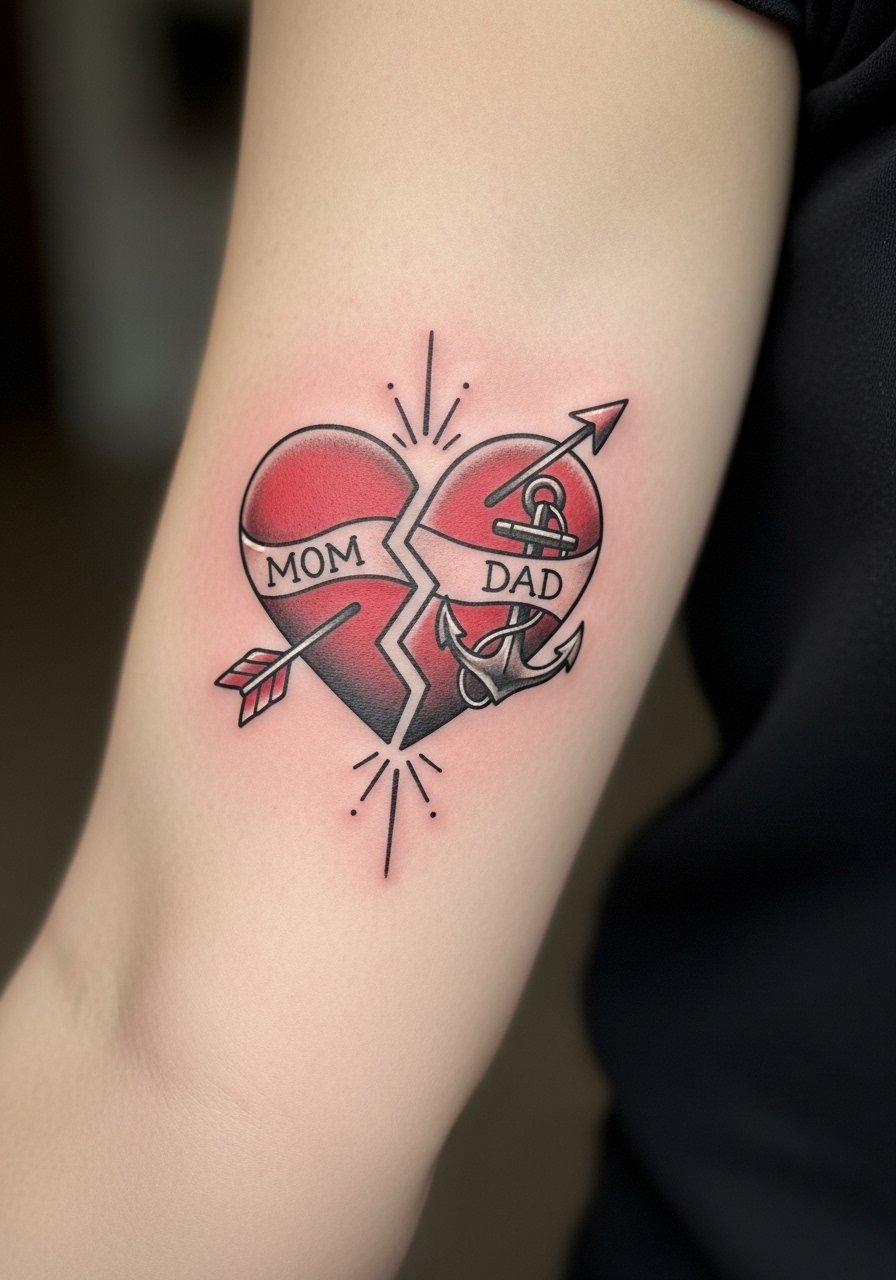
This plays with symbol and narrative while staying compact. Artists sometimes over-detail the split, which reads messy after a year. Ask for bolder outlines and minimal color spots rather than full saturation, that way the heart keeps contrast without early fading. The outer forearm handles color and movement well. For the appointment, a loose button-down shirt you can pull aside is useful. Expect a single session of around an hour and likely a color touch-up at two to three years if you add blues or reds.
Studio Day Picks
The wrist, forearm, and ankle pieces above need different prep than chest or thigh work, so these five items smooth the session and the first week.
- Stencil transfer paper kit. Lets you test placement and spacing on real skin before the needle touches down, very useful for stacked scripts and embedded names.
- Topical numbing cream. Applied about 45 minutes before can ease wrist and ankle sensitivity so you sit through fine line work without tensing.
- Thin protective film roll. Keeps ankle and wrist areas protected from friction during the first days of healing.
- Fragrance free gentle body wash. Cleans the area without irritating fresh lines or delicate single-needle work.
- Aquaphor healing ointment. A thin layer for the first few days helps fine line work retain moisture without smothering needle channels.
7. Fine Line Dove with "Mom Dad" Banner on Collarbone

Collarbones are beautiful but sensitive to placement errors. The common misstep is centering a banner too low so it disappears under clothing. Ask to preview the stencil while standing upright and with the neckline you plan to wear, so the artist can adjust height. Pain is moderate and the session takes 30 to 60 minutes. For showing it off, an off shoulder blouse or a dainty drop necklace sits just below the banner without competing. Expect fine lines to soften slightly by year two and plan for a small touch-up if needed.
8. Minimalist Crown Duo on Inner Wrist
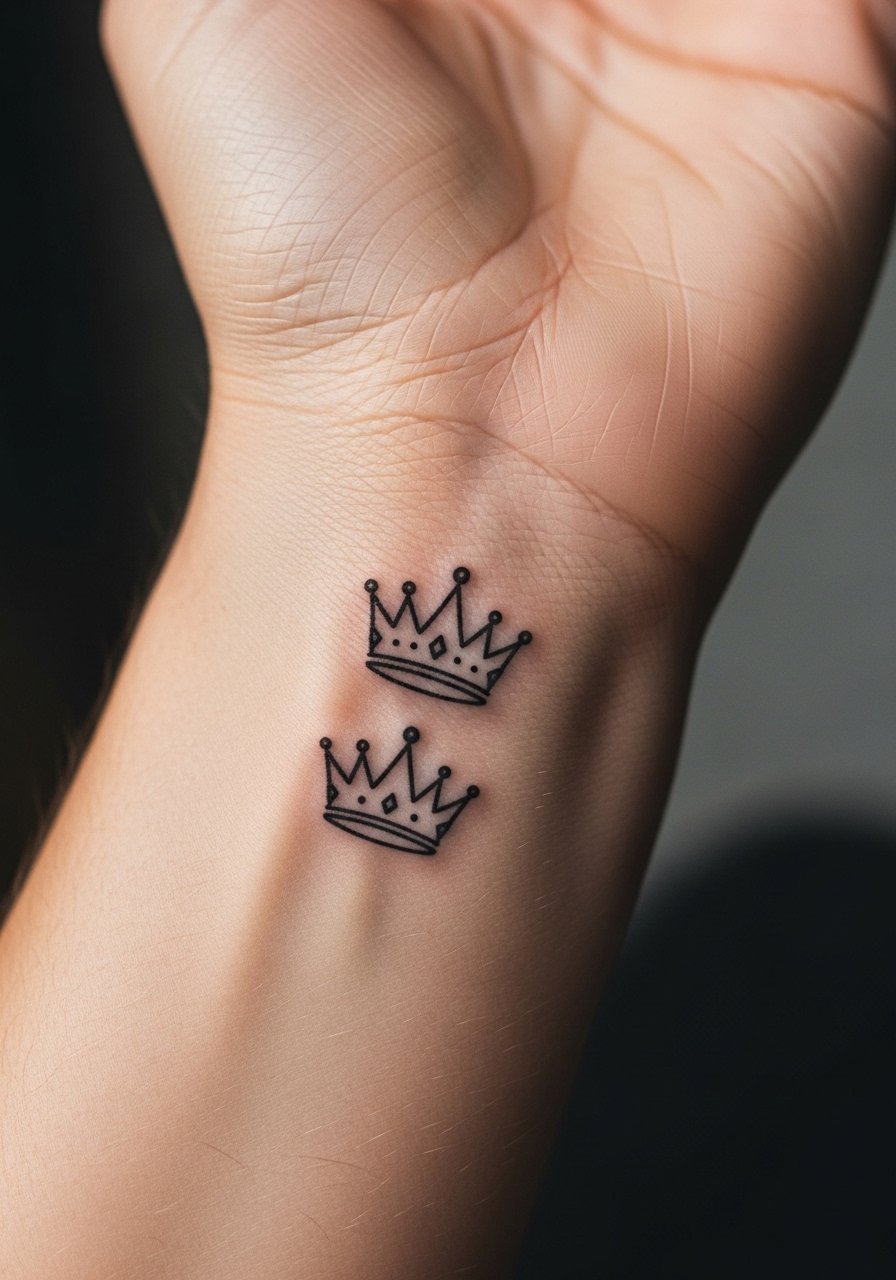
Crowns are compact and versatile, but on the inner wrist you must allow space between crowns so they do not merge. Ask for a one-inch height and slightly bolder linework than on paper so the crowns read after healing. Session time is short, about 20 to 40 minutes. For the session, wear a sleeveless tank top for easy access. Crowns on wrists often need a light touch-up at year one to keep edges crisp.
9. Blackwork Tree with "M" and "D" Roots on Ribcage

Fair warning: the ribcage is a high-pain area. The reward is scale and drama that reads well under clothing or in swimwear. Artists disagree about fine line on ribs. One camp says the skin stretch blurs thin lines within two years. The other camp argues that with correct depth and spacing fine line can settle well. Ask your artist where they stand and request spacing that matches their technique. Expect one to two sessions depending on size. Avoid tight waistbands during healing and plan for a touch-up if roots soften after the first year.
10. Watercolor Splash with Faint "Mom Dad" on Shoulder Blade

Watercolor effects look painterly fresh but are prone to faster fading, especially on areas exposed to sun. The common error is heavy dilution without enough anchor lines, which leaves the text illegible after a year. Ask for a faint anchor outline around the script so the shape survives fading. Session time is usually under 90 minutes. For the appointment, wear a loose tank top you can pull aside easily. Expect color fade over years and plan a color refresh if you want the blues to stay lively.
11. Ignorant Style Block "MOM DAD" on Calf

The ignorant style thrives on raw, hand-drawn energy, so the appeal is the imperfect outline. The mistake is over-refinement in the stencil stage, which kills the attitude. Tell the artist you want visible hand-trace lines rather than machine-perfect lettering. Calf placement tolerates bolder outlines and less touch-up. For session wear, pull on shorts or wear pants you can roll up easily. Pain is low to moderate and session time is brief, typically 30 to 60 minutes.
12. Fine Line Arrow Piercing Heart with Parent Initials on Ankle
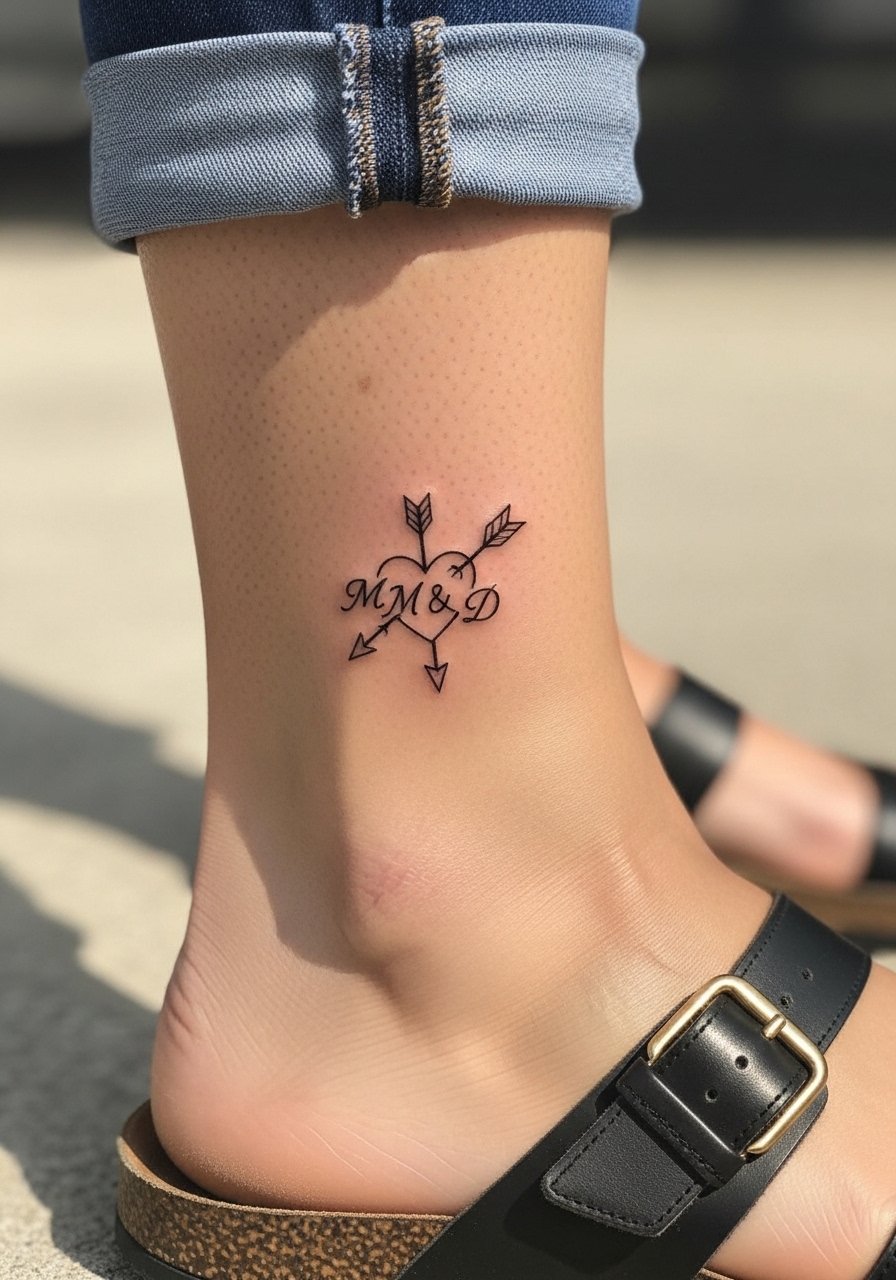
Ankle pieces feel intimate and visible in summer, but thin arrows can blur if too faint. The key is asking for a slightly firmer line weight so the arrow shaft remains distinct as the skin heals. The main session consideration is that ankles are boney and can sting more than fleshier spots. Wear loose pants you can roll up and avoid socks immediately after. Pair the finished piece with cropped straight jeans and neutral sandals to keep attention on the ankle without crowding the motif.
13. Micro Geometric Puzzle Pieces Labeled "Mom" and "Dad" on Inner Thigh
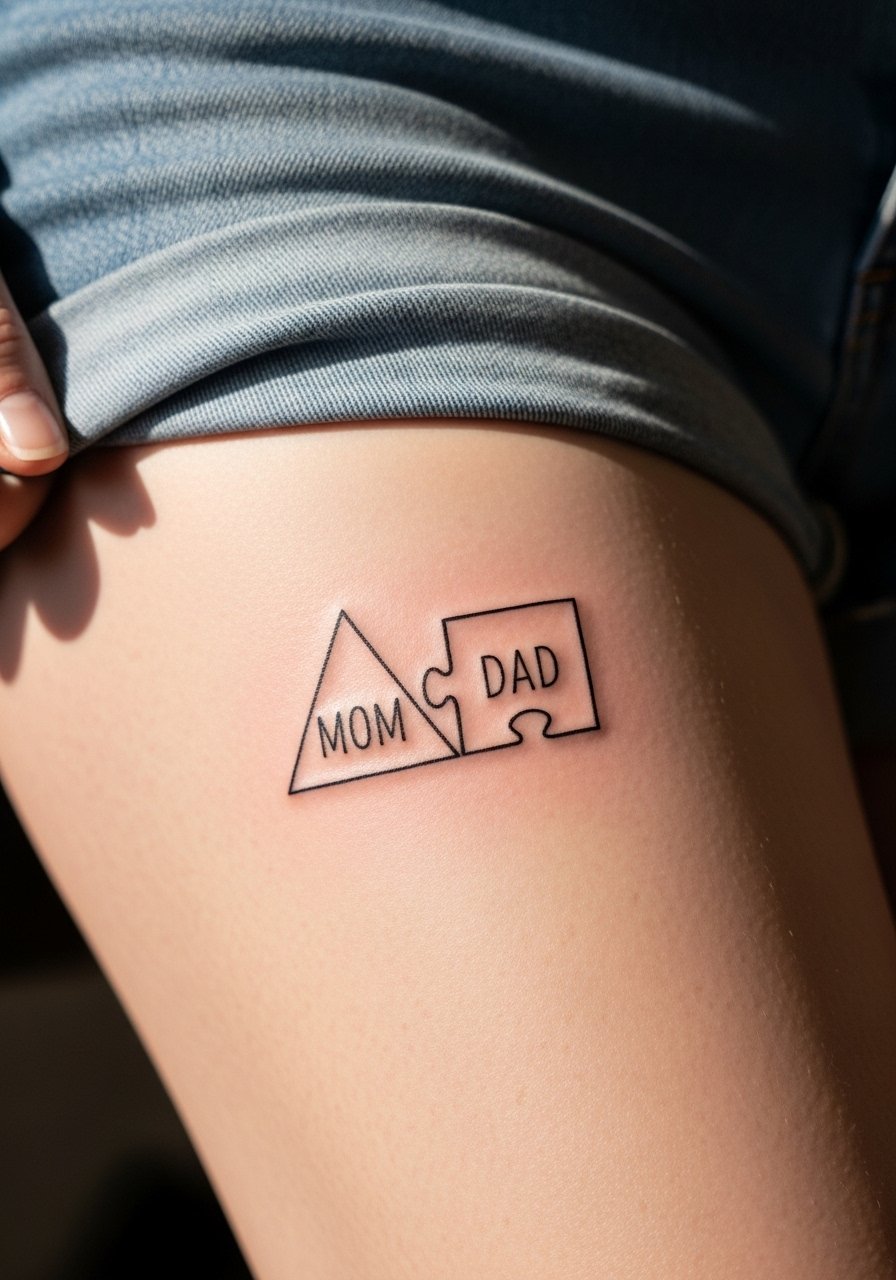
Inner thigh tattoos are often chosen for privacy, and puzzle pieces are a clever visual of connection. The common error is going too small, which makes interlocking edges merge during healing. Ask for one-inch pieces with clear negative space between them. For the session, wear loose shorts you can shift slightly without pinching. Pain is moderate and healing benefits from avoiding very tight clothing for two weeks.
14. Tiny Stippled Mandala with Embedded Letters on Upper Back
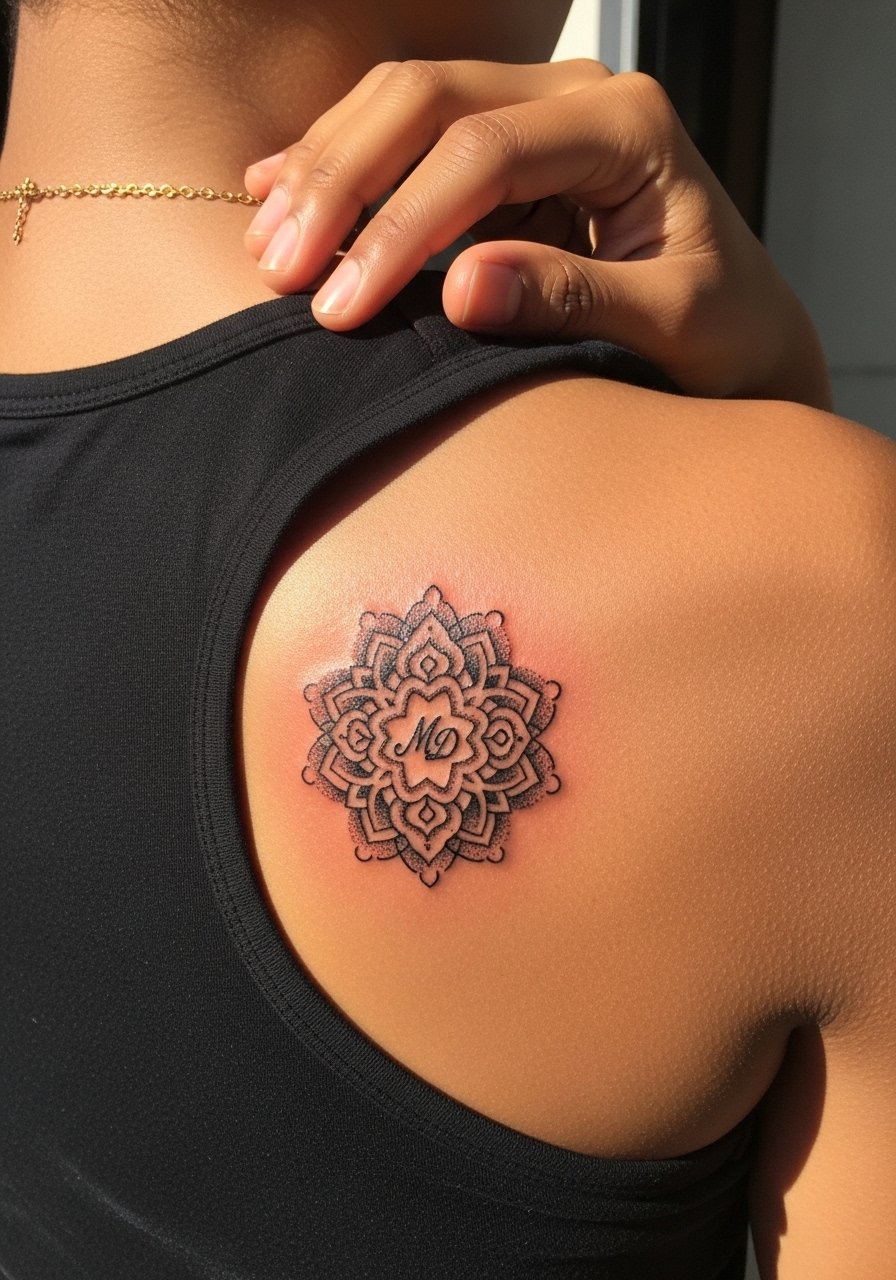
Stipple work relies on dot spacing. Too dense a stipple in a small area becomes muddy when healed. Ask for airy stipple gradients and a slightly larger diameter if you want the letters readable. The upper back is forgiving for touch-ups and often heals cleanly. For showing it off, open-back tops or a simple tank do the job. Expect a 45 to 90 minute session and plan for a gentle retouch if dots soften after a year.
15. Linear Family Coordinates Along Collarbone Curve

When text appears, exactness matters. Specify the precise coordinates you want and the font weight so the numbers do not blur into a line. Collarbones move with posture, so preview the stencil while standing and sitting. Pain is moderate and the session is short. For display, a thin chain pendant necklace sits above the line without competing. Plan for a small touch-up if numerals soften over time.
16. Matching Geometric Crowns on Each Shoulder Blade
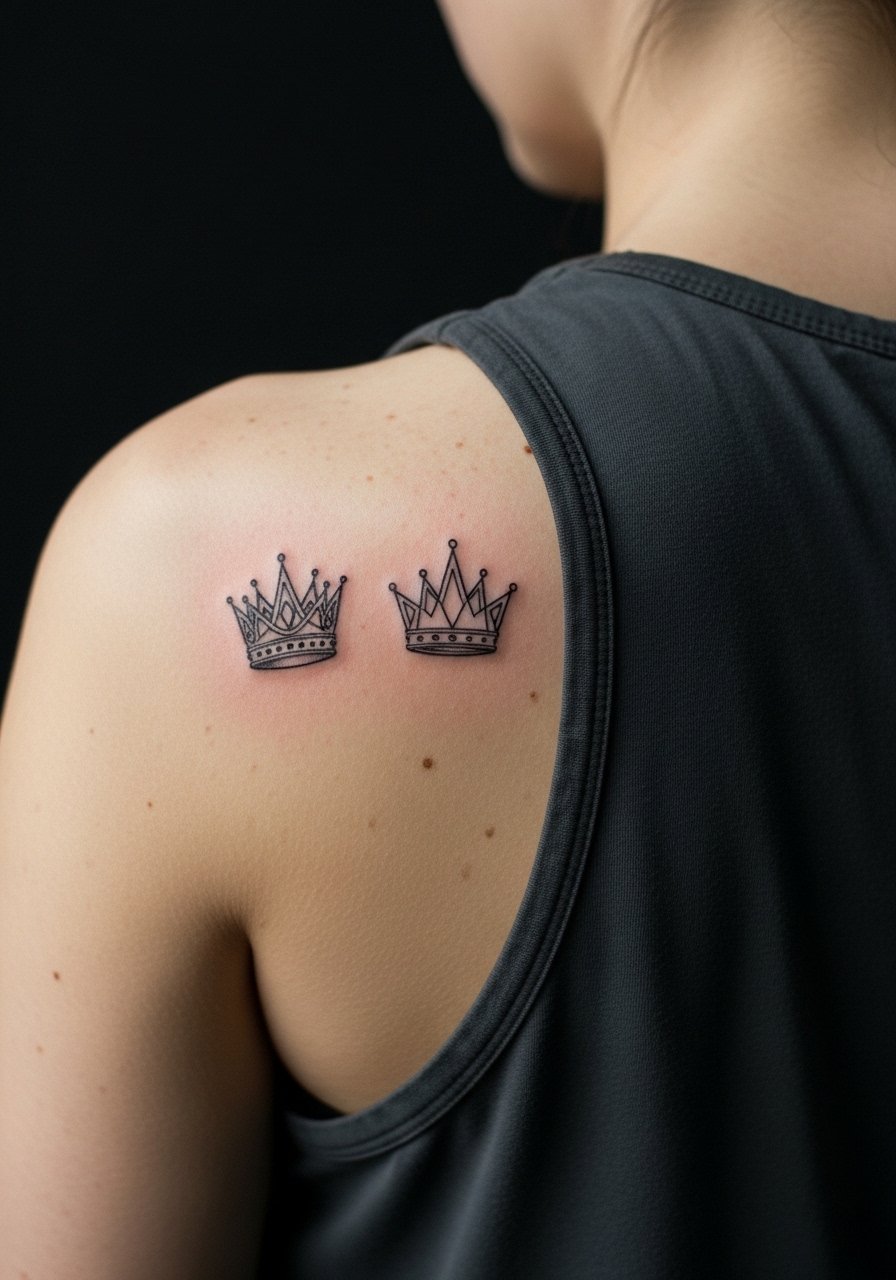
Shoulder blades are great for symmetry and low friction. A frequent mistake is uneven scaling between the two sides. Ask the artist to transfer both stencils, then stand and compare in the mirror before the first poke. Session time is usually under an hour for both pieces. For outfits, sleeveless tops keep the symmetry visible. These often last long between touch-ups because the area sees less direct wear.
17. Parent Silhouettes with Small Heartbeat Under Sternum

Sternum work needs careful placement because of curvature and movement. The biggest error is centering too low so the heartbeat reads off-kilter. Use a fitted sports bra during the stencil check so the artist can position the piece relative to clothing. This is a slightly higher pain area. Artists split on numbing cream use, with one side saying it helps first-timers and the other arguing it changes sensation reports during the session. Ask about their preference and plan for a 45 to 90 minute session.
18. Small Organic Tree with Initial Roots on Side Torso
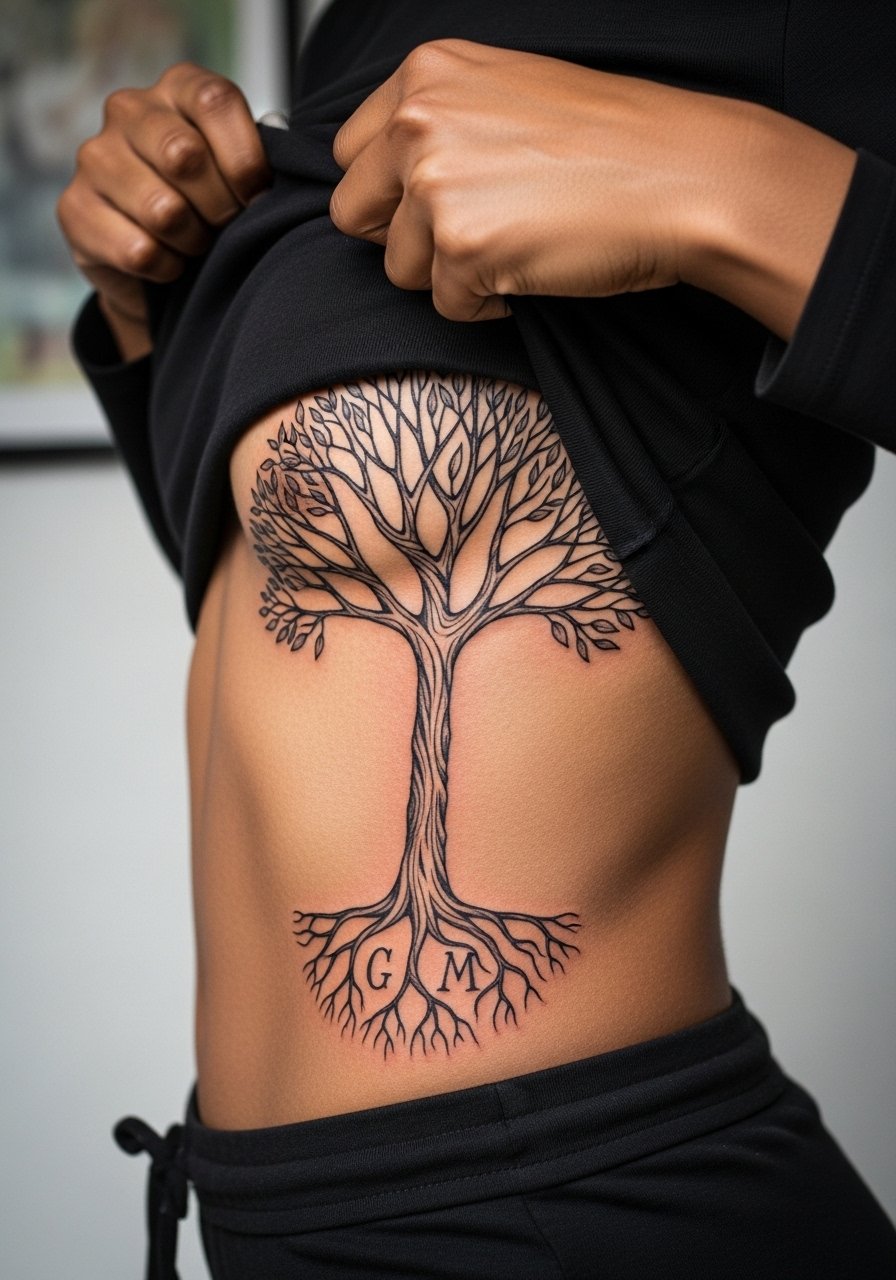
Side torso and ribs bend and expand with breaths and weight changes, so line spacing matters. The common mistake is dense root lettering that disappears when the skin stretches. Request larger root shapes and slightly bolder outlines for the initials. Expect higher pain and a longer session. During healing avoid tight waistbands that could rub the lower trunk area. A touch-up at 12 to 24 months may be necessary if roots soften.
19. Simple Anchor and Compass Duo for Parental Guidance on Outer Forearm
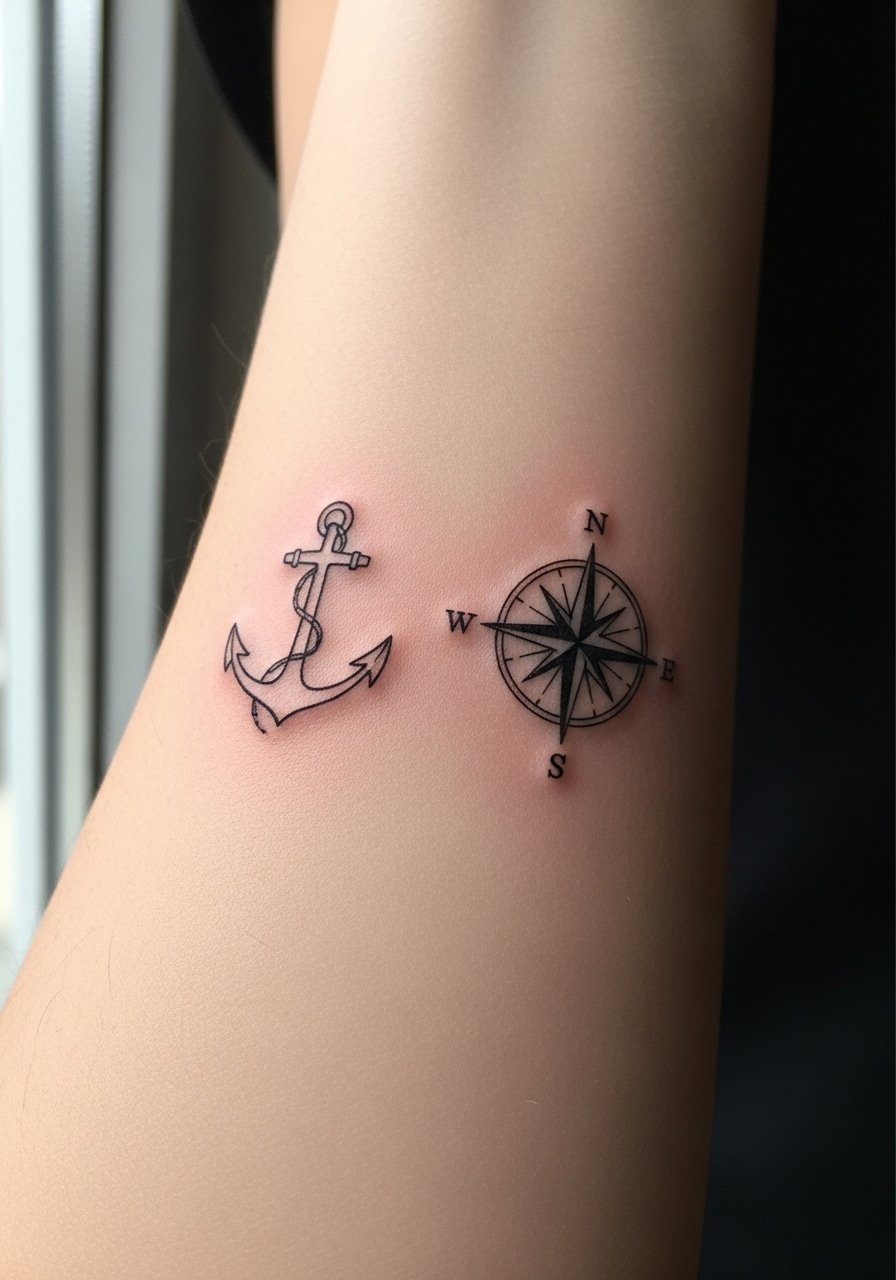
This duo reads well together and the outer forearm is perfect for linear layouts. The mistake is cramming small compass detail that won't hold. Ask for clear negative space and simplified compass points. Session time is short. For showing it off, a loose button-down shirt with rolled sleeves frames the forearm while keeping care simple. Expect minimal touch-ups if outlines are properly spaced.
20. Micro-Realism Hands Holding with Tiny Date on Inner Bicep
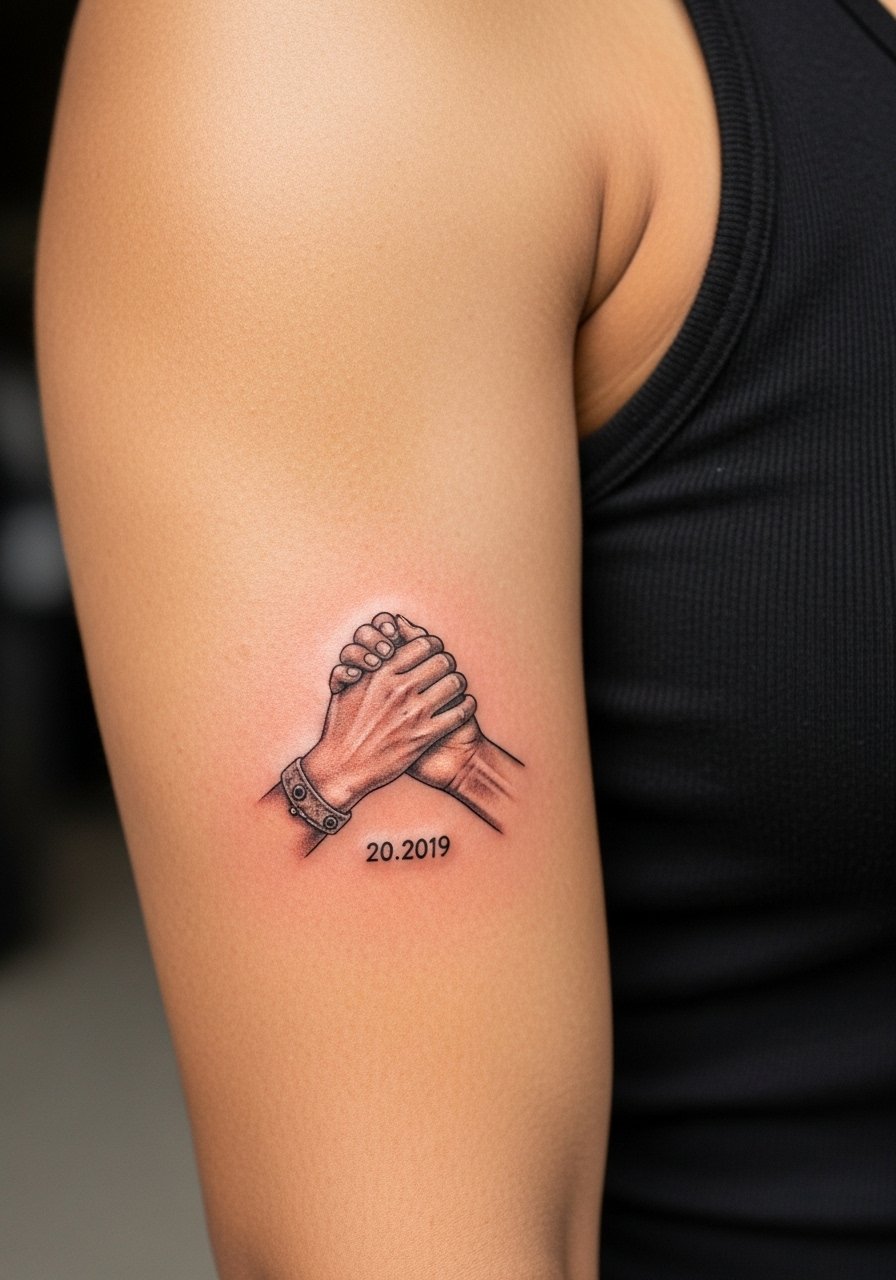
Inner bicep work can hide well but the skin is softer and can cause slight blur in delicate shading. The real mistake is asking for micro-detail too small for the canvas. Ask for simplified silhouettes and a clear, legible date in a slightly heavier weight. For the session wear a tank so the artist can have unimpeded access. Pain is moderate and touch-ups may be needed if stipple shading softens.
21. Geometric Puzzle and Mandala Hybrid on Thigh

This hybrid uses negative space to keep both the puzzle and mandala readable. The common error is overfilling the junction so the two forms lose identity. Ask for a clear dividing negative space and staggered dot work to separate textures. Thigh placement tolerates larger scale which preserves detail as years pass. For the session, wear loose shorts for access and comfort. Expect a 60 to 120 minute session and a touch-up if heavy stipple softens after a year.
Frequently Asked Questions
Q: Will fine line "Mom Dad" scripts on the wrist blur faster than bold work?
A: From what I have seen, fine line scripts on high-motion areas like wrists are more likely to soften than bold blackwork. Two camps exist: one says fine line ages gracefully and looks subtle as it softens. The other says thicker lines hold visibility longer. If longevity matters, ask for slightly heavier single-needle weight or plan for a touch-up at 12 to 24 months.
Q: How should I dress for a ribcage or sternum session to make the artist's job easier?
A: Wear a fitted sports bra, a cropped top you can lift, or a loose tank depending on the exact zone so only the tattoo area is exposed. Clothes that avoid pins, zippers, or tight elastic make the session and initial healing cleaner. Bring a layer for after the session because numbness and cool air can make you feel chilly.
Q: I have darker skin. Will fine line text still show up clearly?
A: Darker skin tones sometimes need bolder line weight or light shading to maintain contrast. Ask your artist to show healed examples on similar skin and to recommend line weight that will remain readable. Testing a small patch or starting slightly larger helps you see realistic outcomes.
Q: Are numbing creams safe for first-timers and do artists accept them?
A: Many people use topical numbing cream to ease wrist and ankle pain and it can make a big difference. Some artists prefer clients to avoid strong numbing because it can alter feedback during the session. Ask the studio ahead of time and follow their prep instructions so you are aligned with their policy.
Q: How often should I expect touch-ups for minimalist parent tattoos?
A: Touch-ups depend on style and placement. Fine line wrist or ankle pieces often need a light refresh around year one to two. Bolder blackwork or pieces on low-friction areas like the shoulder can go longer between touch-ups. Plan for maintenance and budget some time for a quick session down the road.
Q: What should I look for when searching for an artist without naming anyone?
A: Use hashtags like #MinimalistMomDadTattoo and local searches such as "[city] fine line tattoo studio" to pull portfolios. Check healed photos, not just fresh snaps, and confirm the artist has experience with the specific technique you want. Booking a short consultation or a guest spot appointment can also reveal their approach to spacing and longevity.
Q: Will a watercolor "Mom Dad" fade differently from black line work during sun exposure?
A: Yes, diluted color and watercolor washes fade faster under UV exposure than solid black linework. If you choose watercolor, expect more frequent color refreshes and prioritize sun protection after healing. For a softer look that endures, ask for anchored outlines or slight black anchors inside the wash to keep the form readable.
