
Fine line weeping willow pieces look like whispers on the skin at first, and the ones that still read as whispers after five years were planned with spacing and placement in mind. Trends push toward tiny skyline branches and watercolor pools, and the lasting options are the ones that respect movement and friction. Below are 21 modern takes on the willow, with notes on how each ages, what to ask for in consults, and wardrobe tips that actually help you show the work off.
1. Delicate Single-Branch on Inner Forearm

I recommend this when you want a discreet piece that still reads in close conversation. Tell your artist you want slightly heavier main stems and feathered tapering on the secondary twigs so the thin lines do not disappear by year three. Common mistakes include asking for the thinnest possible lines across the whole design, which looks fragile fresh and often blurs where skin creases. The session feels quick, usually a single one-hour pass for a modest branch, with low to moderate pain on the inner forearm. For showing it off, roll up sleeves and pair with a minimalist watch that leaves the linework visible and unobstructed.
2. Pocket Weeping Willow at the Ankle
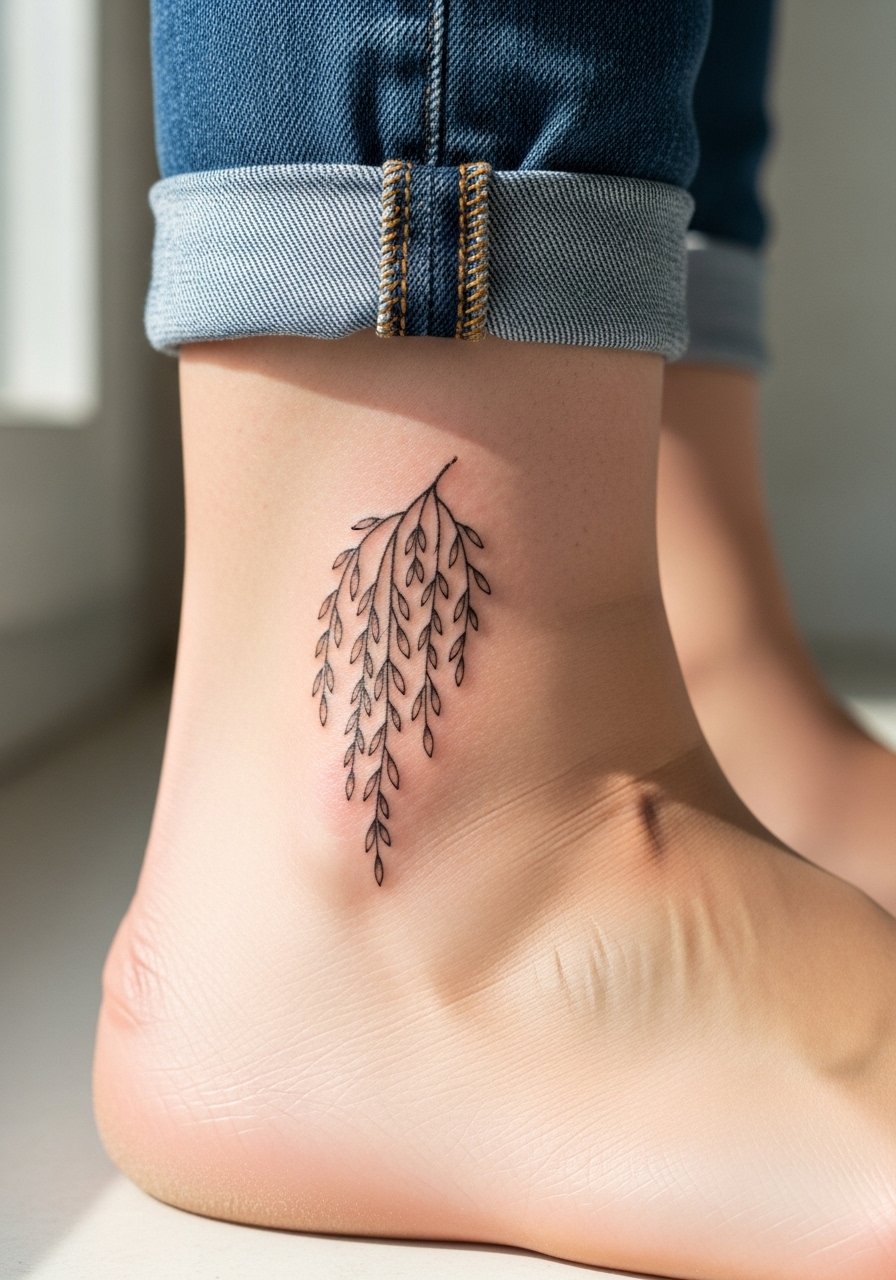
The ankle is perfect for a small, graceful willow where movement helps the branches read as motion. Be explicit in consultation about scale. Ask for slightly thicker root lines and finer hanging branches so the contrast holds as the piece heals. Blowout risk is moderate at the ankle where skin is thin and mobile, so avoid packing detail too densely. Expect a 45 to 90 minute session with sharper pain when the needle crosses bone. For session comfort, wear shoes you can slide off and bring socks. When you want to show it off, sandals or cropped pants work well with a subtle anklet chain that frames the piece without covering it.
3. Crescent Willow at the Collarbone
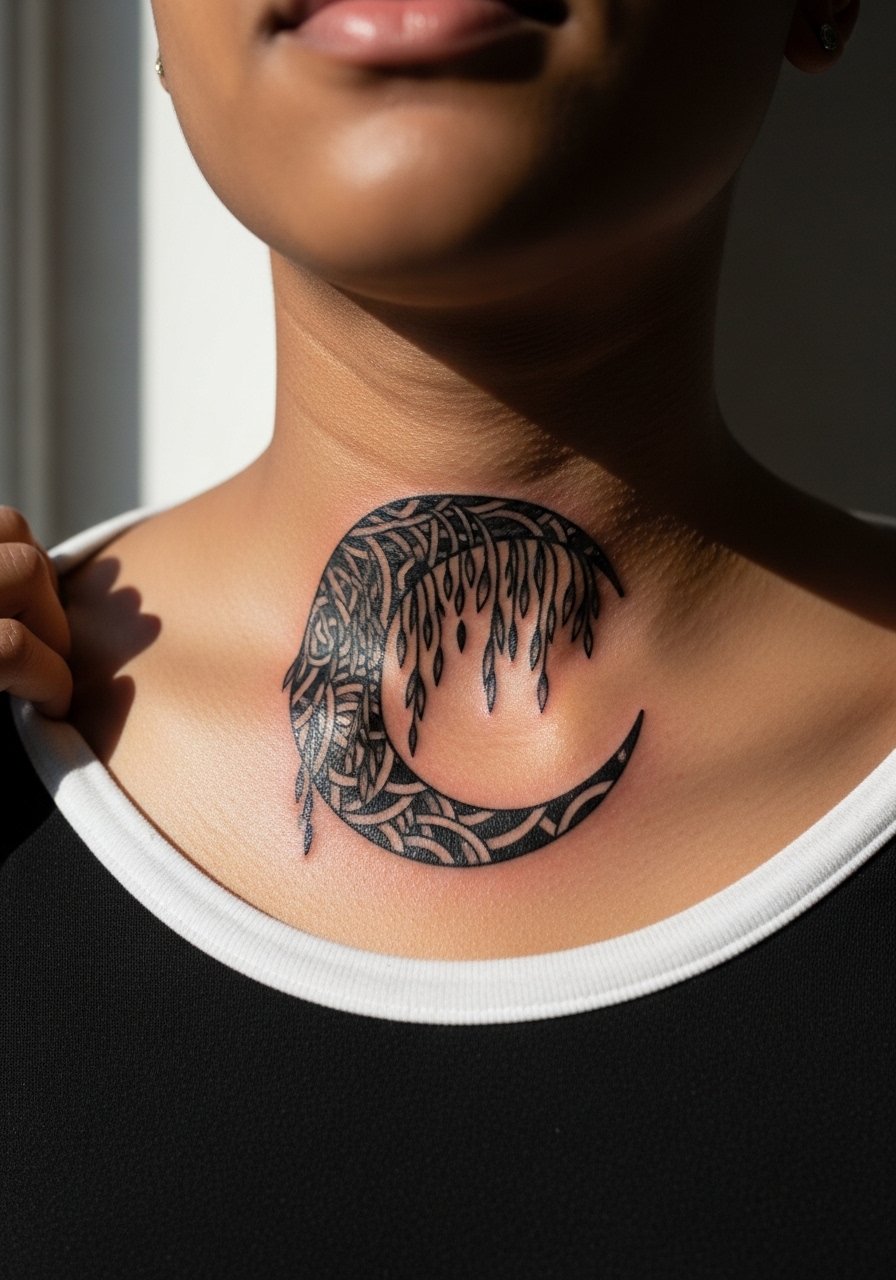
Collarbone placement makes a willow feel architectural. When you sit with the artist, show how you want the crescent to follow the bone so the branches hang naturally toward the sternum. The biggest mistake is crowding the design right over the bone with too many tiny twigs. That density can blur by year two. Expect moderate pain near the bone and a one to two hour session depending on complexity. Pair this with open-neck tops for evenings out and a thin chain pendant necklace so the collarbone line remains the focal point. If you may need a touch-up, budget for one at year two to restore any fine twig detail.
4. Watercolor Wash with Willow Silhouette on Upper Arm
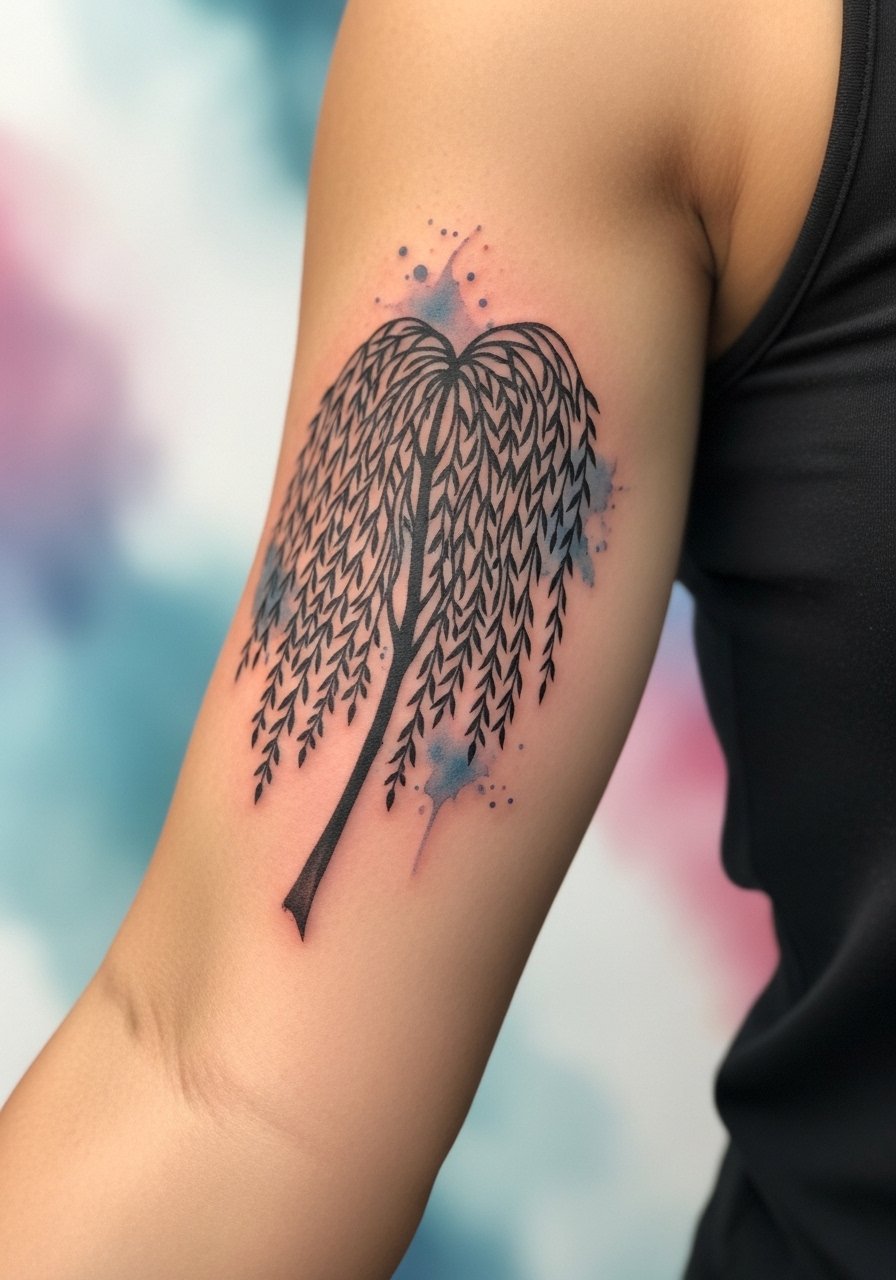
When you like painterly color but want the willow to stay legible, pick a saturated but soft wash behind bold silhouette linework. Tell the artist you want the color to sit under the black outline rather than bleeding into it. A common version that ages poorly uses low saturation watercolor without enough black anchor. That fades into splotches by year three. Expect a two to three hour session and higher chance of touch-up for the color at year two. For showing off, sleeveless linen shirts in earthy tones complement the wash and keep attention on the silhouette. Wear a loose button-down shirt to the session so the artist has clear access to the upper arm.
5. Tiny Willow on the Side of a Finger

Finger work reads intimate and fragile, and the willow motif can look like a secret when placed along the finger edge. The common mistake is asking for too many branches in a small area. That leads to early fading and potential partial loss of detail. Tell your artist you prefer fewer, stronger strokes with a slightly bolder main stem. Expect sharp pain and a short, under-30-minute session, but plan for touch-ups yearly. Hands and fingers rub constantly, so the first-week aftercare matters more than for other placements. For showing it off, layered thin rings or a knuckle chain keep focus near the tattoo, and a delicate ring set complements the tiny composition.
6. Full Sleeve: Willow Grove with Negative Space
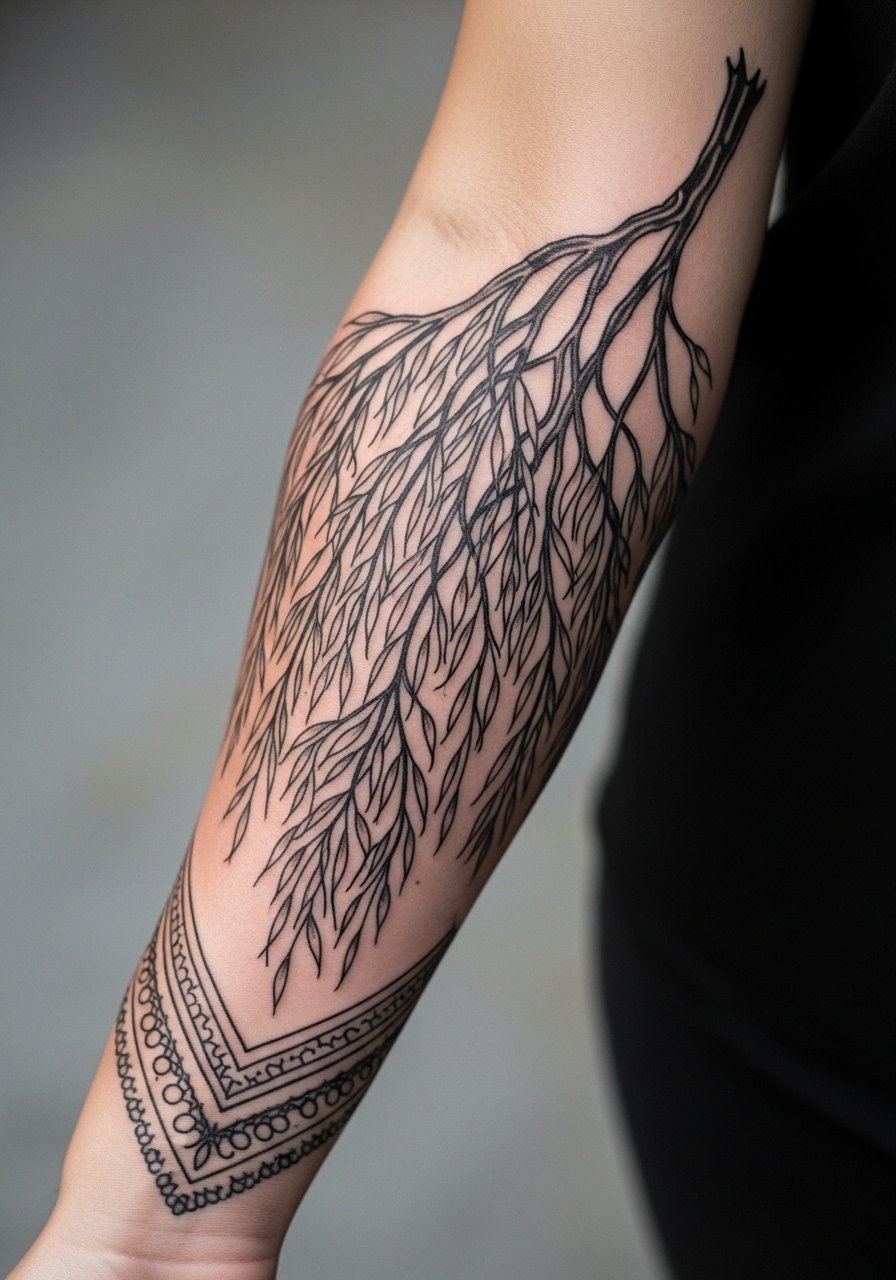
A sleeve lets you turn the willow into a lived-in landscape where branches weave around negative-space elements like birds or falling leaves. In consults, bring several references showing scale transitions from thick trunks to airy twig clusters. The mistake is filling every inch with detail at high density. That compresses during healing and the mid-sections can look muddy by year five. Expect multiple sessions across several months, with moderate pain and noticeable fatigue in longer sessions. Think about wardrobe for revealing the sleeve, like rolled sleeves and sleeveless tops, and pair with a linen button-up when you want casual showing. Plan on a touch-up at year two for edge crispness.
Studio Day Picks
The forearm and wrist pieces above need different prep than the ankle and finger work, and a few targeted items make the session and first week go smoother.
-
Disposable transfer paper pad. Helps you check placement on skin before the needle touches down, critical for palm-side and wrist designs.
-
Medical-grade topical numbing cream. Useful for high-sensitivity areas like the collarbone and ribs when discussed with your artist.
-
Thin antimicrobial protective film roll. Keeps small areas like fingers and ankles clean during the first few days of heavy movement.
-
Fragrance-free gentle body wash. Gentle cleansing prevents irritation on delicate fine line sections while bathing.
-
Aquaphor healing ointment. A thin layer in the first 48 hours helps protect fine line work and stops excessive scabbing that can pull pigment.
7. Branching Spine Piece That Follows the Vertebrae
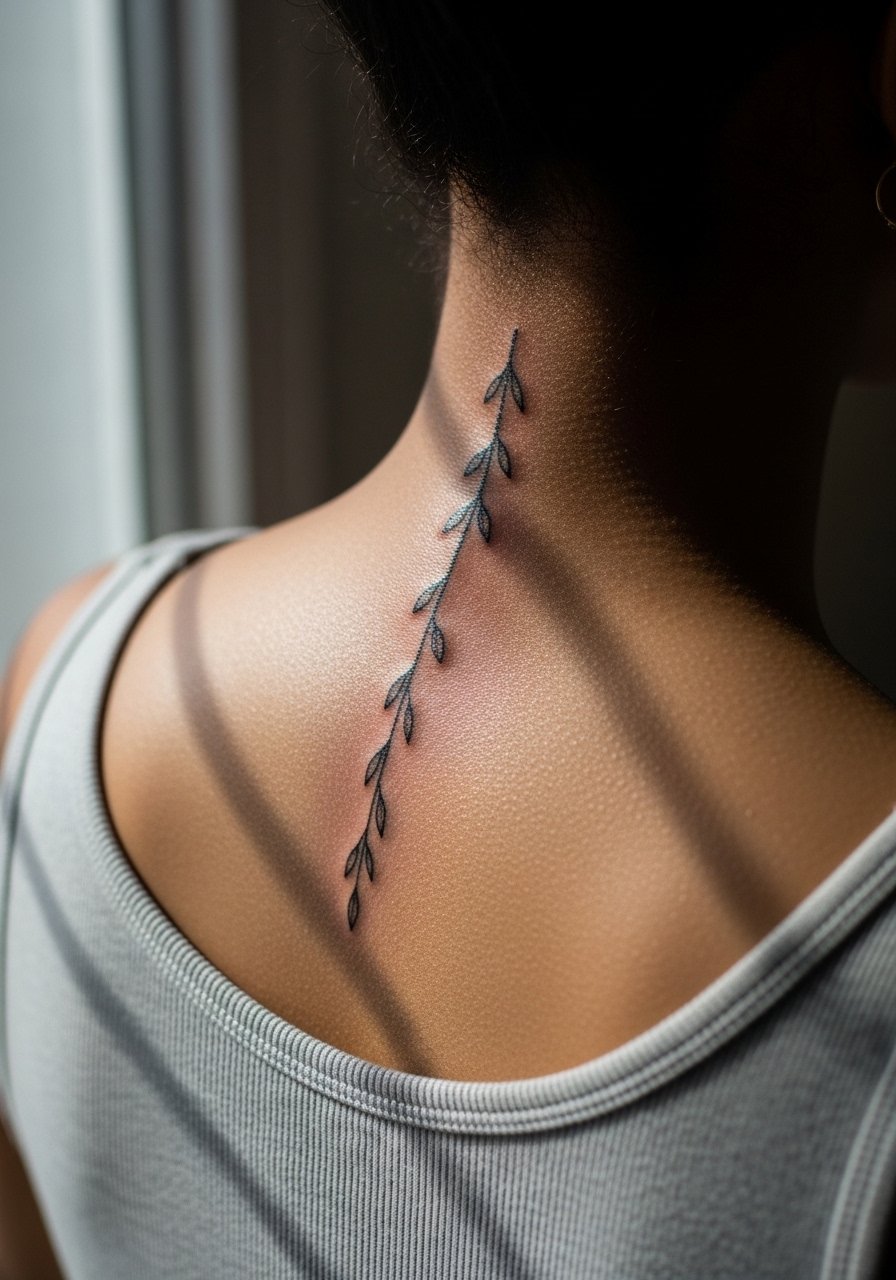
A spine placement emphasizes vertical motion and reads like a natural extension of posture. Ask the artist to map the main trunk to the vertebrae curve so the hanging branches fall with the spine. A common mistake is placing dense twig clusters directly over the spine where touch and movement blur detail faster. Sessions are moderate to high pain toward the middle back and may be split across two visits. For session wear, a button-up or tank top that you can pull aside is best. When dressing to show this piece, open-back tops or halter styles reveal the spine without needing full exposure. Expect a touch-up window at year two for twig clarity.
8. Negative Space Willow Inside the Elbow

Inside the elbow is a tricky move because the skin folds and stretches constantly. The advantage of negative space here is that it reduces the need for dense lines on a high-movement zone. Tell your artist you want the branches to breathe and avoid tight clusters near the crease. Mistakes include packing fine twig detail right in the fold where it will soften dramatically by year two. Sessions feel sharp for short bursts when the needle crosses the crease. For the session, wear a loose short-sleeve shirt that slides up easily. After healed, three-quarter sleeves and cropped tops frame the area without rubbing the design.
9. Abstract Geometric Willow on the Calf
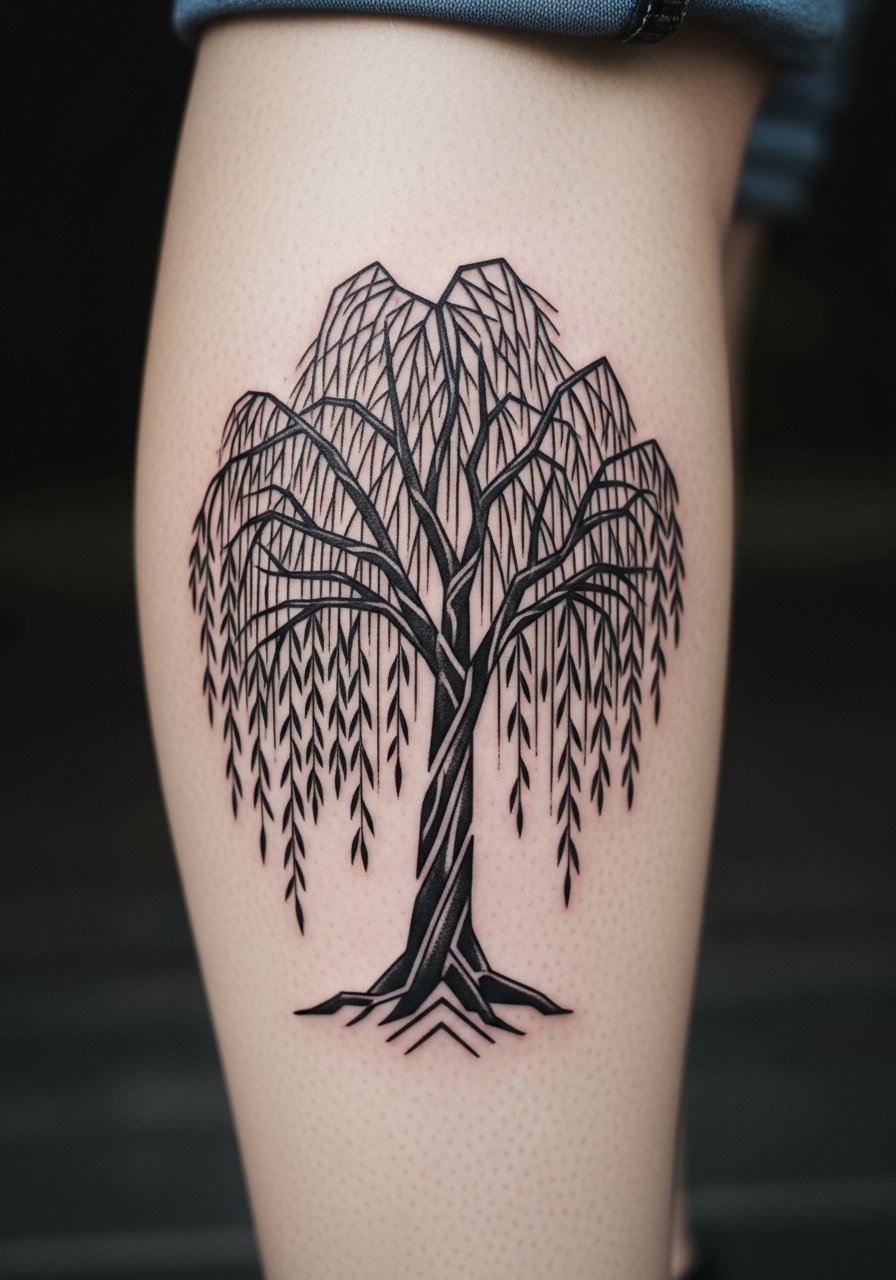
Geometric elements can modernize the willow and hold up well on the calf where skin stays relatively stable. During consultation, specify which parts should stay crisp geometry and which should soften into organic branches. The typical error is overcomplicating geometry with too many intersecting lines. That creates visual noise after healing. Sessions run one to two hours with moderate discomfort, and touch-ups are less frequent than on hands. For showing it off, wear cropped pants or a linen midi skirt so the calf reads as a composed panel. Calf placements age gracefully with UV protection and occasional touch-ups.
10. Little Nape Willow Tucked Under Hairline
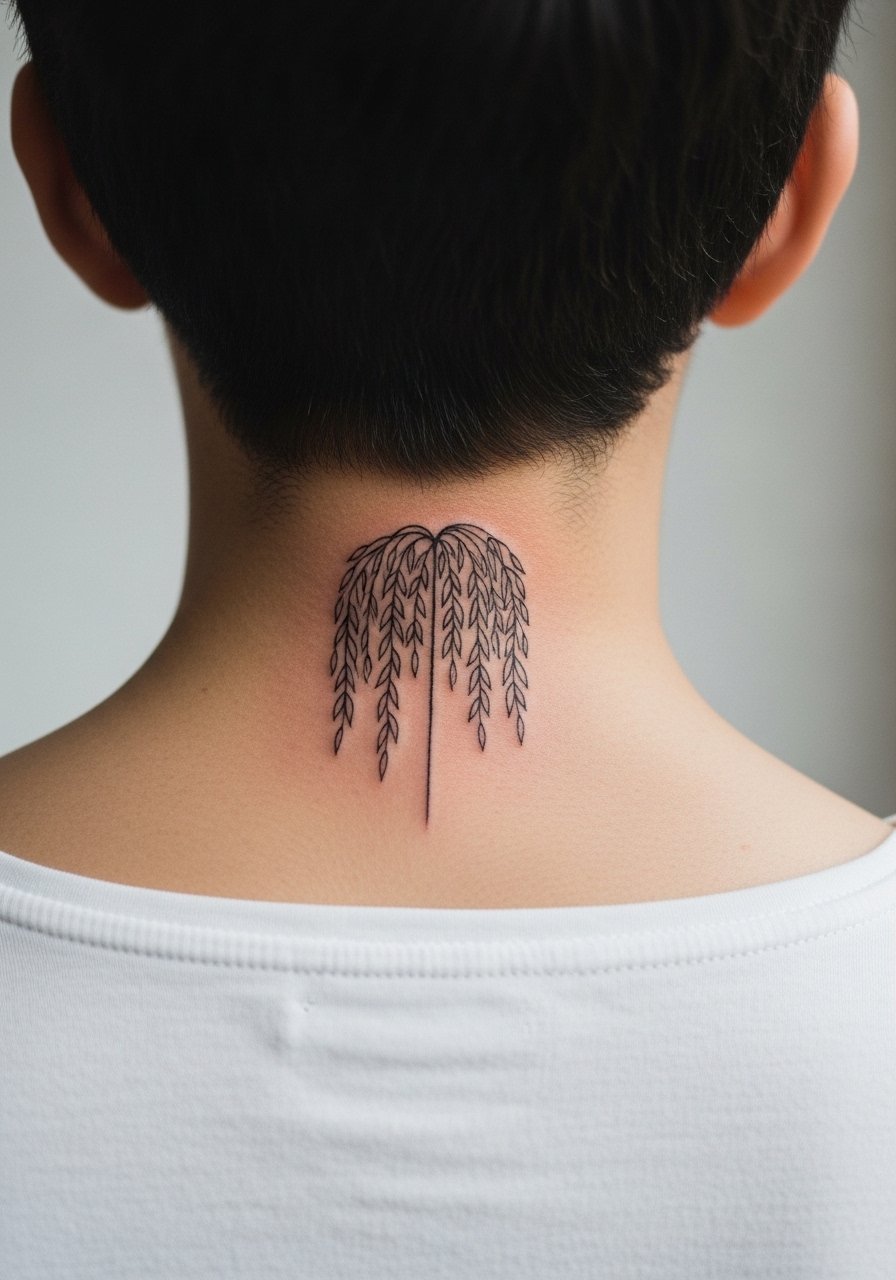
The nape sits between visible and private, and a willow there can peek out when hair is up. In consults, clarify how much should be visible with typical hairstyles. A mistake is making the design too tall so it sticks out in most hair arrangements. Pain is low to moderate and sessions are brief. For the session, wear a shirt that the artist can move aside and a hairstyle that allows easy access. Consider workplace implications for neck placements as they are still noticeable in some professional settings. Plan touch-ups at year two if you wear frequent sun-exposing hairstyles that fade ink.
11. Micro-Realism Willow Over the Sternum
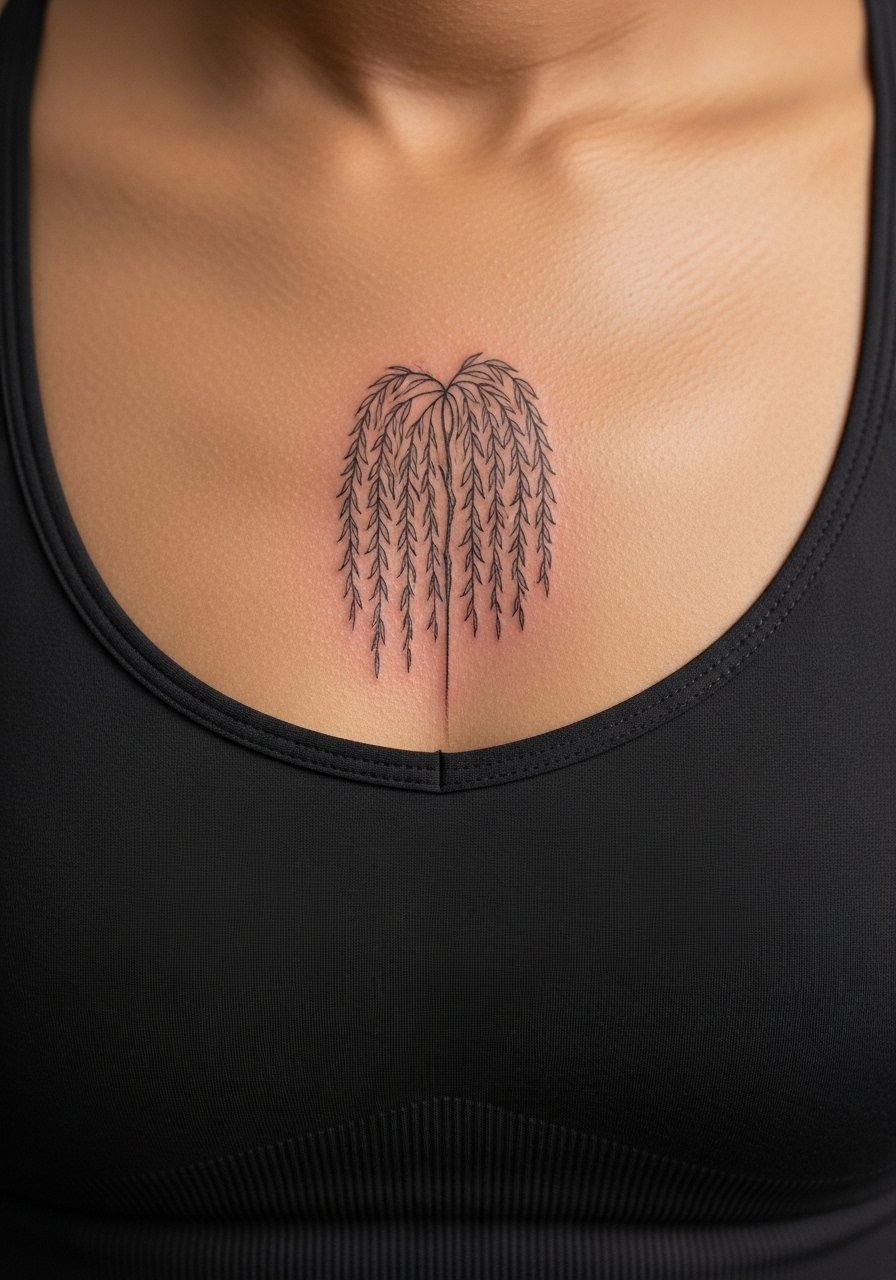
Sternum pieces can be striking, but there is debate in the community about fine line stability here. One camp argues the skin stretch and motion blur fine line within a couple of years. The other camp says that with deliberate spacing and correct needle depth, fine line can hold on the sternum. Both views matter. Ask your artist where they stand and request spacing adjustments if they favor denser detail. Sessions are painful for many and may require breaks. Wear a fitted sports bra or zip-up you can loosen for access. For showing, strapless or cut-out tops reveal the piece selectively. Touch-ups at year two are common.
12. Minimalist Willow Behind the Ear
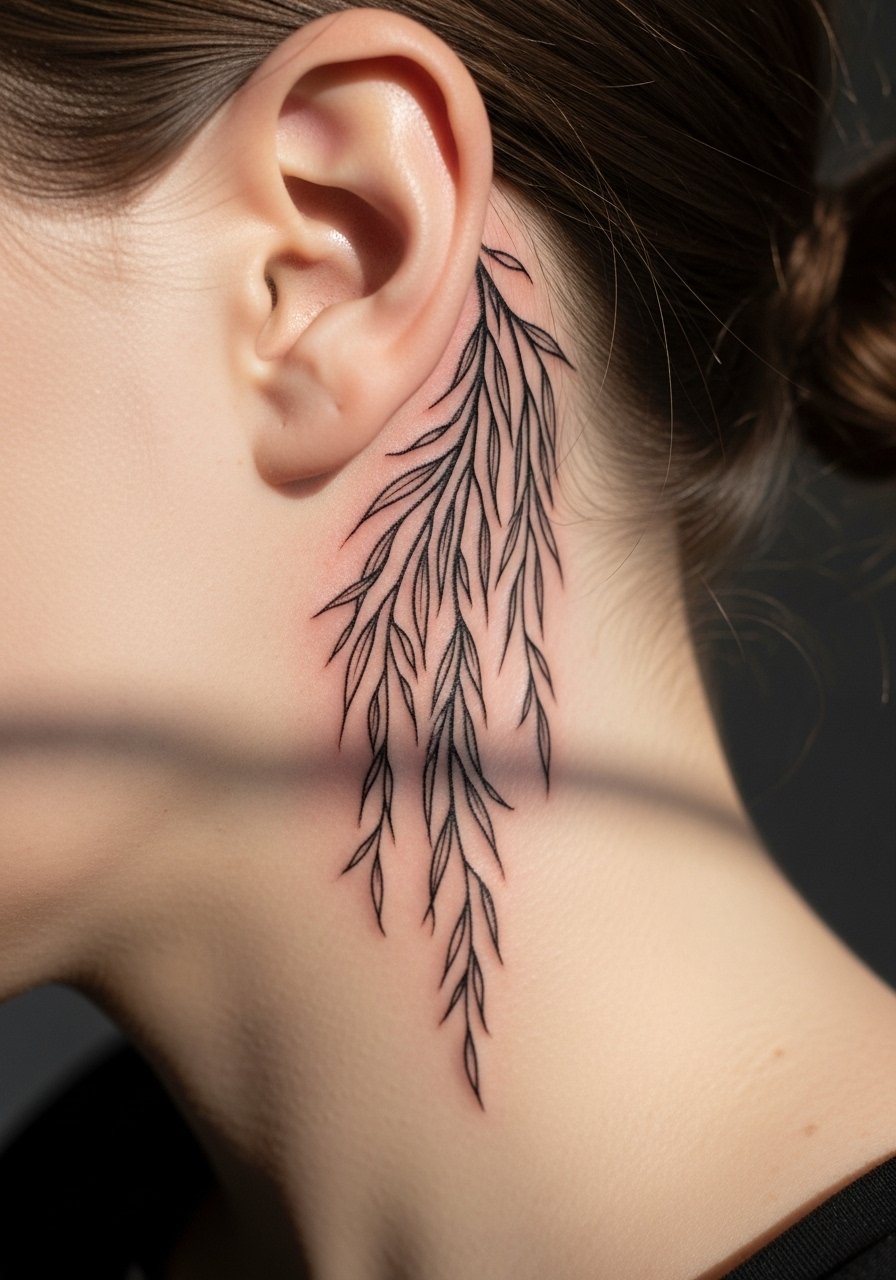
Behind-the-ear placements feel like a whisper and suit tiny willow motifs. Because the area is small and moves with hair, ask for a compact design with one clear focal stem and sparing twigs. Mistakes include asking for text or dense detail there. That gets lost quickly. The session is short but can be ticklish. For the session, wear hair pinned up and bring a hair clip. This placement is discreet and works well with short haircuts or updos. Consider career visibility when choosing the spot. Expect touch-ups sooner than larger pieces.
13. Layered Willow on the Thigh with Floral Accents

Thigh placements allow scale and layering with minimal daily friction, which helps saturation and line longevity. When planning this, decide which elements are primary and which sit in secondary planes. Tell your artist you want the willow to breathe around the flowers so details do not crowd. A common mistake is trying to get sleeve-level density in a single thigh session. Sessions can be long but pain is often moderate because the thigh has more flesh. For session comfort, wear loose shorts or a skirt you can shift and bring slip-on shoes. To show off the piece, high-waisted shorts or swimwear reveal the top of the thigh elegantly. Expect a touch-up at year three if you want the floral accents crisp.
14. Wrist Wrap Willow with Script

Wrist wraps are ideal for combining a willow motif with a single word or date. Specify exact text during the consult and choose font size that pairs with the willow scale. Text needs space to avoid merging into nearby branches. The biggest mistake is choosing overly delicate script that later smudges. Sessions are fairly quick but the wrist is sensitive and may sting. For session wear, a loose long-sleeve you can slide up works best. When showing it off, stack with thin bracelets and a minimal leather cuff that frames rather than competes. Plan on an annual touch-up for both script and fine branch tips.
15. Back Shoulder Canopy That Flows Toward the Arm
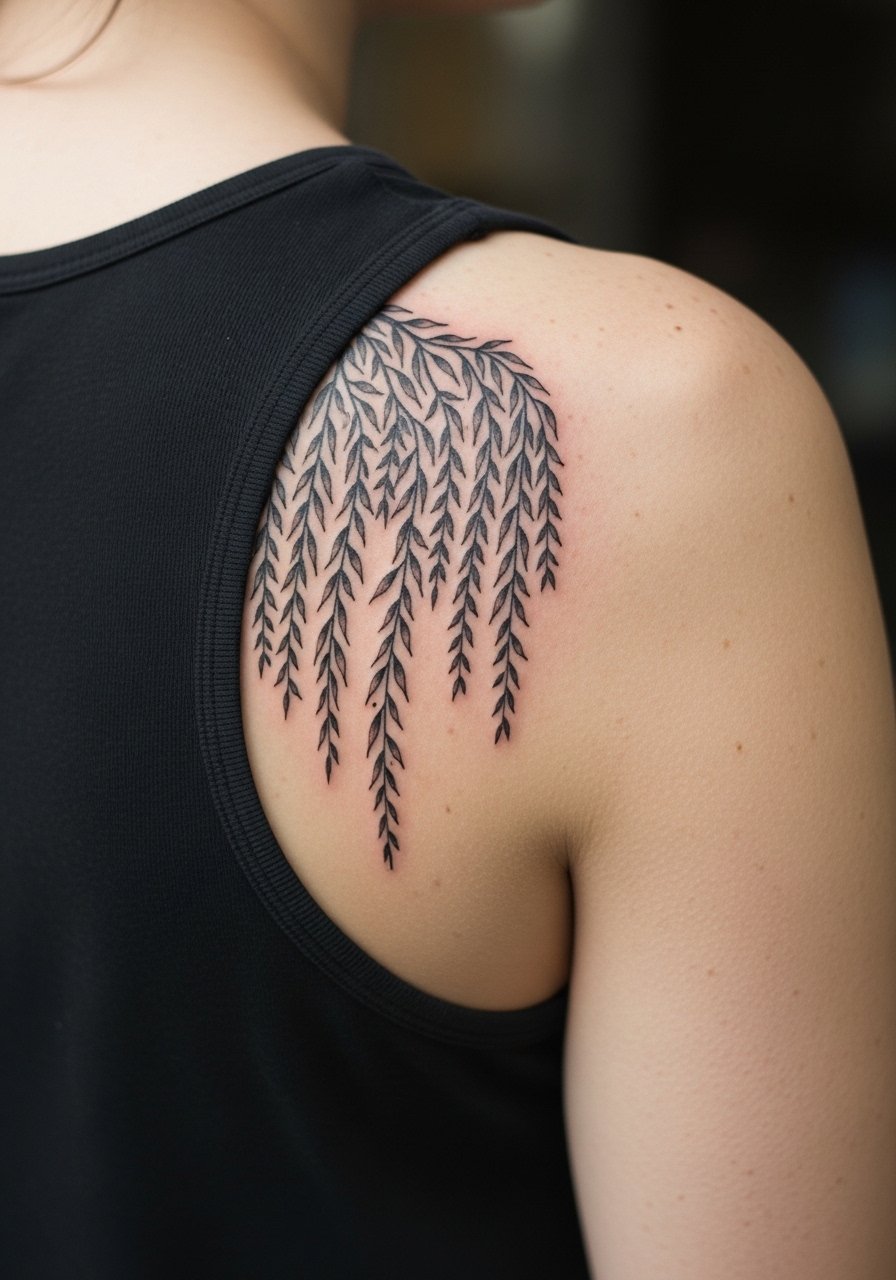
Shoulder canopies let the willow breathe across several planes and adapt to movement. In consults, map how the canopy will look with arm motion and ask for flow lines that avoid tight knots. Mistakes include forcing symmetry across skin that does not sit flat. Sessions can be one to three hours and pain varies. For session clothes, wear a loose tank top or a button-down you can pull aside. For evenings out, open-shoulder tops reveal the canopy without exposing the torso. Expect touch-ups at year three for edge softening from friction with straps.
16. Ankle-To-Foot Vine That Cascades

Cascading designs across the ankle and foot face high abrasion from shoes and socks. Ask your artist to keep the densest detail away from the highest-friction zones, like where straps hit the foot. A common mistake is placing tiny twigs right where shoes rub. That causes disproportionate fading within months. Sessions are short but the foot can be quite painful. For the session, wear slide-on shoes and bring socks to protect the area afterward. When showing it, sandals and cropped jeans showcase the cascade elegantly. Plan for a touch-up in the first year if you wear closed shoes often.
17. Full Back Scene with Willow and Moon
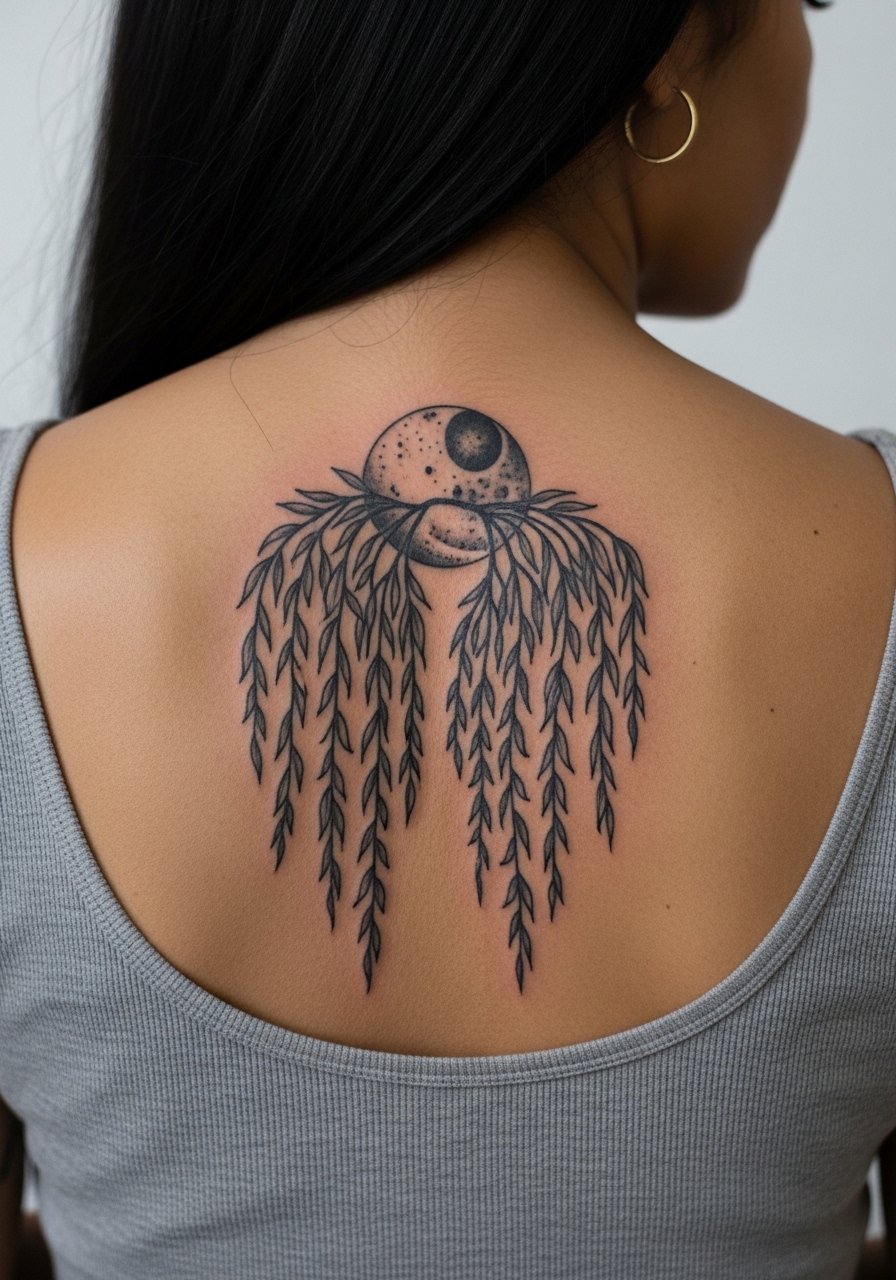
Large back pieces are canvases for narrative willow scenes that age slowly due to limited daily abrasion. For a moonlit composition, instruct the artist on the negative space around the moon so it does not merge into branches over time. One of the controversies around large, detailed back work is whether heavy detail will hold without frequent touch-ups. One camp cautions that very tight detail can look muddy after years. The other camp notes that with spaced composition and proper saturation, a back can keep complexity. Decide with the artist where you fall and plan staged sessions. Sessions are long and intensive. For relaxation on session days, bring layered clothing you can remove easily and expect touch-ups at year two to three.
18. Tiny Chest Sprig Near the Heart
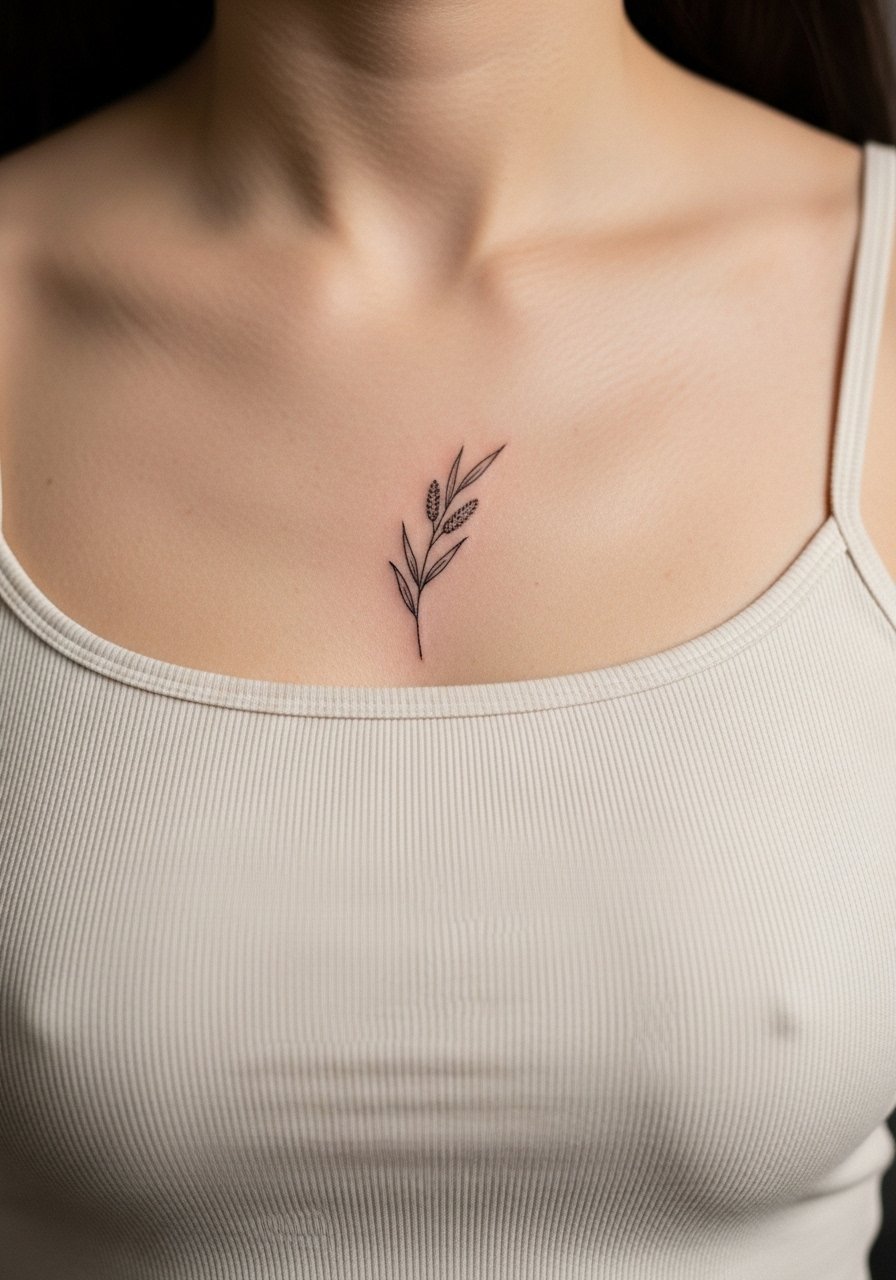
A small sprig near the heart carries personal weight and is intimate by design. When preparing consult notes, be clear about left-right placement and how visible you want it with typical clothing. A mistake is guessing at visibility and later finding the placement sits under normal neckline. Sternum-adjacent skin moves when breathing, so ask for slightly bolder stems to keep them readable. Sessions are short and can be uncomfortable if you are sensitive. For the session, wear a camisole you can easily adjust. For showing, v-neck tops and pendant necklaces set the area off gently. Expect a touch-up window at year two.
19. Blackwork Willow with Stipple Shading on the Thigh
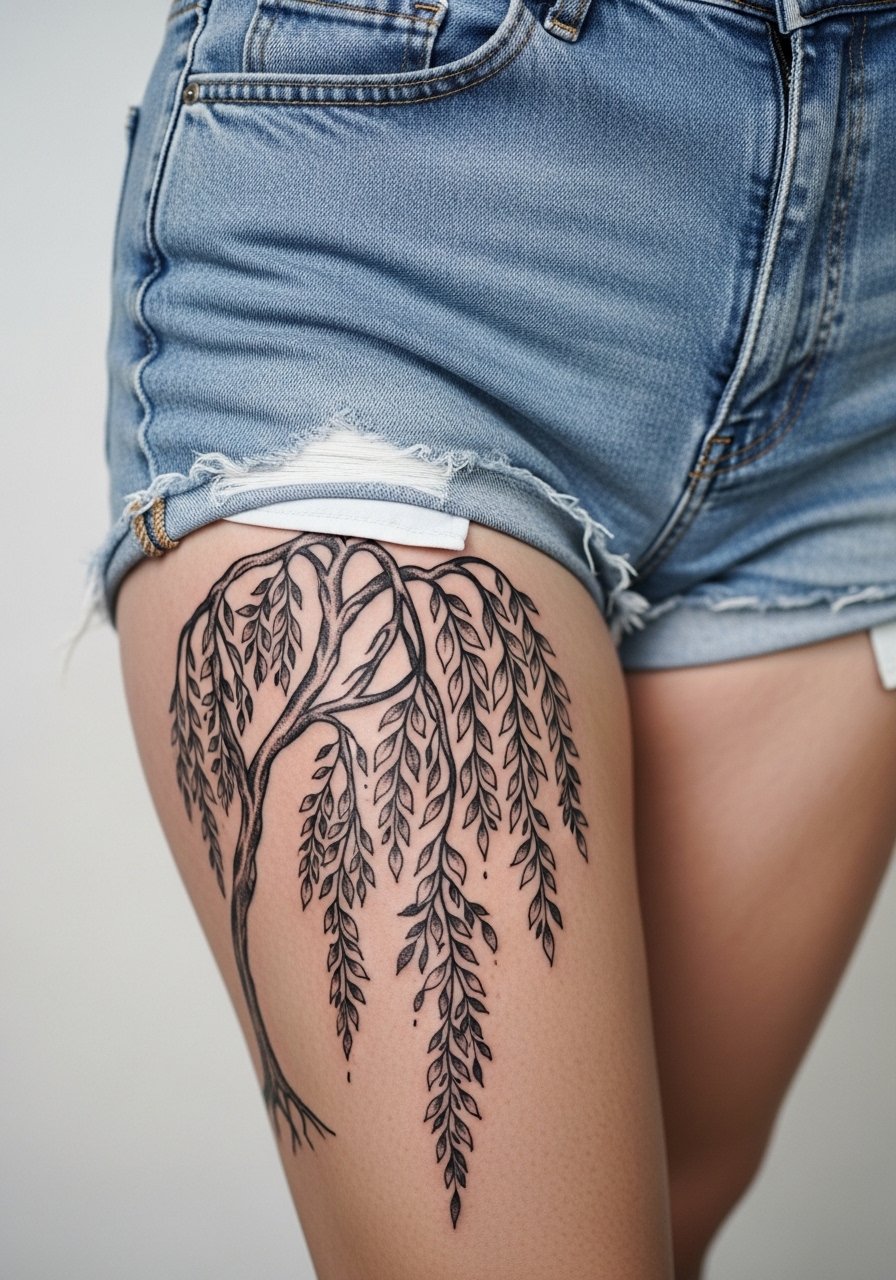
Bold blackwork combined with stipple shading creates strong contrast that reads from distance and holds well on thicker skin like the thigh. When consulting, be explicit about how dense the stippling should be and where negative space will sit. A common error is overpacking dot work too close to the edge of the design. That makes touch-ups clunky. Sessions can be long but pain is generally moderate. For the session, bring loose bottoms and avoid pressure on the area afterward. To highlight the piece in warm months, pair with high-waisted shorts or a denim cut-off. Blackwork ages predictably and needs less frequent maintenance than ultra-fine work.
20. Geometric Minimal Willow on the Ribcage
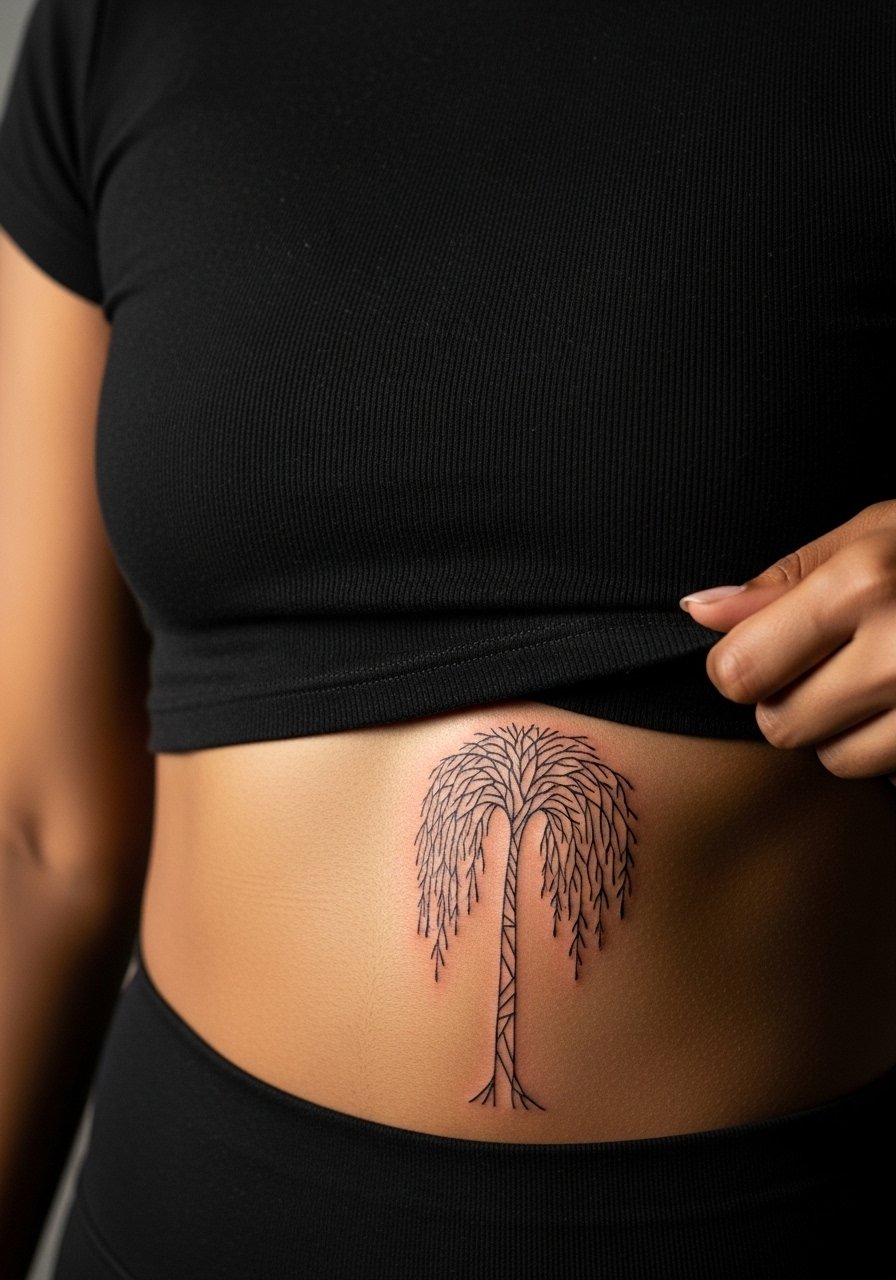
Ribcage placements are beautiful and painful, and the debate about fine line here is pronounced. One camp says the skin stretch and breathing blur fine line within two years. The other camp insists that with correct needle depth and spacing, fine line can remain sharp. The practical approach is to ask your artist which method they use and to choose spacing that favors longevity. The session is intense for many and may be split. For session comfort, wear a cropped athletic top you can lift and bring a pillow for support. For showing, cropped tees and open sides reveal the rib work selectively. Expect touch-ups at year two for the finest twig ends.
21. Forearm Landscape Sleeve with Small Willow Runs
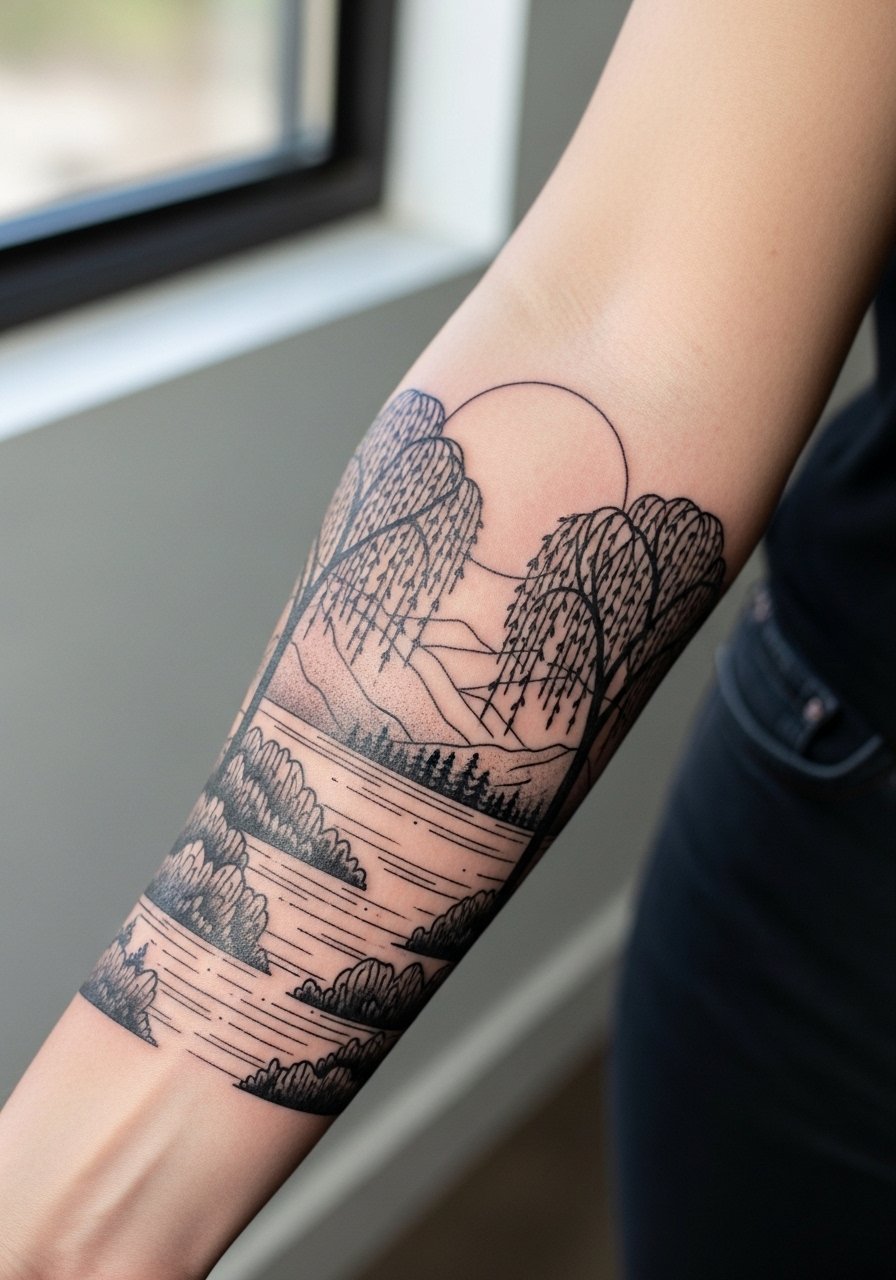
A forearm landscape allows repeated willow motifs that vary in scale and density, which helps the overall piece age more harmoniously. In consults, designate primary and secondary runs so you create hierarchy across the sleeve. The mistake is making every run the same scale, which flattens the composition as it heals. Sessions are typically spread over a few appointments with moderate pain. For the session, wear a short-sleeve shirt and bring a travel pillow for elbow support. To show off the sleeve, roll cuffs and pair with a lightweight blazer for a composed look that frames the forearm art. Forearm sleeves often need a touch-up at year two to maintain crisp linework.
Frequently Asked Questions
Q: How do fine line weeping willow tattoos age compared with blackwork or watercolor versions?
A: In my experience, fine line pieces tend to soften faster because the hair-thin twigs blur under skin movement and UV exposure. Blackwork anchors the composition and often ages with more readable contrast. Watercolor can look beautiful but will likely need color boosts sooner. Ask your artist about spacing and saturation if longevity is a priority.
Q: Can I get a detailed willow on the ribs without it blurring quickly?
A: It depends on scale and spacing. Many artists split into two camps about fine line on ribs. One group warns that breathing and stretch make tiny lines merge within a couple of years. The other group says carefully spaced linework with proper depth can hold. The practical step is to discuss technique and ask to see healed photos similar in scale and placement.
Q: What should I wear to a session for a collarbone or sternum willow so the artist has good access?
A: For collarbone and upper chest work, wear a wide-neck shirt or a fitted sports bra you can pull aside. For sternum pieces, a bandeau or sports bra that reveals only the area keeps the rest covered and the artist focused. Comfortable layers help during longer sessions.
Q: Do tiny weeping willow finger or ankle tattoos need special aftercare compared with larger pieces?
A: Yes. Fingers and ankles face more friction and washing, so the first week matters more. Keep the area protected with the thin film recommended above, avoid tight shoes, and be ready to book a touch-up within the first year. The protective steps smooth the healing window and reduce pigment loss.
Q: Where can I find artists who specialize in the mix of fine line and micro-realism used here?
A: Search tattoo directories and hashtags on discovery platforms, join local tattoo community forums or groups, and check convention rosters. Look for portfolios with healed photos that match the scale and style you want rather than only fresh work. That helps you see real-world aging before you book.
