
Fine line moon phases are trending online, but what looks flawless in a fresh photo often softens faster than people expect. Bold blackwork will age into grit that still reads a decade later, while whisper-thin arcs need the right placement and occasional touch-ups to avoid disappearing. Read on for 27 drawn ideas that balance the look you want today with how each approach actually heals, moves, and pairs with everyday clothes.
1. Fine Line Crescent Arc on Inner Forearm
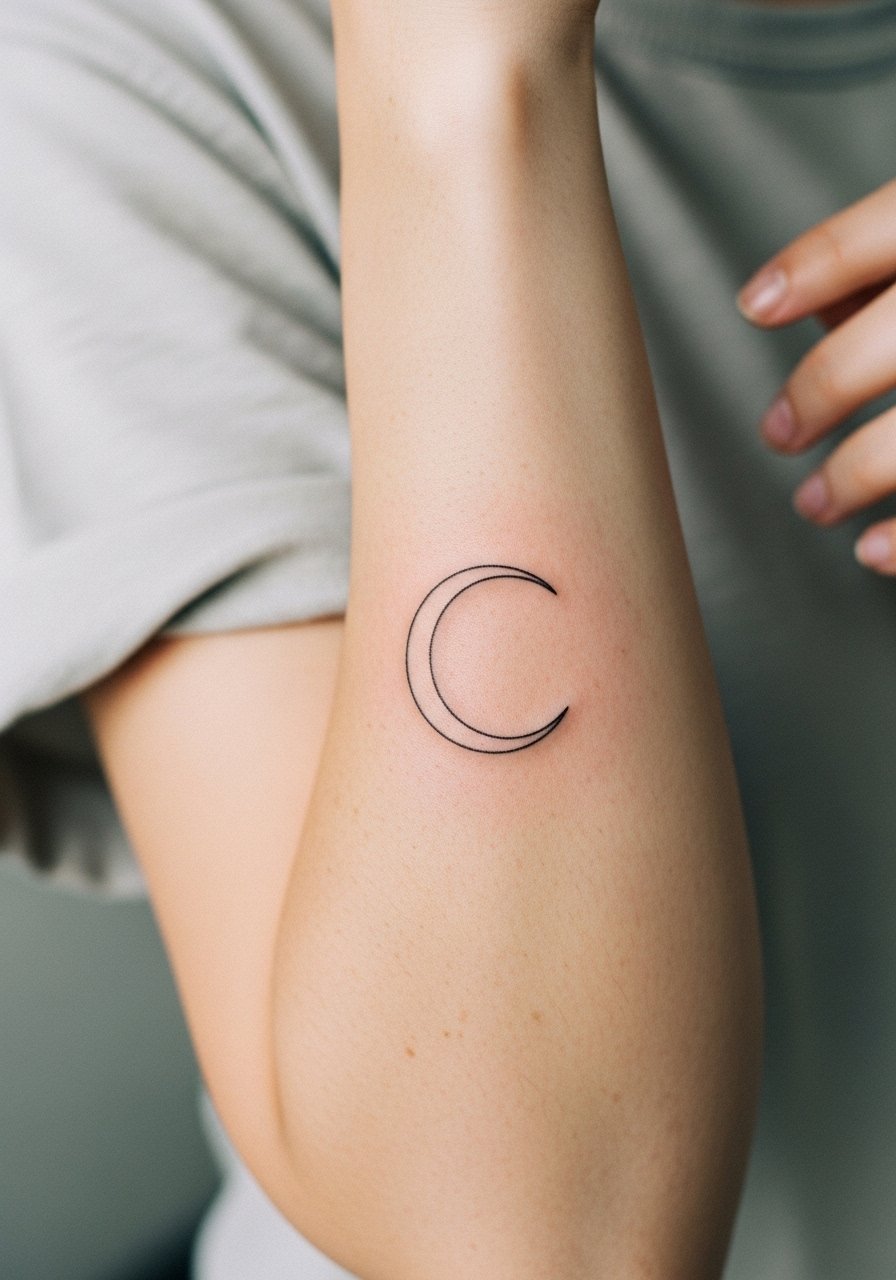
I see this one on wrists and forearms more than any other moon design. It reads clean when kept around 2 to 3 inches and drawn with slightly heavier linework than ultra-micro fine line. Tell your artist you want a fine line but ask for a bit of line weight so it survives daily rubbing and sun exposure. Pain is low to moderate and most sessions are under an hour. Common mistake is asking for lines too hairline-thin, which often needs touch-ups at year two. For showing it off, roll a cuff and wear a rolled cuff chambray shirt that frames the arc.
2. Minimalist Full Phase Sequence on the Wrist
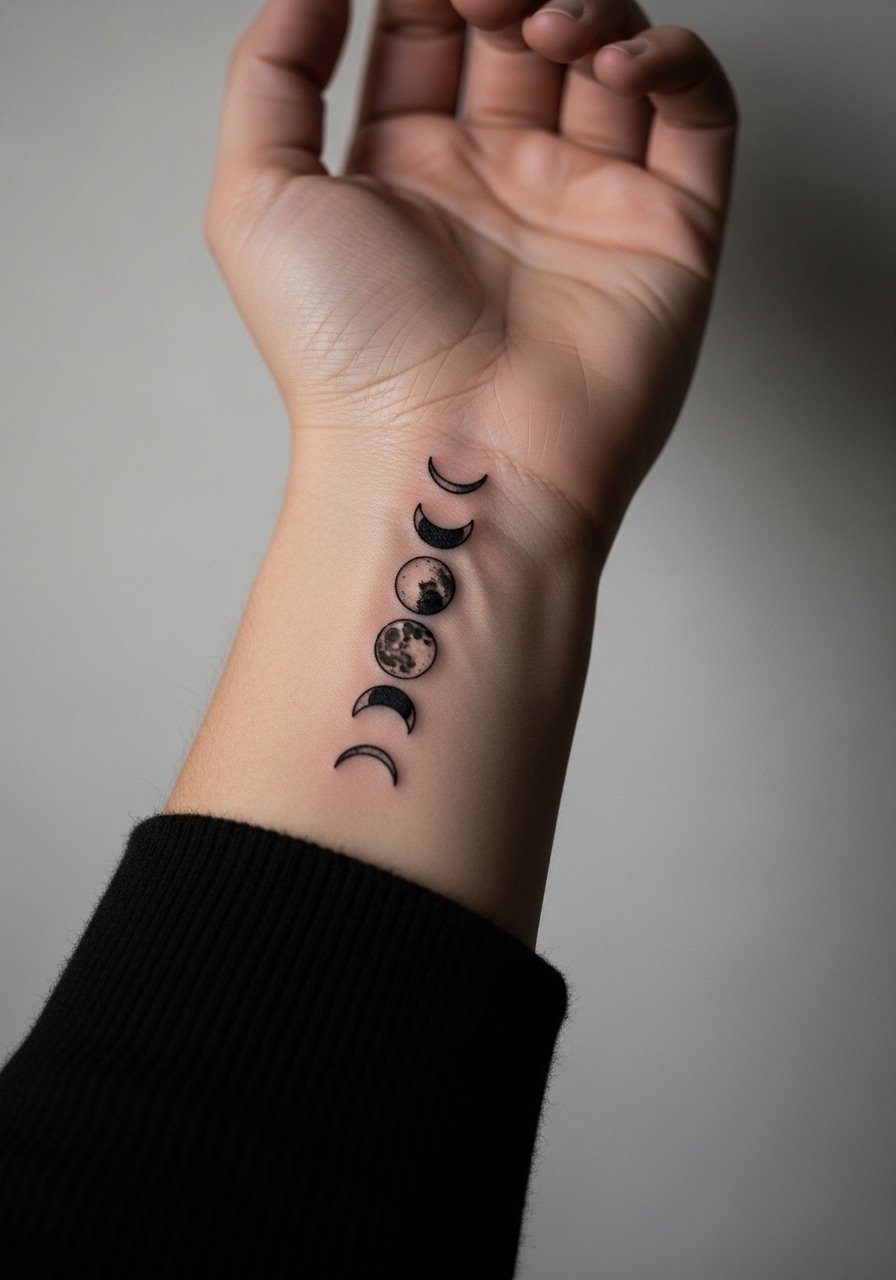
Fair warning, the wrist is a high-friction zone. A compact sequence of circles and crescents looks great at 1 to 1.5 inches across but fine line here can fade faster. When you consult, ask for slightly denser linework and small spacing between phases to avoid merging. The session is short and painful spots are mild, mostly from the bone under the skin. Expect a touch-up window around 12 to 24 months for thin versions. Pair this with a slim leather watch on the opposite wrist so the tattoo stays the focal point.
3. Watercolor Lunar Cycle Over the Collarbone
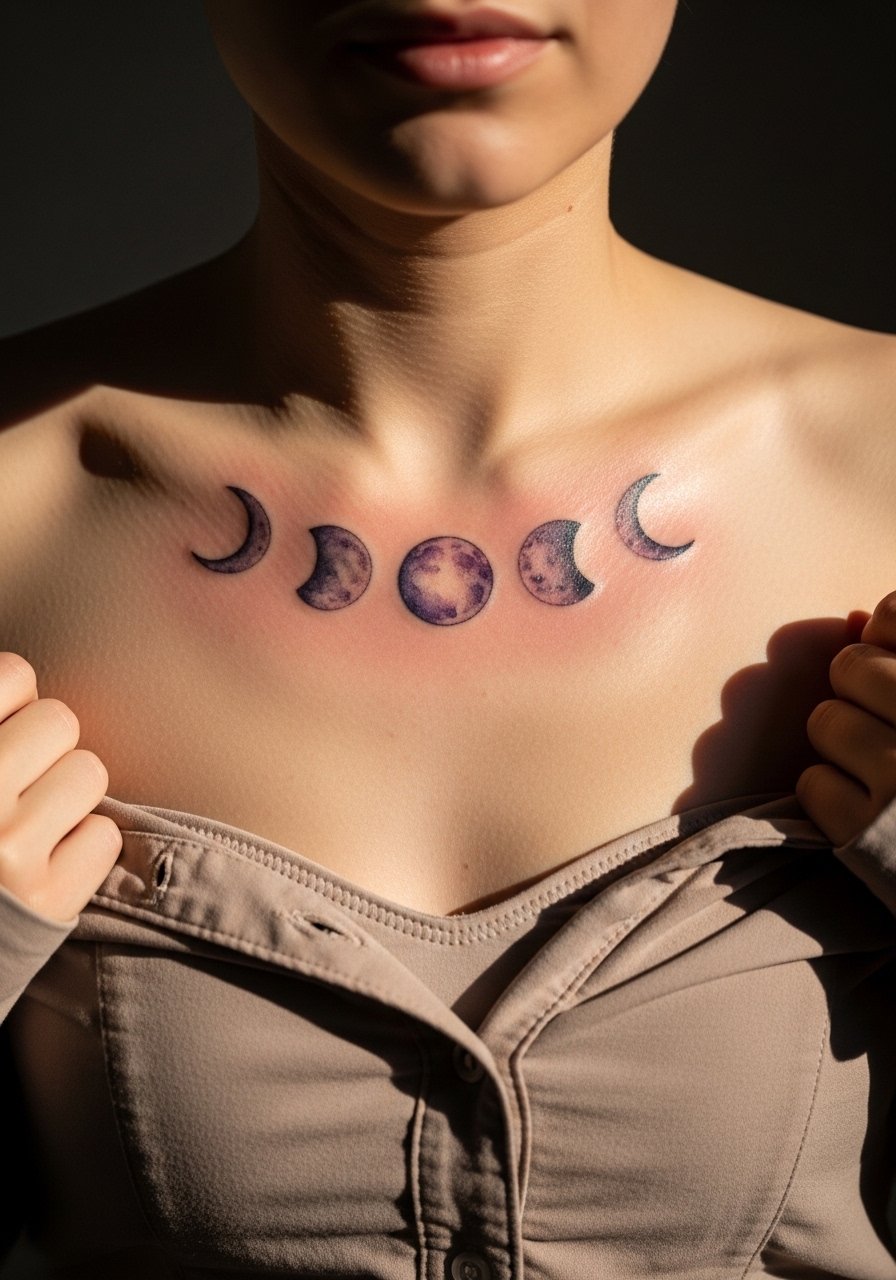
Watercolor on the collarbone looks ethereal but it needs room to breathe. I recommend 3 to 5 inches so the wash can fade out into skin and not cluster into a muddy patch. Tell your artist you want soft edges and a watercolor wash that respects the bone contour. Collarbone sessions feel odd rather than painful because the stencil sits over bone, and you may need two shorter sessions. The main mistake is packing too much color into a narrow band. For evenings, layer an off shoulder blouse to showcase the fade without covering the artwork.
4. Blackwork Geometric Moon Cycle on Upper Arm
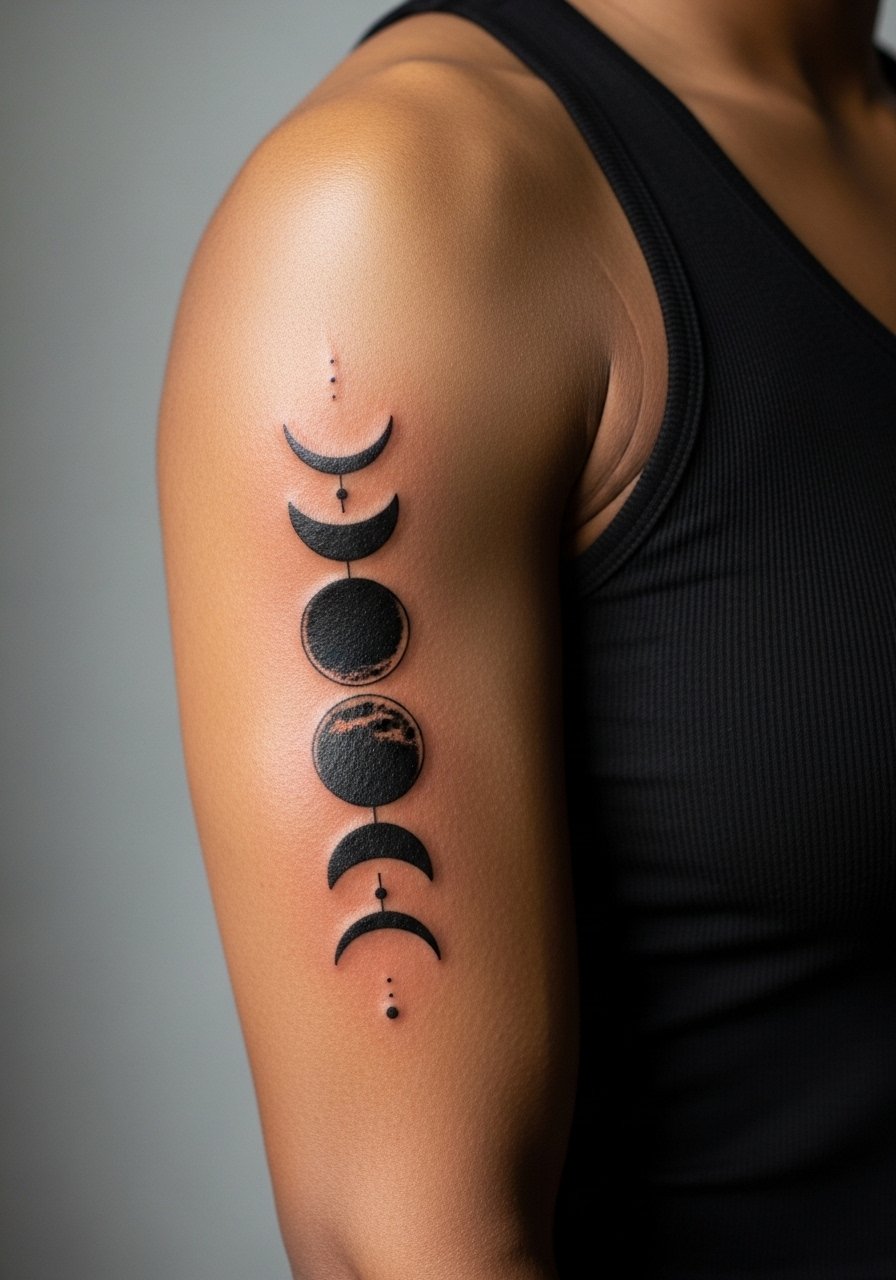
There is something about bold blackwork that holds up. Geometric moons with solid fills age into contrast rather than blur, which makes this a good pick if you want longevity. Outer upper arm is forgiving and sessions usually run one to two hours depending on size. A common mistake is over-detailing small geometric elements, which can bleed into a blocky blur. Ask your artist to scale shapes for the arm's muscle. For casual summer wear, a black muscle tank keeps the piece visible and avoids busy patterns that compete with the geometry.
5. Neo-Traditional Waning Moon with Floral on Ribcage
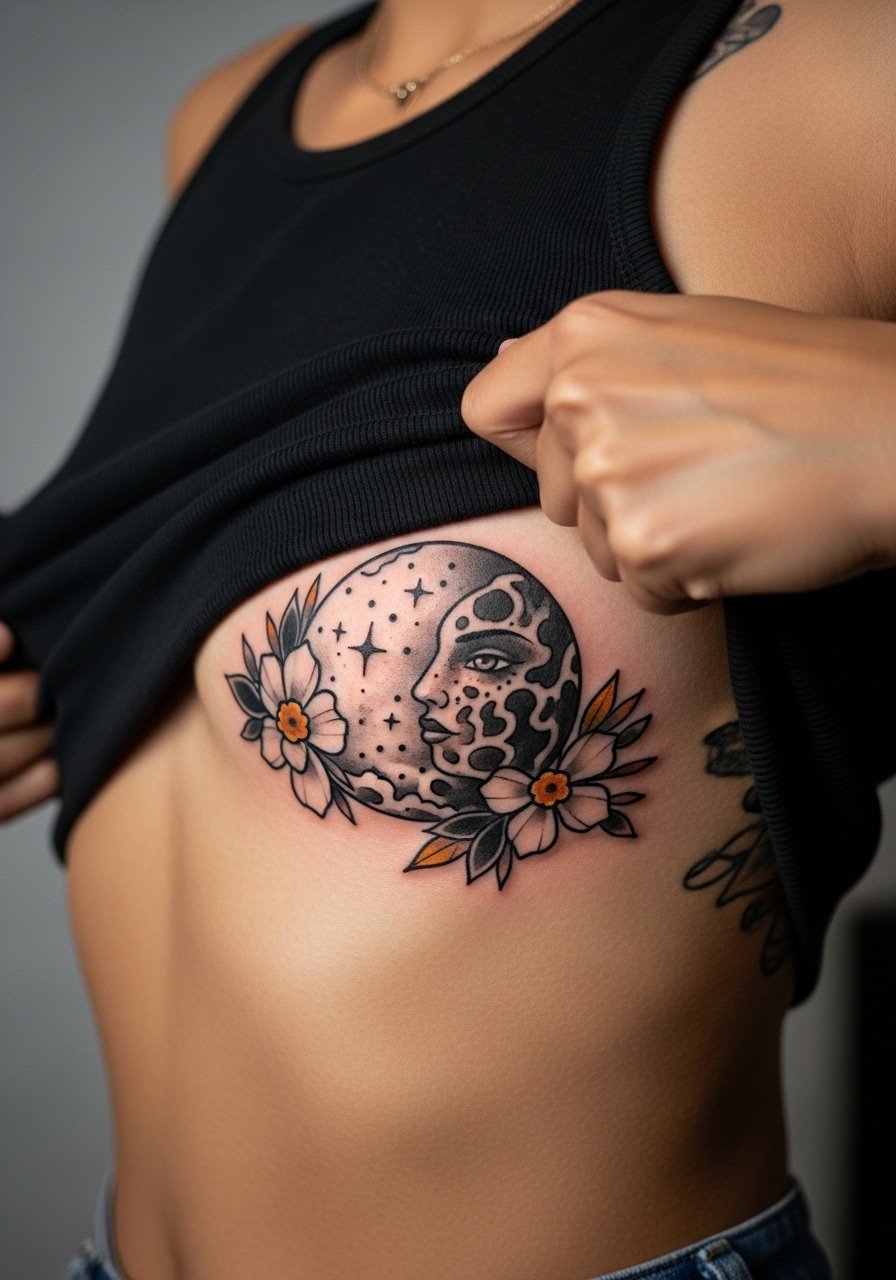
Fair warning, the ribcage is a 7 out of 10 on pain scales for most people. Neo-traditional shading pairs well with the curve of the ribs, and the added floral elements give the piece breathing room. When you consult, ask the artist to space the floral elements away from the tight moon outline so the piece ages without the petals merging. Many people regret designing dense ribs too small. Expect two to three sessions and plan wardrobe for recovery like loose tops. Crop tops with high waists or a crop tank top let you reveal the piece without stretching it.
6. Micro-Realism Waxing Moon on the Ankle
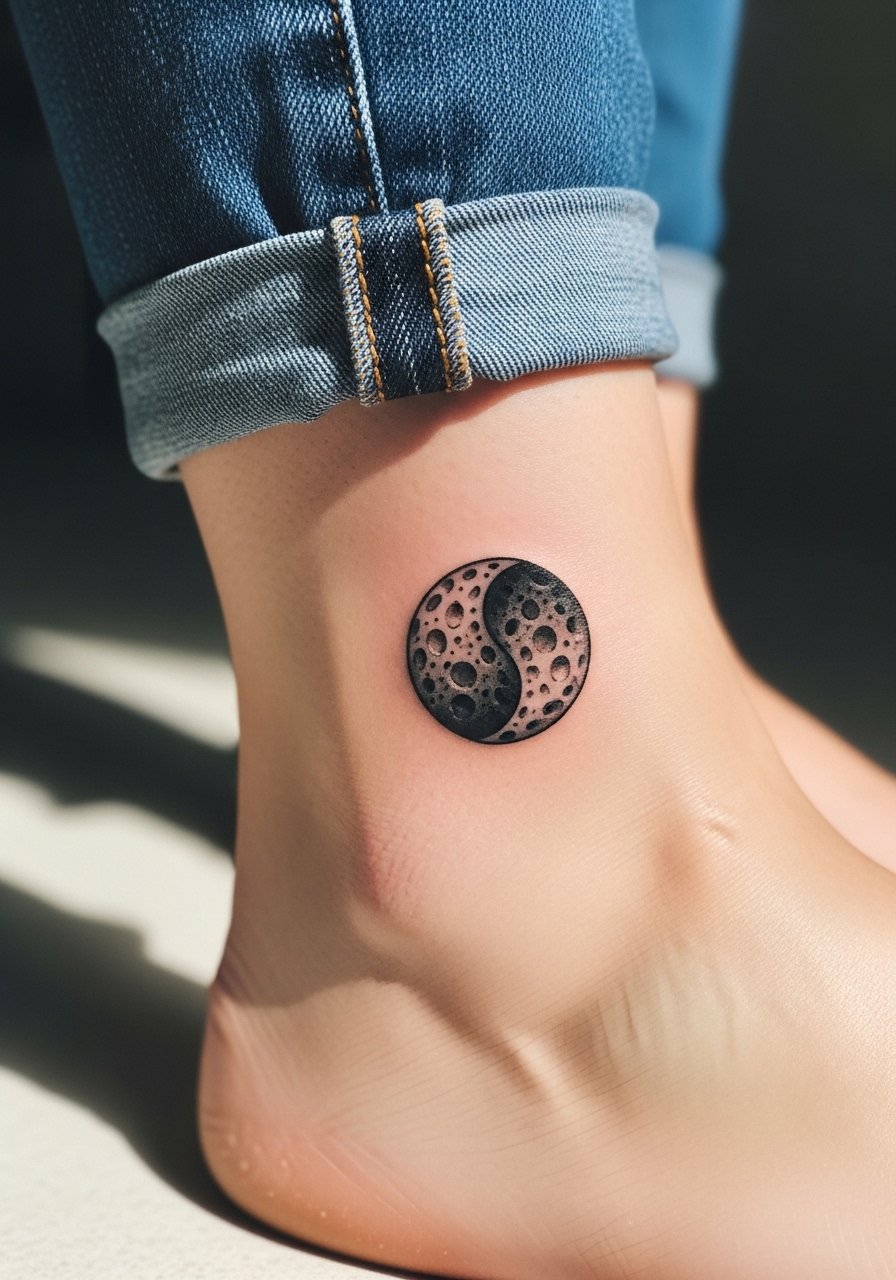
Ankle tattoos are playful summer statements, and micro-realism works well at 1 to 1.5 inches. The blight here is friction from shoes and socks, which can fade detail faster than other spots. Tell your artist you want contrast and tiny stipple shading for crater detail rather than continuous gray washes. Sessions are quick but the ankle is a sensitive zone. The most common mistake is packing micro detail into a spot that sees daily rubbing. For festivals, cuff your jeans or wear espadrille flats so the ankle is visible without constant abrasion.
Studio Day Picks
These first six pieces span wrists, ankles, collarbones, and ribs, so a few targeted items smooth the session and the first week.
-
Stencil transfer paper kit. Lets you preview placement on the actual skin, which matters for arcs and phase sequences that read differently on rounded limbs.
-
Topical numbing cream. Useful for ankle and ribcage sensitivity when you want the session to feel more manageable without affecting saturation.
-
Thin protective film roll. Keeps delicate wrist and finger linework clean during the first days when friction and handwashing are unavoidable.
-
Fragrance-free body wash. Gentle cleansers help the color in fine line pieces avoid irritation while the skin is healing.
-
Aquaphor healing ointment. A thin layer for the earliest days so fine line and watercolor edges stay hydrated without suffocating the skin.
7. Traditional Bold Full Moon on the Shoulder
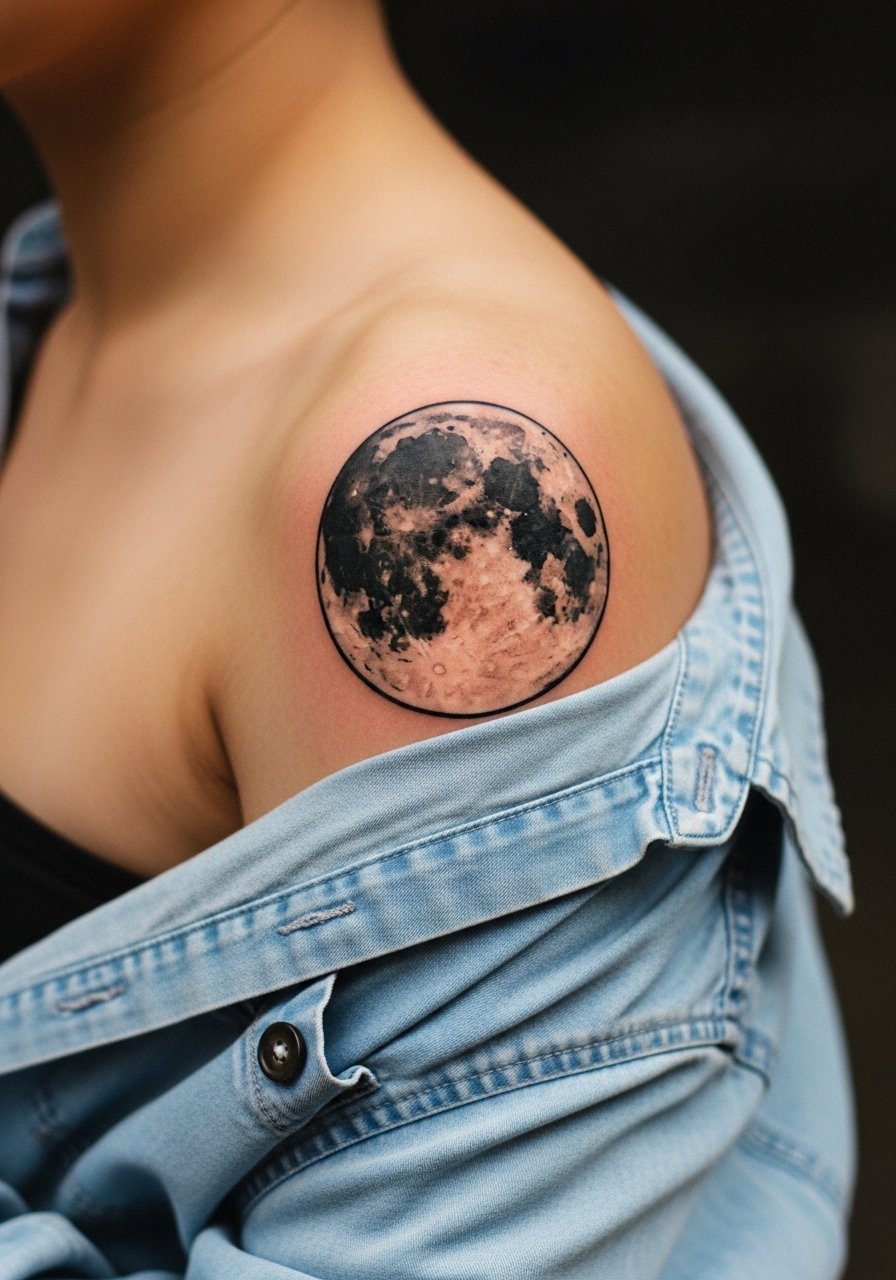
Shoulder caps like this take well to true traditional saturation. The visual impact is immediate and the rounded surface reads large even at five inches. Sessions are moderate in pain and usually require two sittings if color is involved. The common mistake is going too small and expecting the bold fills to read the same as a large shoulder piece. For easy access at the appointment, wear an open button shirt so the artist can reach the shoulder without you getting uncomfortable.
8. Fine Line Lunar Eclipse on a Finger
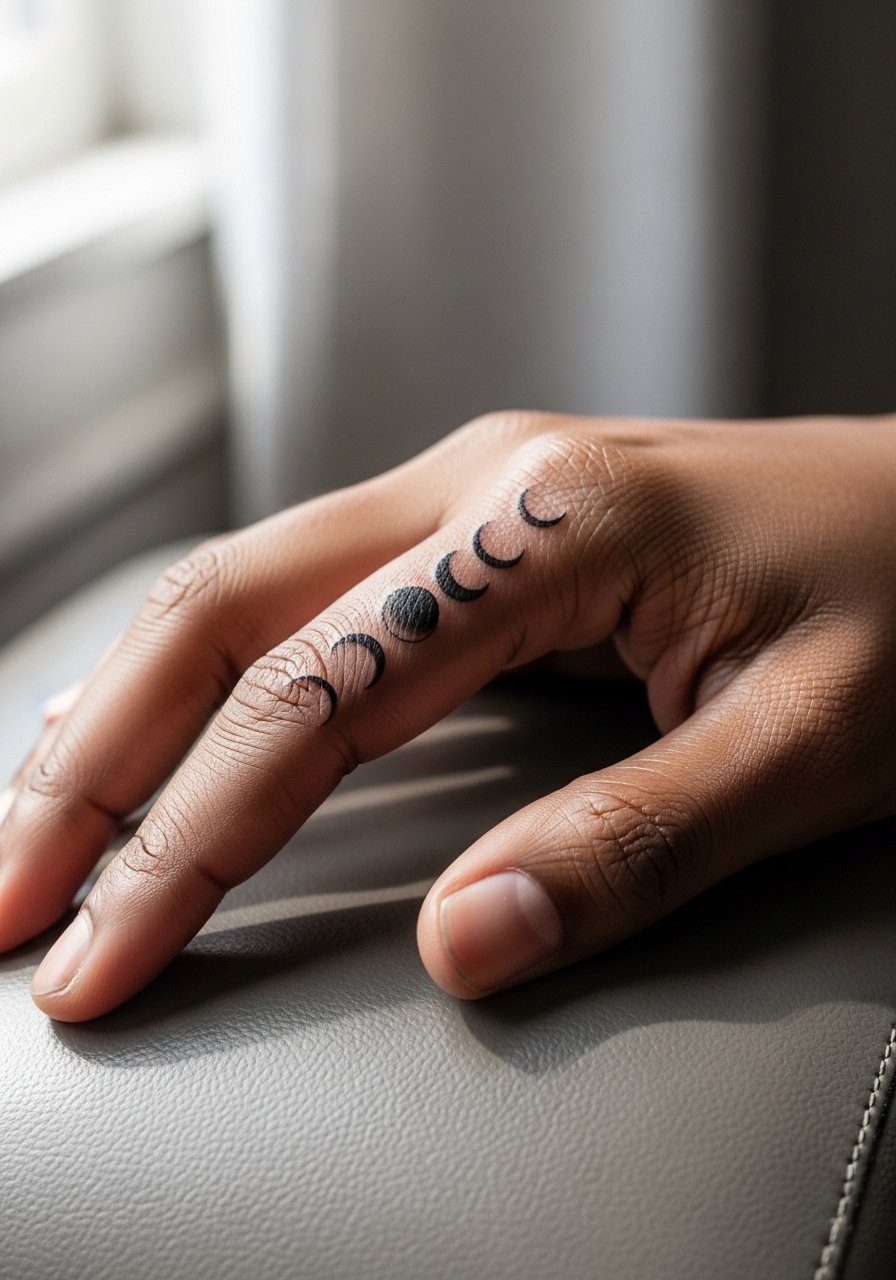
Fingers are notorious for fast fading and touch-ups. Expect this one to need annual refreshes if you want the eclipse detail crisp. When talking to your artist, ask for slightly thicker linework and minimal negative space so the design does not wash out. The session is quick but uncomfortable because of bone proximity. A real mistake is expecting permanent fidelity on fingers without budget for touch-ups. Keep in mind that finger tattoos also face occupational wear if you type or wash hands frequently.
9. Ornamental Mandala Moon Phases on Upper Back
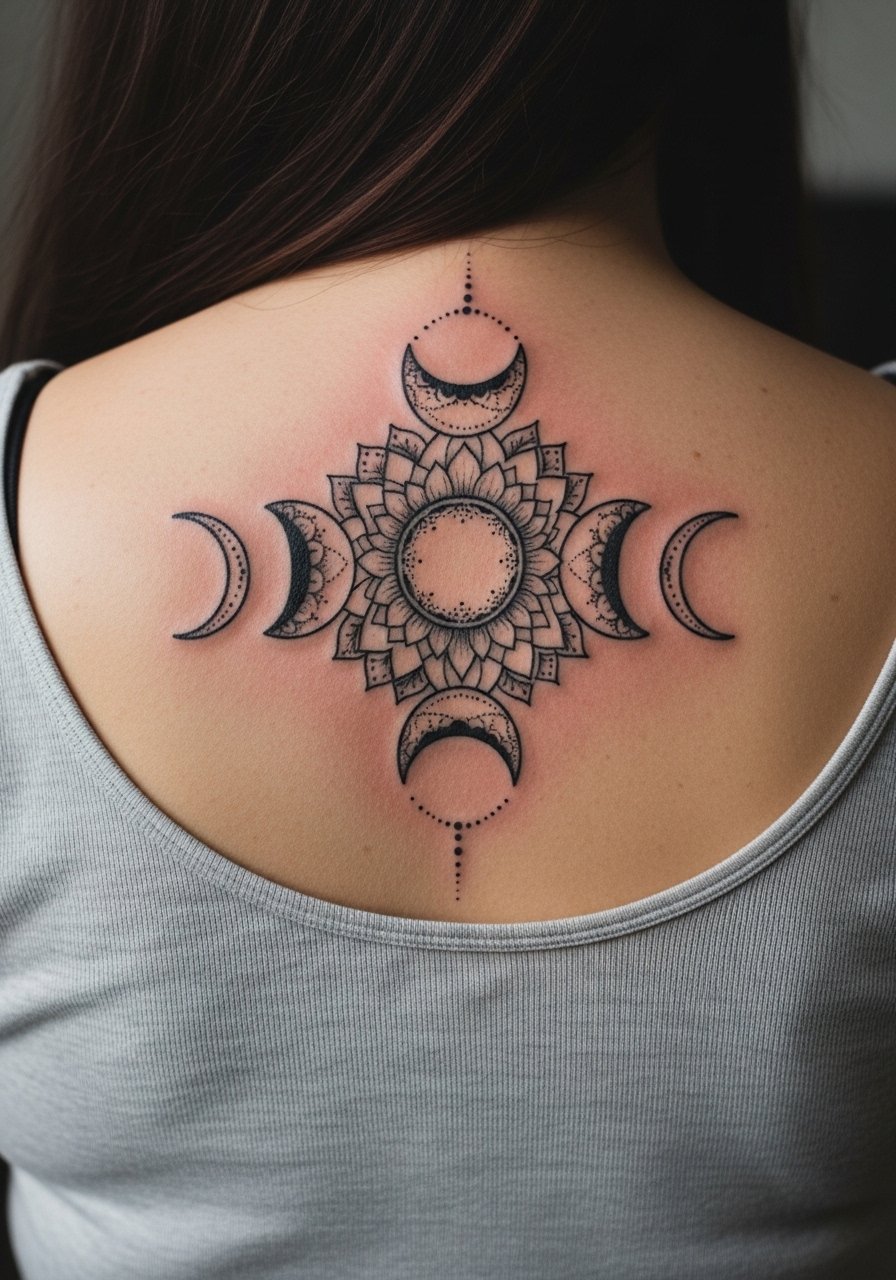
Big back pieces let you play with symmetry and scale. Ornamental mandalas combined with sequential moons sit well across the upper back and can expand later into a full back piece. Sessions are multiple and spaced over weeks. The major mistake is crowding too many tiny stipple patterns into a dense area, which risks blowout over time. On the plus side, upper back work is well protected from sun and friction. For showing it off, choose a wide-back tank or an open-back dress when you want the full spread visible.
10. Ignorant Style Dotted Sequence on Outer Thigh
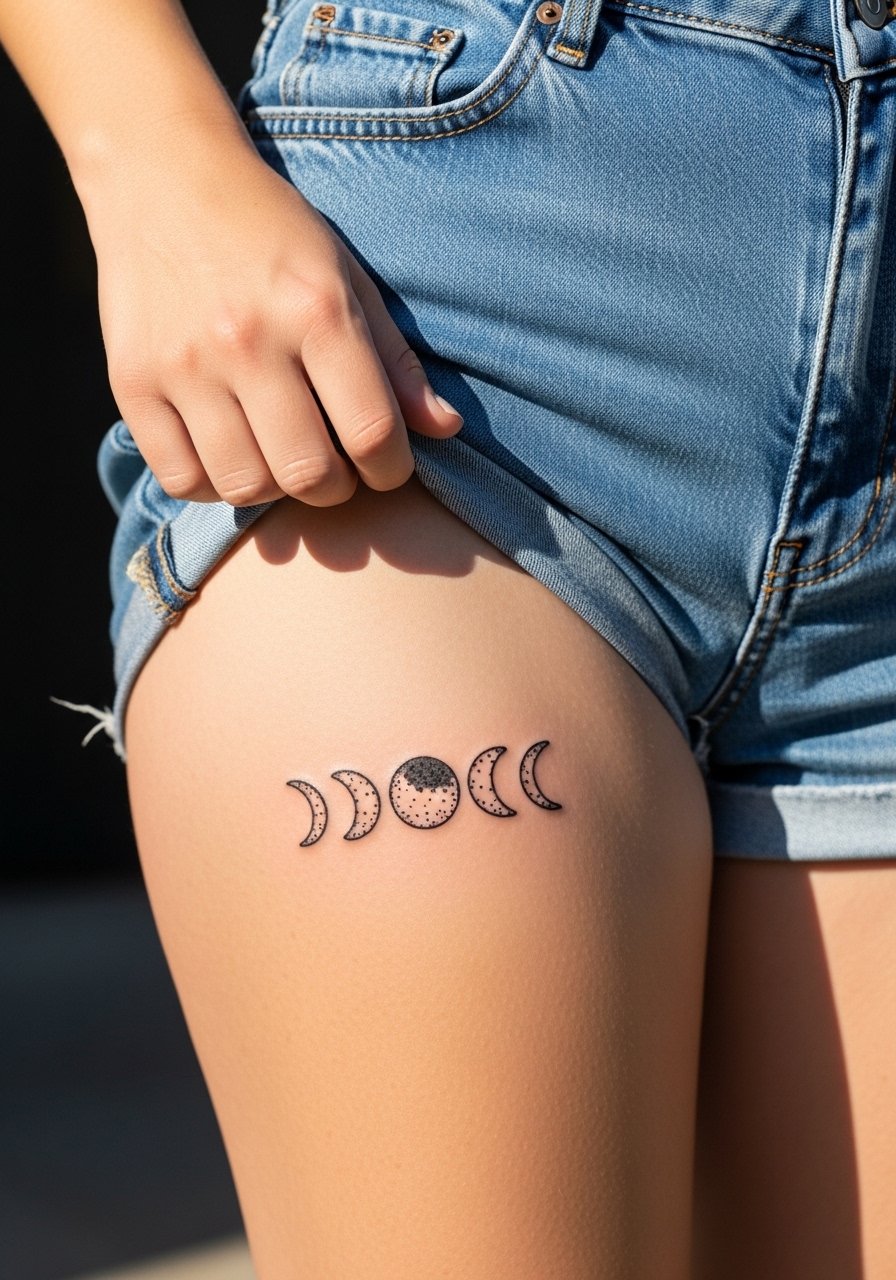
Thighs are forgiving for size and detail because they rarely face daily abrasion. Ignorant style dotted sequences read like doodles and age in a relaxed way. Tell your artist you want varied dot sizes and a loose hand for that sketchbook energy. Sessions are low to moderate pain and often done in one sitting for a 4-inch band. The usual mistake is taking the doodle too small, which loses the intentional roughness. If this is for private symbolism, the thigh is great for pieces tied to personal cycles or menstrual tracking.
11. Micro-Realism Lunar Surface on Inner Bicep
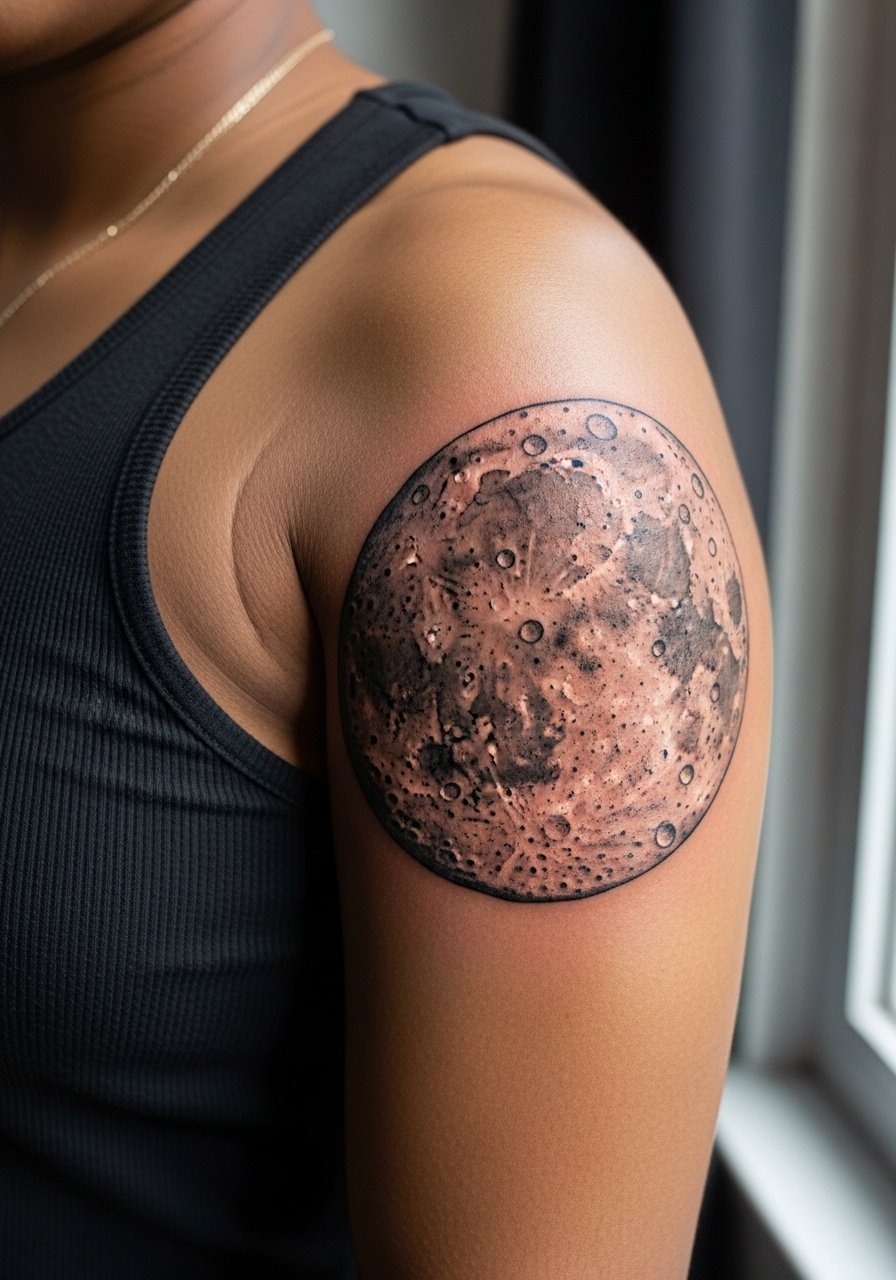
Inner bicep work can be surprisingly delicate because the skin there is thinner and softer. Micro-realism with stipple shading and tiny highlights gives a tactile lunar texture. When you consult, ask for dot work and stipple shading rather than heavy gray washes to keep the detail readable as it heals. Pain is moderate and sessions can be slightly awkward for arm positioning. Watch for blowout in the first year if the artist overworks the soft tissue. For sessions, wear a loose fit tee men so the artist can adjust your sleeve easily.
12. Moon and Sun Integrated Cycle on the Sternum
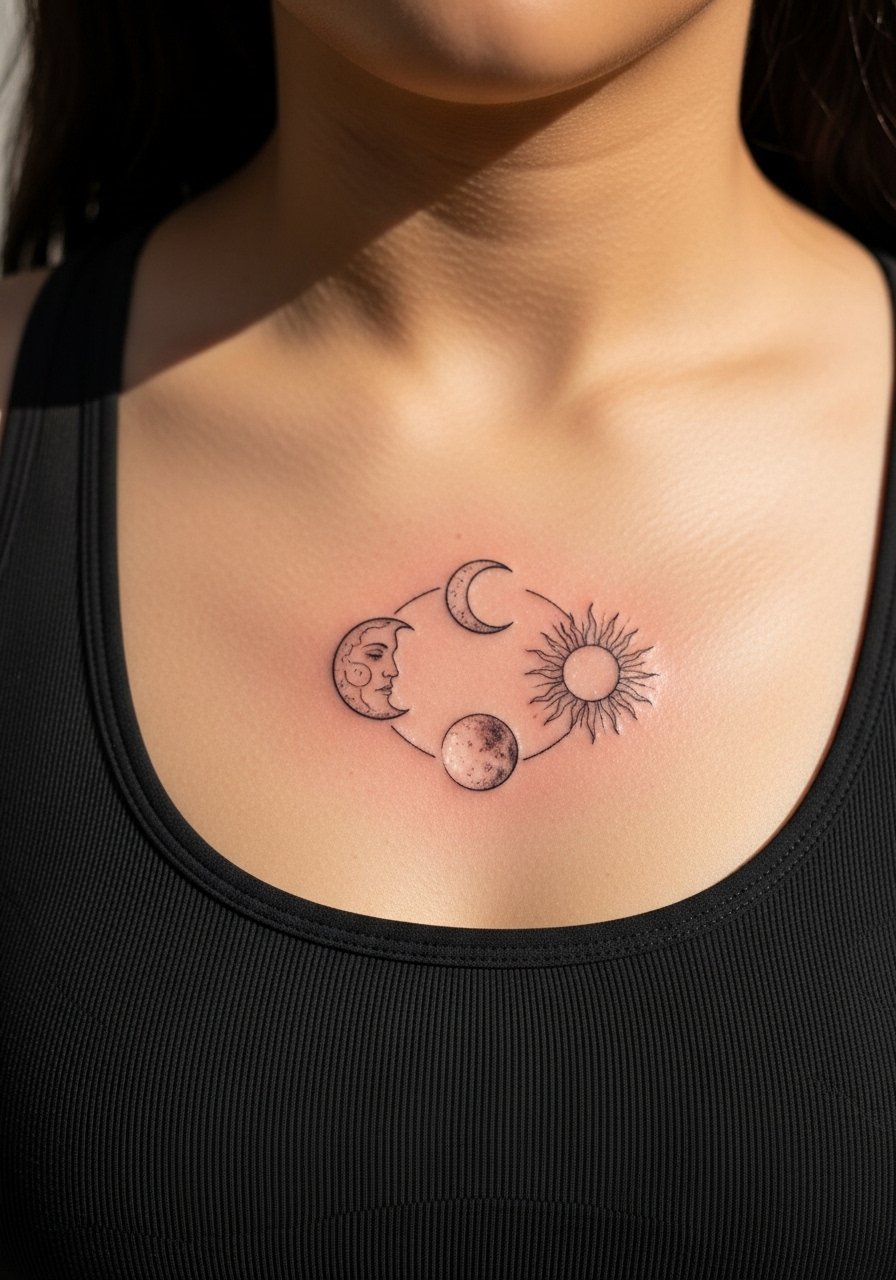
Sternum pieces are intimate and read as centerpieces. Integrating sun motifs with moon phases creates balance visually. Ask the artist for a composition that sits above the fabric line of a sports bra so you can reveal it safely. Pain ranges high because of the bone and thin skin, and sessions are often broken into smaller sittings. Artists disagree about the best needle depth here, so ask where they stand. One camp warns about rapid fading on the sternum, while another says careful depth and spacing keep edges crisp over years. Expect thicker linework than you might request for other fine line pieces.
13. Geometric Moon Sleeve Starter on Outer Forearm
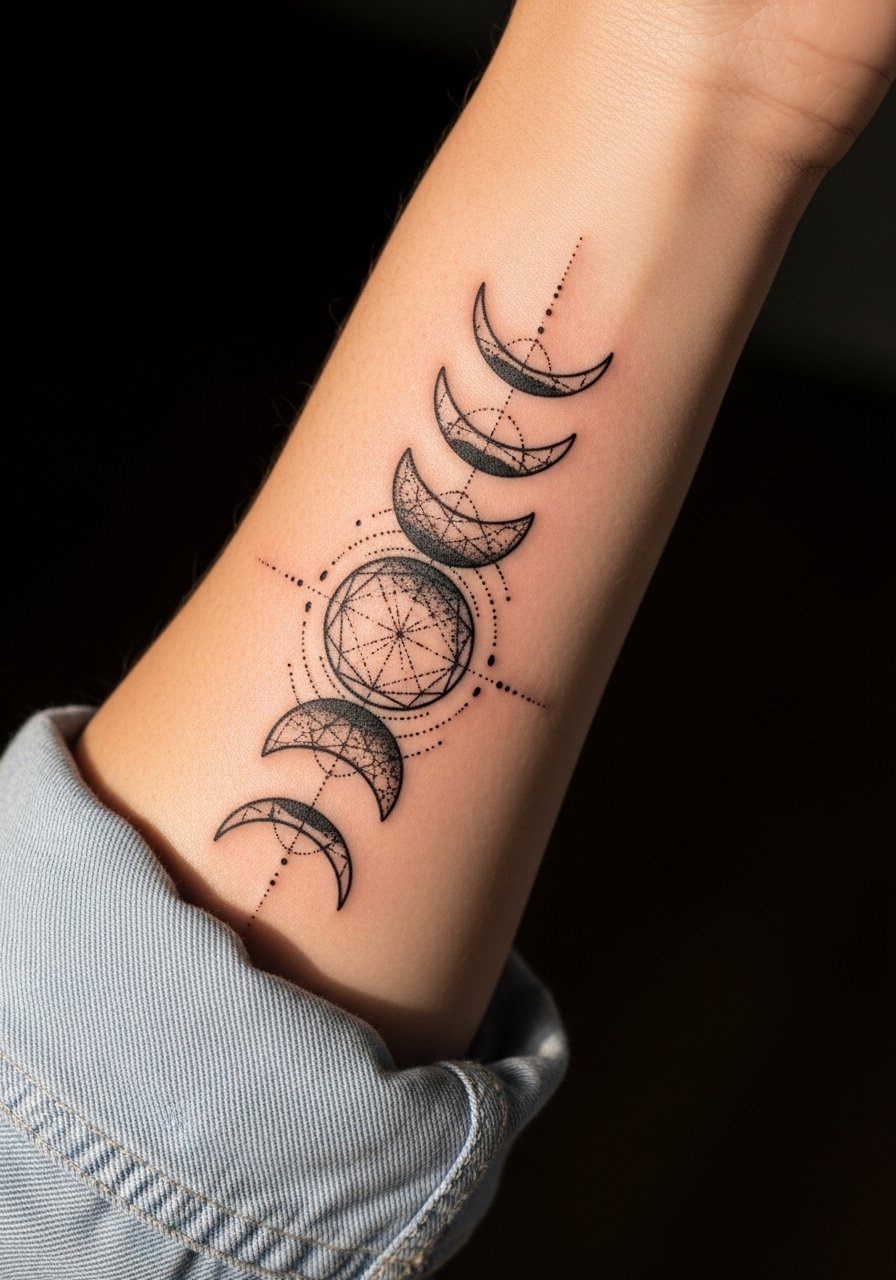
If you are thinking larger, the outer forearm is a smart starter zone for a sleeve build. Geometric moons combined with negative space give you expansion options for later. Tell your artist you want modular elements so future sessions can add stars or bands without reworking existing lines. The session pain is low to moderate and you may book two short sessions for crisp linework and black fills. A mistake I see is trying to cram a sleeve's worth of detail into a single session. For everyday wear, roll sleeves and pair this with a thin silver cuff bracelet to balance the geometry.
14. UV-Reactive Finger Phases for Nightlife
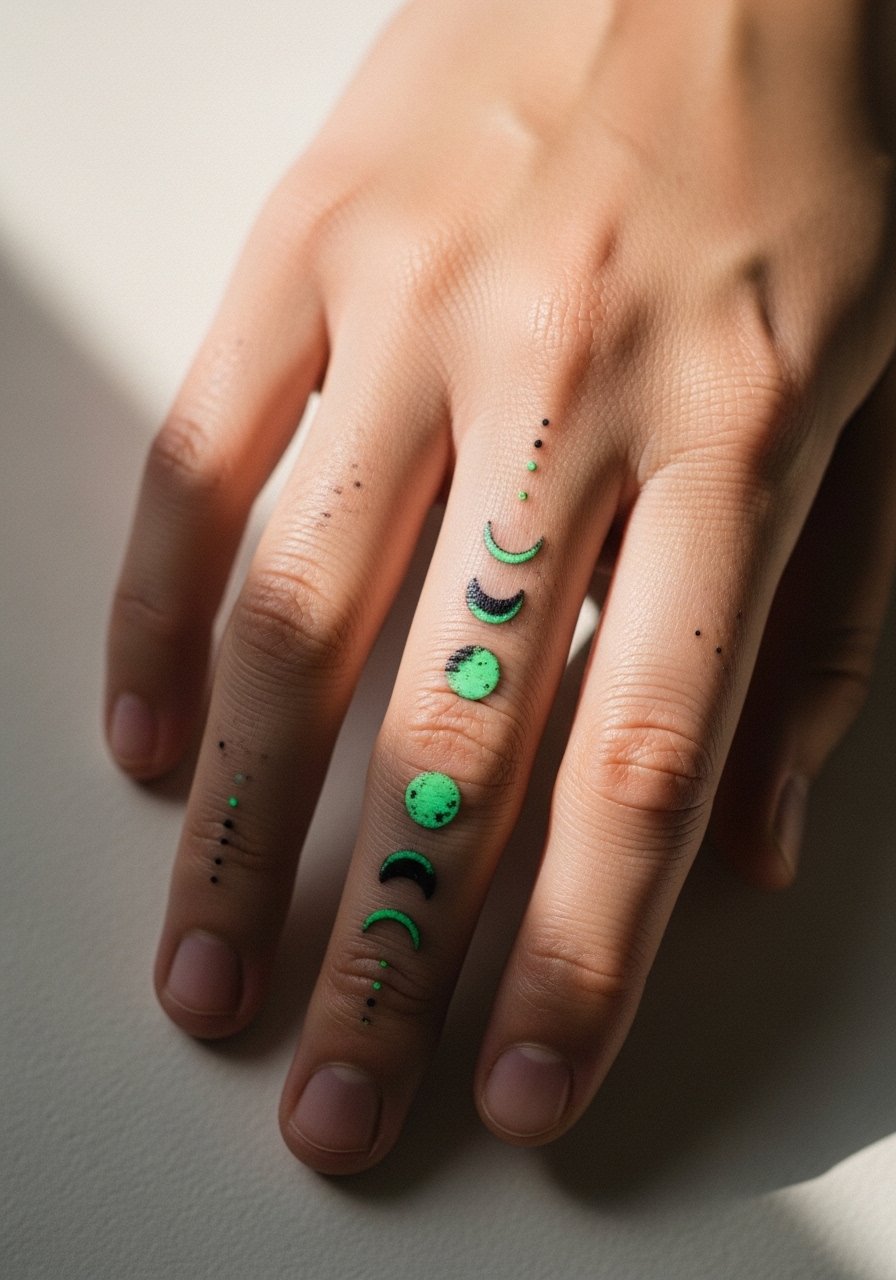
UV-reactive ink is a novelty and it performs differently from standard pigments. In regular light these phases can be subtle or near invisible, and under UV they glow. Ask whether your shop has experience with UV pigments and whether they recommend a clear layering strategy. Expect quicker fading in normal daylight for UV colors, and plan for periodic refreshes. This option is good for nightlife and festival wearers. Keep in mind some studios avoid UV inks because of regulatory concerns in certain regions, so ask about local rules before booking.
15. Dark-Skin Adapted Gradient Blackwork Phases on Outer Arm
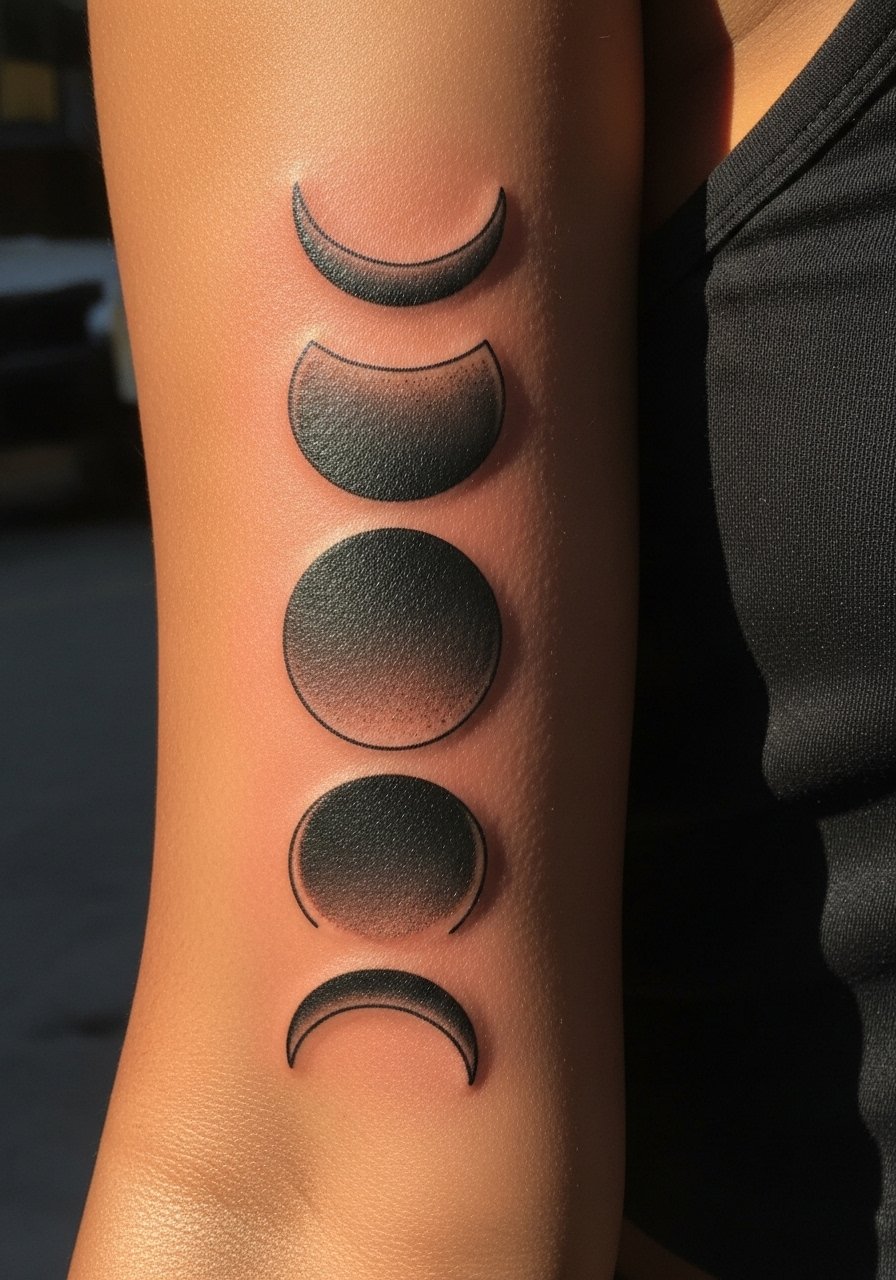
Dark skin tones benefit from high-contrast blackwork and solid fills. I recommend gradient black moons and strong linework rather than whisper-thin outlines that risk disappearing. When you consult, mention you want bold contrast and clear negative space so the phases pop. Sessions are similar to other arm work and usually done in one to two sittings. The common mistake is asking for pale gray shading only, which can vanish on darker tones. This approach ages well and reduces the need for early touch-ups.
16. Spine-Aligned Phase Chain with Tiny Stars
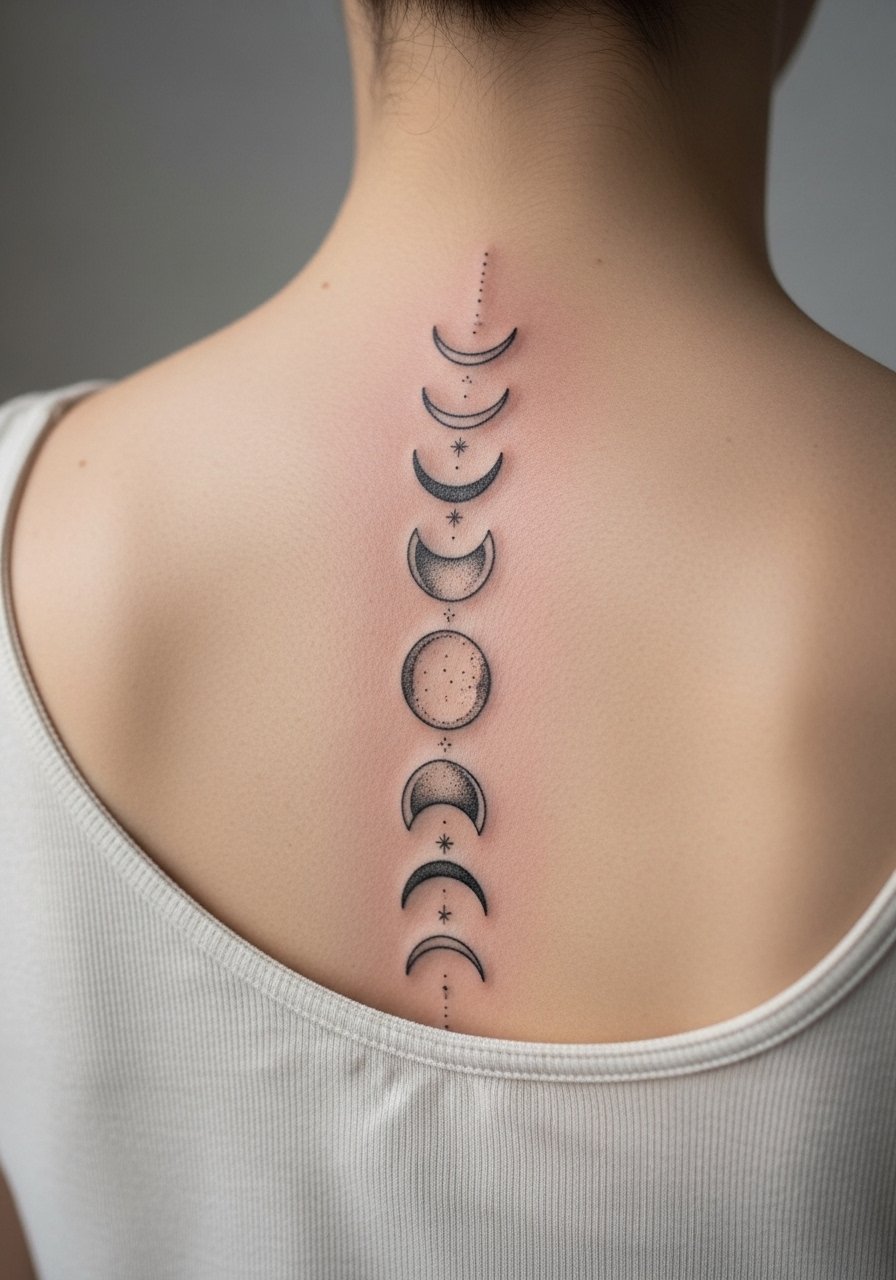
A spine-aligned chain reads like a subtle column and looks elegant with spaced stars between phases. Placement is sensitive but not extreme; pain depends on how close to the vertebrae the stencil sits. Tell your artist whether you want the chain centered or slightly offset toward muscle for better visibility when you move. Mistakes include over-compressing phases so they merge when the back flexes. For long-term care, keep sun exposure low while the skin heals since the back gets sporadic sun that can fade fine line faster.
17. Tiny Crescent Behind the Ear, Below Hairline
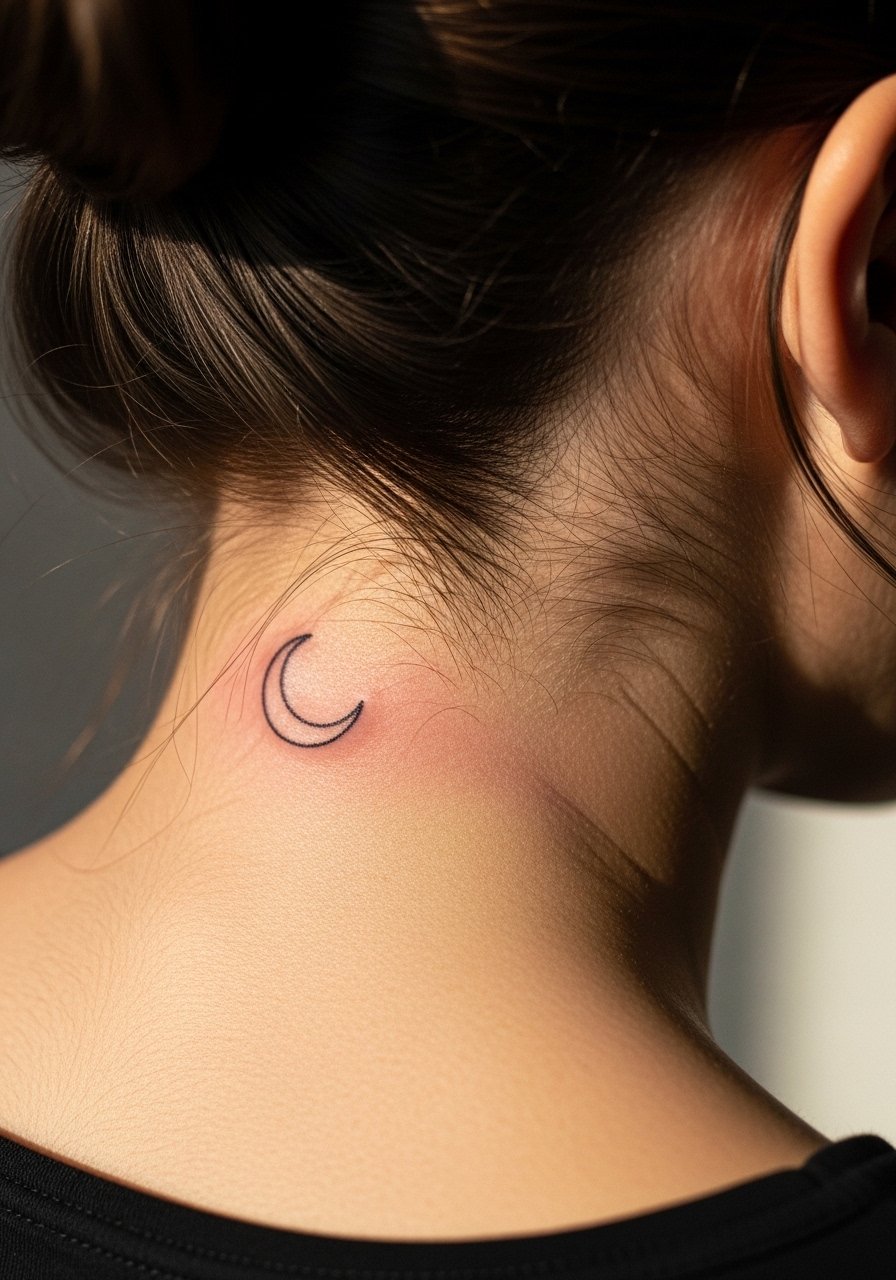
Behind-ear placements need delicate composition and careful framing. This area is subtle and can peek out with short hair or pulled-back styles. The session is quick and mildly painful. A frequent mistake is placing text or heavy detail there because the small zone cannot support it. For discretion, ask the artist to position the crescent just below the hairline so it tucks away. This placement also requires an artist experienced with small curved surfaces to avoid early distortion.
18. Calf Constellation with Phased Accent Moons
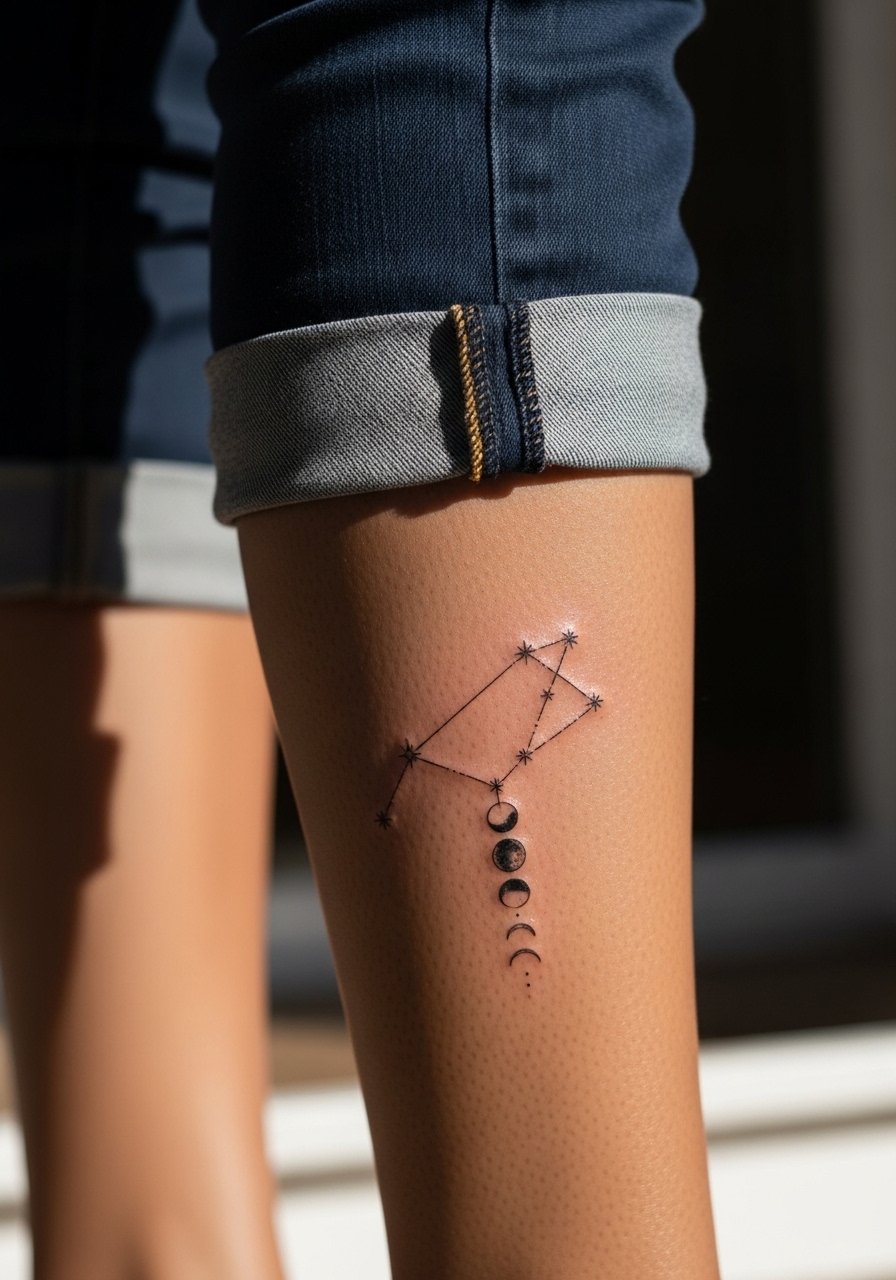
Calves are a great spot for elongated compositions and seasonal showing. A constellation threaded with phase moons gives motion as the leg moves. Tell the artist you want slightly bolder anchors for the major stars so the smaller phase moons remain legible over time. Sessions feel moderate and can be comfortable due to the softer skin. Mistakes occur when artists try to cram extreme micro detail into tight clusters. For session wear, roll up cuffed ankle jeans so the calf is accessible without tight seams.
19. Hip Halo of Small Phases with Floral Edging
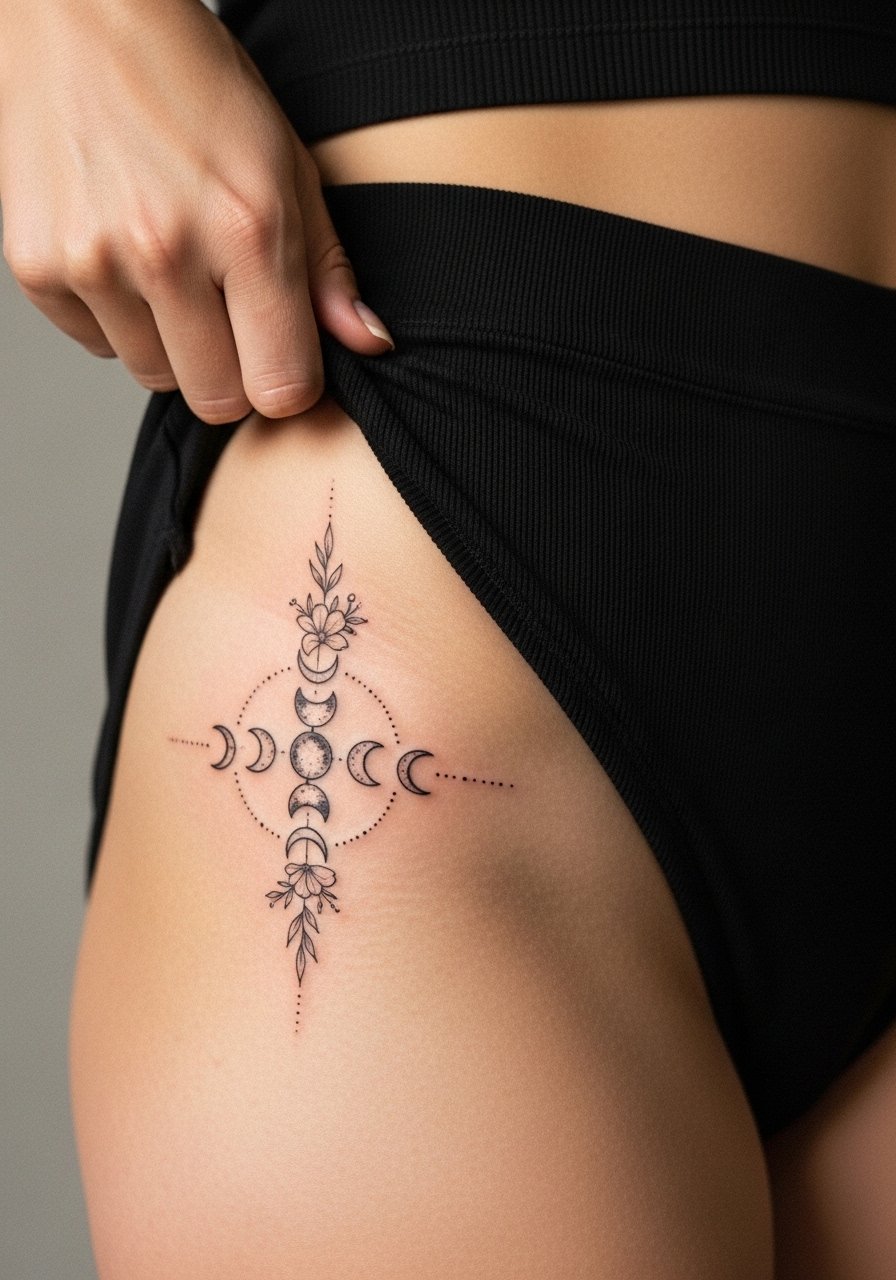
Hip placements are intimate and work well for hides-and-reveals. The halo composition lets you wear it casually or show it in swimwear. Plan for a one-hour session for a 3-4 inch halo, and expect some soreness during sleep positions. A common mistake is placing too much dense detail near the waistband where friction occurs. If you want flowers, space them enough to avoid merging. The hip also adapts gracefully to body changes, but consider sizing if weight fluctuation is likely.
20. Minimal Single Crescent on the Collar of a Shirt
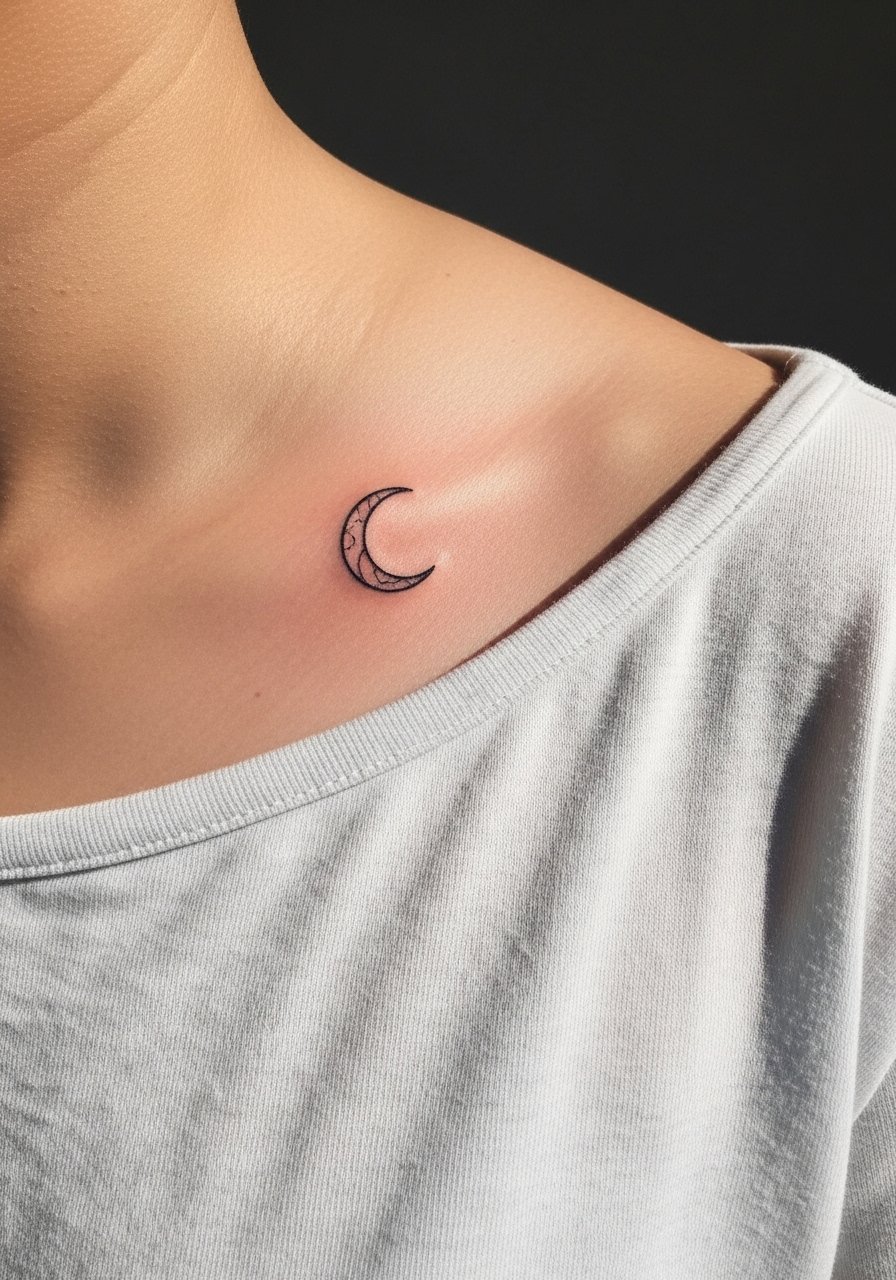
Placing a tiny crescent just above a shirt collar is a discreet option that reads like jewelry. It is low pain and quick to ink. Tell your artist you want the crescent positioned to peek above typical necklines rather than sit covered by fabric. Small mistakes include putting it too close to seams which can distort the line when clothing rubs. For easy daily visibility, pair with a boat neck tee in solid color that frames the crescent.
21. Full Sleeve Lunar Narrative in Dot Work
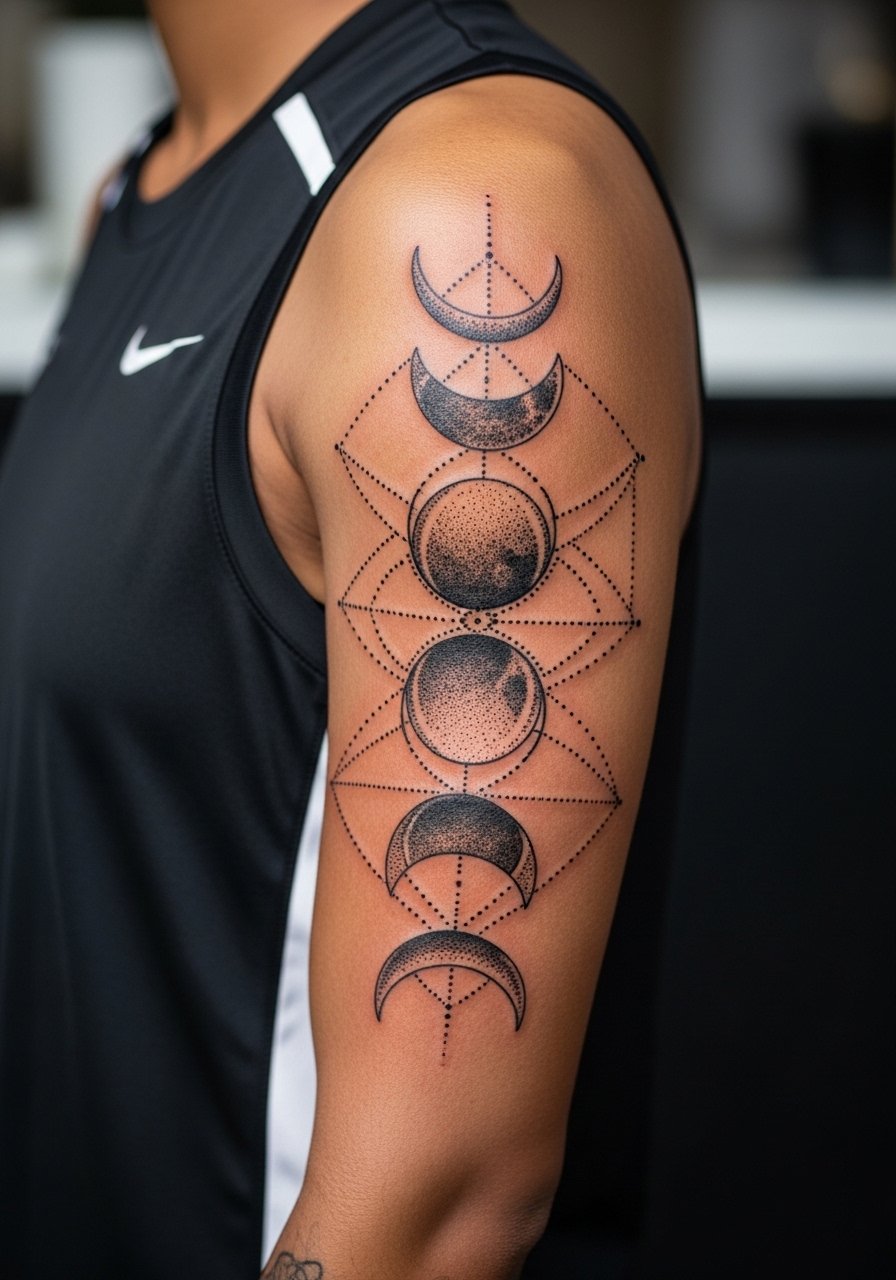
Sleeves are storytelling canvases and dot work lends a meditative rhythm to phase sequences. Expect multiple sessions and staged healing for saturation. Discuss the narrative rhythm with your artist so dark pockets do not crowd thin crescent lines later. A common error is starting too dense and discovering you have no negative space left for future expansion. For the chair day, wear a sleeveless athletic shirt so the artist can rotate the arm without bunching fabric.
22. Thigh Band of Phases for Personal Tracking
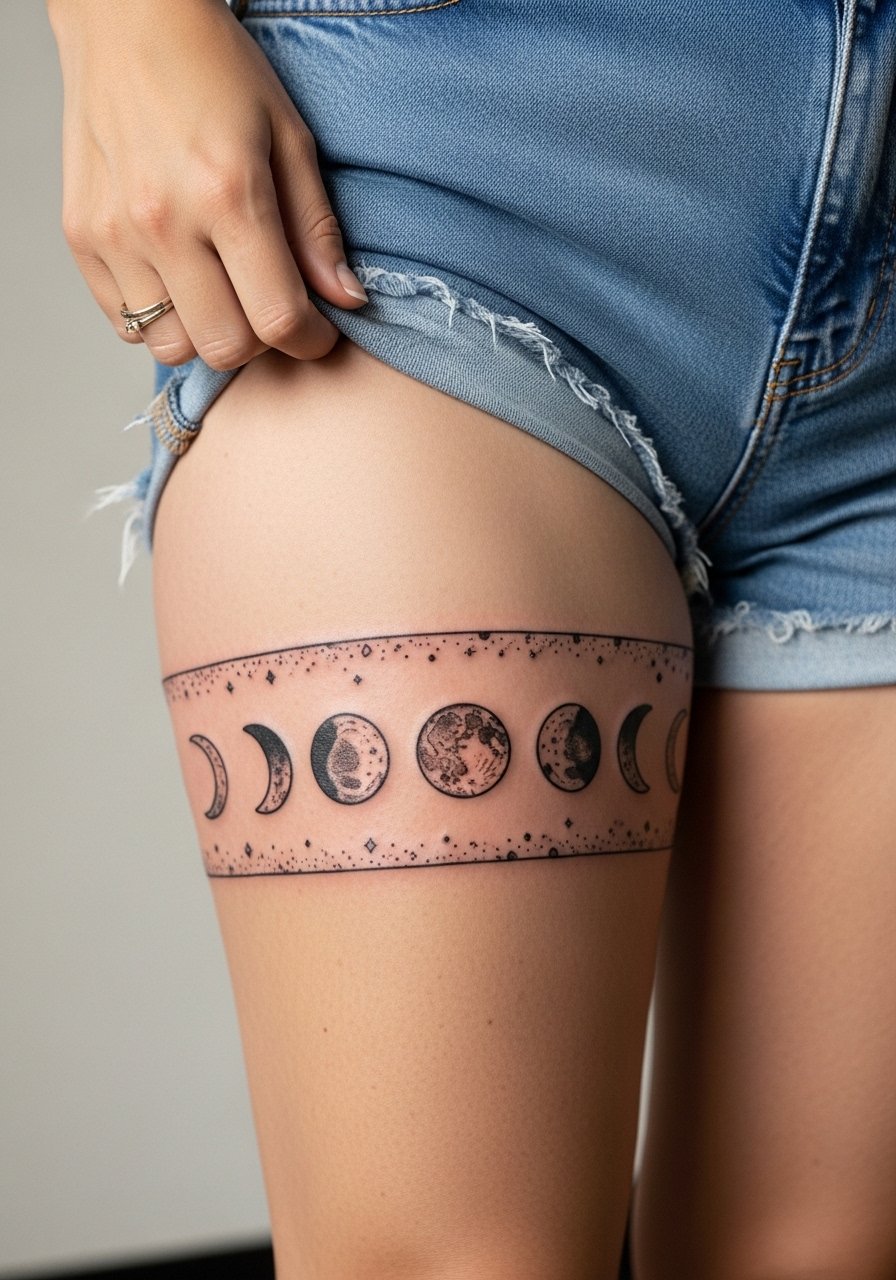
A thigh band is private and versatile, which makes it a natural choice for personal tracking or symbolism. The outer thigh tolerates detail and larger diameters, so blend fine line crescents with a few bolder moons to increase longevity. Sessions are comfortable and often done seated. Mistakes include making the band too tight or thin which causes the design to stretch with body changes. For session comfort, wear loose bottoms you can adjust easily.
23. Moon Phase Medallion on the Upper Chest
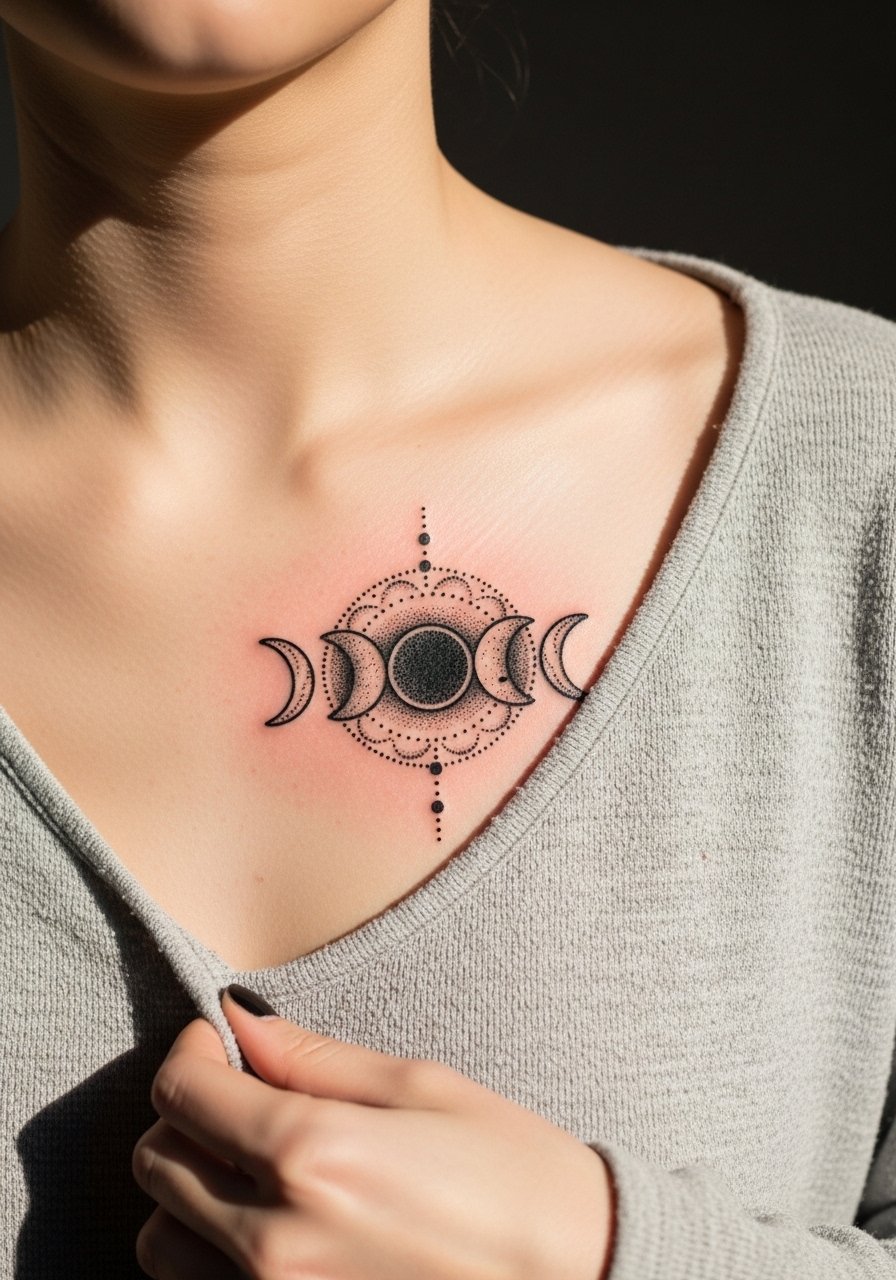
Upper chest medallions read like jewelry and center the gaze. The area takes detail well but can be sensitive near bone. Discuss needle depth and ask for slightly thicker outer outlines so the medallion keeps its shape as it heals. A mistake is overfilling the inner patterns with blurry gray wash. For wardrobe, a wide-neck shirt pulled slightly aside shows the piece without exposing more than you want.
24. Small Crescent Anklet with Dainty Chain Accent
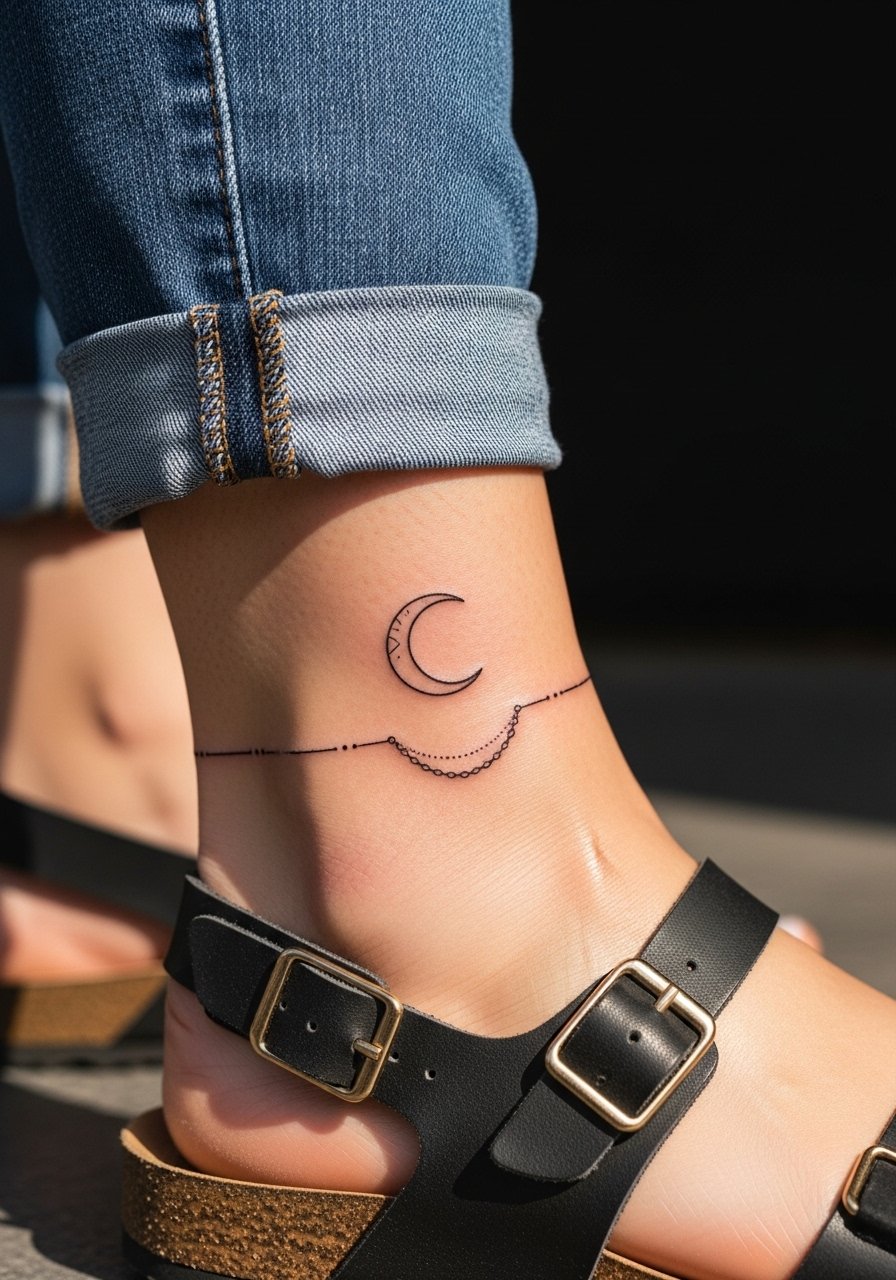
Anklet tattoos are subtle and pair well with jewelry. Keep the crescent small and the chain links slightly irregular to mimic real accessories. Expect sensitivity around the ankle bone and plan for quick sessions. A common mistake is placing the chain too close to shoe rub lines which speeds fading. To show it off, consider a dainty ankle chain layered with a minimalist tattoo for a jewelry effect.
25. Celestial Compass with Phases on the Lower Back
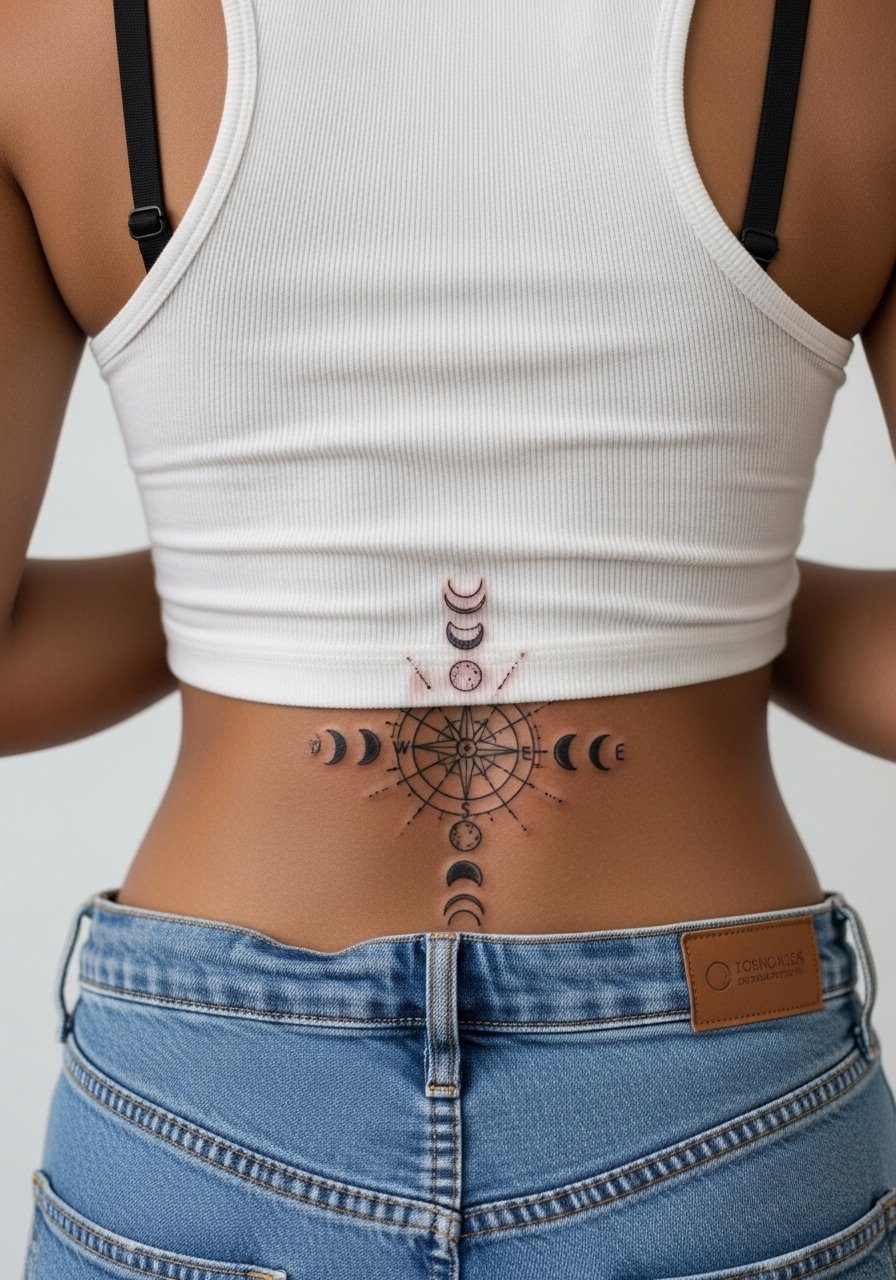
Lower back placement gives you symmetry and the option to expand later. A compass layout with phase markers reads well as a horizontal anchor. Keep the central compass bold and the phase markers spaced so they do not merge during sleep cycles. The error I see is over-detailing tiny ticks that blur within a year. For sessions, bring clothing that lets you lie comfortably without pressure on the fresh ink.
26. Mandala Moon Wristband That Wraps Around
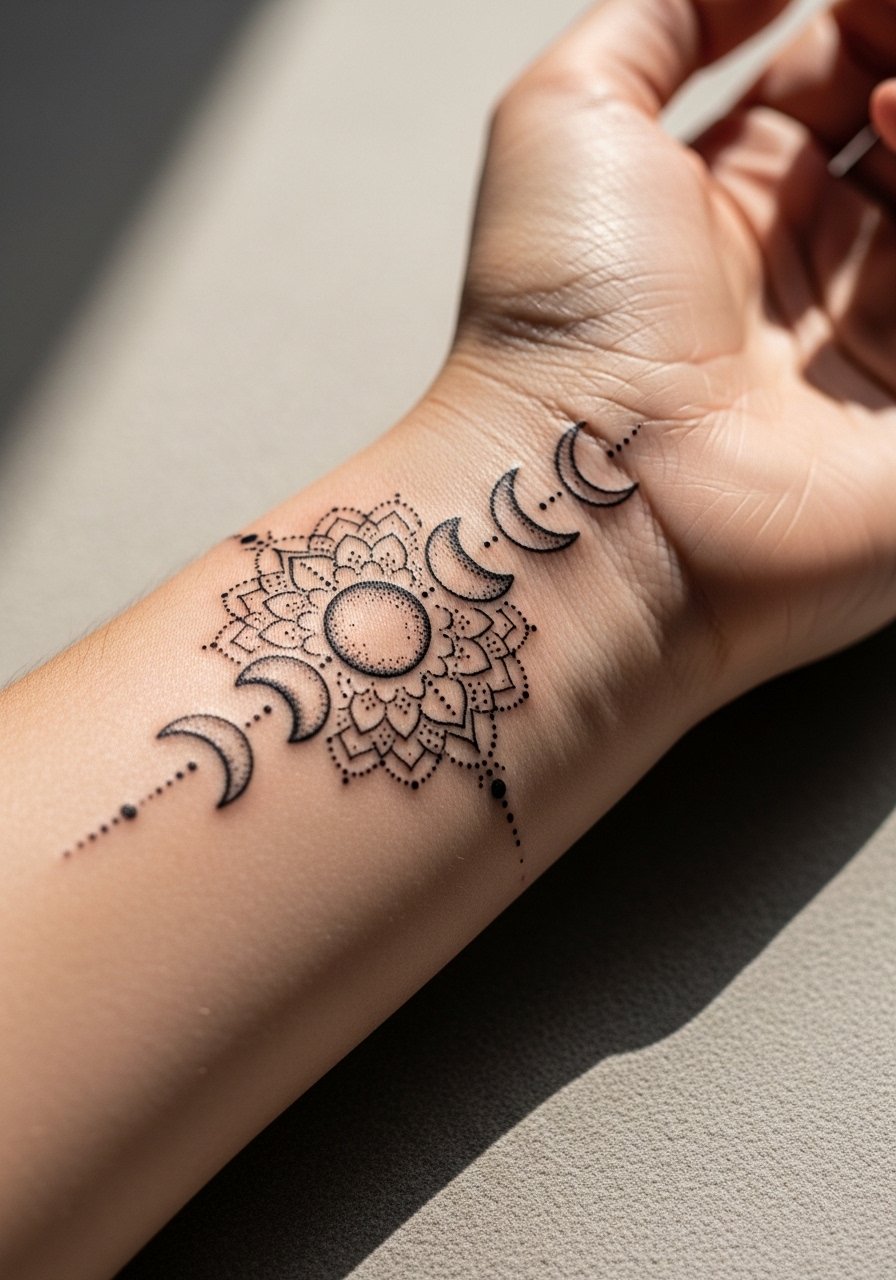
A wristband that wraps gives the effect of continuous motion. Because the wrist sees constant movement, use thicker outlines for the mandala anchors and delicate dot work for filler so the wristband keeps structure as it ages. Request slightly more spacing between radial elements to prevent merging. Expect touch-ups sooner than on the back. For showing it off, a neutral tank top keeps focus on the wrist without competing fabrics.
27. Micro Crescent Cluster Behind the Knee
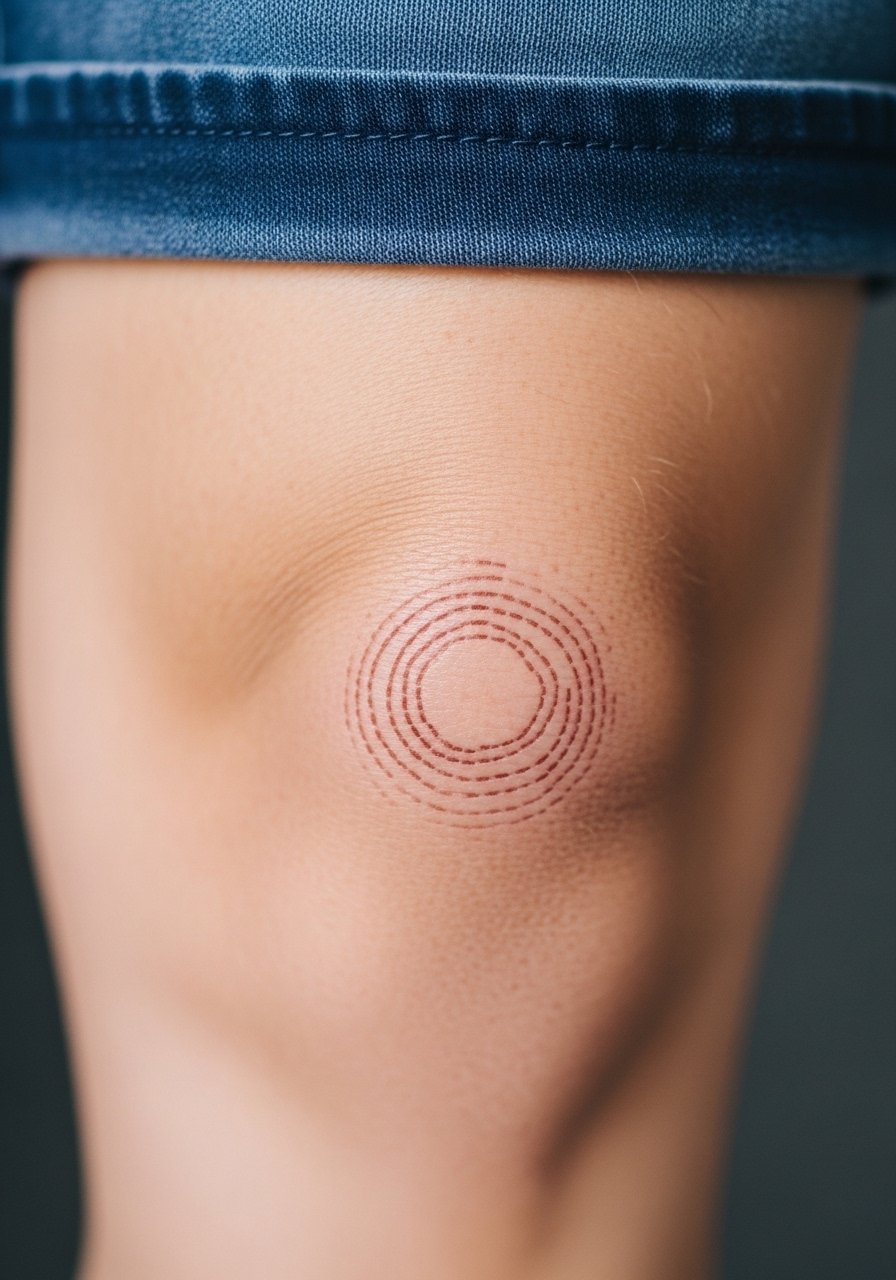
Behind-knee placements are playful but tricky because of constant flex. Micro crescents can hold if spaced and sized to avoid distortion when the leg bends. Sessions are moderately uncomfortable due to movement of the joint. The common mistake is placing a continuous band that becomes illegible when the knee bends. If you want to keep the shapes readable, request the artist space them out slightly and use a mix of fine and slightly bolder lines.
Frequently Asked Questions
Q: Will fine line moon phases on the wrist blur faster than blackwork versions?
A: From what I've seen, fine line on wrists often needs a touch-up earlier because of friction and sun exposure. Blackwork holds contrast longer. If you love the fine look, ask for slightly heavier line weight and expect a refresh around year two to three.
Q: How do I adapt moon phase designs for darker skin tones so they pop?
A: Go for solid black fills, stronger outlines, or micro-realism with high contrast. Ask your artist about gradient blackwork and negative space. Artists who work regularly with darker skin can show healed examples to guide scale and spacing.
Q: Do watercolor moon phases need different aftercare than traditional ones?
A: The basics are the same but watercolor areas rely on subtle color washes, so keep sun exposure low while the pigment settles and follow the shop's hydration guidance. Avoid heavy scrubbing and plan for a possible color touch-up after the first year if needed.
Q: Is it safe to use numbing cream for wrist or ribcage moon sessions?
A: Many people use topical numbing for sensitive spots like ribs and ankles. Ask whether your artist is comfortable working over numbed skin because some prefer feeling feedback from lighter numbing. If you use it, apply only as instructed and discuss timing in the consult.
Q: How do seasonal body changes affect an inner forearm moon arc?
A: Forearms expand less than the torso, but significant weight change can stretch linework. If you expect major body changes, pick placements like the collarbone or upper back that handle stretch more predictably.
Q: Where can I find tailored references and local artists for these moon phase styles?
A: Search hashtags like #moonphasetattoo and #finelinelunar on Instagram, browse Pinterest boards for placement mockups, check local listings on Booksy or Tattoodo, and read r/tattoos threads for healed photos and shop recommendations.
