
Fine line neo traditional compass pieces look like delicate maps at first glance, but the reality is they live with the body for years. Trends push tiny, detail-heavy compasses right now, and from what I have seen in shops across three cities those same pieces often need touch-ups sooner than bolder work. Below are compass-forward neo traditional ideas that balance detail with longevity so your next appointment is closer to a long-term plan.
1. Inner Forearm Compass with Floral Frame
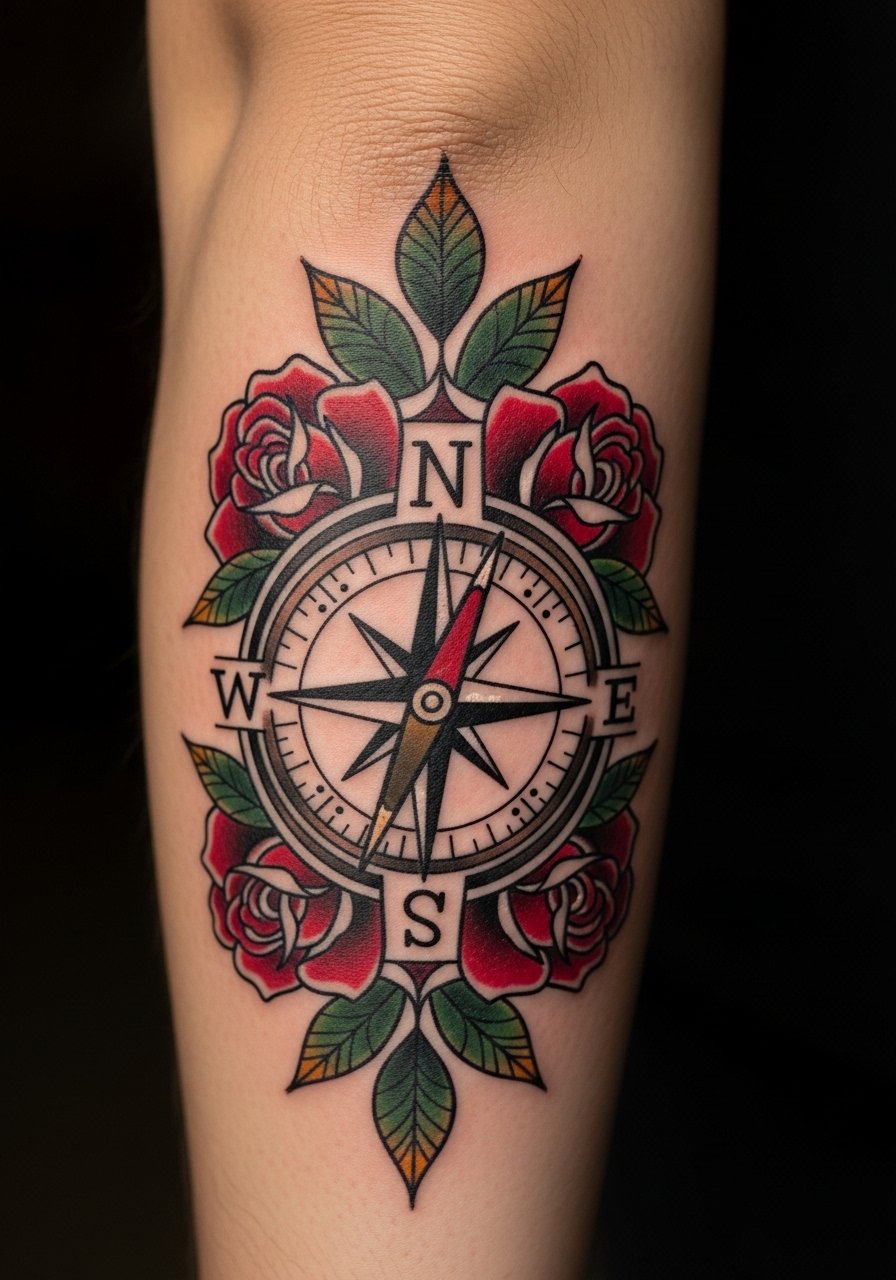
I recommend this when you want a visible piece that ages predictably. Ask your artist to keep the compass center at a slightly larger scale than the surrounding florals so the points stay legible at year three. Common mistake is asking for too many tiny ornamental ticks around the dial, which blur into a brownish smudge with sun exposure. The session feels like moderate vibration and sitting time is often 60 to 90 minutes. For showing it off wear a rolled-up linen shirt so the forearm sits cleanly in the light while still protecting the skin when you walk outside.
2. Wrist Compass Band with Dot Work Compass Rose

Fair warning, wrist work is higher on the touch-up list because of constant washing and friction. I tell people to keep the compass face simplified with bold cardinal points and dot work in the center. A common aging pattern is the inner dots merging within two years when lines are too close. During consultation say "solid cardinal points, airy dot field" to avoid over-detailing. Expect a 30 to 60 minute session and a touch-up around year two for most wrists. For evenings, pair the piece with a thin chain bracelet that sits beside the tattoo without rubbing the dial.
3. Sternum Compass with Banner and Coordinates
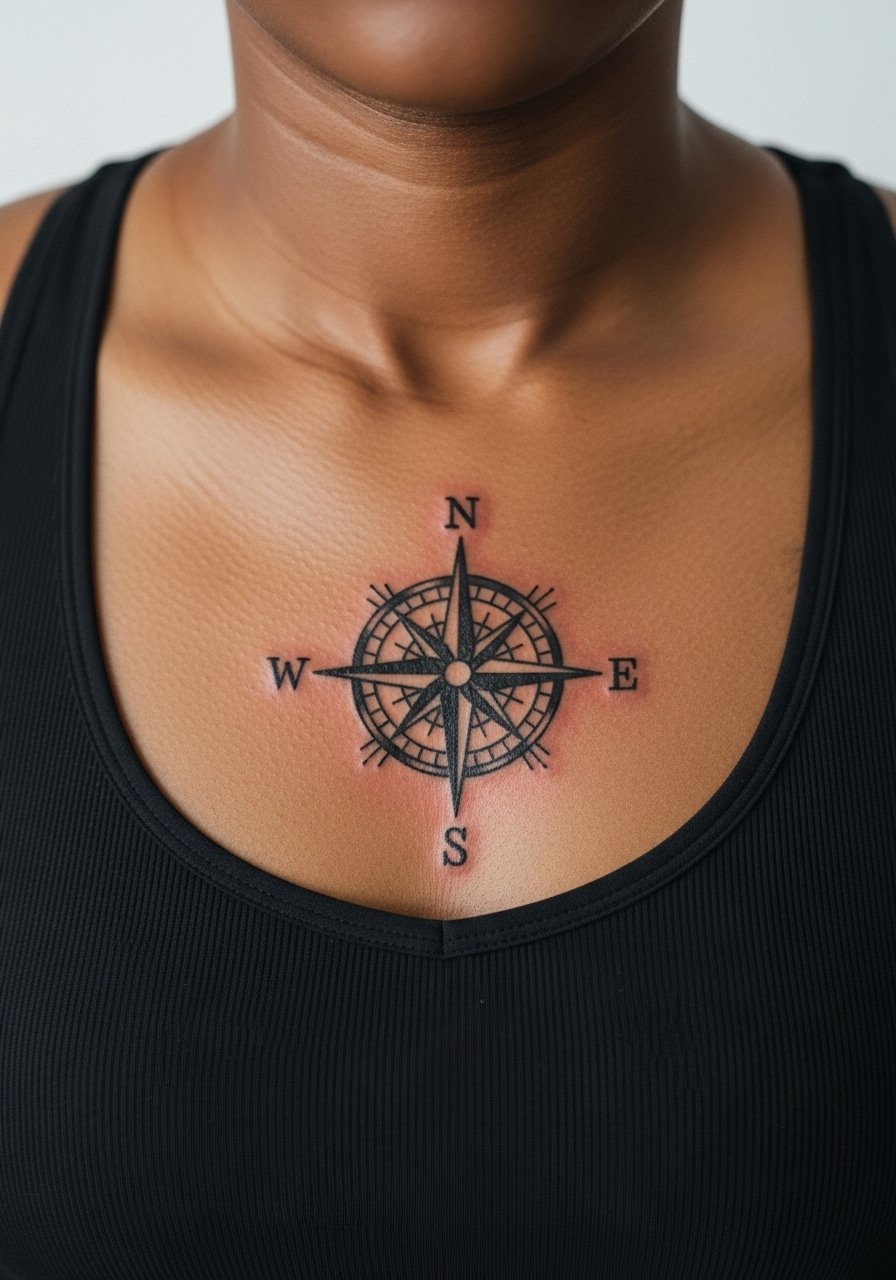
Most people underestimate sternum sessions. Pain is higher, and the skin flexes with breathing which affects line placement. If you want coordinates included, bring the exact text to the consult so the lettering renders correctly. Artists split on whether dense color across the sternum holds better than spaced linework. One camp says saturated fills lock the design in. The other camp prefers spaced elements to avoid banding as the skin stretches. Say where you stand and ask the artist for mockup mapping before the stencil goes on. Session time is often 90 to 150 minutes and expect a touch-up in the first year if the center sees a lot of movement.
4. Shoulder Compass with Sailor Ribbon
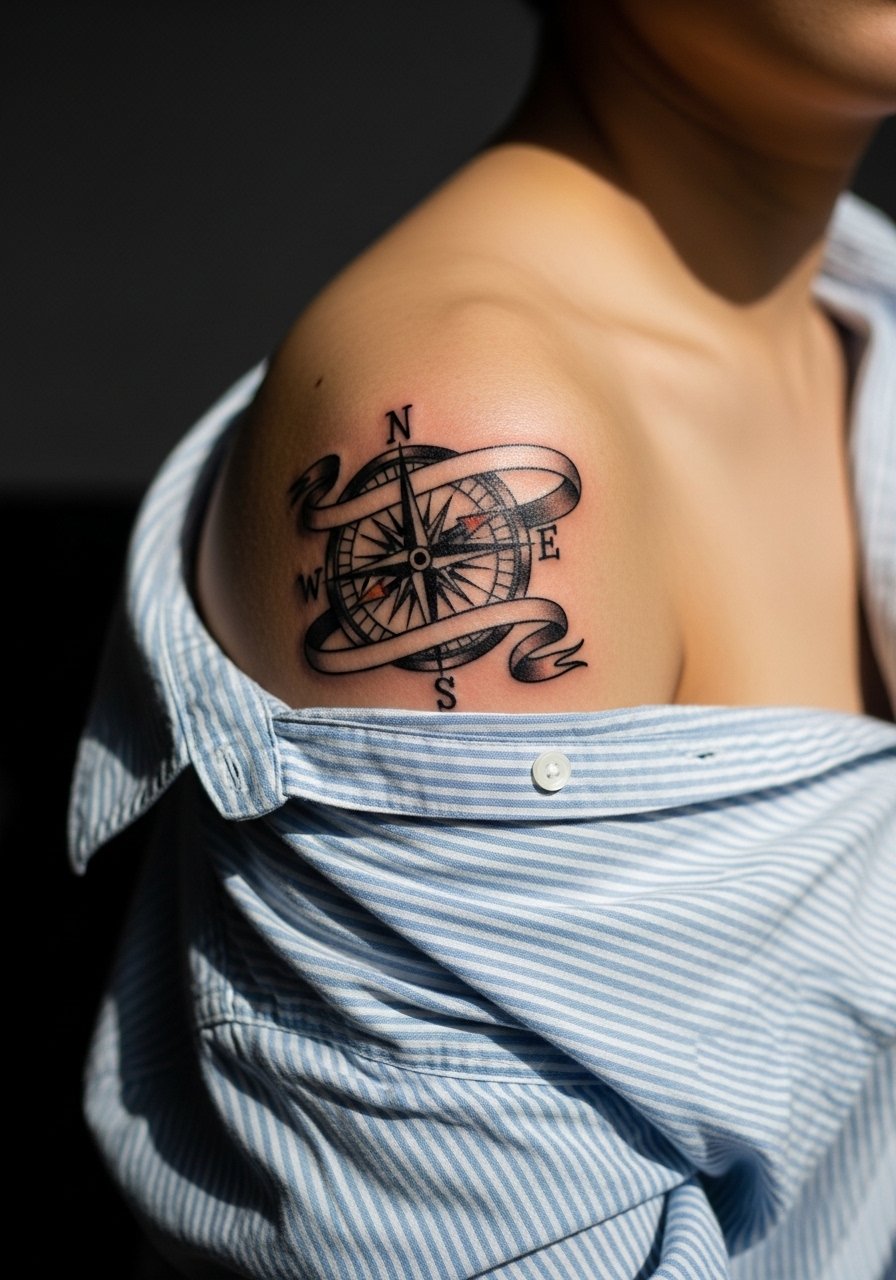
There is something about bold outlines and saturated color on the shoulder that reads from across the room while also holding up long term. I advise a slightly heavier outline for the compass ring and softer stipple shading inside the face so the contrast remains as the pigment settles. A common mistake is shrinking the compass to a size that looks delicate on the stencil but disappears in winter sleeves. The session is comfortable compared with ribs and usually takes 60 to 120 minutes depending on color. For the appointment wear a loose button-down shirt you can pull aside without stretching the skin.
5. Upper Back Compass with Anchor Motif

This placement makes a statement when you want something that can be covered for work. Tell your artist to center the compass so the anchor sits on the lower point for visual balance. A frequent error is crowding the compass with too many maritime extras, which can read cluttered after a few years. The session is often done in two shorter passes because of access and sleeping positions. For after the appointment bring a loose tank top so you do not irritate the area when dressing and undressing the first week.
6. Calf Compass with Wave Background
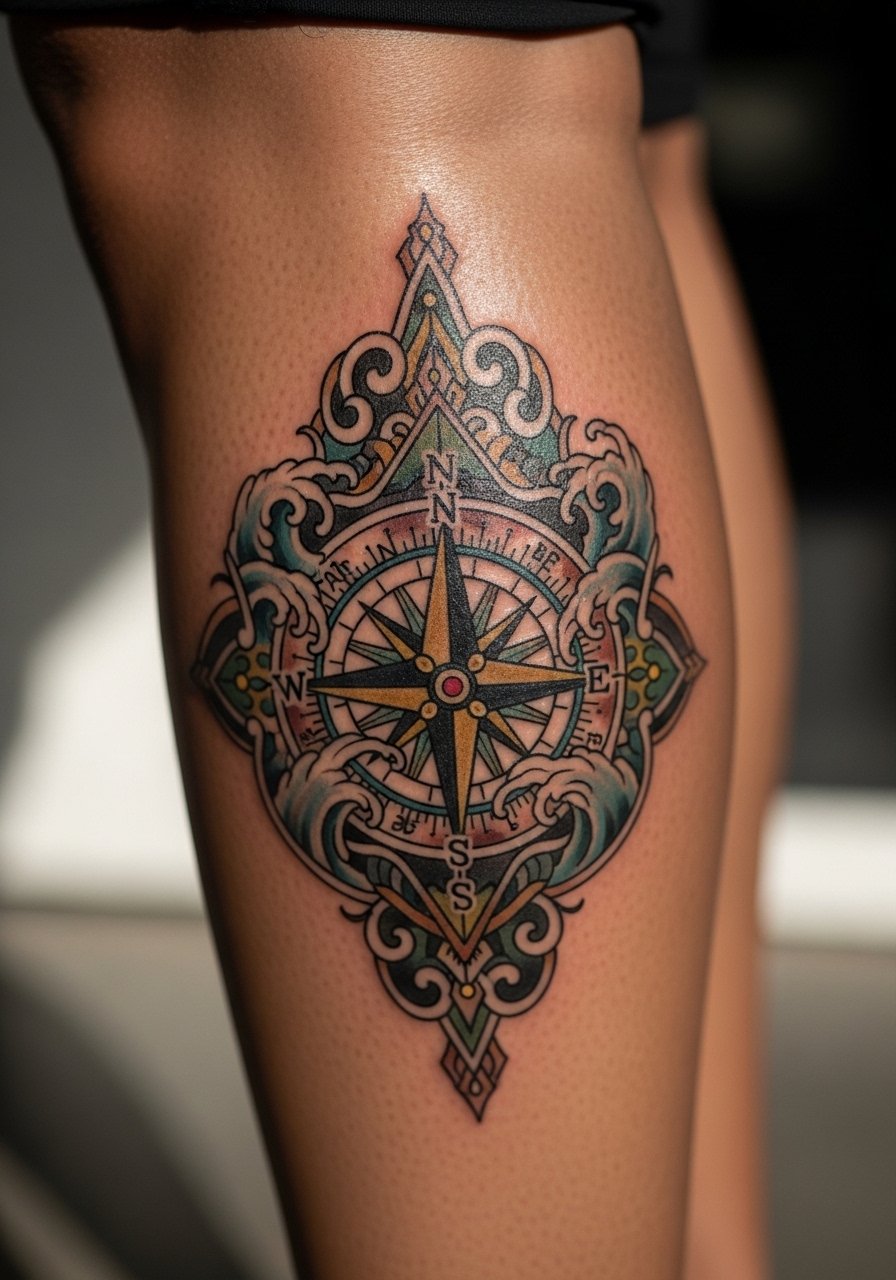
When you want a piece that shows in summer but hides in pants, the calf is ideal. The calf accepts saturation well which keeps the compass face readable longer. The biggest mistake is compressing the compass into a narrow vertical band, which forces the points to squint and lose clarity. Session time runs 60 to 120 minutes depending on color. Artists disagree about how much background to include. One camp argues for bold wave fills to protect the compass from photofading. The other camp prefers airy background spacing so the compass reads sharp on darker skin. Ask your artist which approach they favor for your skin tone.
Studio Day Picks
The forearm, wrist, shoulder, and calf pieces above have different session-day needs, so these items smooth the appointment and protect fine line details in the first week.
-
Stencil transfer paper kit. Lets you preview placement and line weight on skin before the needle starts, which helps with the forearm and wrist layouts.
-
Topical numbing cream. Apply as directed about 45 minutes before a sensitive sternum or rib session to reduce the edge of pain without altering line saturation.
-
Thin protective film roll. Useful for wrist and finger compasses that face constant friction from hand washing and watches.
-
Fragrance-free gentle body wash. Cleanses without stripping pigment, which is important for color retention on the calf and shoulder pieces.
-
Aquaphor healing ointment. Thin layers in the first days keep linework from drying and flaking excessively on flat surfaces like the forearm and upper back.
7. Ankle Compass with Lace Filigree

Ankle tattoos face a lot of rubbing from shoes and socks so the compass needs room to breathe. The common aging problem is dulling and patchy edges from constant friction. Tell your artist to keep the cardinal points bolder than the ornamental filigree so the compass still reads when the filigree softens. Expect a 30 to 60 minute session and a likely touch-up in the first year depending on shoe wear. For showing it off pick sandals or rollable jeans and consider a strappy sandal that sits away from the ink while still drawing attention to the ankle.
8. Collarbone Compass with Scripted Date
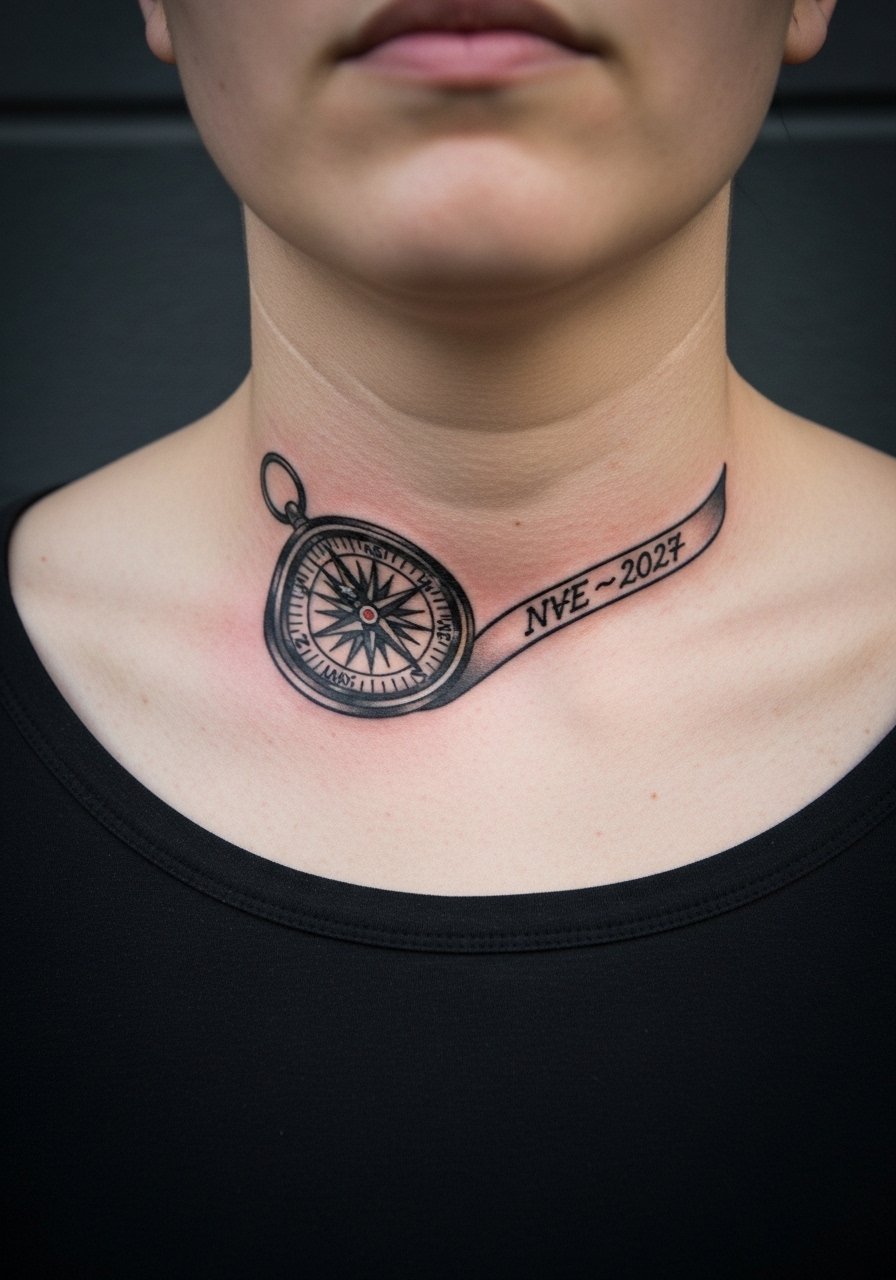
The collarbone shows off compass detail nicely but the skin there sits at an angle that can distort circular designs if the stencil is off. The real mistake is aligning the compass to the shoulder instead of the clavicle line. Bring a photo of the exact shirt styles you plan to wear so the artist can center the piece for how it will show in clothing. Healing at the collarbone can be patchy because fabric rubs during sleep, so touch-ups are common around year two. Pair the design with a thin chain pendant necklace that sits above the banner without overlapping the script.
9. Full Sleeve Compass Map Collage
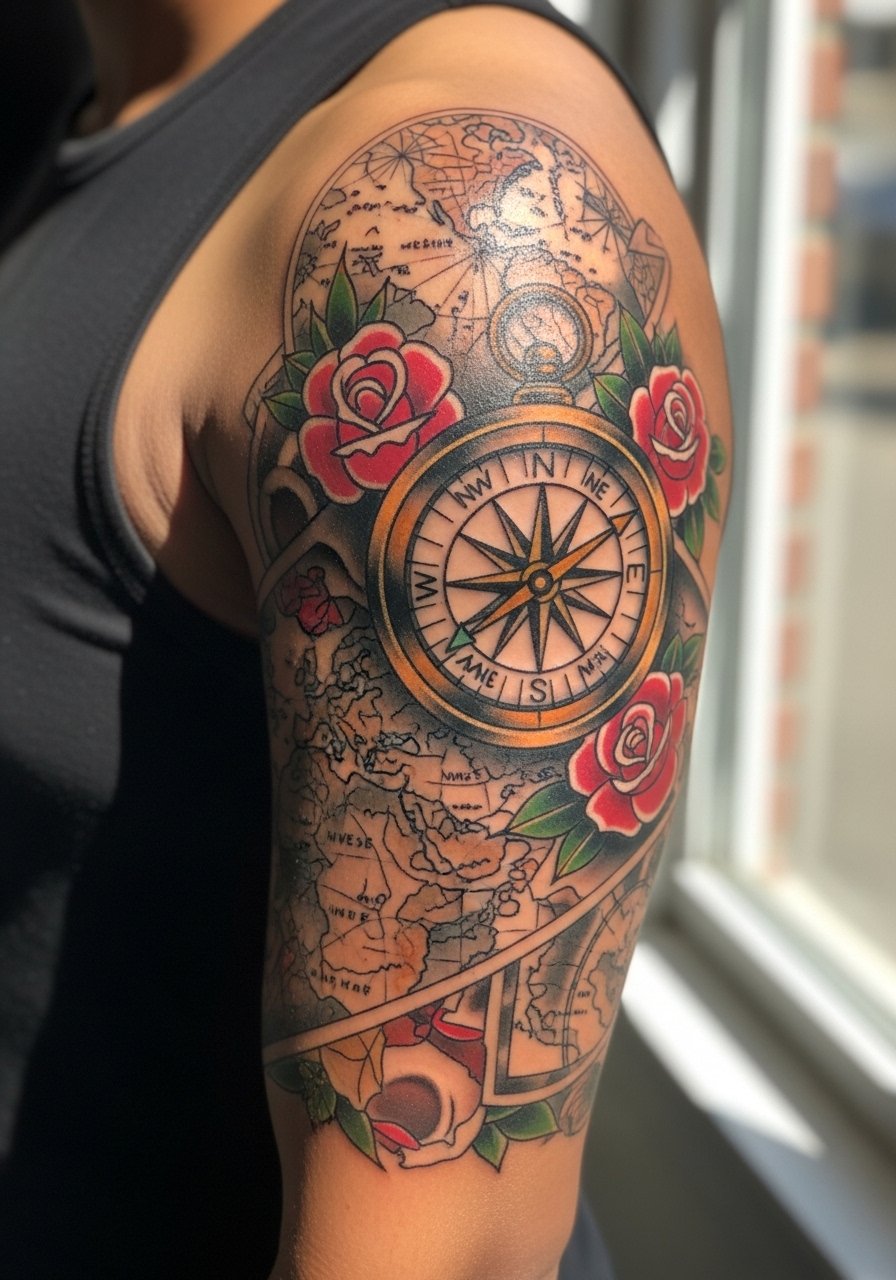
Sleeves let you tell a navigation story while giving the compass room to breathe. My advice is to place a larger primary compass near the elbow crease so it remains visible when the arm rests. A big error is scattering several small compasses across the sleeve which compete and blur over time. Expect multiple sessions adding up to several hours and plan touch-ups after the initial healed year for color saturation. During consultation point to which compass you want as focal and ask for a mock layout in motion so you can see how shirts will frame the piece.
10. Ribcage Compass with Stippled Sky
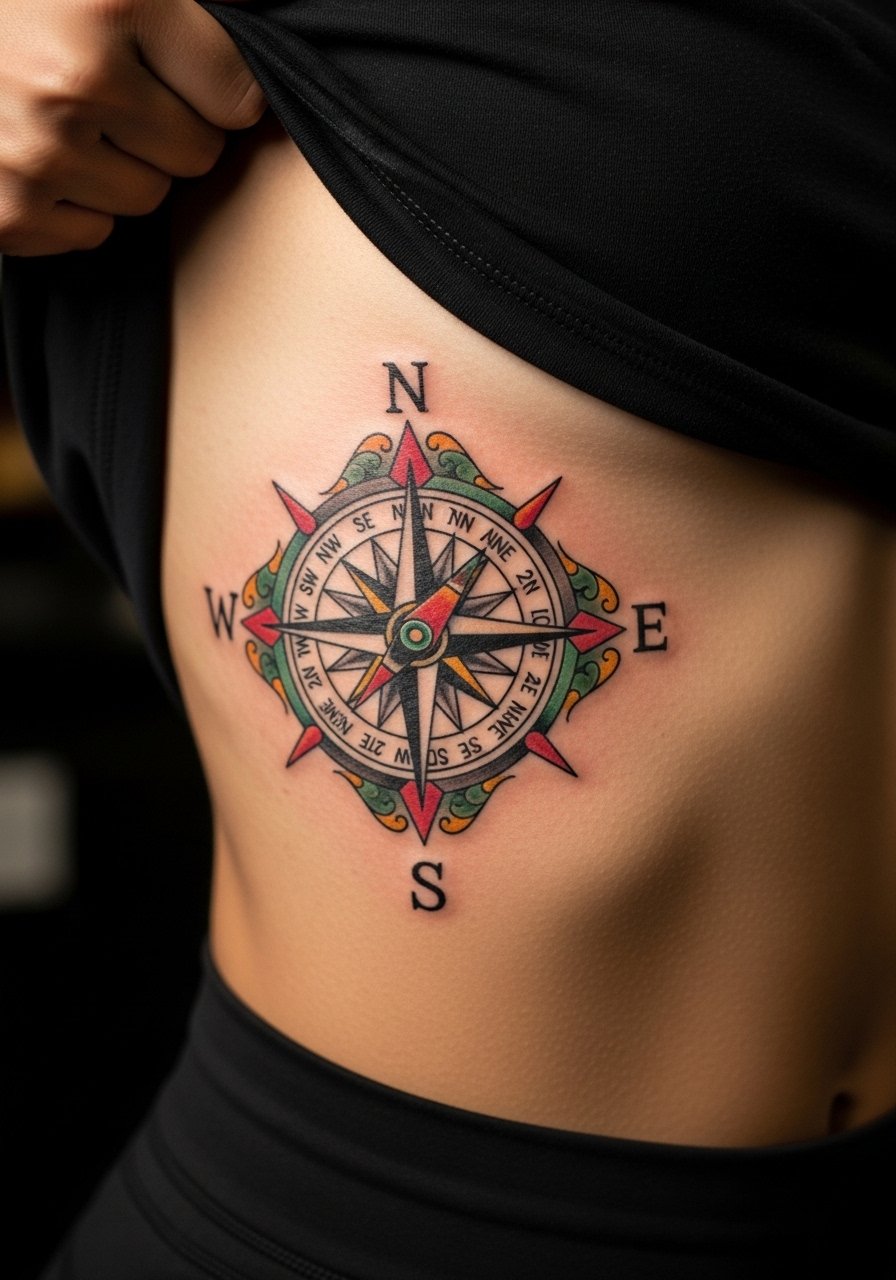
Fair warning, the ribcage is a high-pain placement and that matters for session length. The biggest aging issue is movement and stretching that makes dense linework look soft after a few years. One common mistake is insisting on tiny internal compass ticks that do not survive the skin's stretch. When you consult, specify "open face with stipple sky" so the artist spaces elements for longevity. Expect longer sessions with breaks and a realistic touch-up window at year one to two, especially if there is heavy breathing during healing.
11. Finger Nautical Compass Accent

Finger tattoos are convenient but they demand honesty about longevity. The skin there renews quickly which causes fine details to fade or thin. I recommend keeping the compass to a simplified face with bold cardinal markers and minimal interior detail. The common error is cramming lettering or minute ticks that disappear within a year. Sessions are short but touch-ups are frequent, often annually. For the appointment wear something you can slip off easily and consider a minimalist ring set that complements the compass without rubbing during healing.
12. Side Torso Compass with Botanical Garland
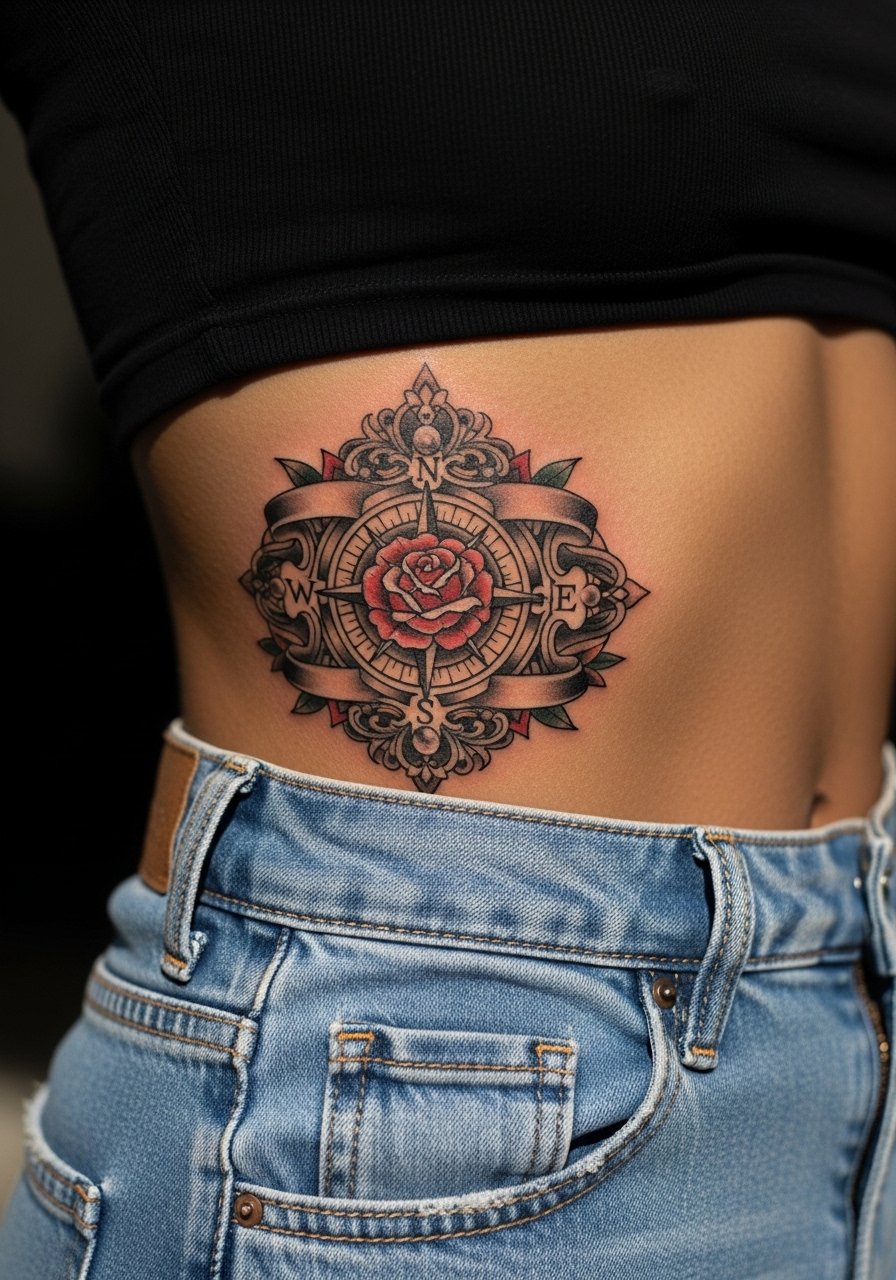
This is a design for people who want privacy and occasional reveal. The side torso moves a lot so keep the compass face open with less micro-detail. A mistake I see is insisting on thin concentric rings that blur into one another as the skin shifts. Tell your artist you want clear spacing between rings and stronger outer lines to preserve shape. Sessions are longer and often split into two. Because it is intimate, check the artist's portfolio for consistent healed photos of side torso work.
13. Nape Compass with Minimalist Lines
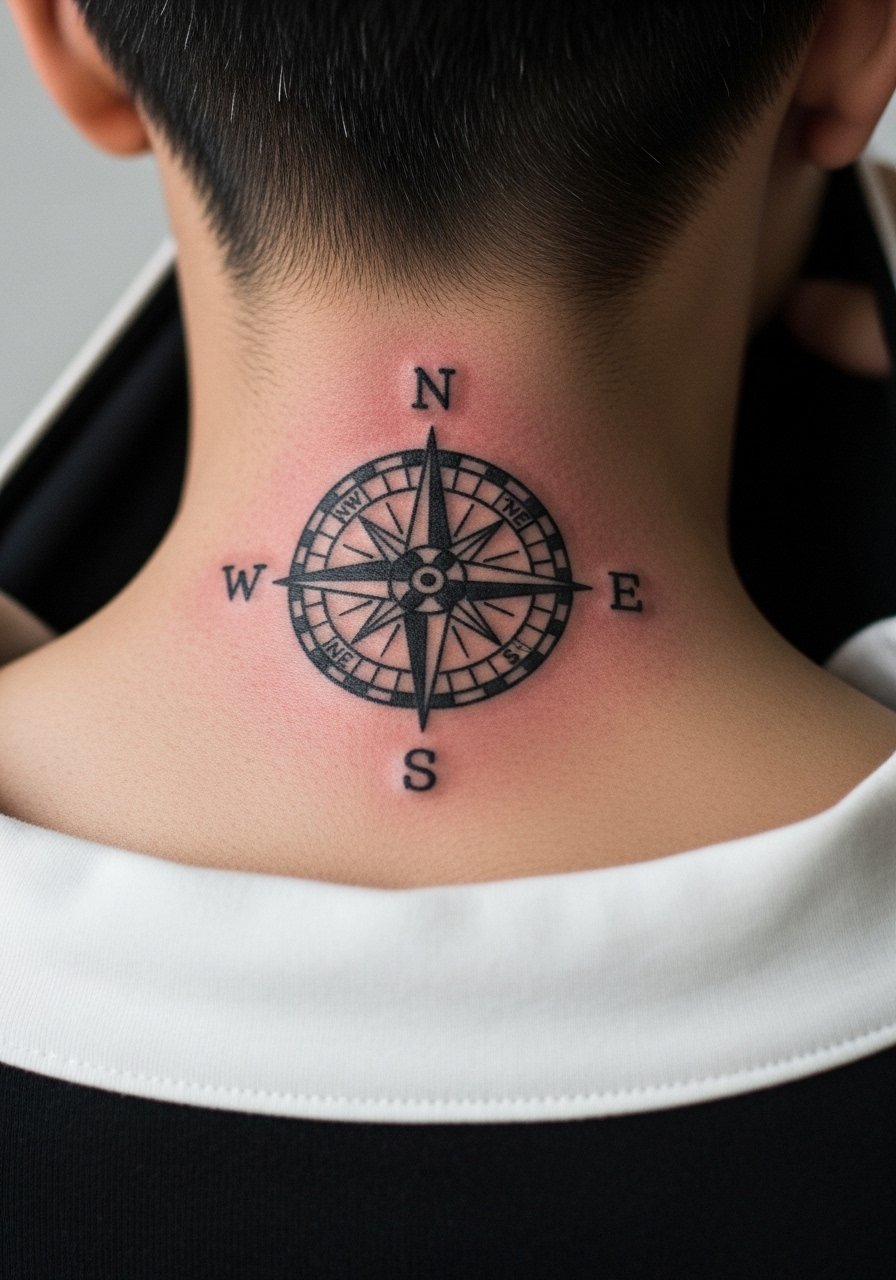
Neck pieces read bold even when small, so a compact compass with clear cardinal markers works well. A frequent mistake is placing the compass too low where shirt collars rub during healing. During consultation request the stencil placement while wearing the shirt you plan to wear most often. The session is quick but expect social considerations since neck tattoos remain visible. If you plan to hide it for work, ask about placement that tucks under hair or collars.
14. Hip Compass with Crescent Moon Accent

Hip pieces are for those who want a private symbol with occasional peekaboo reveal. The skin there accepts medium detail but can be impacted by weight fluctuations. A common oversight is insisting on extremely tight fine lines that later look uneven after body changes. Tell your artist about any recent weight change so they can scale the compass appropriately. Sessions are usually moderate in time and a touch-up within the first year is normal if the area stretches while healing.
15. Spine Compass Column with North Star

Vertical spine pieces need careful axial placement so the compass points align with the body's center line. A frequent mistake is assuming symmetry without sitting or standing checks. During consultation have the artist mark the spine while you stand naturally so the work moves with your posture. Pain is higher near the spine, so expect breaks and a longer session. For showing the work, open-back tops frame the column, but know that friction from backpacks can affect healing.
16. Pocket Compass behind the Ear with Micro Script

Behind-ear placements are discreet and charming when you want a small compass accent. The one real drawback is limited real estate which forces simplification. Ask for a bold outer ring with an open interior so the compass keeps its shape. Artists caution that very fine script near the ear can blur, so keep lettering minimal. Sessions are quick but the area is sensitive and touch-ups are common at year one. For the appointment wear a button-down or your hair up so the artist can access the area cleanly.
17. Hand Compass Palm-Side Accent

Hand and palm-side work is high maintenance because skin there sheds and the lines fade quickly. The bold approach wins here. The mistake is trying to miniaturize the compass with delicate interior ticks that disappear within months. Discuss touch-up plans with your artist and expect frequent color refresh if you want crisp edges. Sessions are often staged to allow the skin to settle. Keep in mind professional considerations for hand ink and the likelihood of annual touch-ups.
Frequently Asked Questions
Q: Will a neo traditional compass age differently on darker skin tones compared with lighter skin tones?
A: From what I have seen, saturated color and slightly heavier outlines help across darker skin tones so the compass remains legible as it settles. Ask your artist to show healed examples on similar skin tones and discuss contrast rather than tiny interior detail.
Q: If I want a tiny compass on a finger, how often should I expect touch-ups?
A: Finger compasses often need touch-ups within one to two years because of constant abrasion and skin renewal. Plan for at least one small refresh and ask the artist about ink depth and simplified detail to reduce the frequency.
Q: Is it controversial to stylize the compass orientation instead of pointing to true north?
A: Yes. One camp insists on accurate north-facing compasses as a nod to navigation tradition. The other camp treats the compass as personal symbolism and rotates the dial to match body orientation or aesthetic flow. Decide which camp you are in and make that clear in the consult so the stencil reflects your intention.
Q: How should I dress to a sternum or ribcage session to make it easier for the artist?
A: Wear a zip-up or a fitted sports bra you can lower or a cropped top you can lift so only the tattoo area shows. A fitted sports bra is often the most practical option for comfort and access.
Q: Do neo traditional compasses require different aftercare than other styles?
A: Aftercare is similar, but pieces with heavy color or large filled areas can scab more visibly and need gentle moisturizing and protection from sunlight. Follow the artist's aftercare plan and expect a touch-up if any patching occurs during the initial healing window.
Q: What should I ask a tattooer during a consult for a sleeve that includes multiple compasses?
A: Ask them to point out which compass will be the focal, how they plan to space secondary compasses, and to show a mockup in motion so you can see how each piece interacts when you bend the arm. Request healed photos of similar sleeves so you can set realistic expectations about aging and touch-ups.
