
Fine line trends and bright neo-traditional saturation both look beautiful on the collarbone, but they behave very differently as skin stretches and clothes rub. The collarbone sits where necklaces, straps, and sun exposure all meet, so planning beats impulse. Below are 17 collarbone-forward neotraditional ideas, what to ask for in consults, how they age, and the clothing choices that actually show them off.
1. Peony and Banner Nesting the Collarbone
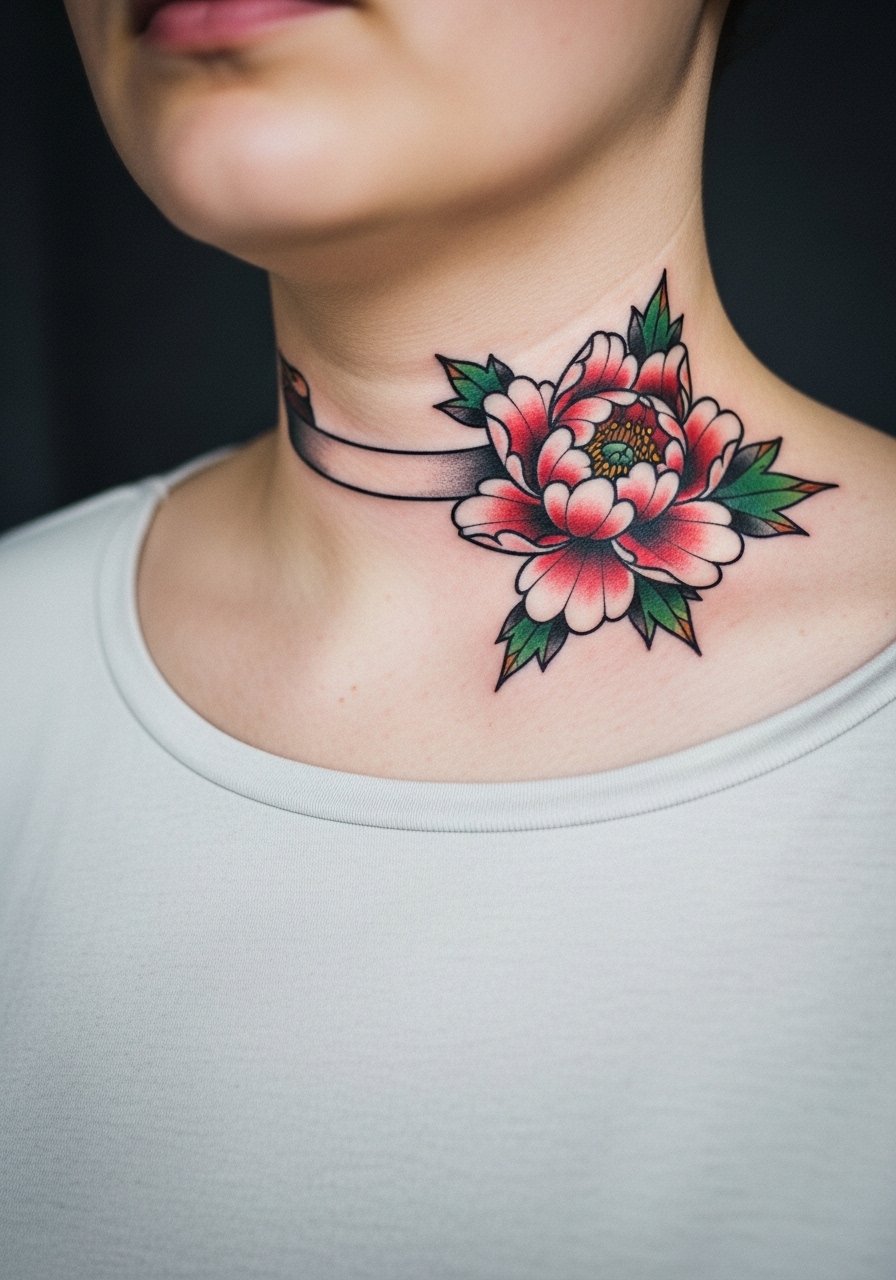
I recommend this when you want a statement piece that still sits comfortably under shirts. Tell your artist to keep the banner narrow and the petals slightly open so the design breathes with movement. A common mistake is packing too much tiny detail into the banner, which blurs faster where the skin creases. Expect moderate pain because the bone is close to the surface. At six months the color will be vibrant, by two years expect softer edges and a likely touch-up at year three. For showing it off, pair the piece with an off-shoulder top that frames the bloom without tugging on the neckline.
2. Neo-Old-School Swallow and Stars Along the Curve
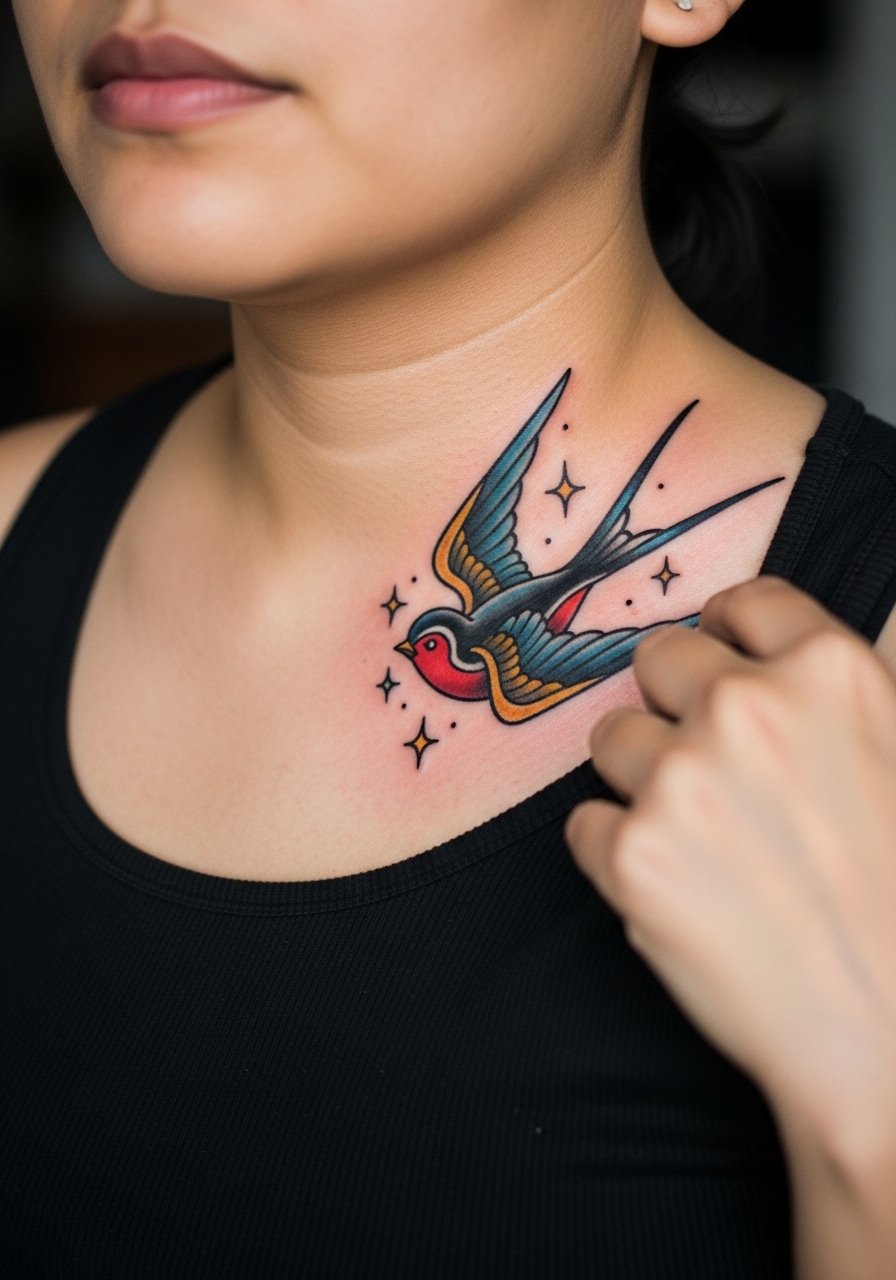
If you want vintage iconography with modern color, this one reads as wearable and graphic from a distance. Tell the artist to keep linework bold at the anchor points where the bird meets bone so the silhouette stays readable as it softens. A real mistake is making the swallow too small; at that scale, the wings lose shape as the ink settles. Session time is usually a single two-hour block for a medium piece, and expect sensitivity when the needle crosses the bone. Pair with a thin chain pendant necklace that sits just above the banner so the jewelry complements rather than hides the edge.
3. Stylized Lioness Facing Outward
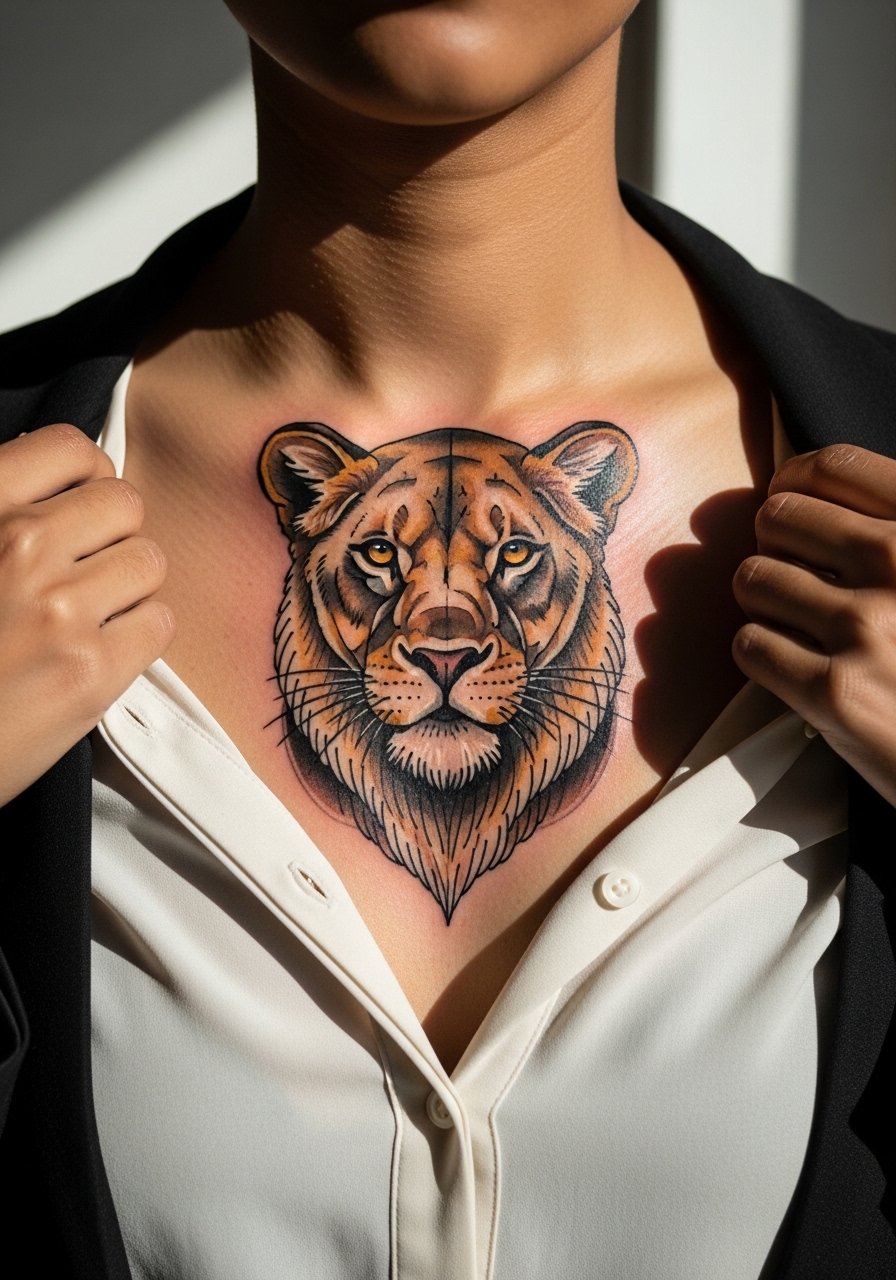
I bring this up for folks who want something bold and figurative. Request clear negative space around the muzzle so the face does not merge into shadow over time. The controversy here is real. One camp says heavy saturation is the only way to keep animal portraits legible on bone-heavy zones. The other camp argues precise linework and selective saturation can last equally well. Ask your artist which approach they use and why. Expect the session to feel intense when the needle rides the bone, and plan a single long session rather than multiple small ones to keep the tones coherent.
4. Crescent Moon with Floral Accents

This is a top pick if subtle symbolism matters to you more than a loud color block. Ask for slightly thicker outer linework around the moon and stipple shading inside the flowers so small details read longer. A common error is too much dense stippling close to the bone, which can patch into a darker blob as the skin ages. Expect a light to moderate pain level and a single hour-long session for a compact version. For outfits, the piece pairs nicely with a v-neck camisole that lets the crescent sit cleanly against skin.
5. Ribboned Dagger Sliding Under the Clavicle
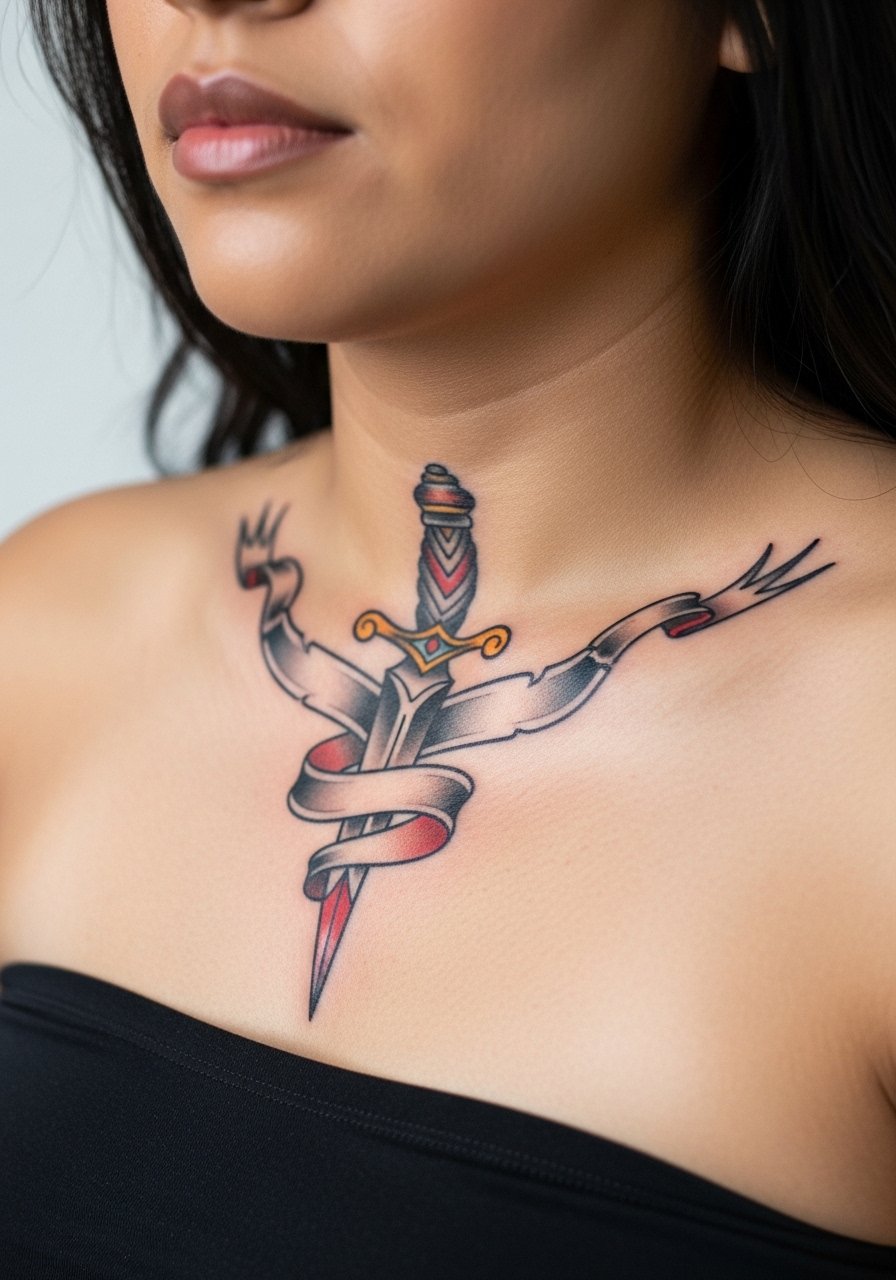
This placement asks for crisp contrast so the blade reads from a distance. Tell the artist to anchor the dagger with heavier black in the guard, and keep ribbon text minimal if you choose lettering. The usual mistake is over-detailing the ribbon folds, which can soften into unclear shading. The collarbone gives sharp sensations in the chair, so plan breaks if you are getting a larger piece. When healed, tight black holds better than very fine transitions. Pair with a strapless bandeau top when showing it off, so straps do not rub the edges while it settles.
6. Art Nouveau Shell with Beaded Chain
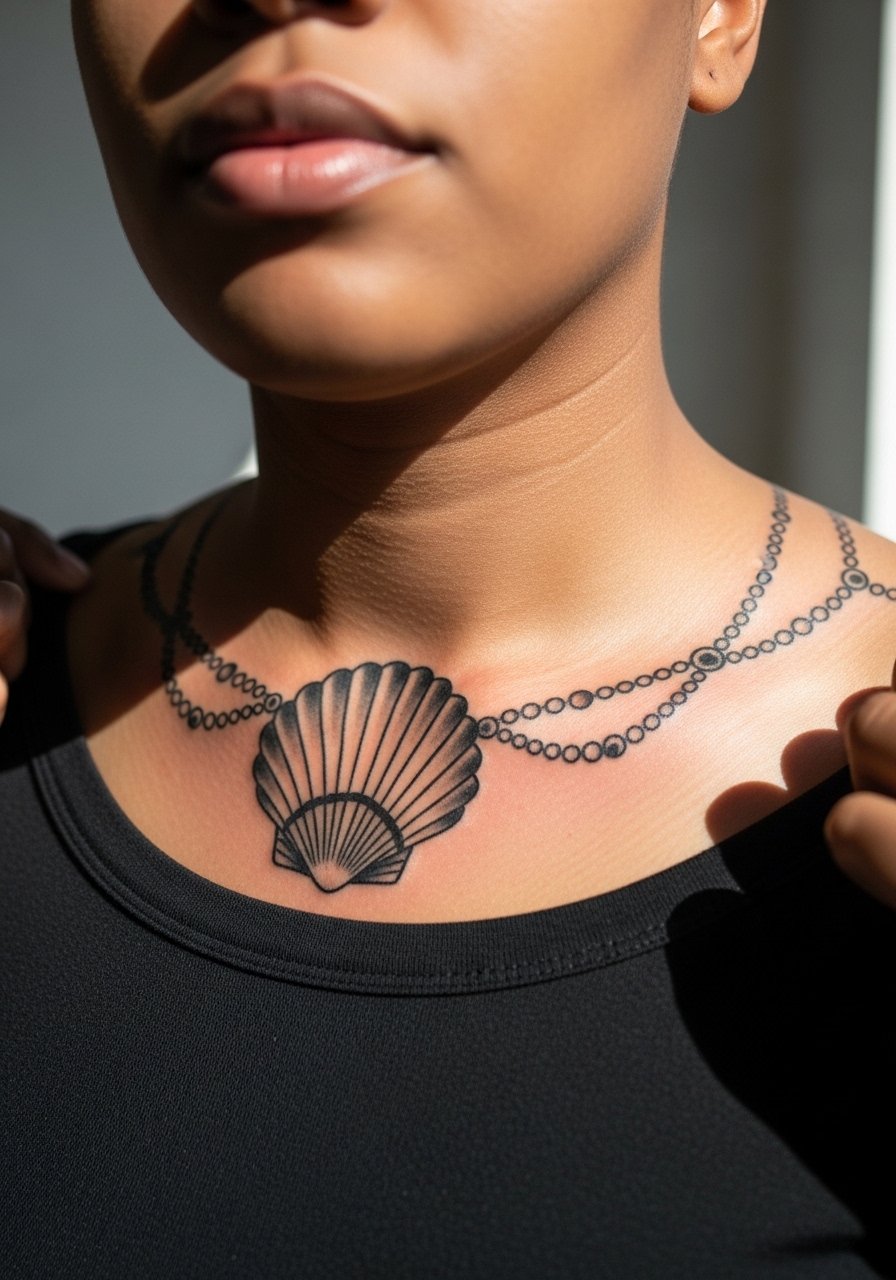
This design works when you want an ornamental look that follows the bone. Ask for bead spacing that keeps each dot at least the size of a sesame seed so the chain does not blur into a line. A frequent mishap is making the beads too small and close together. Expect moderate pain where the needle crosses the clavicle ridge and lighter sensation over the surrounding flesh. For session wear, bring a loose button-down shirt you can pull aside so the artist has clear access without tugging.
Studio Day Picks
The first six collarbone pieces above share friction zones and close-to-bone sensitivity, so a few practical items make the session and first week much easier.
-
Stencil transfer paper kit. Lets you preview how the composition sits across the clavicle curve before the needle touches skin, which matters for asymmetrical designs.
-
Topical numbing cream. Used correctly it can take the edge off collarbone sensitivity for longer sessions without altering the tattoo linework.
-
Thin protective film roll. Helpful during the first days when necklaces or shirt edges might rub the fresh piece.
-
Fragrance-free gentle body wash. Cleanses the area without stripping color from the saturated sections that neotraditional work depends on.
-
Aquaphor healing ointment. Thin layers protect the tight linework on collarbone pieces during the first few days without clogging.
7. Stylized Hummingbird Hovering Near the Collarbone
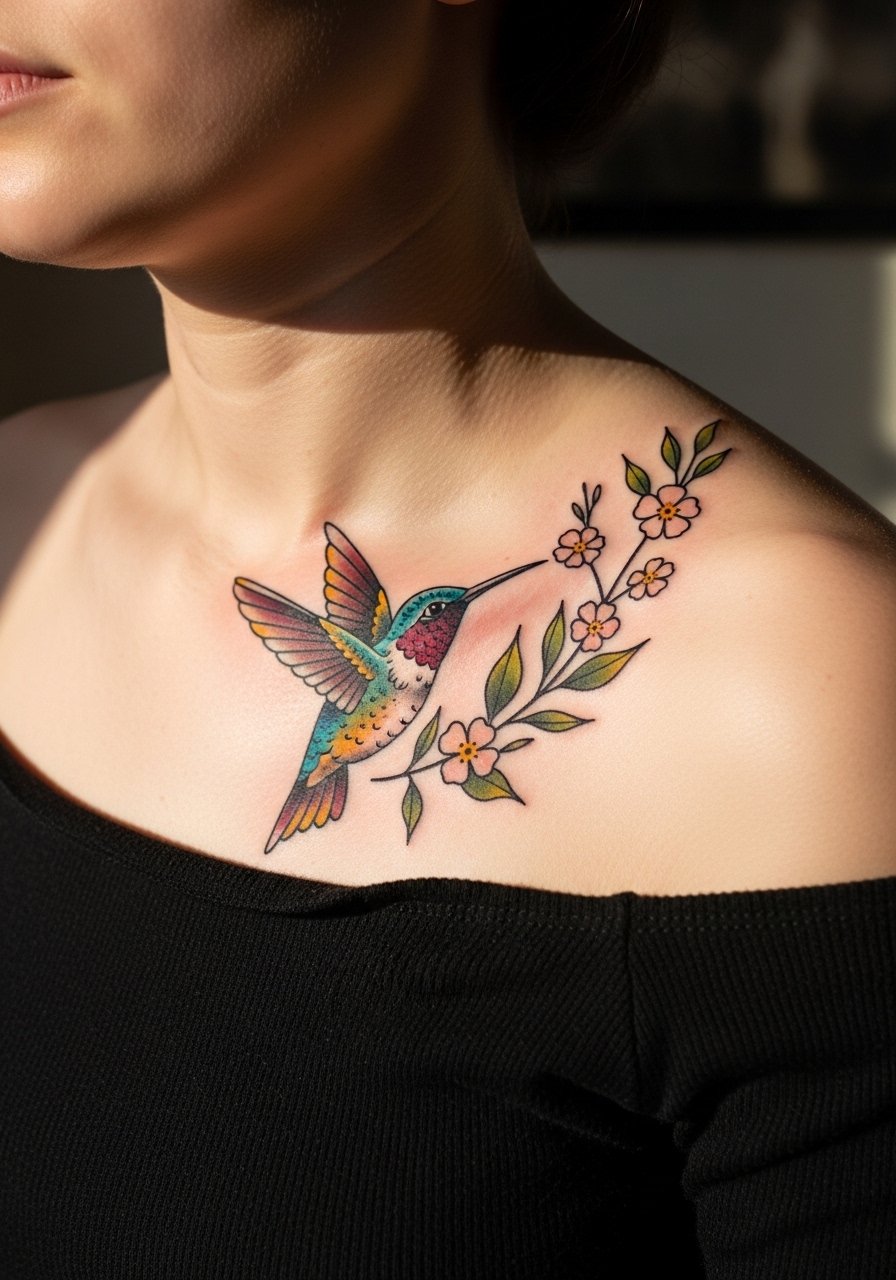
I like this for people who want something dynamic that reads in motion. Tell the artist to avoid tiny feathers and instead suggest movement with bold wing edges and a few staggered dots for motion blur. A typical mistake is asking for hyper-detail in the wing tips, which can vanish as the skin relaxes. The sensation in the chair is brief but sharp when the needle passes the bone. For showing it off, a boat-neck sweater or off-shoulder blouse keeps the area visible without constant friction.
8. Antique Key with Floral Inlay
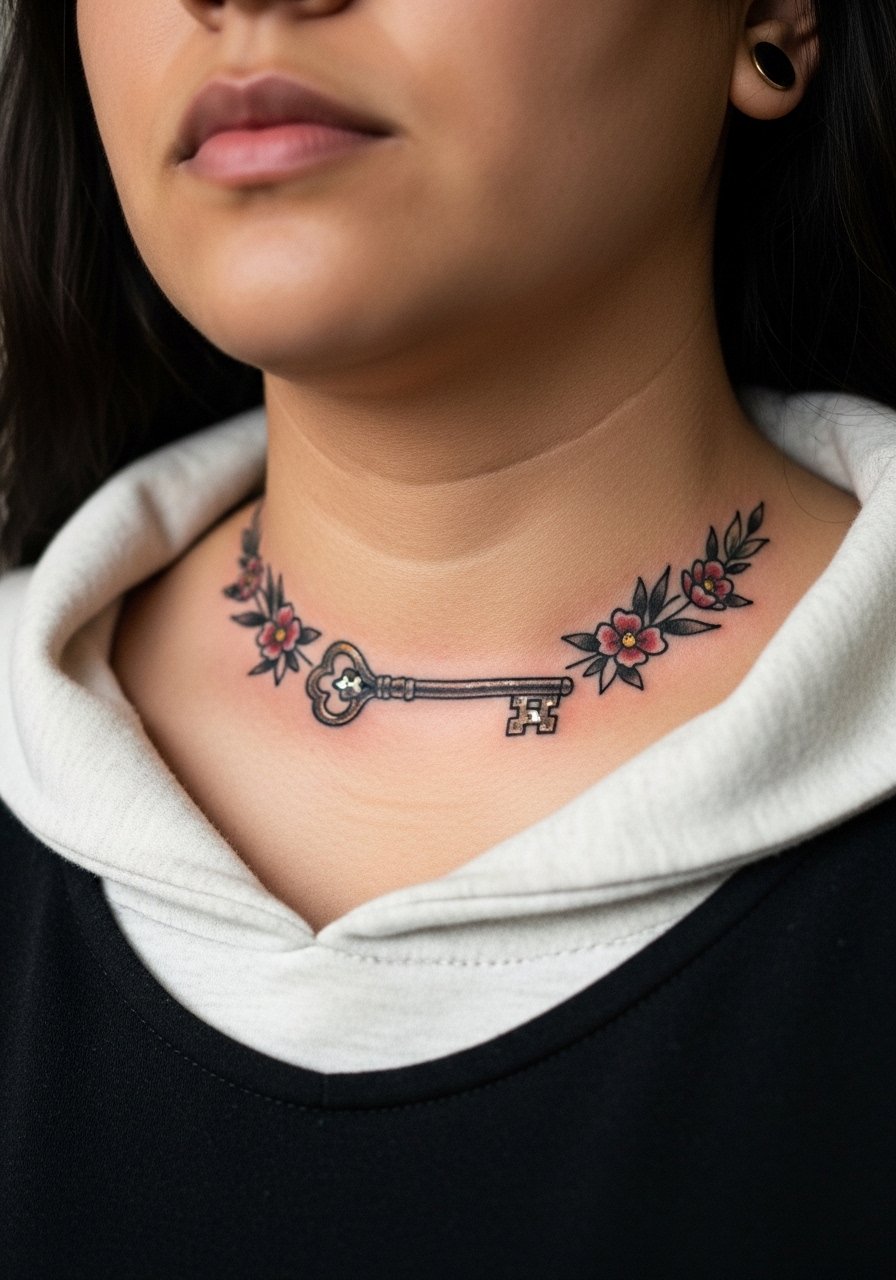
When the key is elongated, it benefits from bolder outlines at the teeth so the shape holds. In consults, say you want negative space between the teeth and the flowers. A common aging issue is letting in too much micro-shading in tight areas, which can muddle the key silhouette. Expect a single-hour session for a compact version. This placement works when paired with layered delicate necklaces, but avoid chains that sit directly on the fresh ink until healed.
9. Lucky Cat with Traditional Color Blocks
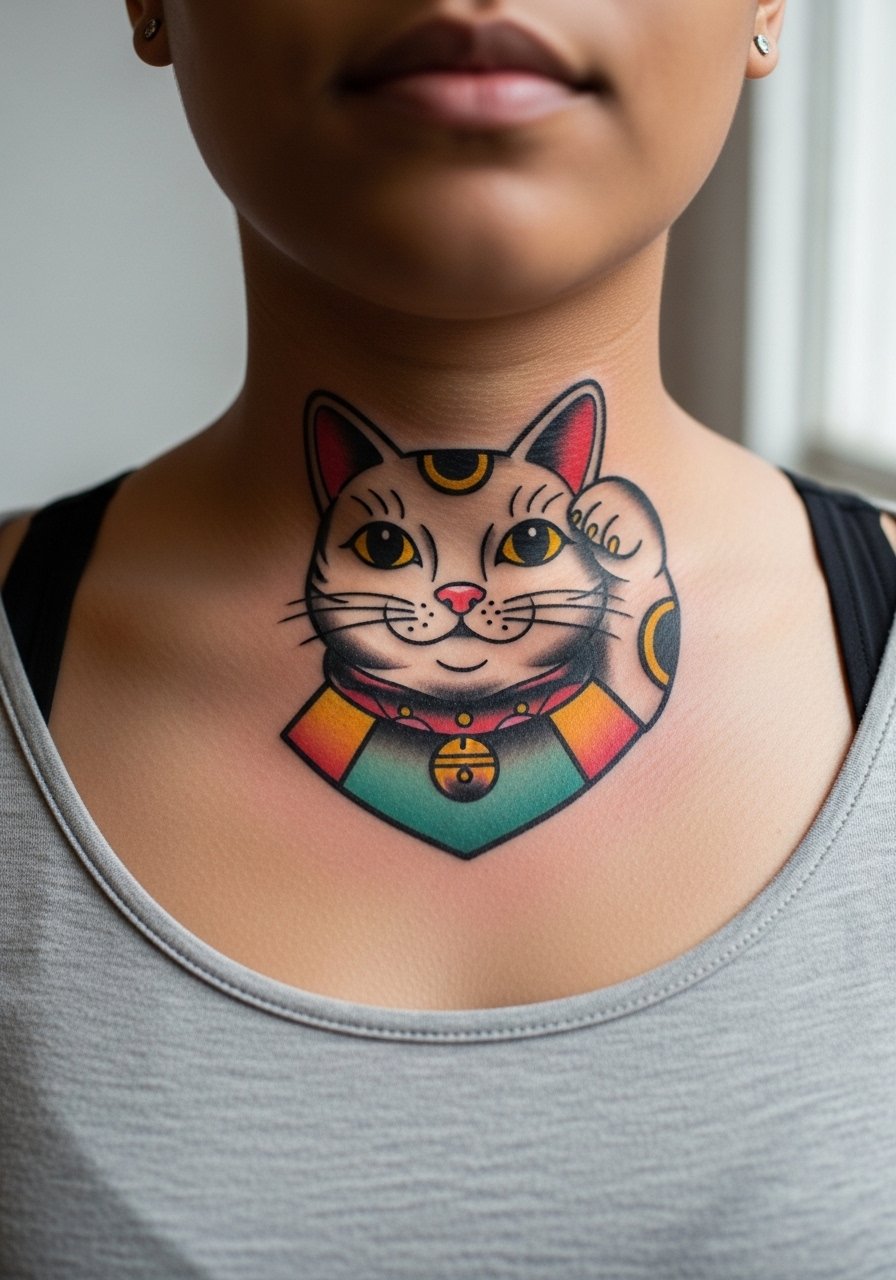
This is for someone who wants character and saturated panels without overly fine detail. Ask for strong black anchors around the paw and face so the silhouette keeps personality as it softens. The mistake is packing facial features too close together. After six months the black will mellow and the colors will soften but the overall shape usually remains. For outfits, a scoop-neck top showcases the piece while keeping straps away.
10. Serpentine Vine Wrapping the Collarbone Arc
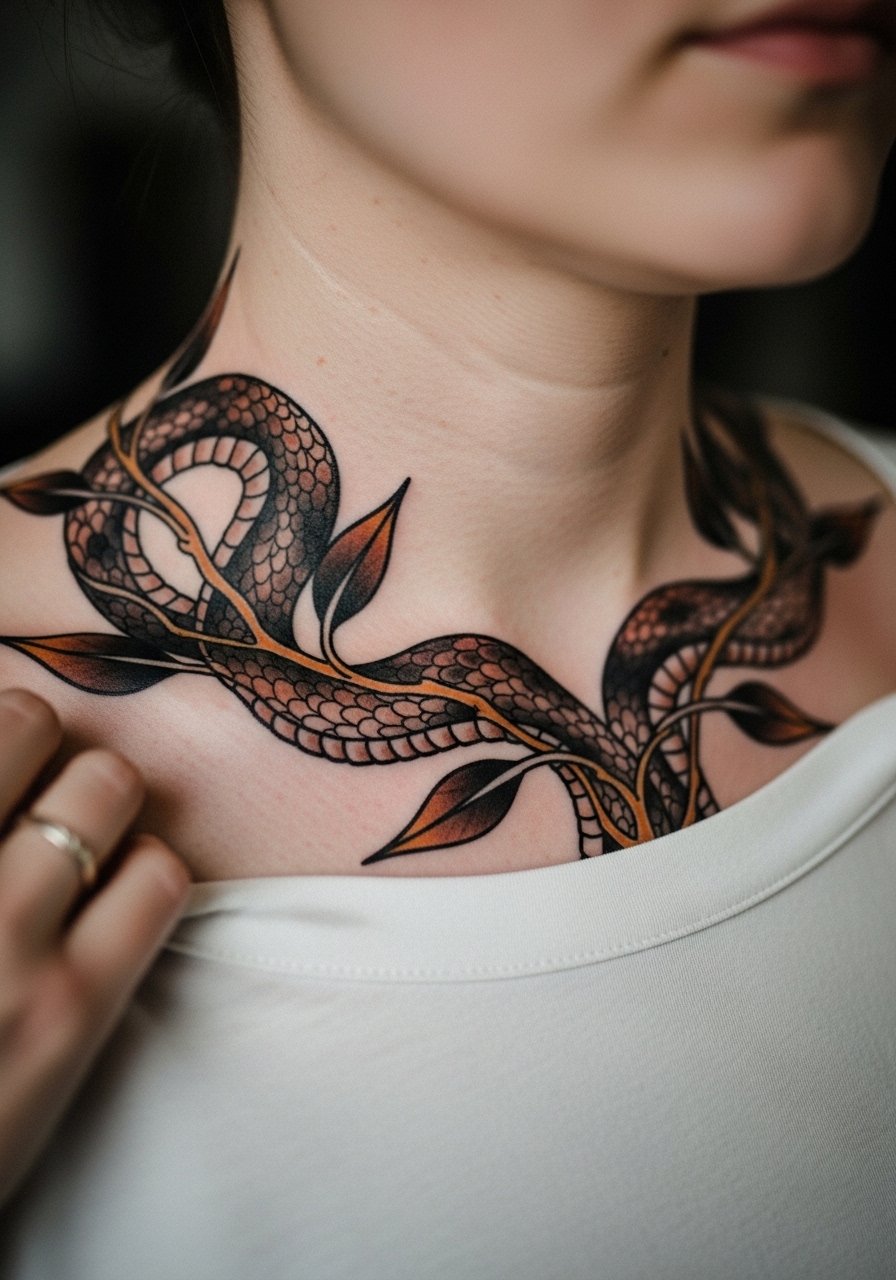
I recommend this if you want a design that feels integrated with anatomy. Tell your artist to map the vine while you move your shoulder so the coils look natural when you change posture. Many people make the mistake of asking for a continuous ultra-thin line snake, which blurs where it crosses the bone. Expect moderate discomfort along the ridge. For session comfort, wear a loose drawstring linen pant if you plan a long appointment, so your whole torso can relax and your breathing stays steady.
11. Fox Mask with Decorative Filigree
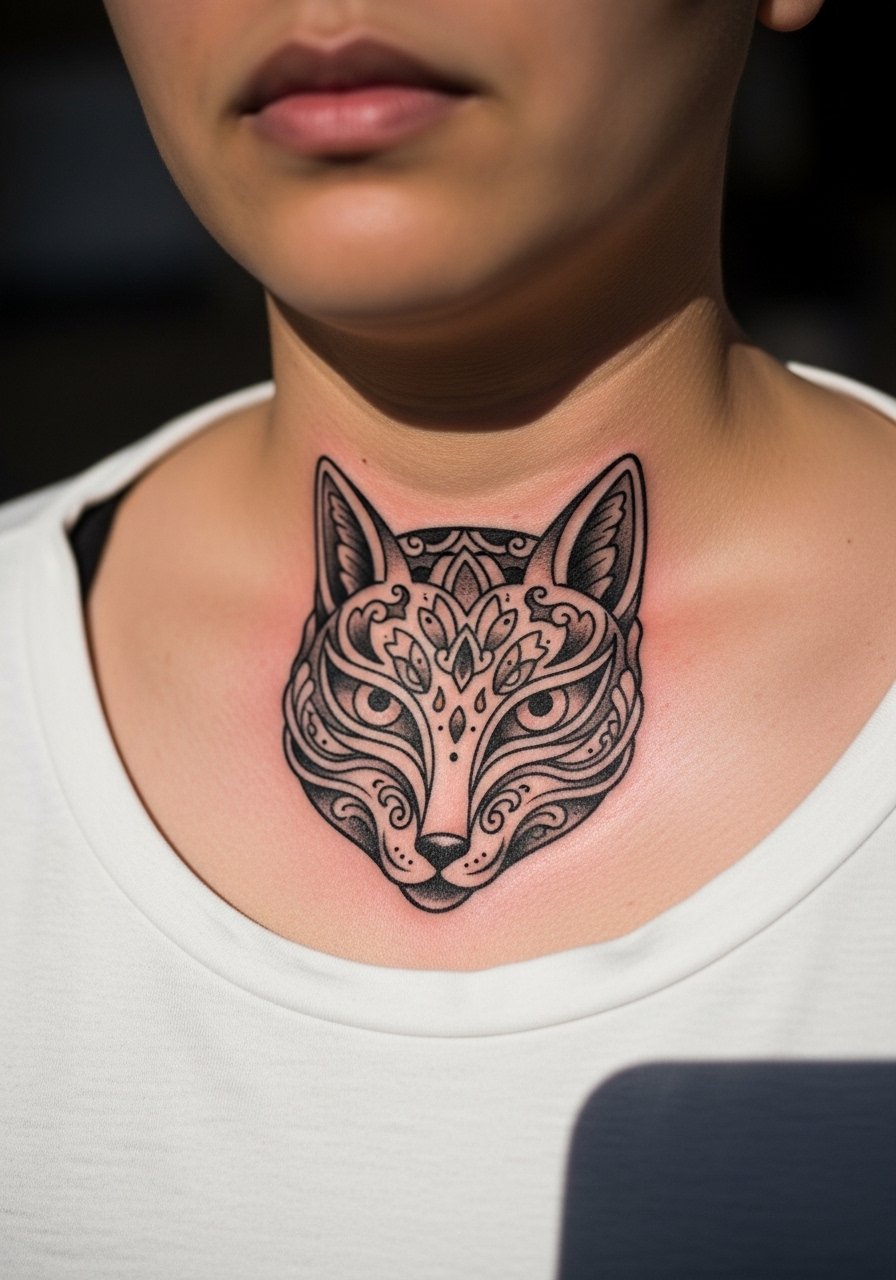
This idea suits someone after a symbolic face motif that reads like jewelry. Ask for negative space around filigree to preserve its lace-like quality. The common issue is too many fine curls close to bone that blend together over time. Expect a two-hour block for a detailed mask. When showing it off, a v-neck blouse keeps the ornamental edges visible without rubbing.
12. Nautical Compass with Rope Border
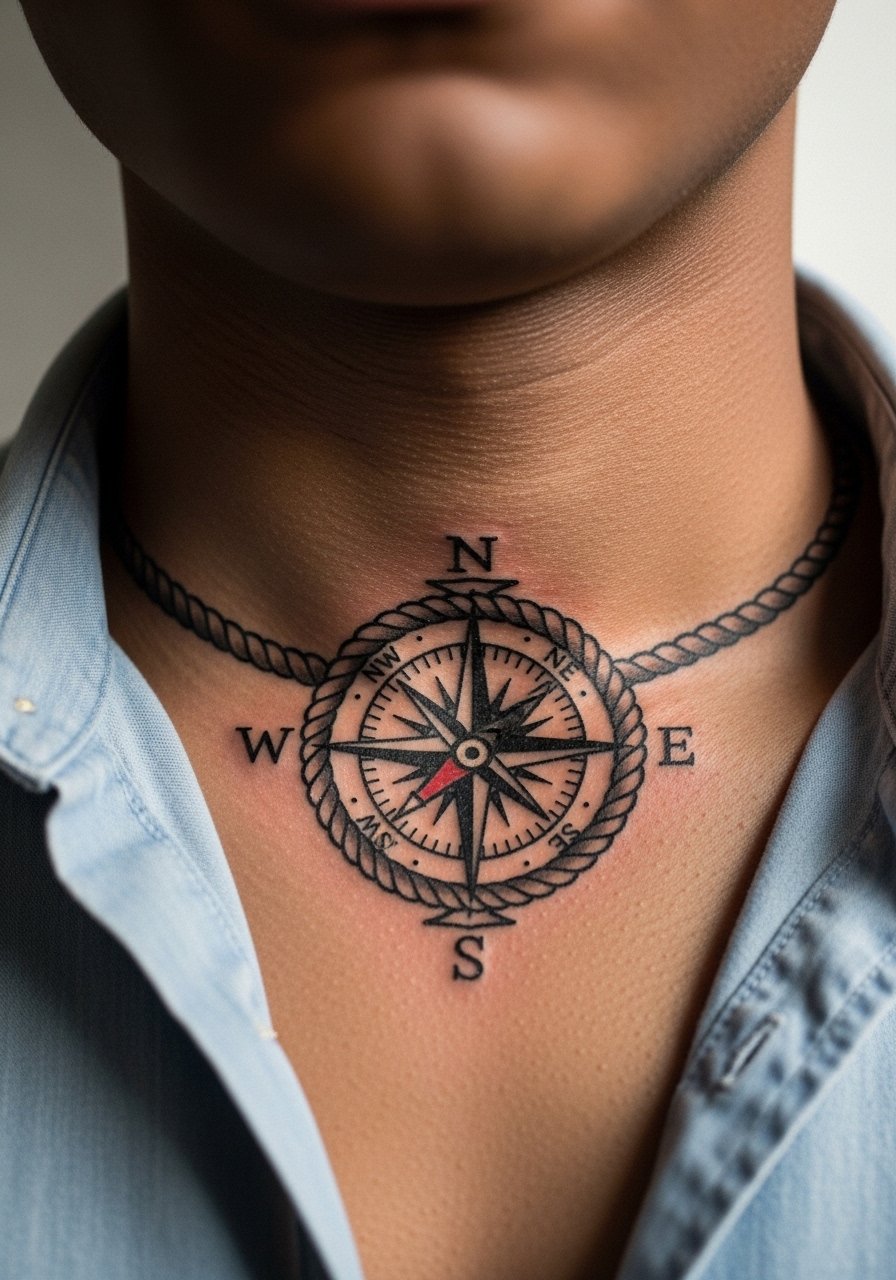
Choose this if travel or direction is your theme. Tell the artist to keep the compass points slightly separated, not jammed tight, so the cardinal directions stay legible as the ink settles. A frequent mistake is over-shading the rope, which can turn into an indistinct band. Pain is sharper where the needle crosses the bone. Long-term, the black points hold better than thin directional ticks, so expect a touch-up in a few years if you want razor-sharp points.
13. Stag Skull with Floral Crown
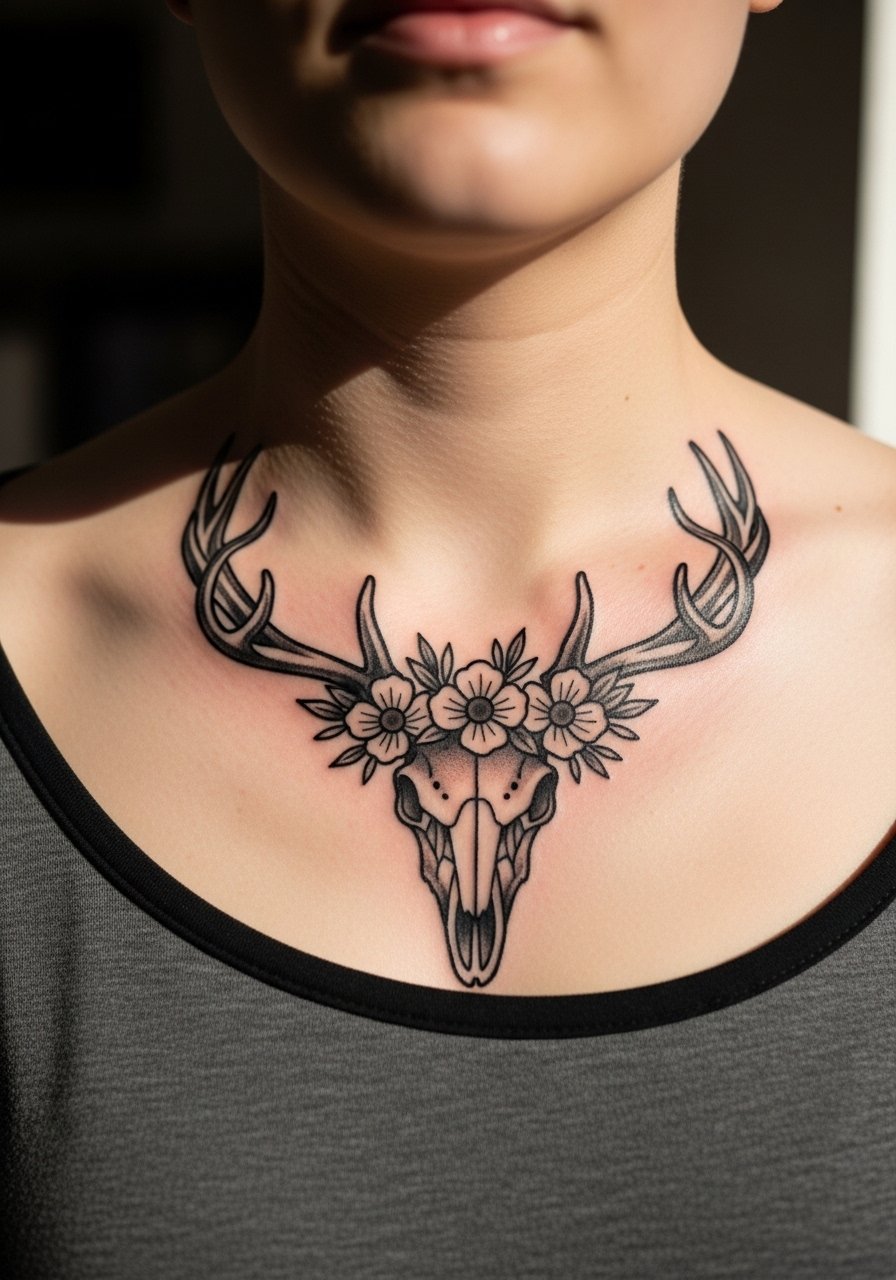
This one reads bold and architectural when the horns are cropped to follow the collarbone. In consultation, say you want the skull lines to be slightly thicker where they meet the bone for longevity. A mistake is letting the crown become too dense with tiny petals. Expect a two-hour session for a medium composition. For showing the piece, a wrap top frames the skull without rubbing the edges.
14. Pocketwatch Split Across the Clavicle
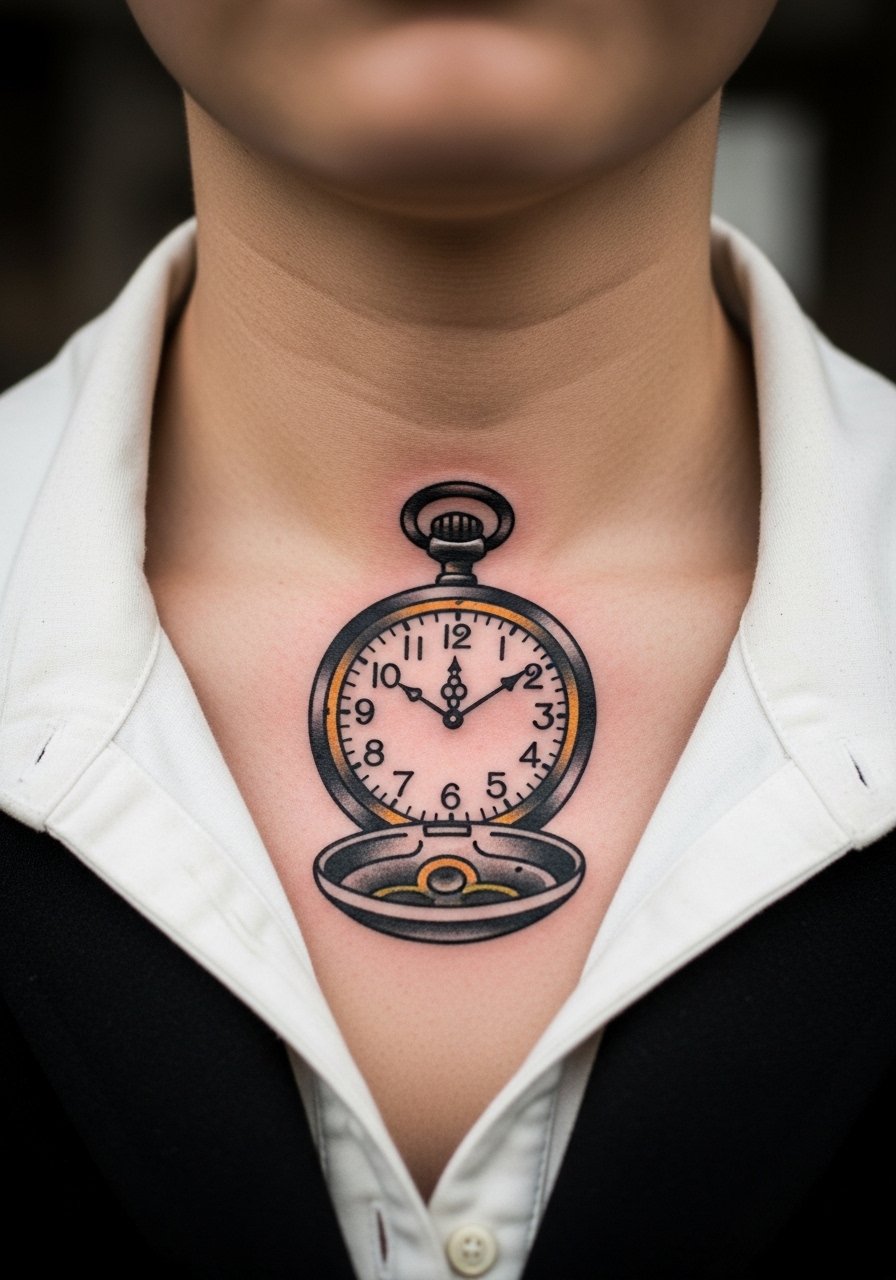
This is a great option if you want symmetry that plays with the bone. Tell the artist you prefer the hinge and chain slightly off-center so the watch does not distort with posture. A common error is loading the face with tiny numerals that fuse as the ink settles. Expect a careful two-hour session and plan clothing that avoids necklaces sitting on the face while healing.
15. Peacock Feather Flowing Outward
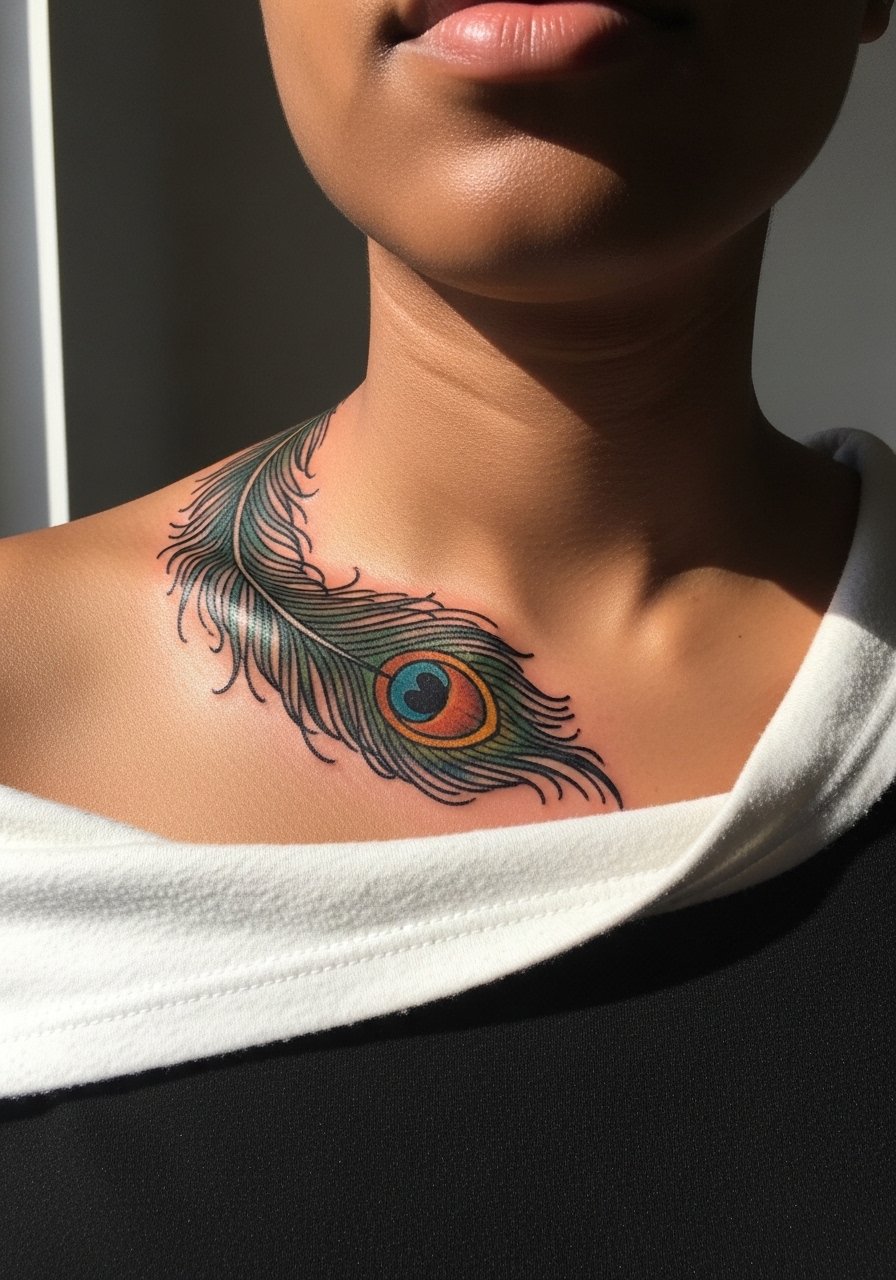
Pick this if you want movement with a long, elegant silhouette. Ask for the eye of the feather to be slightly bolder than the stem so the focal point remains readable. The mistake is making the eye and stem the same fine weight, which can leave the design looking flat over time. Sensation varies, but the sweeping stem can feel more like friction than sharp pain. When wearing jewelry, choose pieces that sit above the feather like a delicate choker so the pendant does not rub the ink.
16. Anchor Wrapped in Roses
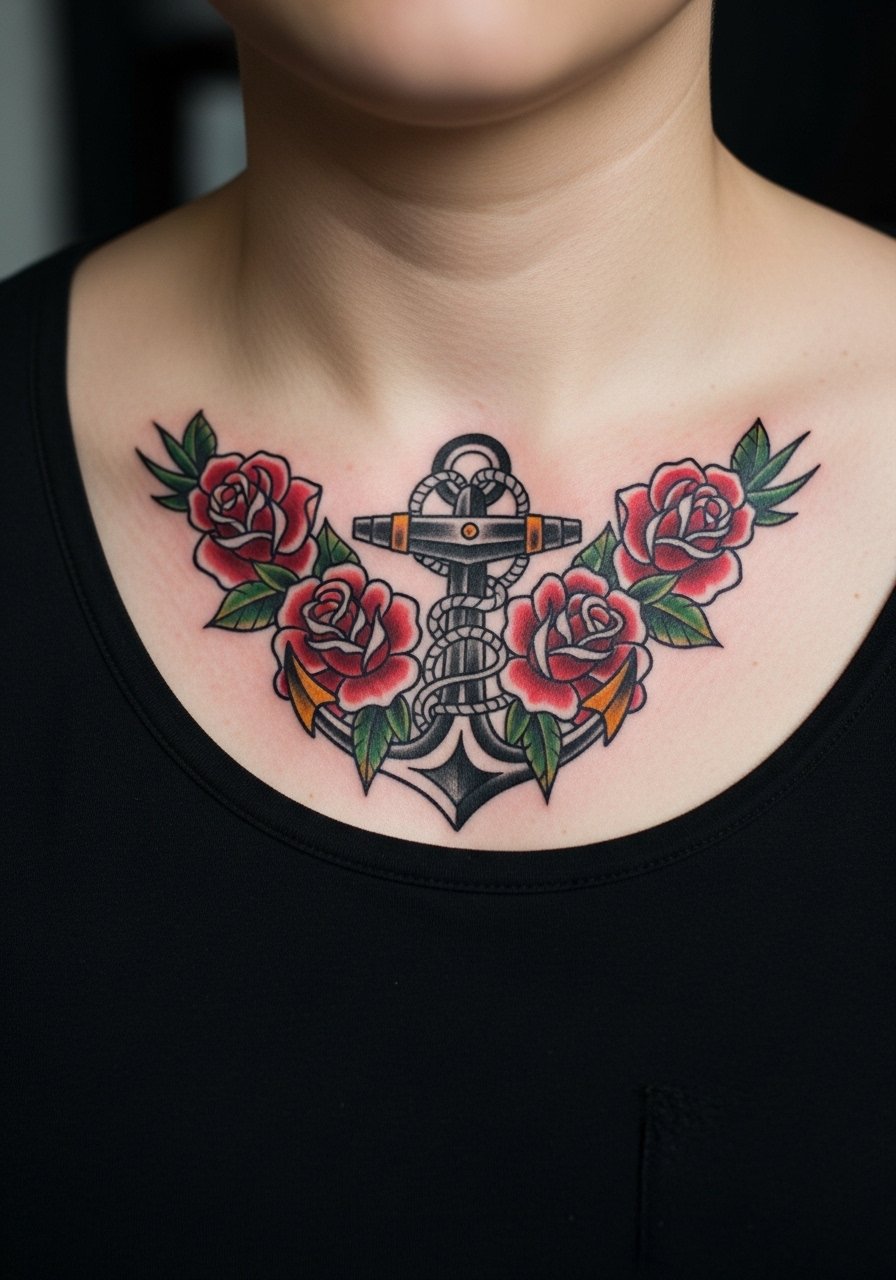
This balances grit and softness. Tell the artist you want the anchor's edges slightly thicker to separate metal from petals. A common aging issue is over-shading between petals and anchor flanges. Expect a moderate session and consider a short break if the needle rides the bone for long. For outfits, a button-up shirt left undone at the collar frames the anchor like a styled accessory.
17. Phoenix Rising Across the Collarbone
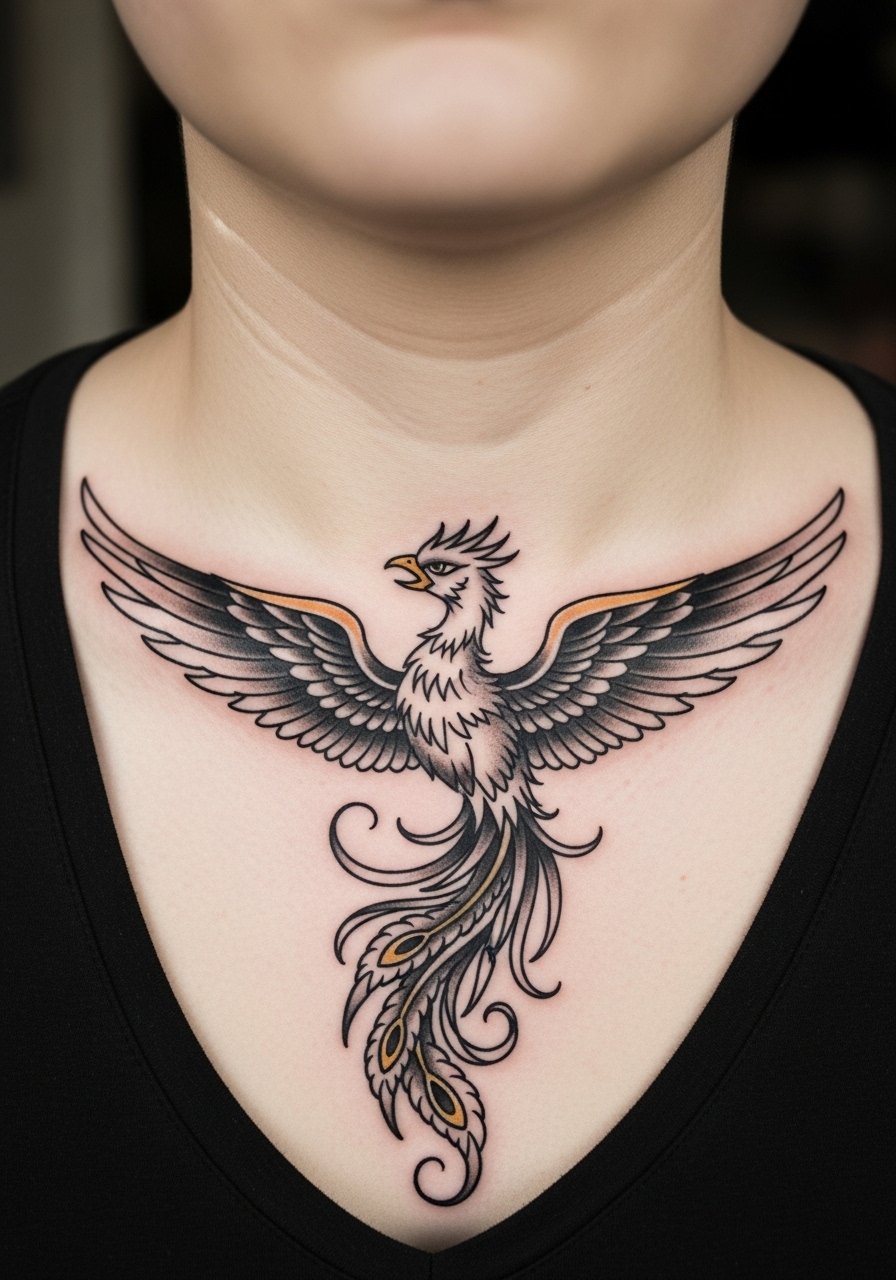
This is a final pick for someone wanting a dramatic yet wearable piece. Ask your artist to lay out wings so the busiest parts avoid direct contact with necklaces. The usual mistake is packing too much flame texture into the wings, which can blend together over time. Sessions may run longer due to the area covered and the high saturation. Expect the core black to hold well and the warm colors to mellow, with a likely touch-up after a few years for vibrancy restoration.
Frequently Asked Questions
Q: Will a neotraditional collarbone tattoo hurt more than other chest placements?
A: The collarbone is one of the more sensitive spots because the needle passes close to bone. Pain tends to be sharp when the needle crosses the ridge and softer on the surrounding flesh. Plan short breaks and discuss pacing with your artist so the session stays manageable.
Q: How should I prepare clothing-wise for a collarbone session?
A: Wear something easy to move aside without being removed, like a wide-neck shirt or a button-down. That keeps the artist's access clear and reduces fabric rubbing during work. Avoid tight straps that press into the area while you sit.
Q: Do neotraditional colors hold on the collarbone, or is black better?
A: Both can work. Heavier black outlines and solid anchors help color panels read longer. Some artists favor dense saturation to preserve shape, while others rely on precise linework plus selective color. Ask which approach your artist prefers and why before booking.
Q: How long before I can wear necklaces or bras that touch the tattoo?
A: Give the area at least one week before tight or abrasive jewelry contacts the fresh ink. Lighter accessories can return sooner if they are not rubbing the site. If you feel irritation, pause wearing them until the scabbing phase is fully done.
Q: Will a thin script banner on the collarbone need touch-ups sooner than bolder designs?
A: Yes, very thin scripts tend to blur faster, especially across bone. If you want lettering, ask for slightly heavier line weight and more letter spacing so the text stays legible for longer. Expect a potential touch-up in a couple of years depending on aftercare and sun exposure.
Q: How do I find an artist who understands neotraditional collarbone work?
A: Look at shop flash walls, local convention portfolios, and curated tattoo directories. Search hashtags focused on neotraditional clavicle work and read client photos. Ask the artist how many collarbone pieces they have done and for healed photos so you see real-world outcomes.
