
Traditional wrist tattoos often age better when the design respects the wrist's small canvas and constant movement. Many people think tiny detail will hold up, but on skin that rubs and bends the simple, saturated motifs tend to read longer. If you worry about sizing, placement, and whether a design will need touch-ups, this list pares down proven old school wrist options and tells you what to ask your artist before the needle hits the skin.
1. Anchor with Banner on Inner Wrist

I recommend the inner-wrist anchor when you want an obvious old school symbol without crowding the hand. Tell your artist to keep the anchor 2 to 3 inches tall and the banner gently curved so the text follows the wrist contour. A common mistake is asking for tiny script in the banner, which often blurs into a line after a couple of years. For longevity, ask for slightly heavier linework and solid color saturation, and expect a short session with moderate pain for the inner wrist. For showing this off, half-roll a fitted oxford cloth button-down so the wrist sits free and framed against a clean cuff.
2. Swallow in Flight on Outer Wrist
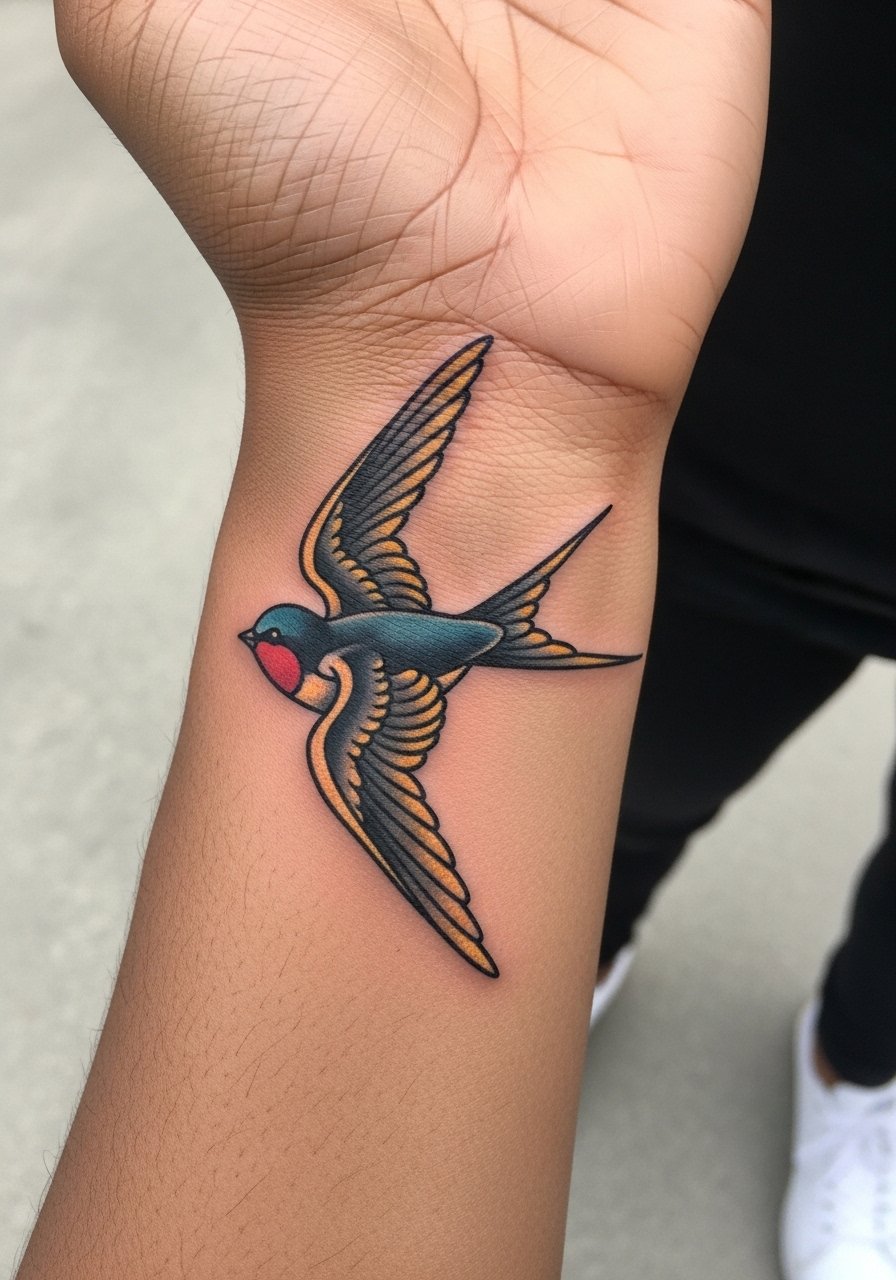
Swallows read as movement, which makes them ideal on the outer wrist where the silhouette is visible in motion. During consultation ask for a compact 1.5 to 2 inch scale and a confident black outline with two-tone wing shading. The mistake I see most is cramming too much feather detail into a small scale. That detail flattens into blur by year three. Expect some sting as the blade crosses tendons, but the session is usually short. Pair this with a rolled cuff denim shirt when you want the tattoo visible without screaming for attention.
3. Lucky 13 with Dice, Outer Wrap
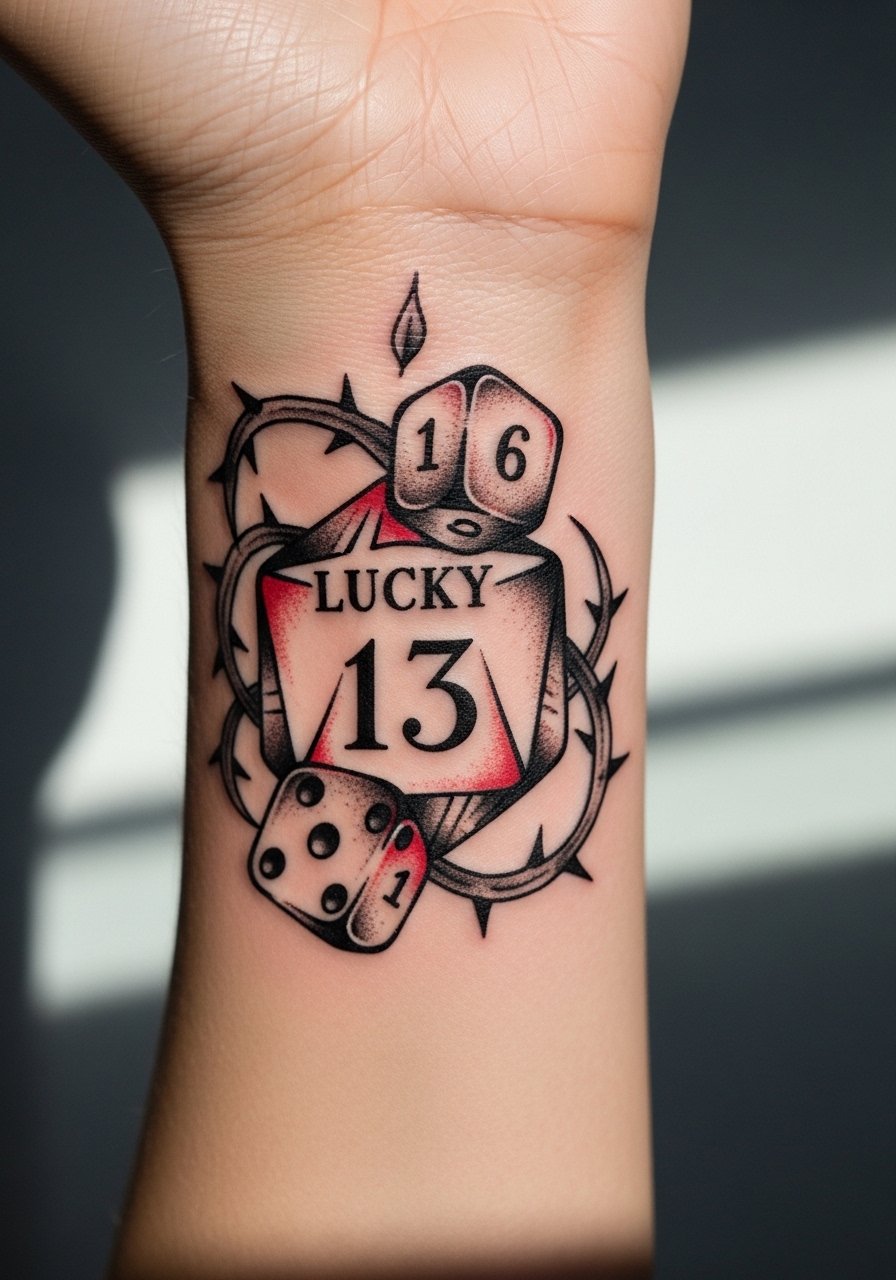
This wrap-style motif benefits from being drawn to follow the wrist curve so faces of the dice read from multiple angles. When you sit with the artist, request crisp negative space between die pips so each face holds up as the skin shifts. A frequent error is flattening the wrap into a flat band. That loses the 3D dice effect and increases blowout risk. Expect a single session and moderate pain. For evenings out, stack a vintage leather cuff bracelet on the opposite wrist to balance the visual weight without rubbing the fresh ink.
4. Rooster Band Adapted for Wrist Top

A rooster band translates well from larger flash by simplifying feathers and focusing on strong color blocks. Tell your artist you want the band to sit higher on the wrist so the design reads when your hand is relaxed. The common misstep is trying to replicate full-leg rooster detail on a two-inch band. That leads to muddy shading. Expect slightly longer session time if the palette is saturated. For session day, wear a short-sleeve tee so the artist has clean access. To wear it out, try a charcoal henley shirt with sleeves rolled to the elbow for a rugged contrast.
5. Pin-Up Girl Portrait Curving Around Wrist
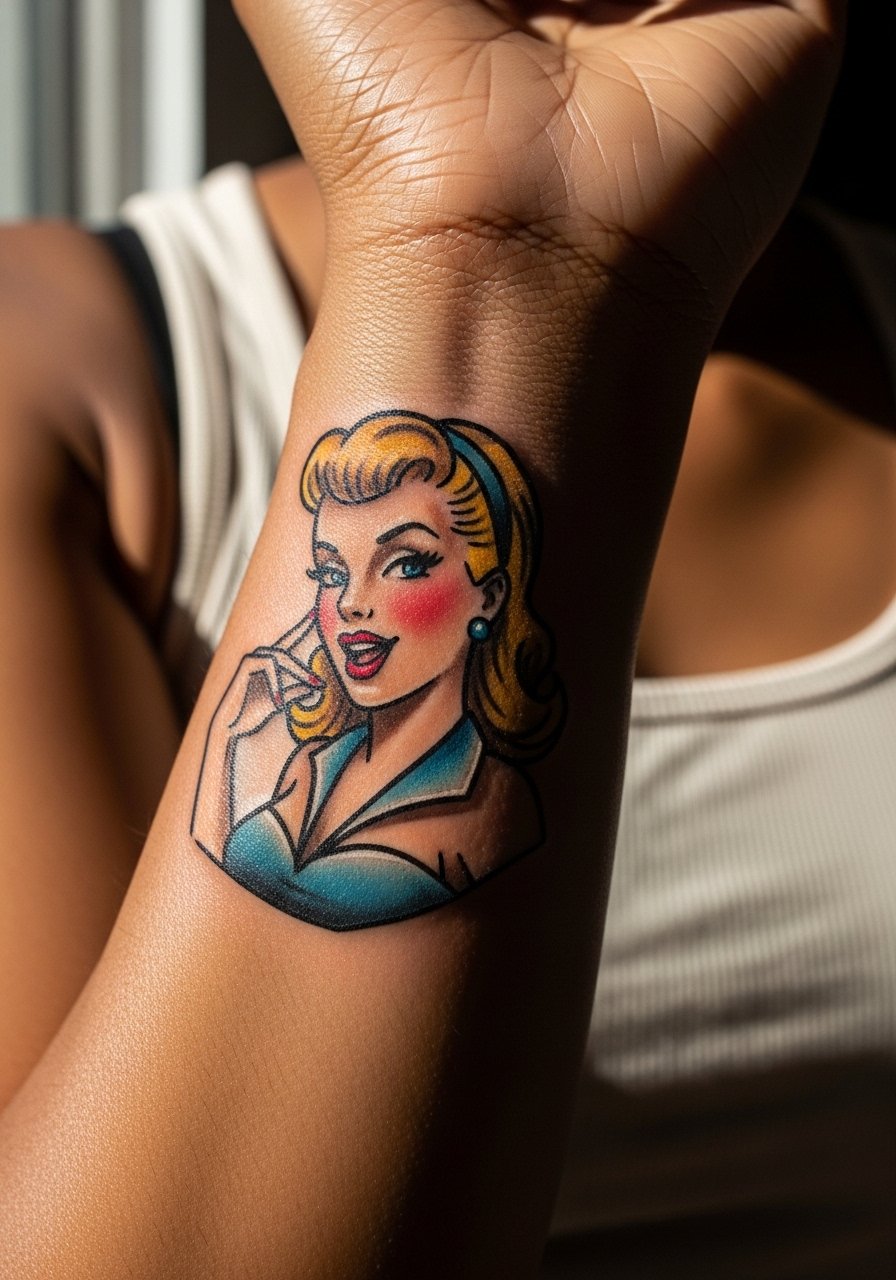
The pin-up portrait needs to respect the wrist's curve so the face doesn't distort when the wrist rotates. Bring full-face and half-profile references and ask your artist to design a composition that follows the wrist line. A frequent error is insisting on photoreal detail at a tiny scale. That detail softens quickly and the portrait loses definition. Plan for a longer single session and early touch-up at year two if you want crisp features. Because this sits near job-visible zones for some people, think through exposure before booking.
6. Heart with Banner and Dagger on Inner Wrist

This compact vertical design does well on the inner wrist when the banner text stays broad and legible. Tell the artist to keep the dagger shaft bold and avoid narrow script in the banner. One camp of artists argues that extremely fine script is a bad idea on the inner wrist because the skin there moves and blurs letters fast. The other camp says with careful depth and spacing fine script can hold up. Ask the artist which side they stand on before you commit. Pain is higher on the inner wrist but sessions are short. For a clean reveal, wear a thin silver chain bracelet on the opposite wrist so attention stays balanced.
Pre-Session Essentials
The wrist pieces above heal under more friction and daily washing than larger limbs, so packing a few session-day and first-week items smooths the process.
-
Stencil transfer paper kit. Lets you preview how the banner and tiny text sit on the wrist before the needle starts.
-
Topical numbing cream. Applied per instructions about 30 to 45 minutes before eases the sting on tender inner wrist work.
-
Thin protective film roll. Keeps small wrist bands and wrap motifs clean during the highest-friction days.
-
Fragrance-free gentle body wash. Cleans the area without stripping the saturated colors these designs depend on.
-
Aquaphor healing ointment. A thin layer in the first 48 hours helps maintain moisture for fine outlines without clogging.
7. Rose Bouquet Topped by a Hand, Wrist Span
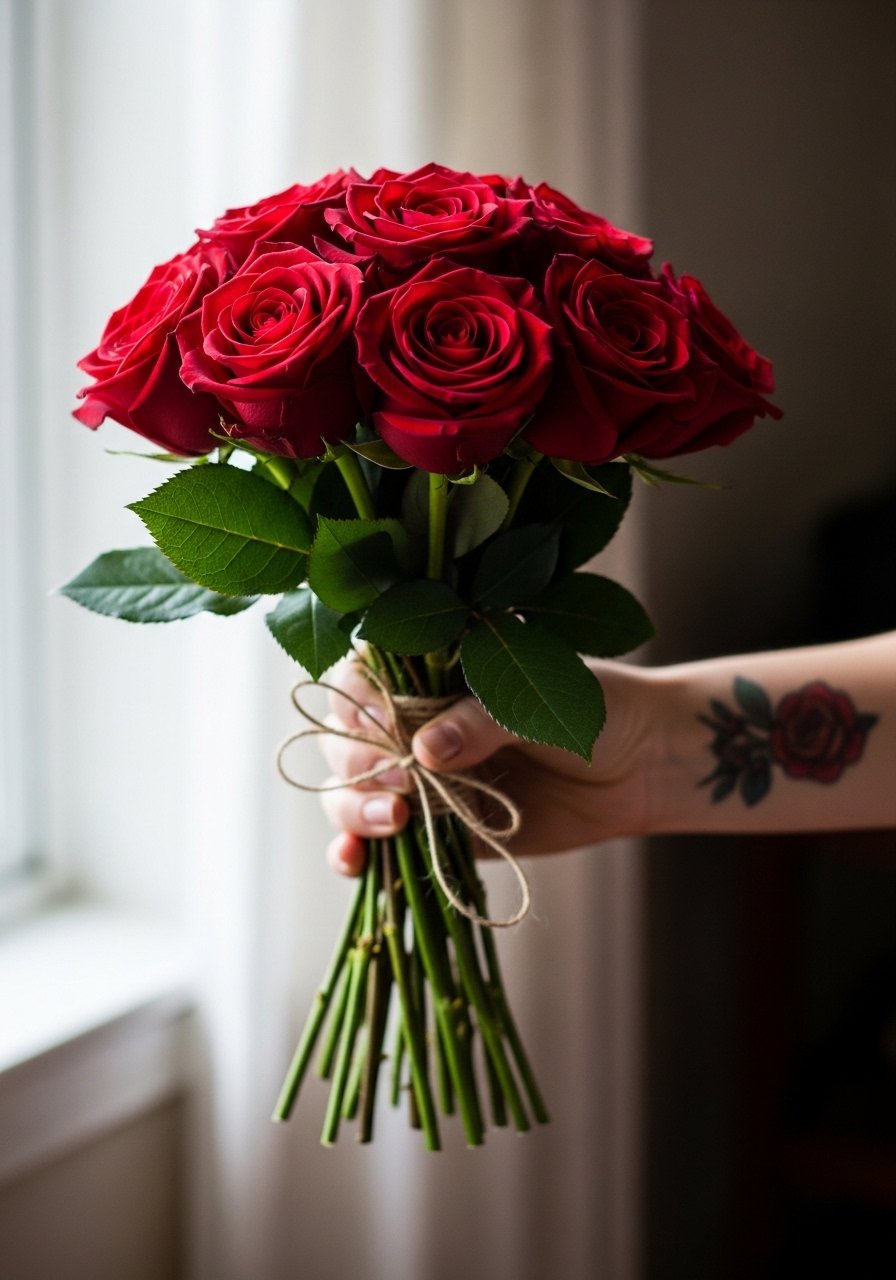
A wrist-top rose bouquet feels like a small anchor for larger arm work, and it photographs well when the cluster follows the wrist's width. Ask for simplified petals and solid leaf fills so the flowers age into readable forms rather than a muddied mass. The typical mistake is packing too many small roses into a tight band. That increases blowout risk along tendon lines. Pain is moderate and touch-up is common around year three if you want saturated color preserved. For showing off, pair with a minimal leather wrap or a leather wrap bracelet above the wrist to echo the bouquet's tones.
8. Skull with Crossed Bones on Outer Wrist
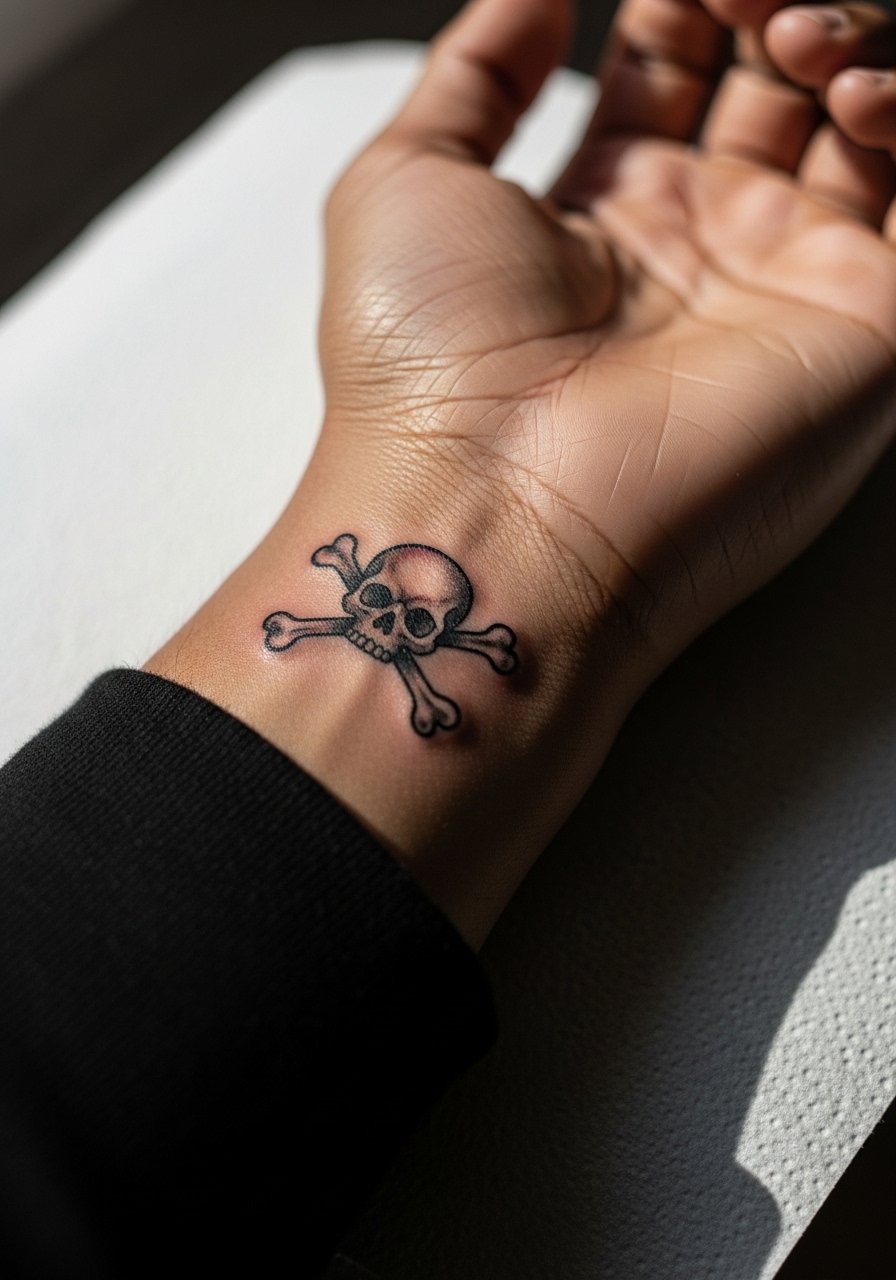
The skull motif reads well on the outer wrist because the high-contrast negative space keeps the eyes on the shape rather than the fine detail. Tell the artist to anchor the eye sockets and jawline with strong black weight, and avoid tiny stipple that can fill in. A common mistake is over-detailing teeth and shadows at small scale, which softens into one tone after healing. Expect low to moderate pain and a single session. This design resists fading well if saturation and linework are prioritized.
9. Eagle Head in Profile Extending to Wrist
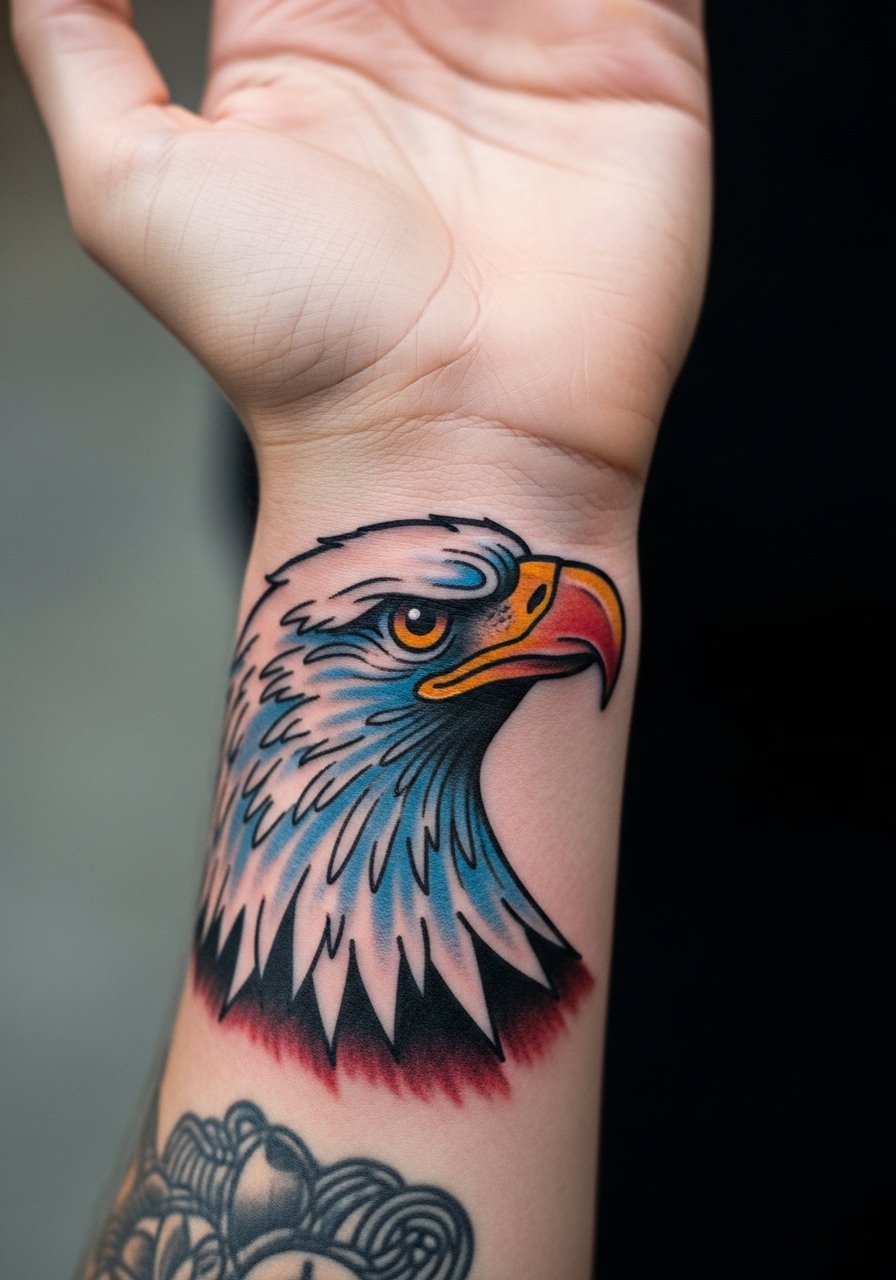
The eagle works when composed to move from forearm into the wrist, using the forearm as the primary canvas and the wrist as a finishing touch. During consultation, ask for the eye and beak to sit on the thicker forearm skin while the feathers taper toward the wrist. The mistake is squeezing the eye into the wrist zone where detail will blur. Expect a two-session plan if you want saturated color and crisp contour. For a casual reveal, roll up a chambray roll up shirt so the forearm and wrist read as a cohesive strip.
10. Ship Helm Circle Wrap on Wrist

A circular helm planted on the wrist uses the joint as a natural center, but it needs precise placement. During the consultation, have the artist mark the exact center and check it with your hand relaxed to avoid rotation misalignment. A common error is centering with the hand tensed, which skews the wheel when relaxed. Expect a quick single session and strong longevity if the spokes use confident linework. The circular negative space helps this design weather time better than dense detail.
11. Pig Luck Motif on Inner Wrist
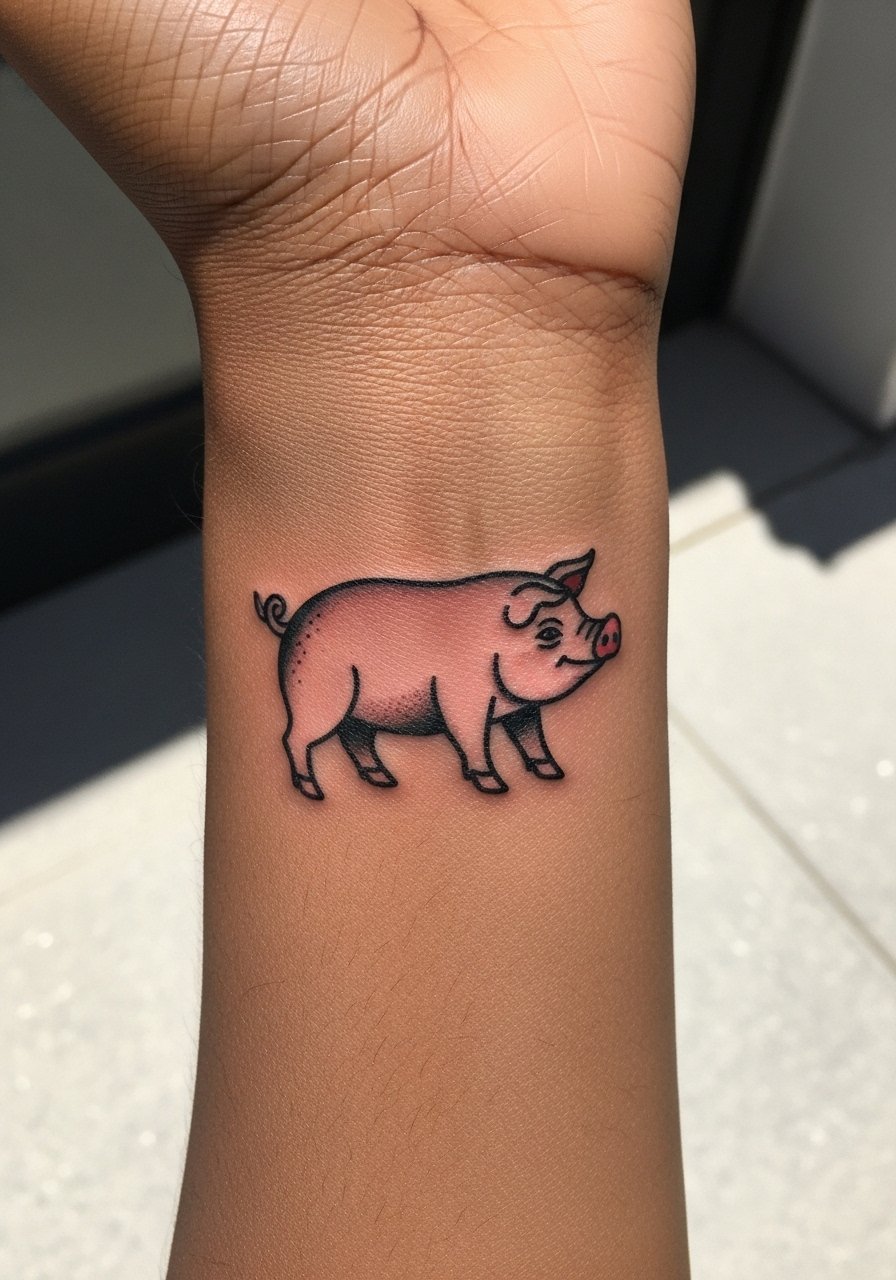
This small pig motif is playful and sits well on the inner wrist where it can be both personal and visible. Ask the artist to simplify the snout and hooves so the silhouette remains readable at one to one-and-a-half inches. People often try to add tiny shading textures that do not survive constant washing and friction. Expect mild pain and a straightforward single session. For subtle accessorizing, a thin silver chain bracelet on the opposite wrist complements the pink tones without crowding the inner-wrist canvas.
12. Single Flower Sprig Along Wrist Base
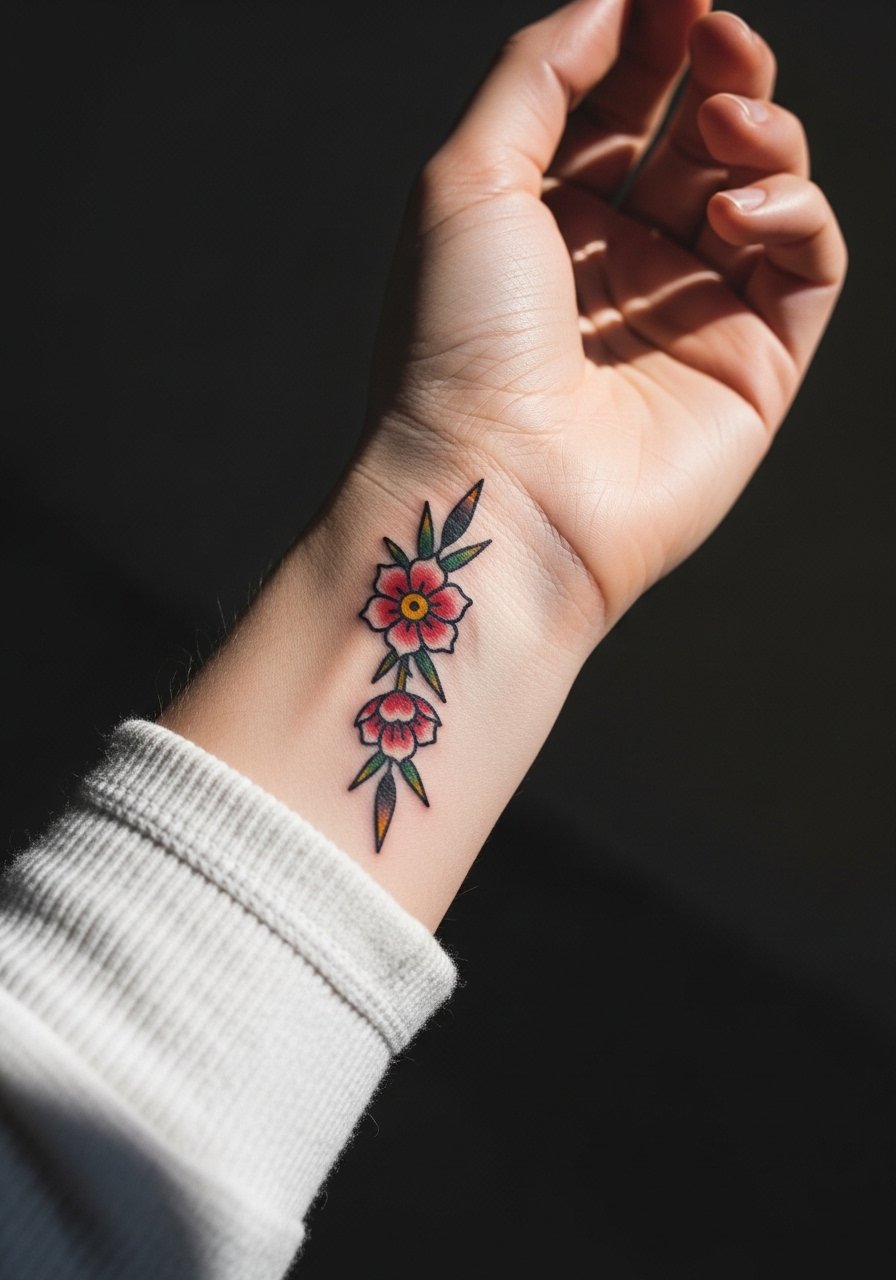
A linear flower sprig is a low-risk way to get traditional color without a wide band. Ask your artist to orient the stem so it sits parallel to the wrist crease and to use open spacing between petals. The error I see often is compressing the sprig into a dot-like patch, which kills the linear flow. This placement has lower blowout risk than dense circular designs, and touch-ups are usually optional after several years. For the session wear a loose short sleeve so the artist can work without fabric dragging.
13. Banner-Only Name Wrap on Outer Wrist
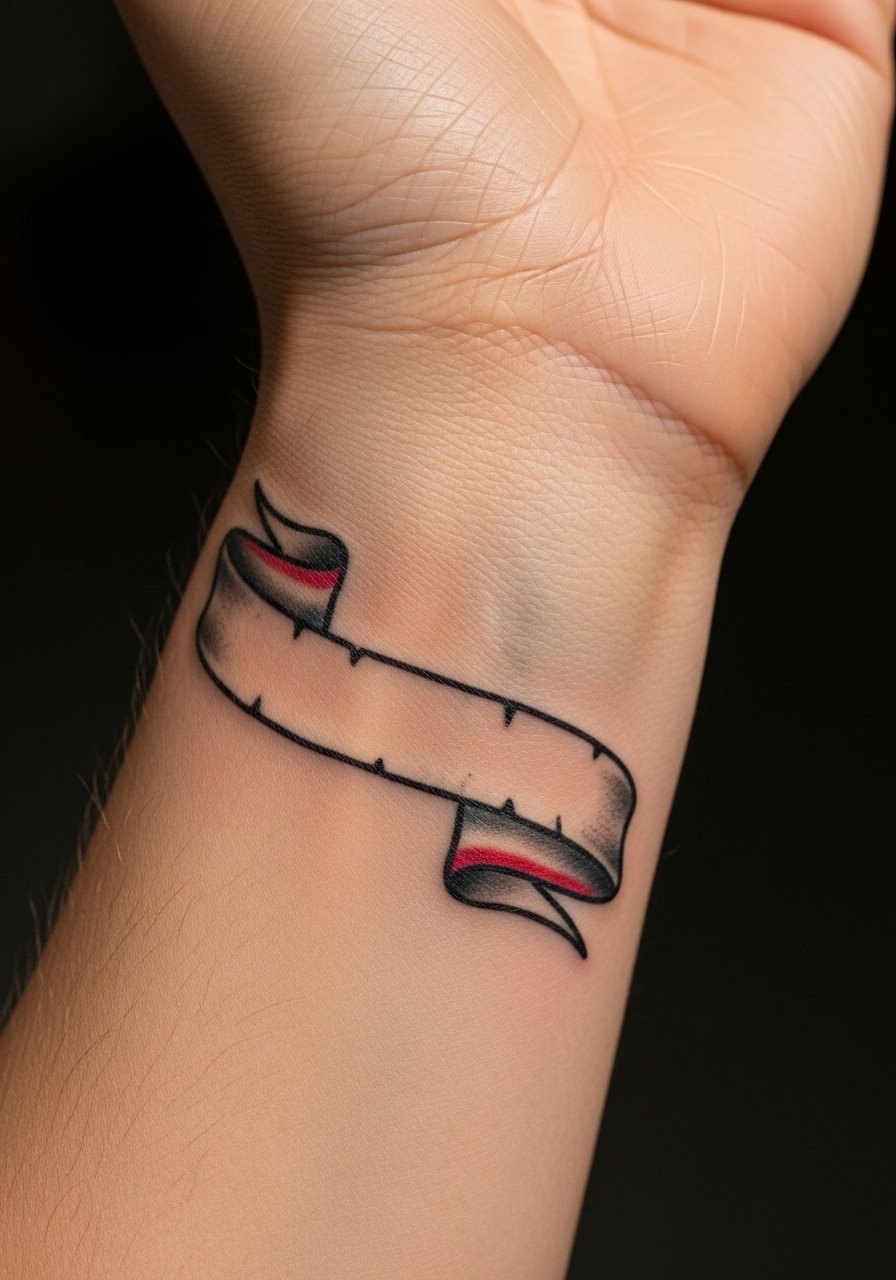
A banner-only piece is deceptively simple and depends entirely on spacing and lineweight for legibility. When you book, bring the exact script or text you want so the artist can draw the banner to fit. The big mistake is choosing a thin cursive that reads like a thread after healing. There are two camps on fine script here. One argues that any very small cursive on wrist skin blurs quickly. The other says slightly bolder lettering with room holds up fine. Discuss which camp your artist follows and plan touch-ups accordingly. For a neat reveal, pair the look with a rolled cuff denim shirt and a clean wristline.
14. Tiny Micro Heart Over Wrist Bone
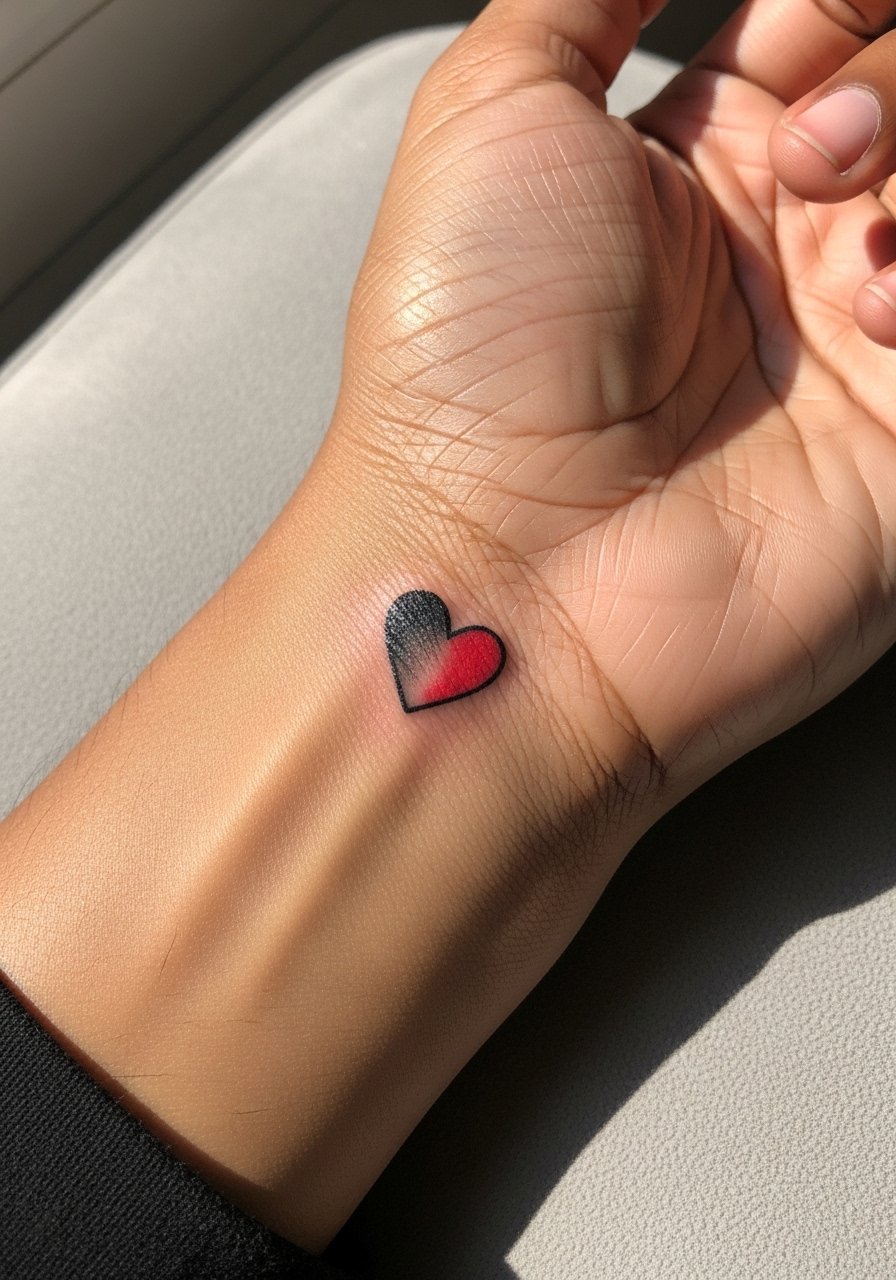
Micro hearts are charming but vulnerable to blowout when placed directly over thin skin. Ask the artist to use a slightly larger aperture for the heart so the outline has room to breathe. The common mistake is asking for extremely minute dots as accents that disappear into the skin texture. This piece is quick and low pain, but expect it to soften sooner than thicker motifs and plan for a touch-up at year two or three if you want crisp edges.
15. Ship Anchor with Floral Pairing on Top Wrist
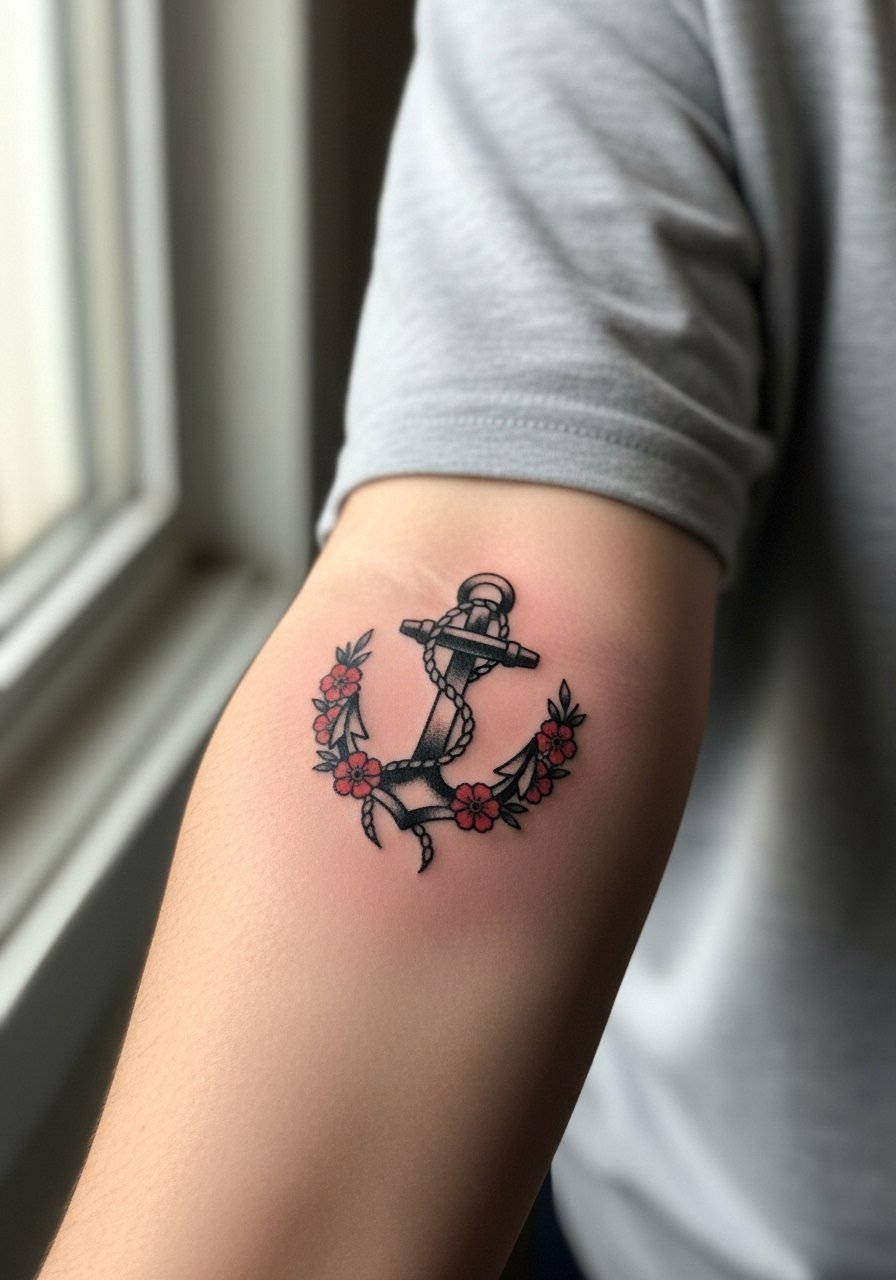
Pairing anchors with a single flower balances nautical grit with a softer element, and it helps the design age by mixing solid fills with open petals. Tell the artist you want the flower to sit slightly offset so both motifs have breathing room. A mistake is crowding both into a single tiny patch. Expect a moderate session and better longevity when saturation is prioritized in the anchor and the flower uses simpler fills. For wearing this out, a minimal wooden or leather accessory works, but if you want a concrete pick try a wooden bead bracelet on the opposite wrist.
16. Small Script Word on Inner Wrist
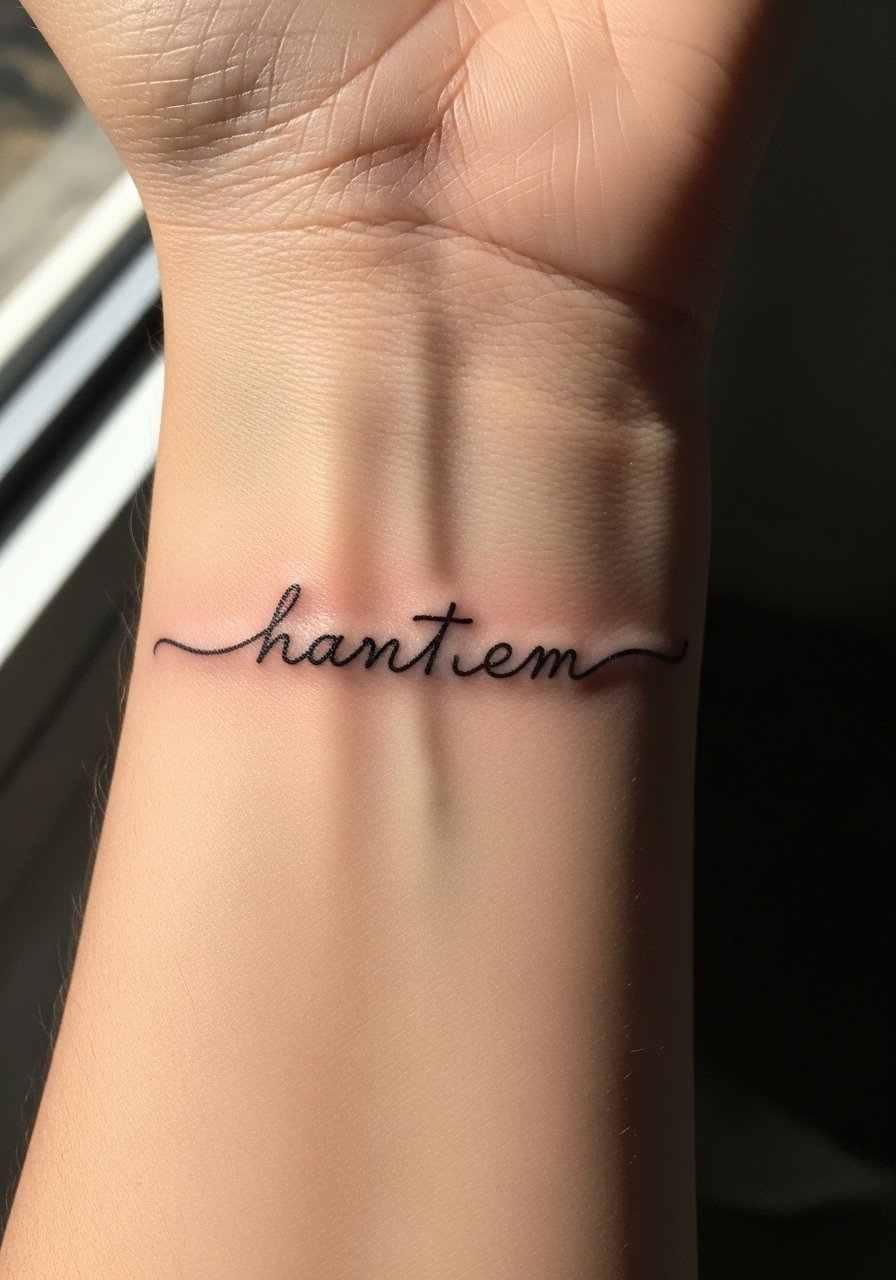
Single-word scripts can be striking when sized correctly, but they are contentious for small-wrist placement. Ask your artist to show the word at the exact size on skin first using stencil paper so you can judge legibility at arm's length. A common error is trusting a font scaled down from a screen without a skin mockup. Pain is higher on the inner wrist and this style often needs touch-ups at year two to maintain crisp edges. If you have concerns about longevity, opt for a slightly bolder script weight.
17. Tiny Ship Wheel Finger-Edge to Wrist Transition

This transitional piece uses the hand base and wrist as a continuous canvas, which looks deliberate when the wheel spokes align with the wrist crease. Tell the artist you want the heavier elements on the hand side and the finer tapers on the wrist. A real mistake is placing the densest details on the hand where movement and washing cause faster fading. Expect more frequent touch-ups for any design crossing the hand and wrist junction. For session day, wear a short-sleeve top so the artist has unobstructed access. To show it off, keep rings minimal so the wheel remains the focal point.
Frequently Asked Questions
Q: How long will an old school wrist tattoo keep sharp color and linework?
A: It depends on placement, activity levels, and sun exposure. From what I've seen, solid black outlines with saturated fills usually hold their shape longer than ultra-fine detail. Expect to check in for a touch-up around year two to four if you want the original contrast restored.
Q: Can fine script fit into a banner on the inner wrist without blurring?
A: Sometimes, but artists split on this. One camp says tiny cursive on wrist skin blurs quickly. The other camp says with deliberate spacing and slightly heavier stroke the script can remain legible. Ask to preview the exact size on skin with stencil transfer before committing.
Q: What should I wear to my wrist tattoo appointment for easy access and comfort?
A: Wear something that exposes the wrist without tugging, like a short-sleeve tee or a loose button-down shirt you can roll up. Clean exposure makes the session smoother and keeps fabric from touching the stencil while the artist works.
Q: Do circular wrist motifs like a ship helm need special placement checks?
A: Yes. Centering matters more than with linear pieces. Have your artist mark the exact center with your hand relaxed so the wheel or circle sits balanced during normal movement. If centered while tensed it can end up off-axis when relaxed.
Q: Will an anchor or rose on the wrist hurt more than on the forearm?
A: Generally yes, the wrist is more sensitive because of thinner skin and proximity to tendons. Pain is usually short lived for these small traditional pieces, but expect sharper sensation than on the fleshy forearm.
