
Fine line portraits of parents can be quiet statements and loud memories at once. I have seen people sit down with a single faded photograph and leave with a portrait that reads like a small memorial. The trick is scale and needle choice so the face holds detail without becoming a blur in five years. These ideas lean into realism, placement, and the small styling choices that keep them feeling personal long after the first touch-up.
1. Micro-Realism Parent Portrait on Upper Forearm

A forearm portrait keeps the image visible and easy to show when you want to, which is why many pick this placement. Expect moderate pain and a one to two hour session for a small portrait. Tell your artist you want slightly heavier linework around the eyes and jaw so the features hold after healing. A common mistake is asking for too-small facial details. Up close the hairline and eyelashes merge if scaled down. At six months the contrast softens, at two years the midtones mute, and a touch-up at year two to three often restores the crispness. For showing it off, rolled sleeves and a loose linen button-down frame the forearm without drawing attention away.
2. Matching Chest Portraits Above the Heart
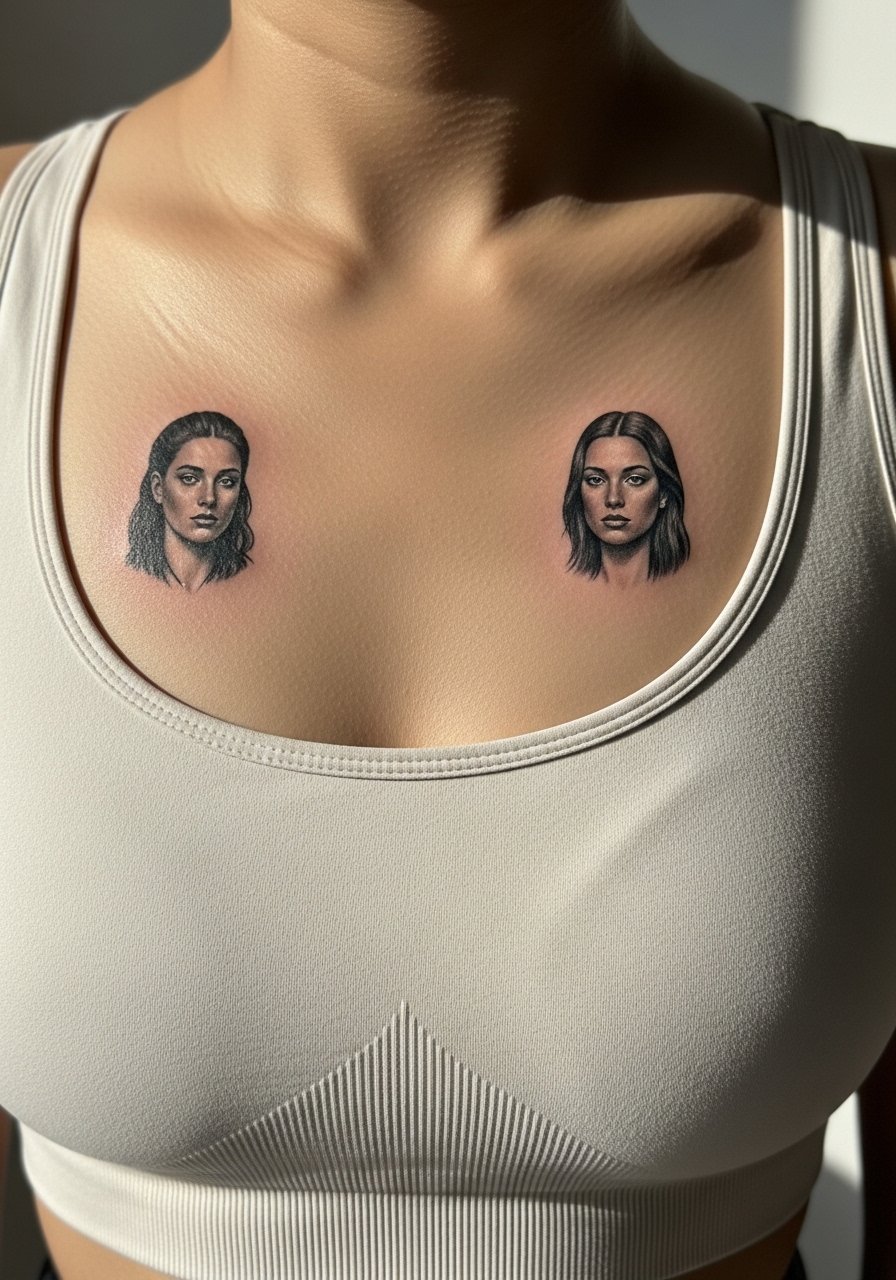
Matching portraits above each breast are intimate and feel like carrying someone physically close. Sternum and upper chest sessions are higher on the pain scale but they have strong emotional payoff. For longevity ask for slightly larger negative space around facial features so saturation does not pool into blotches. The common error is compressing too much detail into a tiny rectangle. Expect longer sessions split into two appointments for shading and finishing. Because the area sits under clothing often, choose a sports bra or low neckline during the session so the artist has clear access. Consider how this placement reads with a simple pendant necklace that sits above the portraits.
3. Single-Line Name Script on Collarbone

A single-line script feels quiet but carries a lot of weight when placed on the collarbone. Pain is lower here than ribs but higher than outer arm. The session is short, often under an hour. Ask for a slightly thicker hairline than you think you need so the letters do not break down into faint strokes after a year. The mistake I see is choosing a font that reads well on screen but loses legibility on skin. At six months the script should still read clean, at two years the thinnest strokes may need a touch-up. Pair this with a wide-neck top to let the script sit as intended.
4. Realistic Hand Portrait on Outer Bicep
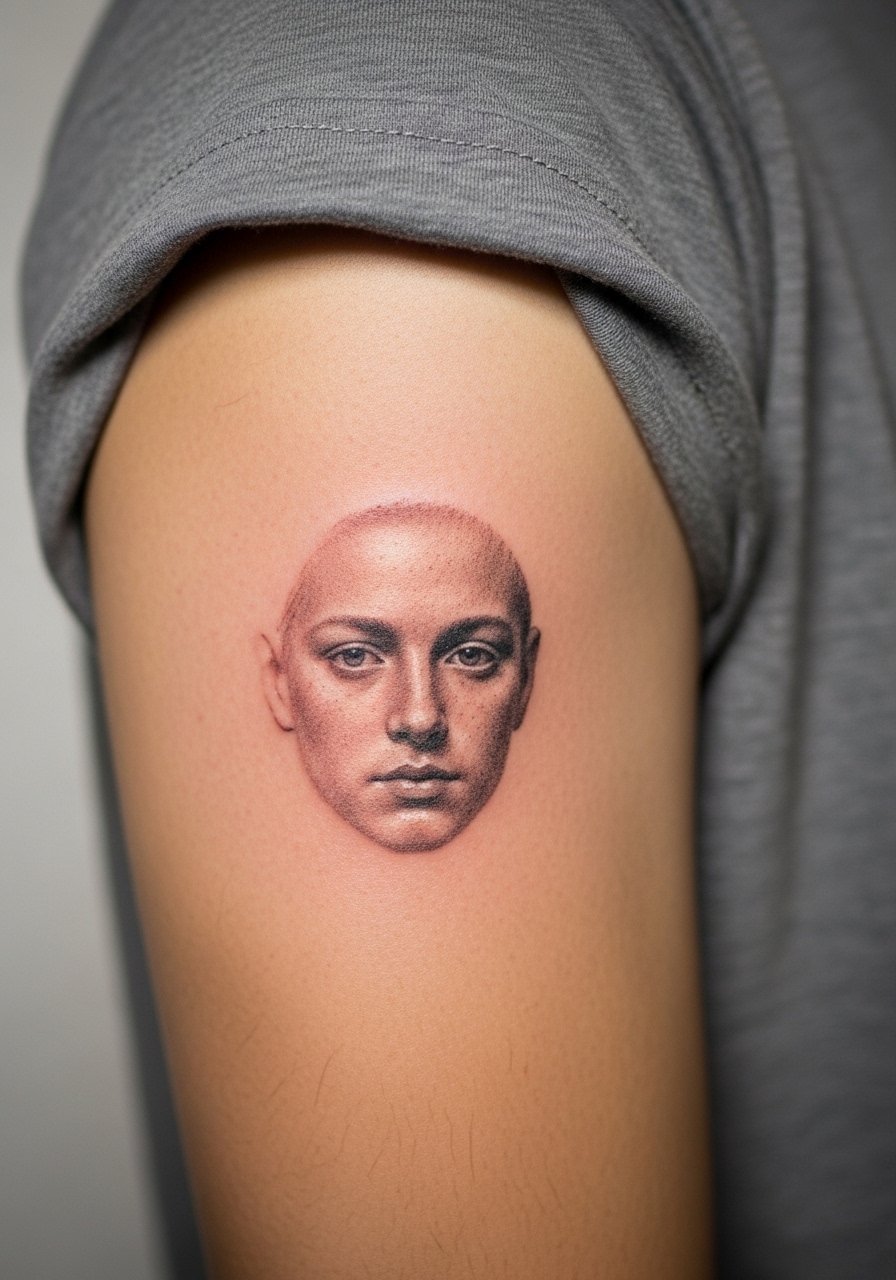
Upper bicep portraits have the benefit of thicker skin and more surface area, so detail holds better. Pain is moderate and sessions run one to two hours depending on size. Tell the artist you want deeper saturation in the darkest shadows to prevent midtone flattening later. A common mistake is asking for ultra-fine lines in areas that move with muscle. Over time the portrait keeps its contrast better than wrist or hand placements. For session comfort wear a loose T-shirt with sleeves you can roll so the artist can access the area easily.
5. Photorealistic Parent Portrait Behind the Arm Tricep

Tricep portraits photograph well when healed because the skin is less exposed to sun and friction. Pain is moderate to low. The session time depends on curvature and detail. During consultation ask the artist to map the portrait to the muscle shape so facial features do not warp when the arm moves. A mistake is flattening contrast to avoid touch-ups, which makes the image look washed in months. Expect touch-ups in year two for midtone areas. For after-session comfort bring a loose tank top you can pull aside without rubbing the fresh ink.
6. Dual Mini Portraits on Inner Forearm

Stacked mini portraits on the inner forearm let you carry two people in a compact way. Fair warning, the inner forearm takes ink differently if the portrait edges are too tight. Pain is moderate and sessions are often one to two hours. Tell your artist you want defined edges around the nose and mouth so those planes do not merge over time. A common mistake is crowding two faces too close together. At six months the midtones soften and the separation between portraits can fade. Plan a touch-up at year two. For showing them off try a rolled sleeve linen shirt that lets the inner forearm peek out.
Studio Day Picks
Those small forearm and bicep portraits above heal differently from chest work, so a few thoughtful items smooth the session and the first week.
-
Thin stencil transfer paper kit. Lets you check placement and scale on the skin before the needle touches it, which is crucial for small facial details.
-
Cooling gel pads. Help reduce local swelling during longer portrait sessions on sensitive areas like the forearm.
-
Non-adhesive silicone healing strips. Protect delicate linework from shirt friction while the surface scabs.
-
Breathable protective film roll. Keeps small portraits clean in the first few days when friction can cause ink loss.
-
Aquaphor healing ointment. A thin layer helps lock in moisture for fine line work without suffocating the skin.
7. Full-Sleeve Family Photo Collage on Upper Arm
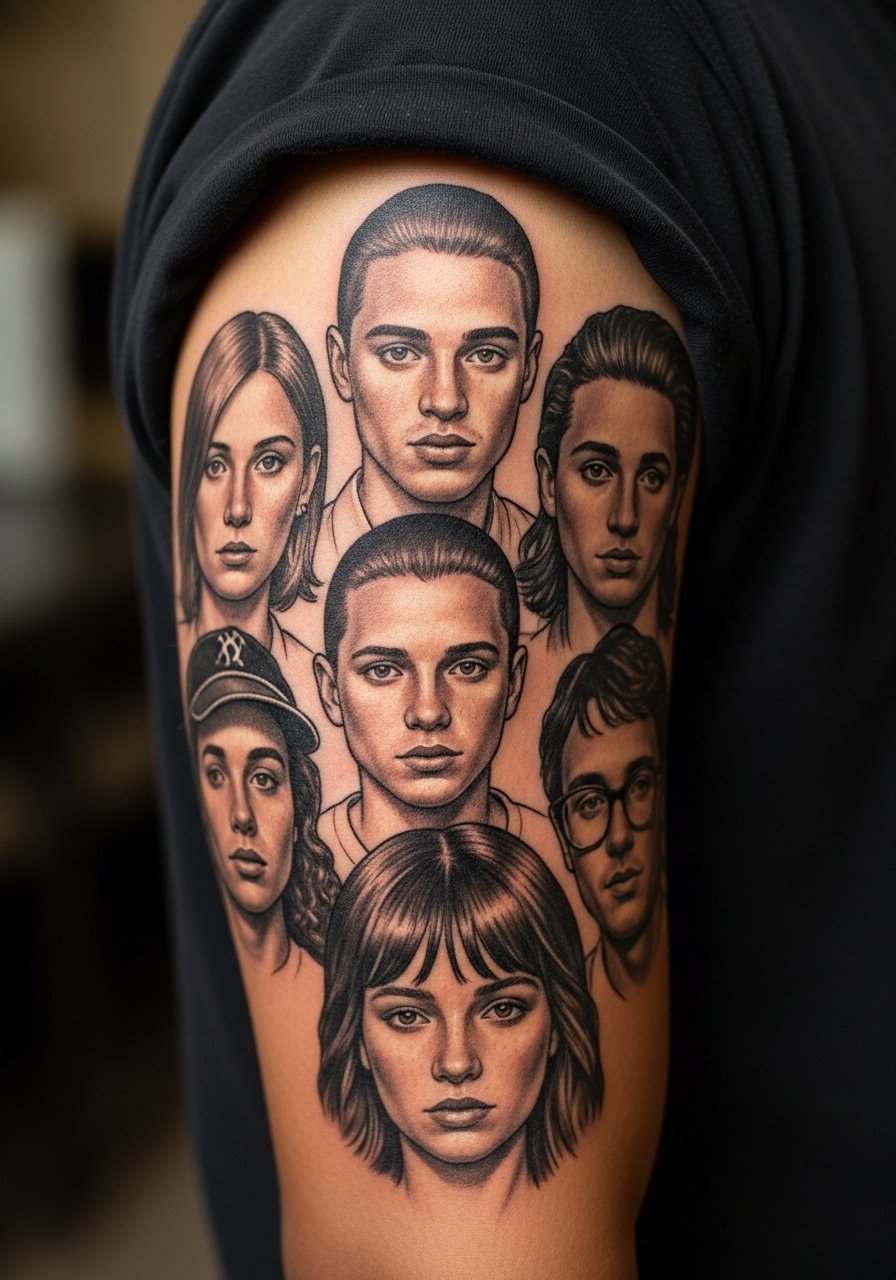
A collage sleeve section lets you combine multiple parent portraits and small symbolic items into one cohesive panel. Expect longer sessions across multiple visits. Tell the artist you want clear negative space between faces so blowout and saturation do not erase separations. One mistake is mixing too many tiny faces without anchors in the composition. Over five years, denser sections can need more touch-ups than single portraits. For the session wear a loose button-down shirt that you can slide to expose the upper arm without rubbing the fresh ink.
8. Realistic Smile Line on Wrist with Tiny Script
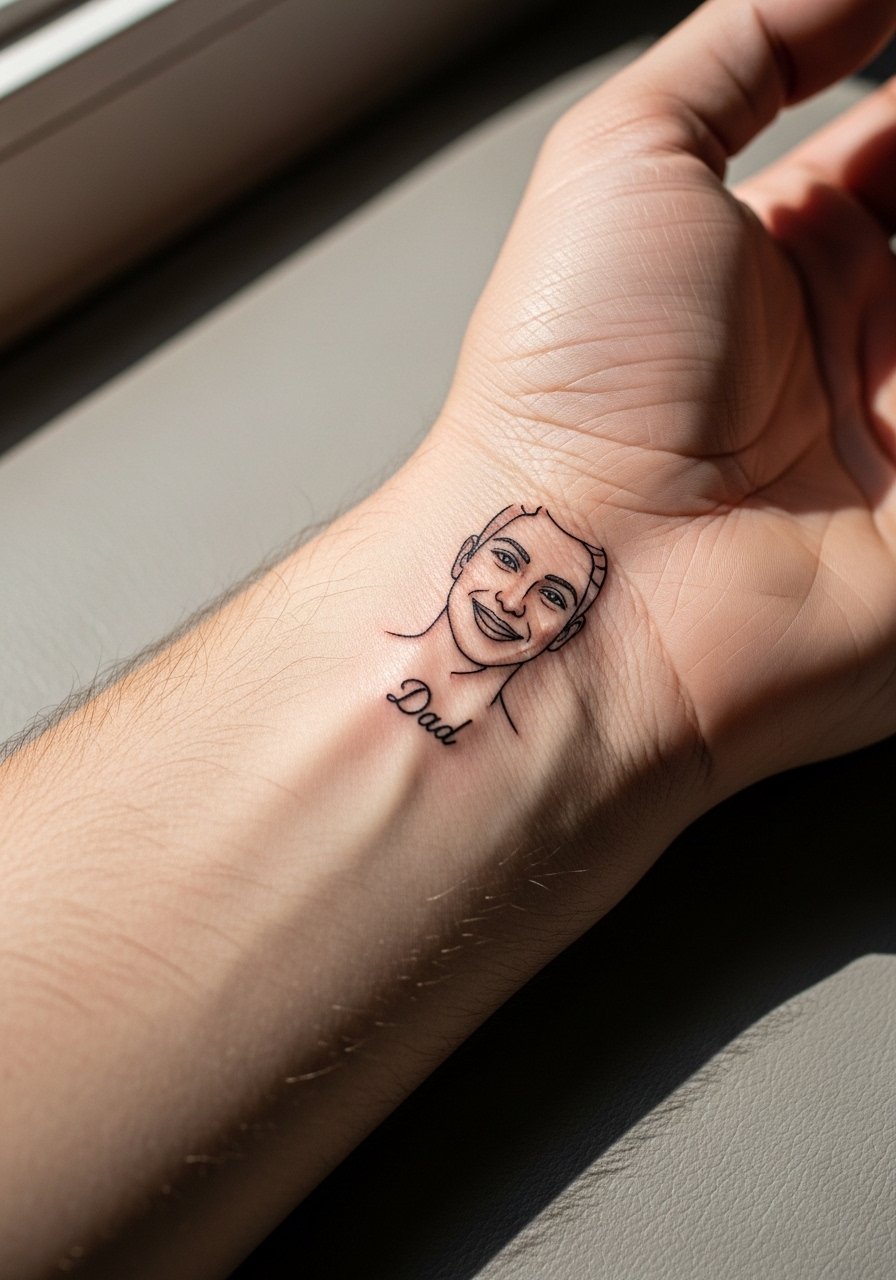
Wrist pieces are visible and intimate but they face continuous friction from bracelets and watches. Pain is moderate and the session is short. Ask the artist to keep linework slightly bolder around the script so it does not fragment with constant hand movement. The debate around wrist realism splits artists into two camps. One camp says wrists move too much and fine detail will blur within two years. The other camp says with proper spacing and saturation, wrist realism can hold. Ask your artist where they stand before booking. For styling, a minimalist watch or thin bracelets can sit next to the tattoo without covering it.
9. Photorealistic Parent Hands Holding on Forearm Wrap
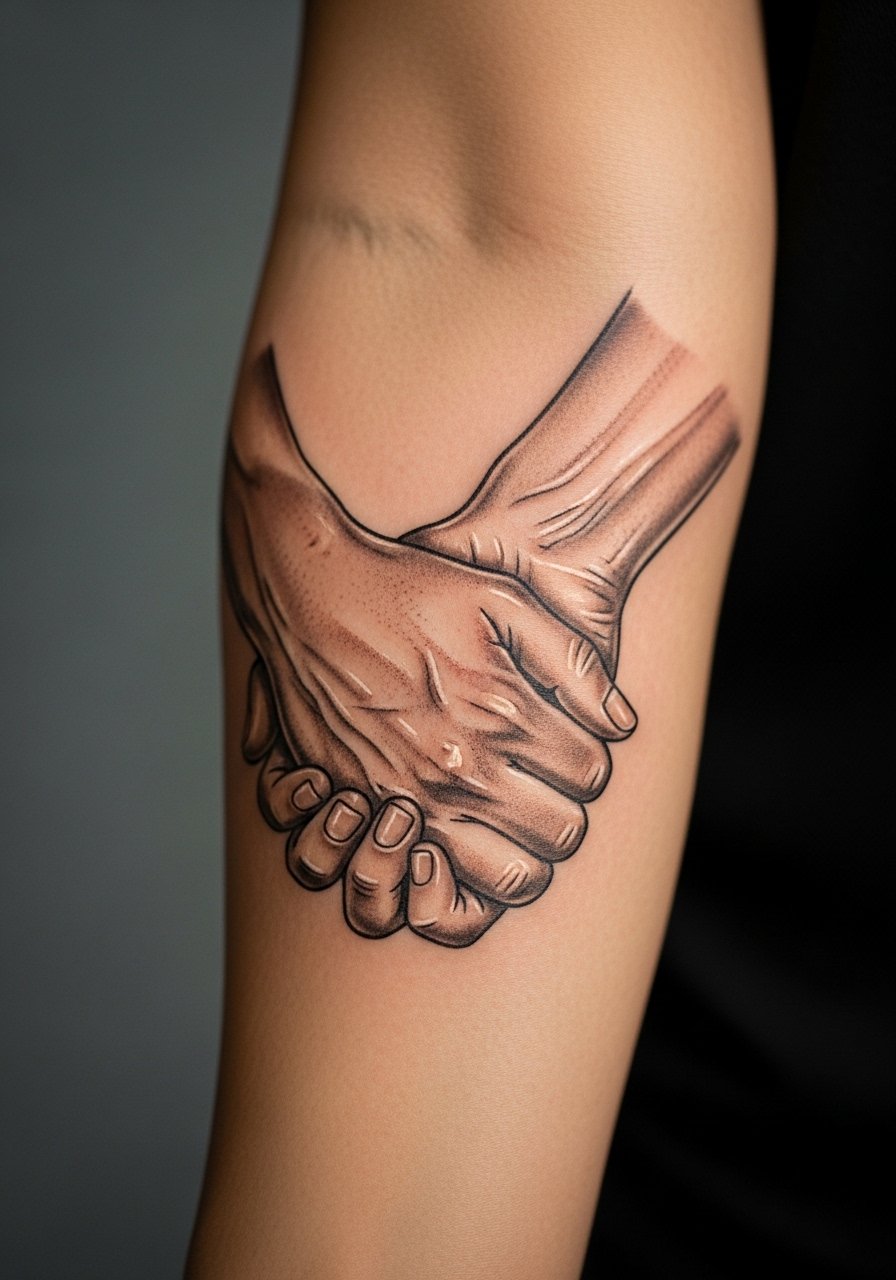
Hands holding each other read like a story when wrapped around the forearm. The main risk is blowout where ink sits too deep near joints. Pain is moderate. In consultation ask for slightly slower machine passes and a focus on skin texture rather than ultra-tight hairlines. The mistake artists often fix later is overworking the knuckles. After healing the contrast softens and the grip detail may need a touch-up at year three. For display try a short-sleeve tee so the wrap reads across the arm without interruption.
10. Linear Portrait Pair Along the Collarbone Edge

Profiles along the collarbone create a cinematic row when placed parallel to the bone. Pain is moderate and sessions are brief. Tell your artist to orient noses and chins with the bone so the profiles read naturally with body movement. A common mistake is centering profiles in a way that contradicts how clothing will sit. Over time the linework can soften, and a touch-up at year two is common for delicate contours. Pair this with an open-neck blouse so the alignment looks intentional.
11. Small Realistic Portrait on the Nape of Neck
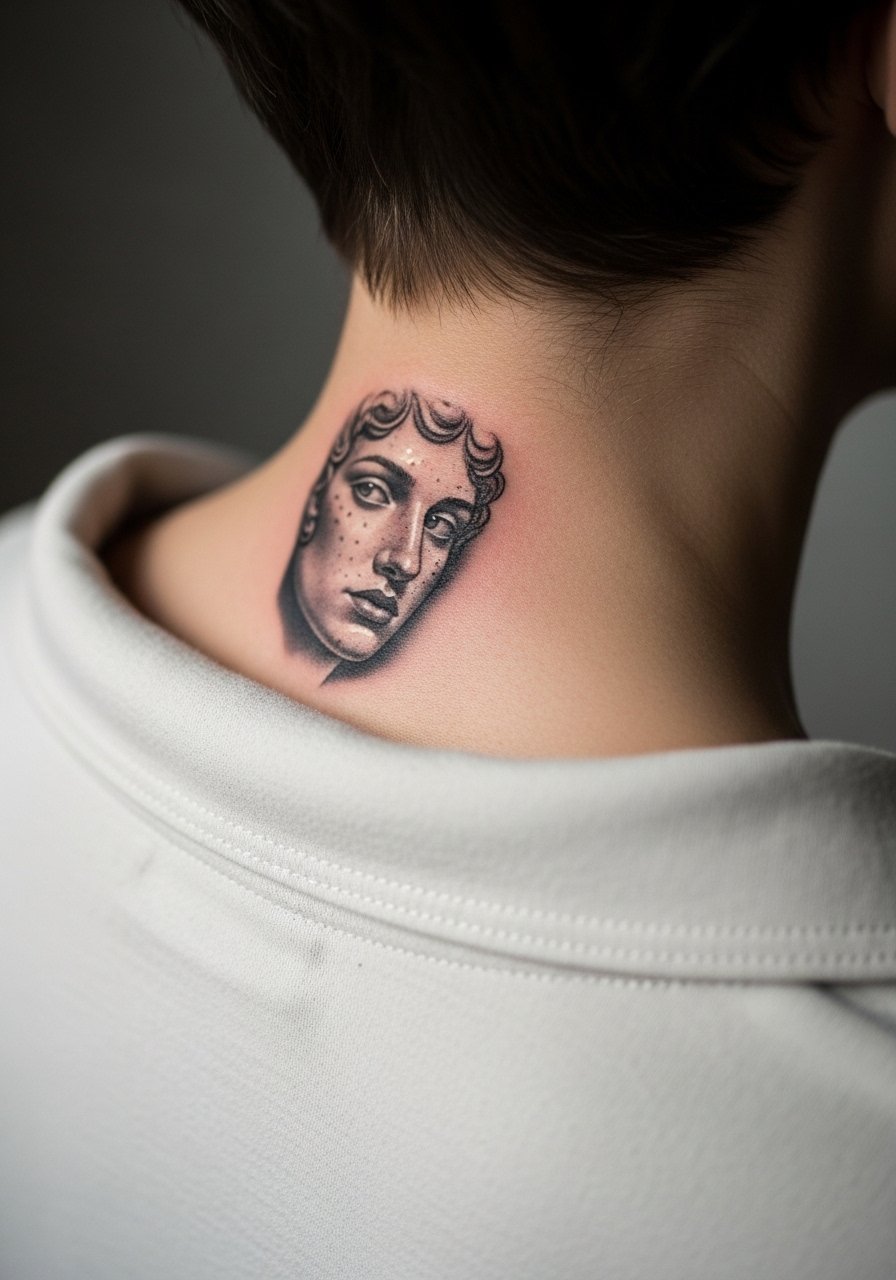
Nape placements hide portraits casually and reveal them when hair is up. The area heals well if kept out of sun. Pain is mild to moderate. Mention during consult that you want the darkest points to sit near bone to keep contrast. A mistake is asking for extra high detail that will blur with hair rubbing. For professional reasons some people prefer to keep this discreet. During the session wear a wide-neck shirt you can pull aside without being topless.
12. Tiny Realistic Portrait on Ankle with Date
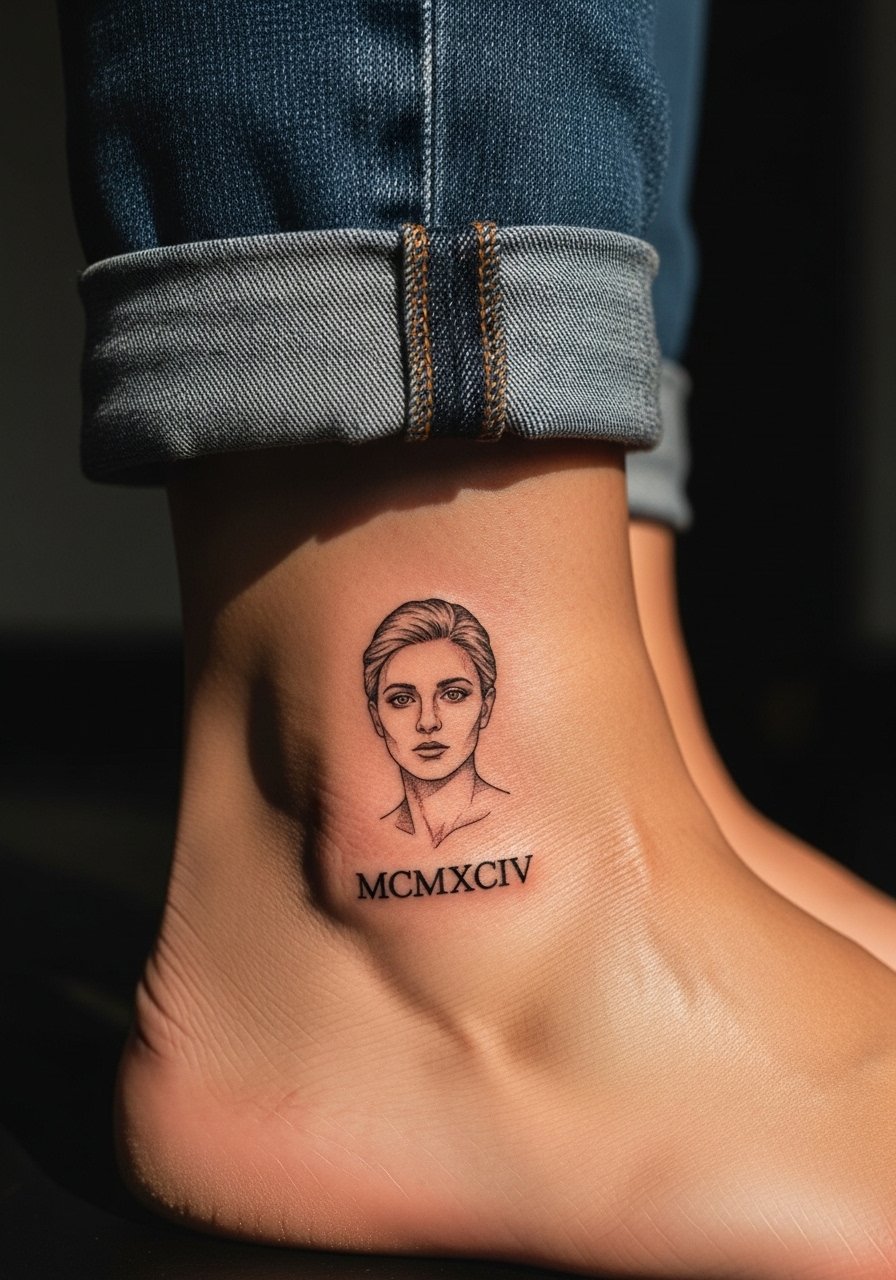
Ankle portraits are very portable and tend to suffer more from shoe friction and socks. Pain is moderate to high depending on bone proximity. Ask for slightly higher contrast so the portrait reads through seasonal wear. A common error is placing the portrait directly where shoes will rub. Over two years the lower contrast areas may need a touch-up. For showing it off wear rolled jeans or a pair of simple sandals that let the ankle breathe.
13. Shoulder-Blade Realism with Soft Background

The shoulder blade gives space for a portrait plus background elements that keep the face legible. Pain is low to moderate. Session time varies with background work. Ask the artist to balance stipple shading with negative space so the portrait does not lose its focal point. The mistake is over-saturating the background to the point the portrait loses contrast. Healed work can stay crisp longer here because the area is not constantly rubbed by clothing. For the session wear a tank top you can slide aside so the artist can access the area cleanly.
14. Realistic Parent Portrait on Ribcage
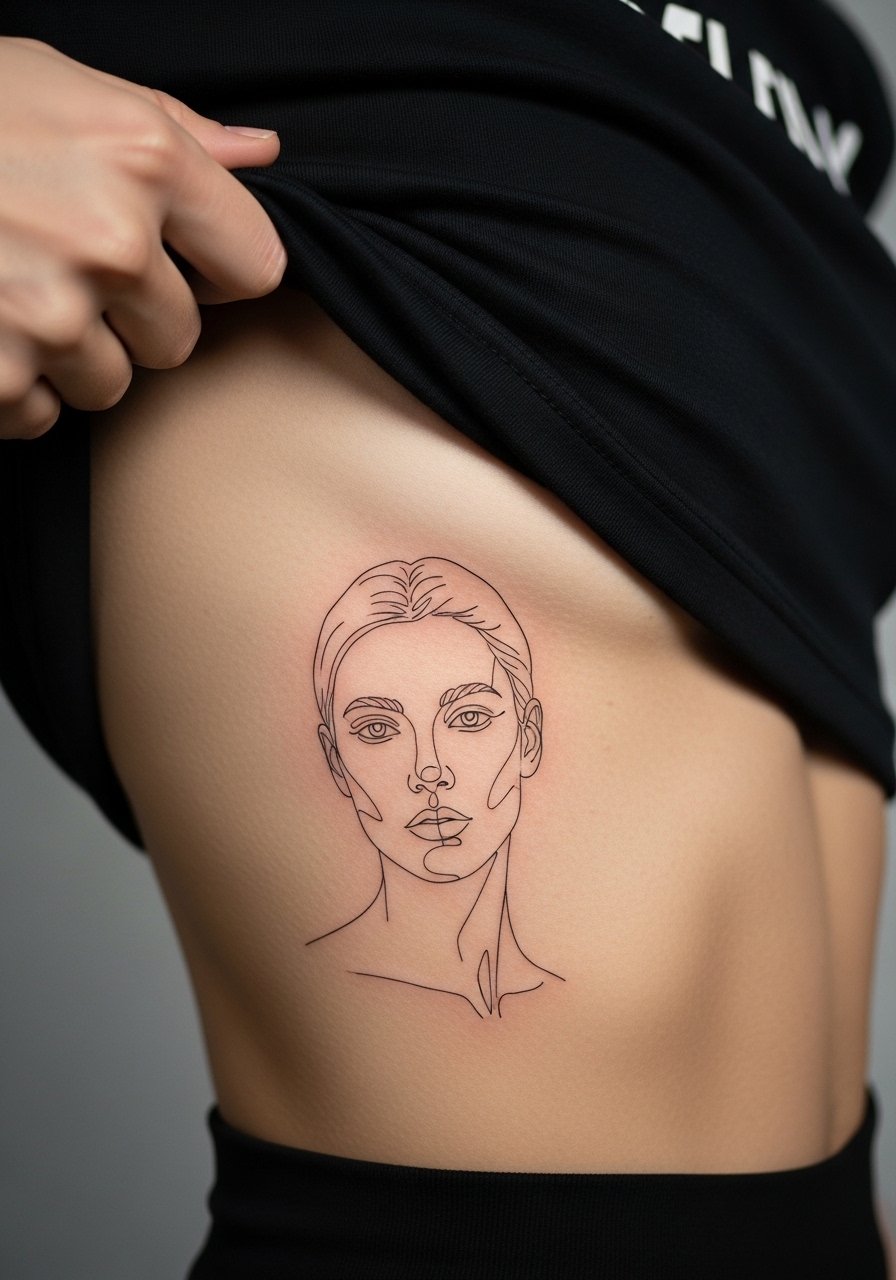
Ribcage portraits can be stunning but the placement is controversial in the fine line community. One camp argues the skin stretch and breathing blur fine detail quickly. The other camp says with correct depth and spacing, fine line on ribs can hold. I recommend asking your artist which side they take and why before committing. Pain is high and sessions are longer. The most common mistake is choosing scale that is too small for the torso curvature. Expect possible touch-ups around year two depending on how often the area is exposed to sun.
15. Calf Portrait with Complementary Script

Calf portraits have the advantage of thicker skin and fewer rub points. Pain is moderate and sessions are usually comfortable. Tell your artist you want a slightly firmer contrast in shadows so the portrait reads from a distance. A common error is pairing a dense portrait with heavy script that competes visually. Over time the calf tends to keep saturation well, but the script may need touch-ups sooner. For showing it off choose shorts and a pair of clean sneakers so the calf image gets daylight without being covered.
16. Tiny Realistic Portrait on Finger Side Panel
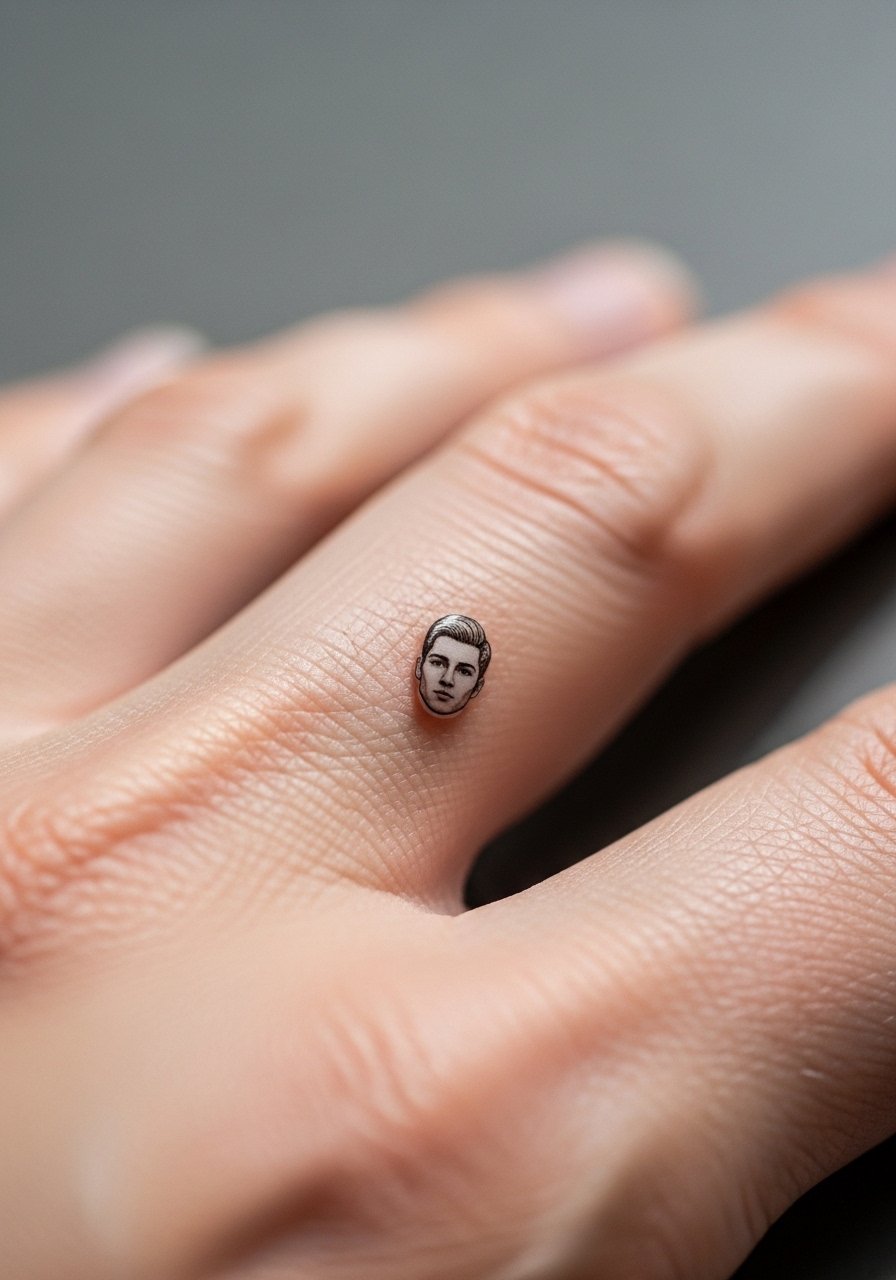
Finger portrait placements are the most fragile for realism because skin turnover and constant washing erase detail. Pain can be sharp and sessions are short but intense. Artists split into two camps about finger realism. One side says the location is doomed to blur within a couple of years. The other side says with bolder linework and acceptance of regular touch-ups, finger portraits can stay meaningful. If you choose this, plan on touch-ups and minimal script around it. For session comfort carry a thin pair of cotton gloves if your hands get cold during long single-finger work.
17. Hip Pocket Portrait with Floral Frame
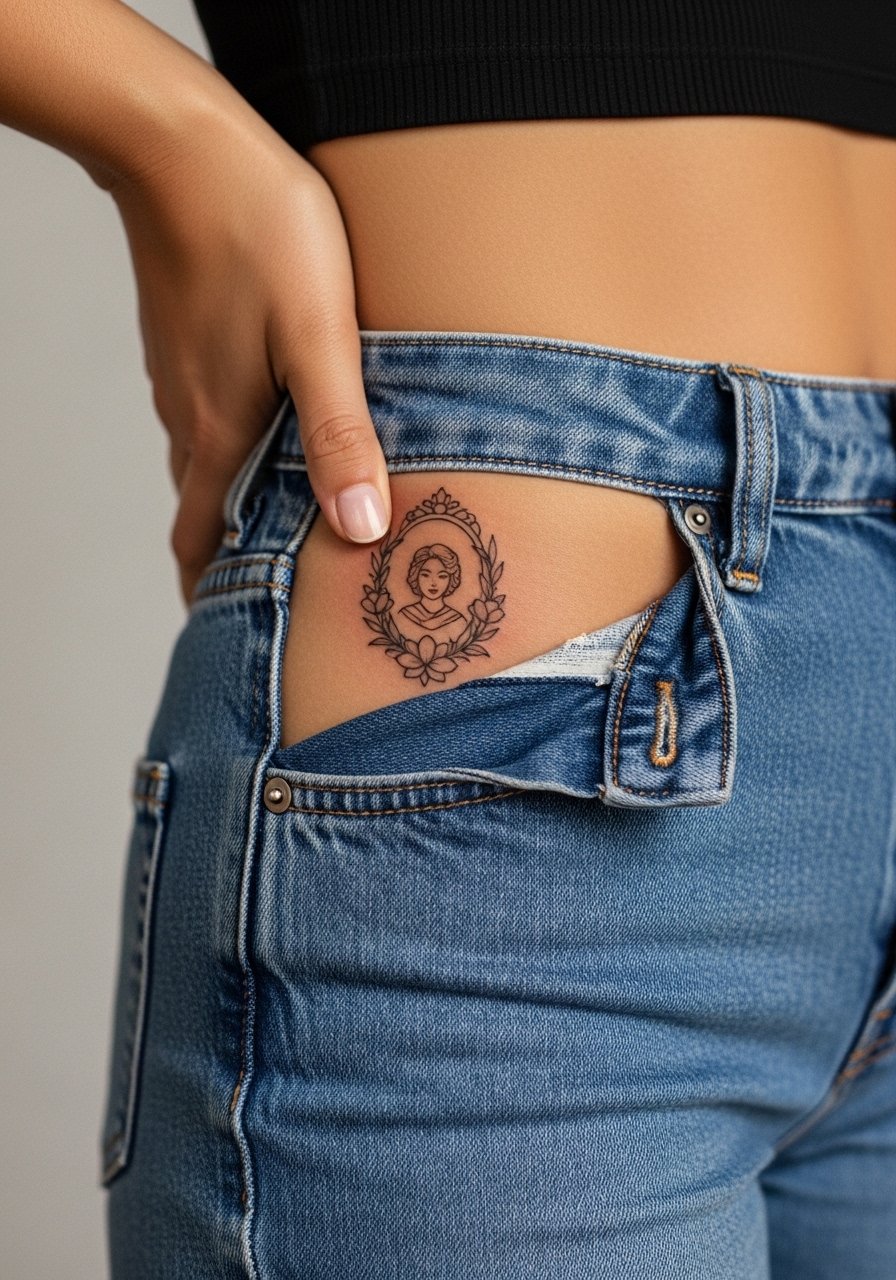
Hip portraits are discreet and nice for people who want privacy. The session pain is moderate and the area heals well if kept covered initially. Tell the artist to keep the floral frame airy so it does not crowd the portrait. A mistake is oversaturating the flowers which draws attention away from the face. Because the area is under clothing often, sun exposure is low so healing can preserve contrast longer. During the appointment wear high-waisted bottoms you can shift easily like high-waisted jeans.
18. Inner Thigh Portrait with Stipple Shading
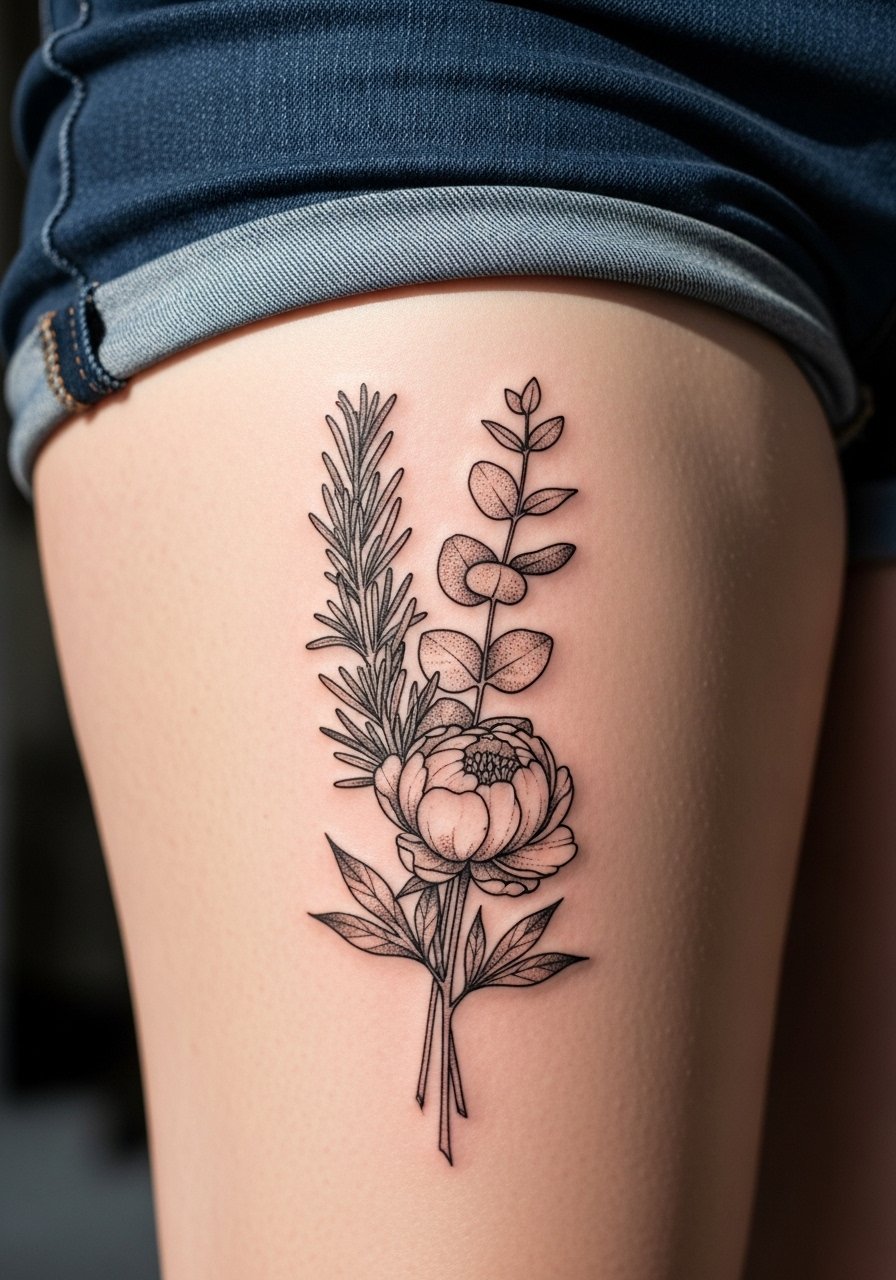
Inner thigh placements are private and can be sensual for some people. Pain ranges from moderate to high. For realism use stipple shading rather than dense blocks of tone so the piece breathes with skin texture. A common mistake is dense saturation that traps moisture under clothing and affects healing. Because this area is sensitive, look for an artist experienced with inner thigh work. Wear shorts you can shift easily for the session.
19. Collarbone Portrait with Minimal Background

A portrait just above the collarbone reads like a medal. Pain is moderate and sessions are short. Ask for slightly increased contrast in the jawline to keep definition when clothing rubs. The mistake I see is too-narrow spacing between portrait and necklace lines. For styling pair this placement with a delicate chain necklace that sits above the portrait rather than over it.
20. Realistic Back-of-Shoulder Portrait with Halo

Back-of-shoulder portraits benefit from less sun exposure and a flat canvas. Pain is low to moderate. In consult ask for the halo to be feathered out so it supports the portrait without stealing focus. A mistake is insisting on too many dark anchors that make the portrait read heavy. Over years the area keeps saturation relatively well. For session ease wear a slip tank you can slide aside without fuss.
21. Minimalist Photo-Real Portrait on Clavicle Edge

A minimalist photoreal portrait right on the clavicle edge reads intimate and intentional. Pain is moderate. Tell the artist you want heavy darks under the chin to anchor the composition. The common error is requesting ultra-fine halftone textures that vanish with movement. Expect a touch-up option after a year if the thin halftone areas fade. For showing it off choose an open-neck tee so the clavicle line remains visible without forcing exposure.
Frequently Asked Questions
Q: Will a photoreal portrait on the ribs last as long as one on the forearm?
A: It depends on placement and skin movement. Ribs stretch and compress with breathing so ultra-fine detail is at higher risk there. Forearms have more consistent surface tension and often keep clear linework longer. Ask the artist about depth and spacing and plan on a touch-up within two to three years if you care about crispness.
Q: How do I choose a photo for a realistic mom dad tattoo?
A: Pick a photo with clear high-contrast features and minimal background clutter. Side profiles or slightly angled faces read better than images with soft focus. Bring a few options to consult with the artist and ask them to mock up scaling on your skin with a stencil before committing.
Q: Are realistic portraits okay for workplace settings?
A: Many portraits are discreet enough for conservative workplaces when placed on the upper arm, chest, or back. Hand and neck placements are more visible and can still affect hiring in some industries. Consider placement and how often the piece will show during a normal workday.
Q: How often should I plan for touch-ups on fine line parent portraits?
A: From what I have seen, plan for a light touch-up around year two to three for most fine line portraits. High-friction zones like fingers and wrists can need attention sooner. Longevity depends on sun exposure, skin type, and how dense the original saturation was.
Q: What's a good way to find an artist who specializes in realistic mom or dad portraits?
A: Use local shop directories and tattoo convention listings to find artists who post healed portrait work. Search hashtags focused on healed portraits and look for portfolios showing similar skin tones and placements to yours. Community forums and dedicated directories also help you filter for artists who do consistent photorealism.
