
Fine line sketch work looks effortless on a screen, but in a chair the choices you make about placement, spacing, and contrast decide whether the piece still reads in five years. Trends push tiny, busy designs now, and the reality is those need room and smarter line weight to avoid merging. Below are 17 sketch-style lights concepts that plan for aging, placement, and style so you get a design that reads like a sketch and lasts like a tattoo.
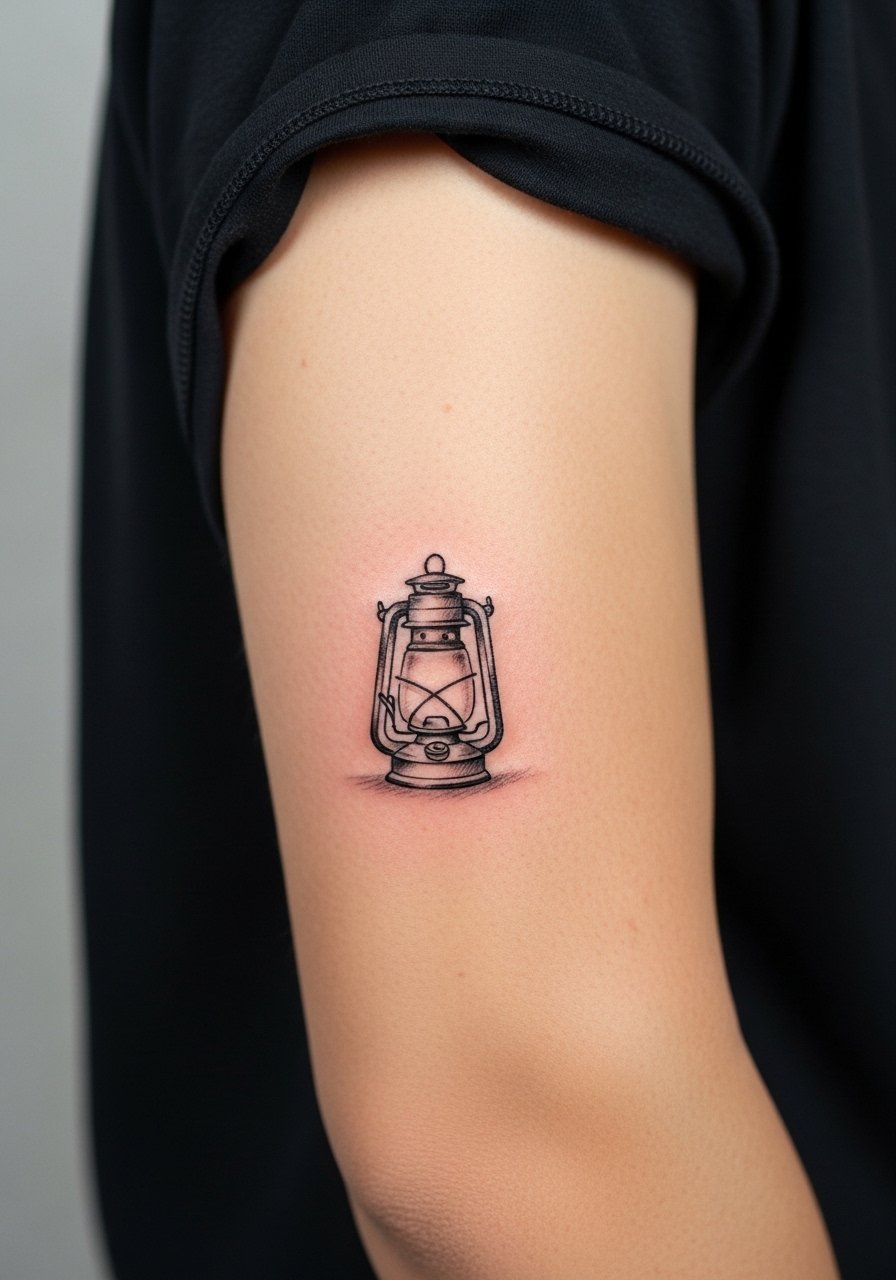
1. Sketch Lightbulb on Inner Forearm
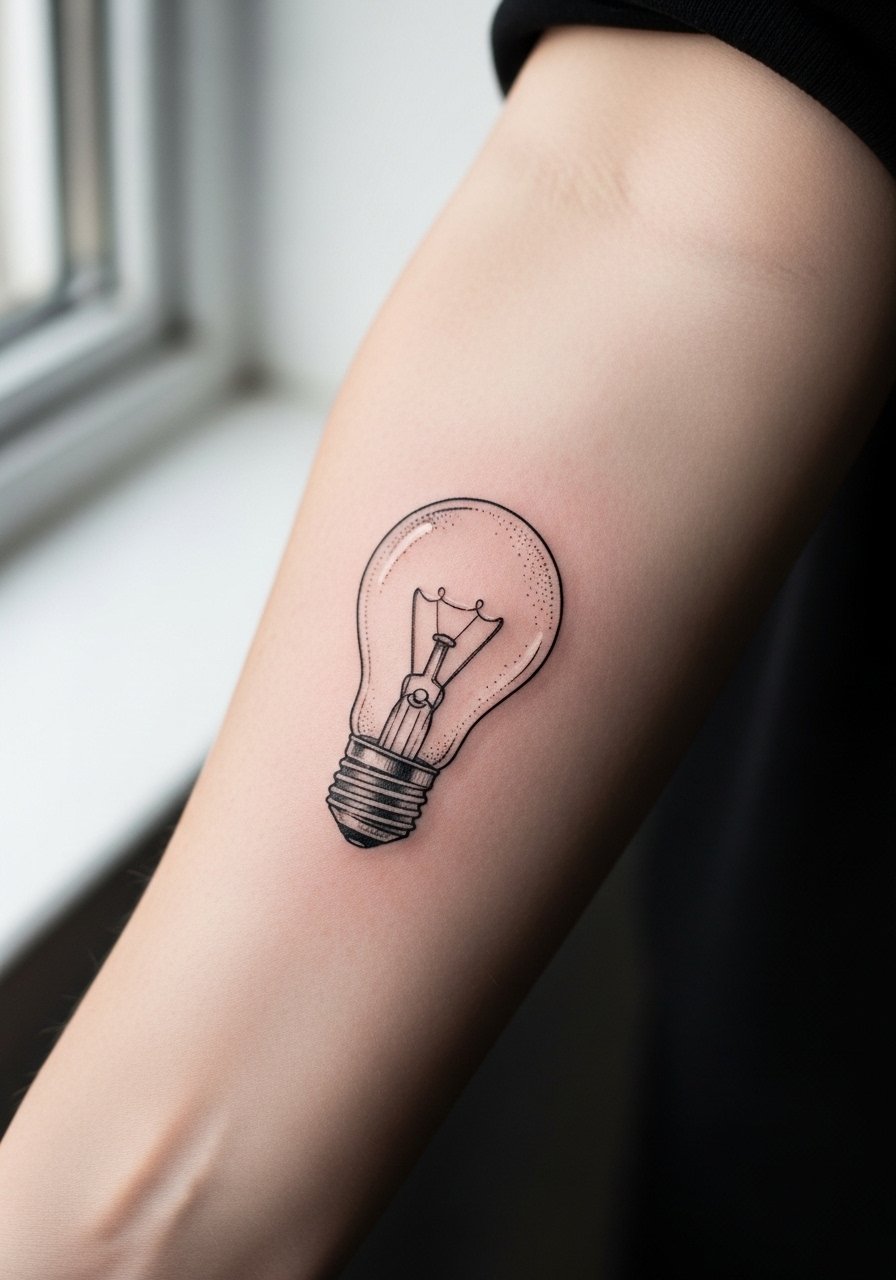
This small sketch bulb reads like a doodle brought to skin. For long-term clarity, ask your artist for slightly heavier main contours with lighter internal sketch lines. Expect a mild pain level and a 45 to 75 minute session for a clean piece. Common mistake is asking for ultra-thin single lines across the entire bulb, which tend to soften into blur by year three. Tell the artist you want visible structure lines and faded sketch marks inside the glass so the design still reads when the delicate interior lines lighten. Pair this with rolled sleeves or a loose linen button-down to show the forearm without crowding the linework.
2. Flickering Candle on Sternum
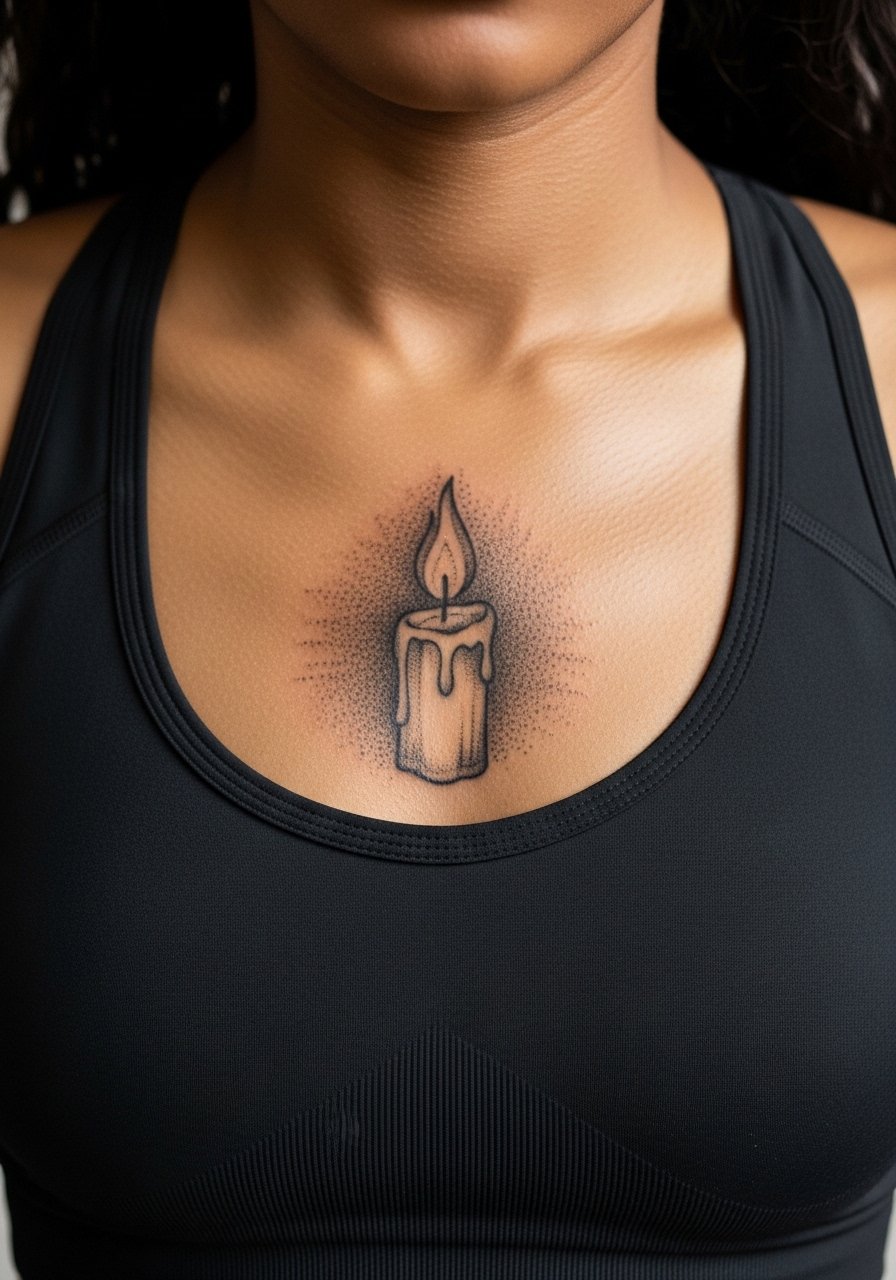
Sternum placements can be dramatic but they demand care during consultation. Pain on the chest is higher than the arm, and sessions can sit around 60 to 120 minutes depending on size. One camp argues fine sketch lines on the sternum blur because the skin shifts over the ribs. The other camp says careful depth and slightly bolder anchor lines keep the design readable. Name both views in your consultation and ask which approach the artist favors. Avoid crowding tiny script around the candle. For session comfort, wear a fitted sports bra so the artist has access without full exposure.
3. Lighthouse Outline on Upper Arm
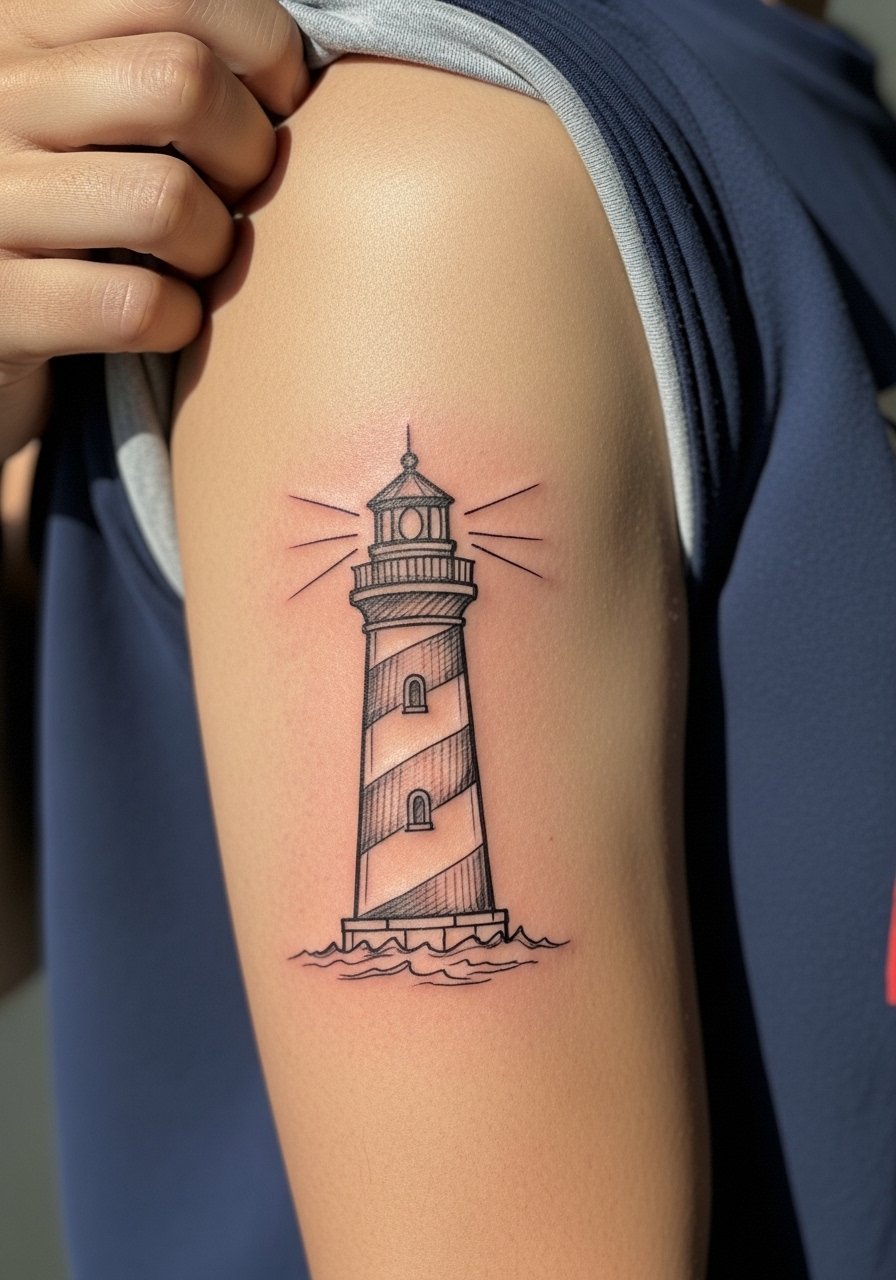
A lighthouse suits the upper arm because the canvas is forgiving for line variation. Expect moderate pain and a session of 60 to 90 minutes. For this style, tell your artist you want motion in the beam, rendered with sketchy strokes rather than heavy black fill. The aging story is favorable here because the upper arm tolerates density well, but avoid packing tiny cross-hatching into the beam. A common mistake is placing too much tiny detail in the windows, which loses definition over time. Show it off with sleeveless knitwear or a loose tank top that keeps the silhouette visible.
4. String Lights Along Collarbone
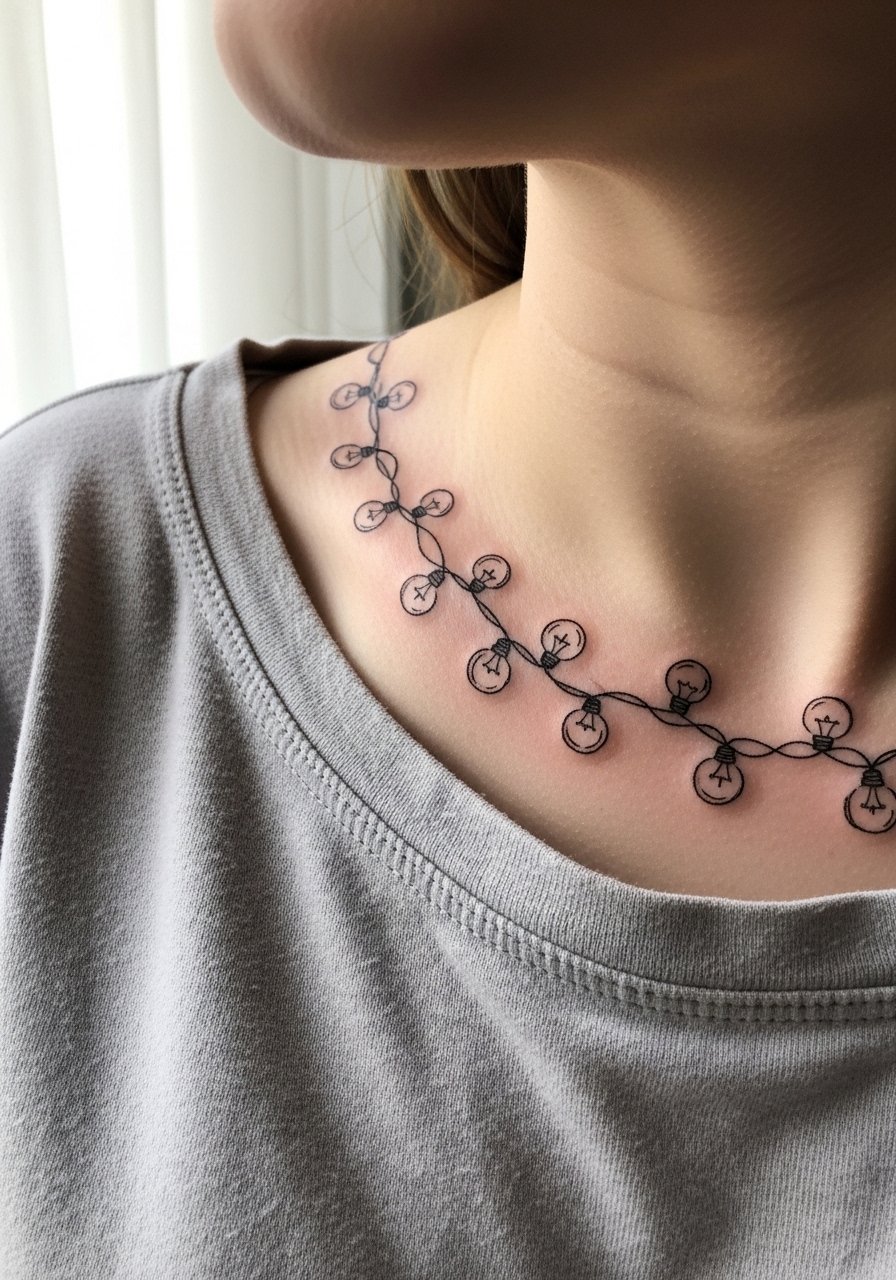
Collarbone string lights play nicely with jewelry and neckline choices. The area is sensitive so expect a sharp sensation and a session under 90 minutes for a small to medium length. In consultations, ask for slightly staggered bulb spacing and variable line weight so the bulbs remain distinct as skin shifts. A mistake is asking for bulbs too close together, which merges when lines soften. For evenings out, pair this piece with a thin chain pendant necklace that sits above the lights without competing for attention.
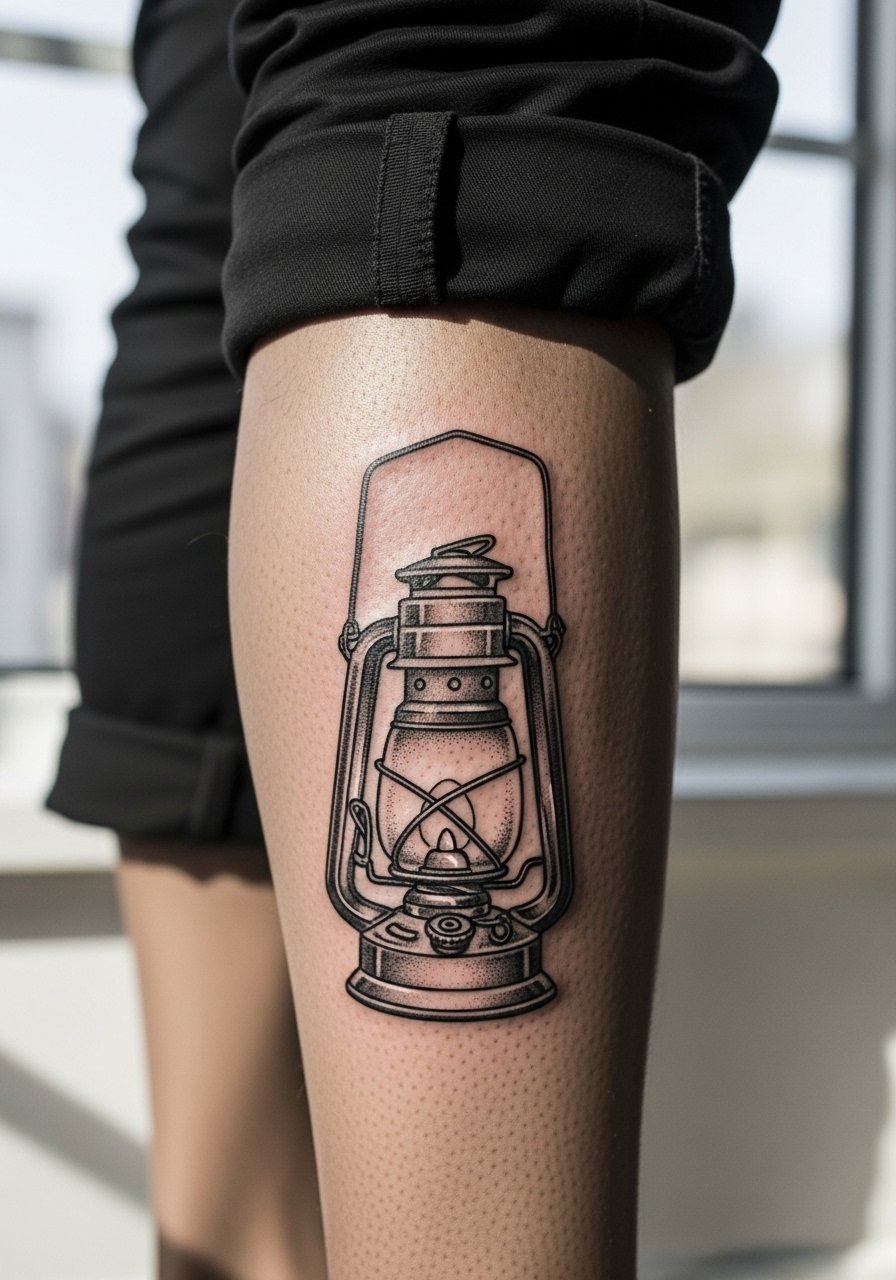
5. Pocket Lantern on Hip
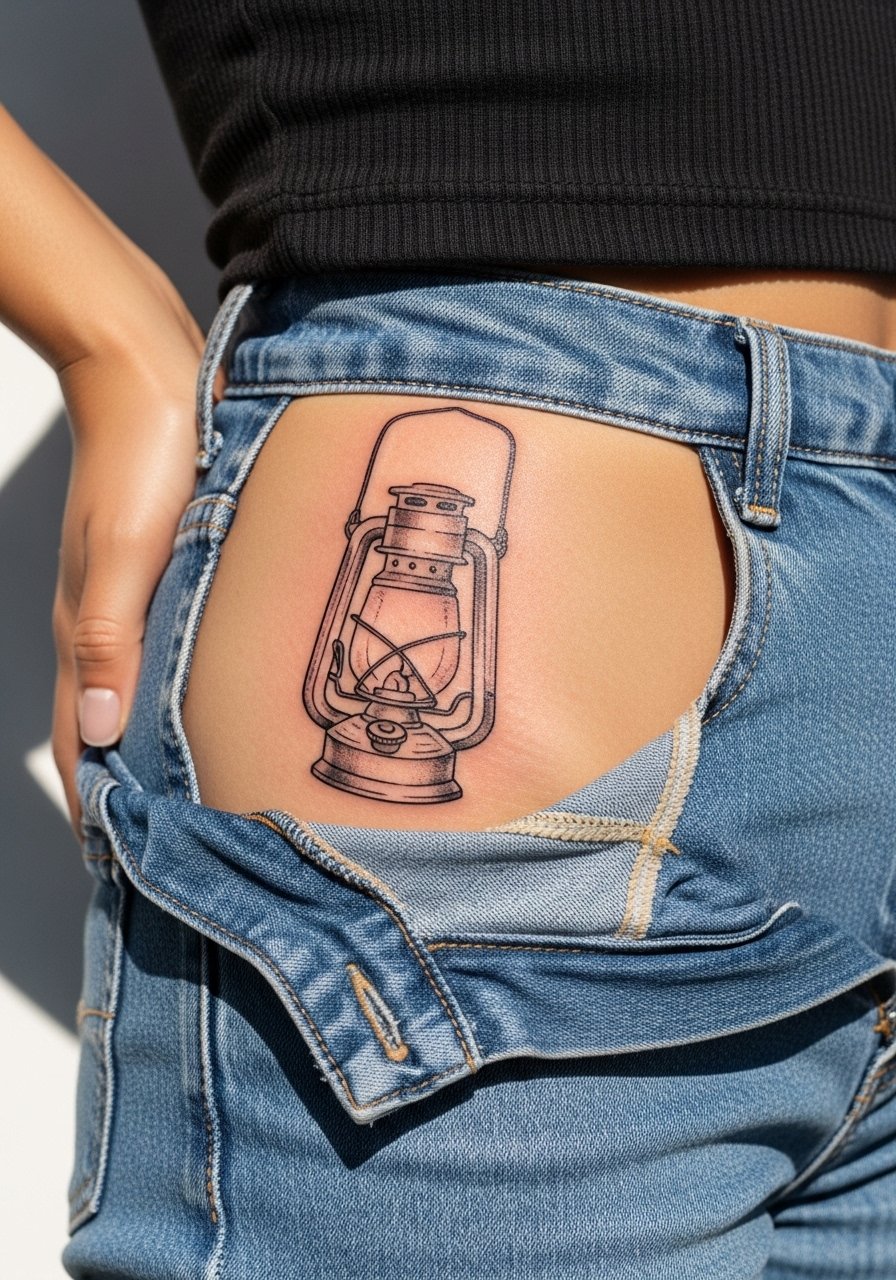
Hip placements are intimate and flattering when designed with skin movement in mind. Session time varies from 45 to 90 minutes and the area can be tender. The most common error is using dense cross-hatching across the lantern body. That detail settles into a blotch on moving skin. Ask for open negative space within the lantern so the sketch marks read as texture, not filled tone. For the appointment, wear high-waisted bottoms that you can shift easily such as a high-waisted denim skirt so access is simple and modest.
6. Neon Sign Script on Ribcage

Ribcage work reads striking in sketch neon script but the skin there moves a lot. Expect higher pain and a 90 to 150 minute session depending on size. Artists split into two camps on fine-line ribs. One camp warns that thin script blurs within two years. The other camp argues that with slightly bolder anchor strokes and careful spacing the lettering holds. Name both positions during your consult and ask which technique your chosen artist uses. Avoid tiny continuous script across multiple ribs. For session ease, wear a cropped athletic top so the artist can expose only the work area.
Studio Day Picks
The chest, ribcage, and hip pieces above need different prep than the forearm and collarbone work, so these picks make getting in the chair and the first week easier.
-
Stencil transfer paper kit. Lets you preview how the lantern and neon script sit on curved areas before the needle hits skin.
-
Topical numbing cream. Useful for ribcage and hip sessions when you need a gentler first hour without altering the linework.
-
Thin protective film roll. Ideal for small pieces like the inner forearm bulb and collarbone string lights that face friction from clothing.
-
Fragrance-free gentle body wash. Cleanses healing areas without stripping the skin or disturbing fine lines.
-
Aquaphor healing ointment. Thin layers help preserve delicate sketch shading in the first days while skin repairs.
7. Lantern Pocket on Inner Thigh
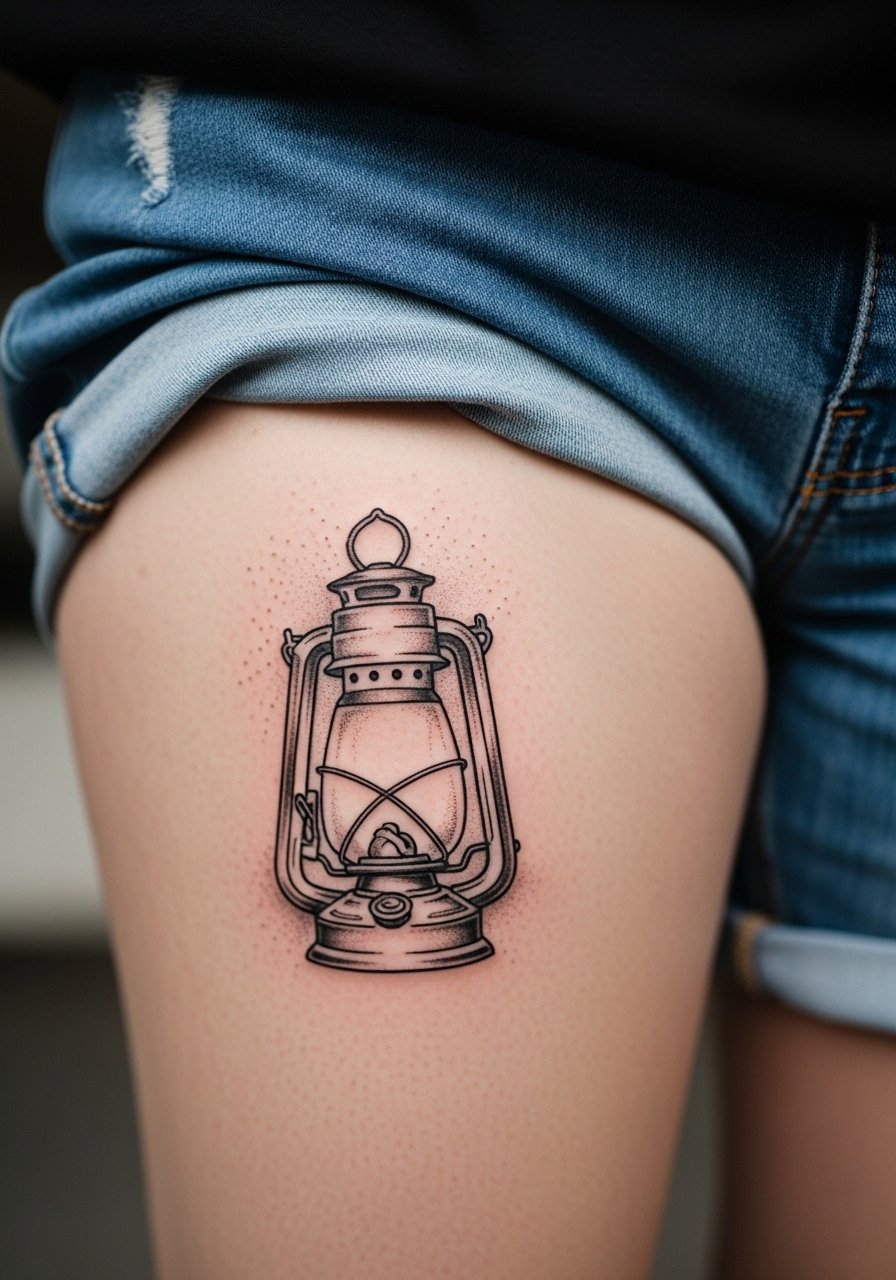
Inner thigh placements are private and heal under less sun exposure, which helps delicate sketch marks hold. Sessions run 60 to 120 minutes and the area is medium on pain. Avoid tiny dotted shading packed tightly, which can merge when the skin stretches. In consults ask for more negative space and broader stipple clusters that read from a short distance. For the session, wear loose shorts or a wrap skirt so you can adjust access without discomfort.
8. Pocket Watch with Beam on Calf
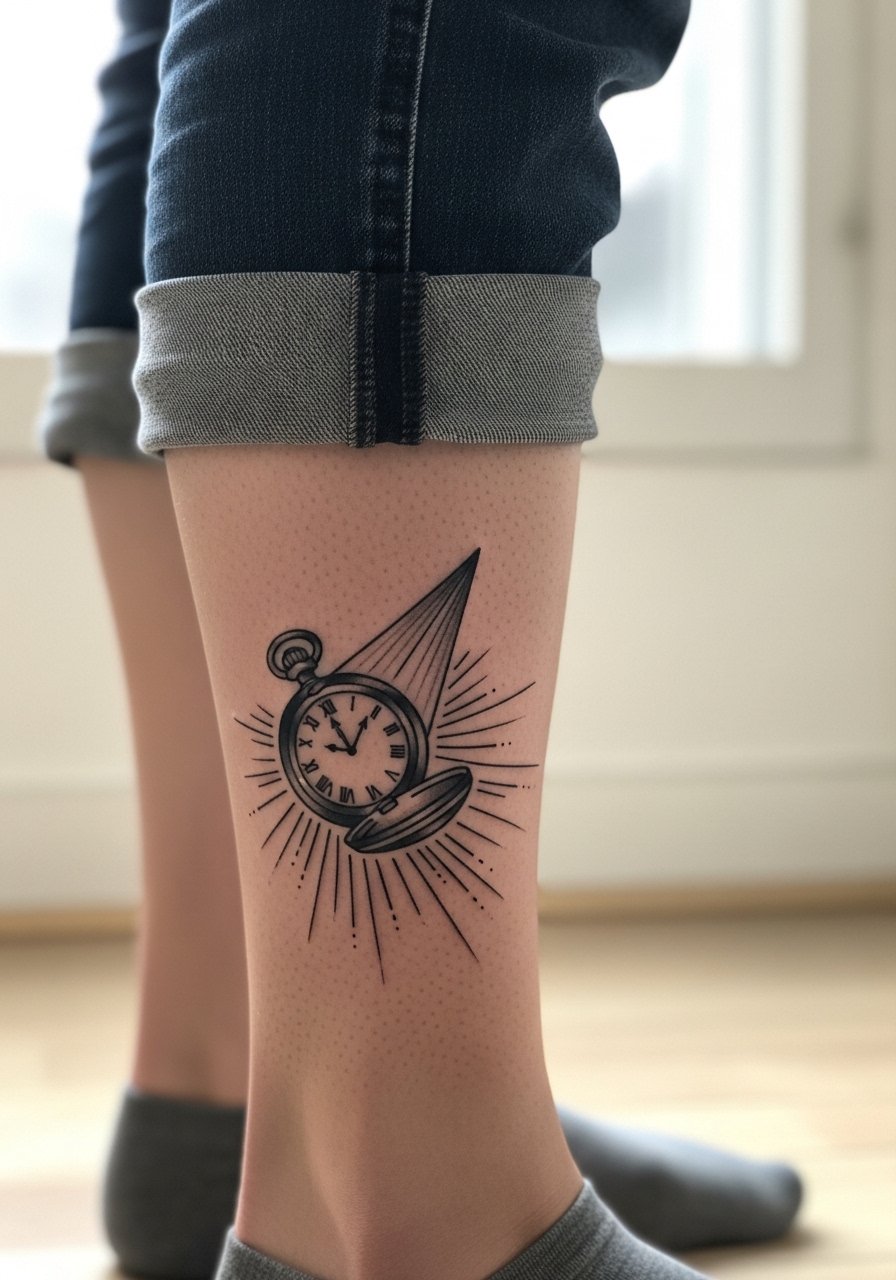
Calf tattoos handle a lot of linework and are less prone to blowout than inner forearm. Expect 45 to 90 minutes depending on detail. The common mistake is overloading the face of the watch with micro-etching that reads as noise after a few years. Ask the artist for clear hour marks and sketchy beam strokes radiating outward. For showing it off, roll up jeans or wear a mid-length skirt to keep the piece visible without competing patterns.
9. Mini Lantern Behind the Ear
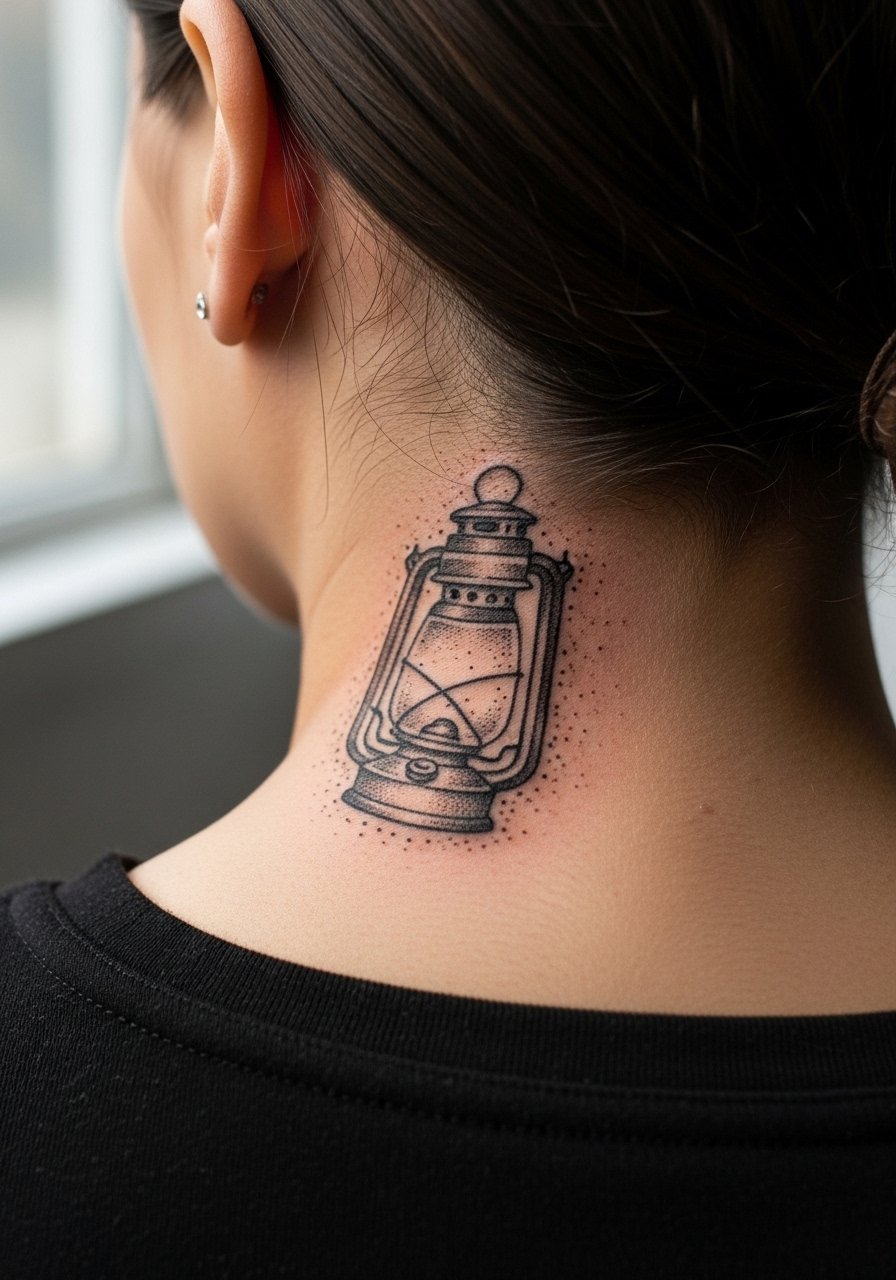
Behind-the-ear tattoos need a precise stencil placement because even a millimeter shift changes the shape when hair covers it. Sessions are short, usually 20 to 45 minutes, but the area is sharp in sensation. Keep the design small and avoid dense shading. A frequent error is requesting heavy shading to make the piece "pop" through hair. If you plan to reveal it, a short hair sweep or tucked style works, but be ready for touch-ups sooner than larger placements because the skin there is thin.
10. Sketch Street Lamp on Ankle
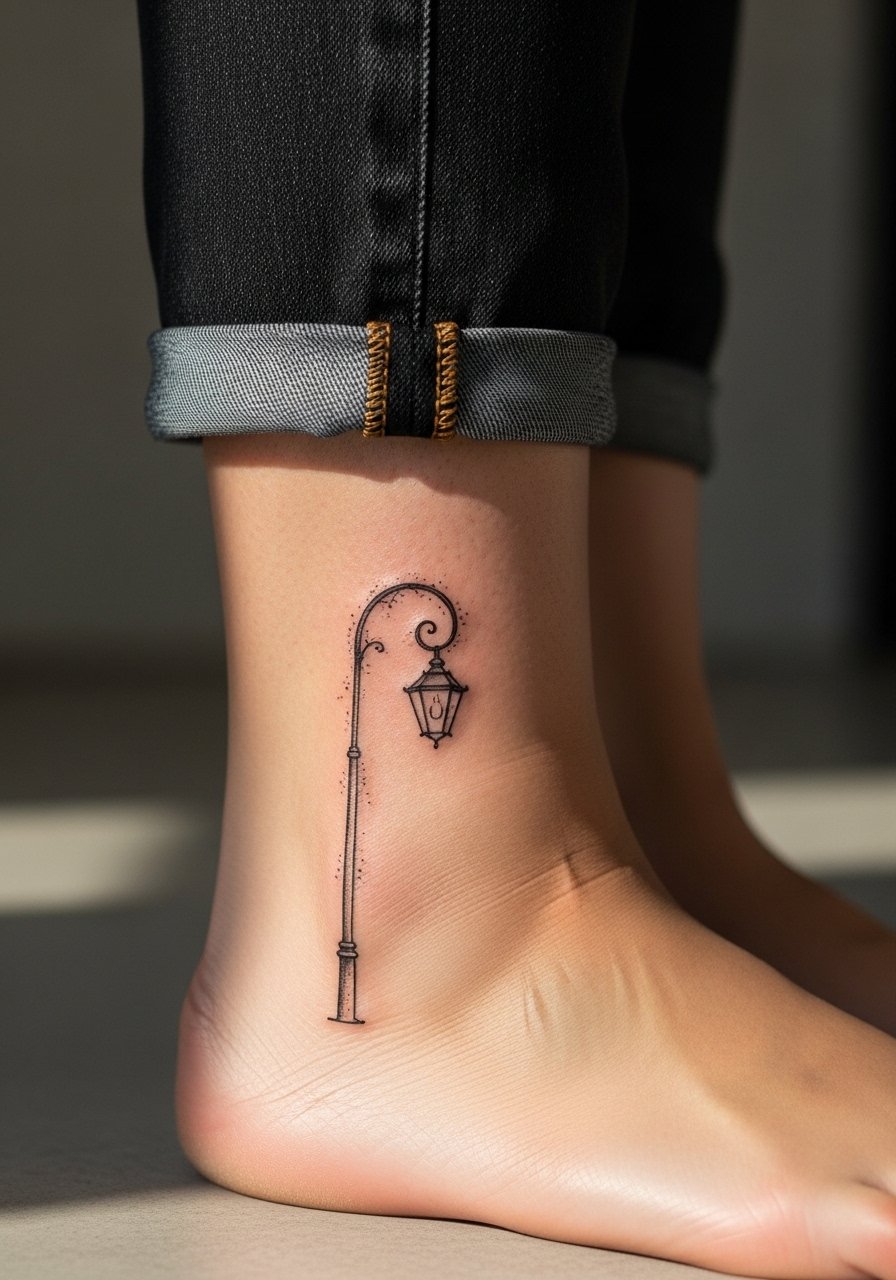
Ankle pieces face constant friction from socks and shoe collars, which affects fine sketch lines. Expect 30 to 60 minutes and mild to moderate discomfort. A common mistake is placing extremely fine cross-hatching near the base of the lamp. That detail wears fastest. Tell your artist you want the pole and lamp outline slightly bolder with inner sketch marks feathered sparsely. Pair with sandals or rolled jeans and a pair of low profile sandals when you want the piece visible.
11. Candle Jar on Back of Shoulder
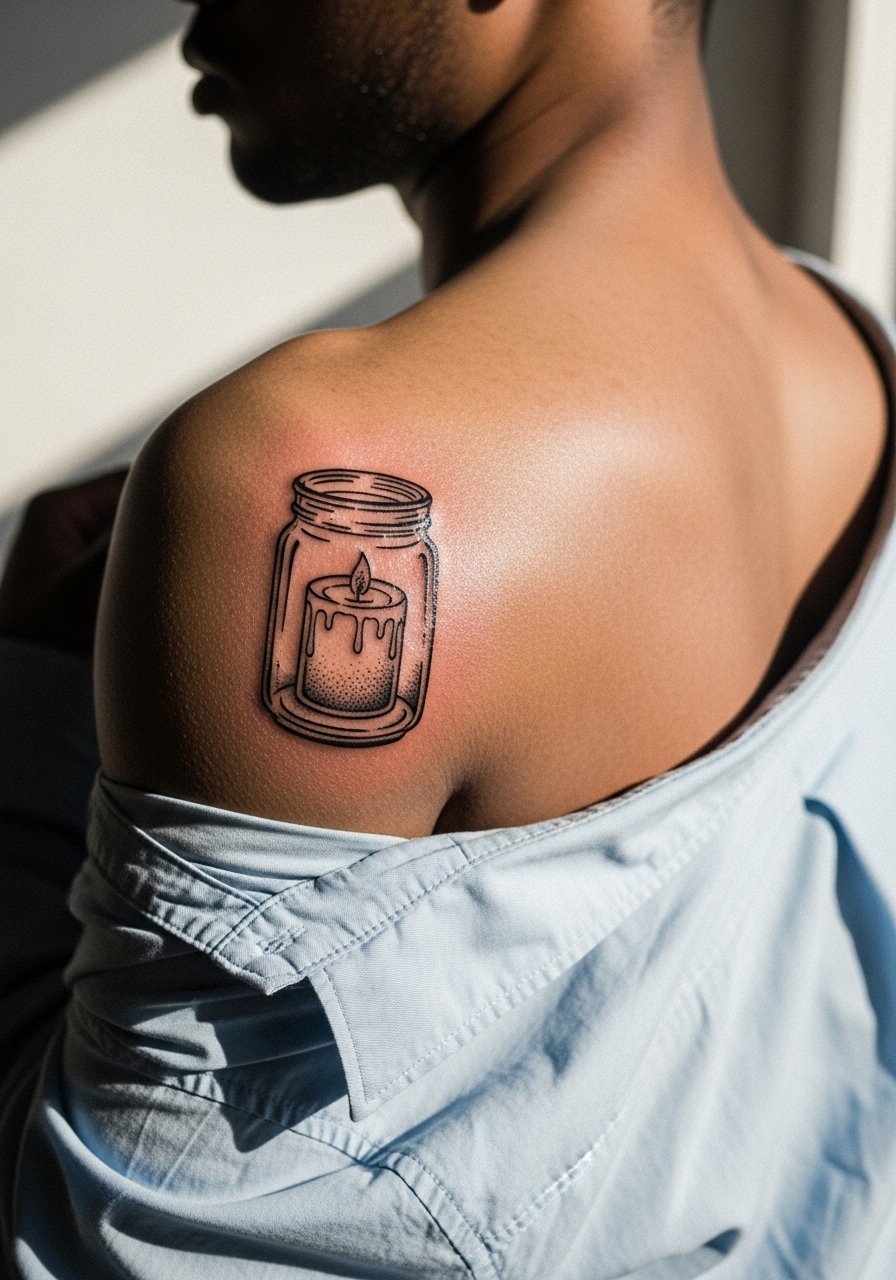
The back of the shoulder gives room for a sketch jar that reads in motion. Pain is low to moderate and sessions run 45 to 90 minutes. The main mistake is asking for packed shading that ends up muddy under shirts. Ask for airy stipple shading and defined contour marks so the jar keeps its silhouette. During the appointment, wear a loose button-down shirt you can shift aside without discomfort.
12. Neon Compass on Lower Back
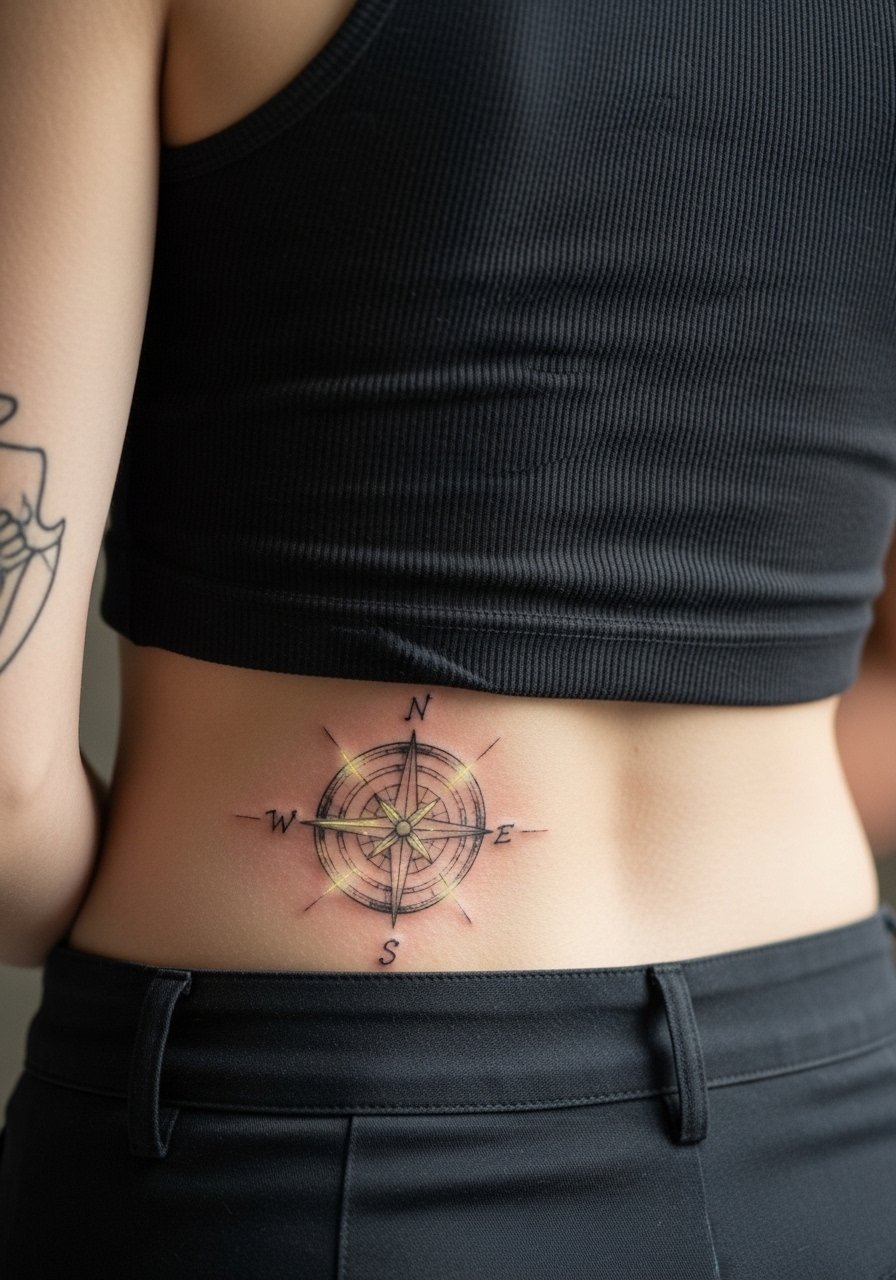
Lower back placements are less visible day to day but they accept more line weight and contrast. Sessions are moderate in length, usually 60 to 120 minutes depending on size. A common error is centering tiny script around the compass. Keep lettering minimal and prioritize the compass arm clarity. If you plan to wear low-rise or open-back garments, an open-back dress shows the design without distortion.
13. String of Stars Along Spine
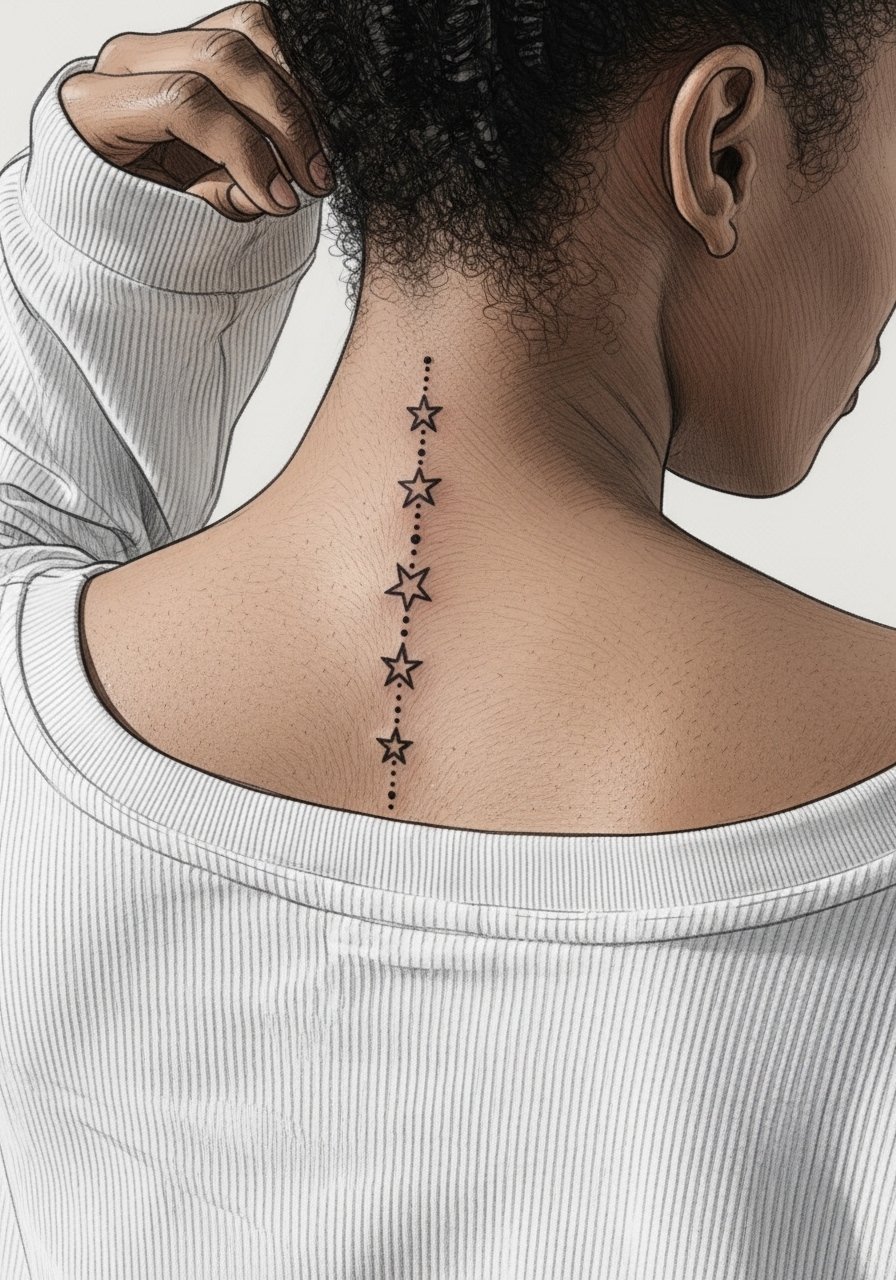
Spine work is sensitive and requires precision. Expect sharp sensations and session times that vary with length, often staged across sittings for longer pieces. The biggest mistake is spacing stars too tightly. Plan bigger gaps and varied star sizes so they remain individual over time. For showing off a short neck-to-shoulder string, a wide-neck shirt keeps the area visible without exposing more than intended.
14. Sketch Lantern Sleeve Accent Near Elbow
Elbow-adjacent work meets a lot of motion and abrasion. Pain ranges higher at the joint and session times are moderate. A common mistake is packing detailed lantern interiors too close to the crease. The result distorts when you bend the arm. Ask your artist to place the main focal elements just off the fold and use sketchy strokes around the curve. For casual wear, rolled sleeves and a short-sleeve linen shirt keep the accent visible.
15. Sketch Light Trail Around Wrist
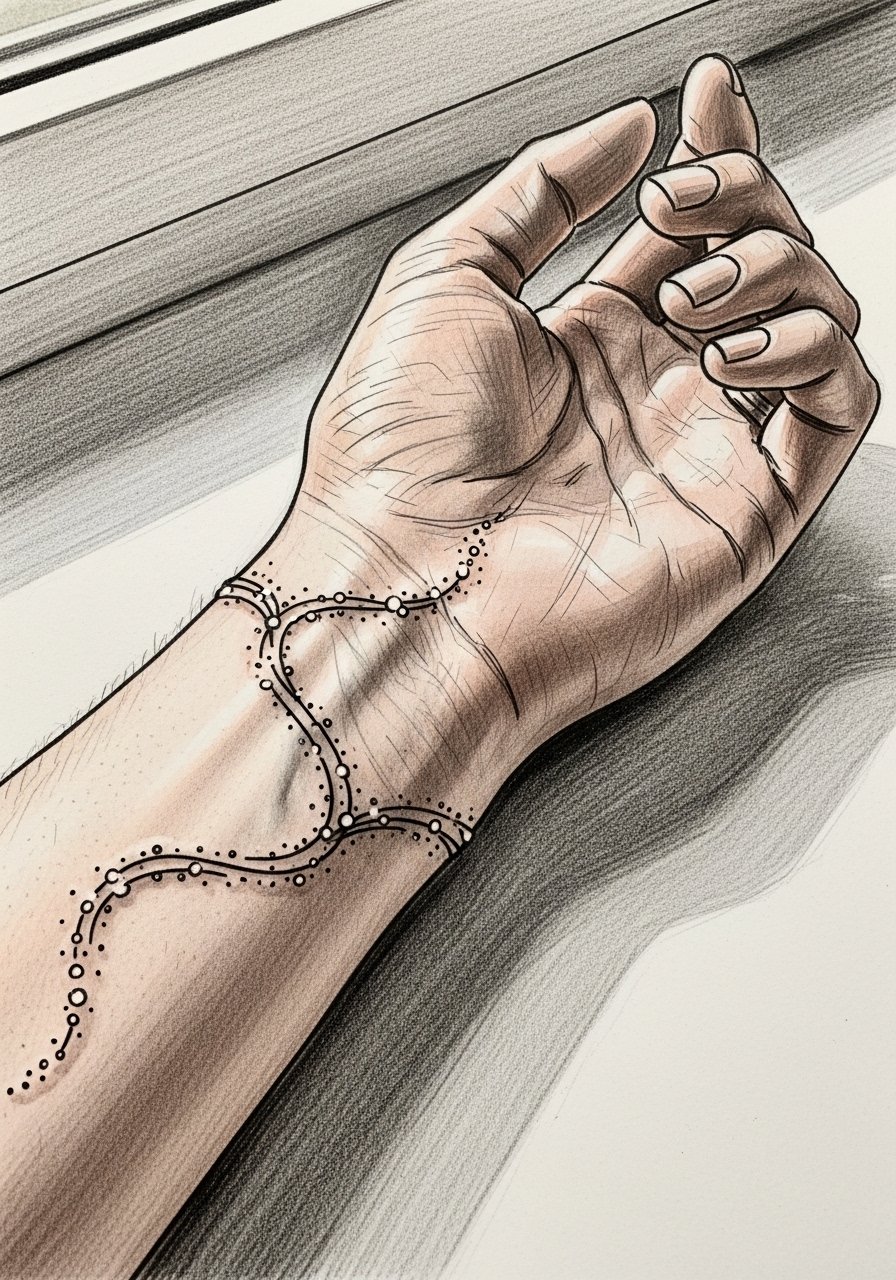
Wrist wraps are highly visible and subject to repeated washing and friction. Sessions are short, usually under an hour, but touch-ups are common for thin sketch marks. The mistake is using continuous micro-strokes around the circumference that blur where skin folds. Ask for intermittent breaks in the trail with slightly bolder anchor points to maintain legibility. Stack with a minimalist watch or a thin leather bracelet so the accessory frames the tattoo rather than crowding its negative space.
16. Pocket Lantern on Calf Inner Side
Inner calf skin is forgiving and tends to hold contrast well. Sessions can be 45 to 90 minutes with moderate discomfort. The common error is too much tiny texture inside the lantern body. That texture can read muddy after a few years. Ask for larger stipple clusters and fewer micro details so the lantern keeps its silhouette at distance. For appointment comfort, wear pants you can roll easily like drawstring linen pants.
17. Tiny Beacon on Finger Side
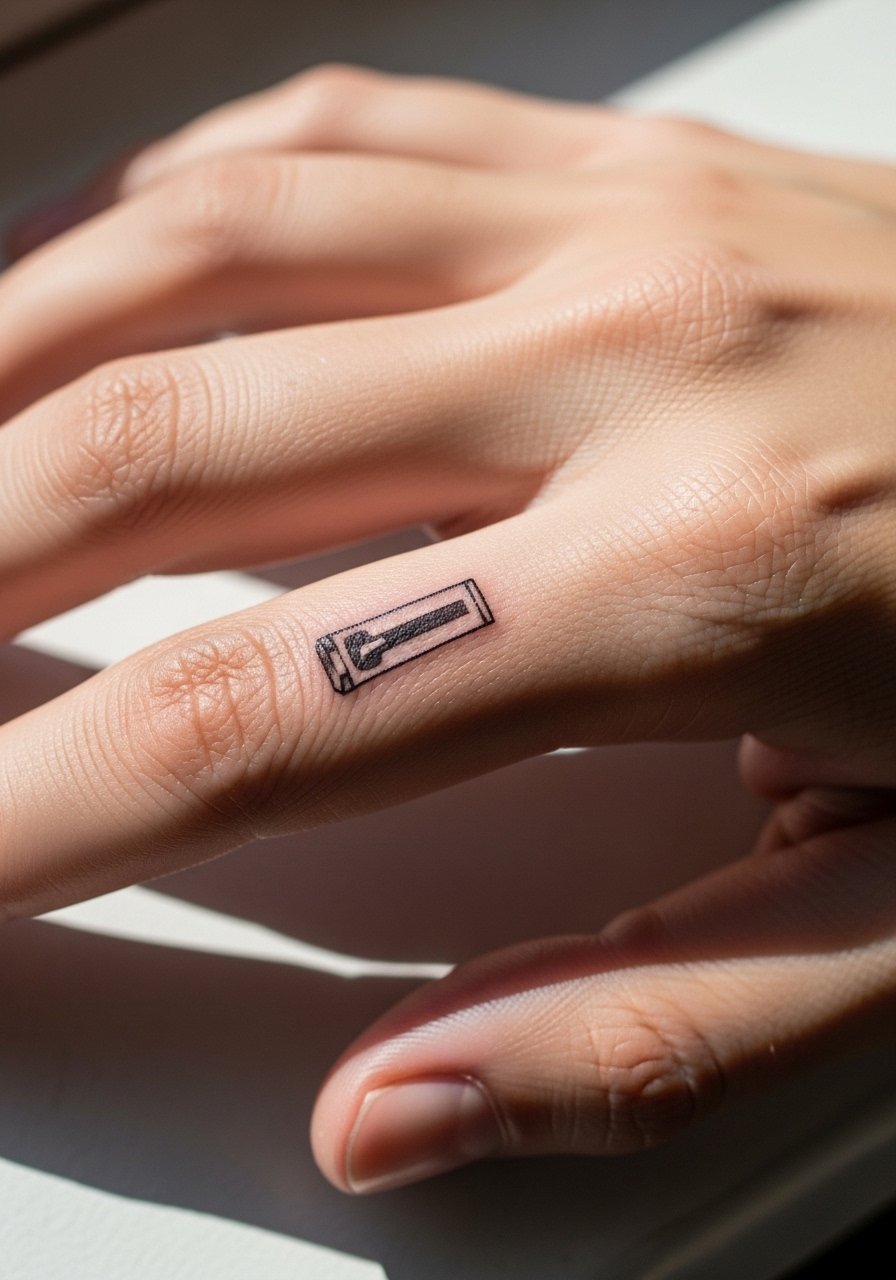
Finger-side tattoos are trend-forward but they age fastest because of constant use and washing. Expect a short session but plan on a touch-up within a year or two. The biggest mistake is requesting thin uninterrupted lines around knuckles. Those lines can blur or flake during healing. Ask the artist to use small anchor points and tiny negative spaces to suggest a beacon rather than fully outlining it. If you want the piece to show occasionally, a slim ring or a thin stacking ring sits beside the tattoo without covering the linework.
Frequently Asked Questions
Q: Will sketch-style fine lines on the ribs definitely blur faster than on an arm?
A: It depends on placement and how the lines are composed. Ribs move a lot and thin continuous strokes there are at higher risk of softening. If the artist uses slightly bolder anchor lines and spaces the elements, ribs can hold sketch work longer. Ask for examples of healed rib work in the artist's portfolio.
Q: How do I phrase my consultation request so a lantern or bulb looks like a sketch and not a smudge later?
A: Say you want "visible anchor contours with internal sketch marks and airy stipple," and ask the artist to show you how those details look in healed photos. Mention concerns about spacing and touch-up timelines so they can plan depth and spacing accordingly.
Q: Can I get a neon-script design on the sternum if I work in a conservative office?
A: Sternum ink is easy to conceal under standard office clothing. The concern is comfort during sessions and the higher touch-up need for fine script. If discretion matters, discuss size and placement so the text sits where a blouse or collared shirt covers it.
Q: How often do sketch-style wrist or finger pieces need touch-ups compared with forearm pieces?
A: From what I've seen, wrists and fingers require touch-ups earlier because of friction and washing. Forearms tend to keep linework longer. Expect touch-ups at year one to three for fingers and at year three to five for forearms depending on sun exposure and care.
Q: Where should I look to find an artist who specializes in sketch-style work without naming specific shops?
A: Use discovery pathways like local shop directories, niche hashtags for sketch tattoos, and community threads on tattoo forums. Search for healed photo tags in your city and check portfolios for healed shots not just fresh work. That shows how the style ages in real skin.
