
Fine line trend photos make sketch wolves look weightless on a thumbnail. The reality is that sketch style depends on spacing, needle rhythm, and placement if you want the jagged, pencil-like energy to hold over years. These picks focus on wolf motifs that read like sketches now and still read like wolves after a few seasons of sun and daily life.
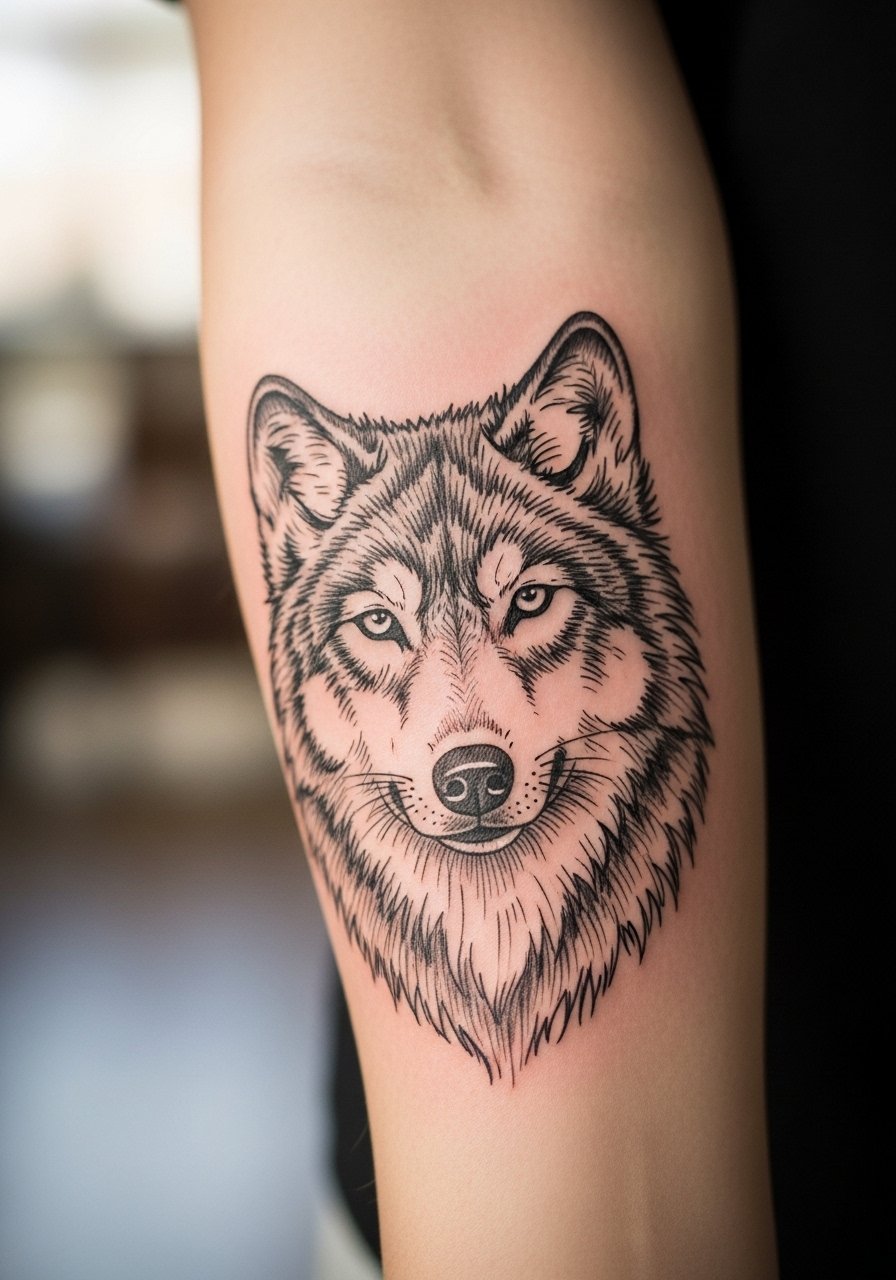
1. Small Inner Forearm Wolf Sketch
A compact sketch wolf on the inner forearm reads like a private emblem. I recommend spacing the fur strokes slightly looser than the reference art so the stipple and short hatch marks have room to settle. In consultation ask for light whip shading with a denser anchor line at the jaw to keep the face readable as the tattoo heals. Expect a moderate pain level and a one-hour session for a palm-sized piece. Common mistakes include cramming too many tiny strokes into the muzzle which blur after two years. For showing it off roll sleeves or wear a loose linen button-down so the forearm sits visible without looking staged.
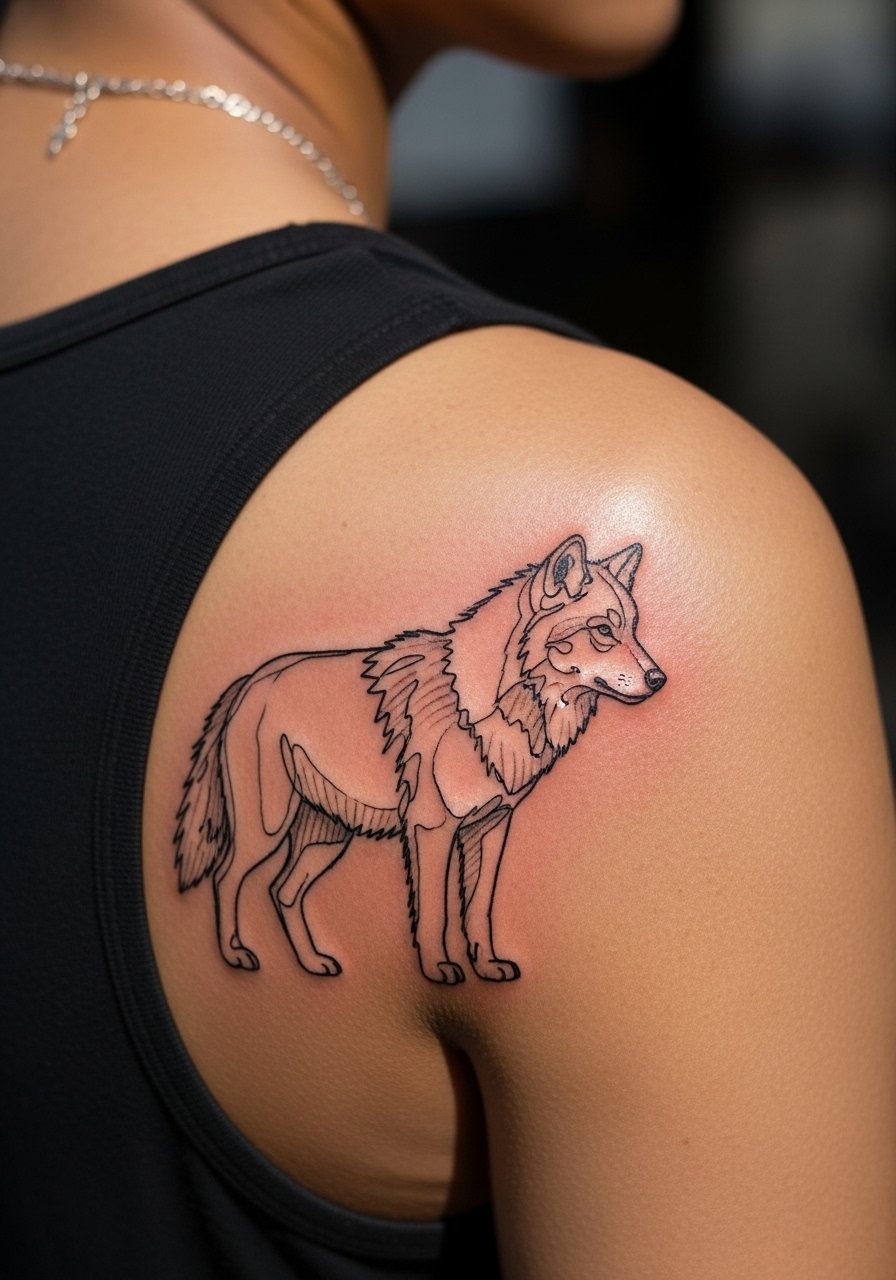
2. Shoulder Blade Single-Line Wolf Sketch
This placement lets a sketch-style wolf breathe across flat skin which preserves long, fluid strokes. I like single-line elements that suggest fur without filling the whole space. Tell your artist you want deliberate breaks in the linework so the piece keeps a sketchy motion after settling. The session runs about 90 minutes for a shoulder blade motif and pain is usually mild to moderate. Watch out for the common mistake of over-detailing at the edges which ages into an indistinct gray. For finding an artist, search local shop portfolios, check convention booths, and read recent client photos on community threads to see healed pieces.
3. Collarbone Mini Wolf Portrait
A mini wolf near the collarbone reads intimate and directional. For lasting clarity request slightly heavier micro-anchor lines near the eyes and lighter hatchwork across the cheeks. Expect the session to be short, under an hour, with a sensitive but tolerable pain because the area has thin tissue. Most mistakes come from making contrast too soft which disappears after the first year. For evenings out, pair this with an open-back dress or a thin chain pendant necklace that keeps attention on the collarbone without crowding the sketch. The visual feels personal and a little defiant when styled right.

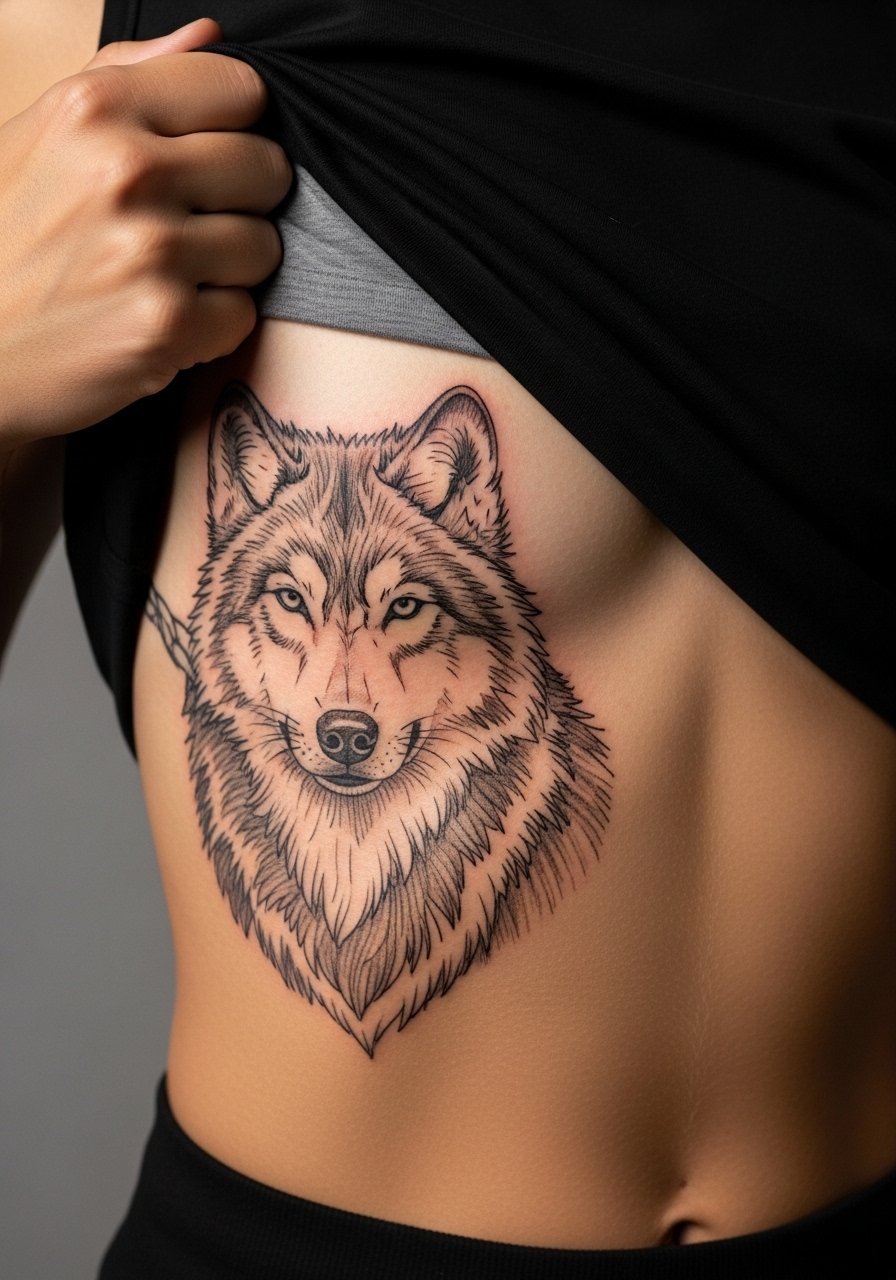
4. Ribcage Full Wolf Sketch
Fair warning the ribcage moves and stretches which changes fine line detail over time. Artists split on this placement into two camps. One camp says fine line on the ribs blurs within two years because of constant motion and thin skin. The other camp argues that with careful depth and strategic spacing the sketch style settles fine. If you choose ribs ask for fewer micro strokes and more negative space so the composition stays readable. The session can run long and pain is high, so plan for breaks. Expect to need a touch-up earlier than forearm pieces if you push density.
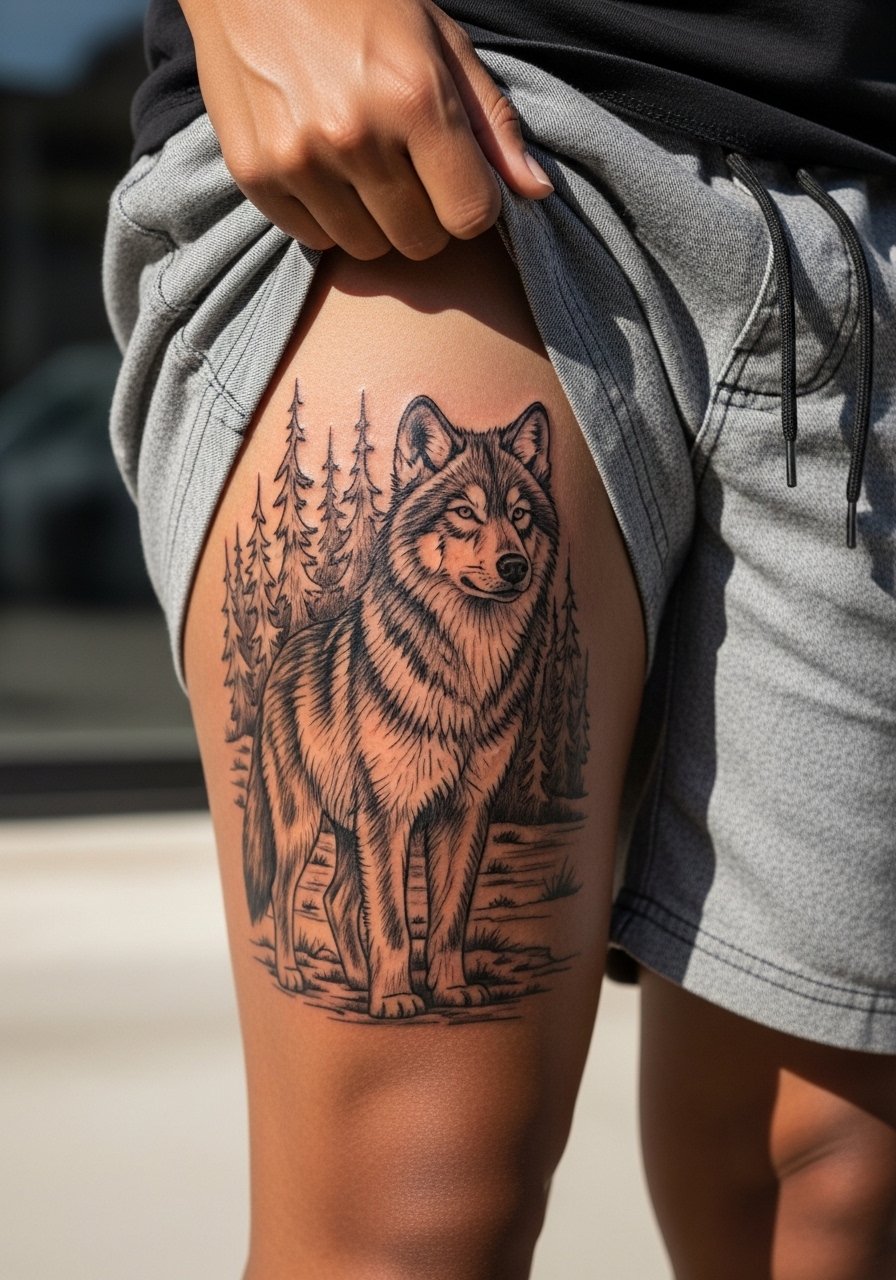
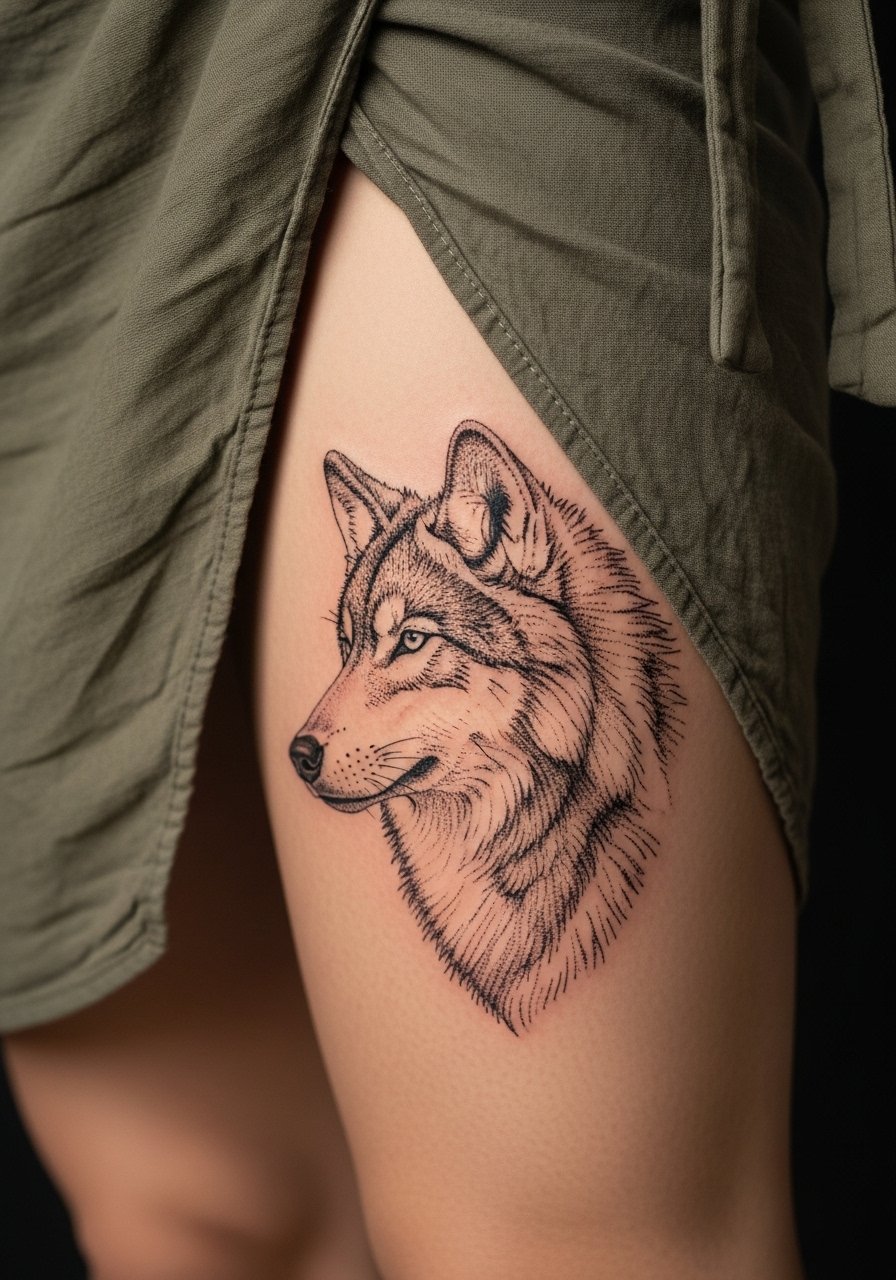
5. Thigh Half-Sleeve Sketch Wolf Scene
Thigh skin tolerates shading which makes it ideal for a sketch-scene with motion lines and a moonlit background. Tell your artist you want stipple shading for the shadow work and sparse hatch marks for fur texture so the piece can stand up to friction from clothing. Sessions are comfortable compared with ribs and you can sit for longer blocks, so expect two to four hours depending on scale. Avoid packing tiny texture into narrow bands that will merge after a year. For the appointment wear loose drawstring linen shorts so the artist can access the area without tugging at seams.
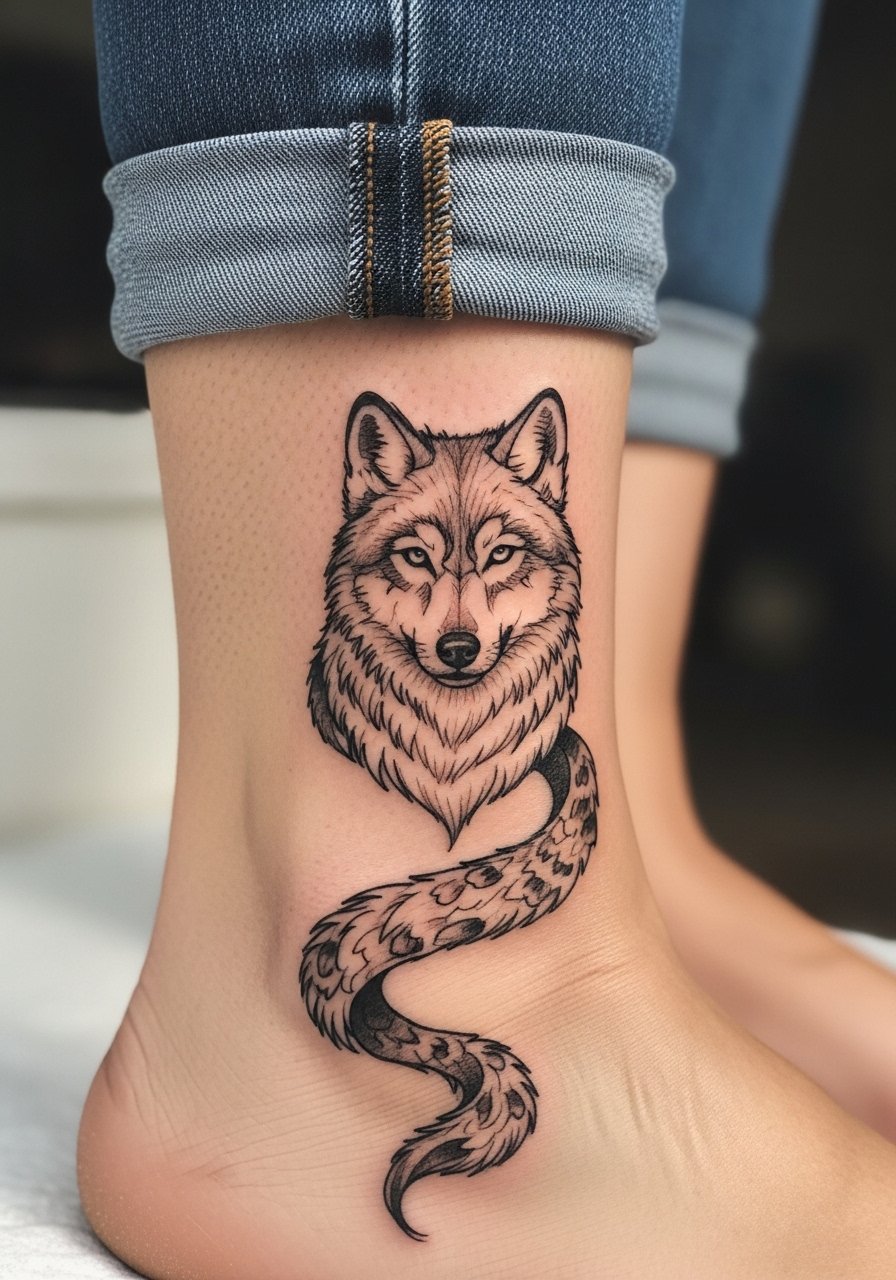
6. Ankle Wrap Wolf Sketch
Ankle wraps with a running sketch wolf work well for people who like movement in small places. The ankle gets a lot of daily friction so keep lines slightly bold at the wrap points to resist early fading. A single session of about an hour is common and the pain is sharp but quick. The frequent mistake is making the design too intricate around the bone which leads to early softening. For everyday wear choose low-profile footwear and show-off styling like rolled jeans with a pair of minimal leather sandals that keep the ankle visible without rubbing the tattoo.
Studio Day Picks
The ankle and thigh pieces above need different prep than collarbone and forearm work, so a few targeted items smooth the session and the first week.
-
Stencil transfer paper kit. Lets you preview how the wolf’s eye and jaw align on curved areas like the rib or thigh before they touch skin.
-
Topical numbing cream. Applied 45 minutes before helps with sensitive ribs and the inner thigh while keeping the artist’s linework intact.
-
Thin protective film roll. Useful for ankle wraps and wrist pieces where friction from shoes and bracelets threatens the first week.
-
Fragrance-free gentle body wash. Cleans healing sketch strokes without stripping the delicate hatch shading on forearm and neck pieces.
-
Aquaphor healing ointment. Thin layers help fine line work retain clarity during the initial flaky phase without clogging the channels.
7. Calf Running Wolf Sketch
A calf placement gives length which suits a running or howling composition. Use stipple and whip shading to create gap-tooth texture in the fur so the sketch look survives two to three years. Sessions tend to be comfortable and allow for longer sittings so you can add selective density around the eye and snout. The typical mistake is too much mid-tone shading which softens into a single gray mass over time. For nights out wear a mid-calf suede boot or cropped skirt that places the calf front and center without covering the art.

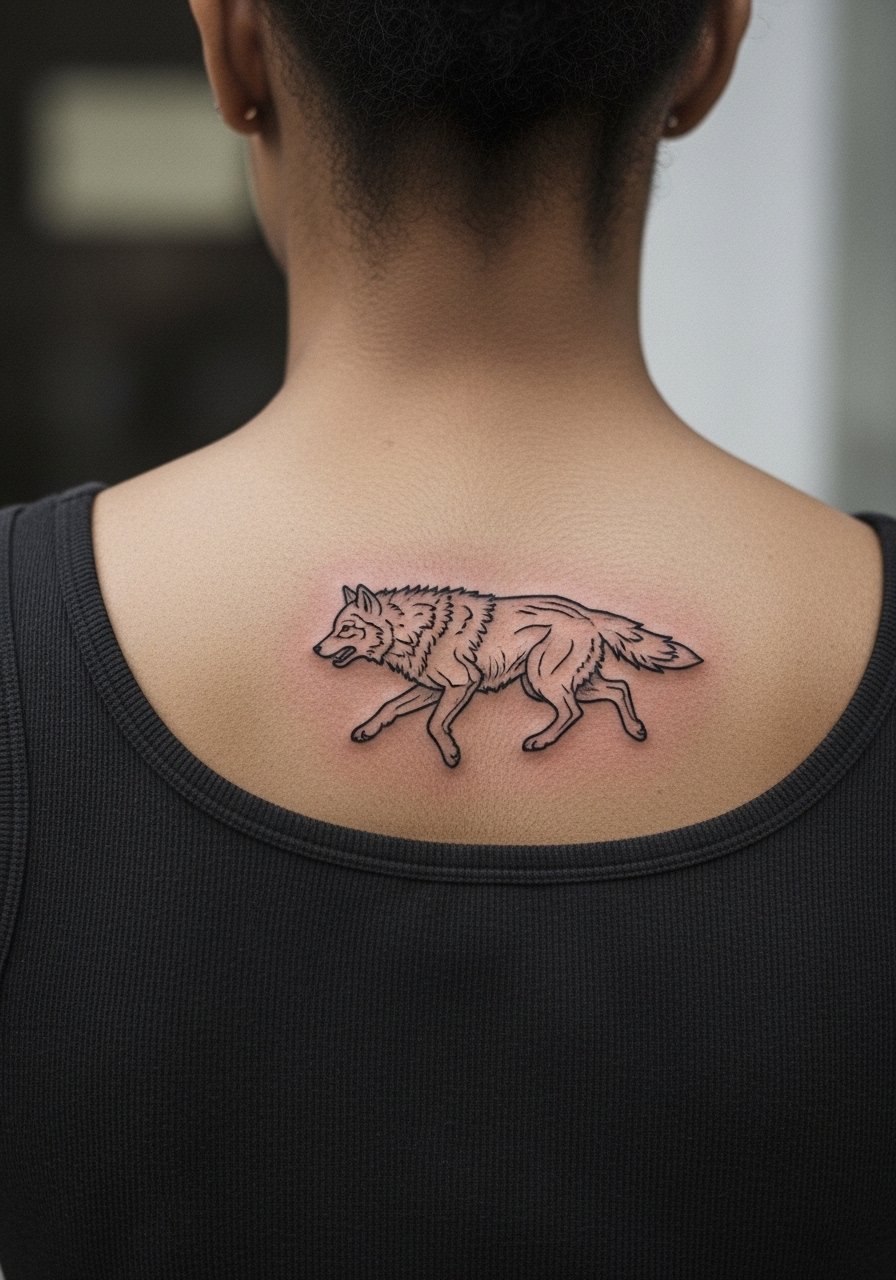
8. Upper Back Center Spine Wolf Linework
A vertical wolf along the spine reads graphic and strong in sketch form. Tell your artist you want denser anchor lines at top and bottom to keep the composition aligned as the back shifts. Sessions can be longer because the area tolerates lying face down. The main mistake is cramming too much facial detail into a narrow column which loses definition with movement. For discovering artists look through shop directories, tattoo convention portfolios, and community threads to see healed vertical pieces. If you plan clothing for photos, open-back tops frame the spine without adding competing patterns.
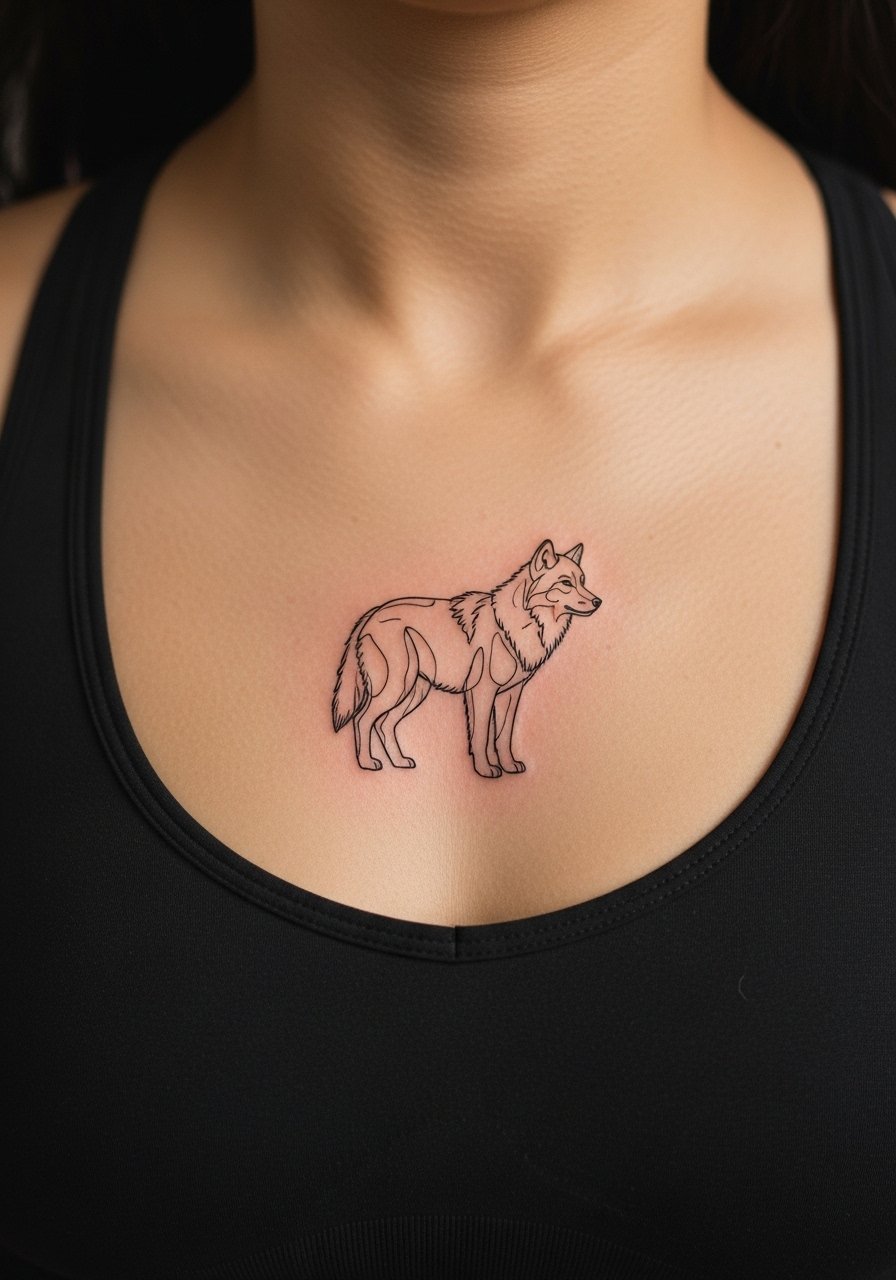
9. Sternum Micro Wolf Sketch
Sternum placements are intimate and require a steady hand for thin sketch strokes. Because this is below the neck the photo must show the area with a fitted sports bra or bandeau so only the sternum is visible. Request slightly heavier centerlines near the nose and eyes so the face stays legible as swelling subsides. The session is sensitive and usually short but intense. Artists argue about longevity for micro work here so ask about their healed photos. Plan to wear a strapless or zip-up top to the appointment for easy access and modesty.
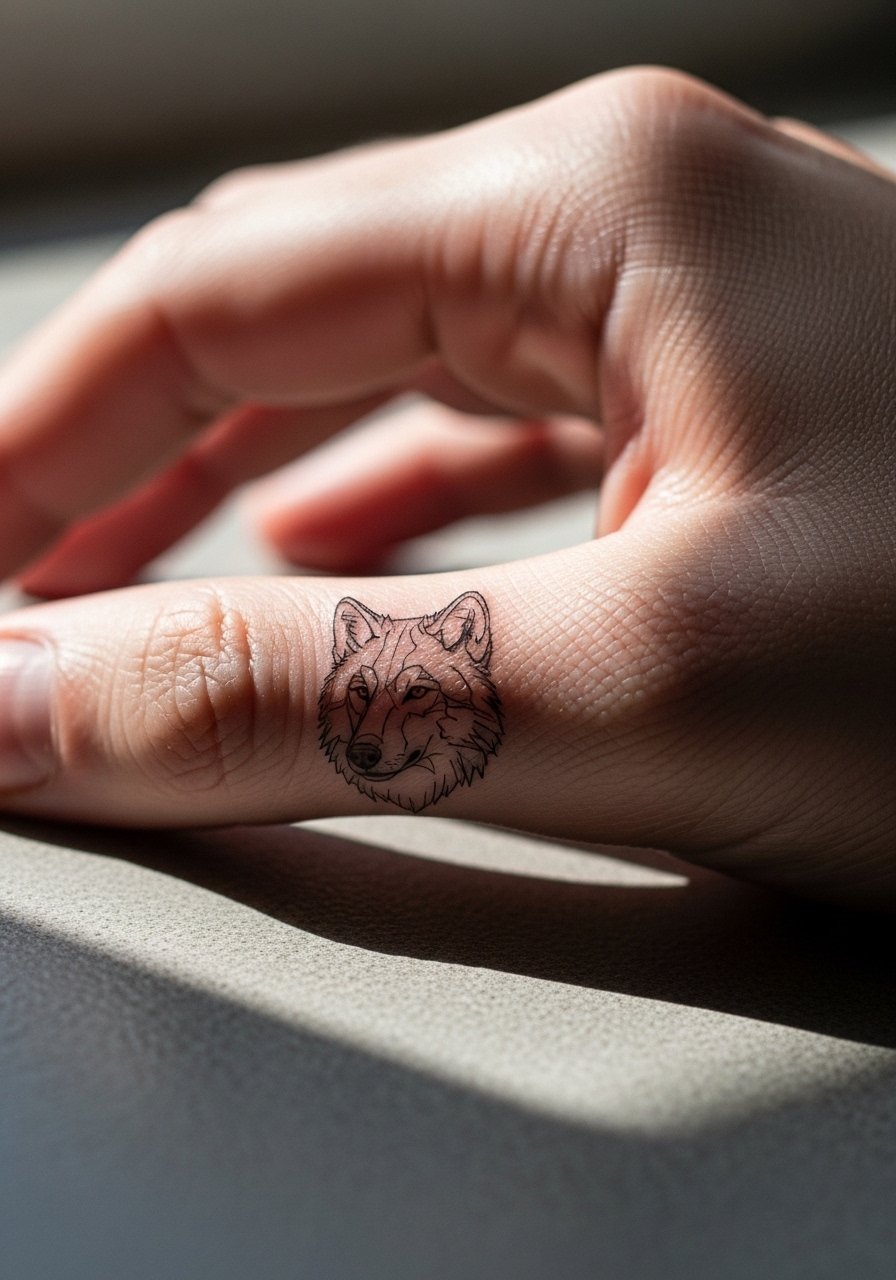
10. Outer Hand Edge Tiny Wolf Face
Hand tattoos remain controversial because they show immediately in public and can affect first impressions. One camp accepts that hand pieces are permanent statements and embraces bold simplified designs that age into character. The other camp warns many workplaces still frown on visible hand tattoos and recommends keeping them small or covered. If you go ahead, ask for bolder anchor strokes and fewer micro hatches so the wolf face holds up through washing and sun exposure. Sessions are sharp and short. Consider the career implications and use discovery pathways like local portfolio searches to see healed hand pieces from different shops.
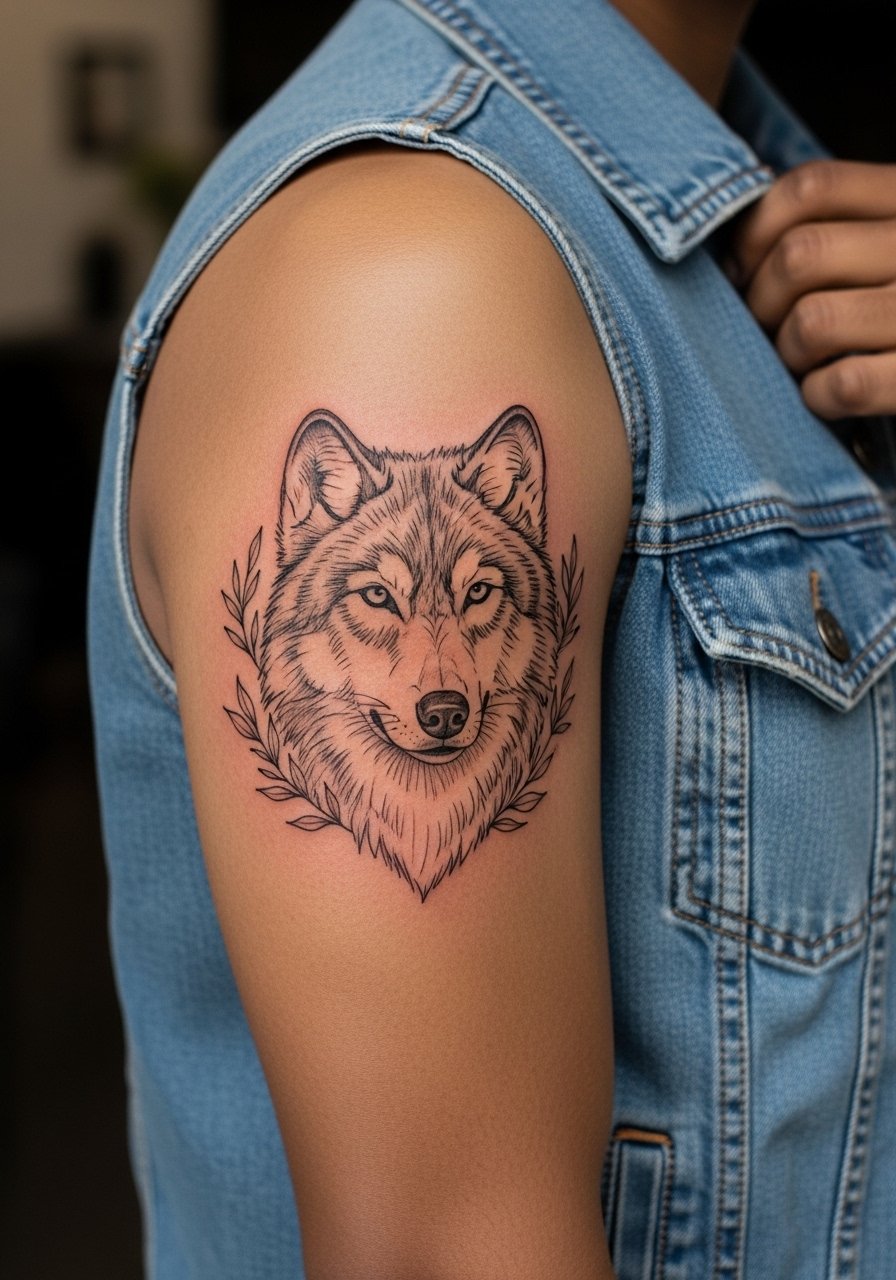
11. Outer Bicep Portrait Wolf with Foliage
Outer bicep space accepts both sketch flow and complementary botanical elements. Ask for stipple backgrounds and negative-space leaves to keep the wolf portrait isolated from banding that can blur over time. Sessions are moderately comfortable and you can sit for two hours if needed. The usual mistake is adding a dense backdrop that flattens the sketch texture. For casual show-off style a sleeveless denim jacket or a loose button-down shirt keeps the bicep visible without clashing with the art.
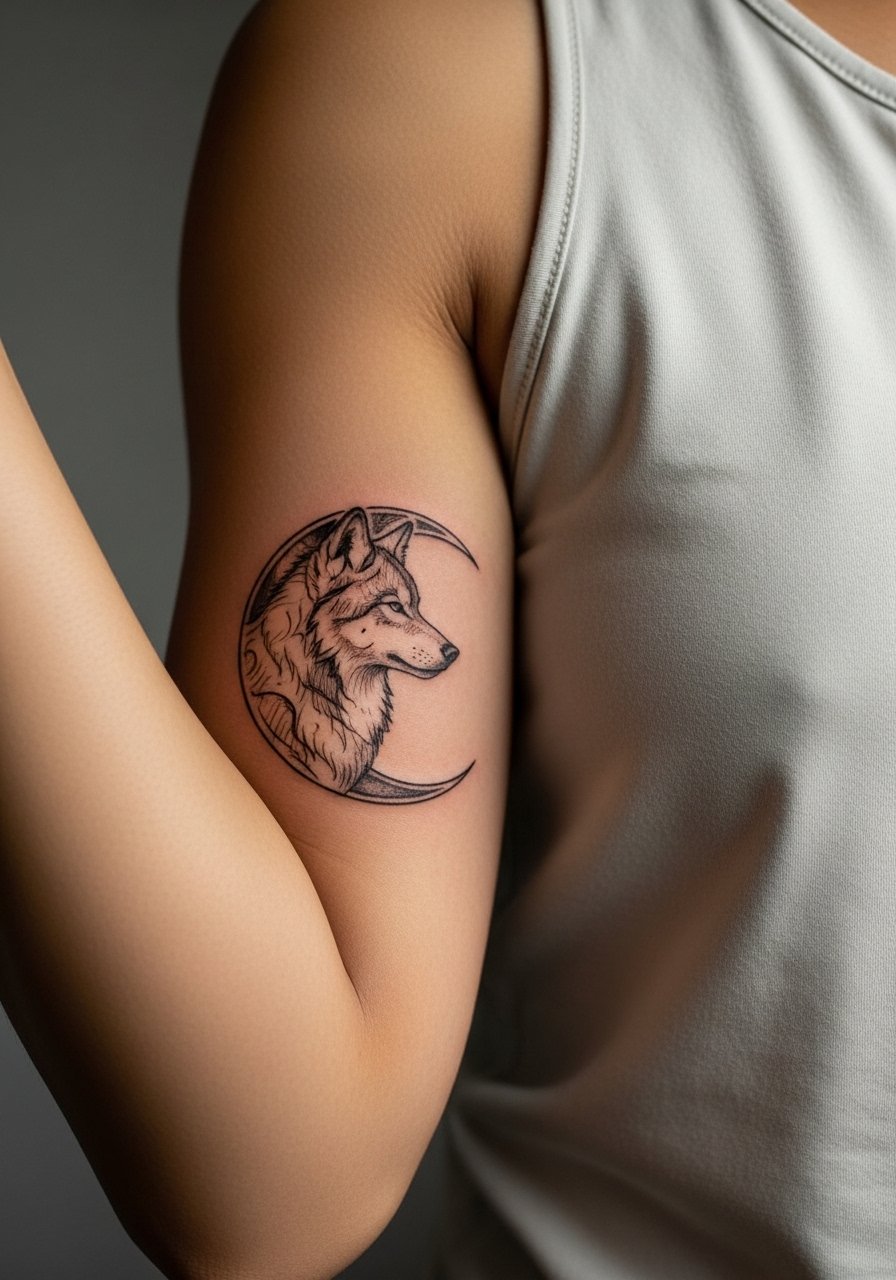
12. Inner Bicep Crescent Wolf Sketch
The inner bicep has softer skin which helps hatch marks sit gently but it also moves with arm folds so plan spacing. Tell the artist to use slightly wider gaps between strokes and to avoid overly tight crosshatching. The session is moderately painful when the arm is pressed, so expect to take breaks. A common mistake is overcompensating with dense shading which disappears into patchy gray. For the appointment wear a loose tank top that lets the artist rotate the arm without exposing more than needed.
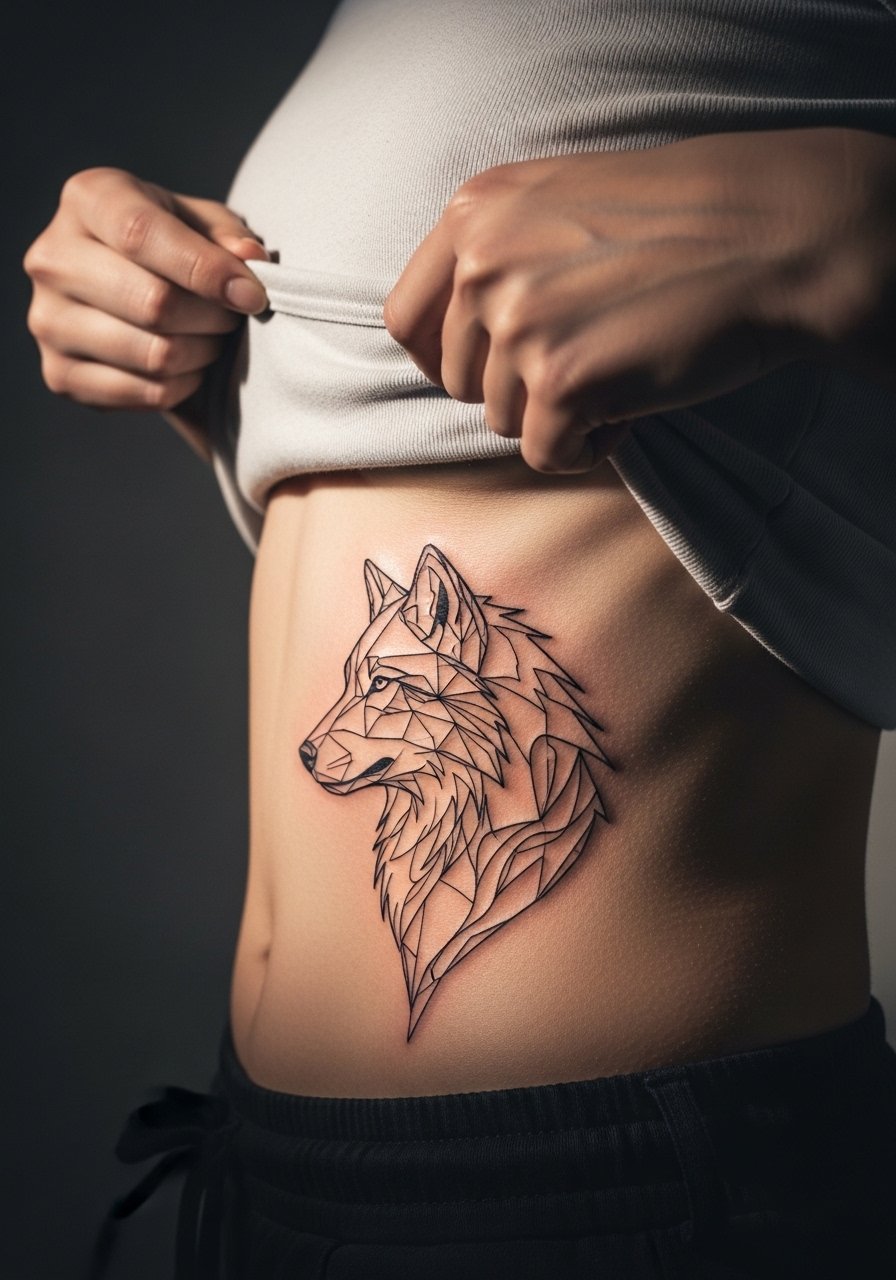
13. Side Torso Geometric Wolf Hybrid
Combining sketch lines with geometric shapes gives the wolf an architectural edge while preserving sketchy texture. The side torso stretches with movement so artists debate best density. One camp says geometric lines stabilize composition and age predictably. The other camp warns that tight geometry plus sketch detail creates competing focal points that blur. My recommendation is to keep the geometry minimal and let the sketch strokes do the narrative. Session time varies and pain is moderate to high. If you plan larger work use discovery pathways like convention portfolios to find artists who photograph healed hybrids well.
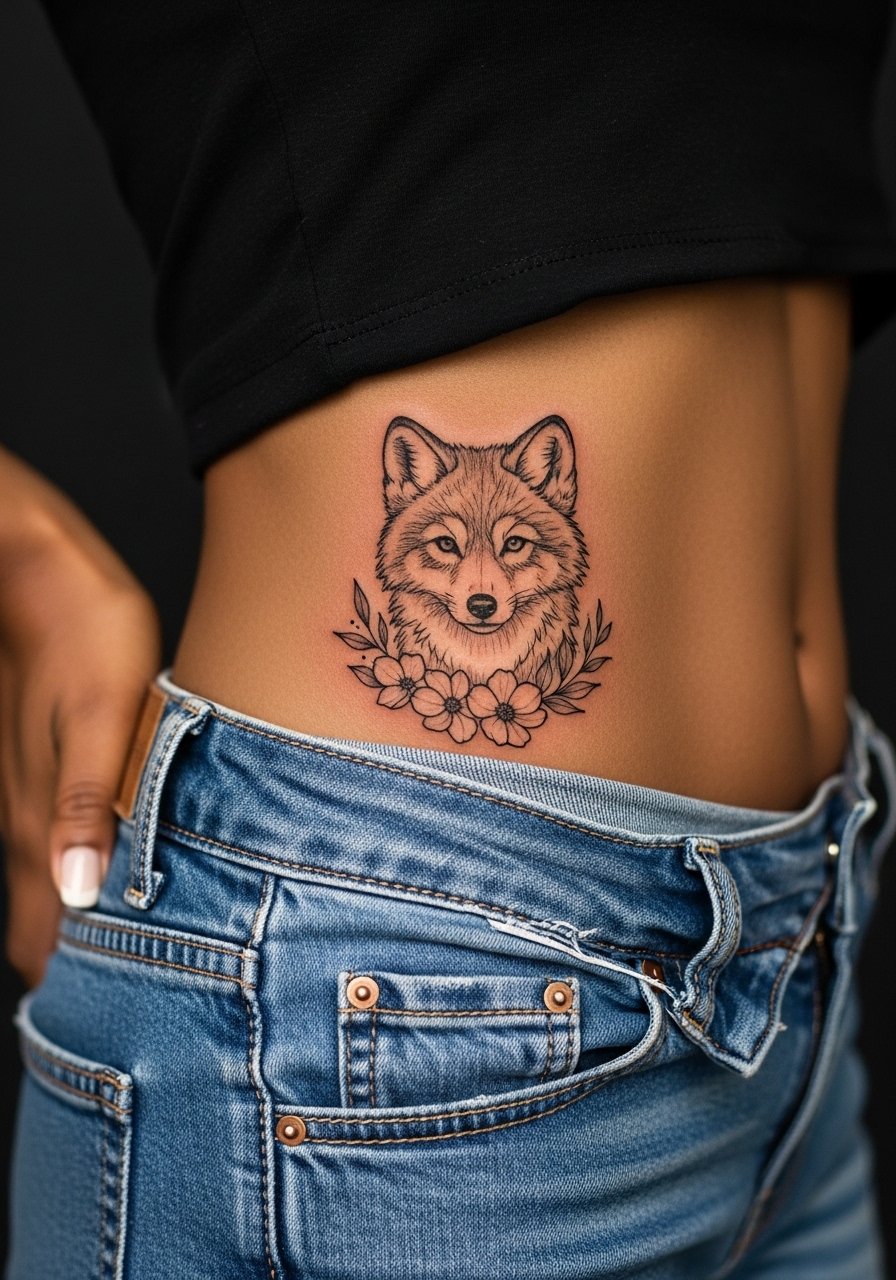
14. Hip Petite Wolf and Florals
Hip placements are great for intimate motifs that peek over swimwear or jeans. The hip moves with clothing so ask for a composition that reads at different angles and a little solid line weight near the tail to resist friction. Sessions are usually short and tolerable. Avoid packing dense hatchwork into thin strips that will rub against waistbands. For showing the piece pair it with high-waisted denim or a swimsuit bottom that reveals the design without stretching it.
15. Outer Thigh Pointillist Wolf
Pointillist stipple blends beautifully with sketch hatching on the outer thigh. For longevity ask for heavier stipple density only in shadow areas and maintain open white space in highlights. The thigh tolerates longer sessions, so plan for three hours or two sittings. A common mistake is overworking the highlights which can create muddy midtones. For a night out pair the design with a wrap skirt that frames the art without rubbing the surface.
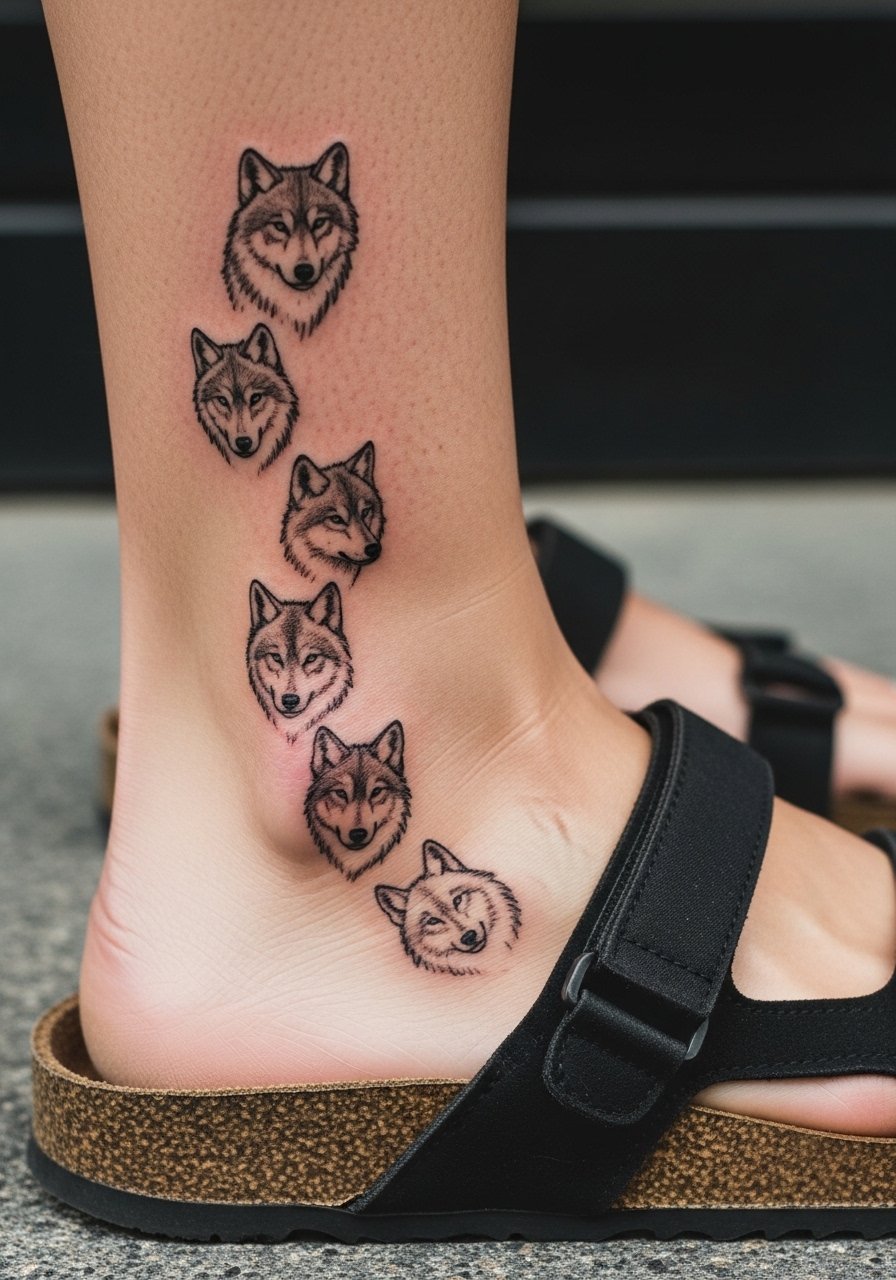
16. Ankle-to-Foot Trail Wolf Sketch
A trail of small wolves moving down the ankle onto the foot reads dynamic and playful. The foot is a high-friction area so keep stroke anchors slightly bolder where shoes contact the skin to reduce early loss. Sessions are sharp around the bone and usually split across two short blocks to manage sensitivity. Mistakes include placing the densest detail on the toe or ball of the foot where blurring accelerates. For session comfort wear slip-on shoes or a pair of canvas slides so the artist can access the foot without awkward bending.
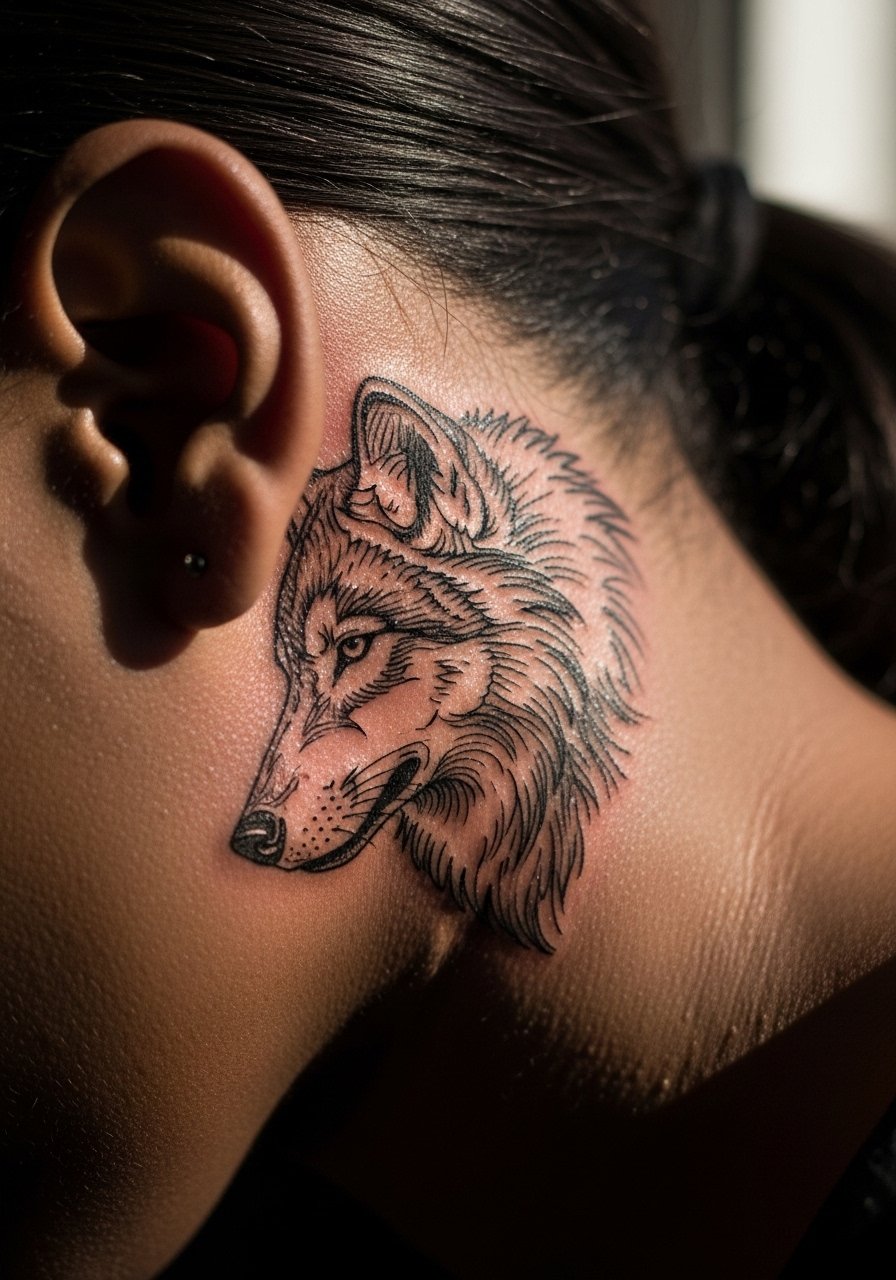
17. Behind-the-Ear Tiny Wolf Motif
A tiny motif behind the ear reads secretive and subtle so the image must be tiny, bold, and simple. Always describe this area as the skin behind the ear below the hairline on the neck to avoid misplacement. The session is quick and sensitive. The usual mistake is insisting on fine hatchwork that the area cannot hold. If you want visibility, pair the piece with a short hairstyle or tuck hair behind one ear so the motif shows without overstating it.
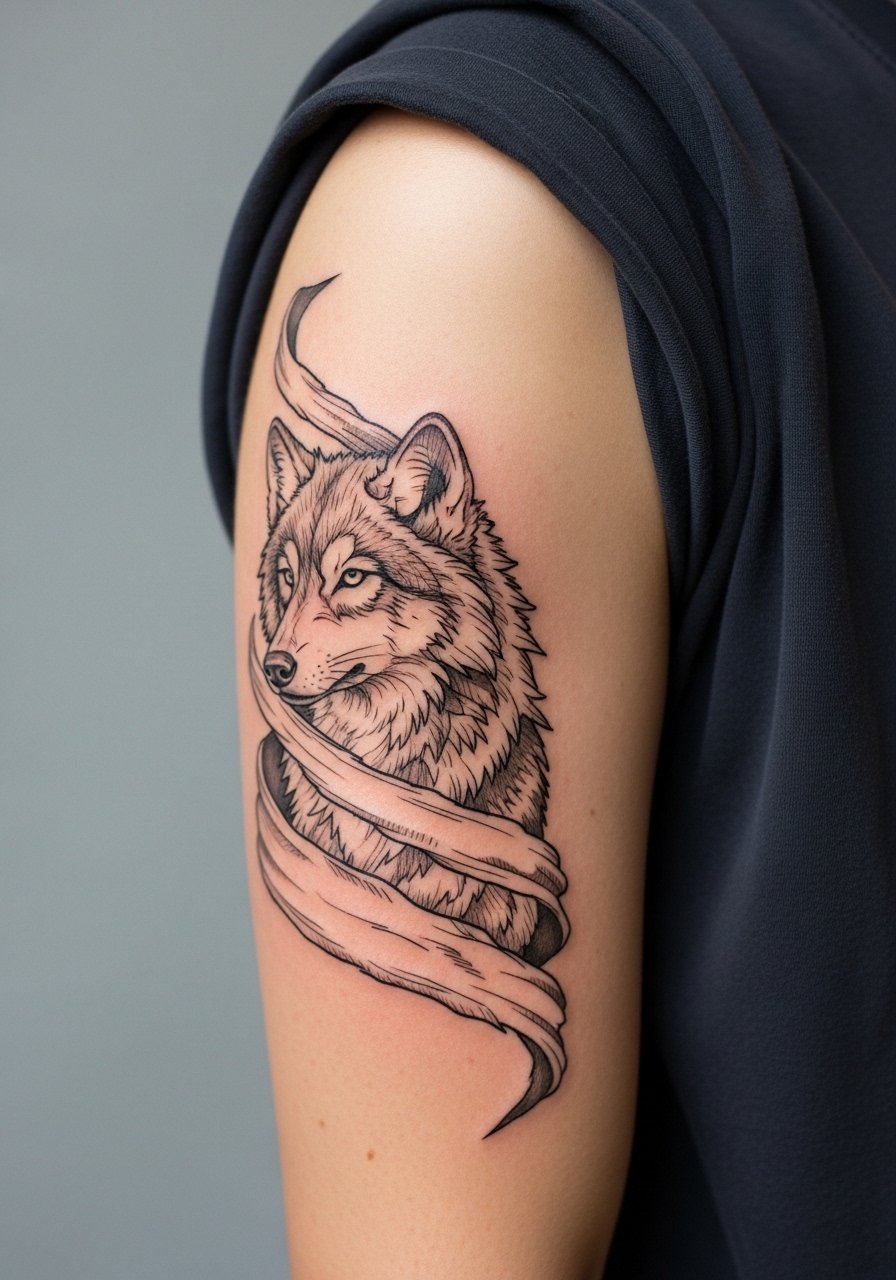
18. Upper Arm Wrap Around Wolf Sketch
A wrap-around composition on the upper arm gives a sketchy panorama that reads from all sides. Ask for staggered hatch directions and a stronger silhouette so the wolf still reads when you view it at a distance. Sessions are easy to manage sitting upright and pain is usually mild. A common mistake is too much mid-density shading which collapses the motion. For casual wear pair the piece with a loose sleeve tee that you can roll to frame the art without overstretching it.
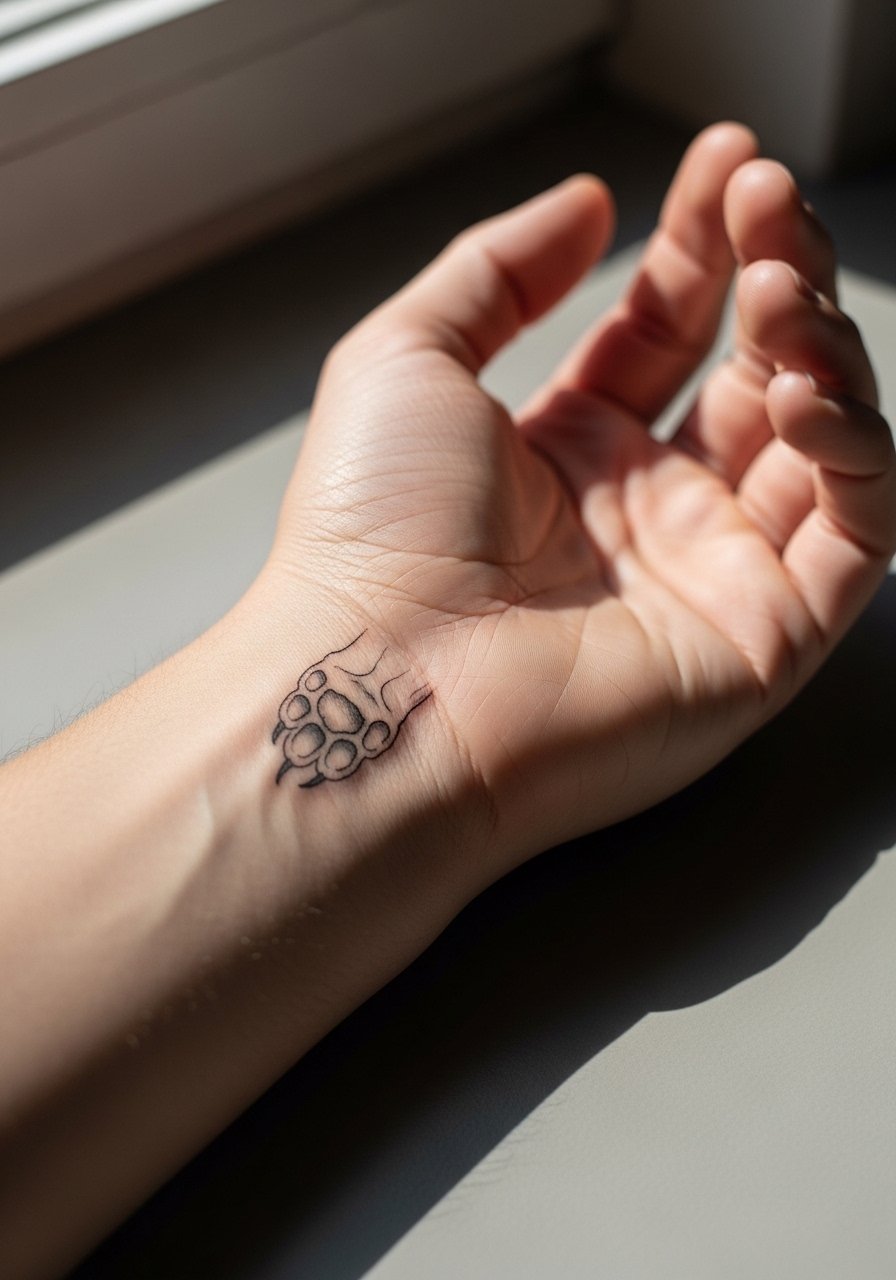
19. Wrist Minimal Wolf Paw Sketch
Wrist pieces need immediate readability because they are seen up close. For a sketch paw ask for bold anchor strokes around the pad and airy hatchwork for the fur so the mark reads during hand movement. Sessions are short and the pain is sharp in that spot. A frequent mistake is trying to make the paw too detailed which fades into a smudge. For daily styling a minimal leather bracelet or thin watch keeps the wrist curated without covering the sketch.
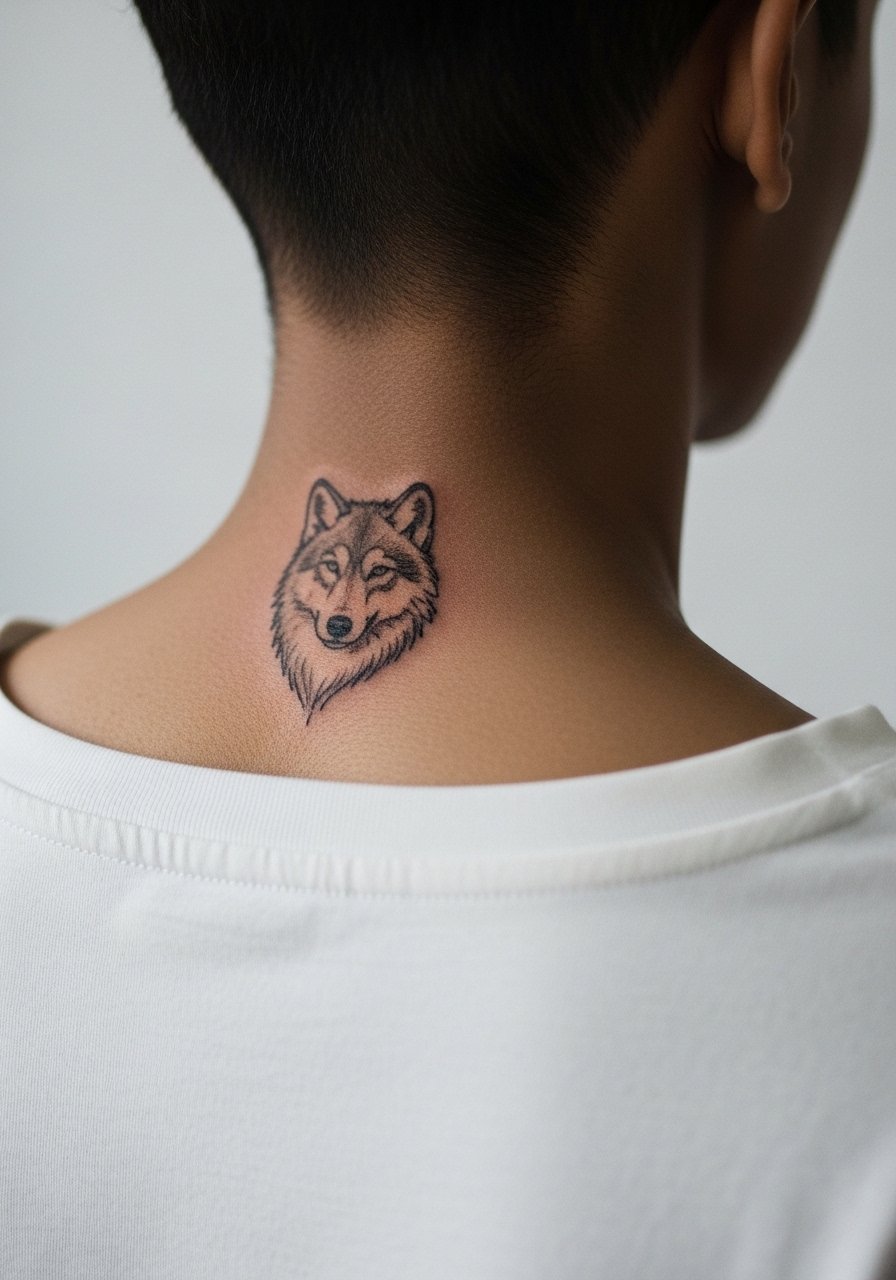
20. Nape of Neck Small Wolf Line
A nape placement sits at the hairline and reads discreetly when your hair is down. For sensitive neck skin wear a wide-neck shirt pulled slightly to one side so only the tattoo zone shows during the session. Request slightly bolder central lines and gentler hatchwork at the edges for longevity. Sessions are short but note that the area can sting more than the shoulder. The typical mistake is choosing too much micro detail which the skin will not keep over time. An open-collar top frames this piece well for photos.
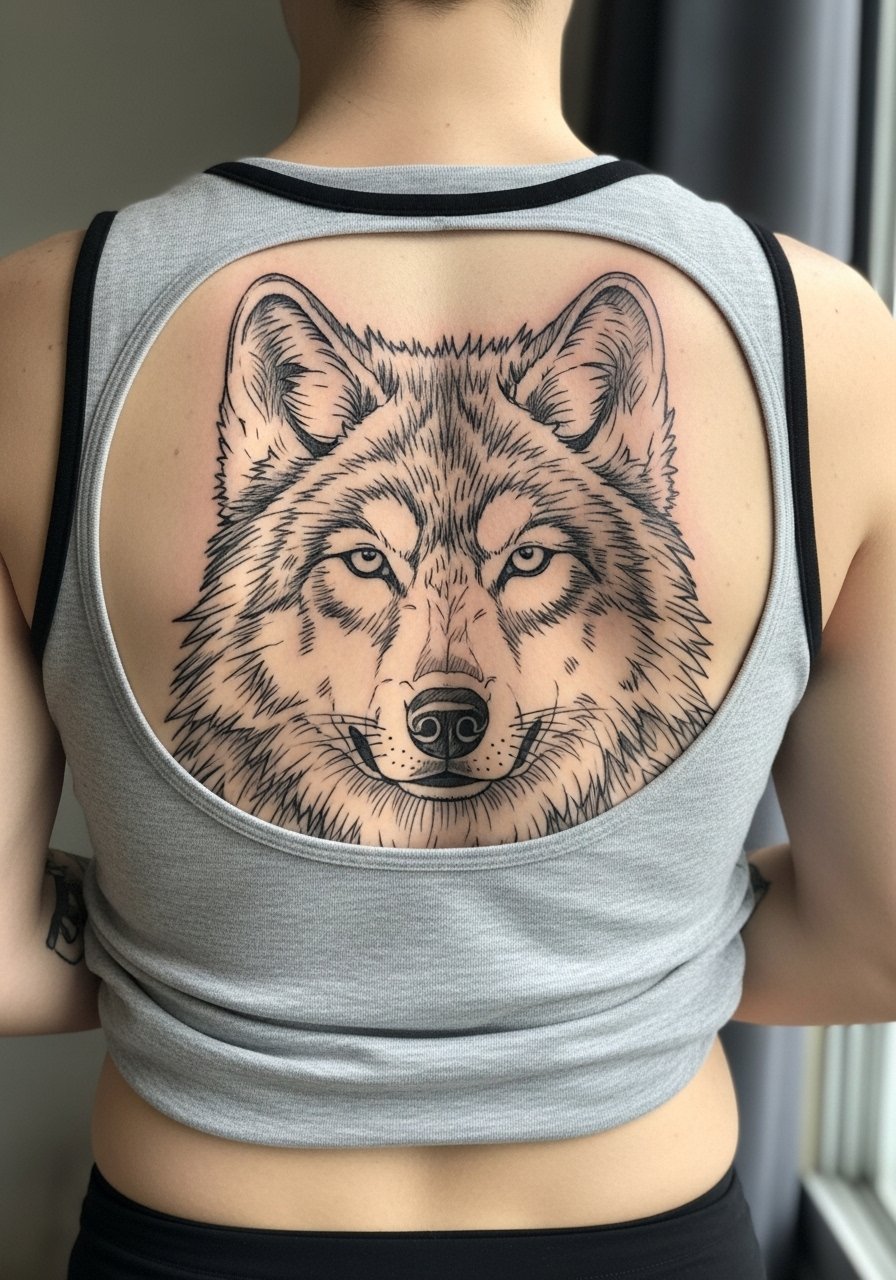
21. Full Back Sketch Wolf Mural
A full back mural gives a sketch wolf room to breathe and tell a story with motion lines and background elements. For durability ask your artist to plan negative-space corridors so heavy hatch zones do not merge. Sessions will be long and likely split across multiple appointments. The largest mistake is treating the back like a canvas for endless tiny strokes without considering how each block will age. For showing off the mural choose open-back dresses or swimsuits that reveal the art without compressing it and plan wardrobe that avoids tight straps over the central back.
Frequently Asked Questions
Q: Will a sketch style wolf fade faster than a traditional blackwork wolf on the forearm?
A: In my experience sketch work can appear to soften sooner because it relies on thin strokes and negative space. Keeping slightly heavier anchor lines where detail matters and protecting the area from sun speeds up how it looks over time. Expect touch-ups earlier than dense blackwork.
Q: Is fine sketch linework a bad idea for the ribs if I want a realistic wolf face?
A: Artists disagree and two camps form here. One camp says ribs stretch and blur fine lines within a couple of years. The other camp says careful depth and spacing let detail survive. If you want realism on the ribs ask for spaced hatchwork and fewer micro strokes and review healed photos from the artist.
Q: How should I find an artist who photographs healed sketch wolves well without relying on Instagram handles?
A: Use discovery pathways like shop directories, convention portfolios, community forum threads, and hashtag searches to see recent healed work. Look for portfolios that show multiple healed photos across skin tones and angles to judge how sketch strokes aged.
Q: Can I get a tiny wolf on my hand and still keep a professional look for work?
A: Hand tattoos are visible and opinions vary by industry. If career implications matter pick a placement on the outer edge or choose a very simplified motif with bold anchors that reads like a mark not a portrait. Checking employer policies helps before you book.
Q: What should I wear to the studio for a sternum or ribcage sketch session?
A: Wear a fitted sports bra or a cropped top that you can lift slightly so the artist has clean access while you remain covered. A zip-up hoodie is also useful for modesty when walking in and out of the shop.
Q: How often do sketch wolves need touch-ups and what affects that timeline?
A: Touch-up frequency depends on placement, sun exposure, and how dense the original strokes were. Exposed spots like hands and ankles often need touch-ups sooner. Areas with more movement such as ribs may need earlier refreshes. Ask your artist for a realistic timeline based on their healed examples.
