
Fine line shoulder flowers are everywhere online, but what actually lasts and still looks like you in five years is a different story. Trends push microscopic petals and whisper-thin stems, and the reality is placement, spacing, and how you dress the area matter more than the flashiest reference. Below are 17 small flower shoulder tattoo ideas that balance immediate impact with how they tend to age, plus what to say in consultation and how to style them for sessions and wear.
1. Fine Line Single Stem on the Shoulder Cap
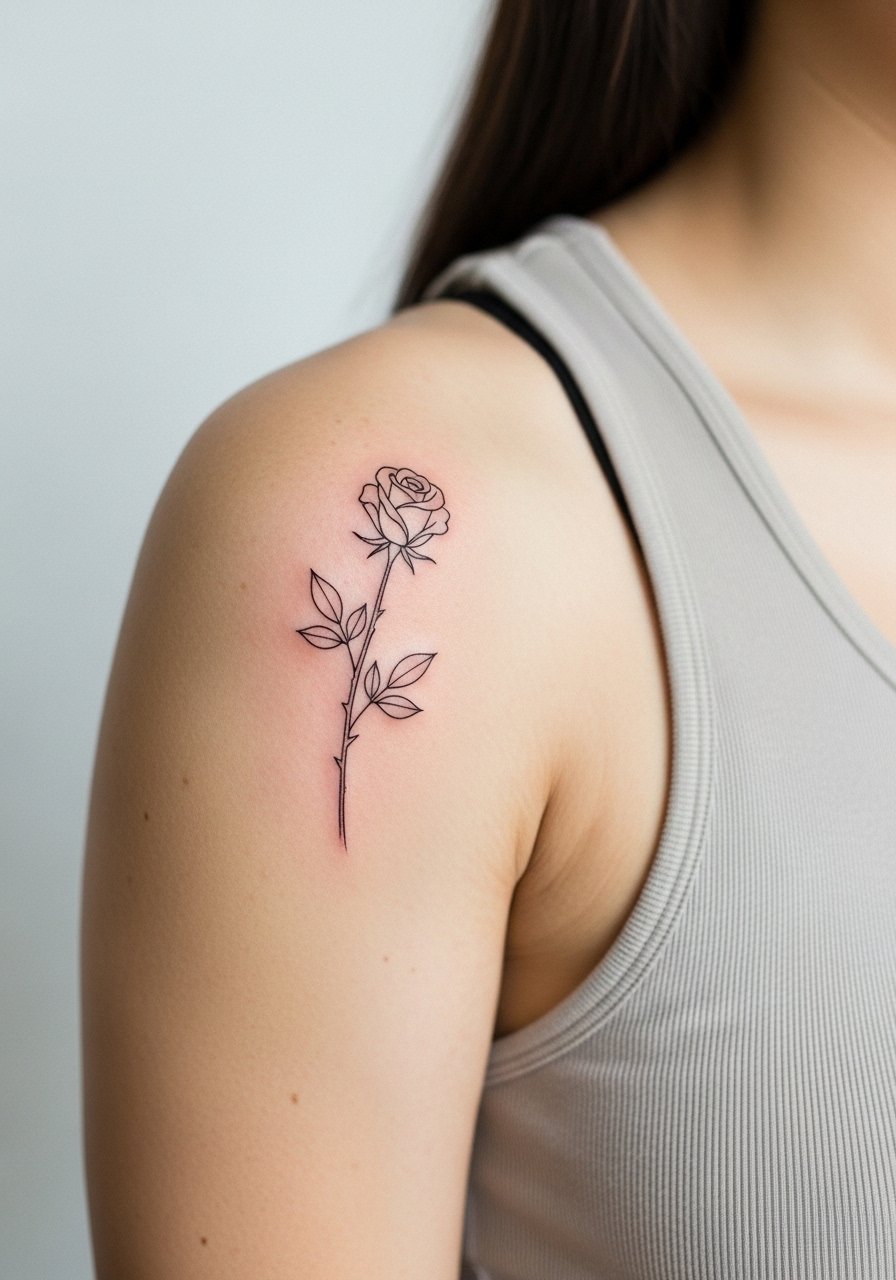
I've seen single-stem pieces on the shoulder stay readable the longest when artists give the petals room to breathe. In consultation, ask your artist for slightly heavier linework than the ultra-micro look on your phone, and specify a small gap between tightly packed petals. Pain on the shoulder cap is mild, and a single short session often does the job. Common mistakes include asking for every petal to be needle-fine, which leads to early blurring. For the session wear a loose tank top you can pull aside easily so the artist can work without stretching the area.
2. Tiny Cluster of Wildflowers near the Collarbone
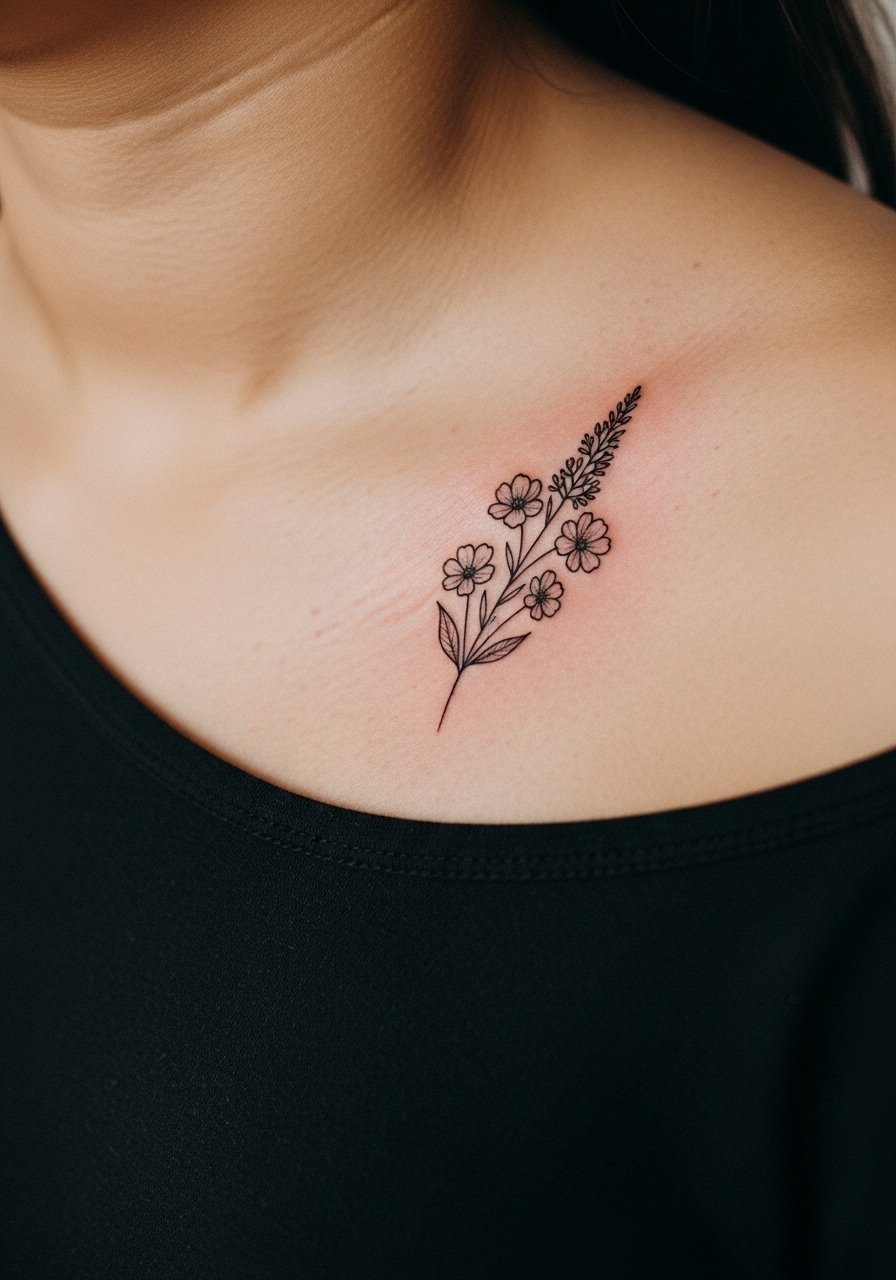
Personal observation: collarbone-adjacent shoulder pieces read larger on the body than they look on a photo. Tell your artist you want the cluster to curve with the collarbone to avoid an awkward flat look. Pain spikes a bit near the bone, so expect a shorter, sharper sensation for a few minutes. At six months petals keep crisp with proper spacing, but by year three dense micro details can blur. For showing it off, pair with an open-neck blouse that frames the collarbone without covering the artwork.
3. Minimalist Outline Blossom on the Upper Deltoid
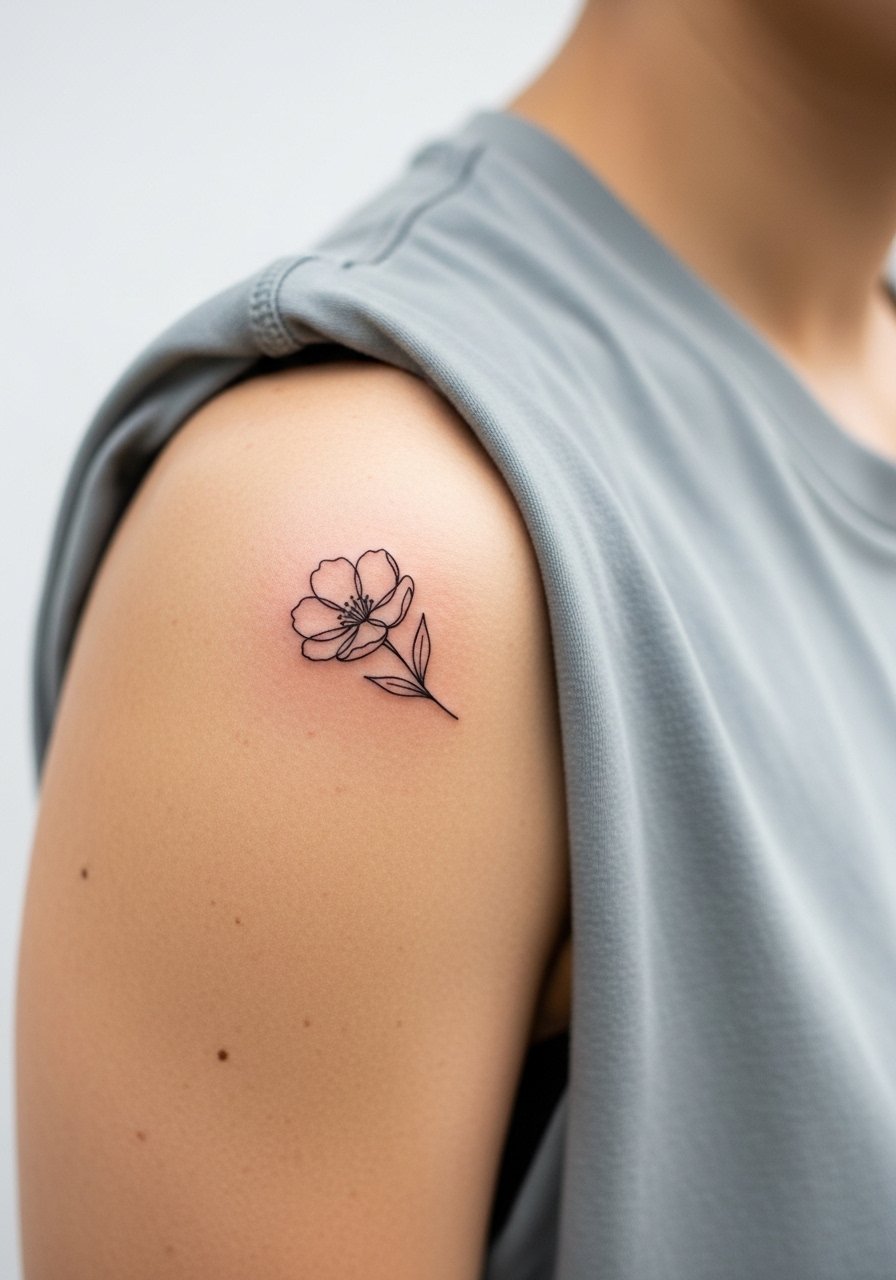
Aging lead: many minimal outline blossoms that look perfect fresh lose definition when the lines are too close. Ask for slightly bolder outline weight and a tiny internal spacing so the blossom does not merge in the midterm. The deltoid is forgiving for touch-ups, which most artists expect around year three for fine work. A common mistake is insisting on near-hairline outlines that the skin cannot hold on moving flesh. For session comfort and easy access wear a sleeveless tee you can lift without tugging at the shoulder seam.
4. Single Small Peony on the Shoulder Blade Edge

Visual impact lead: a peony at the shoulder blade edge reads like a pocket-sized statement when photographed from three quarters. Tell the artist to orient the petals so the tattoo looks intentional when you wear a short-sleeve top. The shoulder blade moves differently than the cap and can distort dense dot shading if placed too close to the range of motion. Expect a touch-up timeline of year two to three for densely stippled parts. For evenings out, an off-the-shoulder top highlights the peony without forcing you to show more skin than you want.
5. Tiny Chamomile Chain Across the Shoulder Line
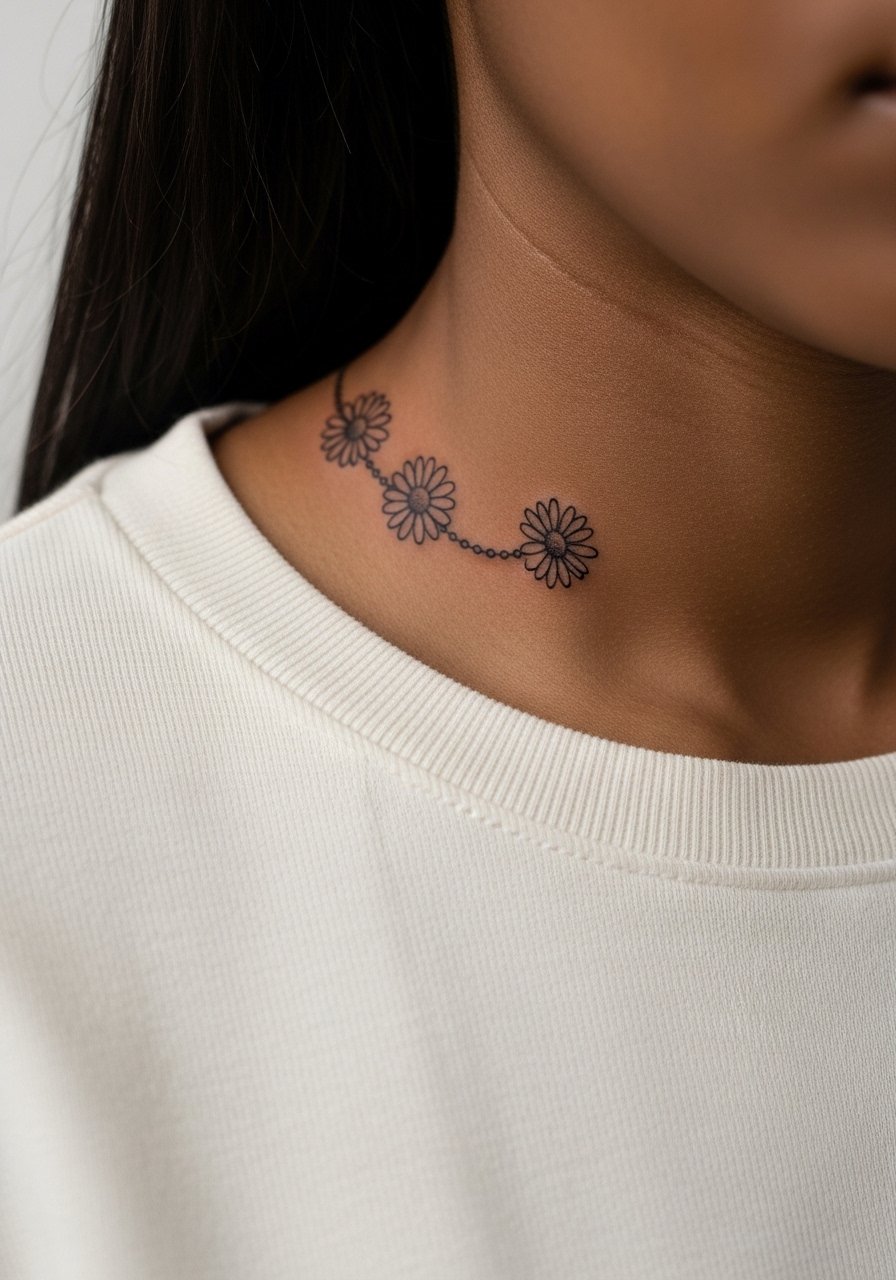
Consultation lead: when you ask for a chain of tiny blooms, say whether you want even spacing or a slightly staggered look that mimics growth. Even spacing can look digital over time if the individual blooms are too small. Pain is low across the flat shoulder line, and sessions are quick. A mistake I keep seeing is trying to cram six near-microscopic flowers into two inches. For casual wear the chain pairs well with a simple pendant necklace that draws the eye without competing.
6. Stipple-Shaded Daisy Near the Outer Shoulder
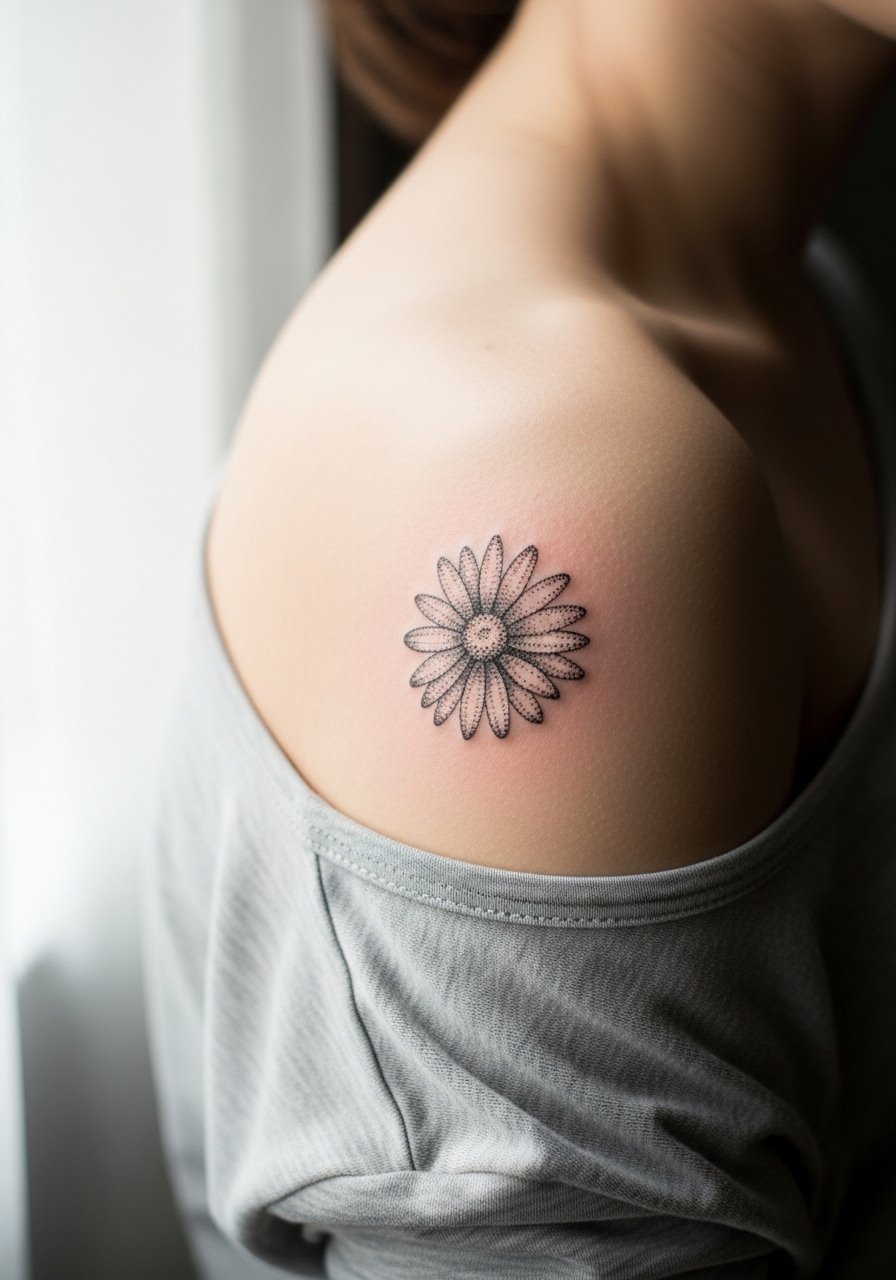
Mistake lead: stipple shading looks great in portfolios but can lose midtone on skin that tans heavily. Ask for slightly denser dots in the core and lighter spacing toward the petals to preserve depth. Stipple work often needs a touch-up by year three, especially on areas with frequent sun exposure. The shoulder's sun exposure makes sunscreen essential, and for styling try a scoop-neck tee that shows the daisy without exposing the whole shoulder.
Studio Day Picks
The upper shoulder and collarbone pieces above benefit from different prep than lower-body work, so these few studio items smooth the session and the first week.
-
Stencil transfer paper kit. Lets you and the artist preview placement directly on skin, which is key for collarbone and shoulder-line pieces.
-
Topical numbing cream. Applied as your artist recommends takes the edge off brief shoulder bone sensitivity without affecting linework.
-
Thin protective film roll. Keeps small shoulder pieces clean during the first days of movement and clothing friction.
-
Fragrance-free gentle body wash. Cleanses healing shoulder tattoos without irritating delicate linework.
-
Aquaphor healing ointment. A thin layer in the first days helps seal moisture for fine line areas without clogging.
7. Tiny Botanical Wreath on the Outer Shoulder
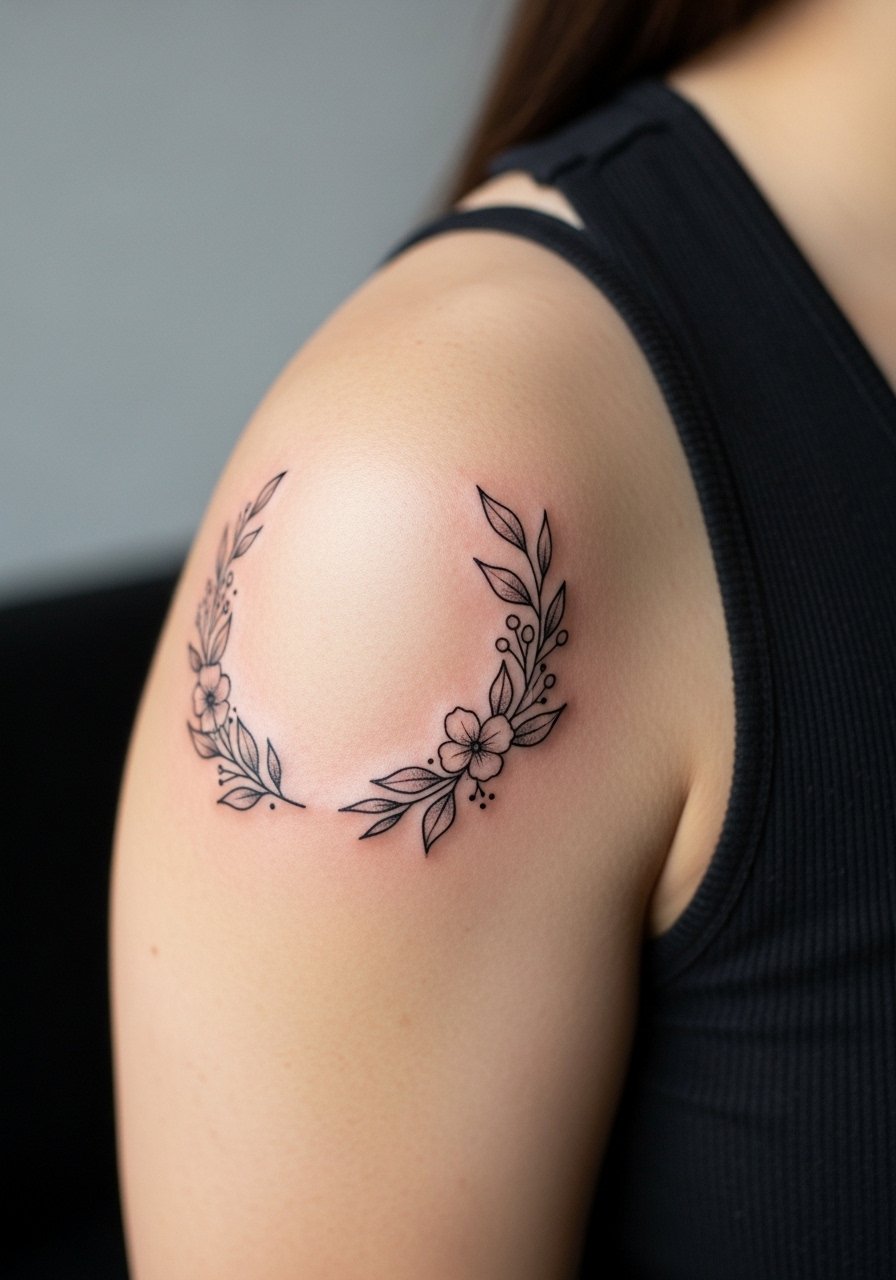
Personal observation: wreaths look best when slightly off-center so movement gives them life. Ask for a subtle asymmetry rather than a perfectly round hoop. The outer shoulder tolerates slightly denser saturation than the collarbone. A common mistake is requesting ultra-tight symmetry that reads flat on the body. For outfit pairings, a cropped button-down worn open frames the wreath for casual looks.
8. Micro-Realism Poppy on the Shoulder Cap
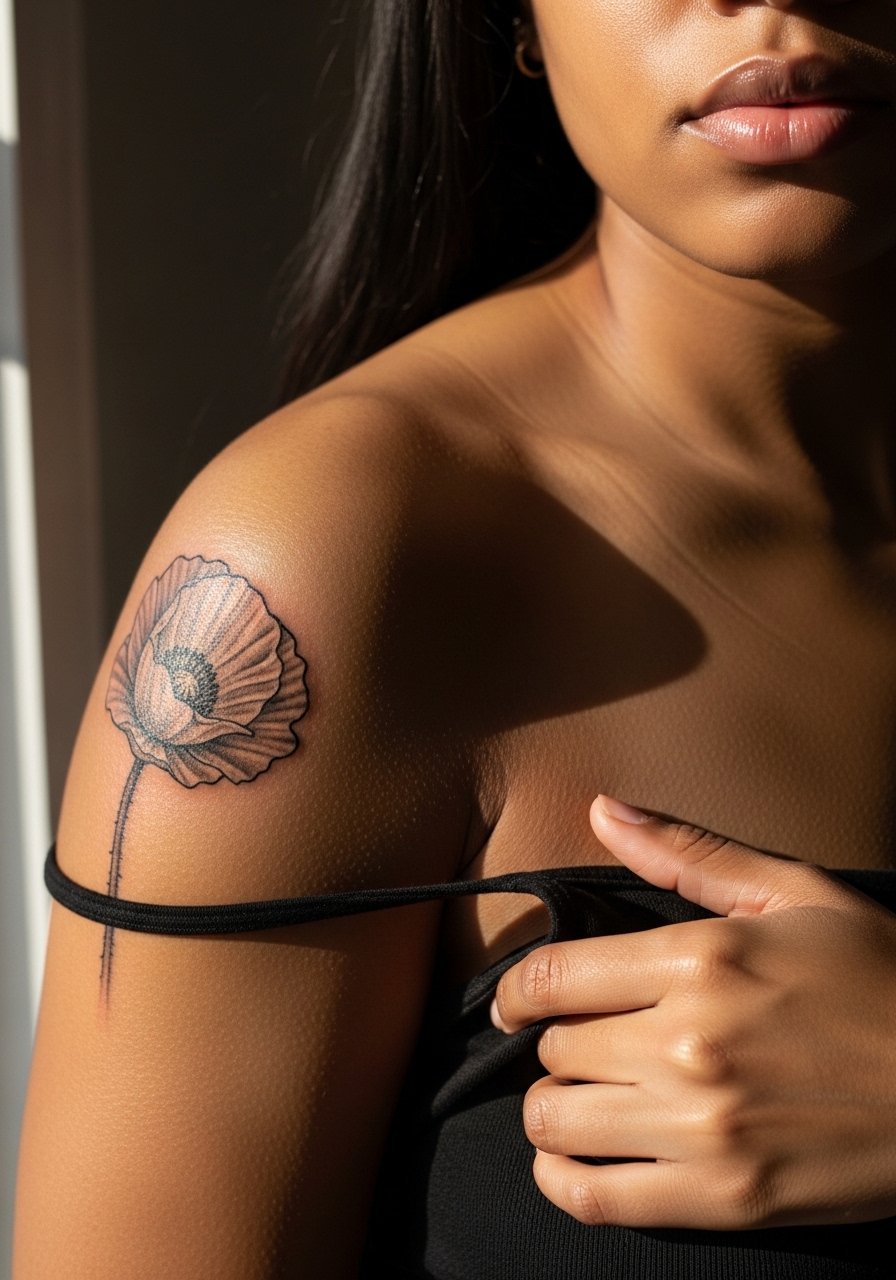
Pain warning lead: micro-realism demands precise layering, and near-bone areas can feel sharp during the session. Artists divide these into short passes to protect saturation. The controversy here is real among artists. One camp says micro-realism on small shoulder areas risks losing detail within a few years. The other camp argues that with the right spacing and subtle contrast, micro-realism can hold. Ask your artist which side they fall on and why. For show-off looks, a thin-strap dress keeps the poppy visible without heavy coverage.
9. Colored Tiny Bouquet on Melanin-Rich Skin
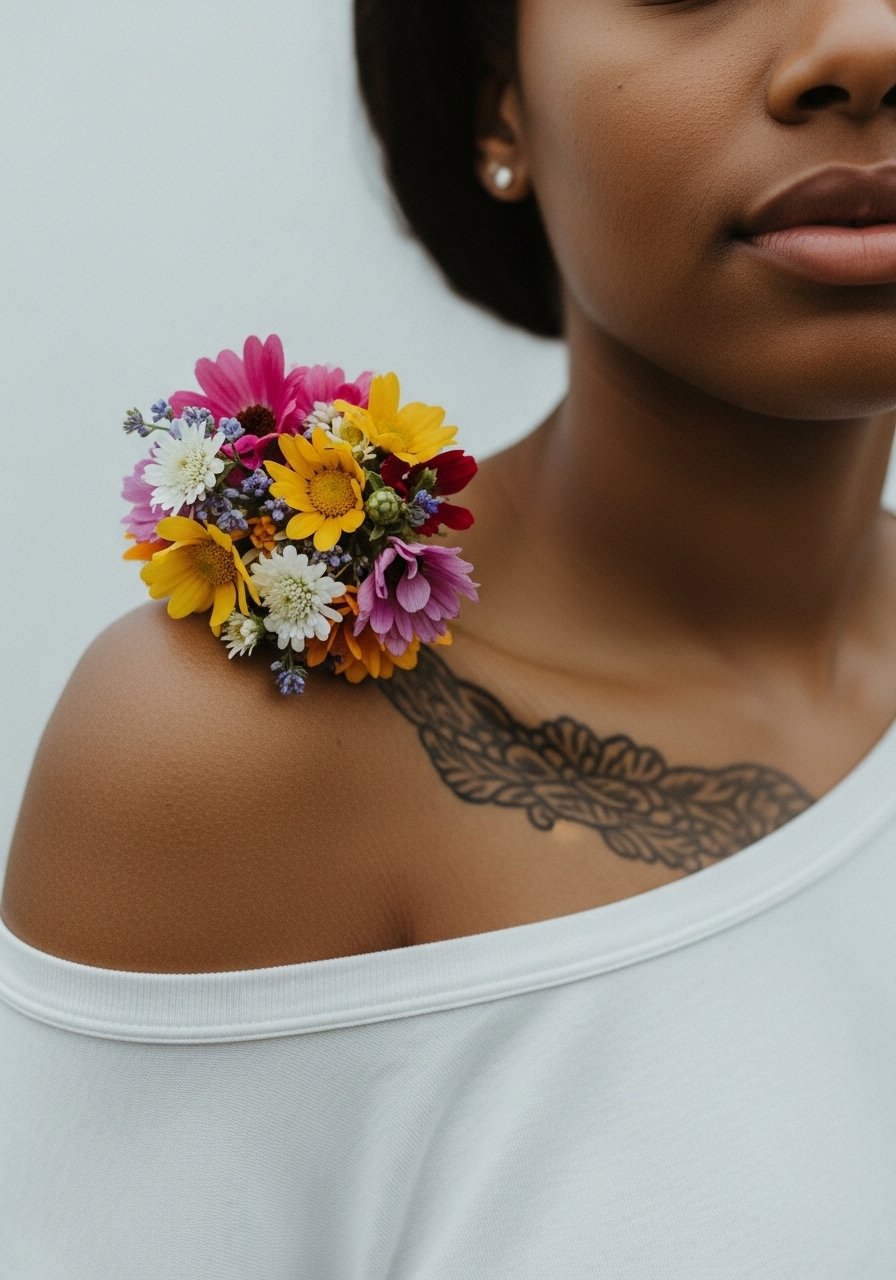
Controversy lead: color on darker skin splits artists and clients into two camps. One group says bright color loses contrast and suggests black or dark linework instead. The other group advocates thoughtful palette shifts and deeper saturation to keep hues readable. Name both camps before booking and see examples on similar skin tones. In practice, jewel-toned accents often read better than pastel washes. Expect slightly longer session time for layered saturation. For styling, a wide-neck woven top complements warm color palettes without overshadowing the artwork.
10. Tiny Linework Sunflower at the Shoulder Ridge
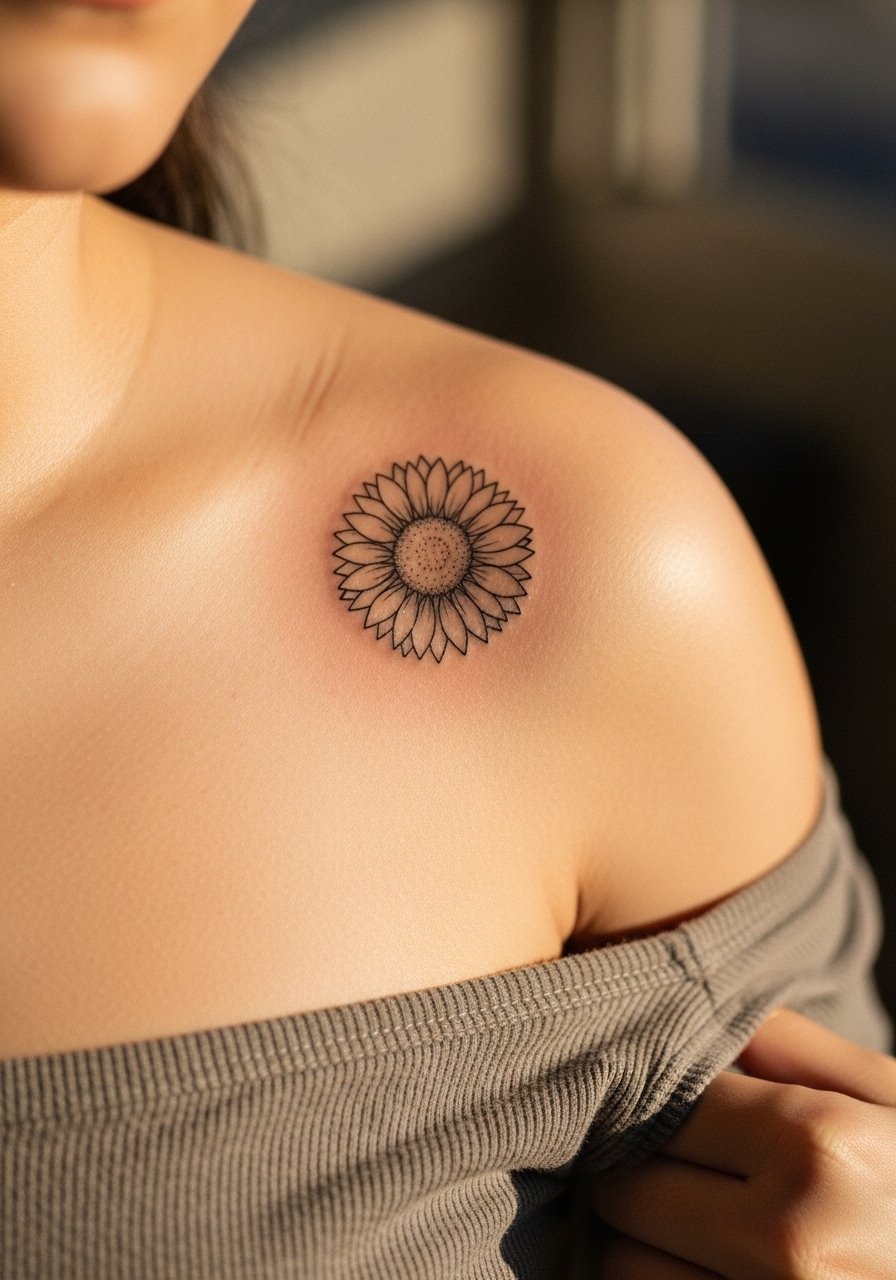
Visual impact lead: sunflower petals work as directional markers that play with shoulder curvature. Tell your artist whether you want the face of the flower angled toward the clavicle or the arm. The shoulder ridge sees gentle friction from straps, so placement just above strap lines prevents rubbing during healing. People often choose a tiny face with many petals and later wish they had fewer petals for clarity. For day-of comfort wear a sleeveless top that leaves the area accessible and strap lines clear.
11. Tiny Camellia Near the Shoulder Joint
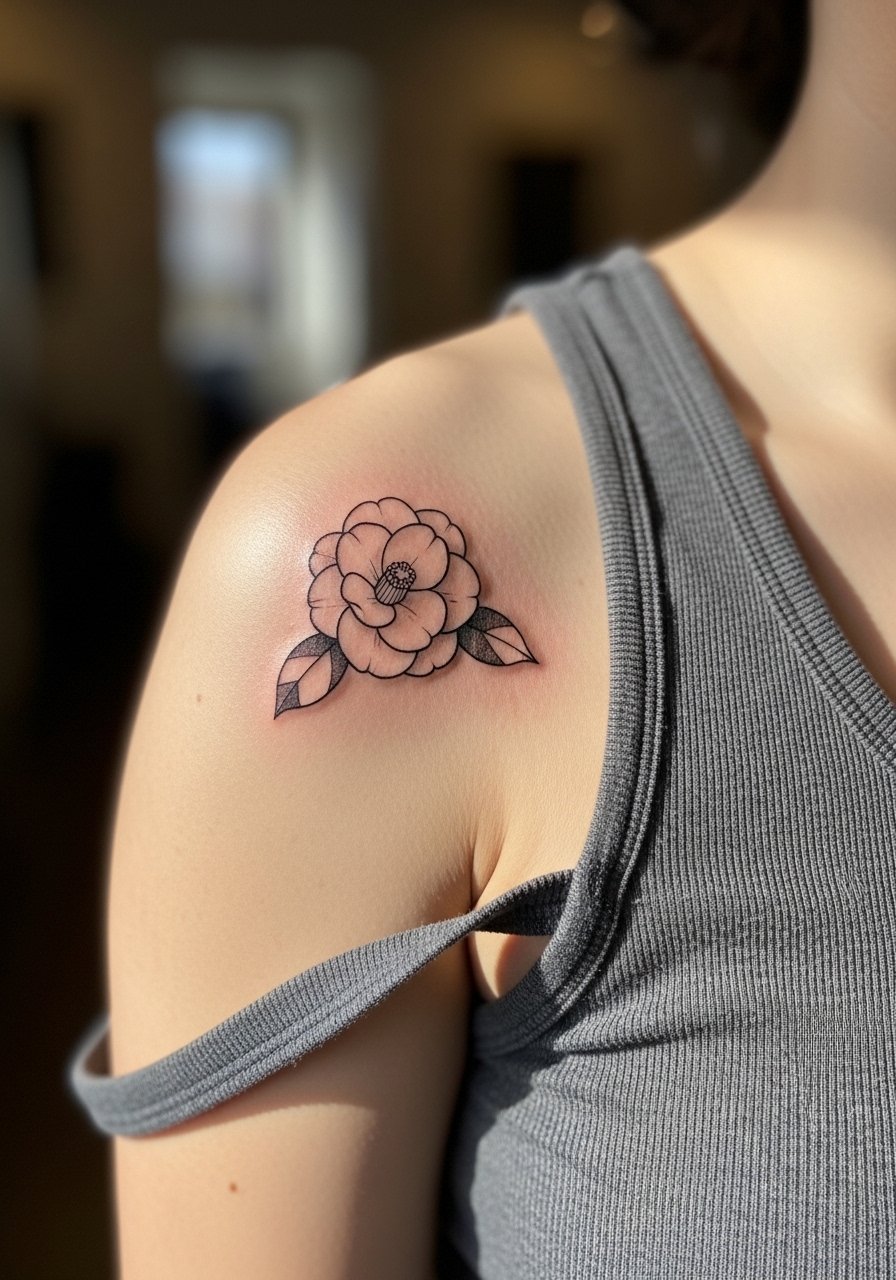
Mistake lead: placing intricate petals directly over the joint can distort the piece when the arm moves. Ask for a placement just off the most mobile point to keep outline integrity. Sessions are short but the joint area can make the needle feel sharper. Expect touch-ups to address any early stretching. A casual button-down shirt you can slide aside is a practical session choice so the artist can work without you contorting.
12. Tiny Line Art Lotus at the Upper Shoulder
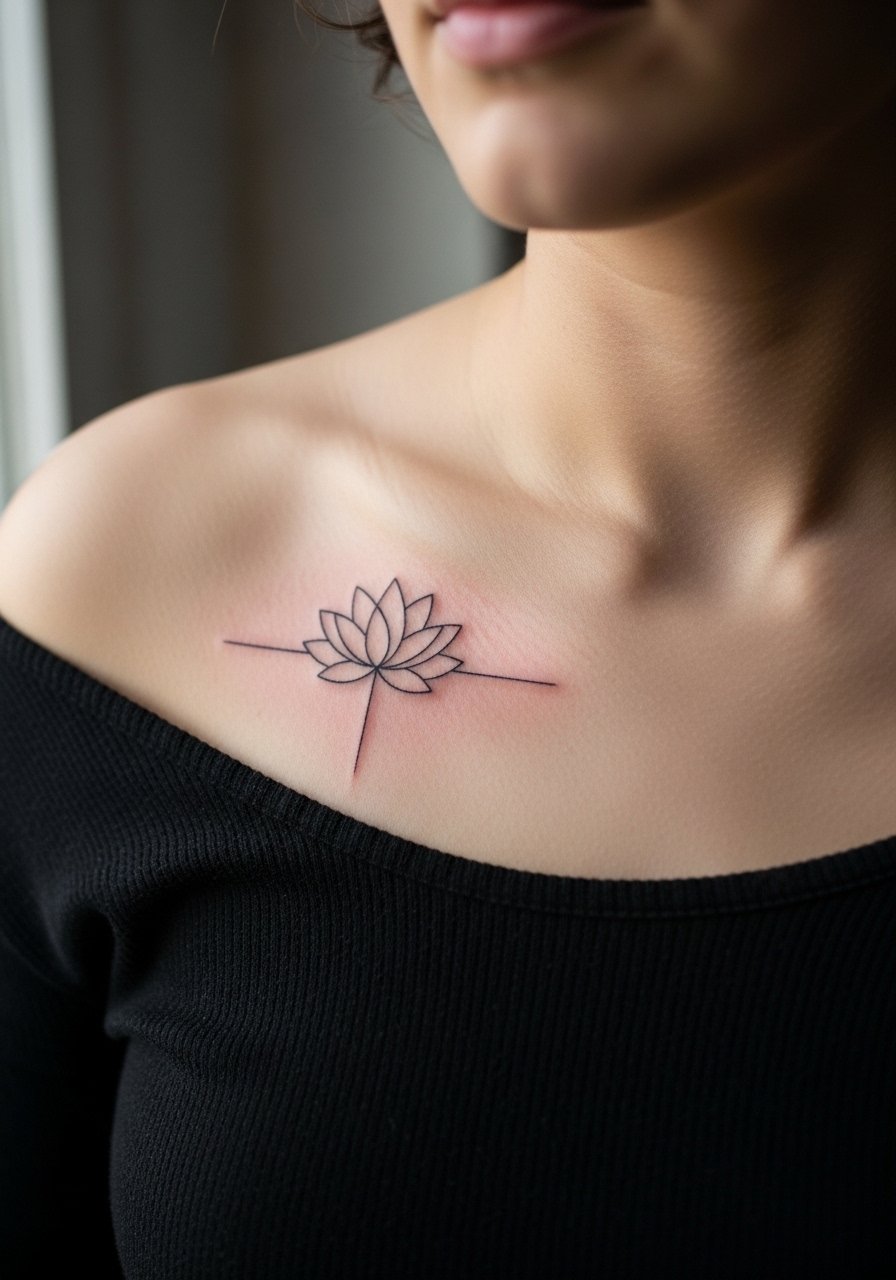
Consultation lead: with sacred motifs like the lotus, say whether you want a stylized nod or a traditional form because artists treat cultural motifs differently. If you prefer a subtle interpretation ask for simplified petals and moderate line weight. This placement reads as calm and unobtrusive in short sleeves. The biggest mistake is copying a dense traditional layout into a very small size. For evening wear, a wide-neck top shows the lotus without overexposing the chest.
13. Tiny Forget-Me-Not Cluster on the Shoulder Top
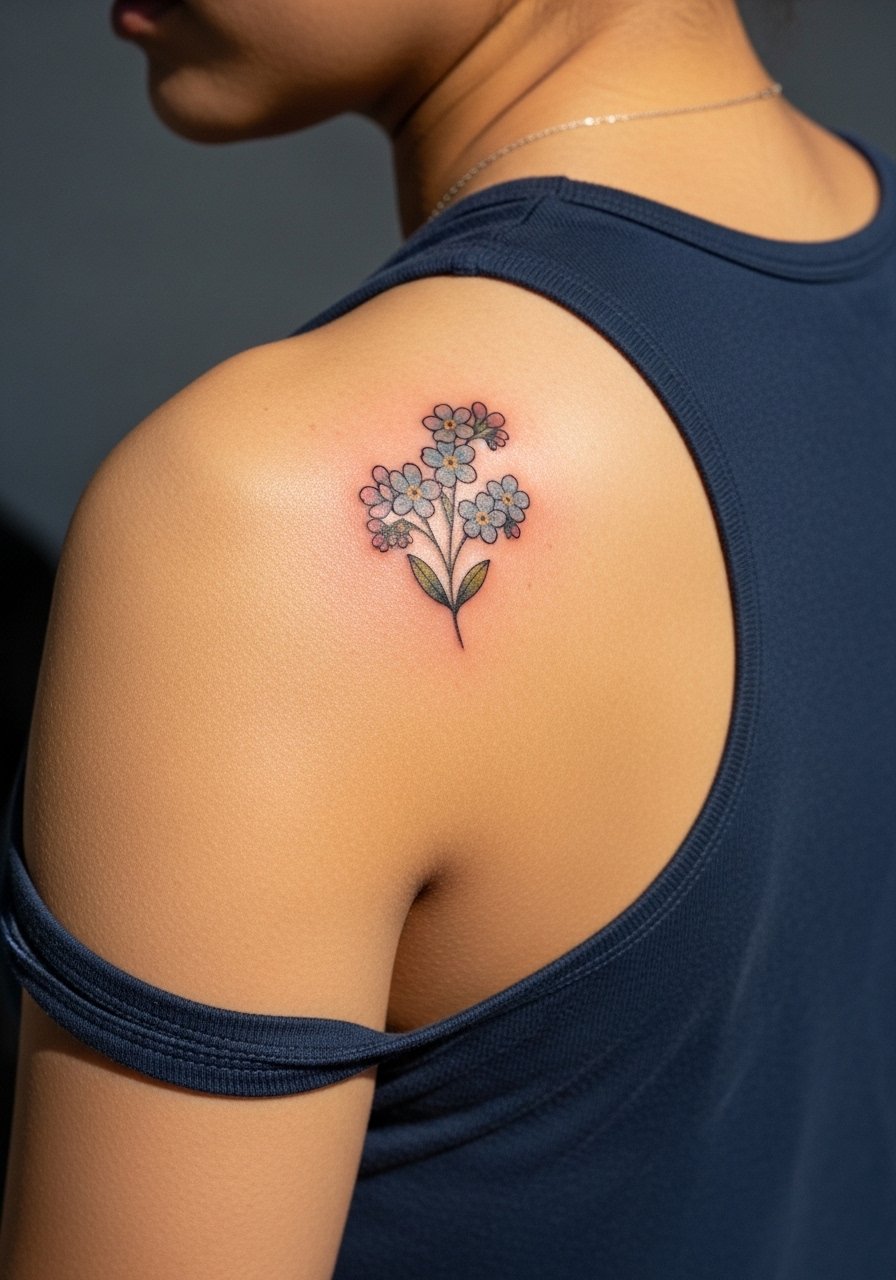
Pain warning lead: the top of the shoulder is one of the least painful shoulder zones, which makes it ideal for tiny color touches. Keep color accents minimal and contrast-ready. A common error is choosing indistinct blues that read muddy on lighter skin after a sun tan. Ask for a small dark outline or tiny dot contrast to keep the blooms distinct. For casual outfits, a racerback tank frames the cluster and keeps the back accessible.
14. Petite Linework Orchid on the Anterior Shoulder
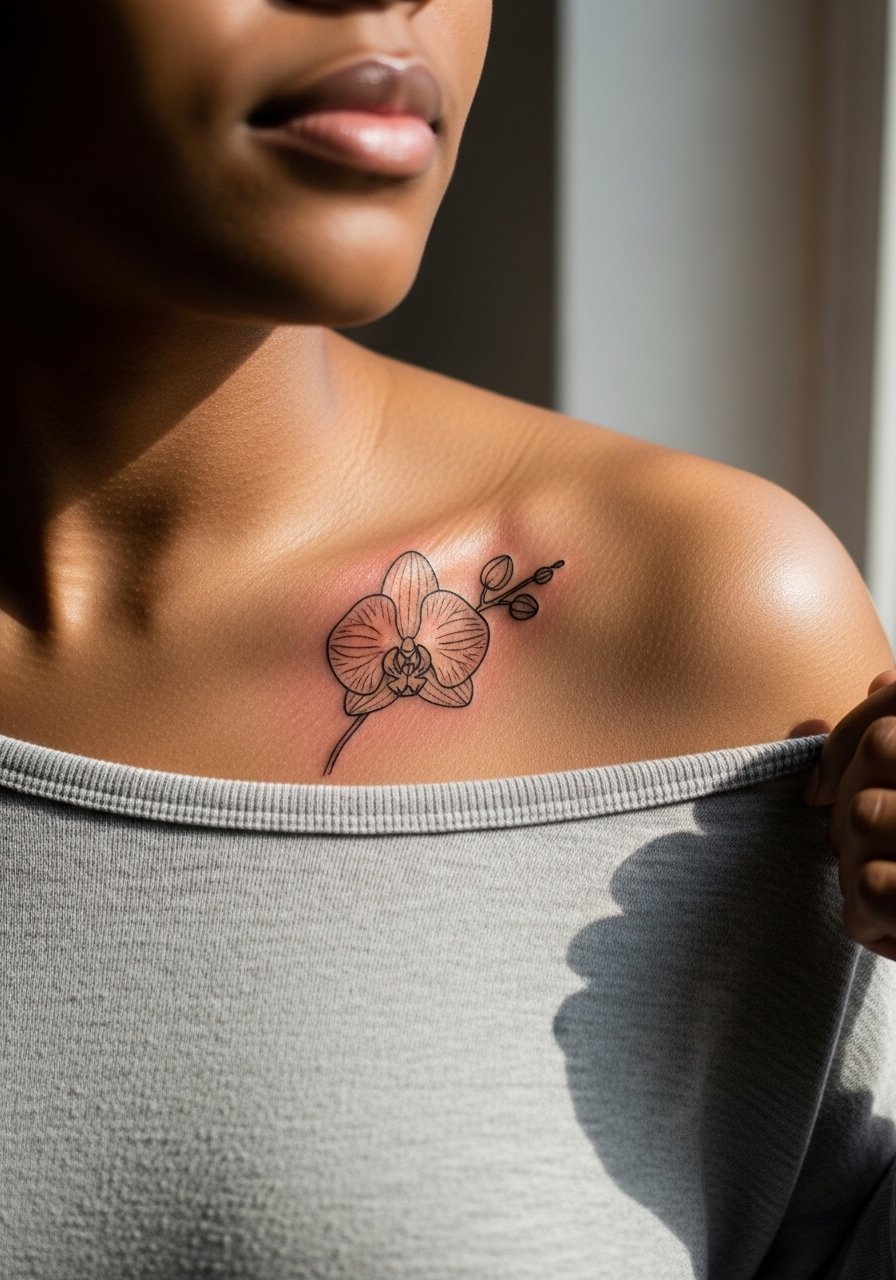
Visual impact lead: orchids with elongated petals suit the anterior shoulder because they emphasize the shoulder-to-collarbone sweep. Ask your artist to orient the bloom to follow your natural shoulder line. The anterior shoulder can be more visible in short-sleeve shirts so balance size with how often you want it shown. A frequent mistake is choosing heavy fill for an orchid meant to be delicate. Pair with a wide-neck shirt that exposes just enough skin to show the orchid without overexposure.
15. Tiny Wild Rose on the Shoulder Fold
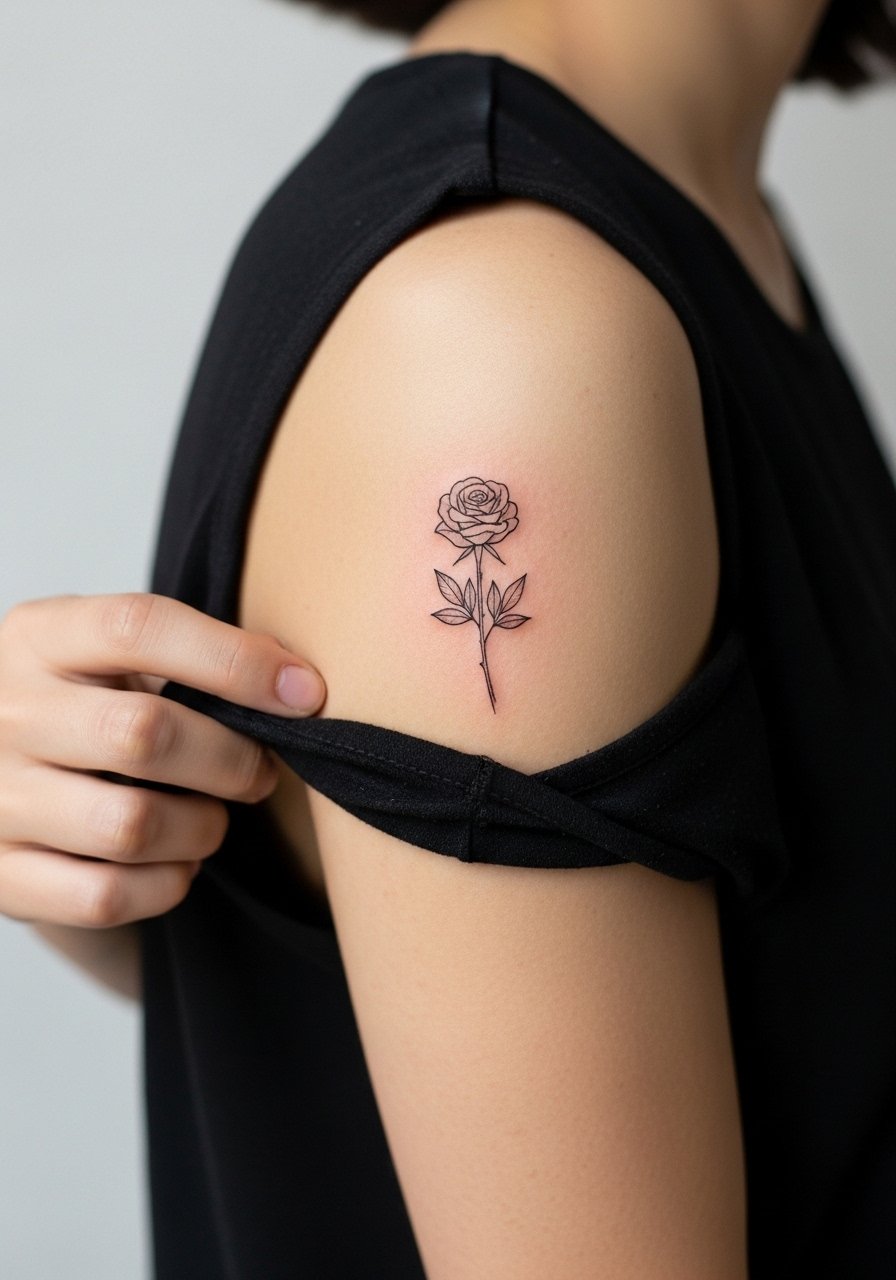
Mistake lead: the shoulder fold sees a lot of movement and can flatten dense shading over time. For a wild rose here, opt for cleaner linework and selective shading rather than packed gradients. The area may need touch-ups earlier than the shoulder cap. The session feels like a medium discomfort because of the shifting tissue. For showing it off in summer, roll sleeves or wear a sleeveless blouse that centers attention on the fold without rubbing.
16. Tiny Laurels Along the Shoulder Curve
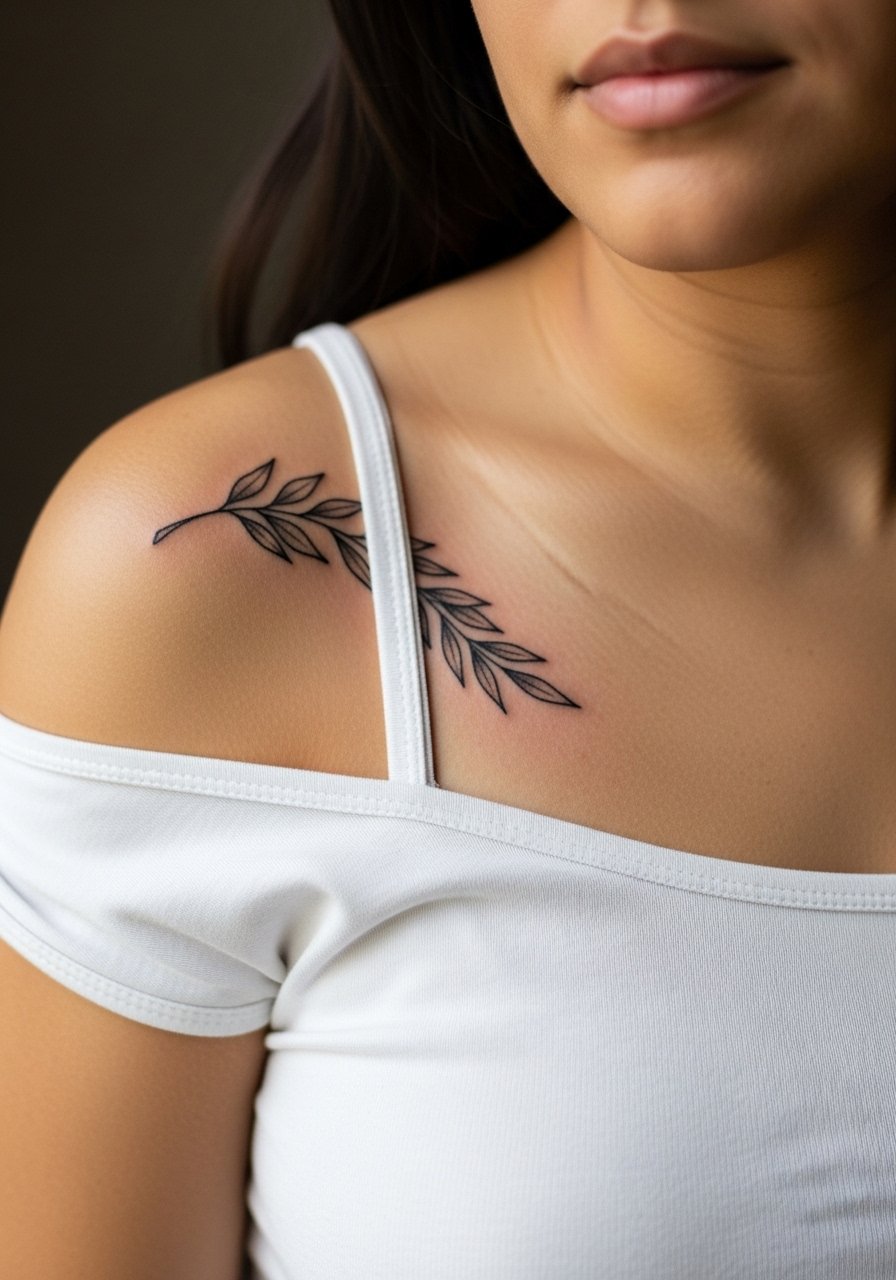
Consultation lead: laurels look more intentional when individual leaf spacing is slightly irregular to mimic natural growth. Request a few leaves larger than others so the piece ages with readable rhythm. The shoulder curve is forgiving for length, but keep leaf details moderate. A mistake is asking for identical leaves which can blur into a texture over time. For styling, a tank top with thin straps or a rolled sleeve makes the laurel visible without exposure.
17. Micro Dot Work Floral Sprig Near the Shoulder Seam

Aging lead: dot work relies on midtone retention and can soften on frequently sun-exposed shoulders. Ask for a balanced dot density, denser in the center and lighter outward, which preserves shape as the skin settles. The shoulder seam area can take slightly longer to heal because of friction from straps. Plan for a touch-up at year two or three if you want the micro dots crisp. For comfort during the session wear a loose cotton tee you can adjust without stretching the artwork.
Frequently Asked Questions
Q: How visible are small shoulder flower tattoos when wearing regular shirts?
A: Small shoulder pieces vary by placement. Outer shoulder and cap tattoos peek out in short sleeves or tank tops while anterior or collarbone-adjacent ones show more with wide-neck or off-the-shoulder shirts. If you want consistent visibility, place the design closer to the collarbone or upper deltoid and mention wardrobe habits to the artist during consultation.
Q: Do fine line shoulder flowers need touch-ups sooner than bold designs?
A: In my experience fine line work often needs a touch-up earlier than bold blackwork because the thin lines have less room for blur. Expect possible lightening or softening around year two to three, depending on sun exposure and skin type. Ask your artist about planned spacing and line weight so you can balance the look with longevity.
Q: Can colored tiny flowers work on darker skin tones?
A: Yes, but approach color choices carefully. Some artists favor jewel tones and deeper pigments to keep contrast, while others prefer dark outlines with selective color accents. Name both approaches in your consultation and ask to see healed examples on similar skin tones before committing.
Q: What should I wear to the studio for a shoulder tattoo session?
A: Wear something you can shift aside without stretching the area, like a loose tank top or a button-down you can slide off one shoulder. Comfort matters because short wardrobe changes during the session help the artist work cleanly and reduce session time.
Q: Are there shoulder placements to avoid if I want long-term clarity?
A: Avoid placing extremely dense micro details directly over the most mobile fold or directly under bra or strap lines. Areas with constant friction or heavy sun exposure are the ones that tend to lose fine detail first. Discuss movement and clothing with your artist and map the stencil while standing so you see how it sits with garments.
