
Fine line butterflies are all over saved boards, but what looks delicate on a screen will not always stay that way on skin. Soft stencils ask you to pick placement and line weight with more care than color choices, because those two decisions determine how the piece heals and how often it needs a touch-up. Start with a simple wrist outline and you will see how small choices change the five-year result.
1. Simple Outline Butterfly on the Wrist

I recommend this when you want a first tattoo that feels intentional without stealing focus. Tell your artist you want a 1.5 to 2 inch, single-pass outline with slightly reinforced junctions at wing tips so the thin line does not spread into a blur. Common mistake is asking for ultra-thin whisker lines at micro scale, which are likely to fade or require a touch-up at year three. Expect a short session under an hour and mild wrist sensitivity. For showing it off, pair the piece with a thin chain bracelet on the opposite wrist and wear sleeveless tops to keep access easy during the session.
2. Dual Butterflies Along the Collarbone
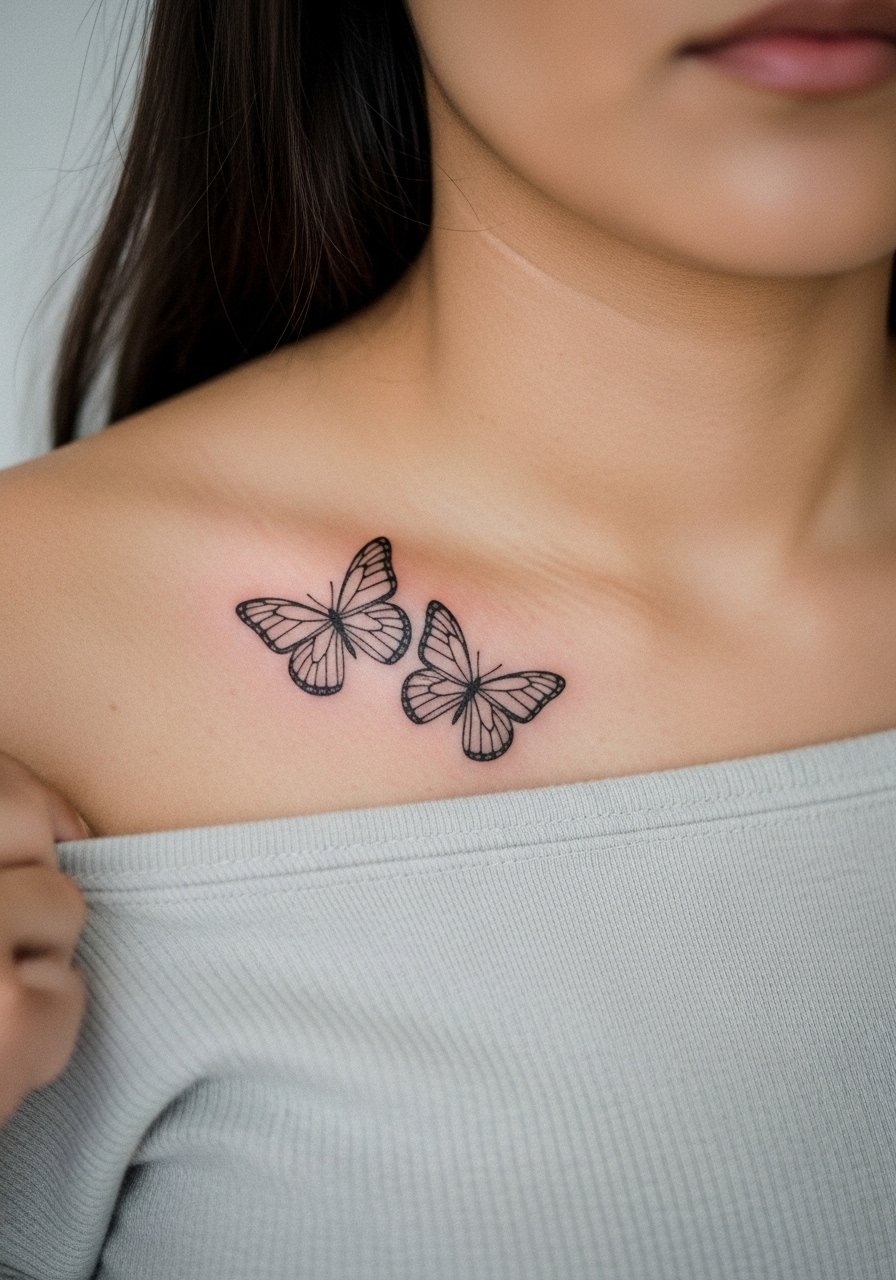
I like paired stencils for symmetry on the collarbone because they frame the chest without crowding. Ask your artist to place them separately so spacing can be adjusted on the skin, not on the iPad. Many people make the mistake of requesting identical spacing from a single stencil, which reads stiff on curved collars. Expect moderate pain and a 45 to 75 minute session for two small pieces. For show-off styling, an off shoulder top or a strapless blouse highlights the balanced placement and keeps attention on the linework.
3. Delicate Quick Butterfly Behind the Ear
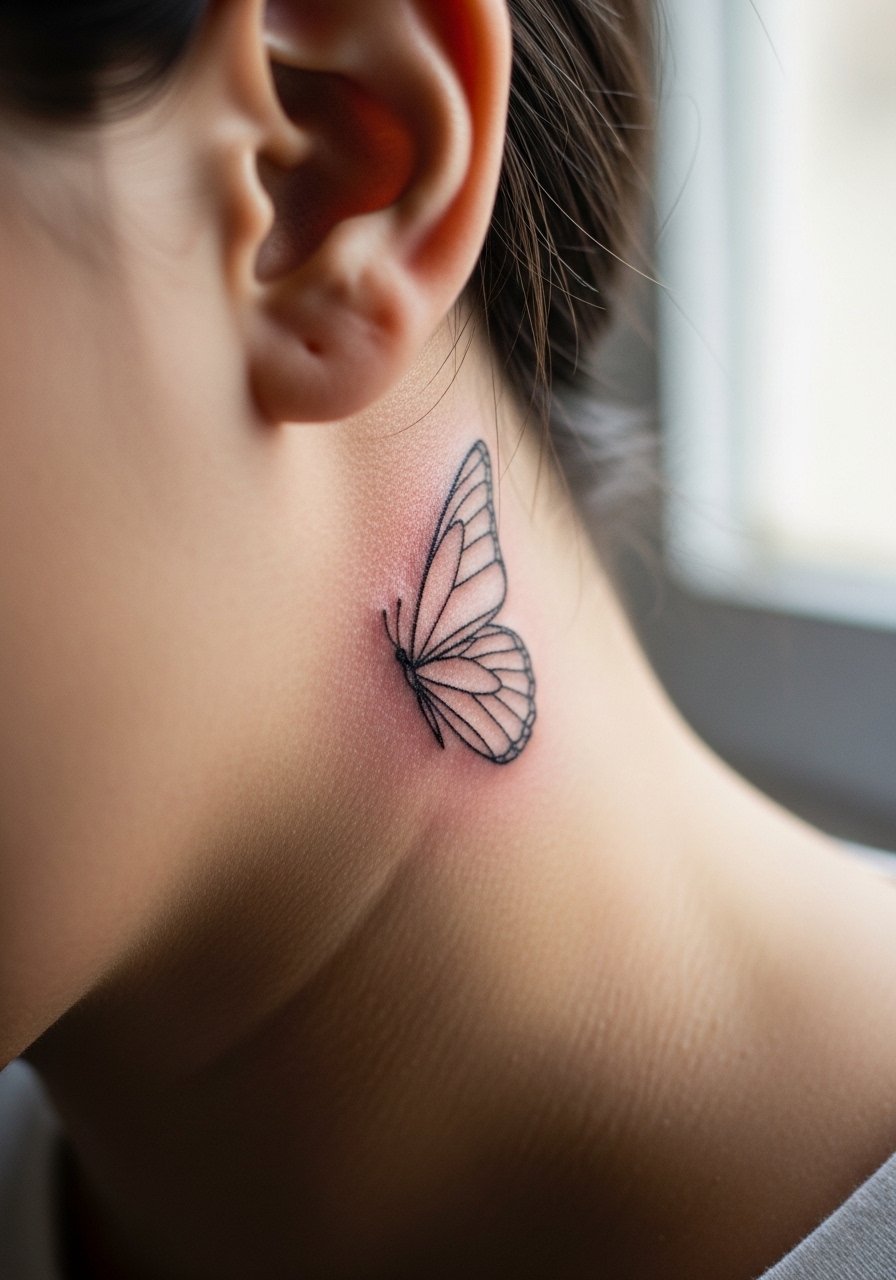
Great for flash days and fast sessions, behind-ear stencils are micro in scale and heal quickly. Tell the artist you want a single outline only, roughly 0.8 to 1 inch, no filling. The common issue is over-detailing a tiny stencil, which blurs as it settles. The session feels quicker than expected because the area is small but sensitive. Wear hair up or a loose updo to the appointment. For a subtle finish pair, choose pearl studs or a small pearl stud earring while keeping your hair half-up when you first reveal the piece.
4. Small Tribal-Inspired Butterfly at the Ankle
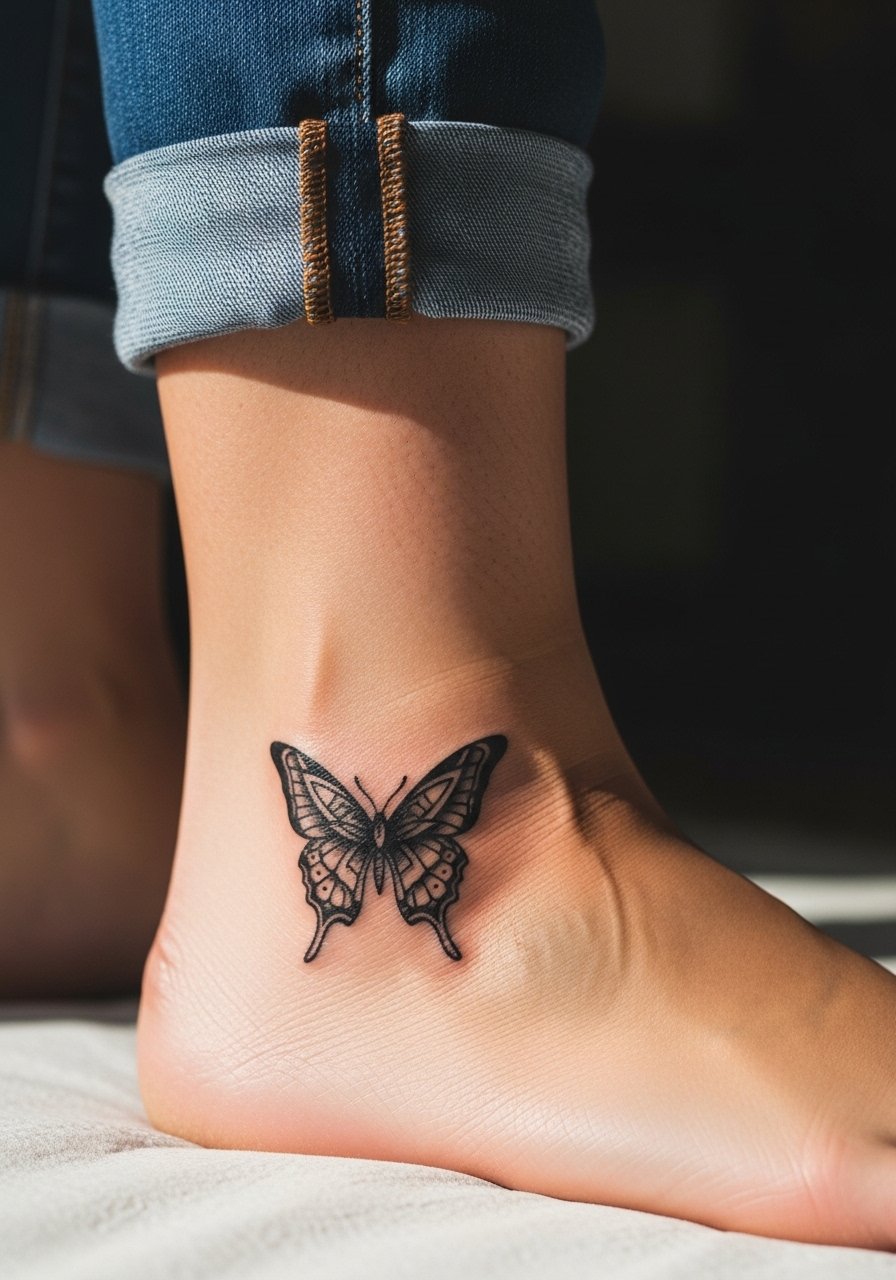
If you want a gothic edge without a large commitment, a two-inch neo-tribal stencil on the ankle reads bold and contained. Ask the artist for solid black edges with softened interior lines to avoid harsh contrast on lighter skin. A mistake I see is forcing pointed tribal spikes too small, which become indistinct in a year. Ankle sessions can be twitchy because of bone proximity but short. For summer show-off, pair it with strappy sandals and a thin gold ankle chain to keep attention on the placement.
5. Vibrant Realistic Butterfly on the Upper Shoulder
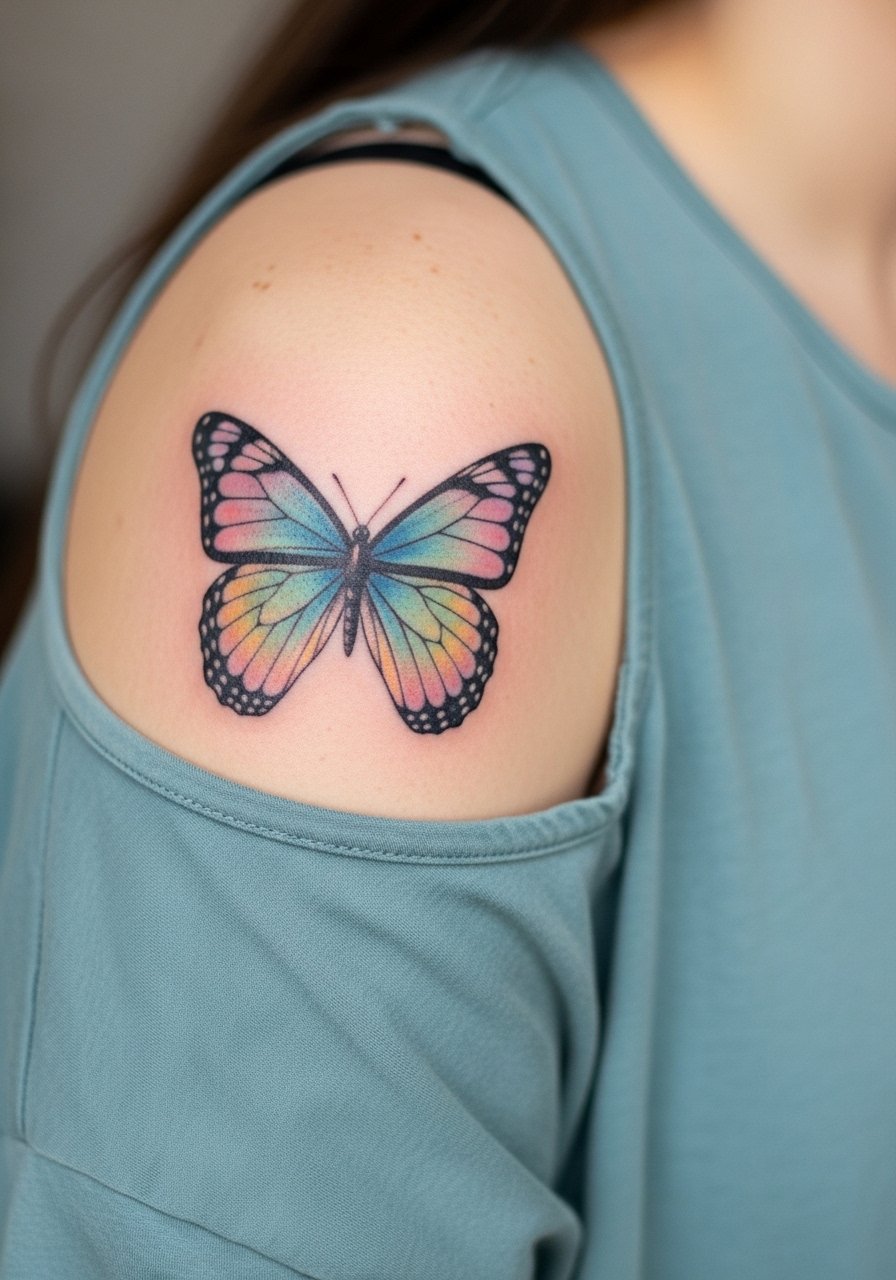
This is for collectors who want lifelike wings in soft pastels. Request layered color passes and a plan for two shorter sessions so saturation can be built carefully. The common aging problem is over-saturated single-pass color that heals patchy; staged saturation holds better. Shoulder sessions are comfortable and allow the artist to angle the stencil for curvature. For wardrobe, a sleeveless sundress or a structured tank complements pastel tones and keeps the area accessible for touch-ups.
6. Abstract Soft Pastel Butterfly on the Thigh
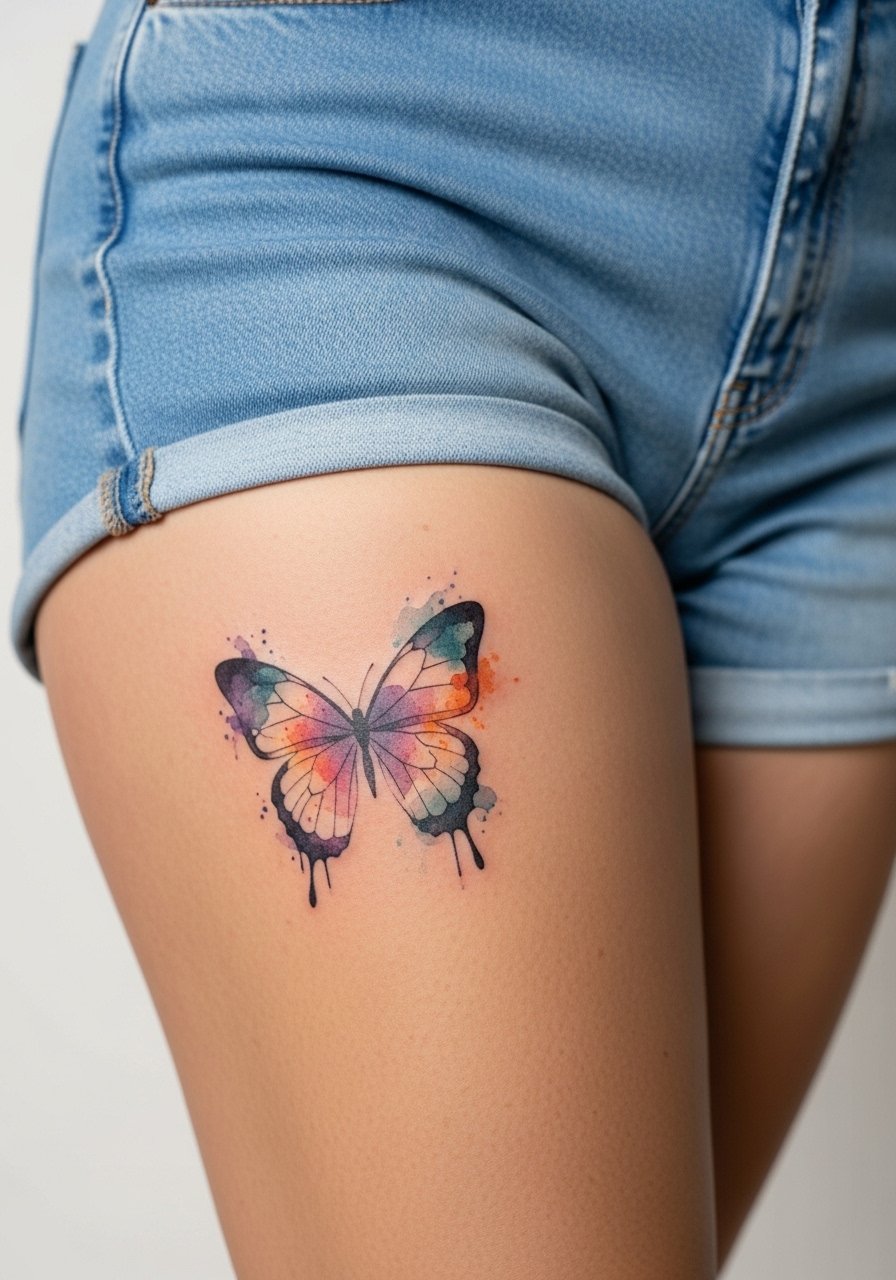
Watercolor stencils translate well to the thigh because the larger canvas lets colors breathe. Ask your artist to map color gradients across negative space and to keep edges soft for a blended look. A frequent error is compressing too much detail into a small area, which turns into muddy healed color. Thigh sessions are lower on the pain scale and can take 1 to 2 hours for a medium stencil. Wear high-waisted shorts to the appointment. For outfits, high-waisted shorts or a flowy skirt pairs with the placement and keeps the colors visible when you want to show the piece.
Studio Day Picks
The wrist, collarbone, behind-ear, ankle, shoulder, and thigh pieces above ask for different prep, and these items smooth the session and the first week.
-
Stencil transfer paper kit. Lets you preview positioning on skin before committing, which helps with the dual collarbone and wrist placements above.
-
Topical numbing cream. Helpful for sensitive ankle or wrist sessions when you want to take the edge off without altering linework.
-
Thin protective film roll. Keeps ankle and wrist tattoos cleaner through the first week of friction from socks and bracelets.
-
Fragrance-free body wash. Gentle cleansing for shoulder and thigh pieces lets the ink settle without irritation.
-
Aquaphor healing ointment. Thin layers for the initial days lock in moisture for fine line pieces while avoiding clogged channels.
7. Personalized Butterfly with Script on the Collarbone
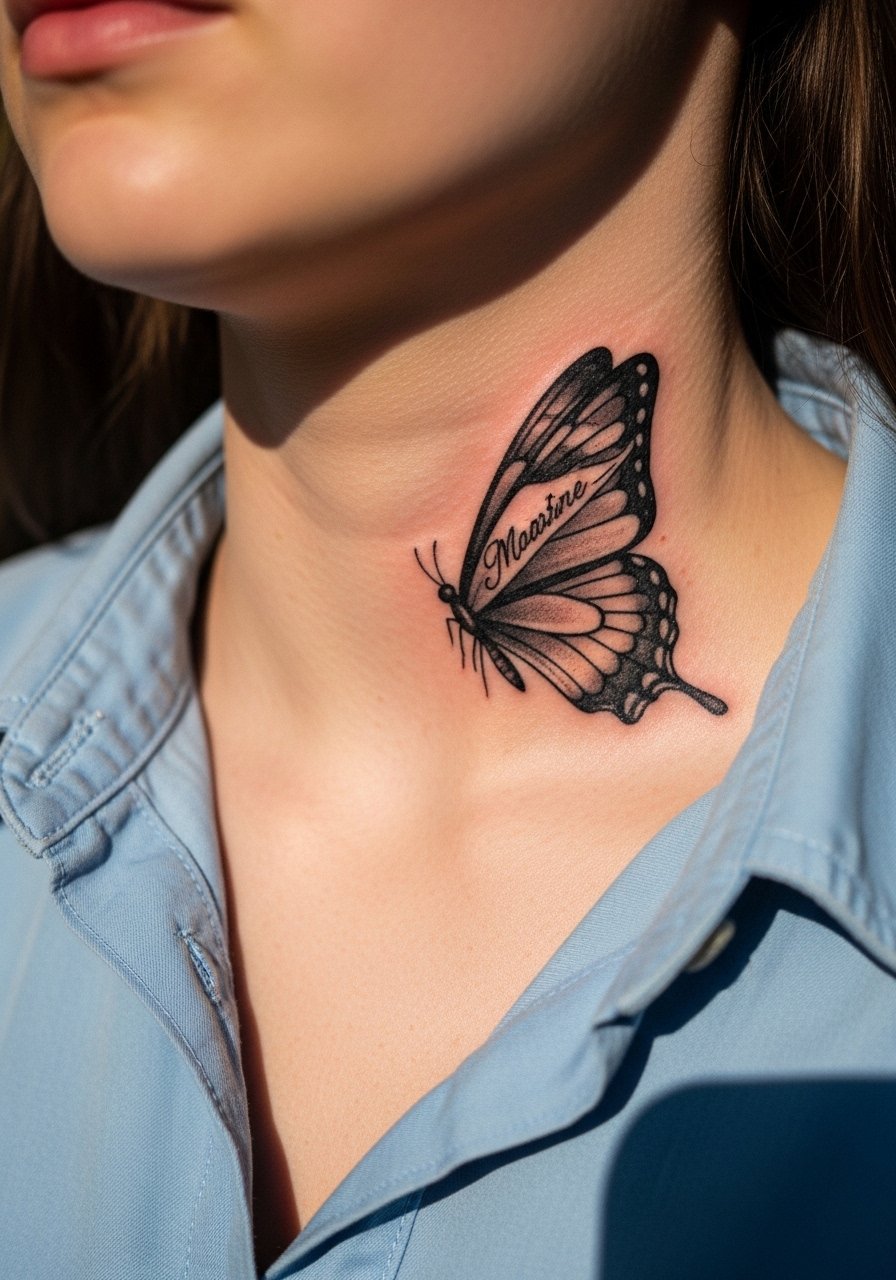
When you want a name or date integrated, ask for the script to sit along a wing edge so both elements breathe. A common mistake is cramming long text into a micro wing, which blurs fast. Expect a 1 to 1.5 hour session and plan for touch-ups at year two if you choose fine cursive. If the collarbone placement matters for work, test shirt reveal positions before you commit. For showing it off, a button down shirt you can pull aside frames the design without overexposing the area.
8. Tiny Gothic Neotribal Butterfly on the Finger
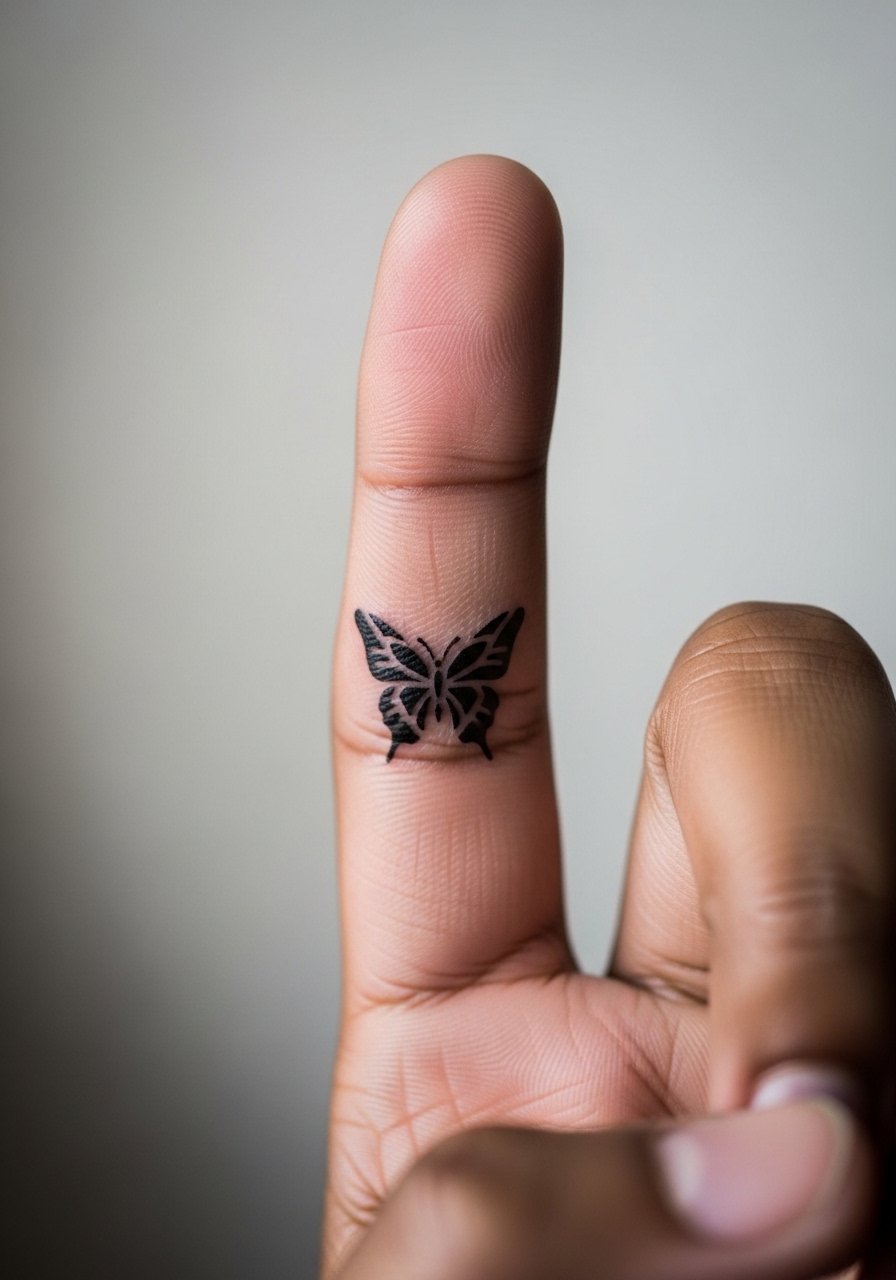
Finger placements are intimate and high-friction so expect faster fading. Tell your artist you want thicker junctions and simplified interior shapes to resist blowout. The mistake is asking for micro spikes and thin interiors because hands wash and type constantly. Sessions are brief but healing is tricky and touch-ups are common at year one or two. Consider career implications before this visible spot. Wear no rings during healing and plan to rebook a touch-up if lines soften.
9. Symmetrical Dual Wing Anklet Pair
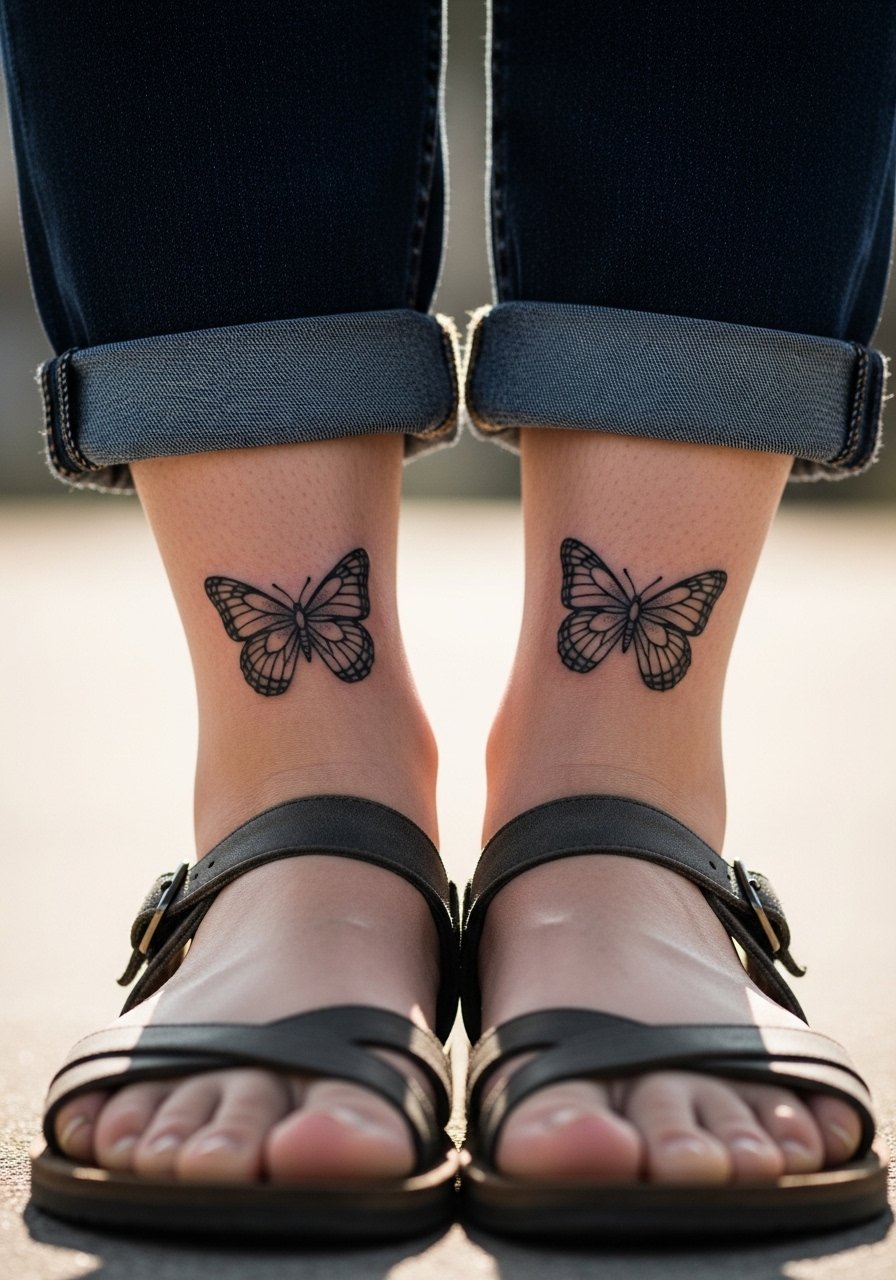
Separate stencil application gives precise symmetry for paired ankle pieces. Ask the artist to apply each stencil individually and check alignment with your legs in a standing position. A common error is transferring both stencils at once and not accounting for gait or posture, which makes them appear uneven when you walk. Sessions are short and pain is moderate. For summer styling, pair these with gold ankle chains and strappy sandals to keep the focus on the matching placement.
10. Color Gradient Butterfly on the Shoulder Blade

Graduated color gains from layered passes and soft edges, which is why shoulder blade is ideal. Tell the artist you want faint outer edges and heavier saturation toward the wing base to avoid edge banding. The pitfall is asking for tiny gradients in a small stencil, which becomes patchy. Shoulder blade work heals well and usually requires two short sessions. Pair the piece with a structured tank top when you want the color to read against a neutral outfit.
11. Minimalist Clear Outline on the Calf
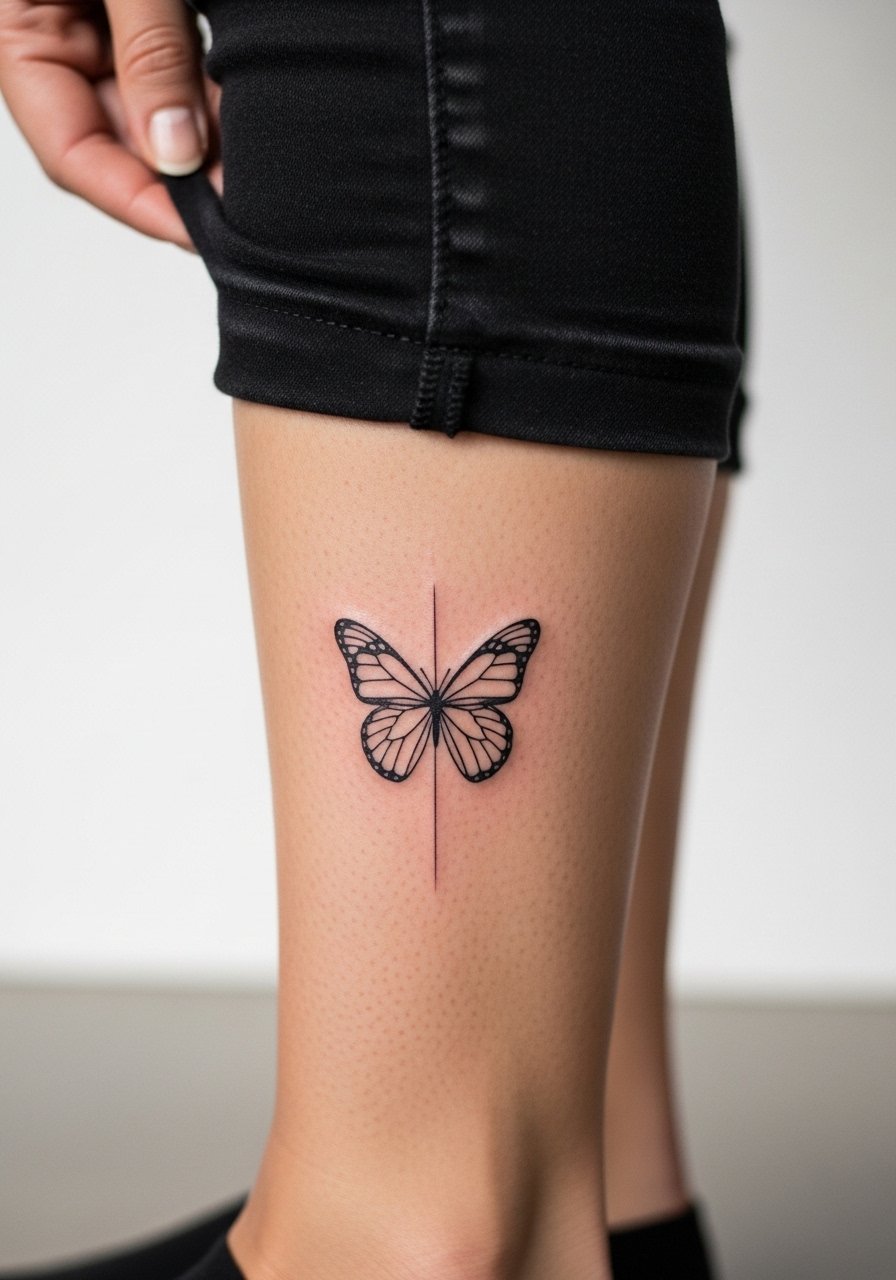
Calf allows slightly larger outlines without losing the minimalist look. I advise a 2.5 to 3 inch size with consistent lineweight so the outline reads from a distance. A mistake is pushing for ultra-fine hairlines on a dynamic area, which can muddle with muscle movement. Expect mild pain and a session of 45 to 90 minutes depending on size. For session wear, bring loose pants you can roll up. Calf pieces pair well with mid-calf boots and cropped pants when you want to show the linework.
12. Spiky Tribal Minimal Butterfly on the Outer Forearm

Outer forearm is forgiving for bold neo-tribal edges because there is enough space for contrast. Ask the artist to keep negative space inside wings to avoid a heavy black block. The aging issue is that solid black blocks in small areas can soften into one mass if spaced poorly. Sessions are straightforward and often one to two hours. Pair this with rolled linen sleeves or an olive tank top when you want the edges to pop without distraction.
13. Watercolor Comet Butterfly on the Inner Arm
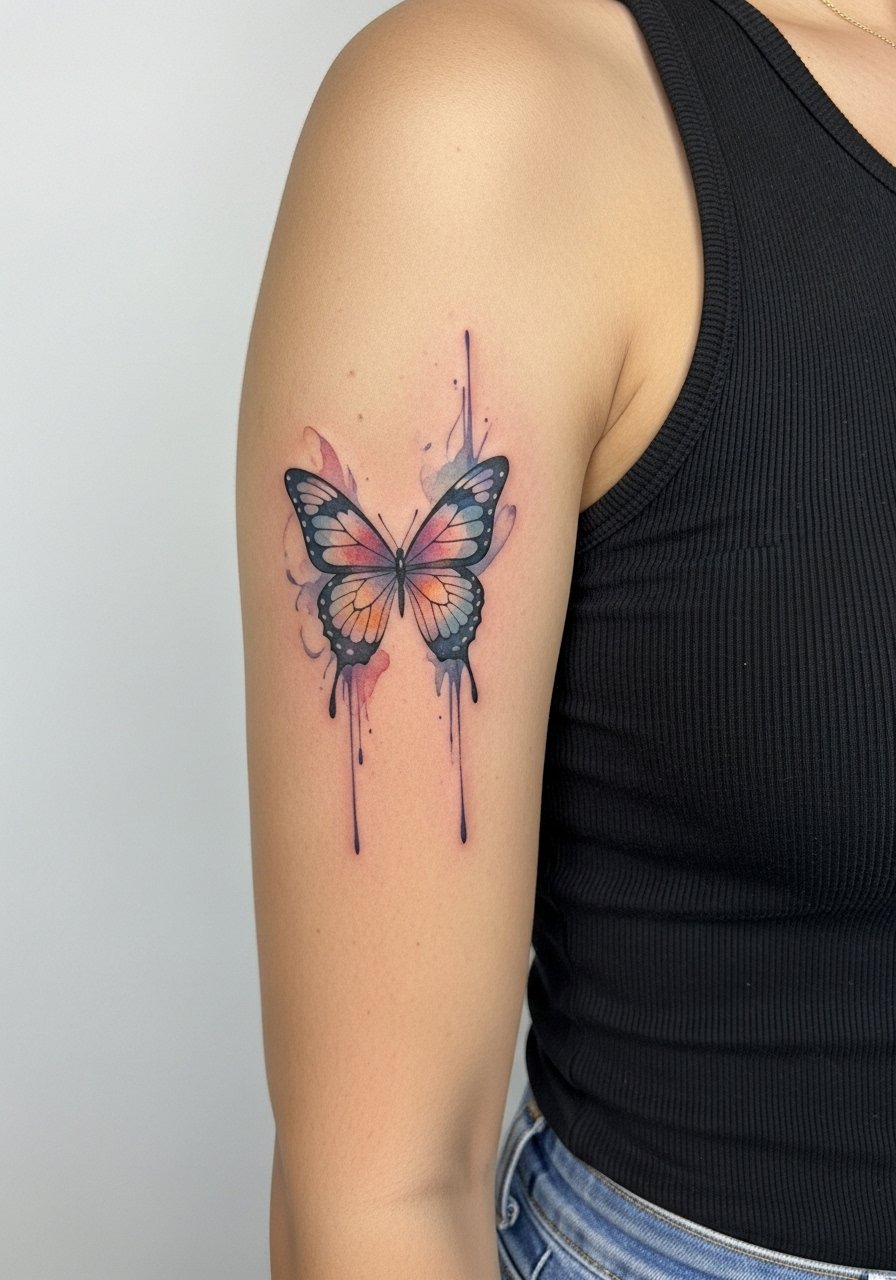
Inner arm gives watercolor strokes a soft backdrop. Ask for loose trailing strokes that fade into skin rather than distinct tails. The common mistake is tight edges on watercolor elements which then look like bruises as they fade. Expect low to moderate pain and a session that may need two passes for gentle saturation. For the appointment, wear a loose button-down you can pull aside. This placement reads beautifully with rolled sleeve shirts.
14. Stipple-Shaded Butterfly on the Nape of the Neck
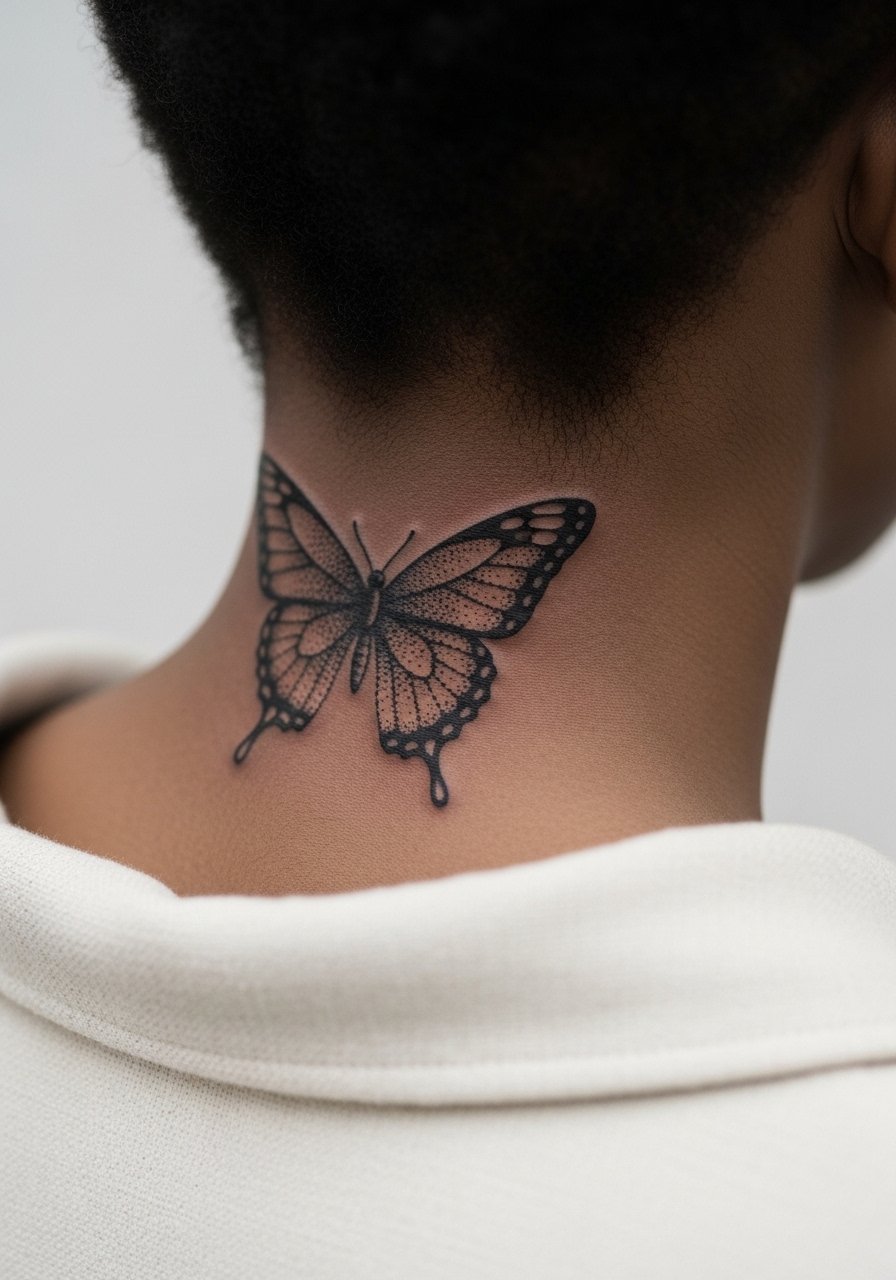
Stipple or dot shading holds texture without heavy saturation so it is ideal for the nape. Tell your artist you want graduated density with clear spacing so dots do not merge. Mistakes usually involve overpacking dots in tight areas which leads to muddiness. Nape sessions are quick but require hair pinned up and a wide-neck top for access. Consider professional visibility of a neck tattoo. Dot shading ages with soft grain rather than large blown-out areas.
15. Micro-Realism Finger Tip Accent
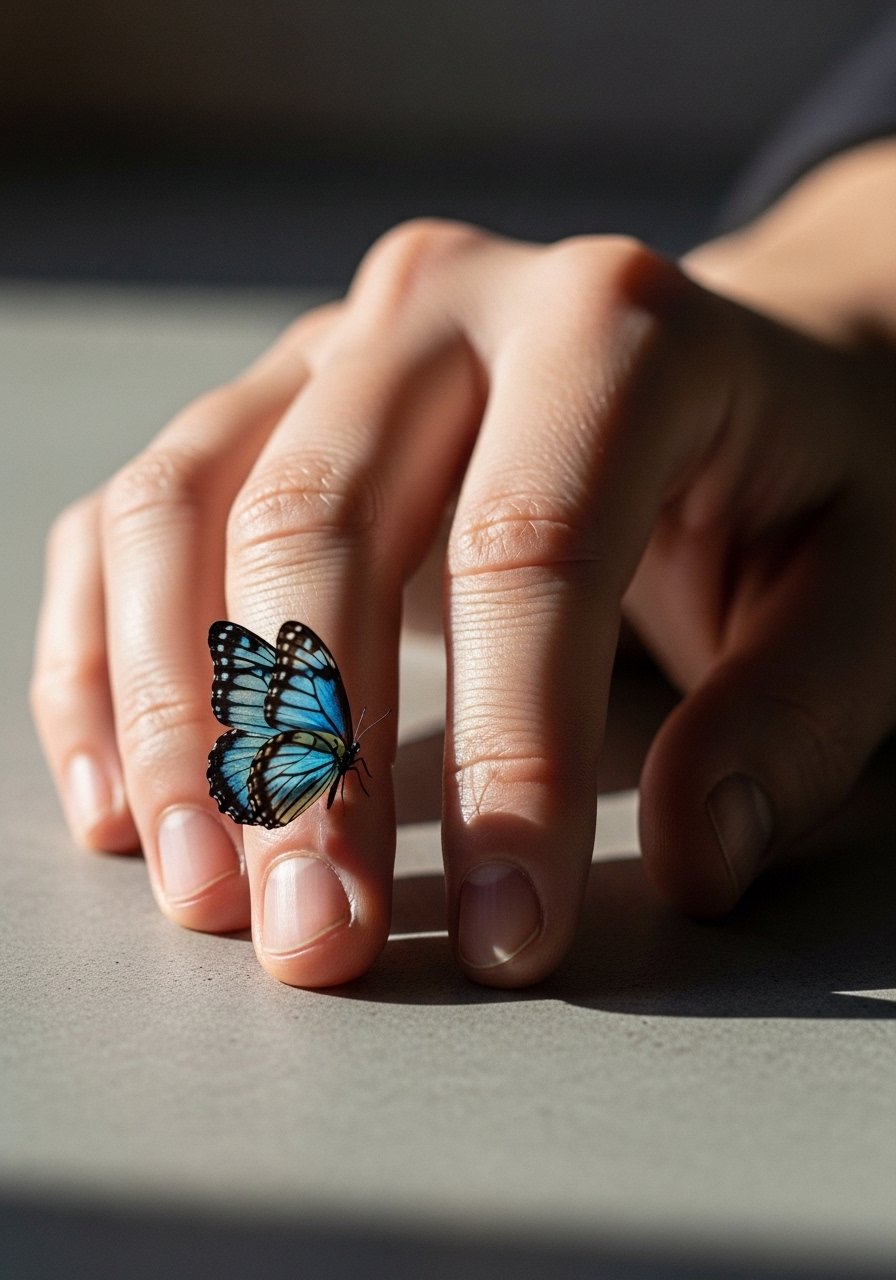
Micro-realism on fingers needs serious simplification to survive. If you want realism, ask for one clear focal detail, like a vein or spot, and keep surrounding lines minimal. The common error is cramming wings with highlights at micro scale. Expect rapid fading and a likely touch-up at year one for high-friction fingers. Pain is sharp but brief. Keep your hands out of water and heavy work during healing.
16. Geometric Frame Butterfly Near the Sternum
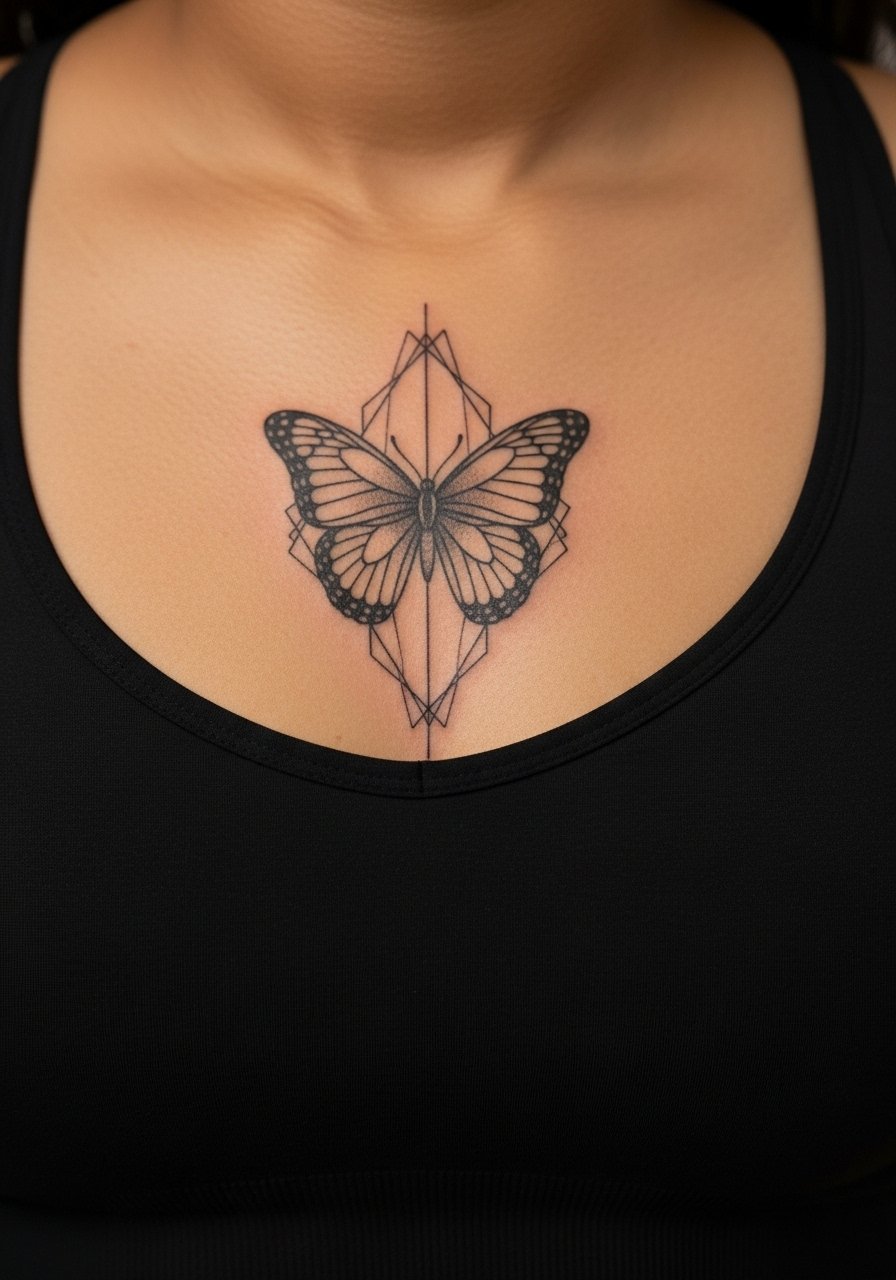
Sternum work requires contour planning because chest movement and breathing affect line settling. Ask for spacing between geometry and wings so lines do not crowd when the skin moves. A frequent mistake is too-dense geometry on flexible skin, which can merge into blotches. Expect higher pain and a longer session. For the appointment, wear a fitted sports bra or bandeau. Be aware artists differ on fine line at this location, so ask where they stand before booking.
17. Mirrored Flight Pair on the Collarbone
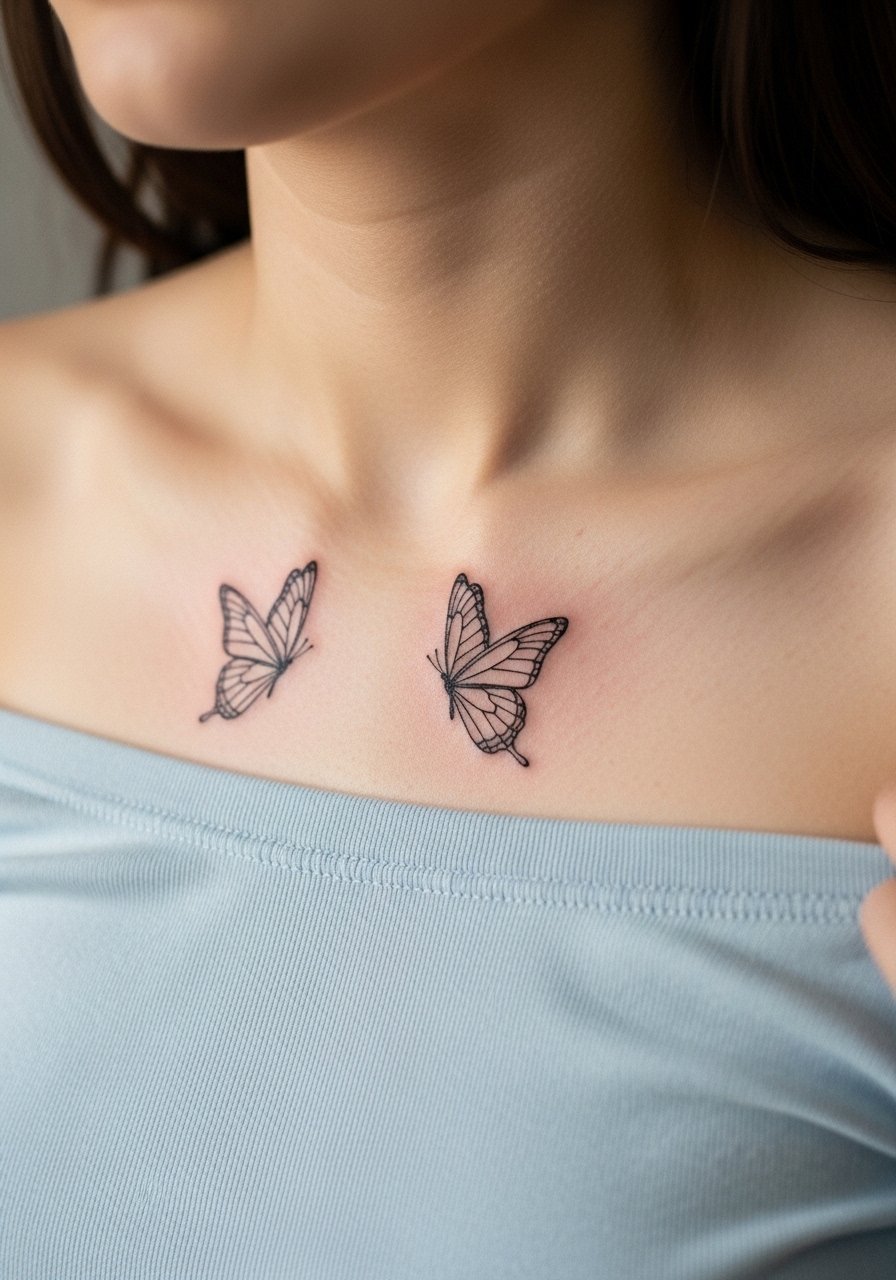
Mirrored pairs bring balance when the wings point inward. Tell your artist to mirror scale not negative space exactly, which avoids a forced look. The mistake is insisting on mirror-perfect stencils without testing on your posture, which can read off when you move. Sessions are similar to other collarbone pieces and often under 90 minutes. Off-shoulder tops frame mirrored chest pieces well and keep lines visible for photos.
18. Flight Trail Butterfly on the Inner Forearm
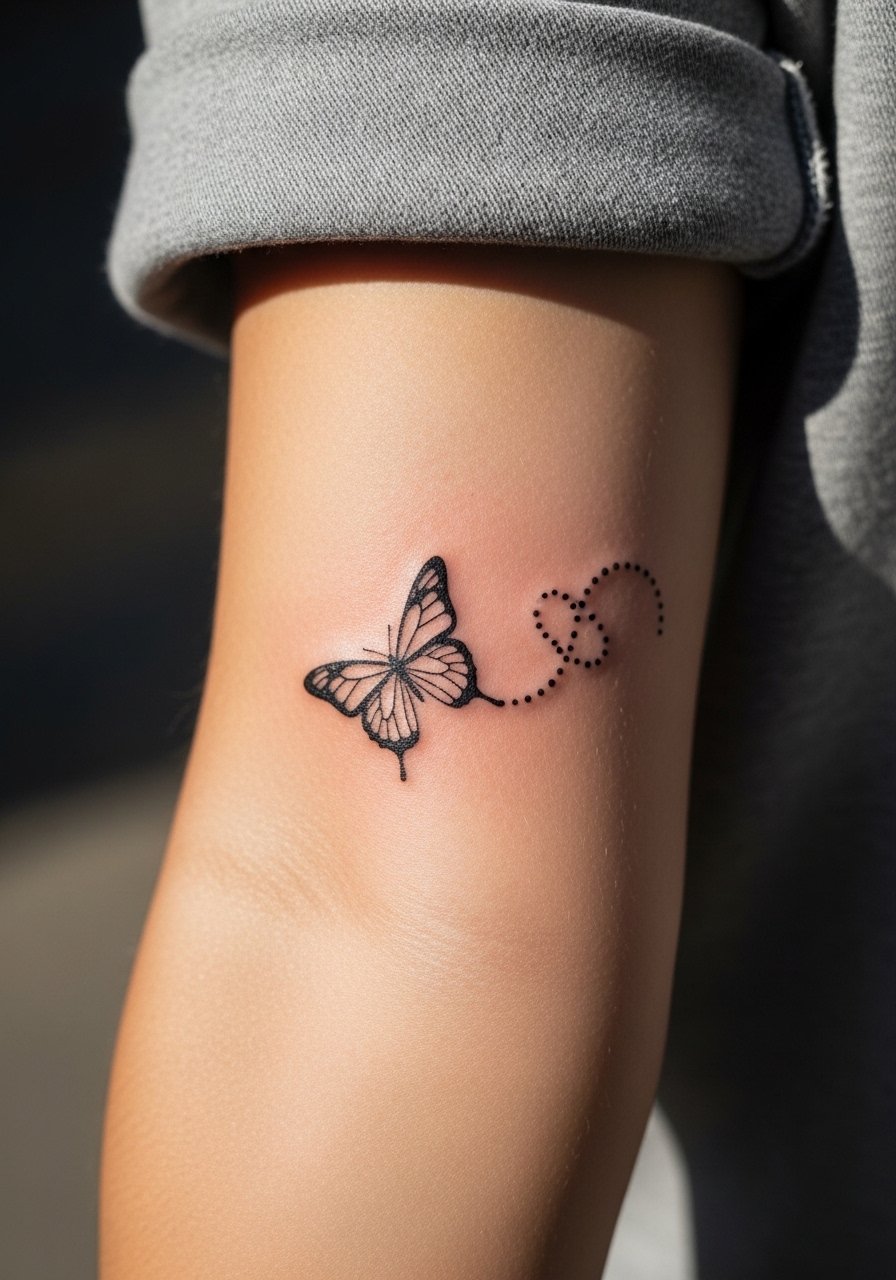
Inner forearm is forgiving for a trail design because the skin is flat and heals predictably. Ask for slightly bolder dots in the trail so they do not disappear into skin texture. A common mistake is making the trail too fine and long which loses continuity as it fades. Sessions are comfortable and usually a single session under an hour. When showing it off, roll sleeves like a loose button-down shirt to keep the arm exposed and the trail readable.
19. Moon-and-Butterfly Ribcage Accent

Ribcage pieces are sensitive and require planning for curvature and breathing. Tell the artist you want clear spacing between moon and wing to avoid merging when you move. Artists split on fine line on ribs. One camp says the skin stretch blurs lines within two years. The other camp says with proper depth and spacing, fine line settles fine on ribs. Ask the artist where they stand before booking because the result depends on technique and your anatomy.
20. Lace-Edged Butterfly on the Upper Back
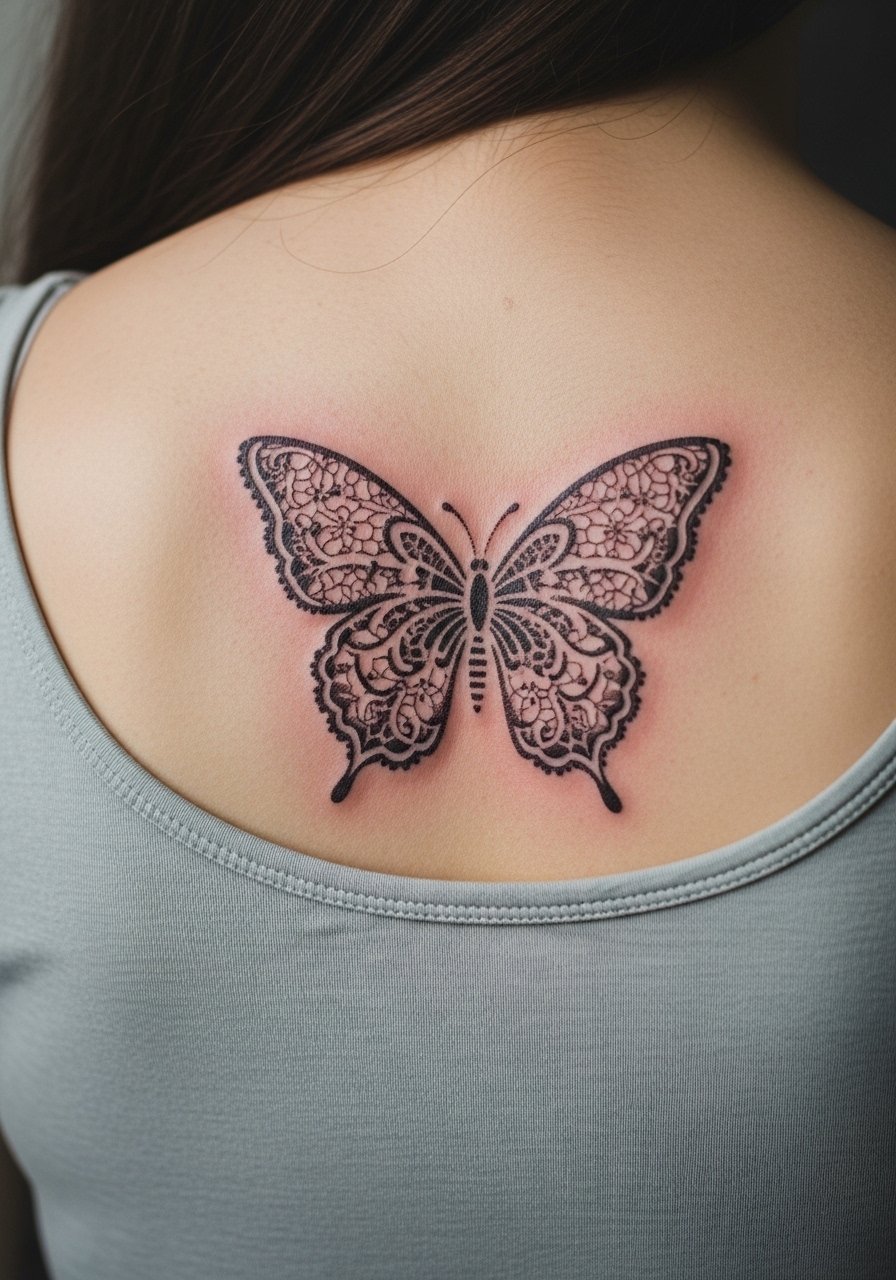
Upper back provides canvas for ornate edges that need breathing room. Ask for a 3 to 4 inch scale so lace details are held as negative space. A mistake is shrinking lace work too small which becomes blotchy after healing. Sessions are moderate and comfortable. For showing it off, an open-back dress or halter top reads the lace and keeps the focal area centered.
21. Watercolor Pastel Butterfly Comet on the Shoulder
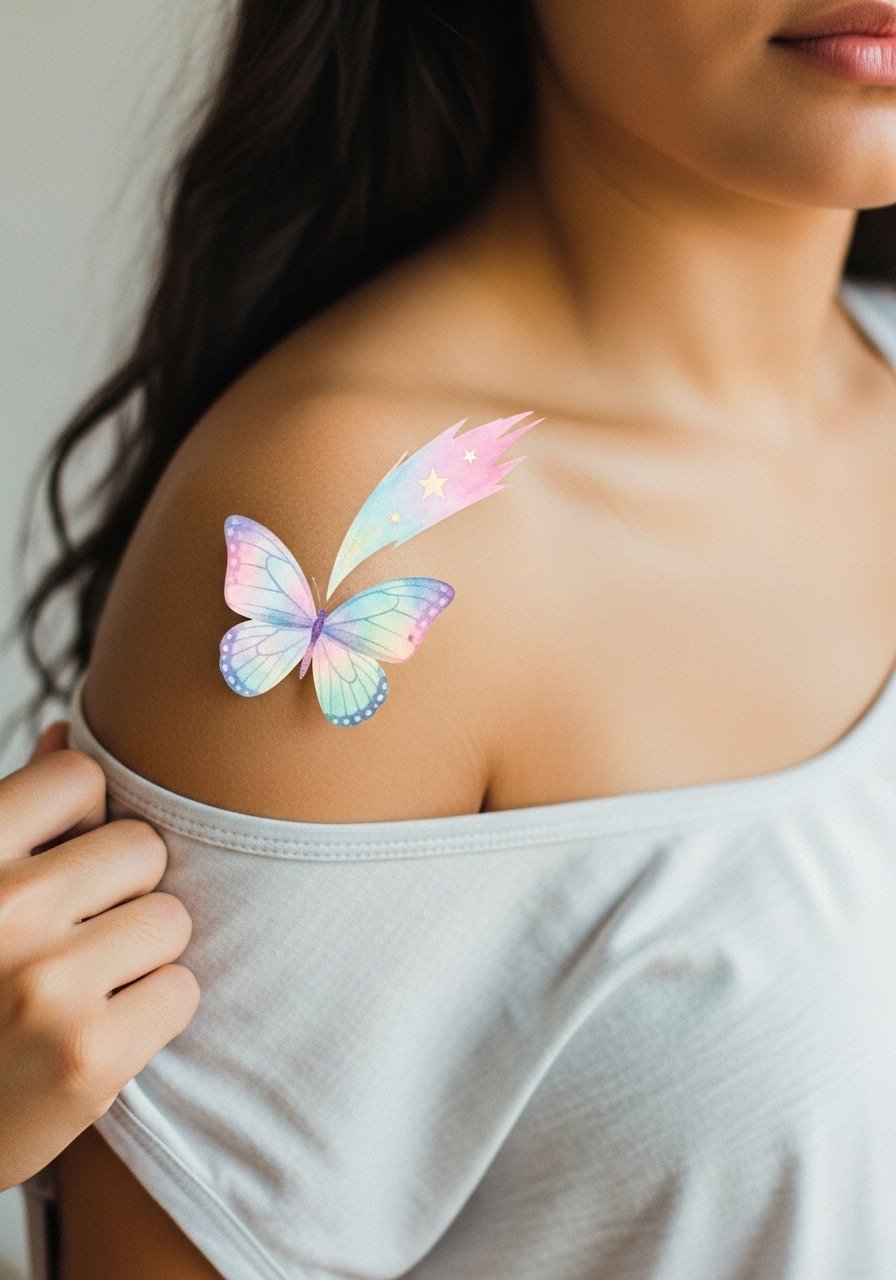
This variation plays with motion and color over a curved shoulder. Request staged color passes and soft edge blending rather than a single saturated pass. The common issue is overworking color in the first session which increases scab thickness and color loss. Shoulder healing is forgiving and touch-ups can be scheduled after three months. Pair with structured tanks or sundresses to let pastel hues breathe.
22. Minimal Dotwork Ankle Accent

Dotwork keeps visual texture without heavy lines so it works well on the ankle. Ask for spaced stippling with a clear outer outline to avoid dot merging. A frequent mistake is dense stippling at micro scale which becomes visually heavy. Sessions are brief and pain is moderate. Pair with sandals during the warm months to highlight the discreet placement.
23. Script Wing on the Collarbone

When adding a short quote or single name, keep the script to three words or less and ask the artist to test letter spacing on the skin. The mistake is forcing long phrases into wing space which compresses letters. Expect a single session and prepare for a touch-up if the lettering sits on thin skin. For hitting workplaces and social events, a strapless blouse reveals the piece without overexposing.
24. Negative Space Silhouette on the Wrist

Negative space uses solid blocks to define a butterfly without outlines. Ask your artist to map solid areas with escape channels so the black does not become one mass. Mistakes include overpacking black at tiny scales which softens into blobs. Wrist sessions are short but healing needs care because of friction. For session access wear a sleeveless top. A thin bracelet on the other wrist balances the visual weight.
25. Fine Line Moth-Inspired Butterfly on the Upper Chest

Chest work behaves differently because of daily movement and skin stretch. Ask for slightly increased spacing and stronger junctions at antennae points. Artists are split on whether super-fine line holds on chest areas. One camp says denser chest textures blur quickly. The other camp says proper depth and spacing keeps detail intact. If you choose the fine line route plan for a possible touch-up at year two and discuss spacing thoroughly in consultation.
26. Haloed Pastel Butterfly on the Shoulder Blade
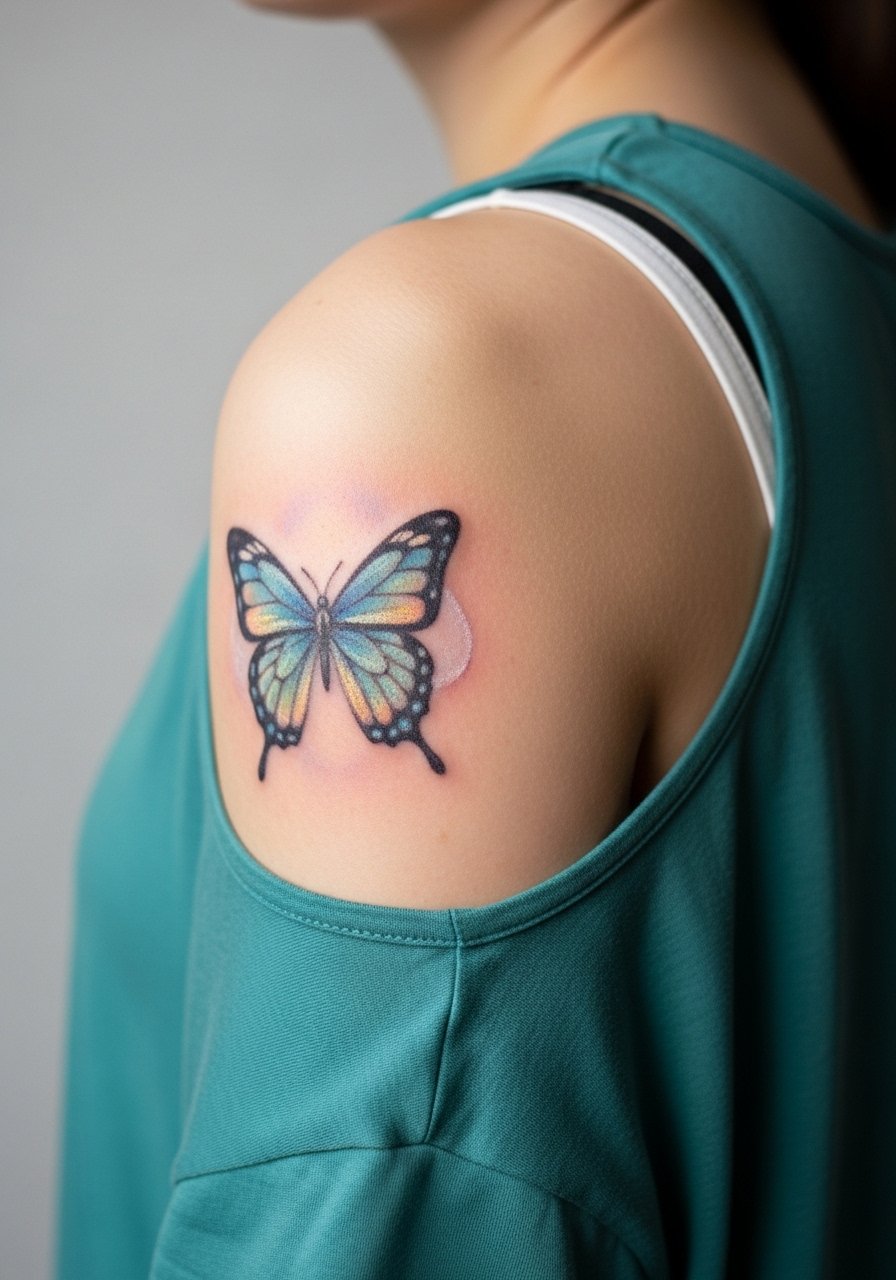
Halos are a soft glow technique that frames a central butterfly without heavy outlines. Tell the artist you want the halo to fade into skin so it does not read like a bruise. Overdoing halo contrast in the first session is a common error and can look patchy when healed. Shoulder blade fits this approach well and usually heals predictably. Pair with loose tanks for casual reveals.
27. Lace and Dot Wing on the Thigh
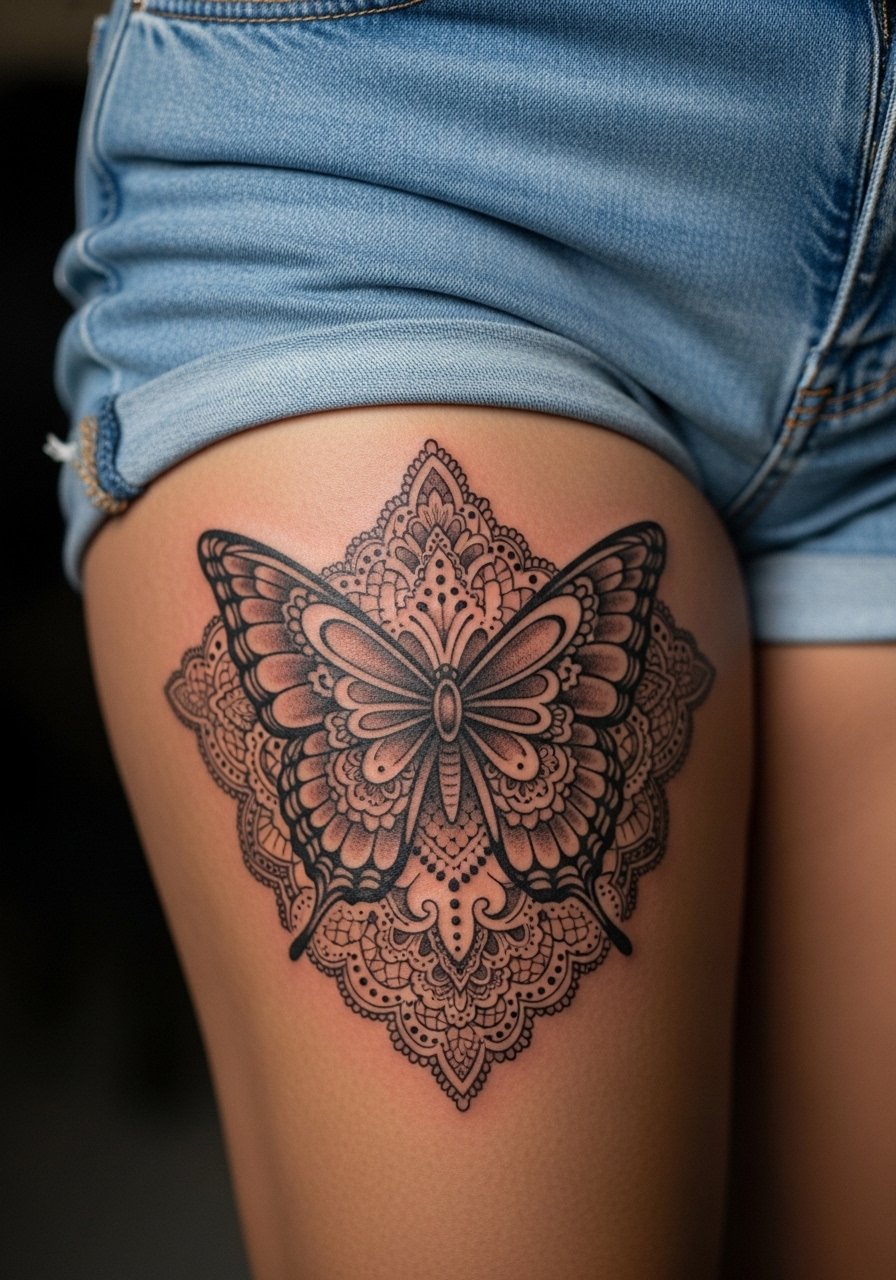
Thigh provides room for mixed techniques like lace edges and stippling. Ask your artist to map negative space for lace and to test dot density on a paper proof so expectations match the skin result. The mistake is combining too many micro techniques in a small stencil. Sessions are low to moderate pain and may take one to two hours. Wear loose shorts for the session and high-waisted shorts or flowy skirts to show the piece when you want to.
Frequently Asked Questions
Q: How long should a soft butterfly stencil remain crisp on a wrist?
A: In my experience a clean wrist outline can read well for two to five years before visible softening. Expect touch-ups around year three for ultra-fine lines. Choosing slightly reinforced junctions and avoiding hairline single-pass strokes improves longevity.
Q: Do watercolor or pastel butterfly stencils need different healing than blackwork?
A: Yes. Pastel and watercolor looks are built with lighter saturation and may need staged passes, which means avoiding thick scabs. Keep showers short and pat dry. The core rule is gentle cleansing and minimal picking, but the timing for re-saturation depends on how the color settles after the first phase.
Q: Should I be worried about fine line stencils on the ribs or chest?
A: Expect a conversation with your artist. Some artists say fine line on ribs blurs more quickly because of stretch and movement. Others point to spacing and needle depth as the deciding factors. Ask where your artist stands, and consider slightly increasing size or spacing if longevity is a priority.
Q: How do tiny tribal edges read on light skin compared with darker tones?
A: Pointed black edges are bold on most skins, but on lighter skin they can feel stark if packed too densely. A simple test is to print the stencil and place it on your skin under the same lighting. If it reads harsh, ask the artist to soften interior lines or add micro negative space.
Q: Will ankle and finger butterfly stencils need more touch-ups than shoulder pieces?
A: Yes. High-friction zones like fingers and ankles see more washing and fabric contact, which accelerates fade. Shoulders and thighs usually need fewer early touch-ups. Plan for an ankle or finger retouch around year one, depending on your lifestyle.
Q: What should I wear to a collarbone or sternum session for easiest access?
A: For collarbone pieces an off-shoulder top or open button-down is ideal. For sternum work a fitted sports bra or bandeau keeps the area accessible while remaining modest. A simple strapless blouse can work for revealing chest areas without exposing more than needed.
