
The tattoos that tend to still read sharp a decade later are not always the ones that got the most likes on day one. Heavier saturation and clean, slightly spaced linework often win for forearm placements, and placement matters more than the trend. Read on for 17 swallow treatments for the forearm, how each ages, what to tell your artist, and the wardrobe notes that make them sing.
1. Traditional American Swallow with Banner on Outer Forearm
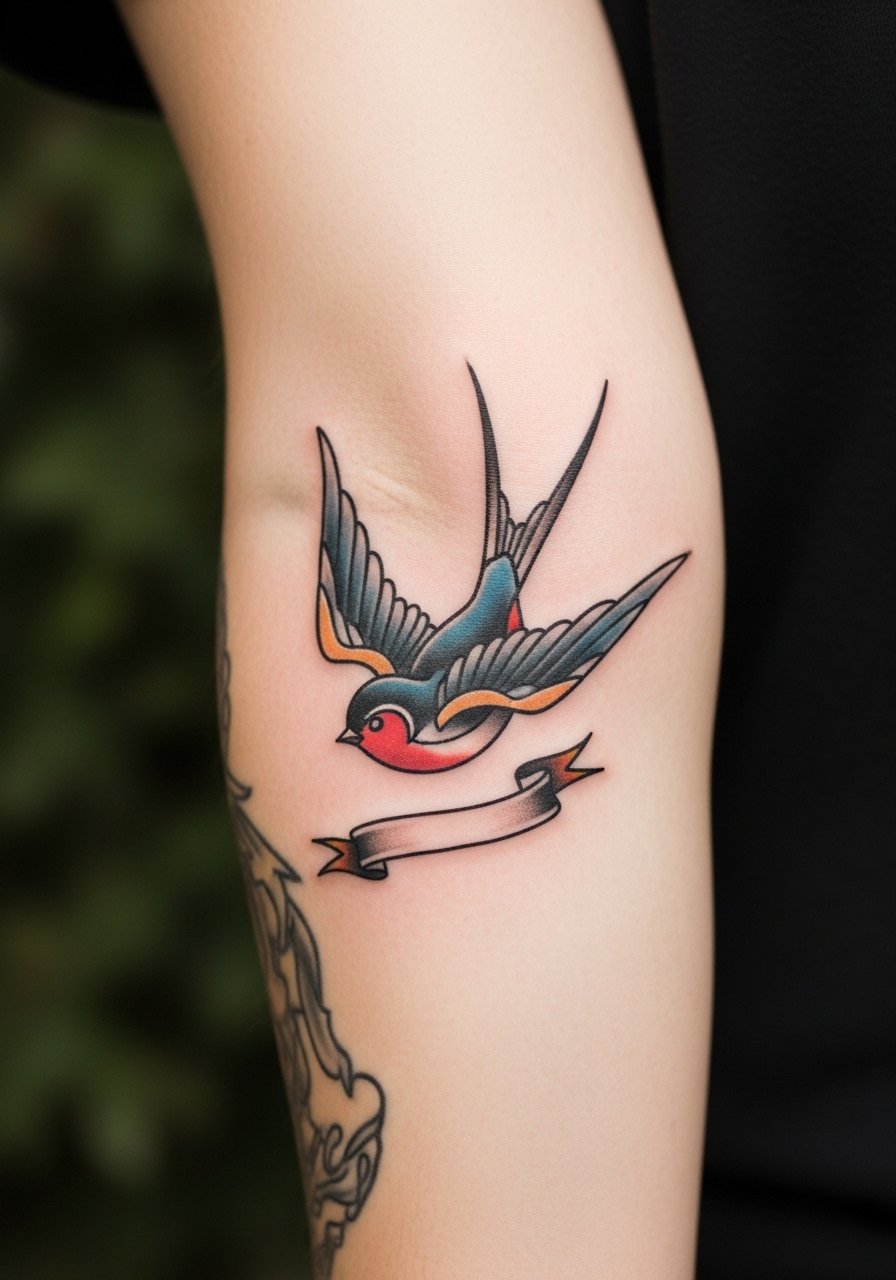
I’ve sat in consultation rooms in five shops across Brooklyn and this version is the one people book when they want a forearm piece that still reads from across a room. Tell your artist you want a slightly larger scale, firmer outer border, and honest color saturation so the reds and blues don’t wash out under sun exposure. Common mistake, requesting the classic flash but shrinking it to wrist scale, which accelerates blur and reduces legibility. For session day, wear a rolled sleeve chambray shirt you can push up cleanly so the artist has full outer forearm access. Expect one session for a 3 to 5 inch piece and a touch-up window at year two if you spend a lot of time outdoors.
2. Fine Line Single Swallow in Flight on Inner Forearm
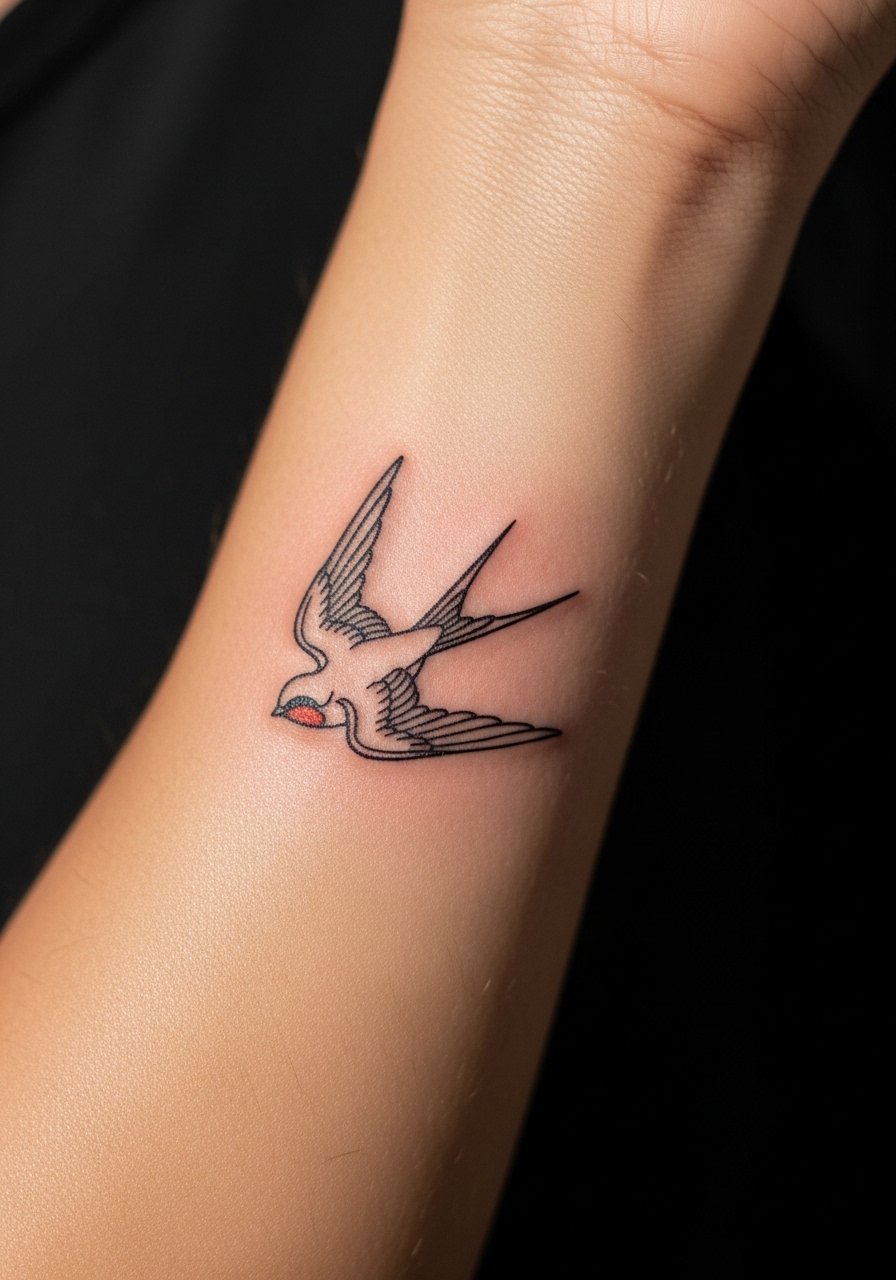
Fine line on the inner forearm is the go-to for people who want discreet movement without heavy saturation. Be explicit in consults about keeping negative space between wing feathers and asking for single-needle or three-round liner work done with a bit more spacing so lines do not merge. A common aging issue is crowding the feathers too close, which looks crisp at six months but softens by year three. Inner forearm sessions are lower on the pain scale but you will feel the artist passing over bone near the wrist. For showing it off, push sleeves up on a cream linen shirt so the delicate flight reads against a pale neutral backdrop.
3. Neo-Traditional Swallow with Rose, Forearm Sleeve Start
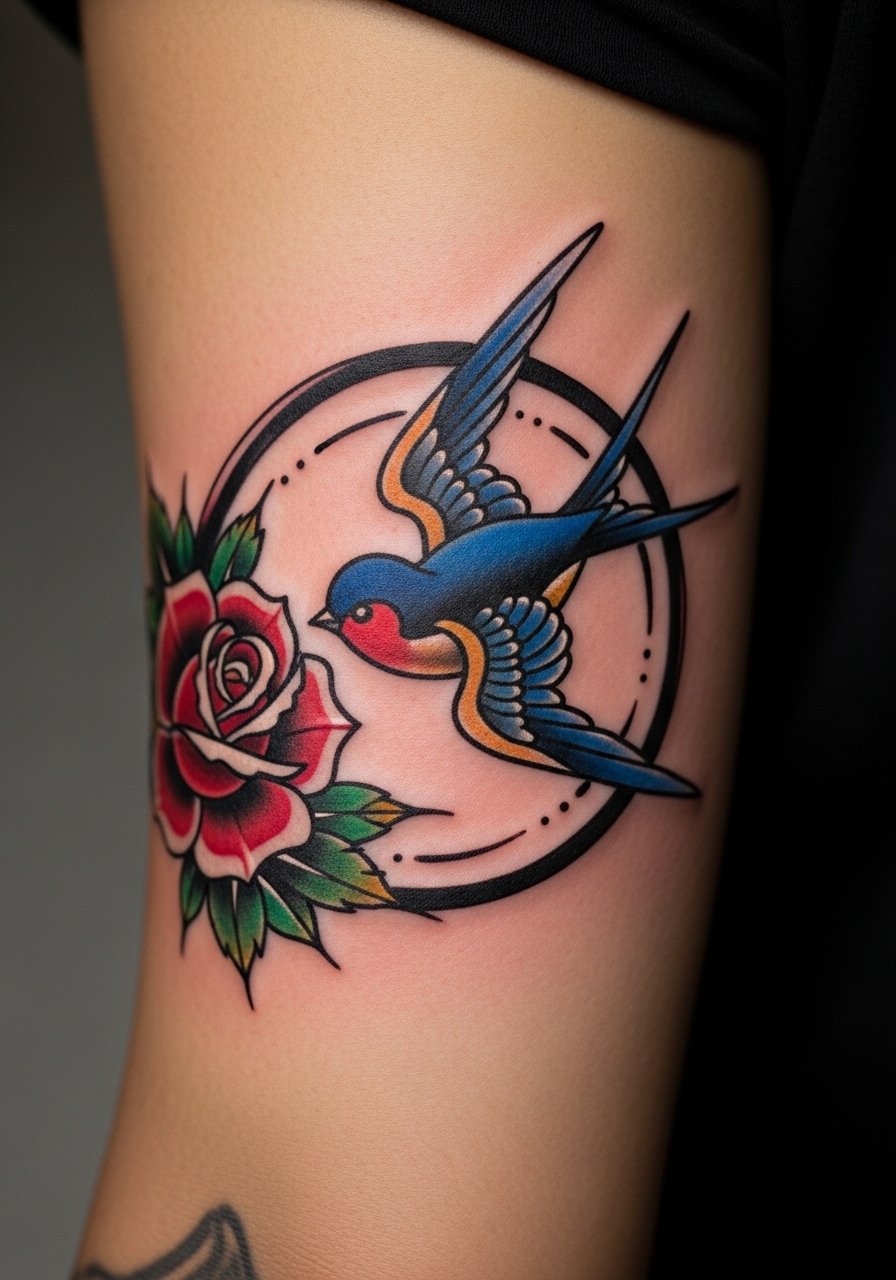
Neo-traditional gives you the vintage romance of the swallow with modern detailing on petals and beak. Ask for slightly thicker outlines around the rose to preserve contrast as pigments fade, and request that filler shading use stipple or whip shading rather than heavy wash. Mistakes I see include packing too many small leaves into a narrow forearm band, which peters out when the arm flexes. This design often begins a sleeve, so plan negative-space flow up and down the arm. Pair it with a black henley shirt when you want the color pops to read against dark fabric. Sessions for a sleeve start are longer, expect two sittings for a good block-in.
4. Blackwork Swallow Silhouette Pair on Outer Forearm
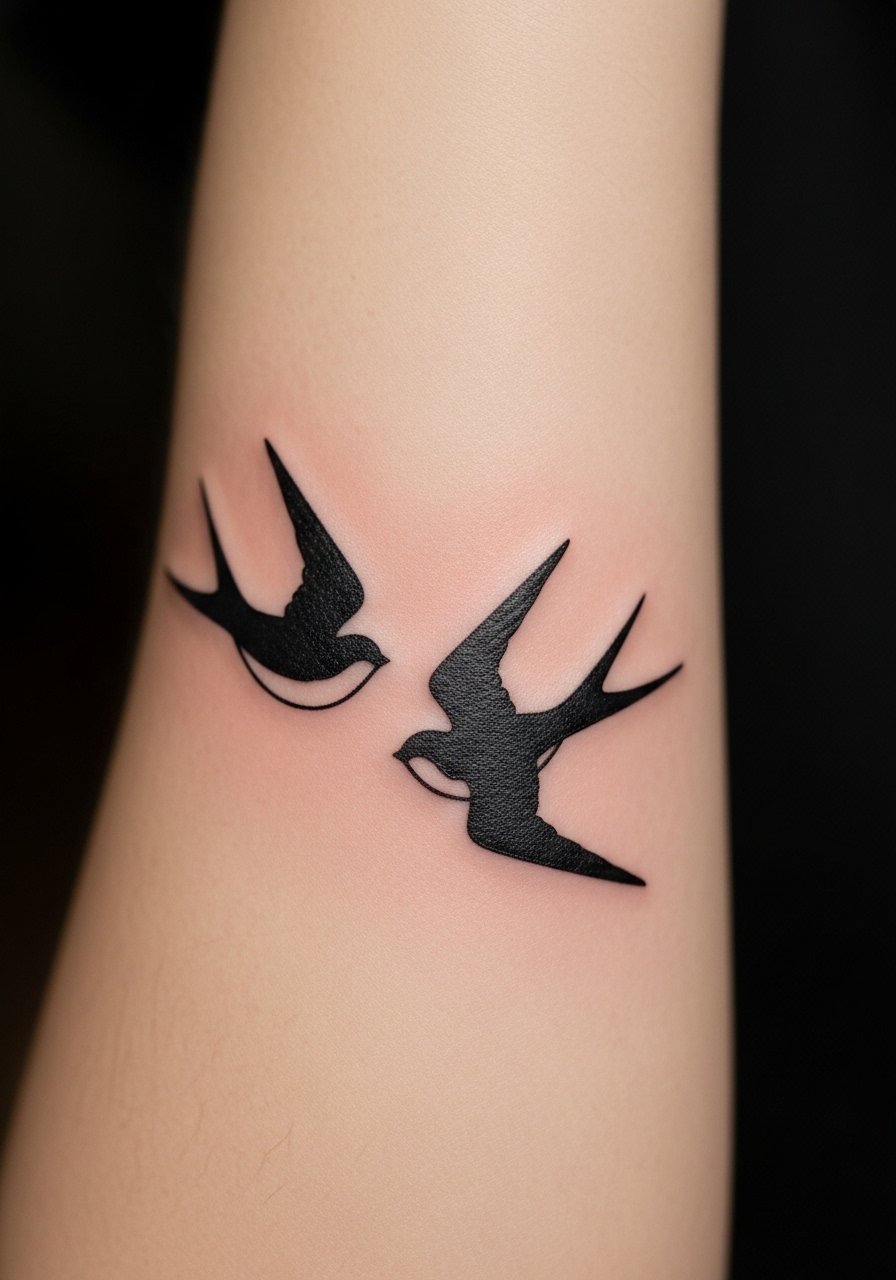
A solid black silhouette ages well because saturation holds where color can fade. Tell your artist you want even saturation and consistent needle passes so the fill does not look patchy. A frequent error is stopping the black fill too shallow, which shows through as spots after healing. These pair nicely with masculine accessories, try a leather cuff bracelet on the opposite arm for vintage balance. Expect a single session for a 3 to 4 inch silhouette and a simple touch-up at year two if needed.
5. Watercolor Swallow with Horizon on Upper Forearm
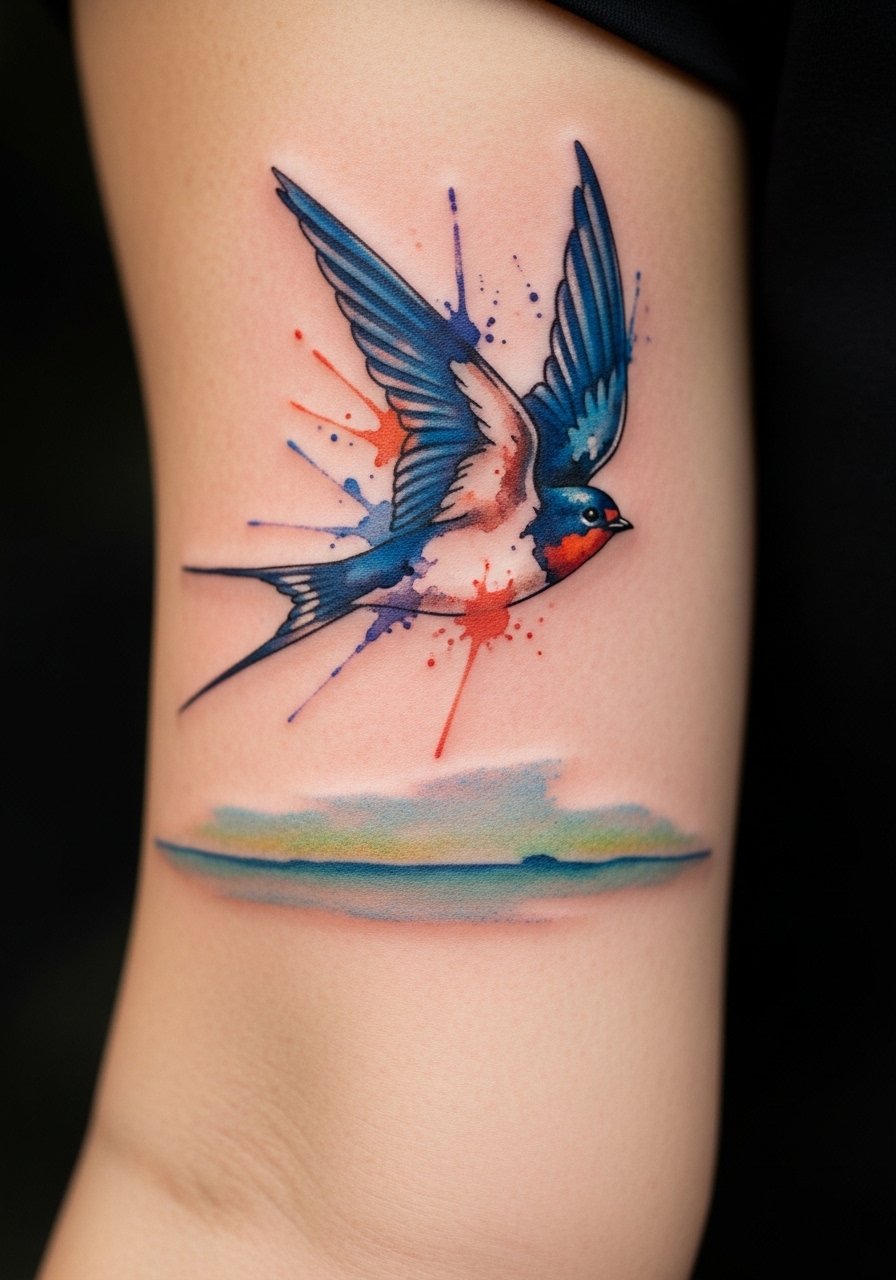
Watercolor brings painterly splashes that feel light on the arm, but artists split on longevity. One camp prefers color-heavy watercolor and accepts touch-ups as part of ownership. The other camp argues that forearm sun exposure makes watercolors blur and fade faster than blackwork. Name both camps in the consult and ask where the artist lands. The version that holds best uses anchored black or dark gray outlines under the wash. For session day, wear a sleeveless top or open button-down so the shoulder and upper forearm are unobstructed. Expect 2 to 3 sessions and plan for touch-up work in the first three years if you want color vibrancy maintained.
6. Minimalist Swallow Outline at Wrist-to-Forearm Transition
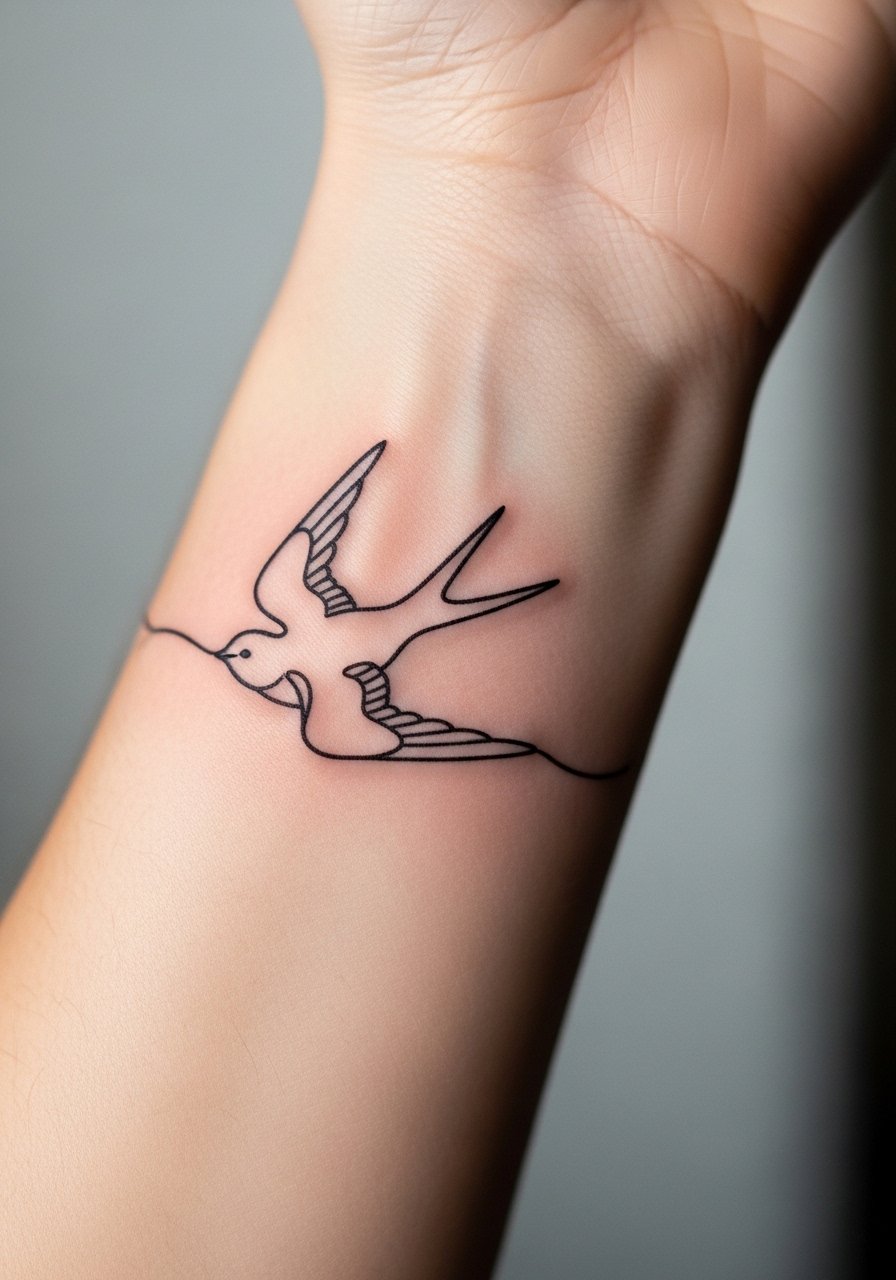
Minimalist outlines are quick to get and quick to heal, but small scale on the wrist invites blowout risk. Ask for a slightly thicker single line and modest negative space in the wing tips to avoid early merging. A real mistake is insisting on ultra-fine single-needle weight at wrist scale; the wrist moves constantly and that thin line can spread. Wear a thin gold bangle set on the opposite wrist to keep attention balanced without crowding the new art. Sessions are usually under an hour for a tiny outline, but keep sun protection in mind during the first year.
Studio Day Picks
The small wrist and inner-forearm pieces above heal differently from larger, saturated work, so a few practical items smooth session day and the first week.
- Stencil transfer paper kit. Lets you test placement directly on skin before the needle touches down, especially helpful for the wrap and wrist pieces in ideas 1 to 6.
- Topical numbing cream. Applied 45 minutes before can ease the edge on tight wrist and inner-forearm spots without affecting linework.
- Thin protective film roll. Useful for keeping small forearm tattoos clean during that first week of showering and movement.
- Fragrance-free gentle body wash. Cleans the area without irritants while the skin reforms, which matters for fine line and watercolor work.
- Aquaphor healing ointment. A thin layer helps protect fresh ink on friction-prone forearms in the initial days without blocking needle channels.
7. Traditional Swallow with Arrow Piercing Wing on Inner Forearm
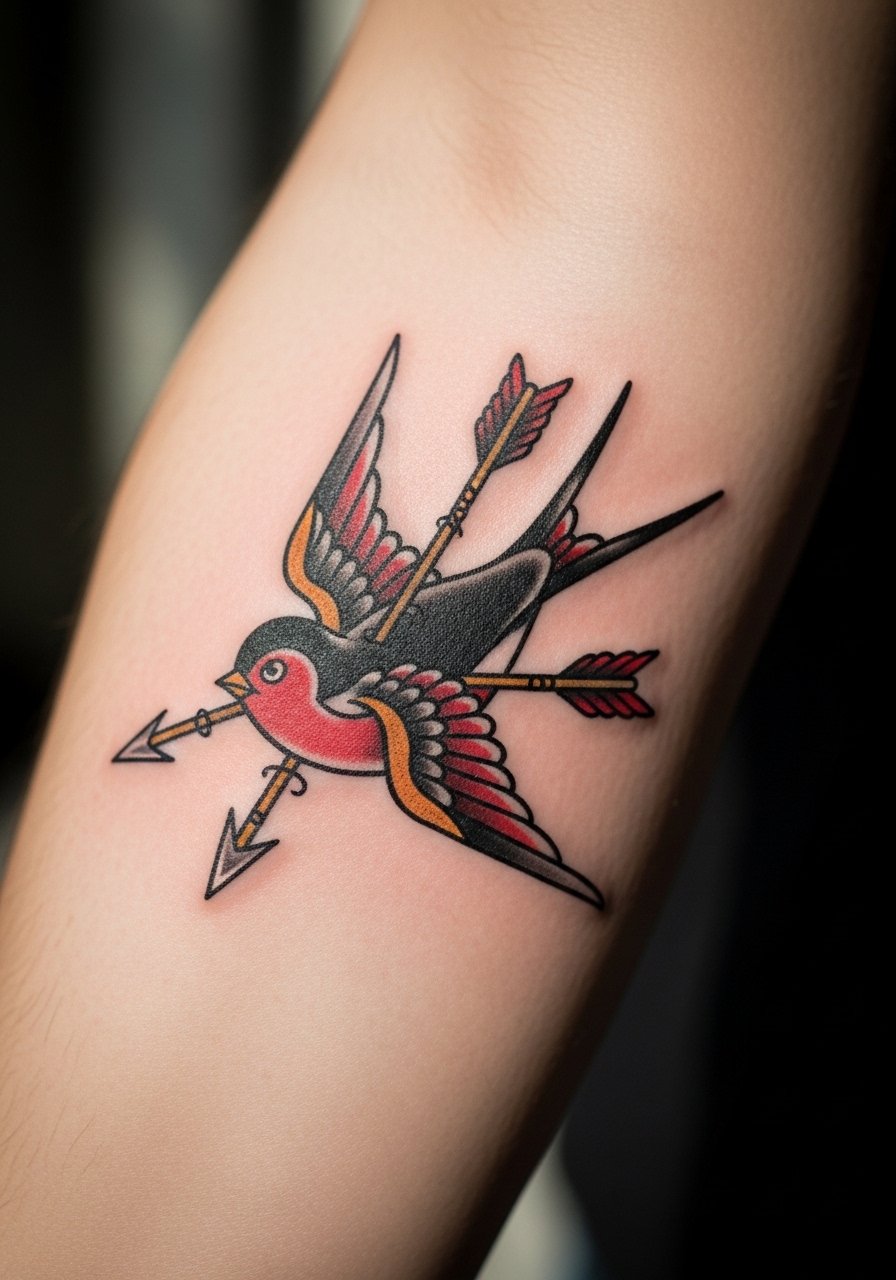
The arrow-through-wing motif reads as resilience, and it is straightforward to translate into traditional American linework on the inner forearm. Tell the artist to keep the arrow slightly offset from the wing joint so the composition breathes when you flex. People sometimes force the arrow to bisect too many wing feathers, which looks cluttered over time. Inner-forearm placement keeps the piece private for interviews but visible when you want it to be. The session is comfortable relative to ribs or sternum, and a single solid session usually does the job.
8. Micro-Realism Swallow Portrait at Forearm Center
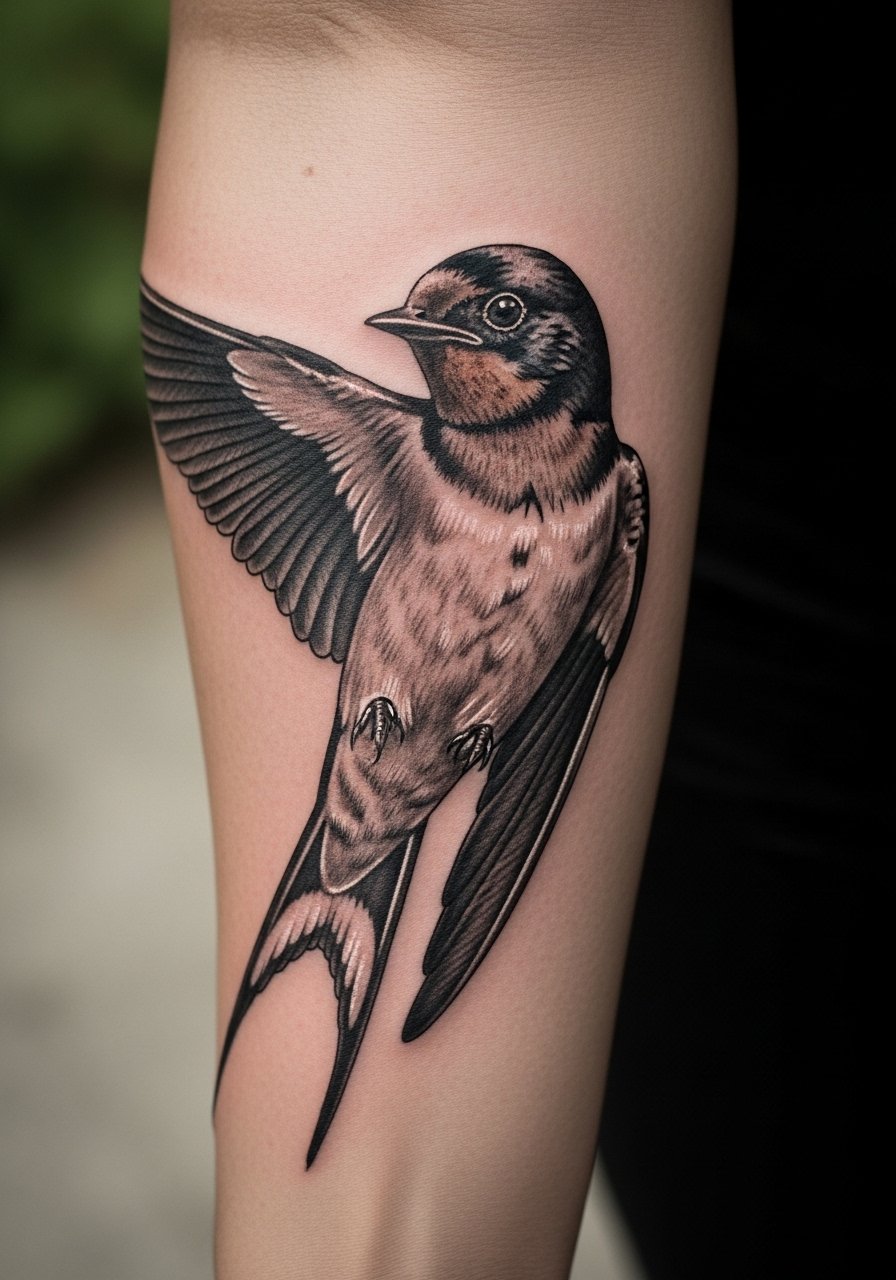
Micro-realism needs a highly skilled hand and slightly more space than many clients expect. In consults, bring multiple scaled references and ask your artist to design with at least a three-inch minimum for facial feather detail to hold over time. A mistake is demanding a two-inch portrait on the forearm center, then wondering why shading softens quickly. Expect two sessions for good contrast and more careful shading. For session day, a slim slim fit crewneck tee is easy to roll and keeps the forearm accessible without tight seams.
9. Ornamental Swallow with Geometric Wings Wrapping Outer Forearm
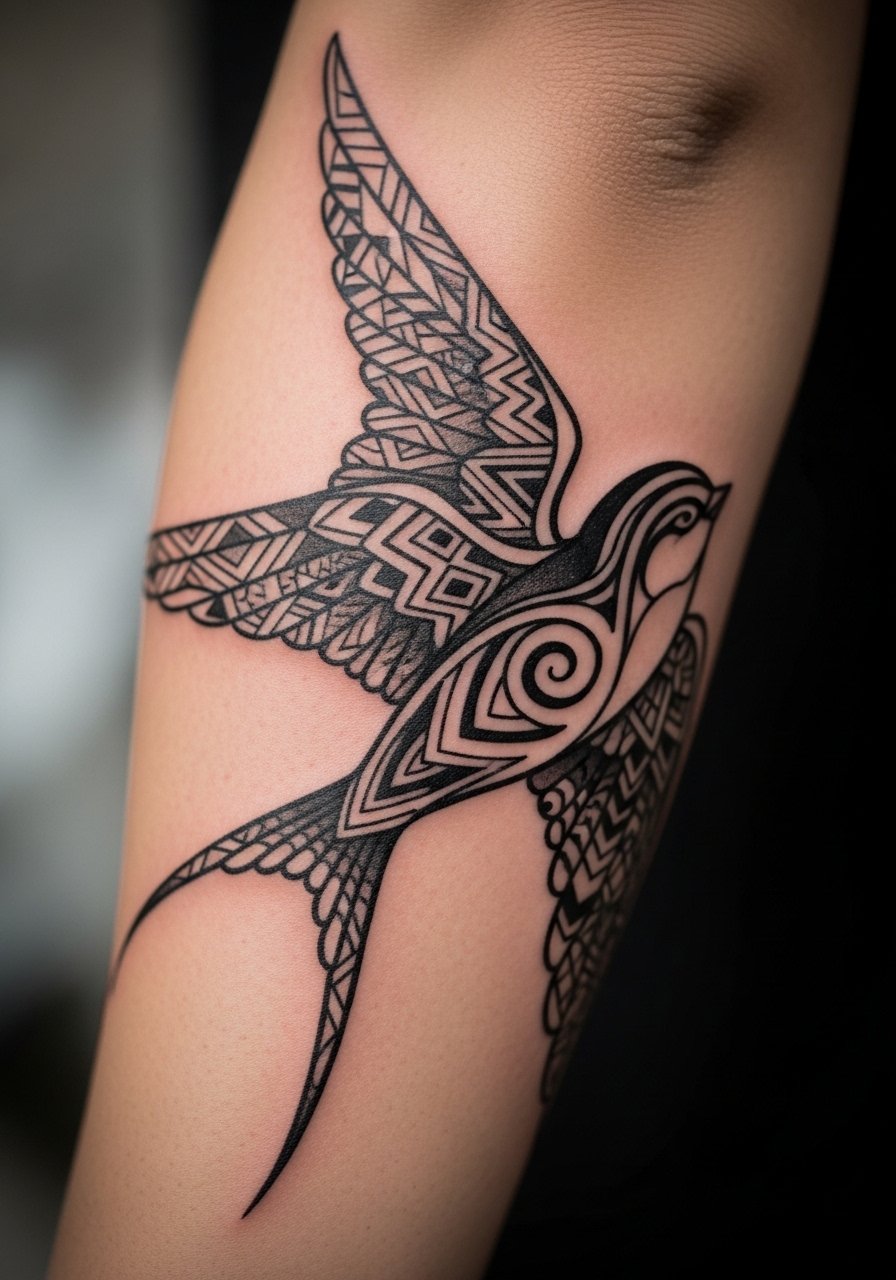
Ornamental work with geometric wings relies on pattern spacing to stay readable for years. Ask for slightly increased negative space in repeat motifs and stipple shading rather than solid gray floods. People often request overly dense geometry that reads beautifully fresh and then loses definition as lines blur. This wrap benefits from a wardrobe that shows off the forearm. Try a navy chambray work shirt with sleeves rolled to frame the pattern. Expect two sessions for a five-inch wrap and a touch-up timeline around year three for dense blackwork.
10. Ignorant Style Blocky Swallow Band on Mid-Forearm
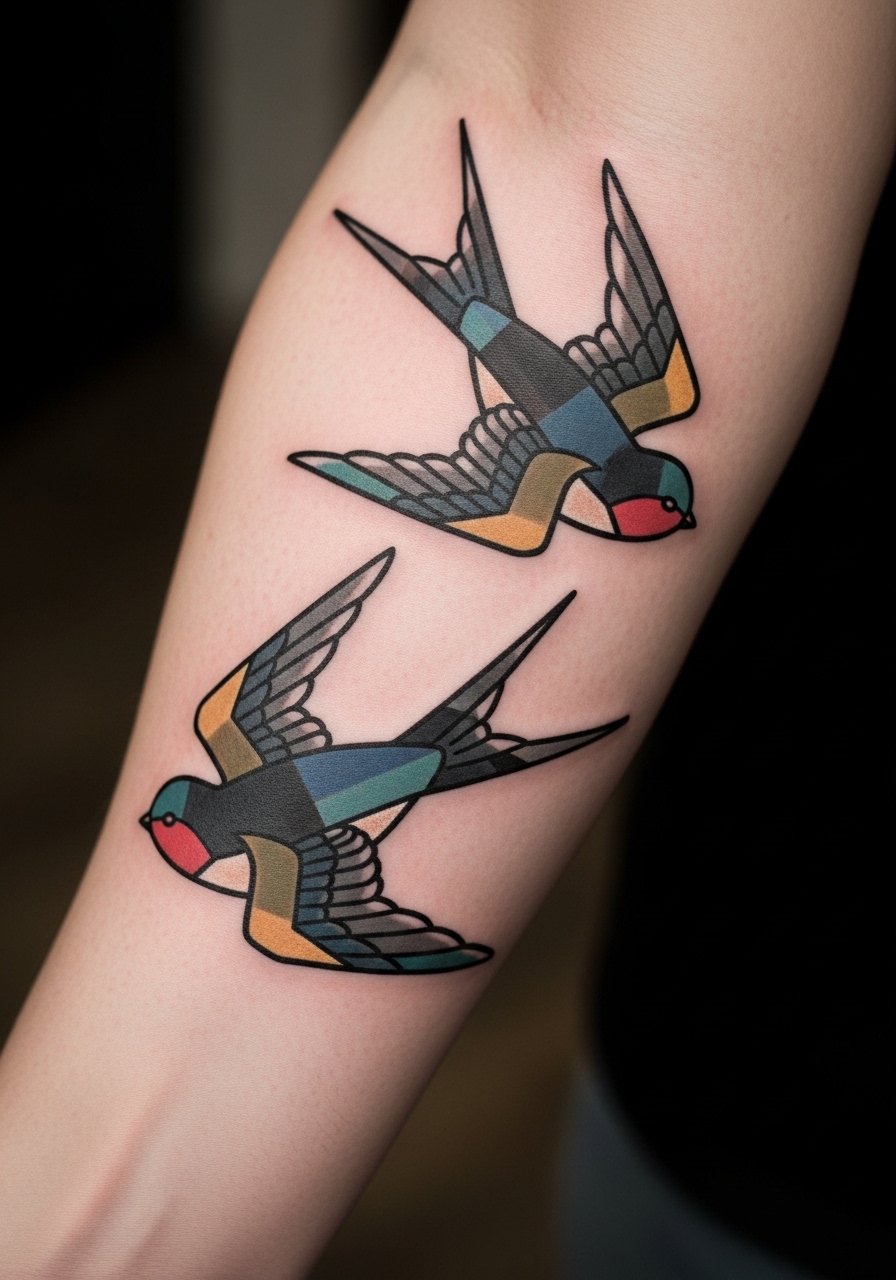
Ignorant style is bold with heavy black outlines and large shapes. The appeal is low-detail toughness and quick sessions. Tell your artist you want deliberate, even spacing between the block elements so the design does not gap when the arm moves. The typical mistake is small scaling which makes the blocky shapes lose presence. For session comfort, wear a loose button-down shirt you can roll without pressure. One solid session generally covers a forearm band of this scale.
11. Arrow-Pierced Swallow for Resilience Stories on Inner Forearm
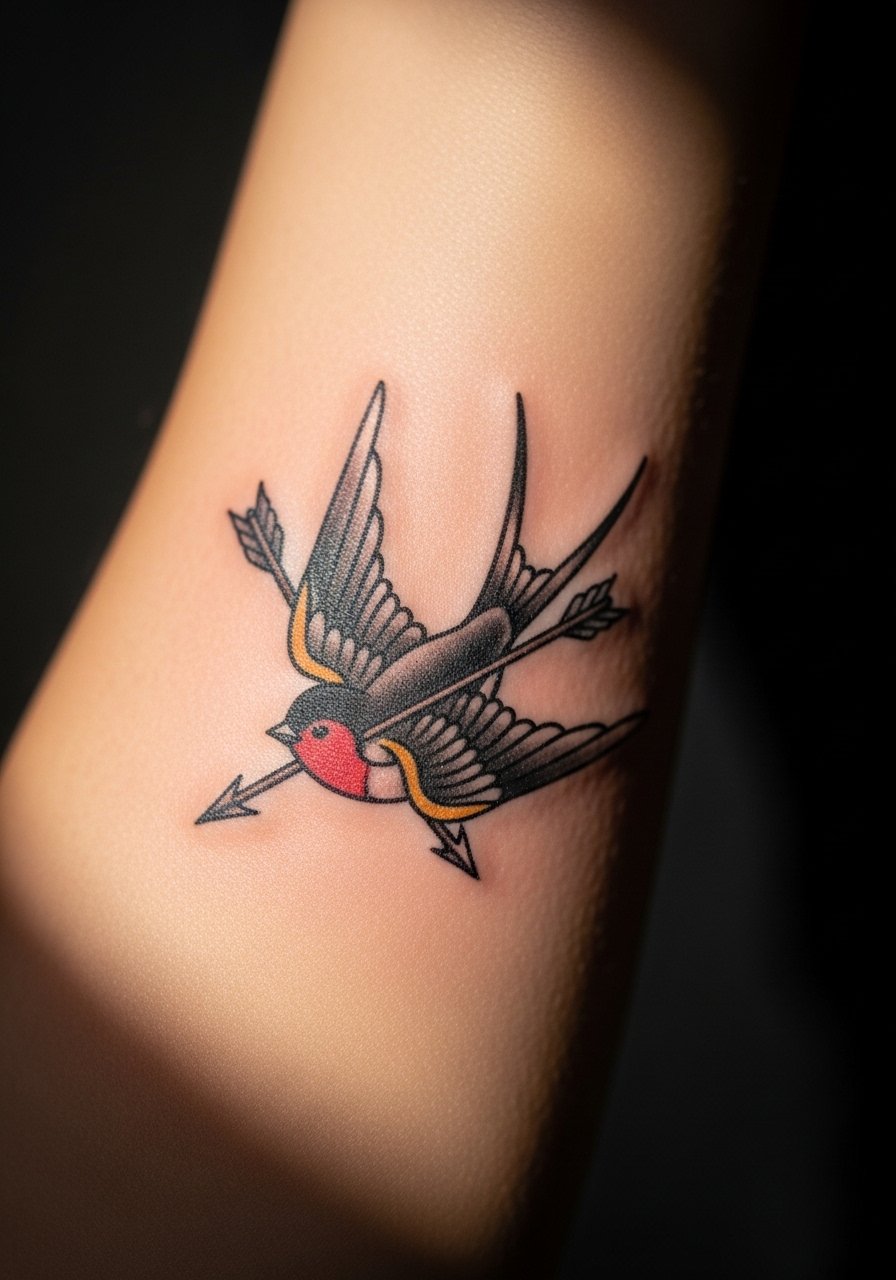
This variation leans into narrative without being literal memorial work. Be clear in the consult that you want the arrow to read symbolic rather than gory, and ask for color placement that balances with any existing arm pieces. A common pitfall is overloading the craft with extra banners or script that compete with the motif. Inner-forearm placement keeps the piece readable and discreet for professional settings. If the design is black and red, expect one session and a possible color boost at year two depending on sun exposure.
12. Micro Swallow Portraits Along the Forearm Axis
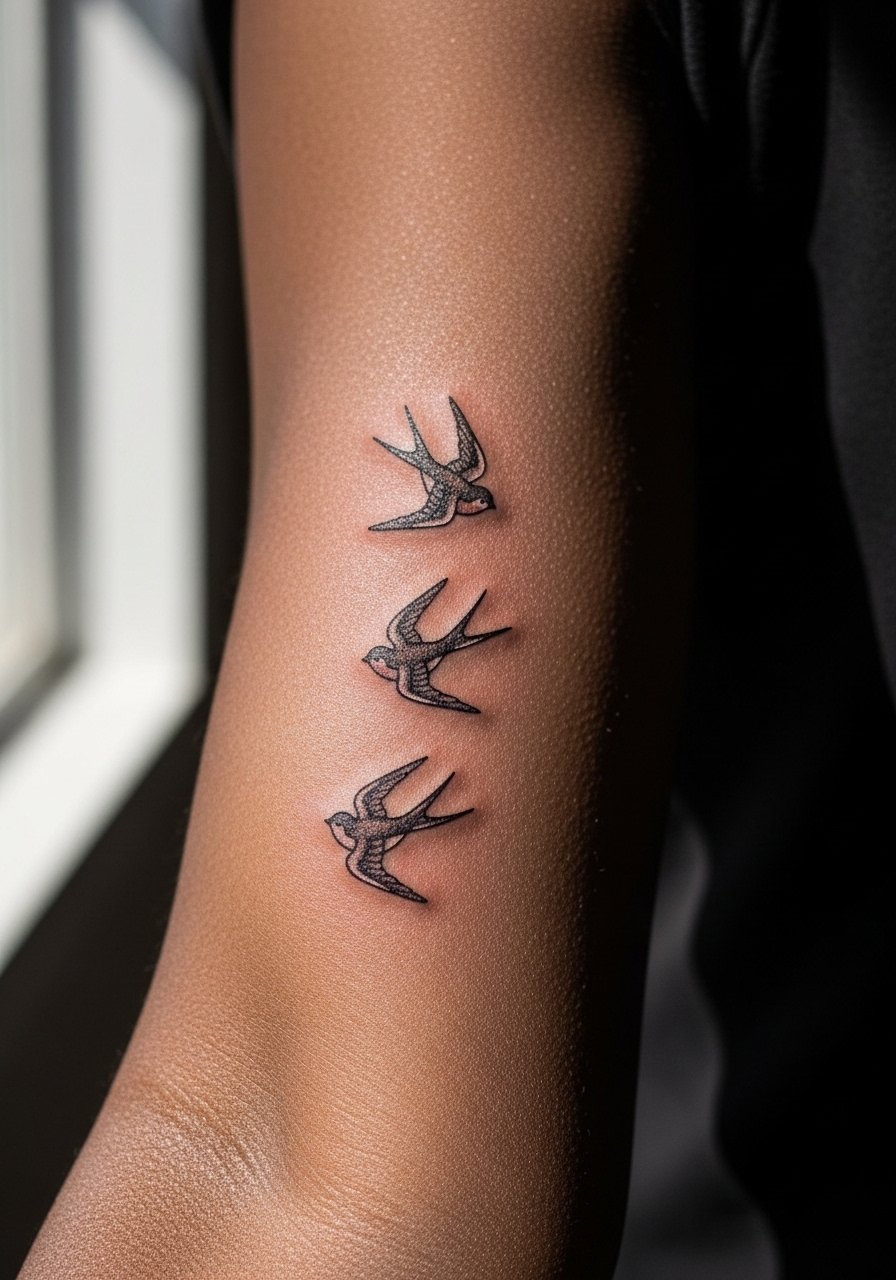
A line of tiny portraits gives movement and a narrative without committing to a full sleeve. Ask for slightly different poses for each bird so from a distance the cluster reads as motion rather than repetition. The mistake is placing them too close together; spacing keeps each micro portrait readable as they age. Session feel is quick, brief breaks between placements help with circulation and comfort. For display, short sleeves or rolled cuffs work best, and a dainty accessory keeps the eye moving up the arm.
13. Eagle-Swallow Hybrid Emblem on Outer Forearm
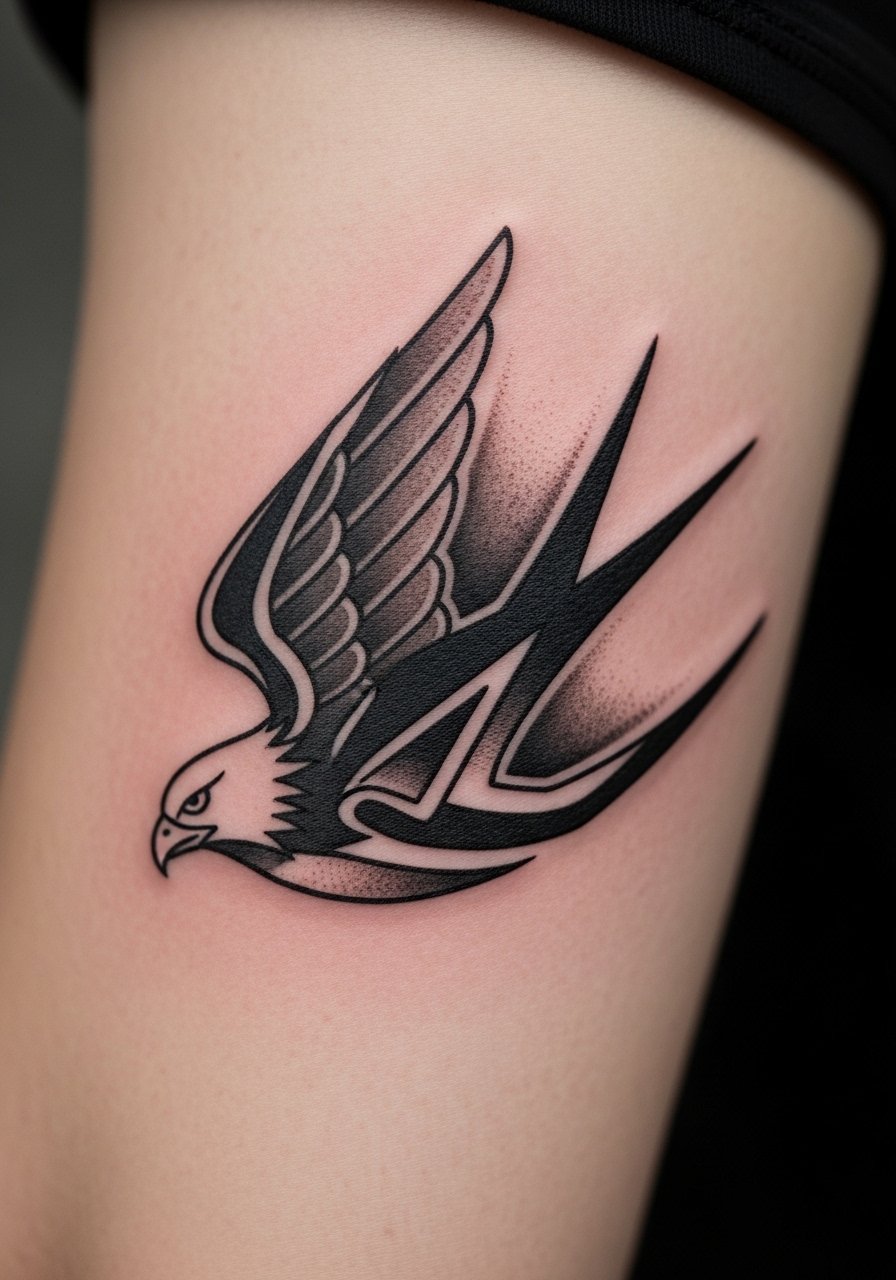
Hybrid pieces layer symbolism and require clear direction in the consult. Bring references that show which features you want dominant, like a swallow silhouette with an eagle beak, and ask the artist to prioritize legibility over complexity. A frequent error is packing too many animal markers into a small field which becomes visually muddy as it settles. Expect a single longer session for a mid-sized emblem and a touch-up if you plan to add color later. For session day comfort, a slim fit crewneck tee rolls easily and keeps the forearm accessible.
14. Forearm Sleeve Starter: Swallow Chain Flow
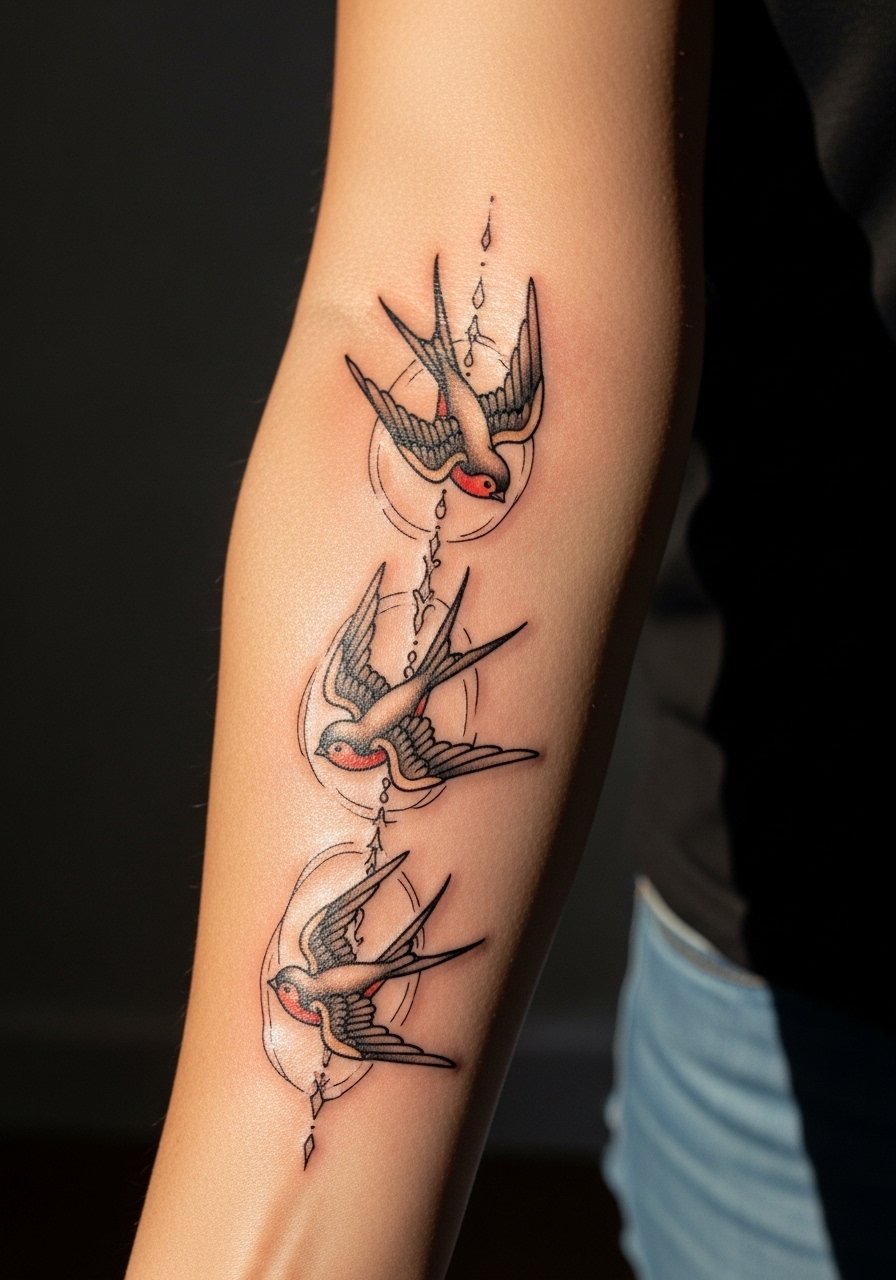
Starting a sleeve with a repeating swallow motif is smart planning. In consults, request anchor pieces at elbow and wrist and ask your artist to design linking elements that let future pieces slot in. The mistake is treating each swallow as a separate flash without a linking rhythm, which makes sleeve building awkward later. This approach ages well if you balance saturation and spacing. For show-off looks, roll sleeves on a chambray or linen top to display the chain flow. Expect staged sessions over months rather than one marathon.
15. Single-Session Swallow Flash for Quick Inking on Outer Forearm
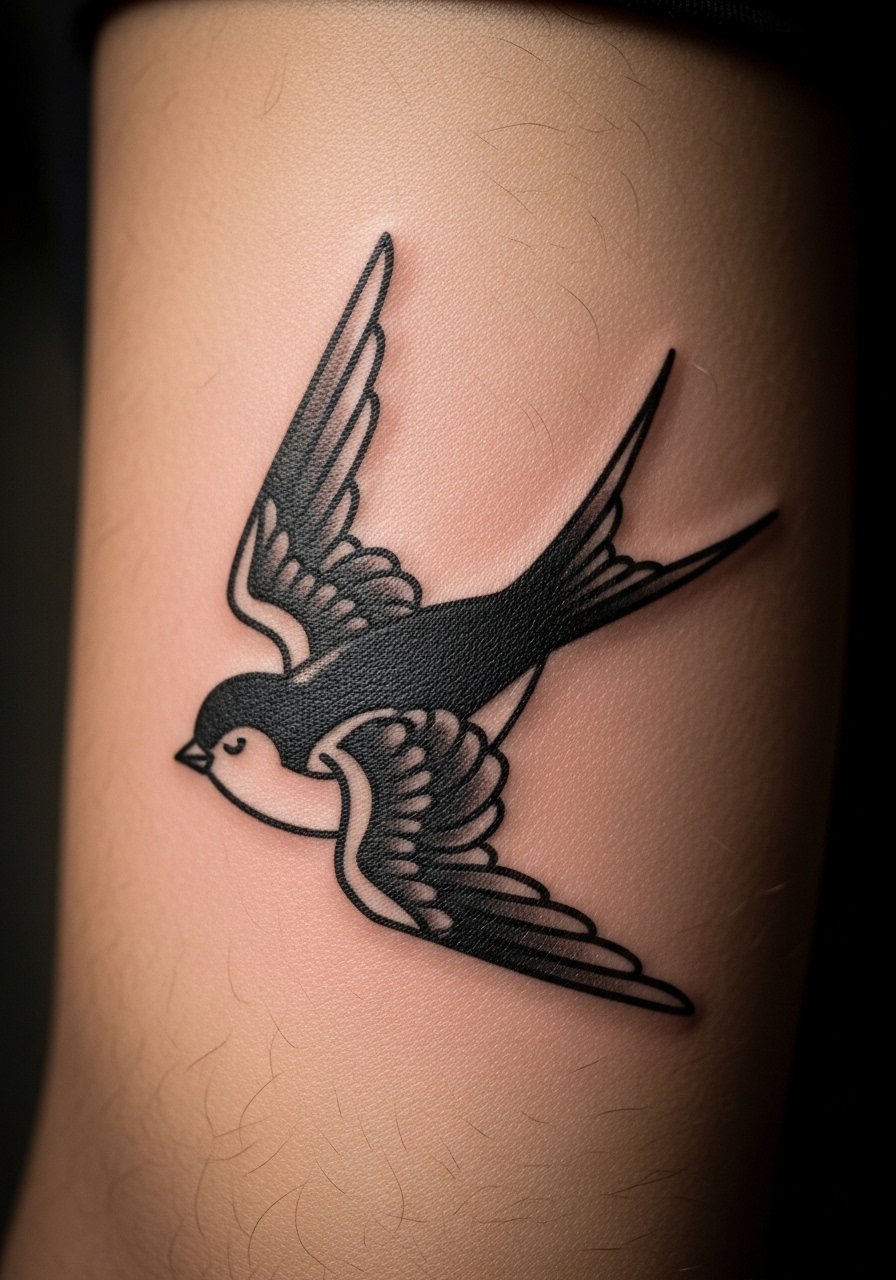
Flash is perfect if you want a quick, walk-in piece that still reads classic. Ask the shop about flash sheets and whether the artist will customize line weight slightly for your skin type. A common mistake is asking for a flash to be resized too small, which undermines the artist’s tested proportions. For the appointment, wear a loose button-down shirt you can adjust easily. Expect one efficient session and minimal setup time.
16. Geometric Winged Swallow with Dot Work Accents
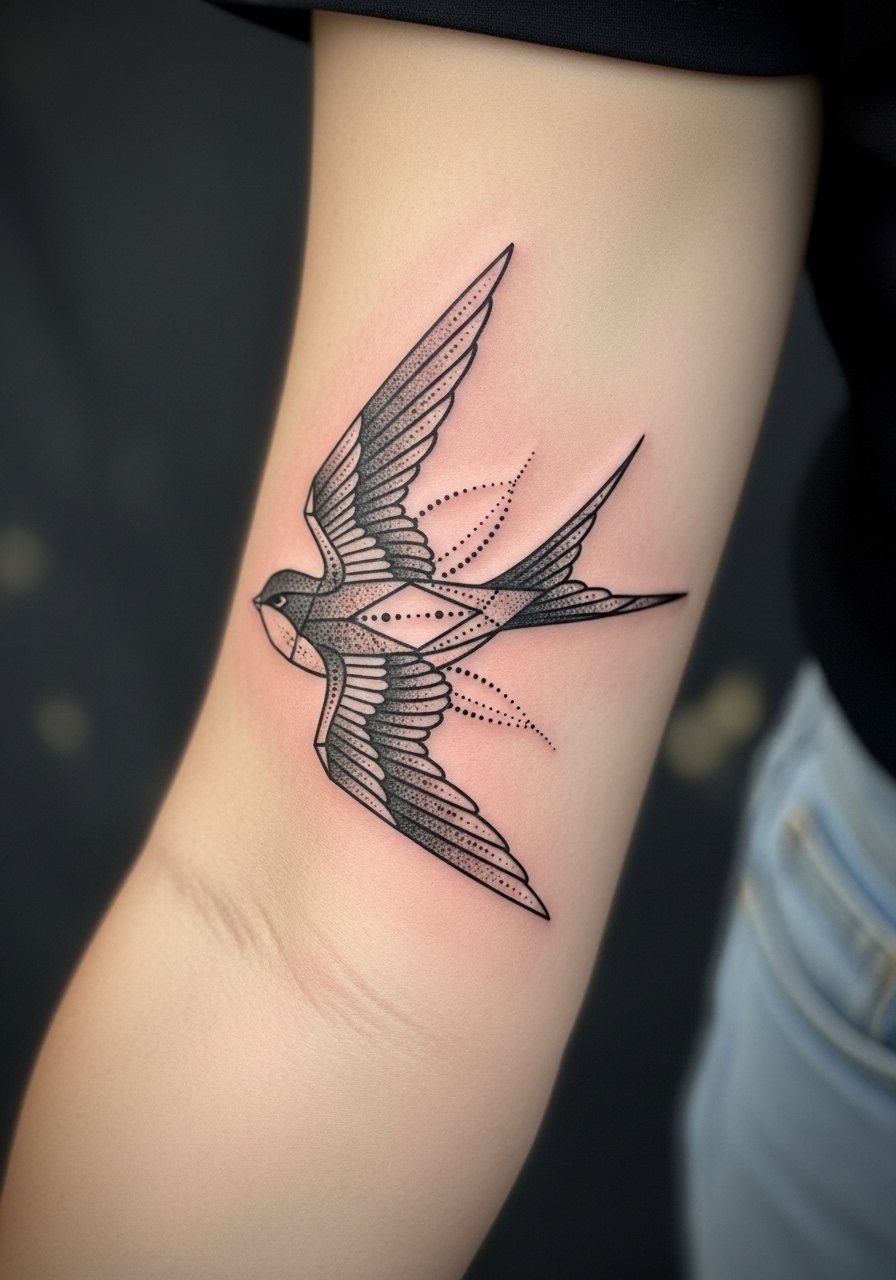
Geometry with dot work gives a modern edge while preserving legibility if the artist spaces the dots and lines carefully. Tell your artist you want negative space paths in the wing to prevent dense packing of dots that can fill in. A common error is compressing geometry into a narrow band, which ages into a muddy gray. Sessions require patient dot shading and may take two sittings depending on scale. This style tends to show texture nicely under linen or cotton rolls for casual wear.
17. Fine Line Constellation Swallow Cluster Along the Forearm
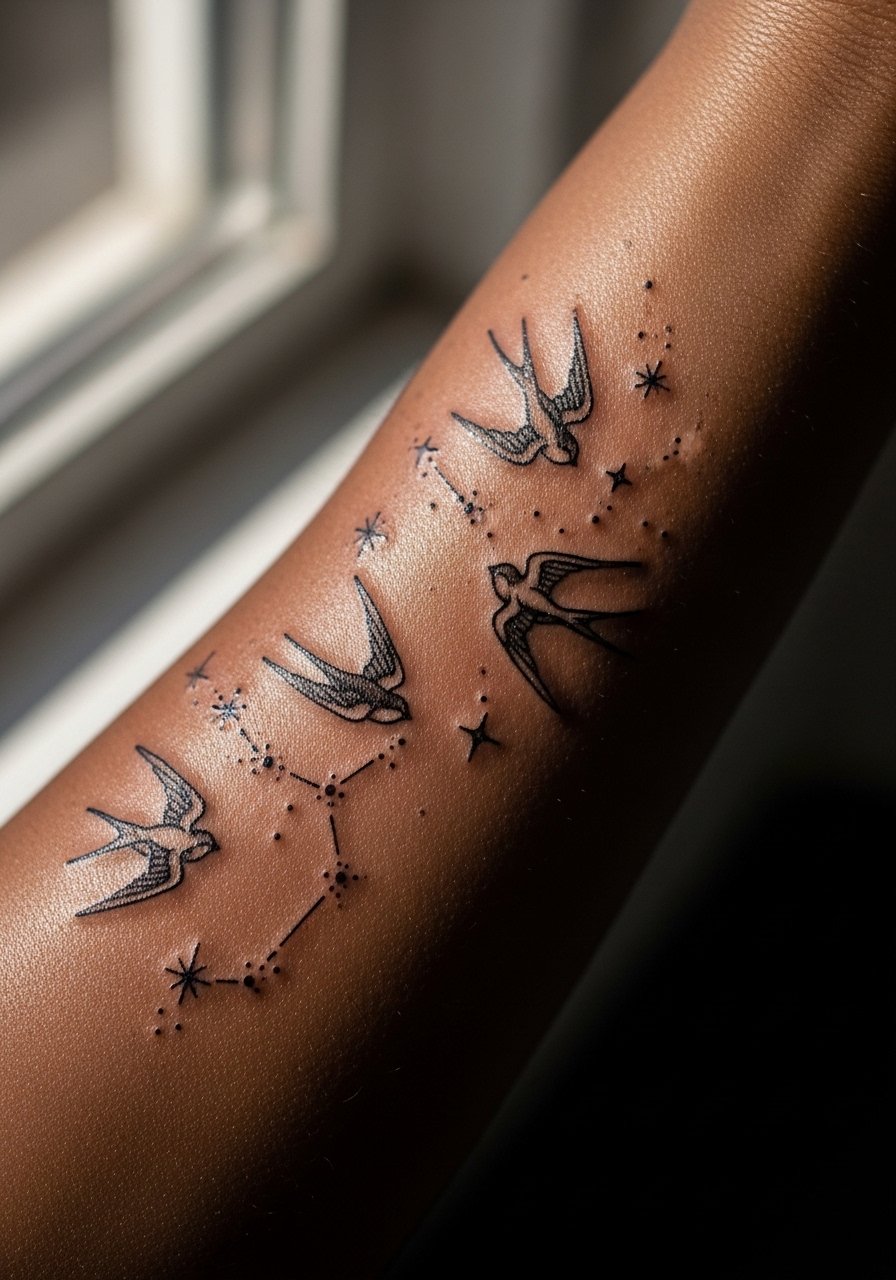
A constellation cluster of fine-line swallows reads like movement and subtlety across the forearm. During consults, ask your artist to stagger line weights slightly and use micro negative spaces between stars and feathers, which prevents early merging. The main mistake is over-concentrating the cluster in one small block; a breathable layout holds longer. For evenings out, pair the cluster with a dainty bangle bracelet that sits above the topmost bird so the arm reads as intentional styling. Expect multiple tiny passes in one session and potential touch-ups at year three if you want the finest lines preserved.
Frequently Asked Questions
Q: Will fine line swallow tattoos blur faster on the forearm than traditional swallows?
A: Fine line pieces are more vulnerable to blur if they are dense or placed where skin stretches. Traditional, saturated work tends to hold contrast longer on the forearm. Ask your artist about spacing and slightly thicker single-needle choices if longevity is your priority.
Q: How should I plan clothing for a forearm session so the artist has clean access?
A: Plan loose sleeves you can push up without gripping the arm, like a cream linen shirt or a loose button-down. Avoid tight cuffs that press on the fresh tattoo during the session.
Q: Does watercolor on the forearm always need touch-ups more often than blackwork?
A: Many artists will say watercolor requires more frequent touch-ups because dilution and sun exposure reduce saturation faster. If you love watercolor, expect to budget for occasional refreshes and ask for an underlying anchor line to help color read longer.
Q: If I want a sleeve starter with swallows, how many sittings should I expect?
A: Plan for staged sessions. A starter block to establish anchors and flow can take one or two sessions, then additional sittings fill in and blend. Spacing sessions allows you to assess how healed work interacts with new pieces.
Q: Is the inner forearm a good place if I need to hide a tattoo for work?
A: The inner forearm can be easier to keep private than the outer forearm, but it still shows when you raise your arm. Consider placement closer to the bicep or under the sleeve line if concealment is essential.
Q: For small swallow clusters, how often should I expect touch-ups?
A: Tiny fine-line clusters often need touch-ups sooner than larger saturated pieces, commonly in the two to four year range depending on sun exposure. Choosing modest spacing and asking about ink depth in the consult helps stretch that timeline.
