
Fine line work looks flawless on a phone screen, but the truth is that what looks sharp the first week often blurs fastest unless placement and spacing are right. I have watched whole trends rise and then require a round of touch-ups at year three. This list focuses on stencil-ready templates that give an honest plan for longevity, placement, and what to tell your artist before the needle touches skin.
1. Fine Line Arrow on Inner Forearm
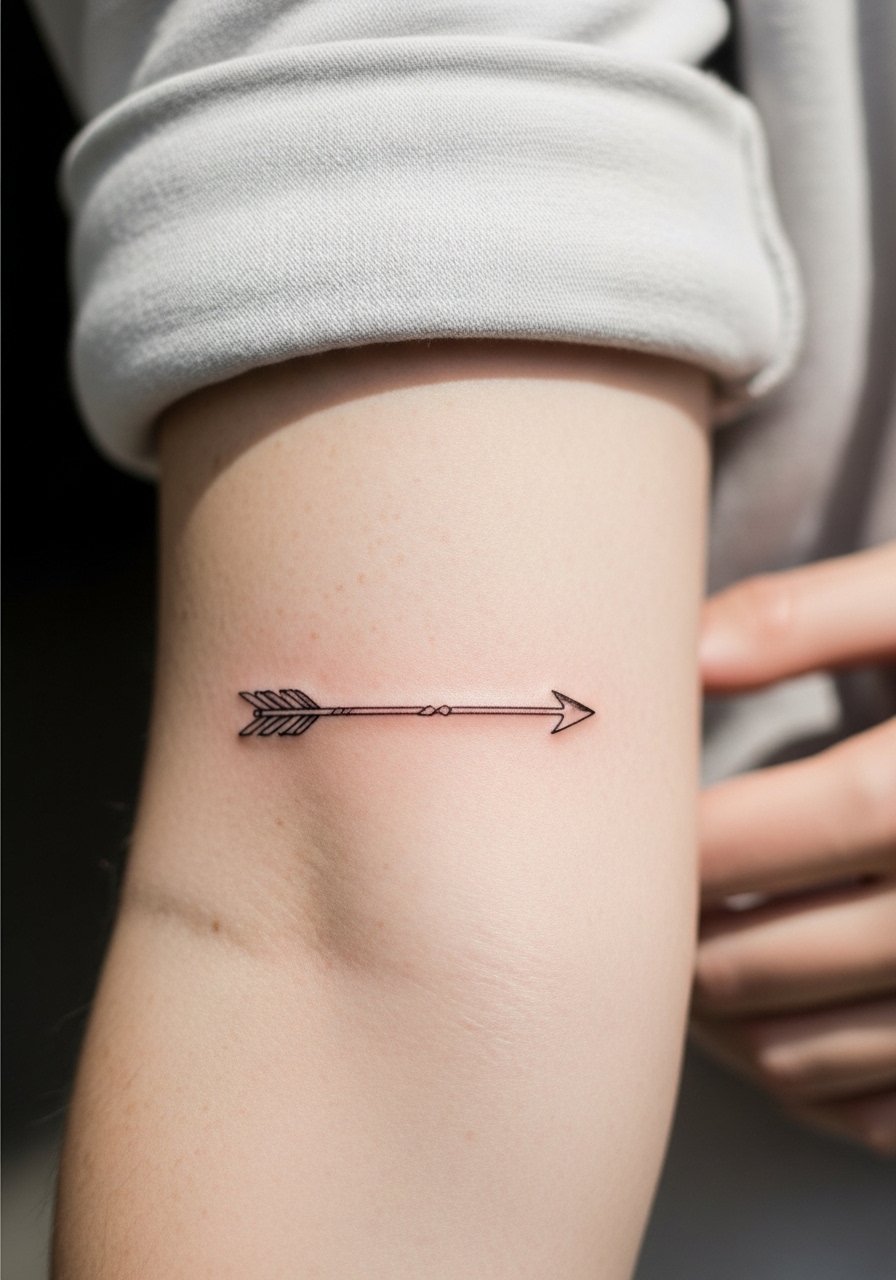
This tiny arrow stencil works when scaled so the shaft uses a single consistent lineweight and the arrowhead has a bit of negative space. I recommend it for anyone who wants readable minimalism without early blurring. Tell your artist you want a slightly stronger lineweight than the thinnest flash so the line has room to settle. Pain on the inner forearm is moderate and sessions run under an hour. A common mistake is asking for hairline lines that sit too close to each other. Expect the piece to soften at two years and need a touch-up around year three if you want crisp edges. For showing it off, roll sleeves up and wear a racerback tank that keeps attention on the forearm without competing.
2. Micro-Realism Bee on Wrist
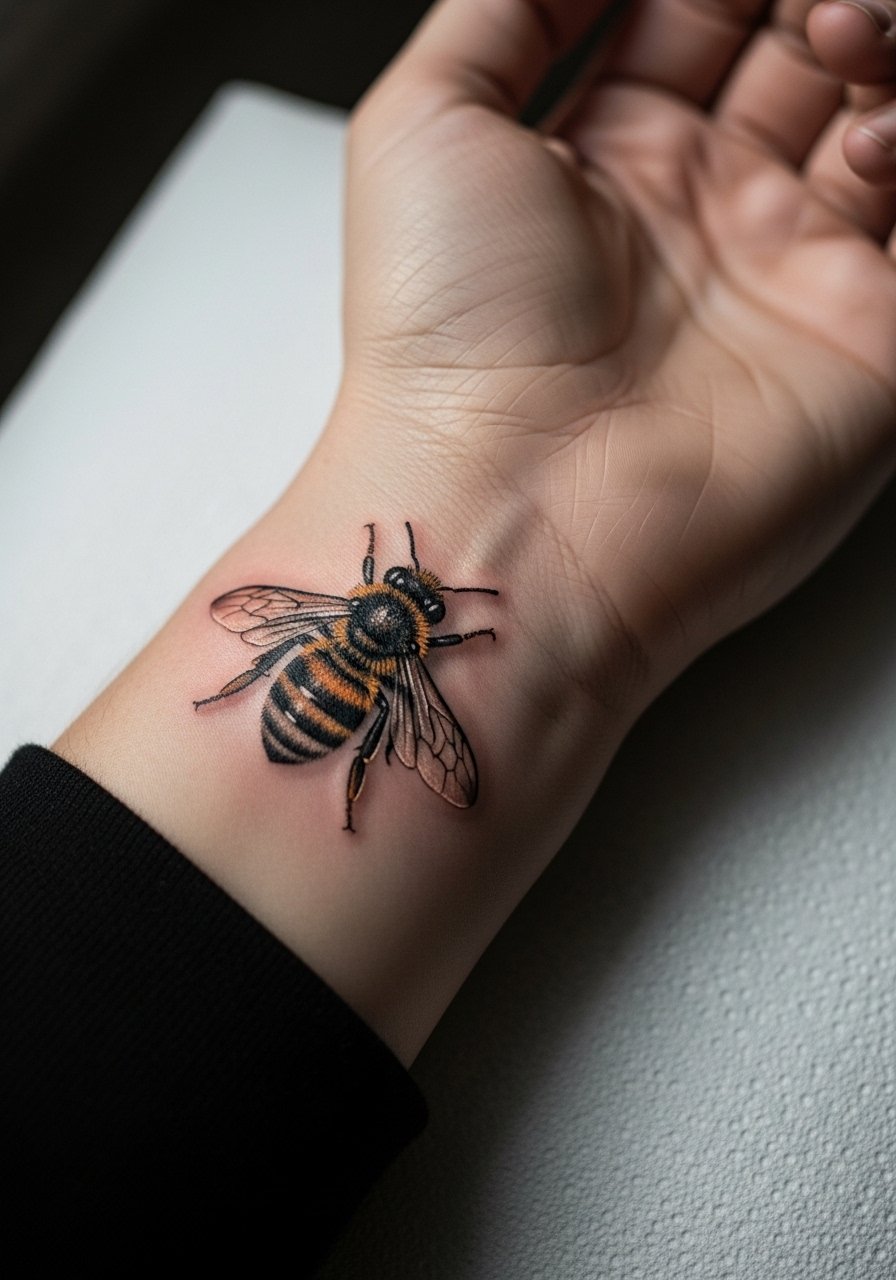
A tiny micro-realism bee reads best on the outside wrist where movement and visibility let the detail breathe. Ask for a single-needle stipple approach rather than dense shading so the tiny wings do not pool. The wrist is a high-friction zone so expect more fading if you wear watches or bracelets every day. Sessions are short, often 30 to 45 minutes, and pain is fair. The common mistake is asking for photographic detail at postage stamp scale. At six months the wings stay readable, but by year three delicate stipple may need a small touch-up. Pair this with a slim thin chain bracelet so the jewelry frames rather than rubs the area.
3. Stipple Shaded Crescent on Behind-Ribcage
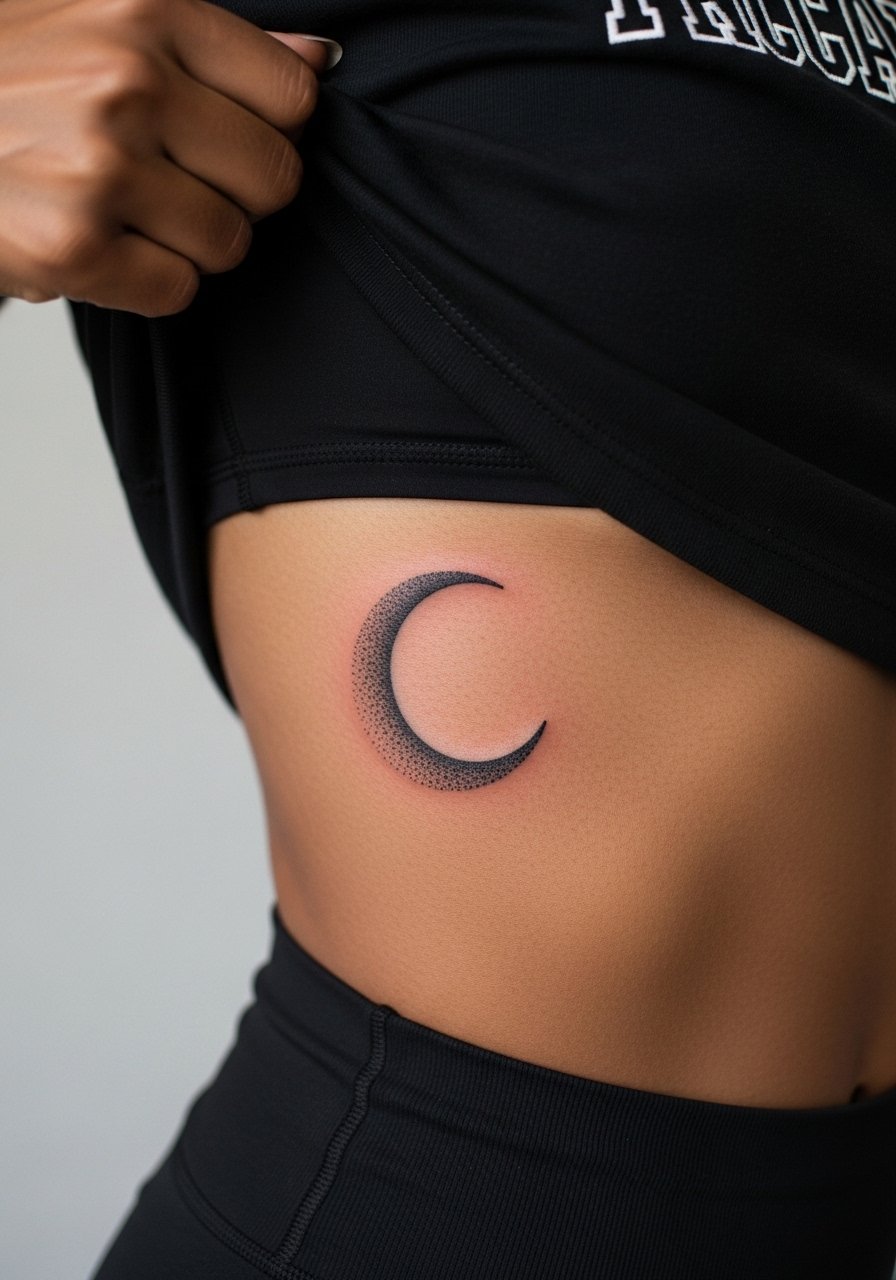
This crescent uses stipple shading to hold texture without dense saturation that can band on curved ribs. Fair warning, ribcage placement is one of those debates the community splits over. One camp says fine line on ribs blurs fast because the skin stretches and breathes, and the other camp says careful needle depth and spacing keep lines readable. Ask your artist where they stand and whether they recommend spacing or slight thickening of key strokes. Sessions feel long and can be painful, but a single focused session usually finishes the stencil. Expect slower healing because clothing rubs here. For the appointment wear a cropped tank top so the artist can access the area without you being uncomfortable.
4. Traditional Anchor on Outer Calf
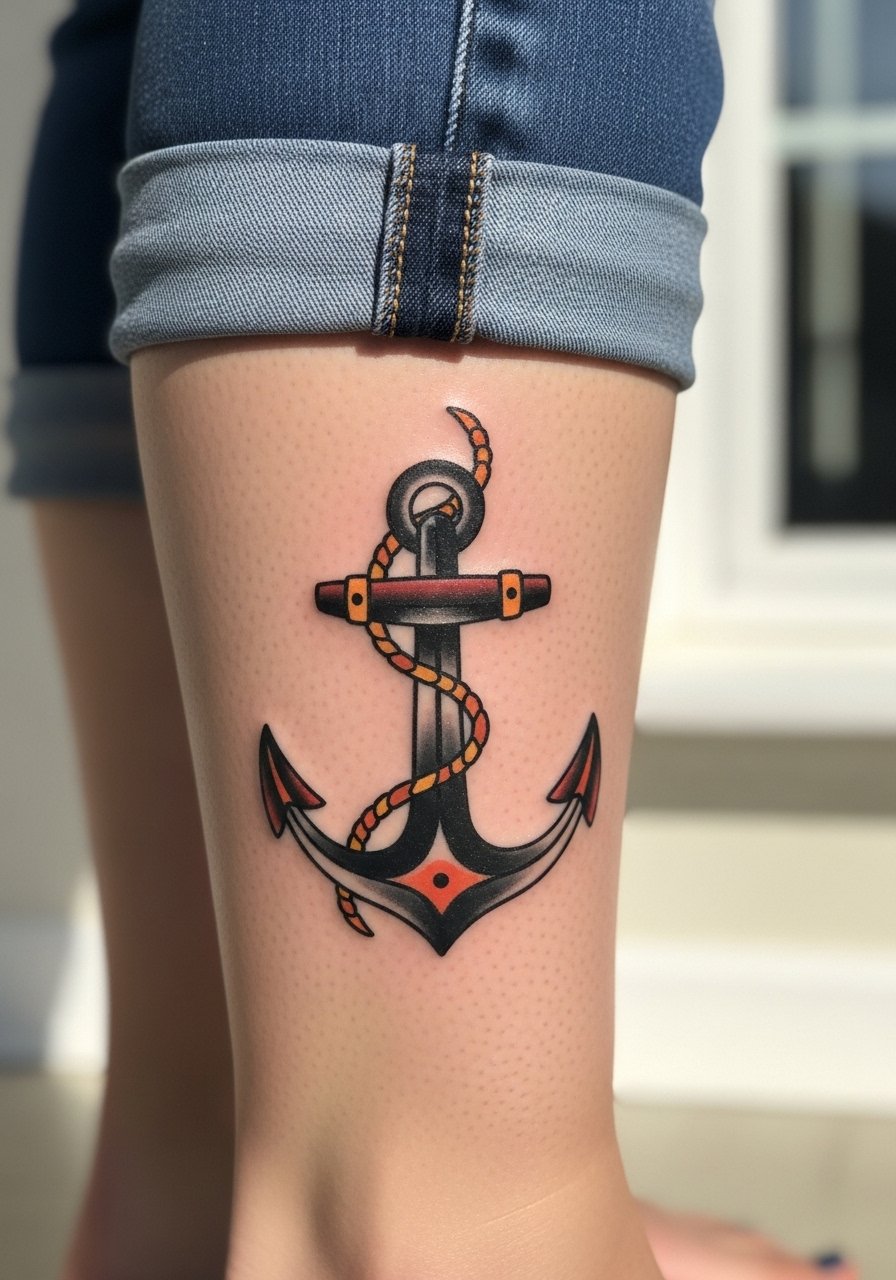
Bold outlines and saturated blacks are the reason traditional work ages well on the calf. If you want a long-lasting flash piece, choose a slightly larger scale so the black saturation can stay dense over time. Tell your artist you prefer saturated fills and a bold outline that reads from distance. Calf sessions are lower on the pain chart and can take one to two hours. A common mistake is shrinking a traditional flash down until the fills and outlines compete, which leads to patchy fade. Color on the calf can remain vibrant for years with low sun exposure. For showing it off, roll jeans and wear a loose linen short so the tattoo sits clear when you walk.
5. Geometric Mandala on Upper Back
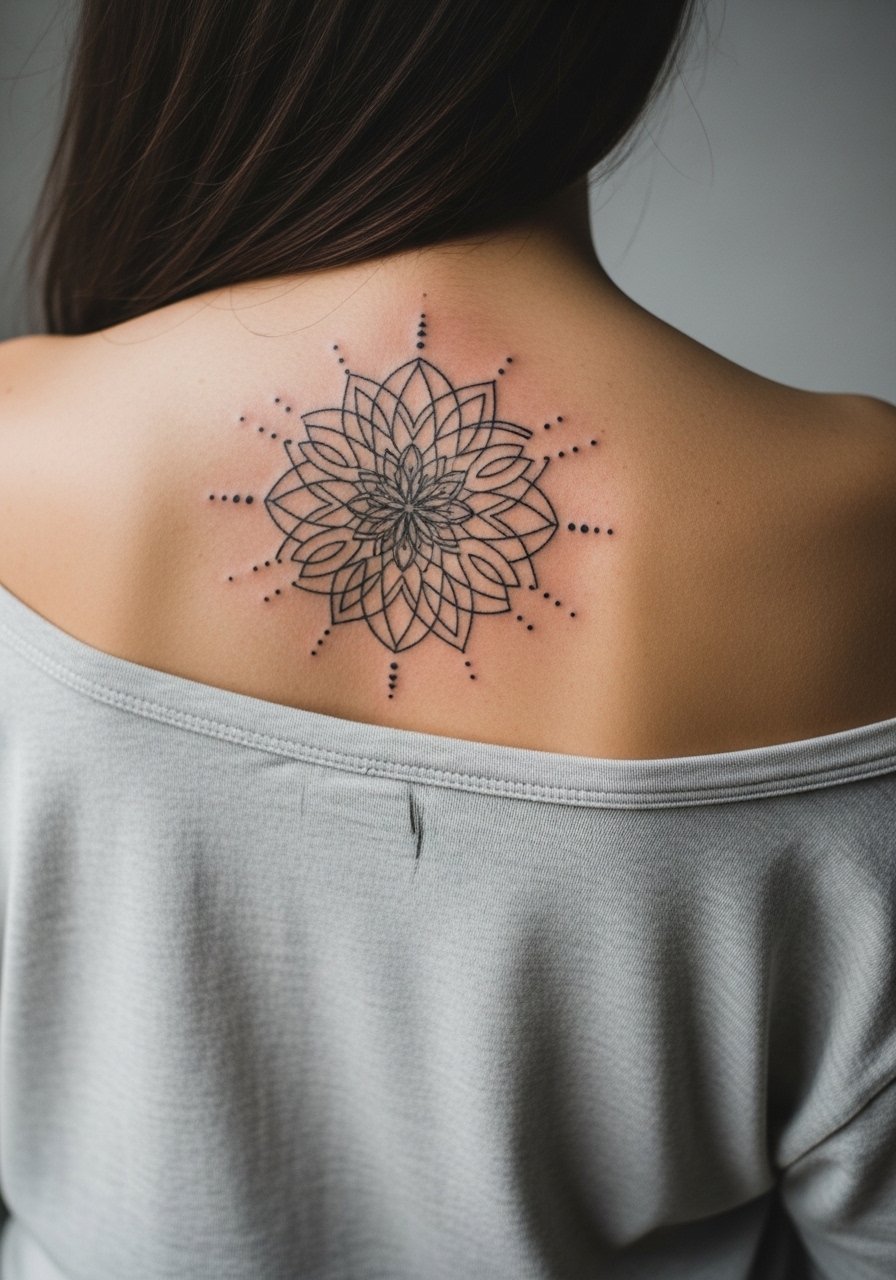
Mandala work needs breathing room. I push for radial spacing between concentric lines so the dense center does not merge over time. During consultation bring photos that show lineweight and negative space clearly and ask for a test stencil to check placement across the shoulder blades. Upper back pain is mild and sessions vary from one long block to two shorter visits. The usual mistake is crowding too many tiny details into the center. Expect center lines to soften by year five if the spacing is tight, otherwise a touch-up restores crispness. Pair this piece with an open-back linen dress when you want to show the symmetry.
6. Single-Line Script Along Collarbone
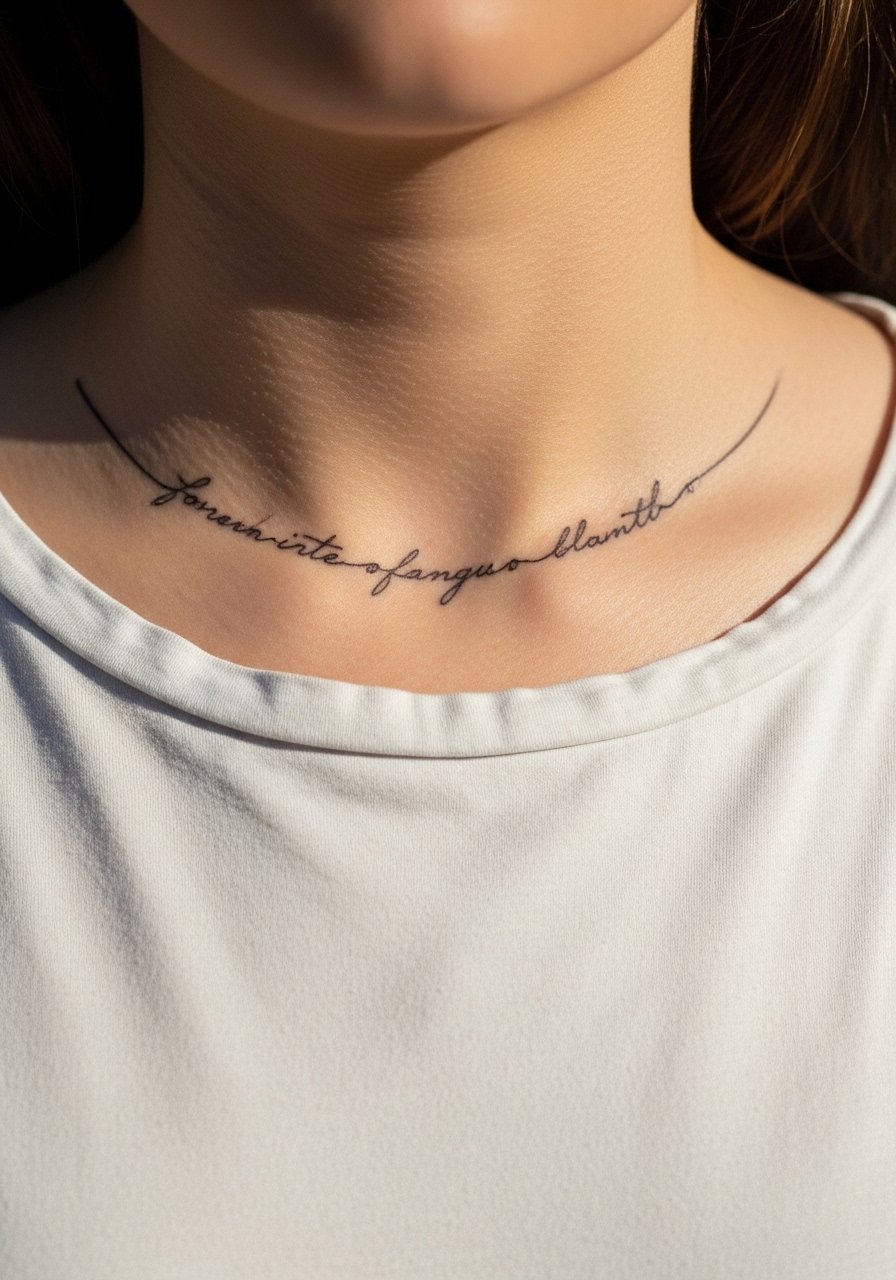
Script along the collarbone reads as delicate when letters have even spacing and a bit of weight at the low strokes. Ask your artist to stencil the full line so you can check how it sits across movement. Collarbone skin is thin and sensitive so the session will feel prickly but quick. The mistake is choosing micro cursive that threads letters too closely. At six months the letters usually look soft, by three years small strokes can fade. A single touch-up restores counters. For the session wear a wide-neck shirt you can pull aside to give clean access without being uncomfortable.
Studio Day Picks
The wrist, calf, and collarbone pieces above each ask for slightly different prep. These five items smooth the session and the first week.
-
Stencil transfer paper kit. Lets you preview line placement on skin before committing, useful for the script and arrow pieces above.
-
Topical numbing cream. Applied per instructions takes the edge off sensitive ribs and collarbone sessions without masking detail.
-
Thin protective film roll. Keeps small wrist or finger tattoos clean during the first week of hand washing and typing.
-
Fragrance-free body wash. Gentle cleansing for healing areas that helps preserve fine line detail on forearms and calves.
-
Aquaphor healing ointment. A thin layer in the initial days locks in moisture without blocking tiny needle channels for delicate script.
7. Dot Work Mountain Range on Outer Thigh
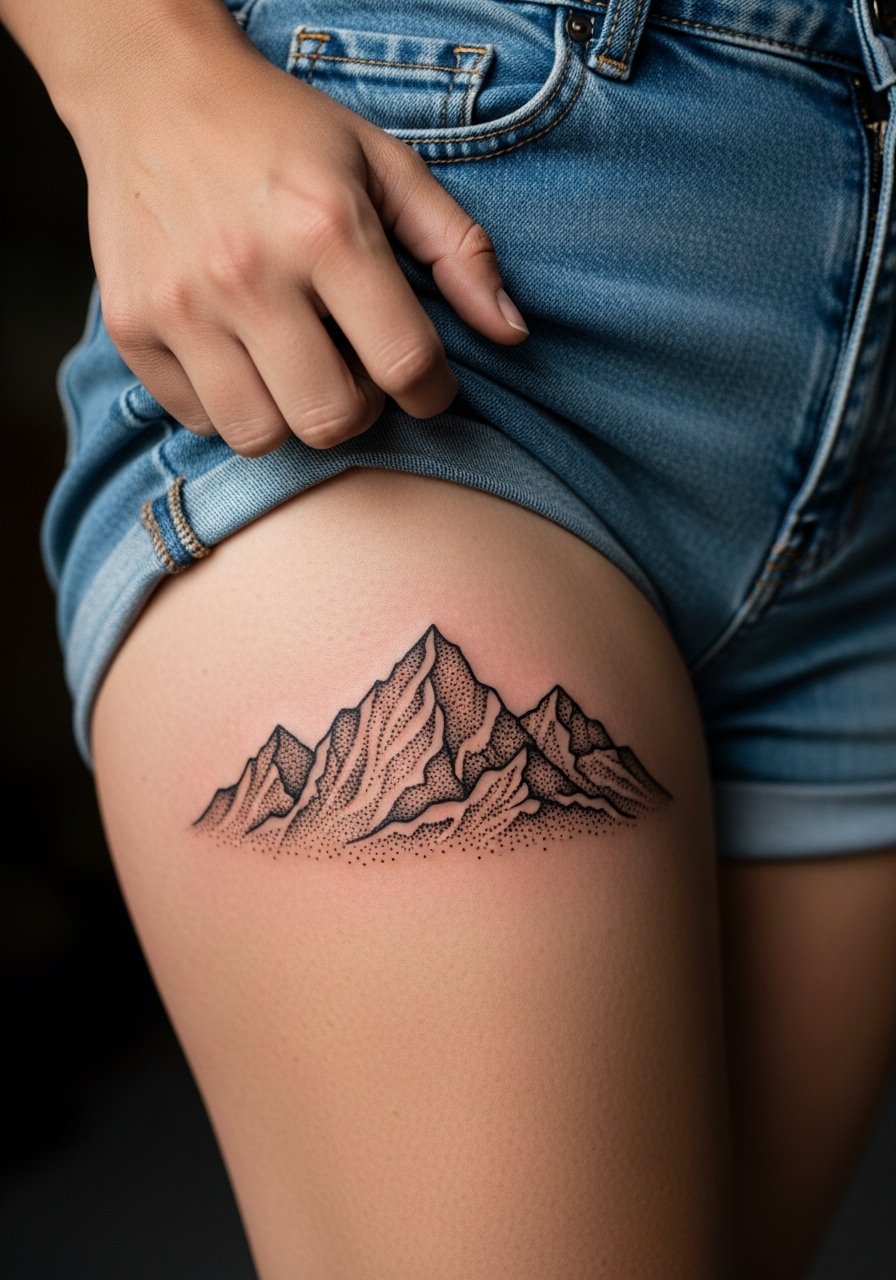
Dot work scales beautifully on the outer thigh because the area tolerates dense texture without noticeable distortion. When you consult, show how dense you want the stippling from a mid distance and ask for a larger scale to avoid loss of detail. Thigh sessions are moderate for pain and can be one longer block. The mistake is requesting photographic stipple at small scale. At two years stipple texture will mellow but maintain shape if started slightly larger. For the session wear high-waisted shorts so the artist can expose only the zone being worked on.
8. Minimalist Constellation on Ankle
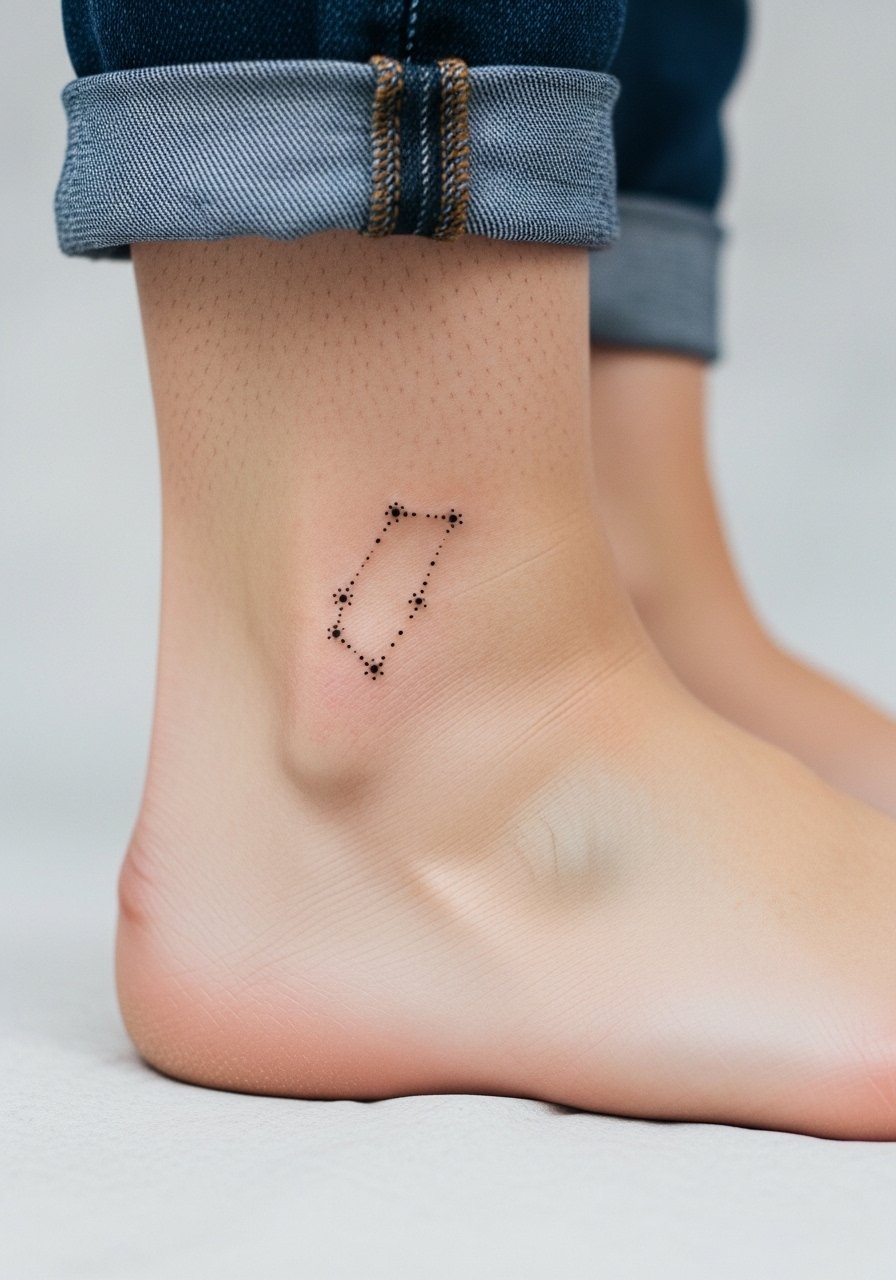
Ankle stick-and-dot work is visible but exposed to friction from shoes and socks. Make the stencil slightly higher above the ankle bone to avoid constant rubbing. Sessions are quick and pain is transient. A common error is packing clusters too tightly near the ankle bone where blowout risk increases. Six months in the dots hold, but by year three you may see softening and need a touch-up. Show it with cropped jeans or sandals and consider a simple ankle bracelet that complements without covering the dots.
9. Scripted Phrase Around Wrist
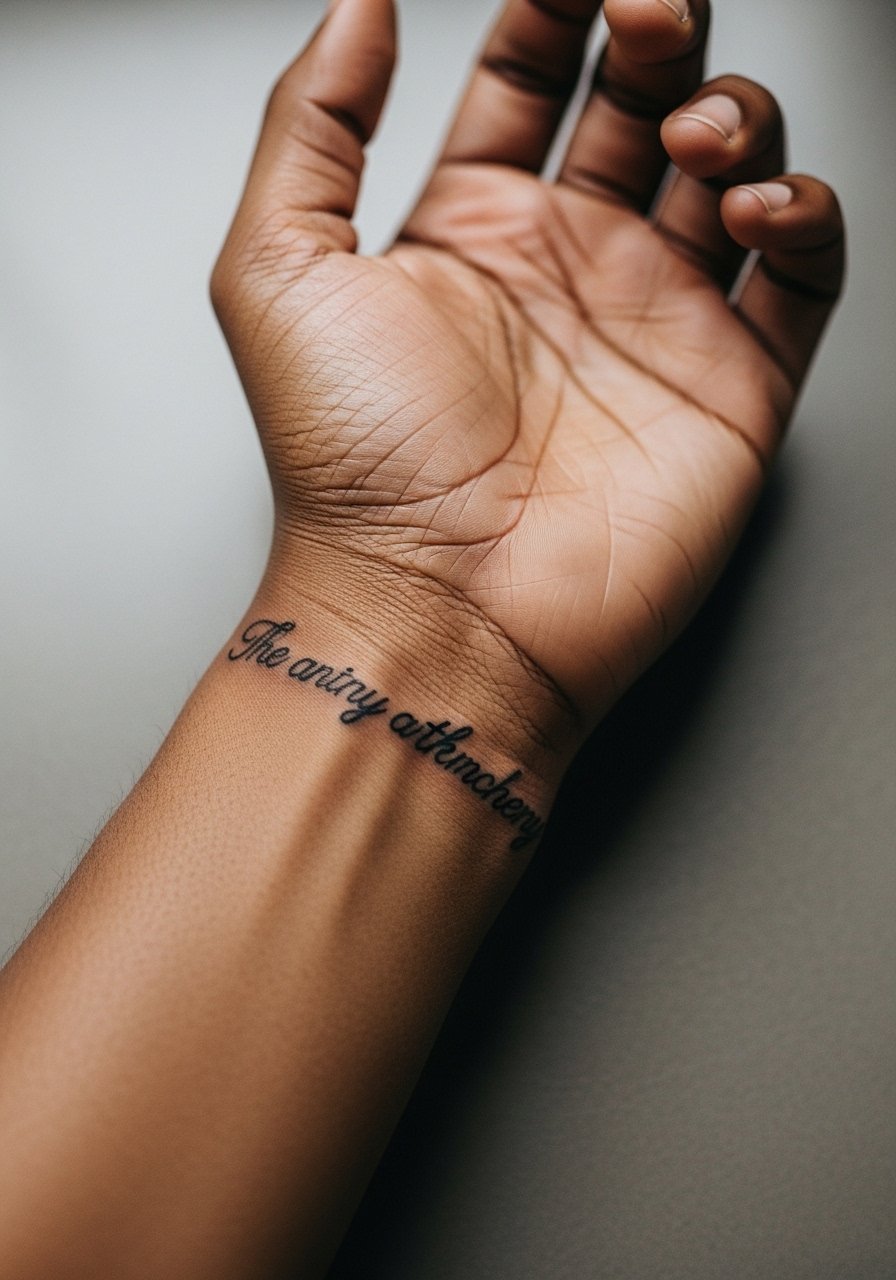
Wrapped wrist phrases require careful spacing so the words remain legible at all angles. Tell your artist to use larger letter spacing and slightly heavier downstrokes rather than microscopic script. Wrist skin moves and endures frequent washing so expect faster fade there than on the forearm. Sessions are short and pain is moderate. The mistaken request is wanting a tiny cursive wrap that reads only up close. At year two a light touch-up often restores the counters. For a minimal daytime look, pair the piece with a slim minimalist watch that sets off the script without rubbing the ink.
10. Micro-Realism Eye on Upper Arm
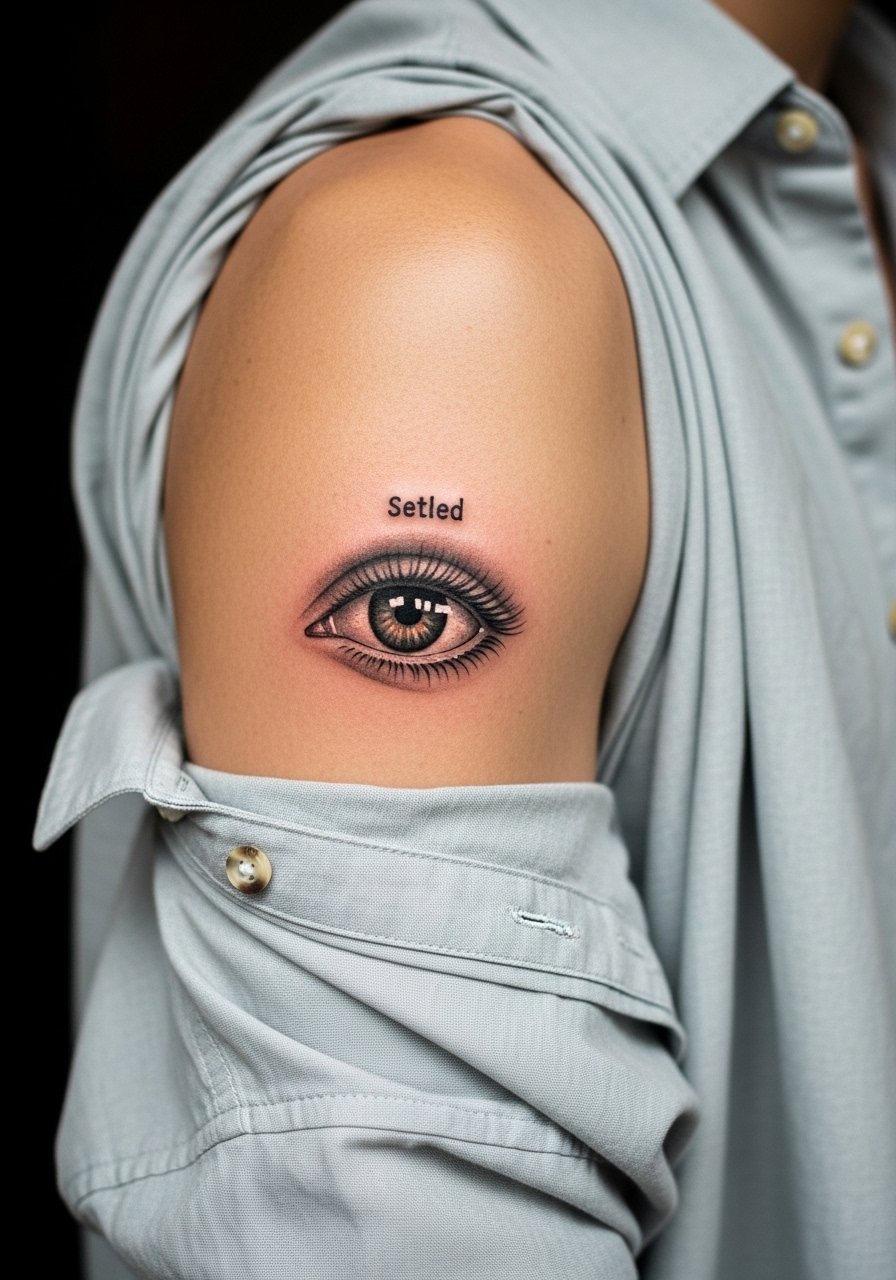
Micro-realism eyes need scale to show pupil detail, otherwise the iris turns into a blob. I advise sizing the stencil so the pupil has at least a 4mm diameter. Upper arm skin ages favorably and handles detail well. Most sessions take under two hours and pain is low. The usual mistake is forcing portrait scale into micro dimensions. At five years the piece keeps its character if exposure to sun is limited. Pair with a loose button-down shirt that you can pull aside during the session and wear open to reveal the artwork.
11. Blackwork Band on Finger
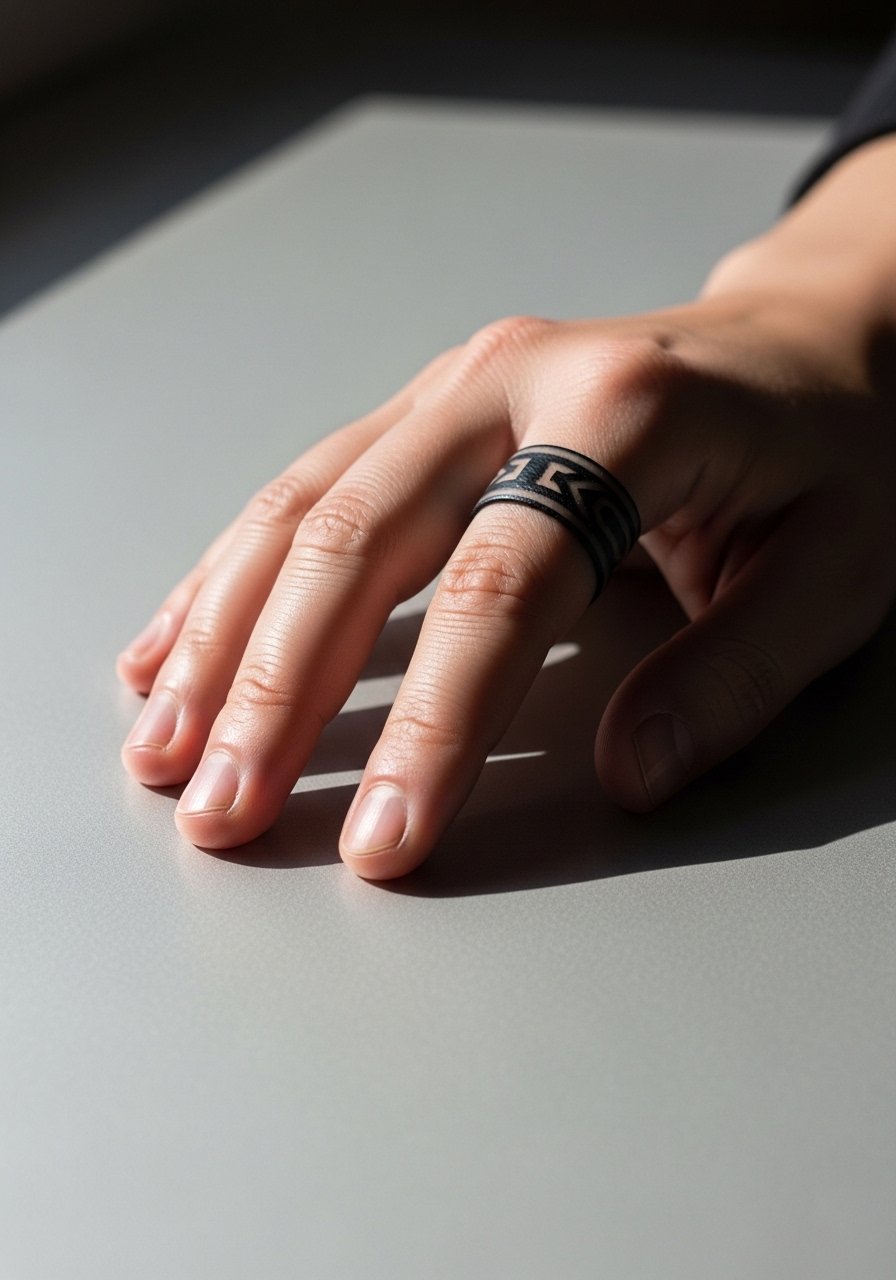
Finger bands are convenient but notoriously touch-up heavy because the skin there regenerates fast. If you want a durable band, request a slightly thicker width and confirm the artist will account for future touch-ups. Pain is sharp and sessions are brief. The common mistake is choosing ultra-thin bands thinking those will stay crisp. Expect maintenance at year one or two. For wearing, choose thin stacked rings rather than bulky pieces to avoid extra wear on the ink. Consider a delicate stacking ring set when showing off a band.
12. Botanical Sprig on Inner Bicep
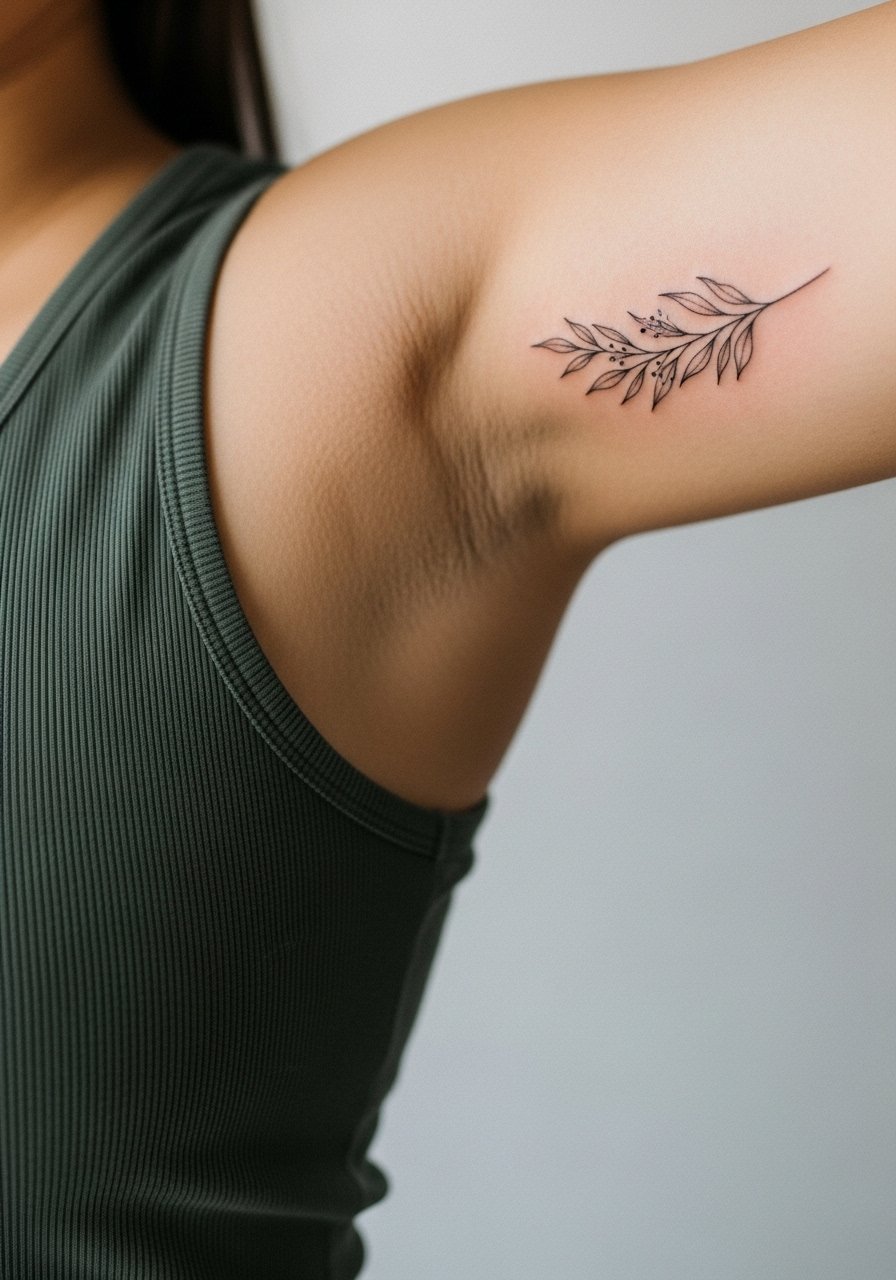
Inner bicep pieces are intimate and wear well when the design follows muscle lines. Ask the artist to place the sprig so it reads with the arm relaxed and lifted. Pain can be higher here and sessions may feel prickly. A frequent mistake is not previewing the design while flexing, which can leave the sprig distorted in motion. The skin there ages differently, often preserving lines better than hands. For the appointment, wear a tank top so the artist can easily expose the inner arm.
13. Small Blackwork Skull on Behind Ear Area
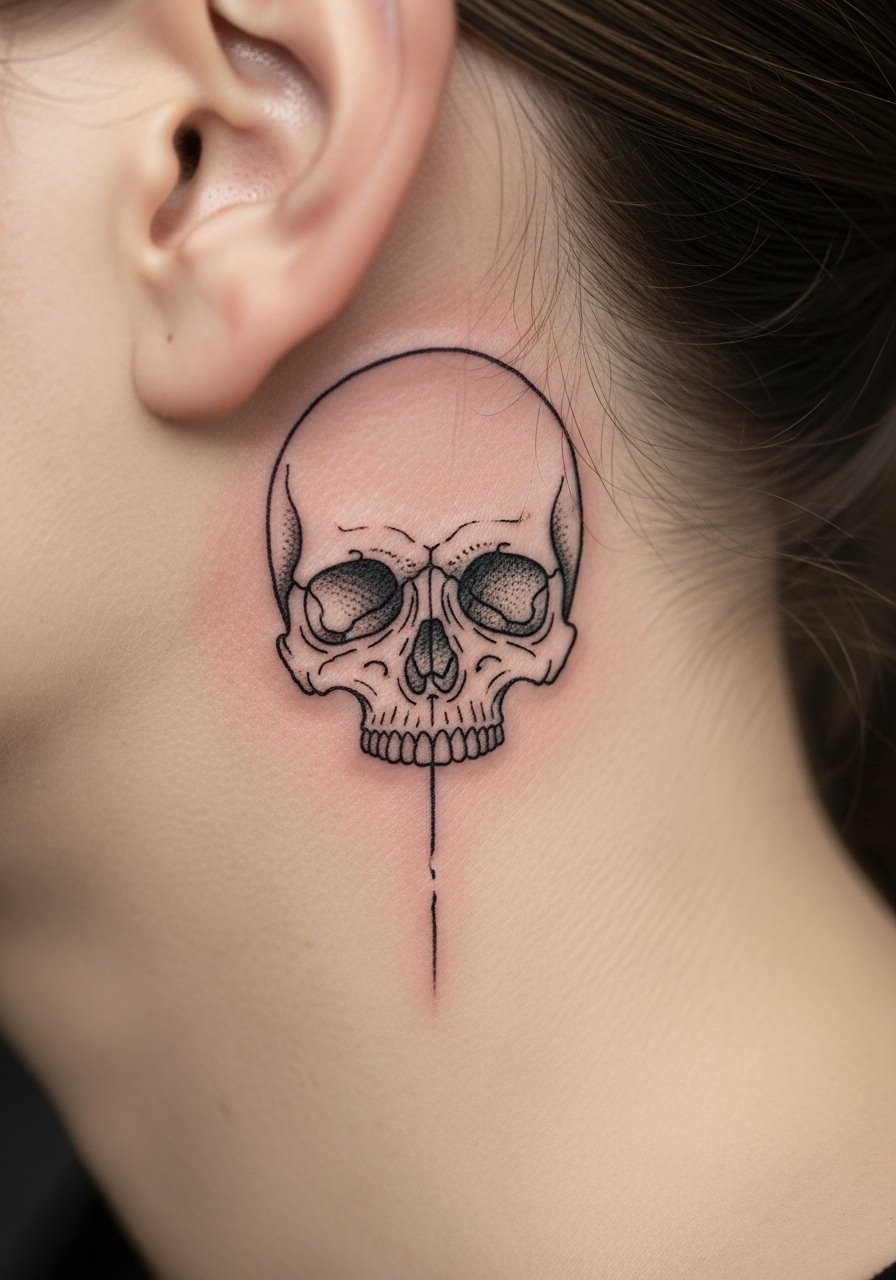
Behind-ear placements require careful framing because proximity to hairlines can hide details as hair grows. Describe exact placement relative to the hairline and ask for a slightly bolder outline than you might choose elsewhere. Pain is low but the area is sensitive to touch after the session. A common mistake is placing tiny details too close to the hairline where they become obscured. Expect the design to age well if kept visible. Style it with short hair or a tucked hairstyle when you want it visible and wear a thin chain necklace that keeps attention upward.
14. Watercolor Splash Behind Shoulder
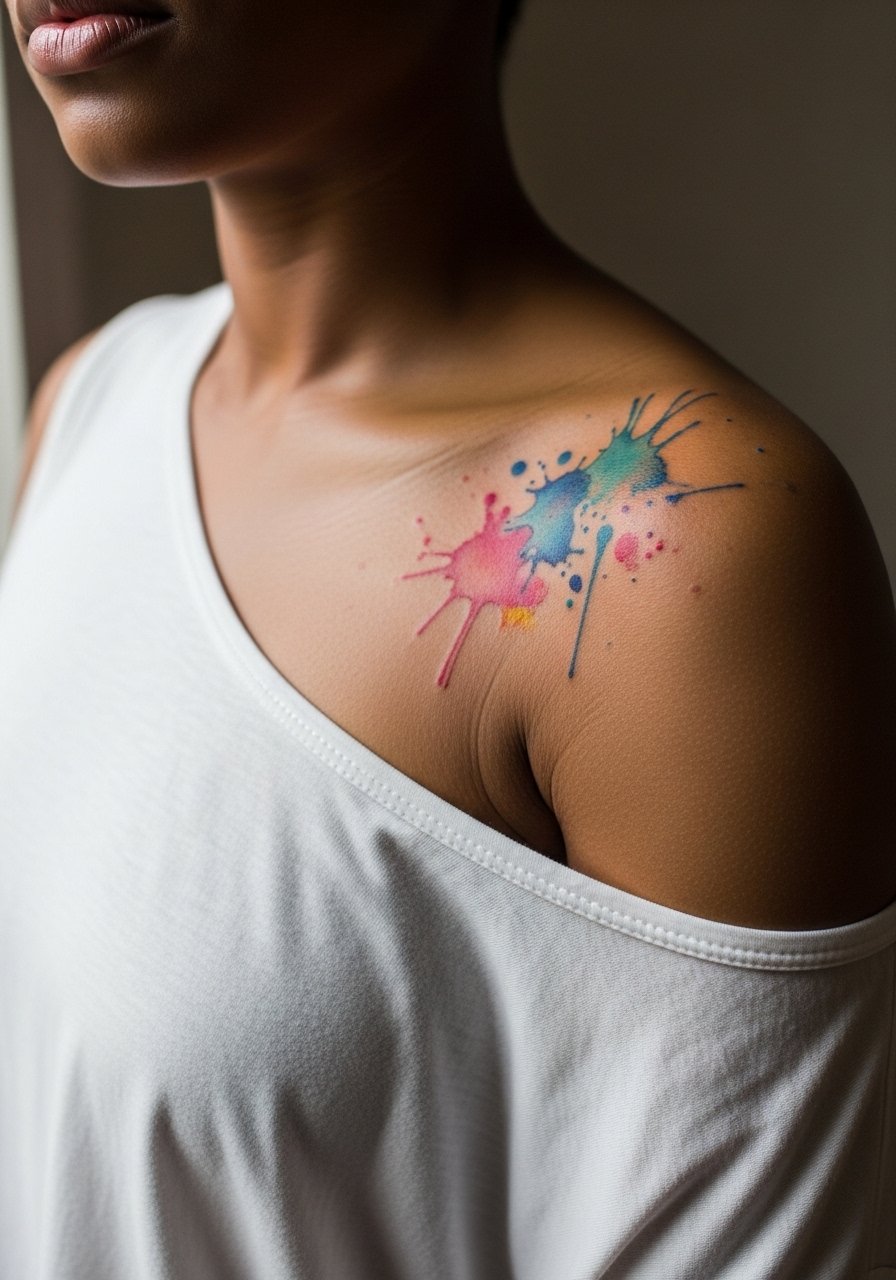
Watercolor effects depend on soft saturation rather than crisp outlines. If you want longevity, ask for a small outline or micro stipple anchor under the color to preserve shape as the pigments move. Shoulder skin is forgiving and sessions feel mild. The mistake is requesting full watercolor without any structural anchor, which can blur into indistinct patches over years. Expect colors to fade faster than black and to need refreshes sooner. For show-off outfits, choose a loose tank top that exposes the shoulder and keeps the watercolor visible.
15. Minimalist Line Mountain on Sternum
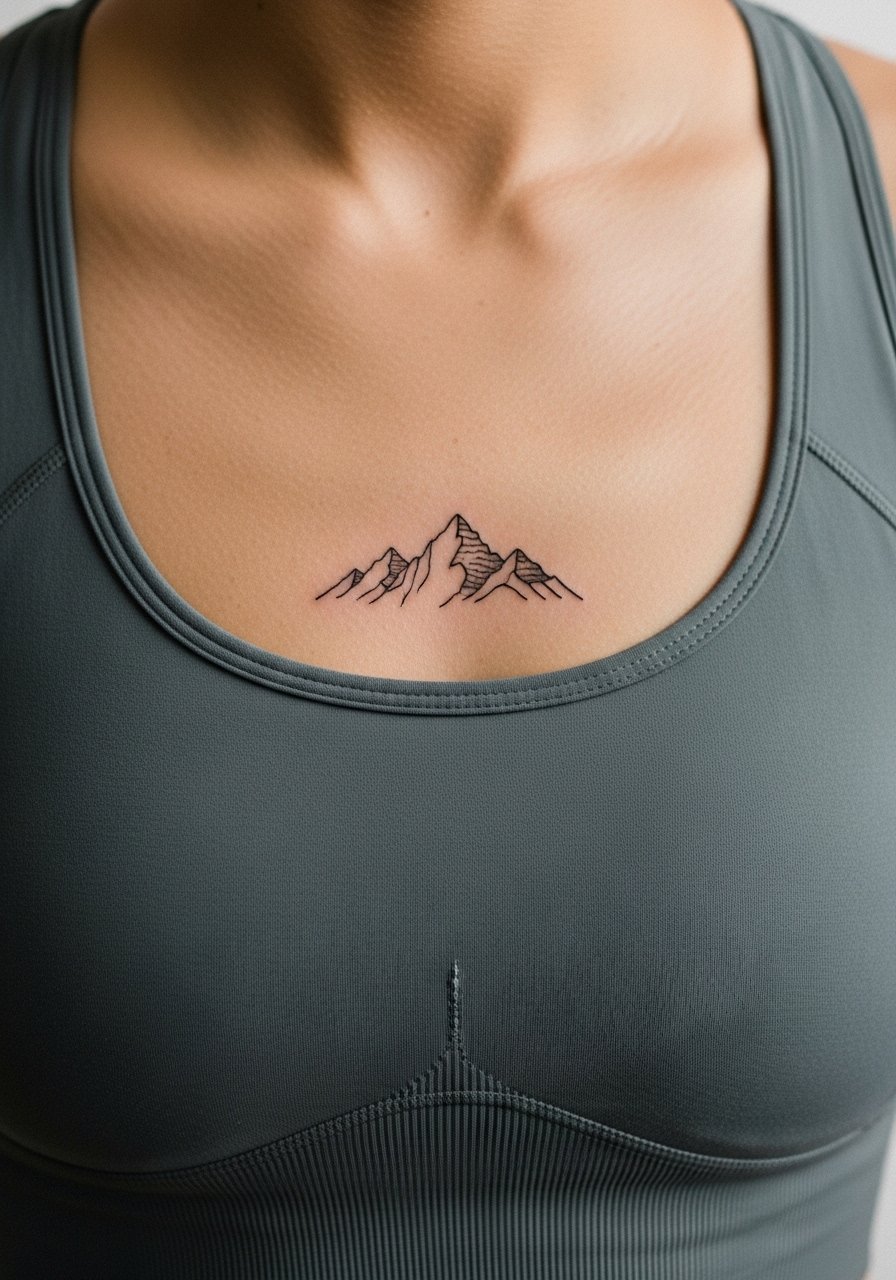
Sternum pieces are bold statements and require careful pain tolerance planning. Lines should be slightly thicker than micro to avoid the natural mobility of the chest disrupting them. One camp of artists advises against fine line sternum work because the skin flex causes early blurring. The other camp says strategic spacing and slight weight preserve clarity. Ask which approach your artist uses and whether they recommend spacing. Sessions can be intense and often need breaks. For the appointment wear a fitted sports bra so the artist can access the area with dignity.
16. Geometric Sleeve Accent on Outer Forearm
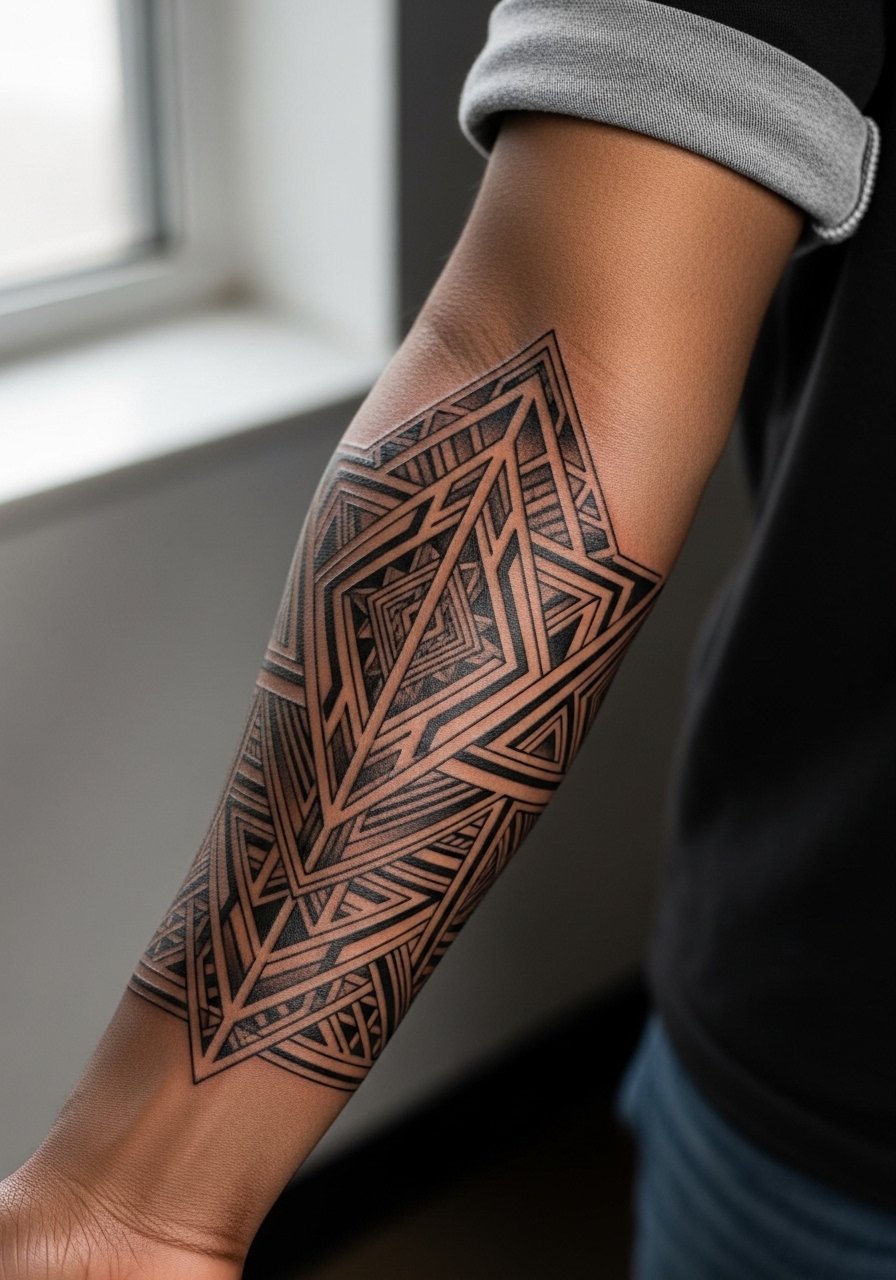
As a sleeve accent, geometric shapes need consistent grid spacing to avoid wobble as the arm rotates. Request that the stencil be checked in multiple arm positions so the angles align. Forearm pain is low and sessions vary by how much of the sleeve you fill. Mistakes include overlaying too many intersecting grids that create visual noise over time. Geometric work generally holds well if not jammed into a very small area. For everyday wear, roll sleeves and use a button-up linen shirt to keep the design framed.
17. Single Needle Portrait Mini on Ribcage Side
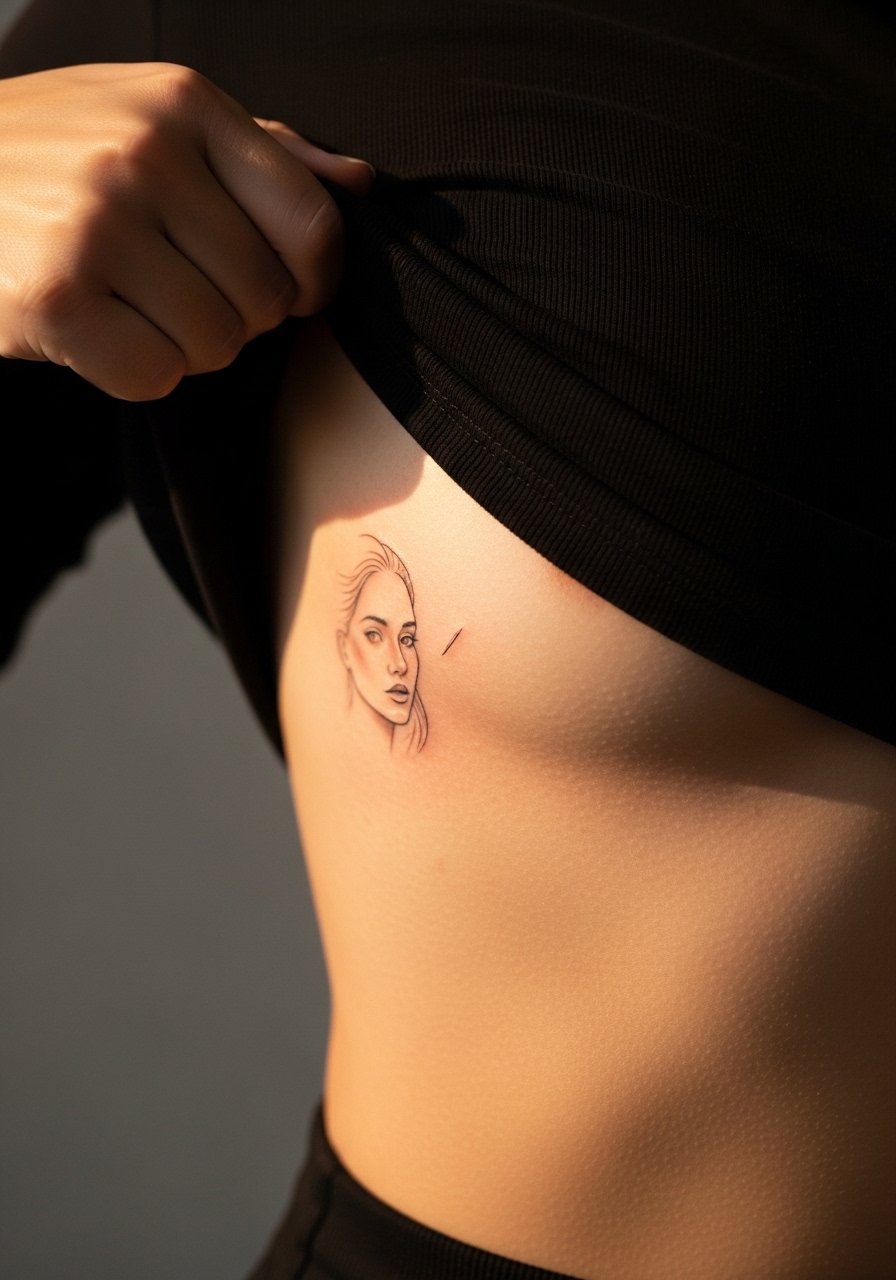
Tiny portraiture on the ribs needs deliberate scaling because the area flexes and breathes. Ask for a larger focal point like the eye or mouth to remain readable later. Rib sessions are often high on the pain scale and done in one focused visit. The common error is asking for micro facial detail that cannot survive movement. Portrait miniatures may need a corrective touch-up sooner than larger portraits. For the session wear a cropped athletic top that gives access and comfort.
18. Hex Dot Cluster on Calf
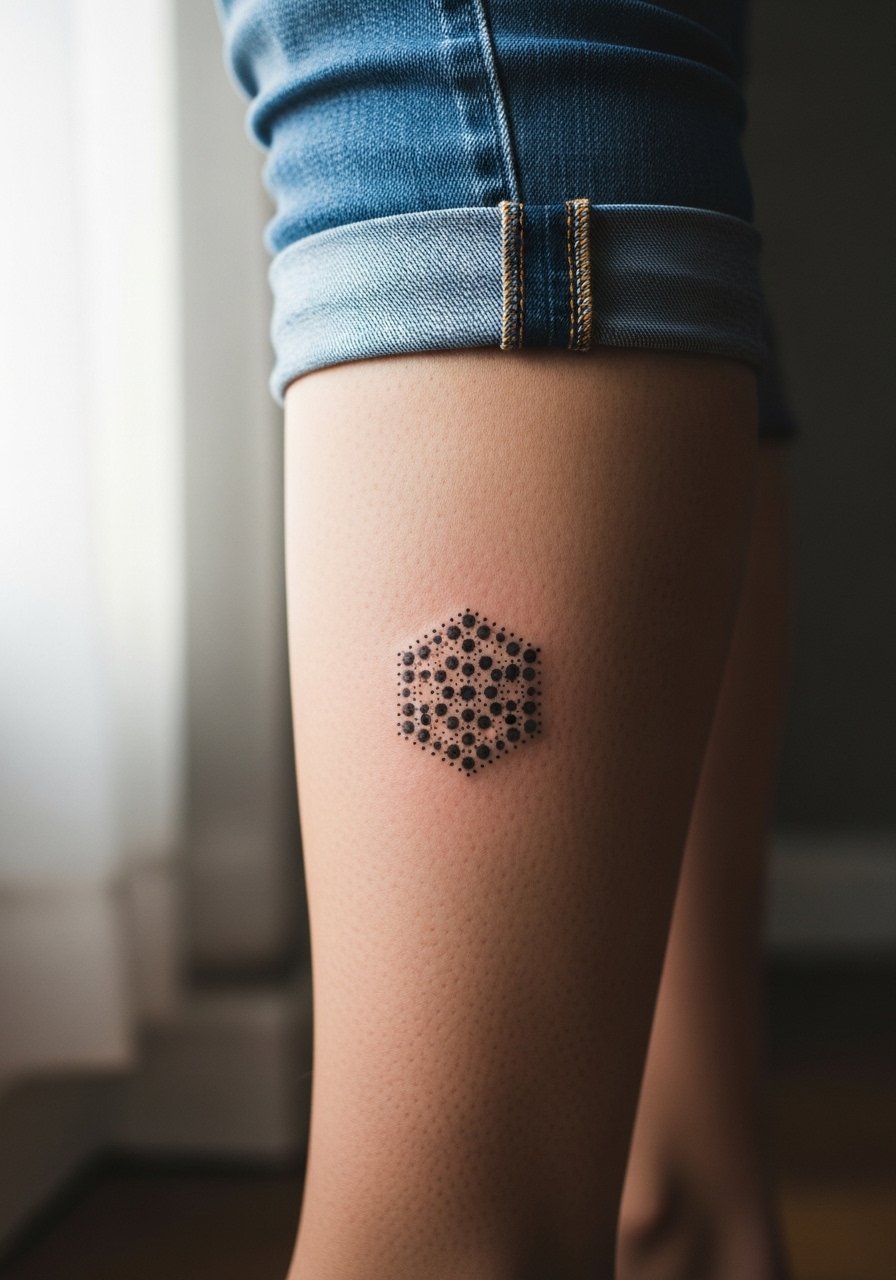
Clustered hex dot patterns read as texture from distance and hold well on the calf where skin tension is moderate. Tell your artist you want defined negative space between hexes so the pattern keeps shape as skin stretches. Calf sessions are tolerable and often done in under two hours. A mistake is packing hexes too tightly which reduces the intended honeycomb effect. Over years the pattern keeps integrity if spacing is respected. Wear cropped trousers or a linen short to show the repeating geometry.
19. Tiny Zodiac Glyph on Side Neck
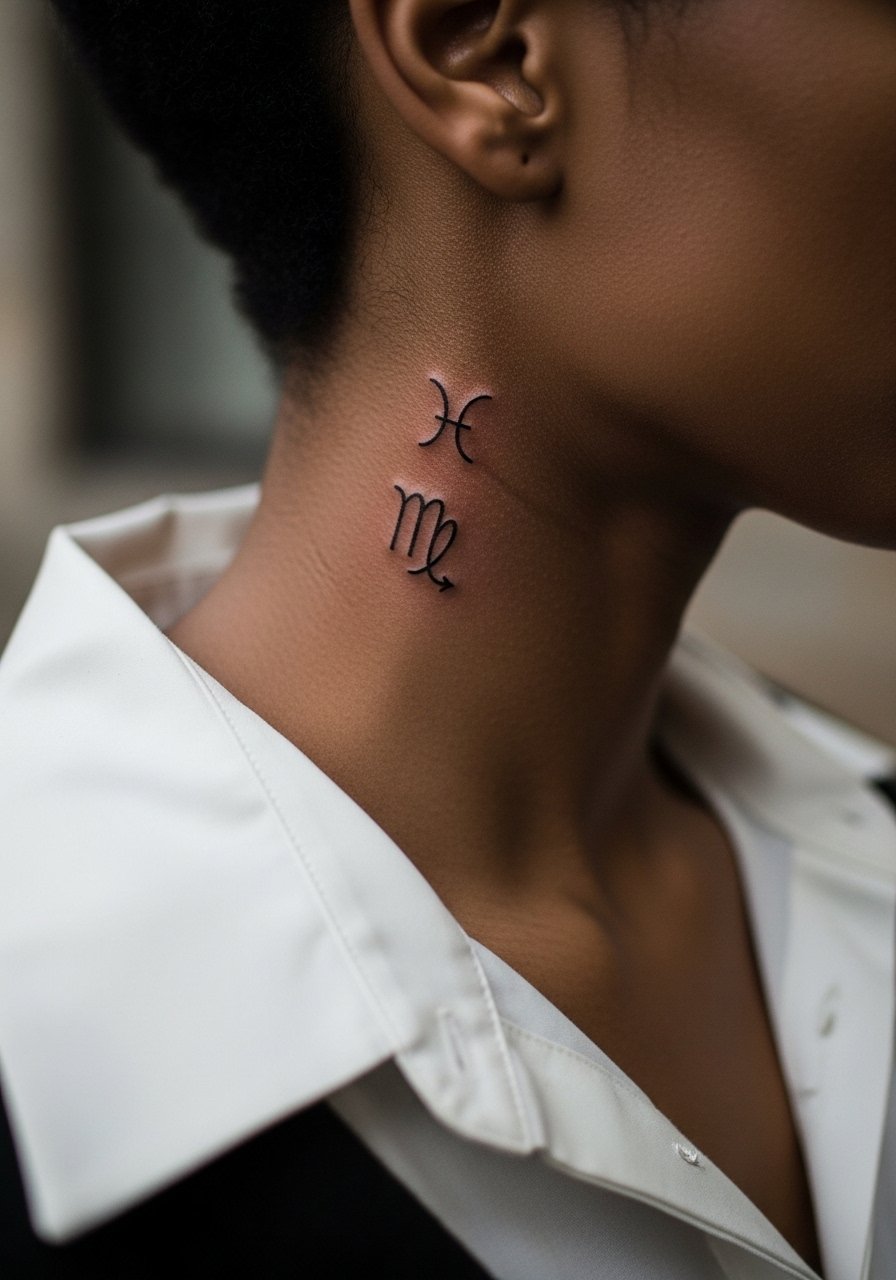
Neck tattoos are visible and often judged differently in professional settings. Ask the artist about ink depth and spacing so the glyph does not feather into blur. Pain can be moderate and the area heals with particular sensitivity to sun. The common mistake is choosing intricate shading right on the neck where it will lose definition. Consider placement slightly lower or behind the ear if your career requires discretion. For showing it subtly, pair with a thin pendant necklace that draws attention upward.
20. Single Needle Floral on Upper Thigh Inner Edge
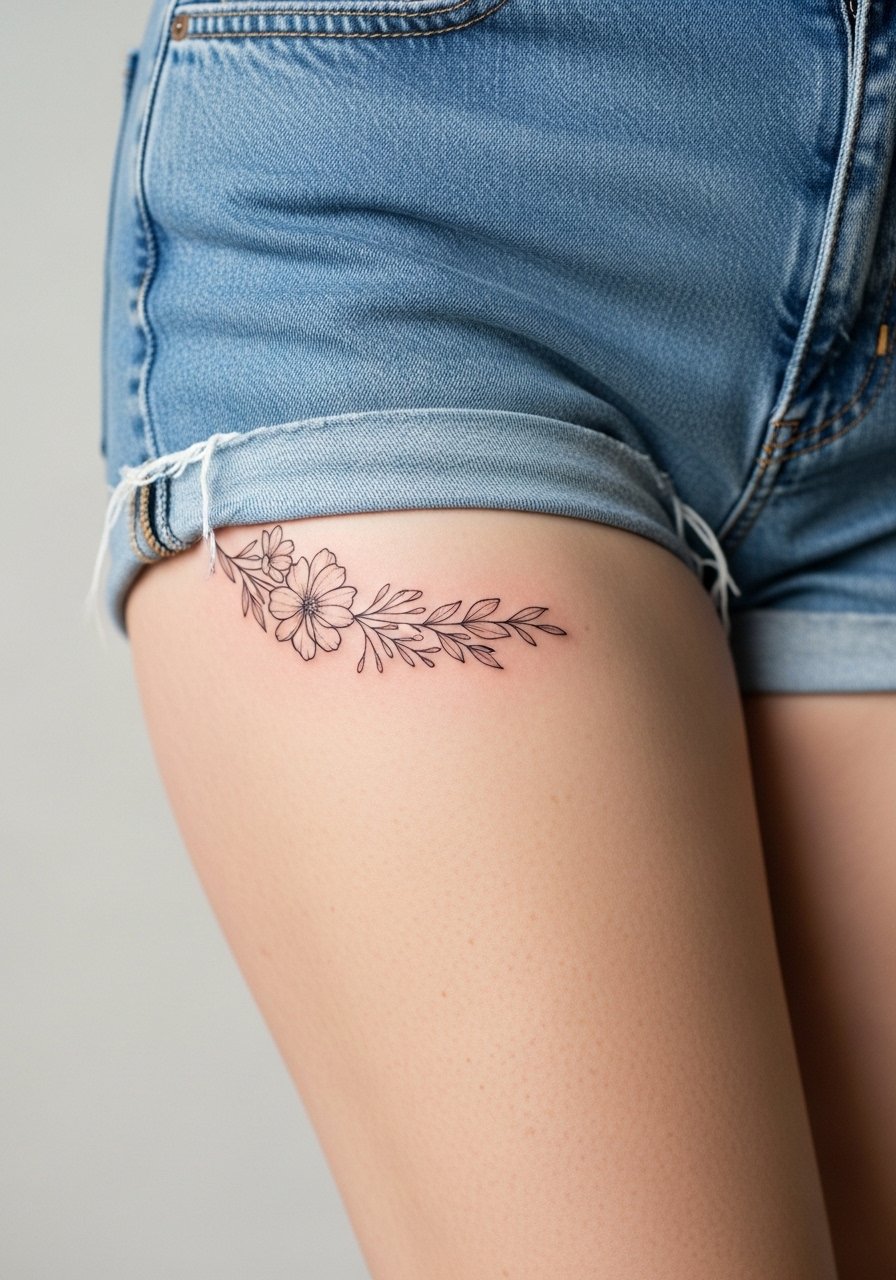
Inner thigh florals look intimate and age gently when lines follow natural curves. Ask for slightly bolder stems than micro threads so the design keeps clarity through friction from clothing. The inner thigh is sensitive and sessions may require breaks. Many people make the mistake of cramming too many petals into a small vignette, which blurs over time. Expect slower fading if you wear tight fabrics frequently. For the session wear high-cut shorts that can be shifted for access while keeping you comfortable.
21. Fine Line Compass on Sternum Edge
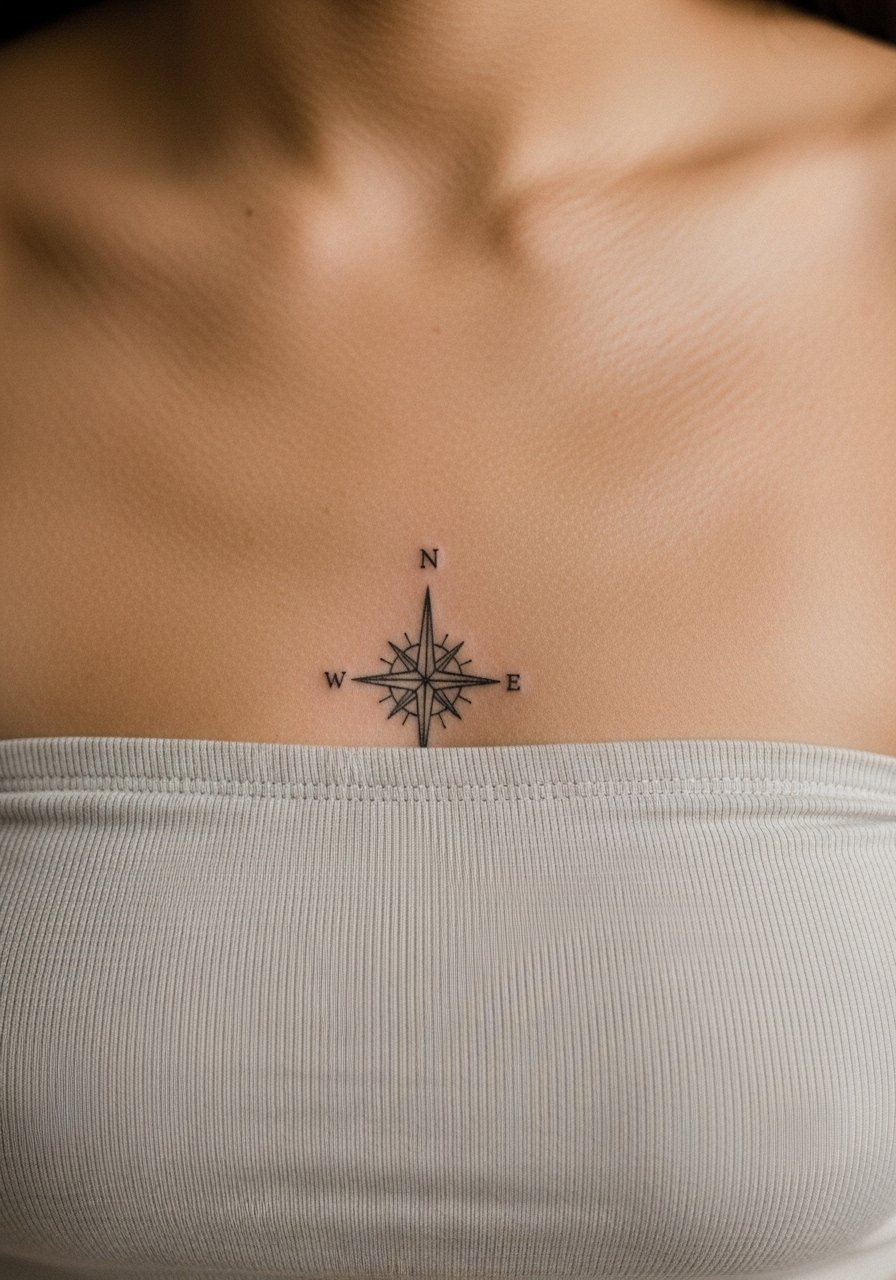
Compass motifs near the sternum need balanced negative space around the points to avoid early merging. Tell your artist you want the cardinal points slightly blunt to give longevity. Sternum areas see a lot of movement so sessions can be intense and require breathing control. Mistakes include chasing super-fine points that soften quickly. Expect a touch-up at year three for sharper points. For modest exposure wear a bandeau top that shows the design cleanly.
22. Small Linework Wave on Ankle Side
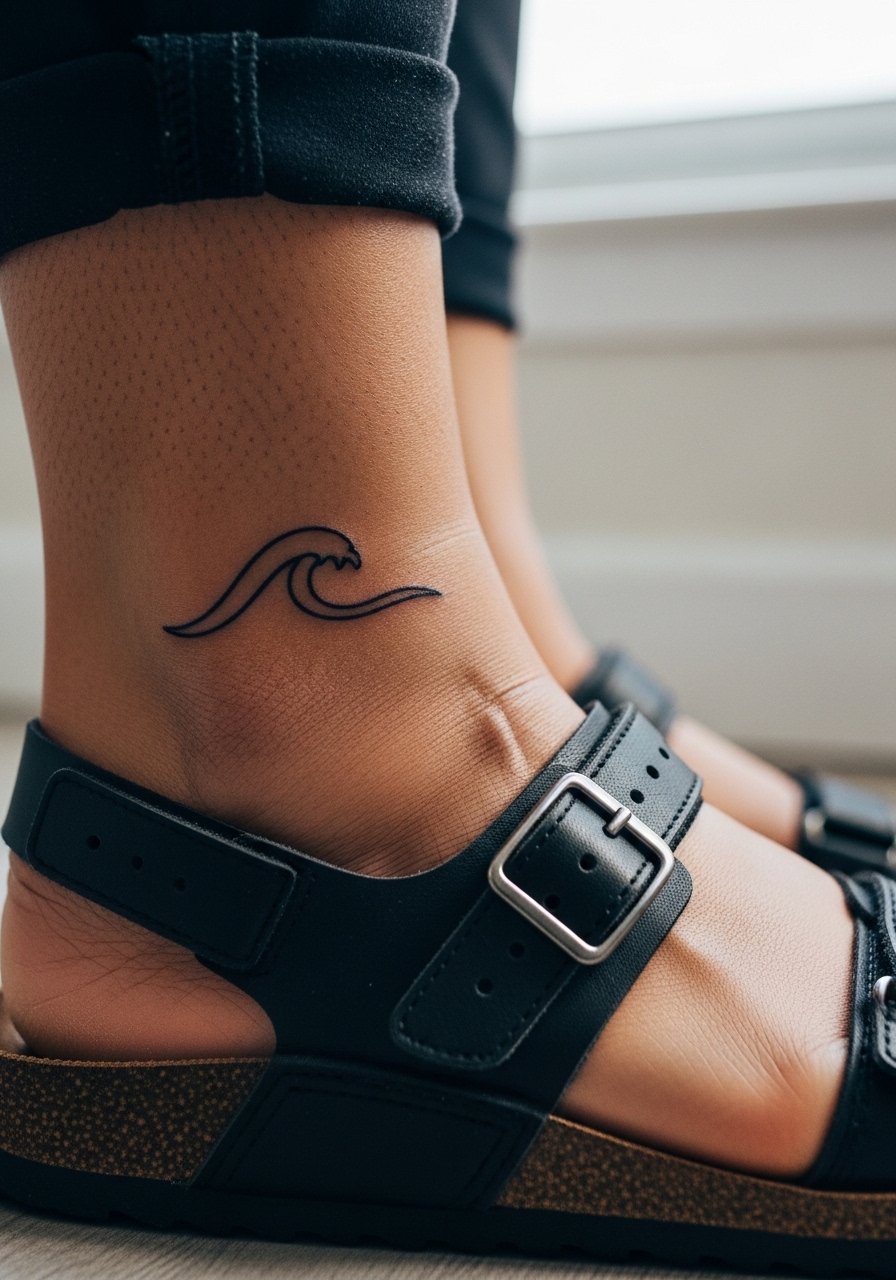
A side-ankle wave is low profile but suffers from shoe rub. Ask for a slightly thicker line and placement just above where shoes contact skin. Sessions are quick and the pain is sharp but brief. A mistake is placing the wave where socks or shoes compress the ink. Expect yearly softening if you wear closed shoes a lot. Pair with open sandals or a beaded anklet to keep the area visible and reduce friction.
23. Blocky Blackwork Moon on Lower Back
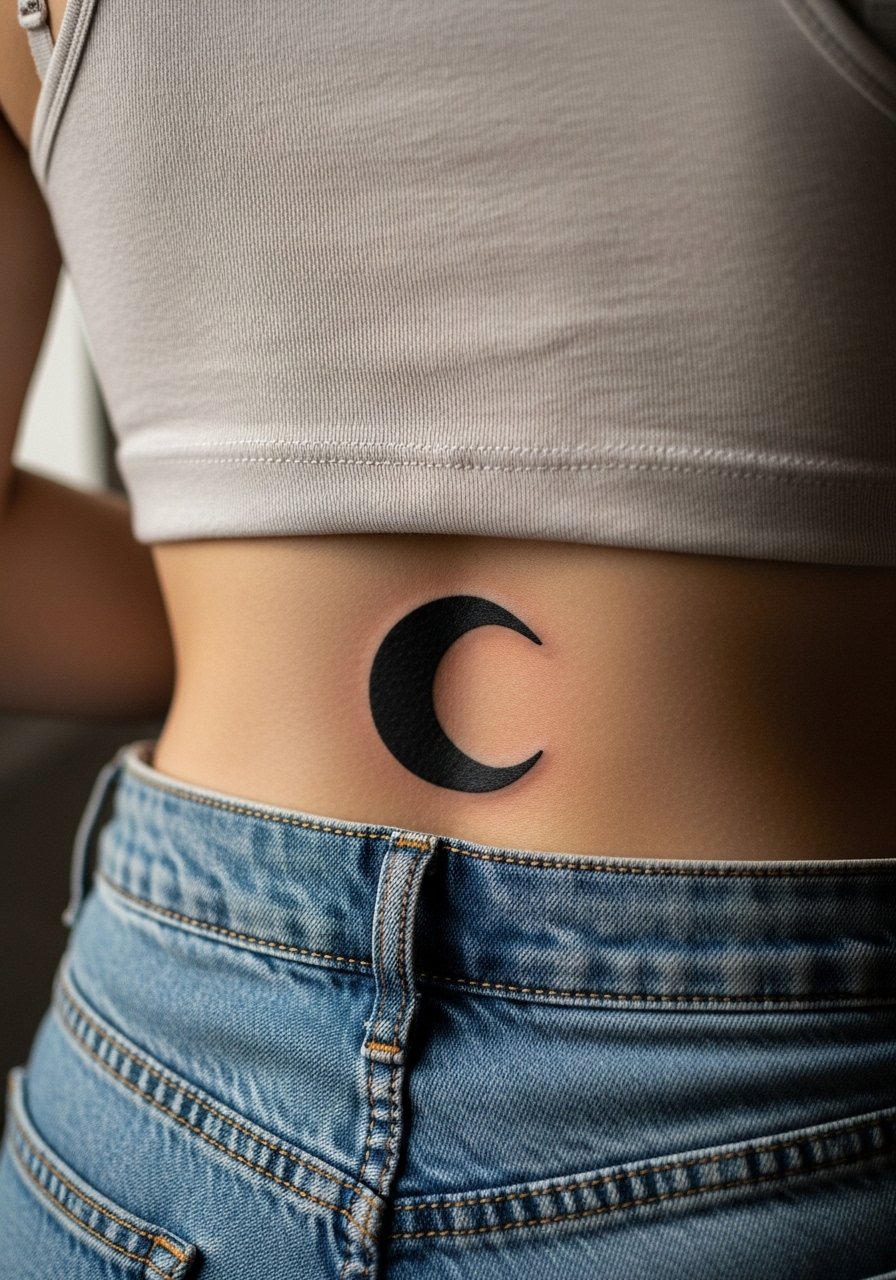
Lower back blackwork holds because the skin there is stable and tends to keep saturated fills intact. Ask for a smooth edge and avoid overly complex inner texture that could break up. Sessions can be longer depending on size but pain is usually low. The common mistake is choosing tiny internal detail that reads poorly as the area moves. Expect deep blacks to remain dominant for many years with little maintenance. For outfits, try a low-back top or a crop top that reveals the motif when you want to show it.
24. Linework Compass on Foot Arch
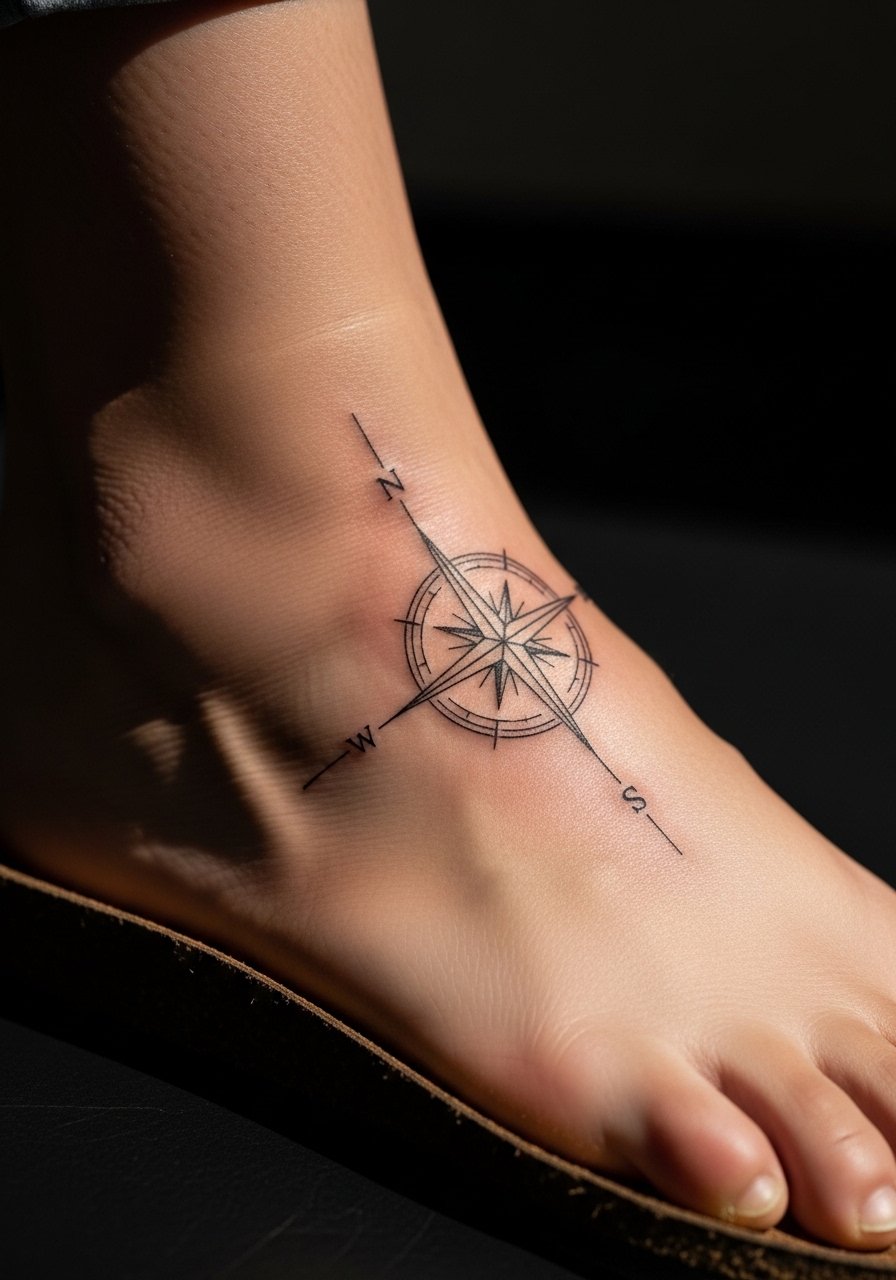
Foot tattoos are high-maintenance because of constant friction and moisture. If you want a compass there, request slightly thicker lines and a simplified center so the design reads despite wear. Foot sessions hurt more than expected and often require touch-ups. The common error is picking intricate detail on the sole edge where walking destroys detail. For showing the work wear sandals and choose a simple slide sandal so the ink can breathe dry between wears.
25. Mini Botanical Anklet on Lower Leg
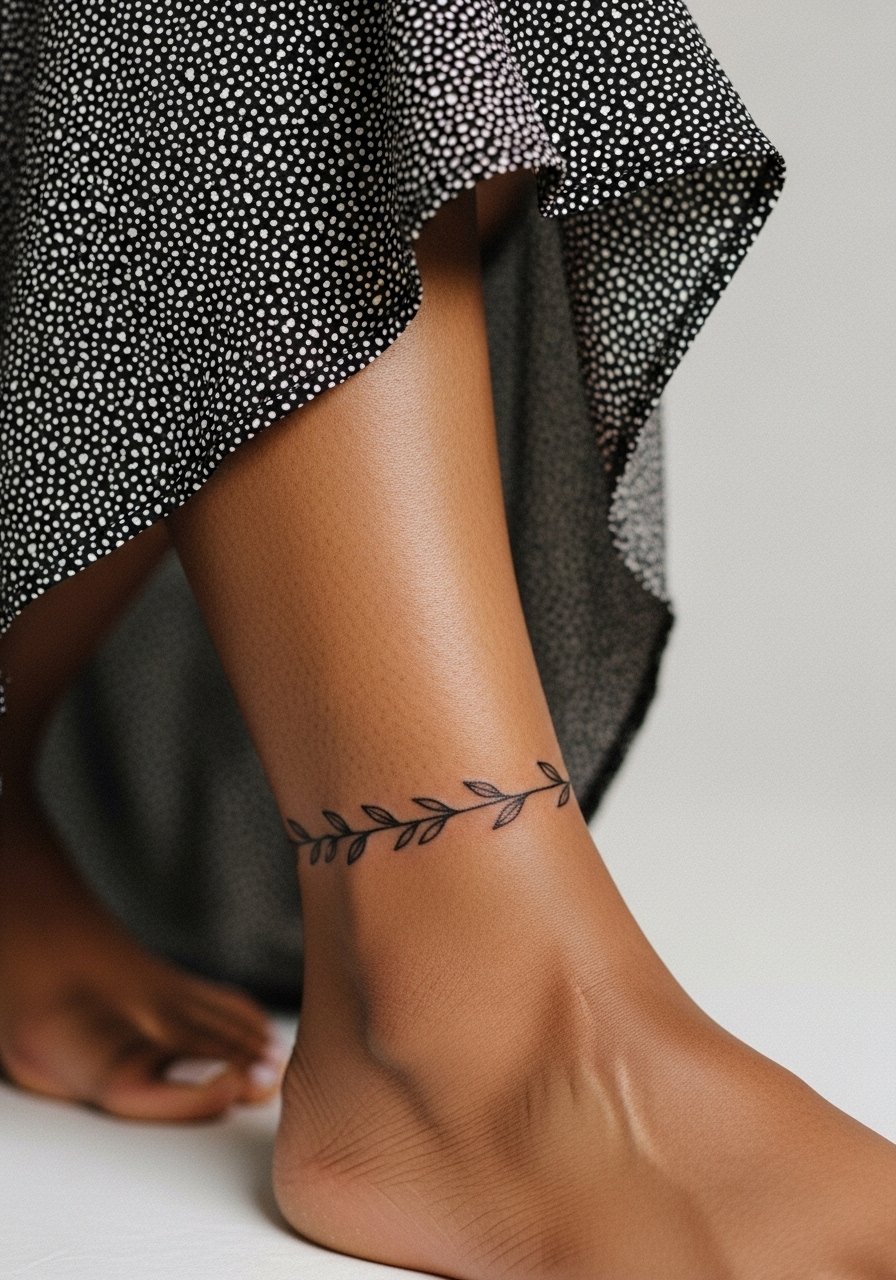
An anklet vine needs break points in the design so the leaves do not ink into one continuous band. Ask for spacing and a mix of dot accents to preserve shape over time. Lower leg skin tolerates detail and sessions are quick. A mistake is demanding continuous thin vine around the circumference which collects wear. Expect some fading where socks hit. Pair with a flowy skirt and sandals to highlight the wrap without crowding it.
26. Tiny Geometric Heart on Chest Near Collarbone
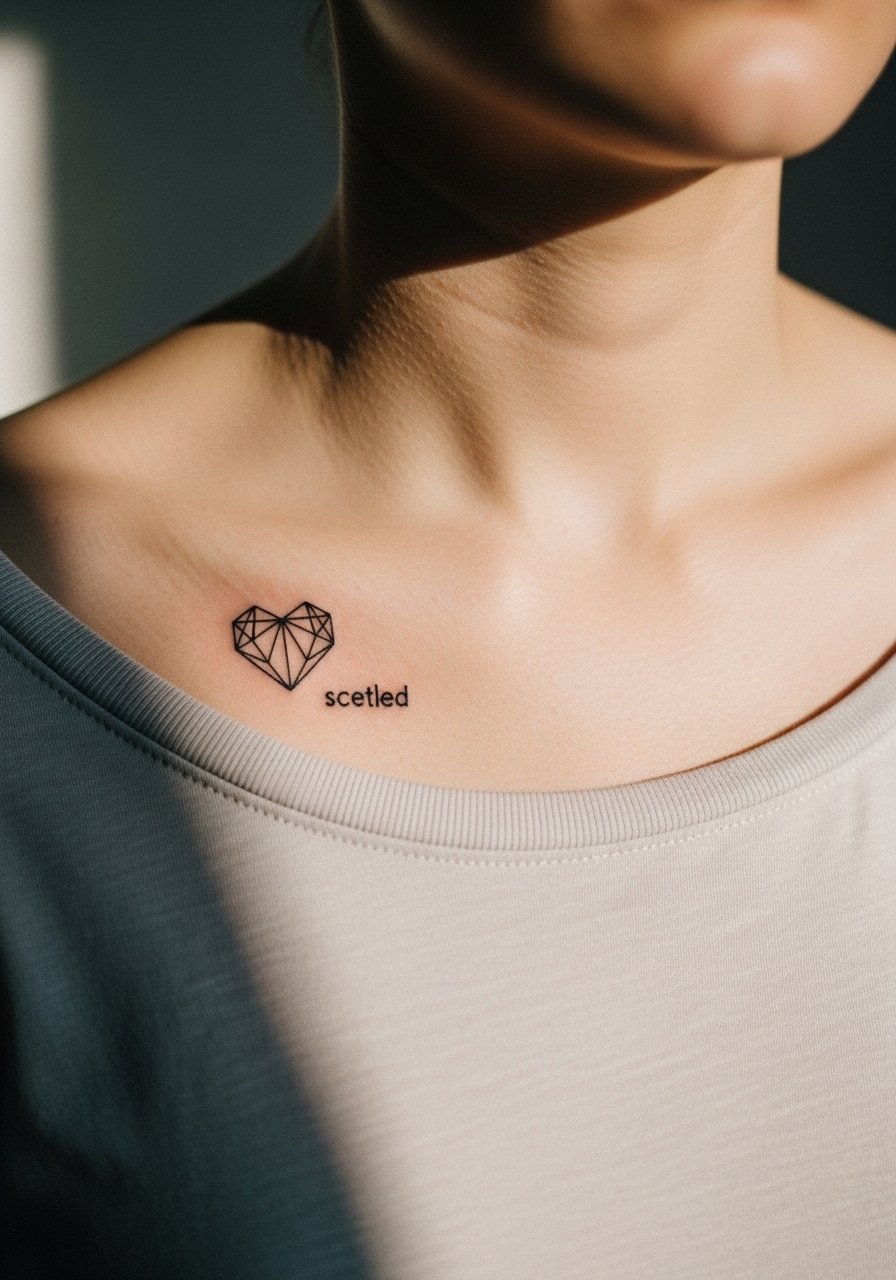
Small geometric hearts look clean when edges are given a touch of weight. For collarbone adjacency, have your artist place the shape so it follows the clavicle angle. The area is sensitive so expect quick sessions and focused aftercare. The mistake is choosing a fragile outline that fades into the collarbone texture. Give the heart a tiny internal dot or microline to keep a focal point intact. Wear a thin chain pendant so the jewelry sits just above without rubbing.
27. Tiny Script Date on Side of Finger
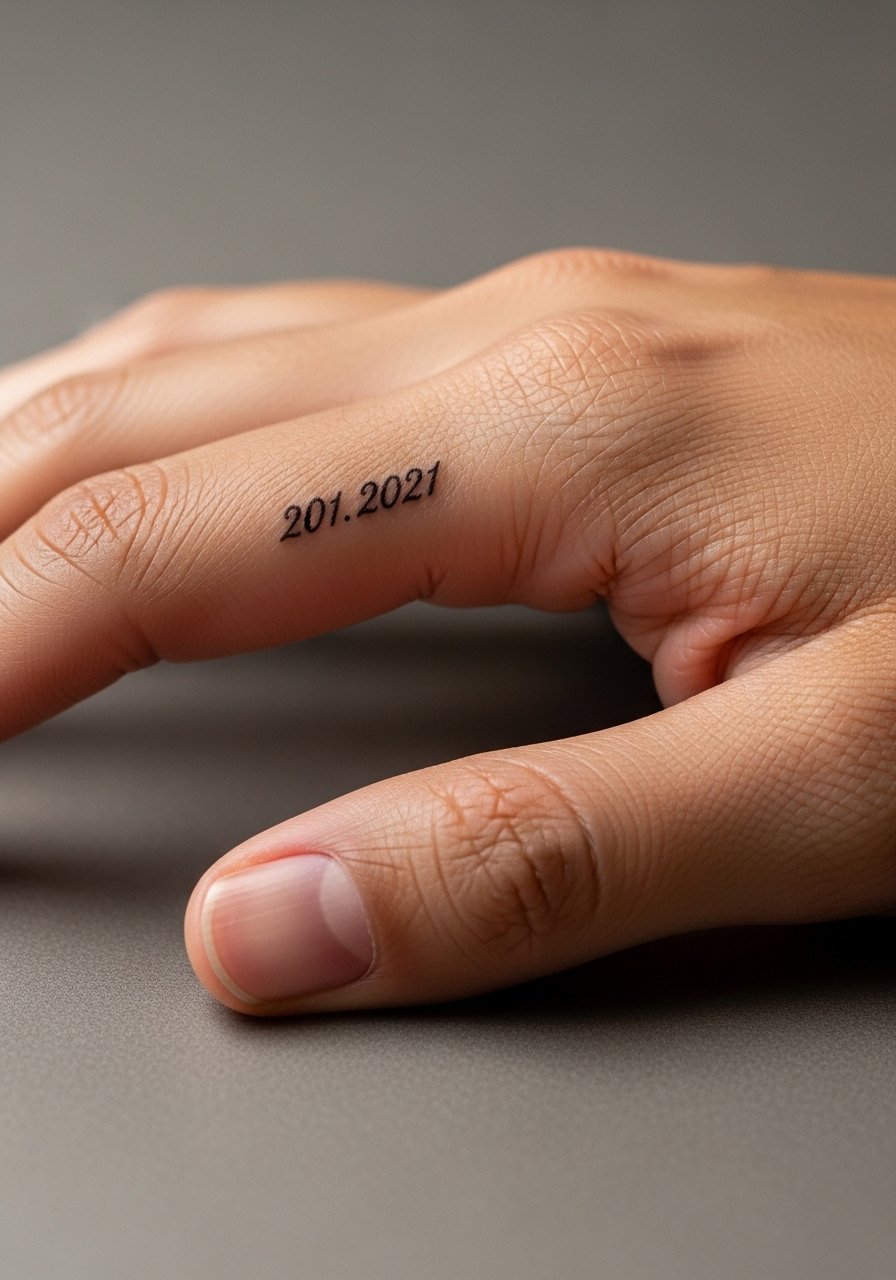
Finger-side dates are intimate but abraded constantly. Request blocky numerals rather than looping script so the numbers remain readable through washing. Sessions hurt and healing is quick but touch-ups are common. A common error is choosing delicate cursive that disappears with normal wear. Expect a maintenance session within the first two years. For showing it off, wear thin stack rings so the band complements rather than competes with the numeral.
Frequently Asked Questions
Q: Will fine line tattoos blur faster if I get a full sleeve that mixes dot work, geometric, and script?
A: It depends on scale and spacing. If the script and dot work are given room and the artist staggers the heavier geometry, the sleeve will age more gracefully. Ask for larger spacing on script and slightly heavier downstrokes where the arm creases.
Q: Do watercolor-style tattoos need different session-day clothing than traditional blackwork?
A: Yes. Watercolor and shoulder or back pieces are easiest if you wear a loose tank top or a button-down you can slide aside. Blackwork on limbs usually only needs shorts or rolled sleeves.
Q: Why do mandalas sometimes look blotchy after a few years on the ribs?
A: Ribs move and stretch a lot. If a mandala is too dense with close lines it can merge. Some artists avoid fine mandalas there while others compensate with spacing and slightly heavier lineweight. Ask your artist which camp they fall into before booking.
Q: How often should I expect touch-ups for hand and finger work compared with forearm work?
A: Hands and fingers typically need touch-ups sooner, often around the first year or two, because of constant washing and friction. Forearms generally hold longer and may only need attention at year three or later depending on exposure.
Q: Is there a reliable way to preview how a small script will sit across the collarbone before tattooing?
A: Yes. Request multiple stencil placements and check the design while moving and breathing. A good artist will print the stencil, hold it in place, and adjust until the flow sits naturally with your collarbone.
Q: Are there career considerations for visible neck or hand tattoos that I should weigh?
A: Hand and neck tattoos still trigger different reactions across workplaces. Some people opt for placements that can be covered with sleeves or collars for interviews and reveal them freely elsewhere. Ask yourself how often you want to hide the work before committing.
