
Bold trends catch eyes fast, but what sticks five years later is usually the opposite of what racks up the most saves. Fine line trends photograph clean, but classic traditional saturation and decisive linework tend to age with clarity. Read on for 17 traditional men tattoo ideas that balance presence today with how they actually heal and hold up, plus what to ask your artist at the stencil stage.
1. Anchor on Outer Forearm
I've seen anchors on forearms keep their presence longer than smaller wrist pieces, because the forearm gets less friction. Tell your artist you want bold outlines and dense black saturation so the anchor reads from a distance while still looking clean up close. Avoid asking for tiny, intricate rope detail packed into a 2-inch piece, because the rope will blur into the fill over a few years. Expect a moderate pain level and a single session of one to two hours for a medium-sized anchor. For showing it off, rolled sleeves and a solid tee frame the forearm nicely. Wear a solid color t-shirt to let the silhouette speak.

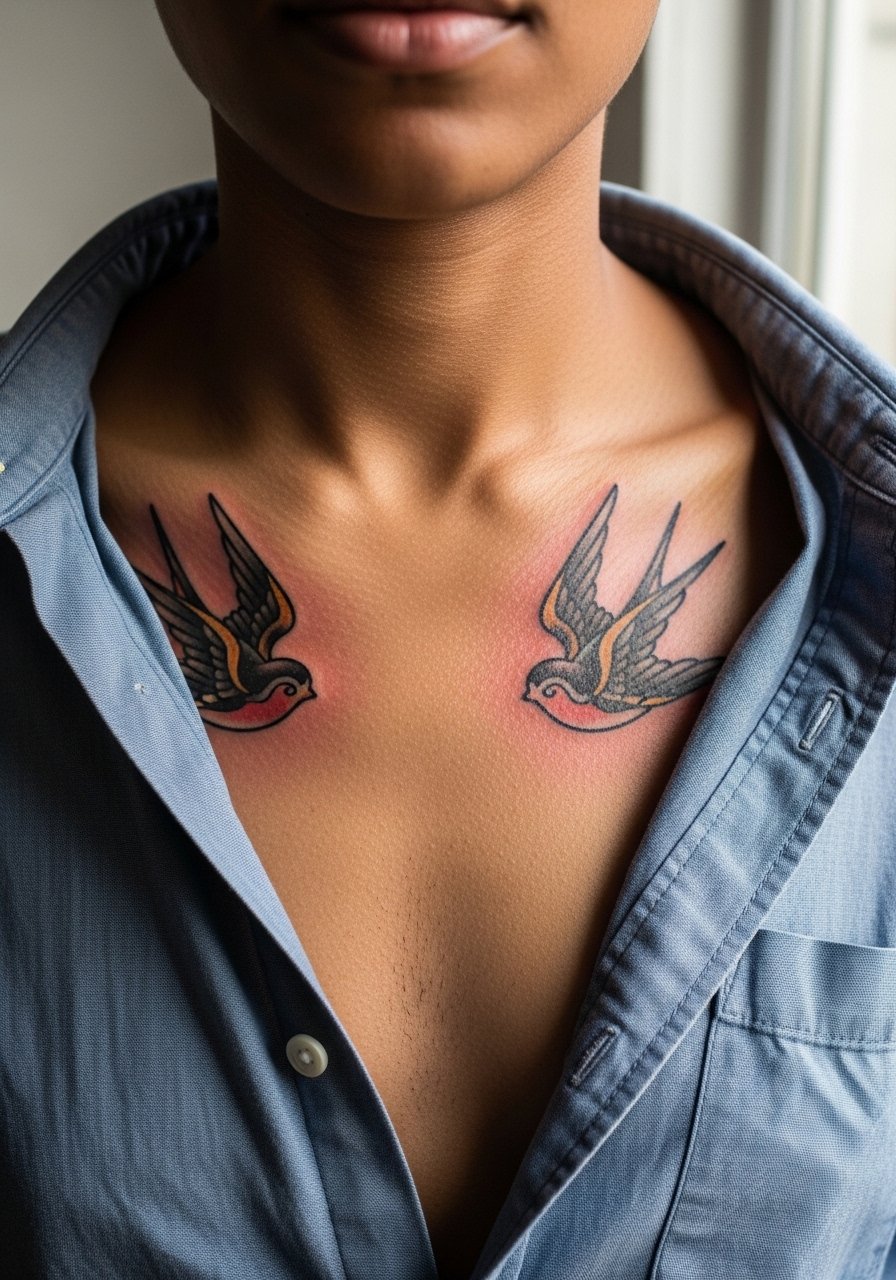
2. Pair of Swallows on Upper Chest
Personal observation: swallow tattoos on the upper chest age well when placed beside the sternum rather than dead center. Ask for slightly thicker wing outlines and restrained color saturation so the birds do not fill into blotches as the skin moves. The chest will sting more than the arm, so expect higher discomfort and a touch-up at year two if you want peak contrast. Some artists debate whether to push saturated red in chest pieces. One camp favors heavy saturation to keep contrast, the other warns that heavy red can soften on high-movement areas. Name where you want the birds relative to the collarbone during consultation. Show-off pairing works with wide-neck shirts or open button shirts. Try a loose button-down shirt you can pull aside for the session.
3. Thor's Hammer with Runes on Upper Arm
Consultation lead: when you bring Norse symbols, clarify whether you want literal historic runes or a modern geometric take. The upper arm handles solid blackwork and raised saturation without blowout risk, but cultural sensitivity matters. One camp treats Norse symbols as wearable heritage, the other cautions against using sacred motifs without context. Mention your ancestry or intent in the consult so the artist can recommend respectful adjustments. Expect a two-hour session for a medium Thor's Hammer and plan for a touch-up in one to three years if you push very tight linework. For the session wear, a rolled sleeve shirt makes access simple.

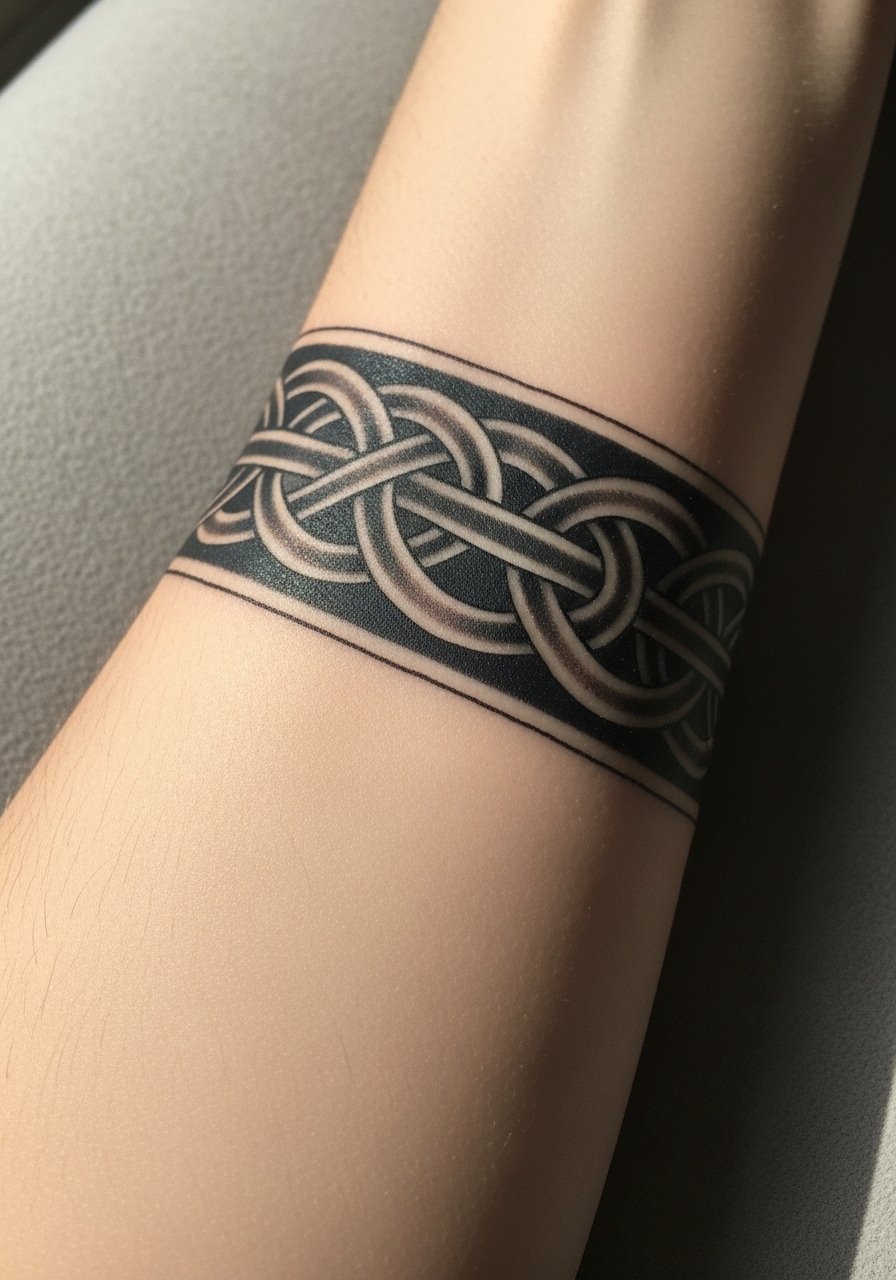
4. Celtic Knot Armband
Mistake lead: the biggest mistake with Celtic armbands is making the knot too small. The pattern needs breathing room so the negative space stays crisp as the skin settles. I usually suggest a slightly wider band and a confirmation stencil wrapped around the arm in the consult so you can see the flow. Pain is low to moderate on the outer arm, and a single session often handles a mid-width armband. This design shifts visually if placed higher on the bicep versus the forearm, so pick the exact ring position while the stencil is on. For evenings out, a minimalist watch complements an armband without crowding it.
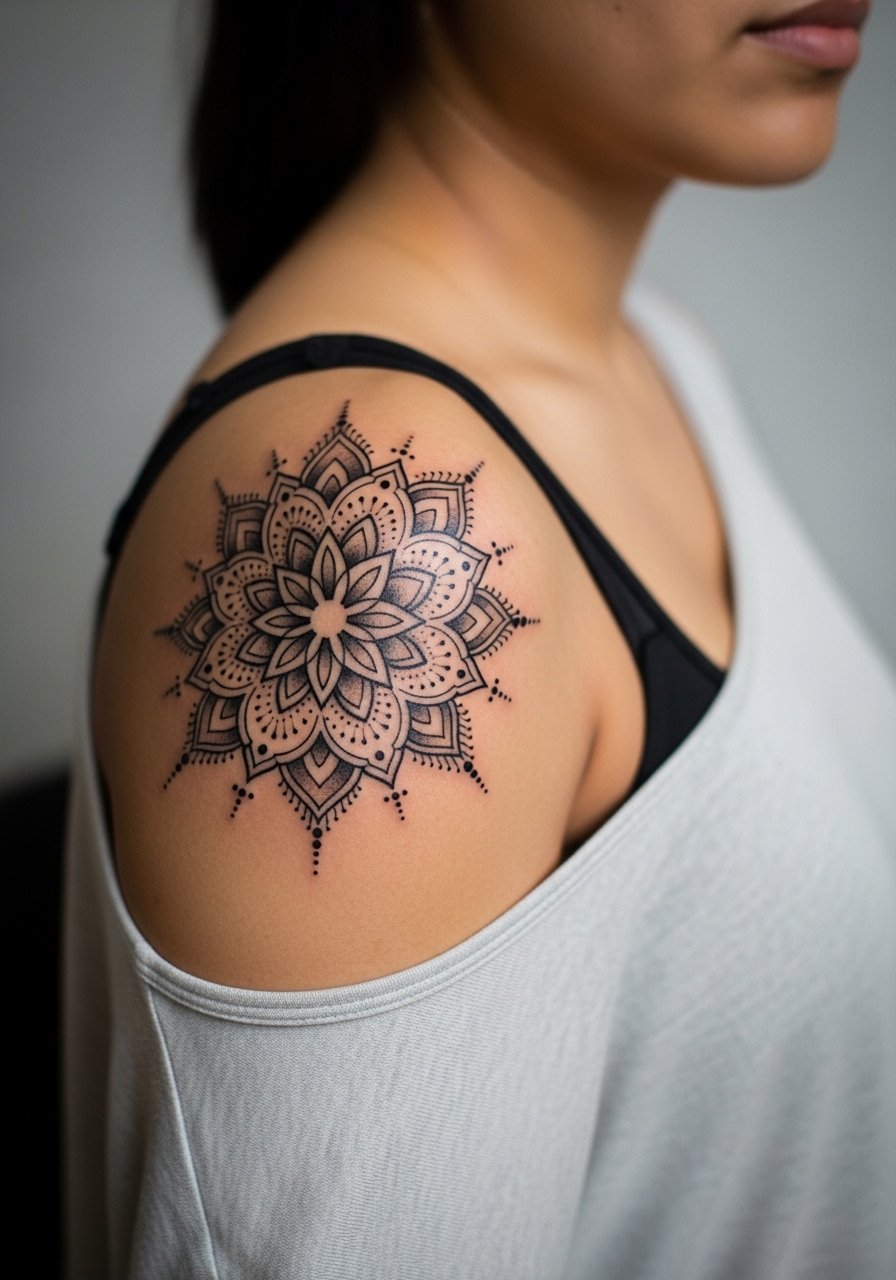
5. Mandala on the Shoulder
Aging lead: mandalas with dense linework can merge over time if scaled too small, especially on curved shoulder skin. Scale this one up slightly and ask for clear spacing between concentric bands. The shoulder is forgiving and photographs well with natural light, and session time runs one to three hours depending on size. If you plan a future sleeve, map the mandala placement during the consult so it flows into surrounding work. For session comfort, wear a loose tank top you can remove or pull aside easily.
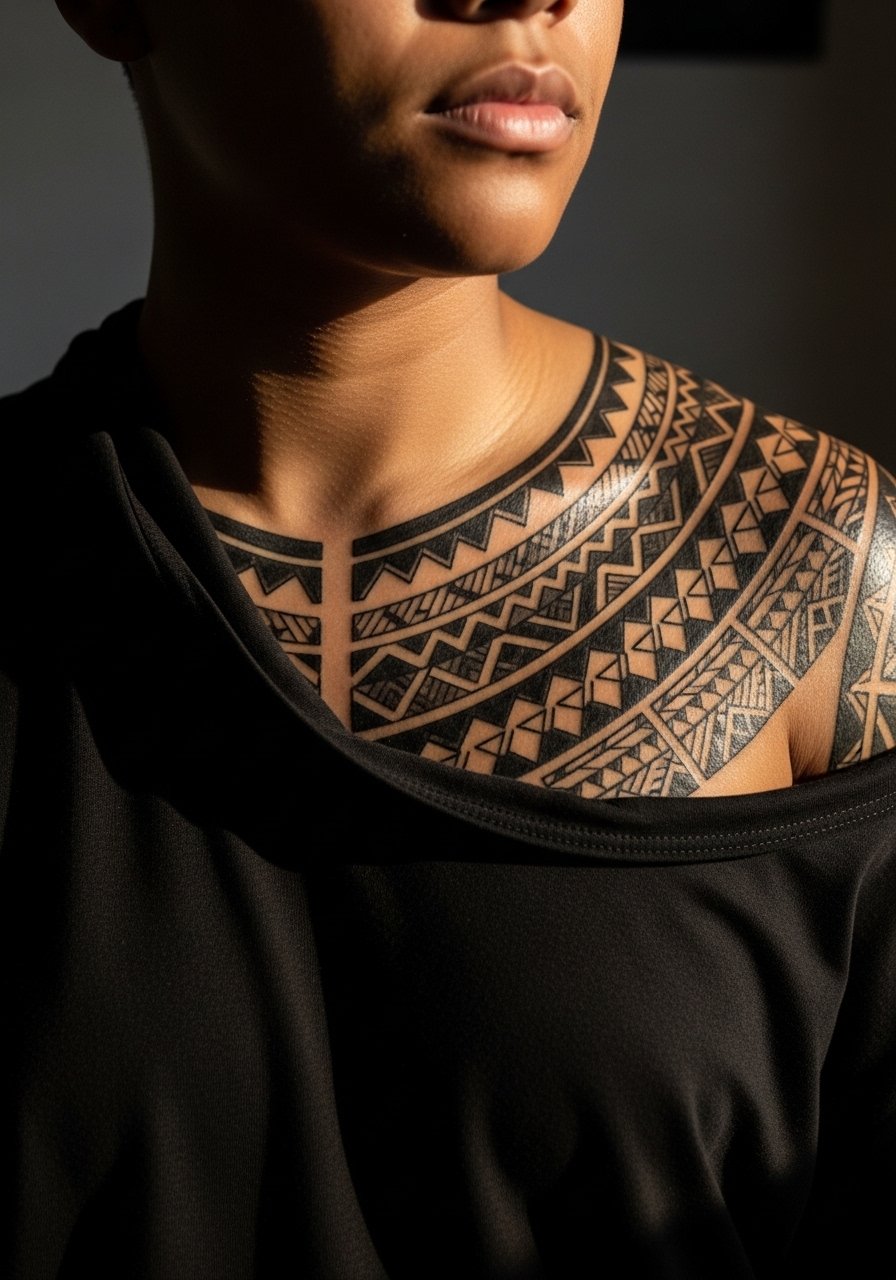
6. Polynesian Tribal Chest Panel
Consultation lead: tribal panels are storytelling garments in ink, so bring references that show the motifs you want and mention family or cultural ties if applicable. Work like this often becomes a multi-session commitment and requires a tattooer experienced with pattern flow across the chest and ribs. If you do not have cultural connection, expect the conversation about respectful adaptation during booking. The sternum and ribs are more painful and need longer sessions. For session prep, wear a fitted sports bra or wide-neck shirt if you prefer modesty during the chest work.
Studio Day Picks
The forearm, shoulder, and chest pieces above ask for slightly different prep, so a few targeted items make the session and the first week smoother.
-
Stencil transfer paper kit. Lets you preview the knot and mandala wrap in place before needles touch skin, which is key for symmetrical bands.
-
Topical numbing cream. Helpful for sternum and rib sessions where the pain spikes and long sittings are common.
-
Thin protective film roll. Useful for chest and arm areas to cover fresh work that might rub clothing in the first 24 hours.
-
Fragrance-free body wash. Gentle cleansing reduces irritation during early healing for saturated traditional fills.
-
Aquaphor healing ointment. A thin layer in the first days keeps black and red pigments from drying in patchy patterns.
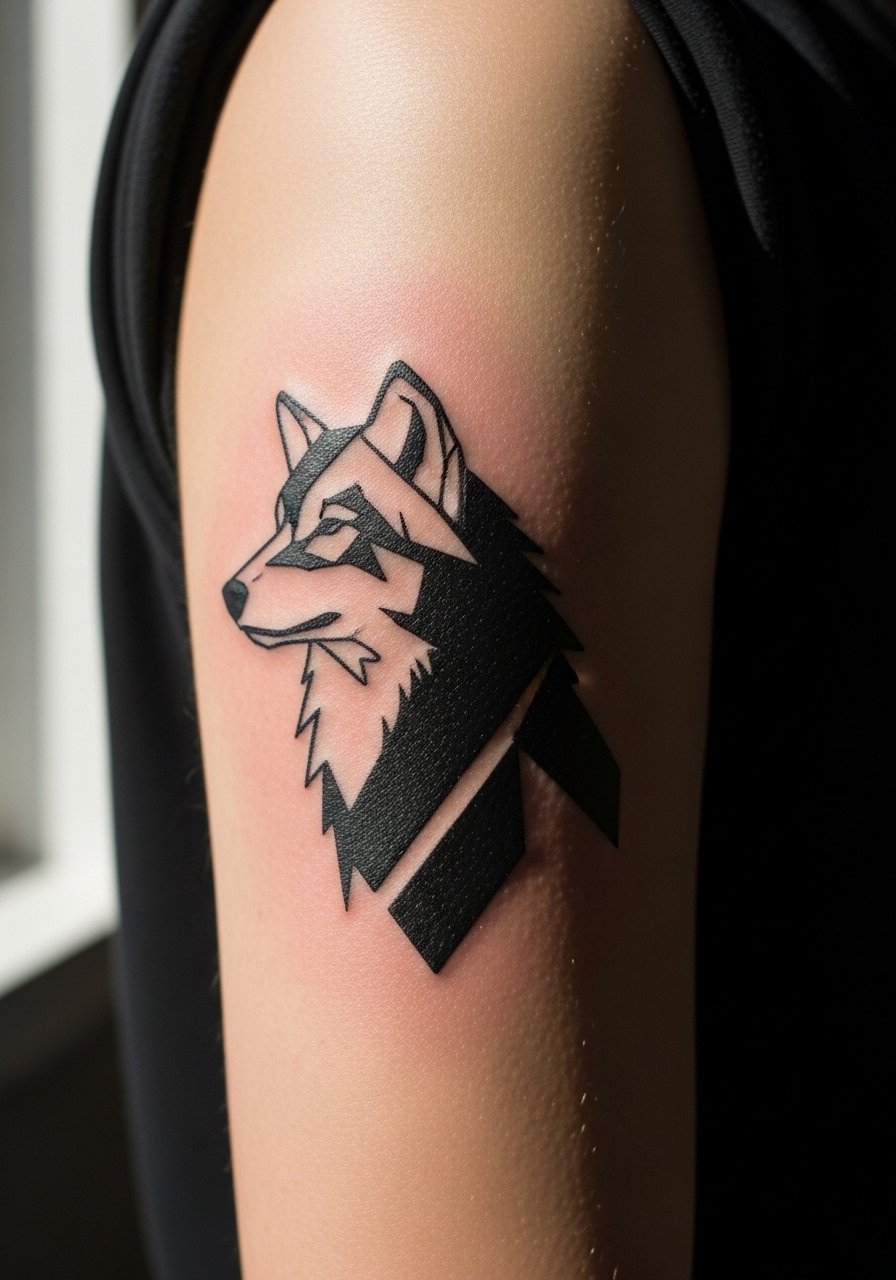
7. Geometric Wolf on Outer Bicep
Visual impact lead: geometric wolves balance sharp angles with naturalistic forms, so they read clean on broad placements like the bicep. Ask your artist to keep the geometric sections open with negative space between shapes, because overfilled geometry blurs into a dark mass over time. The bicep tolerates heavy saturation and needs moderate session time. Blowout risk is lower here, but tight repetitive dots can soften, so favor deliberate spacing. For casual outfits, a loose button-down shirt with sleeves rolled shows the bicep without competing.
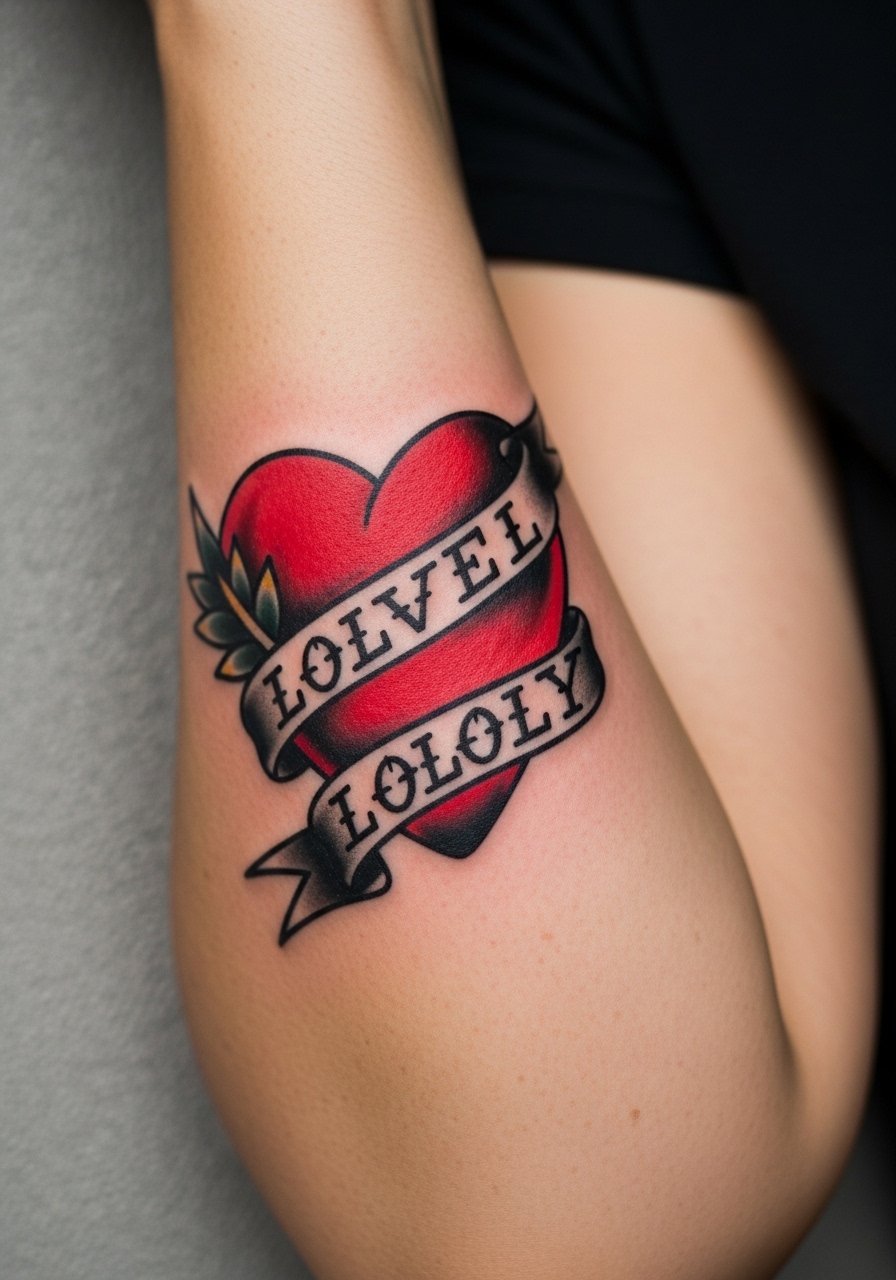
8. Classic Heart with Banner on Bicep
Mistake lead: people often ask for a tiny banner and packed lettering. In practice, slightly larger lettering in a simple serif reads cleaner as the skin ages. Tell your artist the exact initials or dates you want in the banner so they can size the letterforms correctly during the stencil stage. The bicep is a forgiving place with moderate pain and short session times. For showing it off, a minimalist chain necklace sits just above the collarbone without stealing attention.
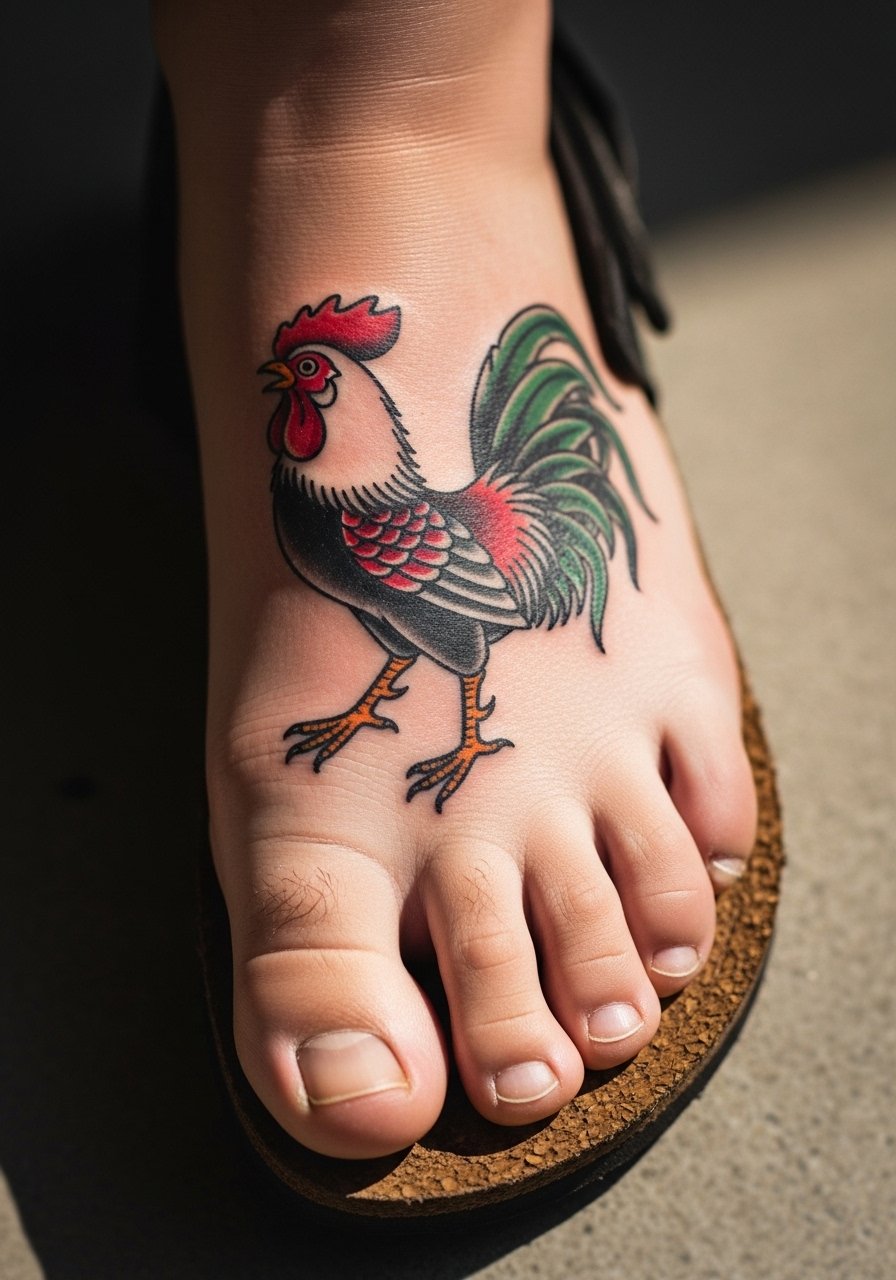
9. Rooster on Top of the Right Foot
Pain warning lead: the top of the foot is one of the more sensitive spots, and small tattoos there can sting for a long session. Sailor tradition placed roosters on the right foot for luck at sea, and the design holds as a compact, high-contrast piece. Keep the rooster moderately sized rather than micro, because foot skin and daily shoe friction force frequent touch-ups. For the session day, wear loose sneakers or sandals you can slip on without rubbing the fresh ink.
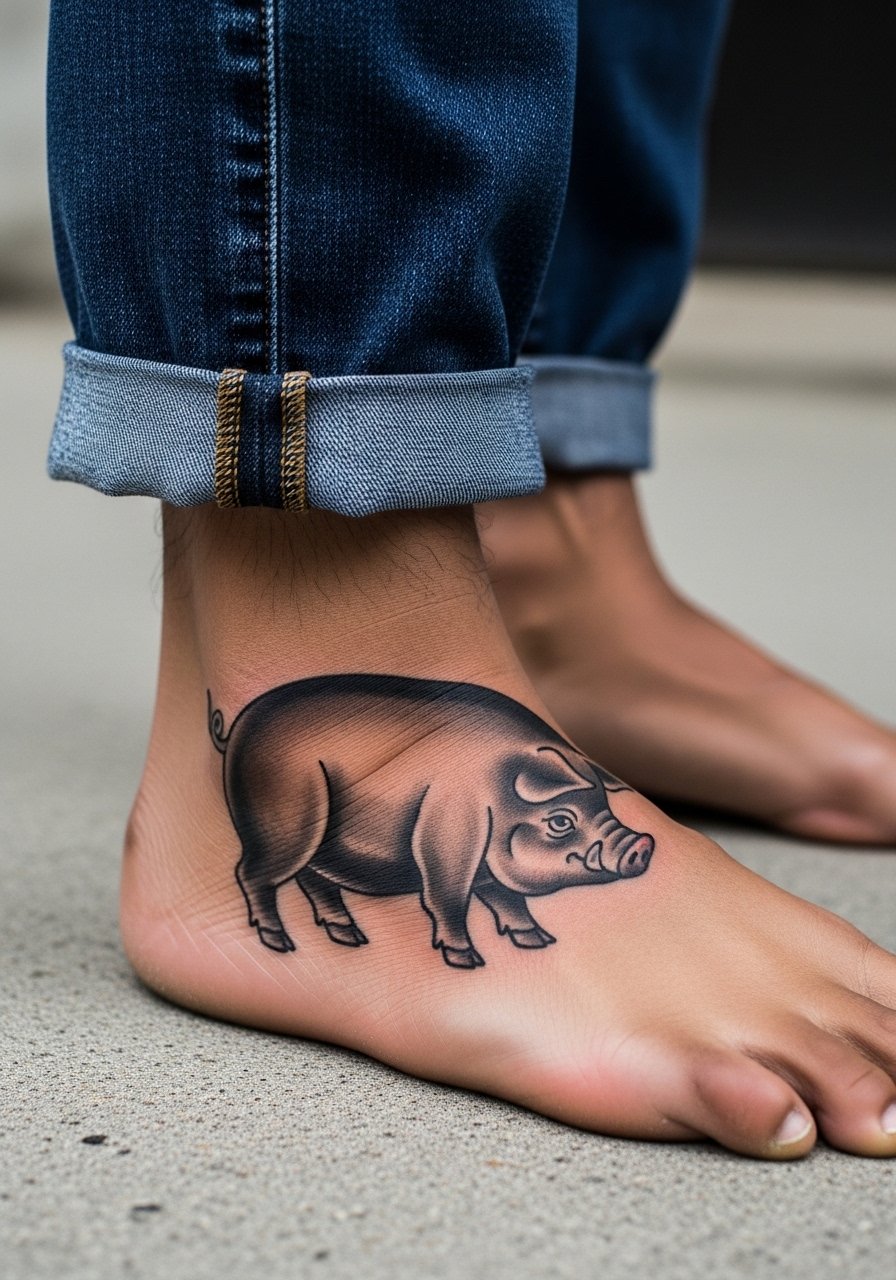
10. Pig on Top of the Left Foot
Personal observation: pig tattoos mirror the rooster superstition and work the same way on the left foot. The skin and healing pattern match the opposite foot, so sizing and aftercare advice are identical. Expect higher sensitivity and recommend slip-on shoes to avoid pressure. This pairing makes sense if you like sailor lore and want mirrored symbolism across both feet. Keep the lines bold and avoid tiny inner detail that will smudge under constant sock and shoe friction.
11. Nautical Star on the Wrist
Styling lead: the nautical star is small but iconic on the wrist, and it competes visually with watches and bracelets, so plan accessories to frame rather than crowd it. Ask for crisp five-point geometry and slightly thicker outer outlines to defend against early fading. Wrist tattoos face friction and frequent washing, so a touch-up at year two is common for very small stars. For a clean session and display, pair with a minimalist watch that sits a finger-width away from the star.

12. Skull on the Chest or Bicep
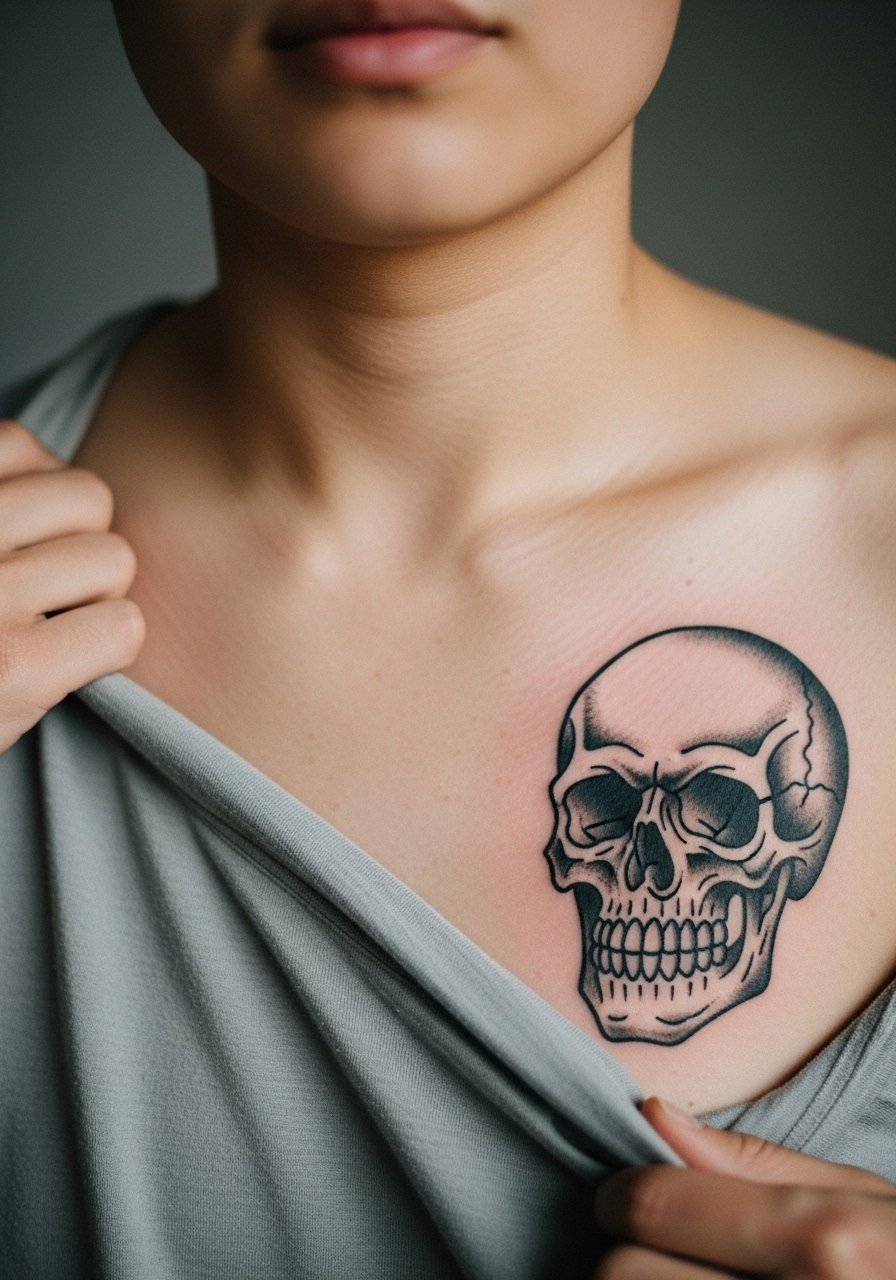
Controversy lead: skull work straddles two camps in the community. One camp sees skulls as classic memento designs that work with heavy black saturation. The other camp worries that large skulls can anchor a sleeve too heavily and overshadow surrounding work. Your choice should depend on placement and whether you plan additional pieces nearby. For chest placement, expect more pain and longer sessions than a bicep skull. Tell the artist if you want deep black contrast or a more graphic outlined approach, because the two age differently.
13. Eagle Spreading Its Wings Across the Back
Visual impact lead: eagles make dramatic back pieces and benefit from broad, bold lines and heavy black shading to read at distance. Back work usually requires multiple sessions and careful mapping so the wings sit symmetrically across the shoulder blades. Pain varies, ribs being the worst, but the shoulder blade area is tolerable for most. Consider how the wings will sit under shirts and with outerwear. For a clean session, wear a loose top you can remove or pull aside easily.

14. Traditional Rose on Forearm
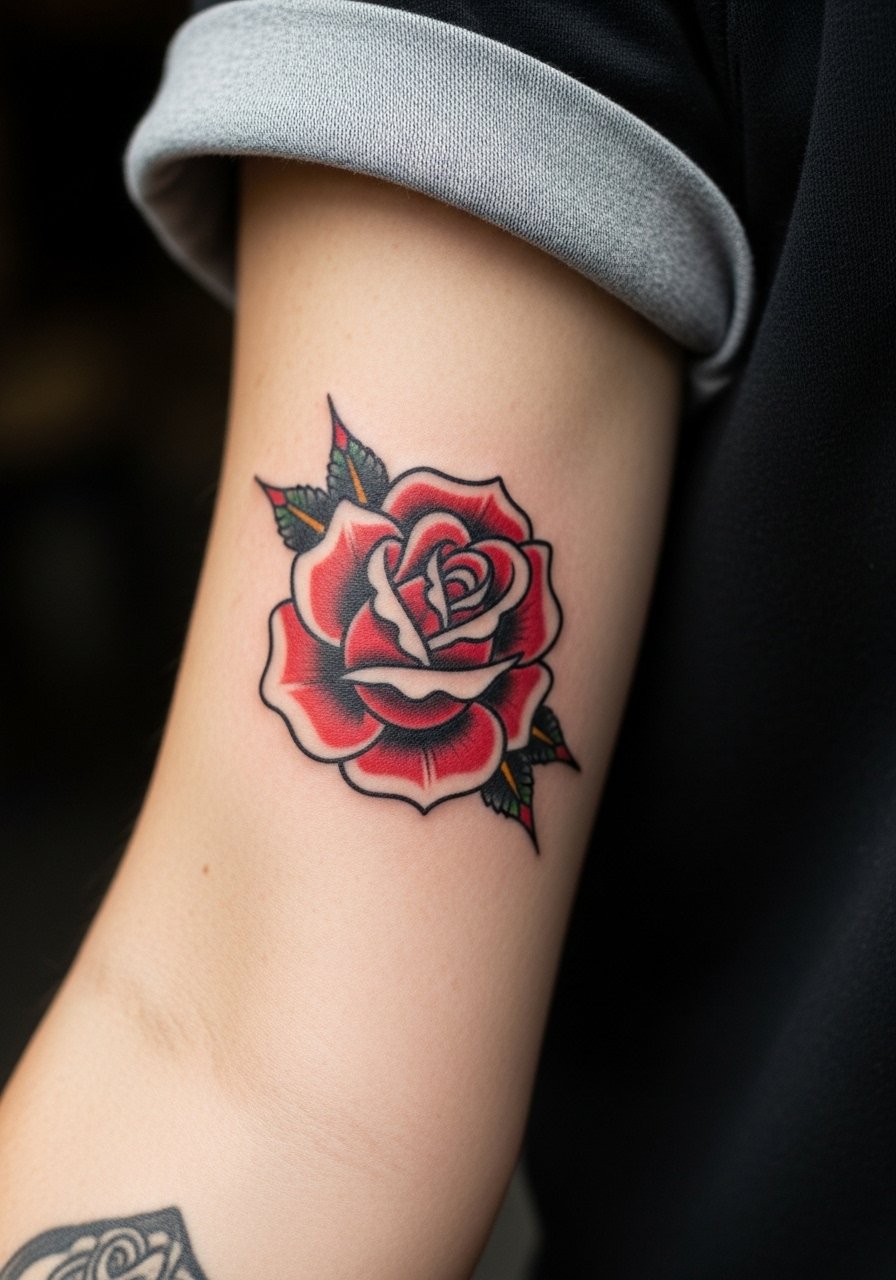
Personal observation: roses with negative space between petals and a clear stem tend to hold up far better than solid packed petals. Ask for deliberate petal spacing and moderate red saturation. The outer forearm is a forgiving placement with low blowout risk. Expect a one to two hour session for a medium rose and a likely touch-up in two to four years if you push the reds intensely. For display, rolled sleeves and simple cuff bracelets keep attention on the bloom. A solid color t-shirt or short sleeve shirt provides a neutral backdrop.
15. Snake Coiling Around the Upper Arm
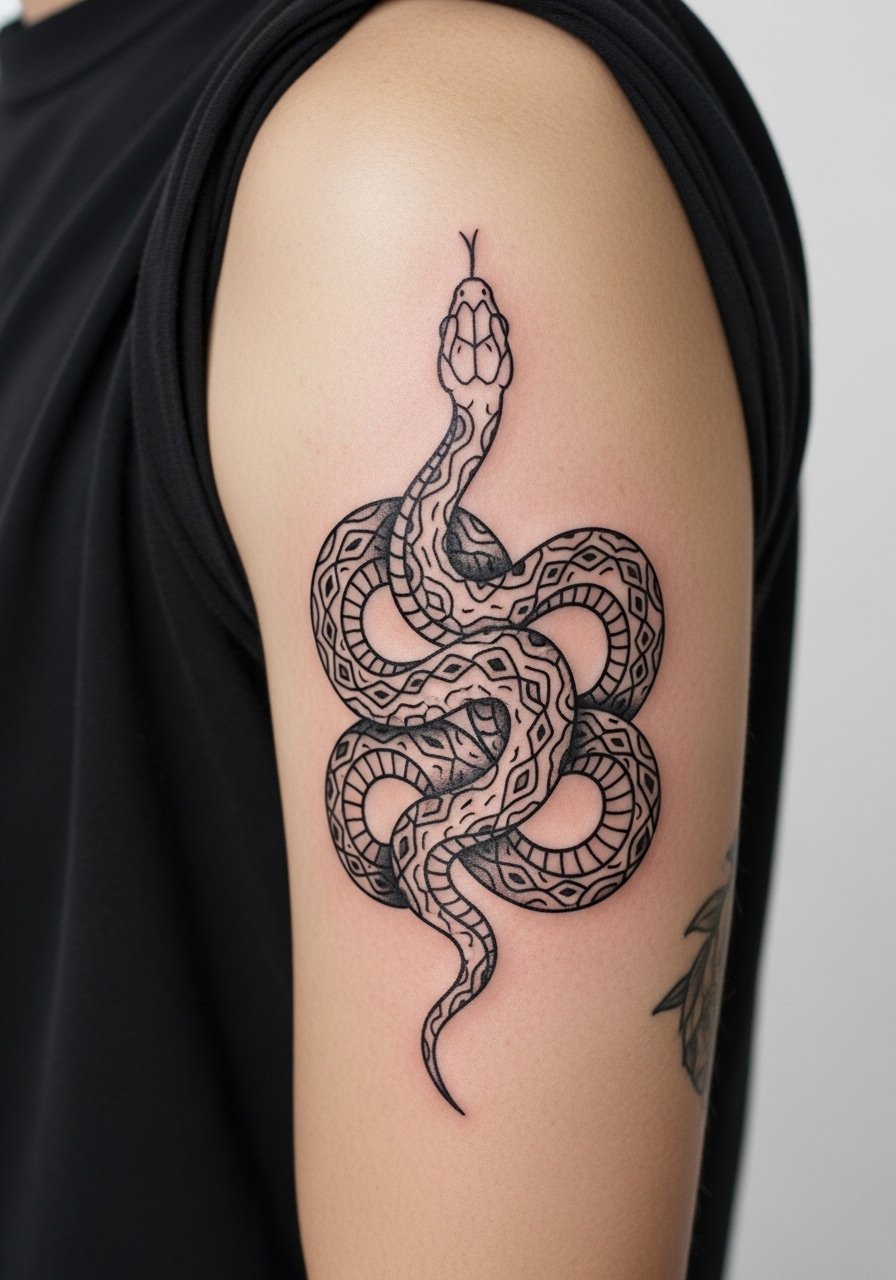
Mistake lead: snakes done too tightly around the arm can compress negative space and look like a dark band over time. Leave breathing room between coils and favor a head focal point with visible scale texture. The upper arm session is moderate in pain and accepts saturated black nicely. Snakes adapt to many placements, and a coiling arm piece reads differently when shifted toward the shoulder versus the bicep crease. For session day, a loose button-down shirt with the sleeve rolled makes access simple.
16. Panther for Cover-Ups or Full Sleeve
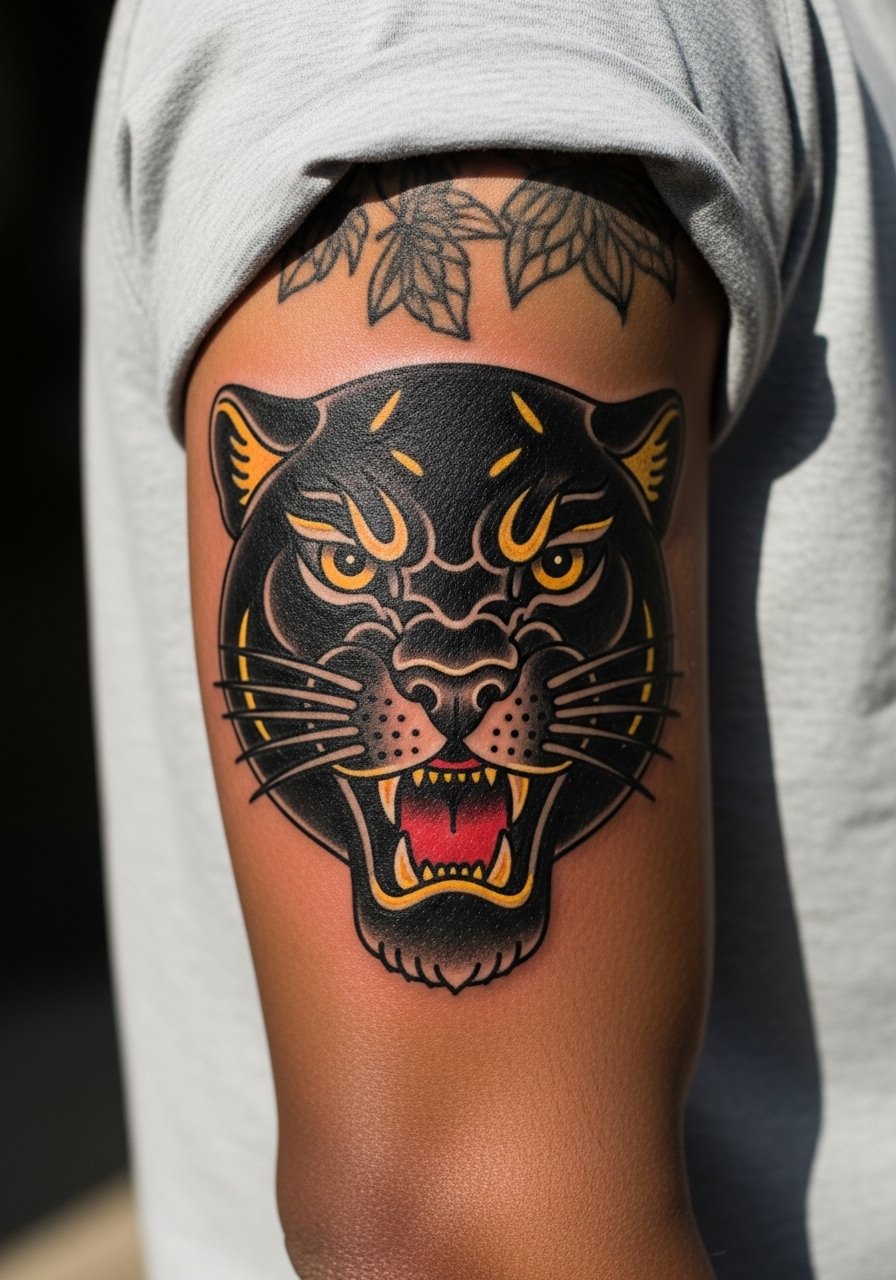
Consultation lead: panthers have historically been used as cover-up work because their dense black shapes can hide older ink. If you are planning a cover-up, bring the old tattoo photos and let the artist design a panther that follows and masks the ink underneath. Expect multiple sessions and realistic expectations about what can be hidden without massive size increases. The sleeve option reads bold with heavy black and selective color pops. For long sessions, wear comfortable loose pants such as loose drawstring linen pants so you can shift position easily.
17. Dagger Piercing a Rose on the Forearm or Hand
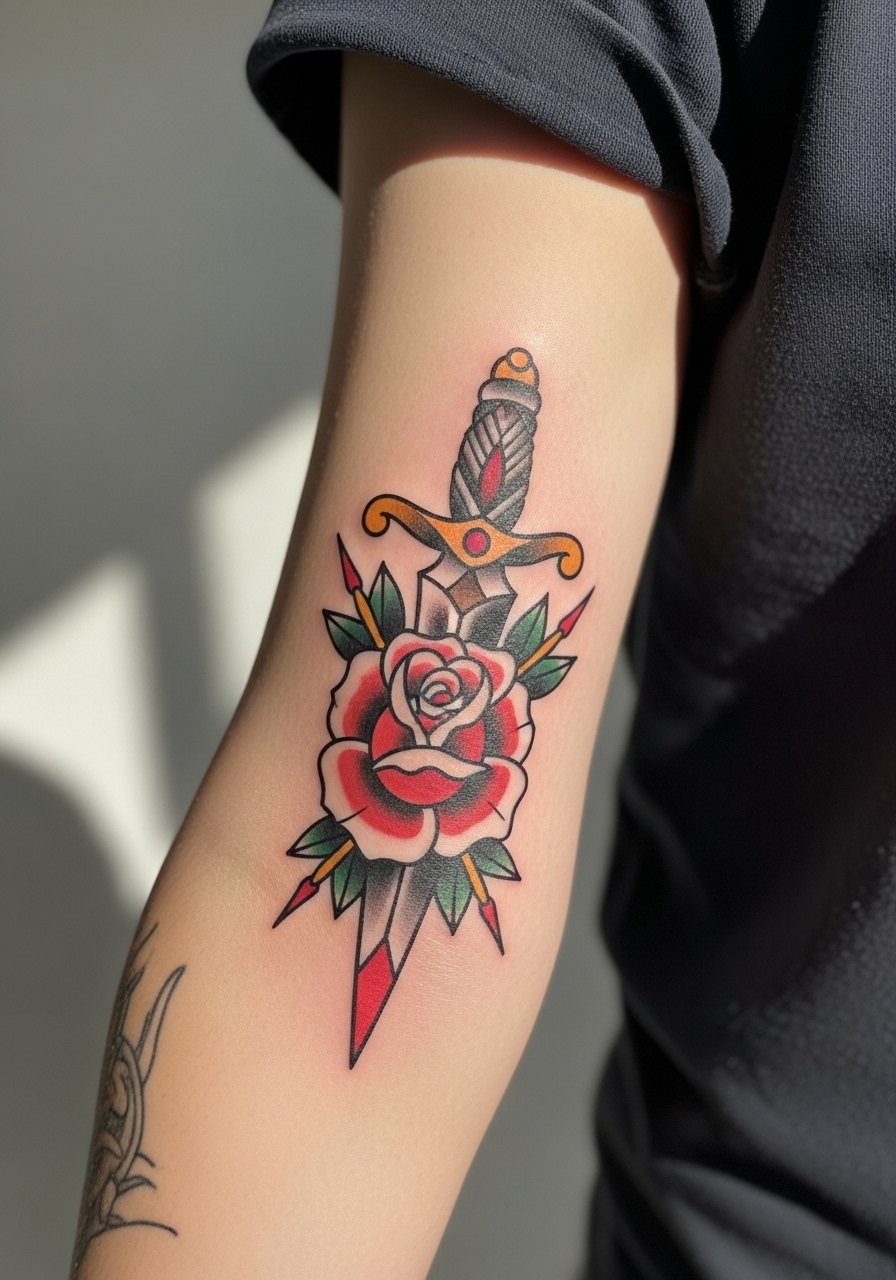
Styling lead: dagger pieces on the forearm or hand are graphic and demand clear, decisive linework so the blade edge stays readable. If you choose the hand, acknowledge the extra fading and job-related visibility considerations. Artists split on fine line in hand work. One group warns the constant movement and washing accelerate blur. The other group says with strong outline and depth control it can last. Ask where your artist stands and reserve a hand piece for someone comfortable with future touch-ups. For the session, a loose short sleeve shirt gives the artist clear access and reduces fabric contact.
Frequently Asked Questions
Q: Will a traditional anchor or rose fade faster on darker skin tones?
A: From what I've seen, darker skin holds black saturation well but certain reds and light tones can read differently than on lighter skin. Talk with your artist about pigment choices and contrast goals so they can adapt color saturation and line weight for your skin tone.
Q: How often do small wrist or foot pieces need touch-ups compared with forearm work?
A: Wrist, hand, and foot pieces face more friction and washing, so touch-ups commonly arrive at year one to three. Forearm pieces tend to hold longer thanks to lower daily abrasion. Plan ahead and ask your artist about expected timelines during the consult.
Q: Are Polynesian or Norse designs cultural appropriation?
A: Artists and clients split into two camps on this. One camp treats these motifs as heritage that should be worn by those with a direct cultural link. The other camp supports thoughtful, informed adaptation when done with respect. Have an honest conversation with your artist about origins and whether a modified motif is more appropriate.
Q: What should I wear to a chest or ribcage session to make the artist's job easier?
A: Wear a wide-neck shirt or a zip-up that you can pull aside so only the area needed is exposed. For upper chest work, a loose button-down shirt you can open keeps you comfortable before and after the session.
Q: If I want a panther as a cover-up, how big will it need to be?
A: Size depends on the tattoo you're covering and how dark or colorful it is. Panthers work because of dense black fills, but expect multiple sessions and a design that expands beyond the original area. The safest approach is a dedicated consult with clear photos so the artist can map coverage options.
