
Fine line tattoos dominate saved boards and tagged posts, but the pieces that still read clean after years are often the ones that married classic traditional elements with baddie attitude. Think bold outlines with smart negative space, or small script with heavy black anchors that protect the detail. Below are 27 traditional tattoo ideas tailored for a female baddie aesthetic, with consult tips, how they age, and outfit pairings to show them off.
1. Fine Line Arrow on Inner Forearm

I recommend this when you want a minimalist focal point that still reads feminine and fierce. Ask your artist to use slightly bolder key lines with subtle stipple shading for the tail. Fair warning, the inner forearm is a mid pain zone and small lines can blur if placed too close together. Expect a short session under an hour and a touch-up window around year two if you keep it tiny. For showing it off, roll sleeves or wear a racerback tank so the arm is visible with clean lines.
2. Bold Traditional Rose on Outer Bicep
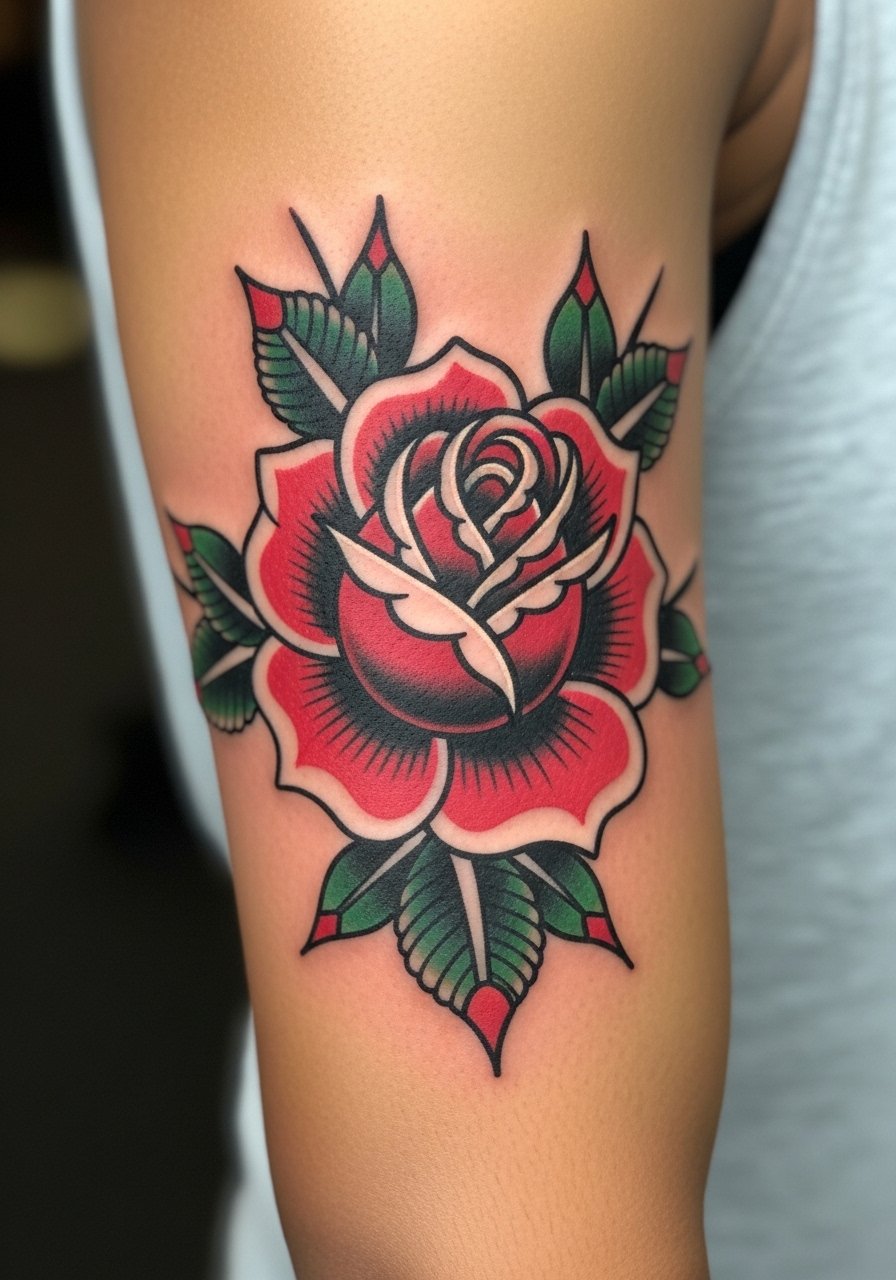
There is something about heavy outlines and saturated color that reads across a room. This one is best for anyone who wants vivid longevity rather than delicate detail. Tell the artist you want classic saturation rather than micro detail, and plan for a 90 minute session for a medium-sized piece. A common mistake is shrinking the rose too small for the bicep canvas. At six months the colors pop, and at five years the outline keeps the shape even if the fills mellow. Pair with a loose button-down shirt with sleeves rolled to frame the bloom.
3. Nautical Swallow Near the Collarbone
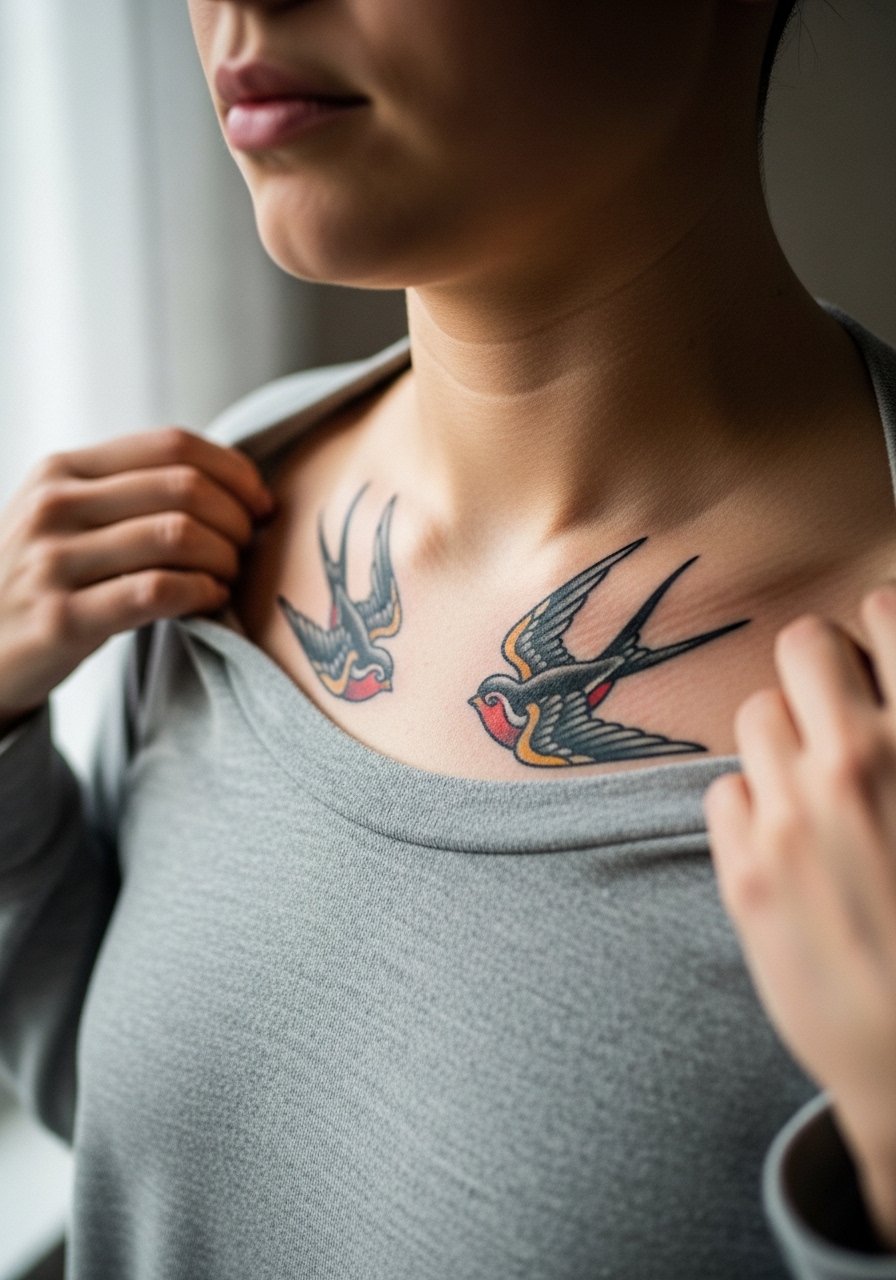
A swallow near the collarbone is a classic that wears well. The placement needs a steady hand because the skin there moves with breath and neck turns. Session feel is short but can sting more than the arm. Tell your artist you want slightly bolder linework so the tiny feathers do not merge over time. This piece ages by keeping its silhouette thanks to the heavy outline. For evenings, pair it with an open-back midi dress that lets the collarbone piece peek without competing.
4. Mini Script on the Side of the Ribcage

Fair warning, ribs are sensitive and this piece splits artists into two camps. One camp says fine script blurs as the skin stretches and suggest bold, spaced lettering. The other camp insists a true fine line approach with the right depth settles fine. When you consult, ask where the artist stands. The session is slower and more painful but the result can be intimate and striking. Wear a sports bra for the appointment so access is easy. Expect a touch-up at year two to preserve the thin strokes.
5. Anchor with Chain on the Wrist
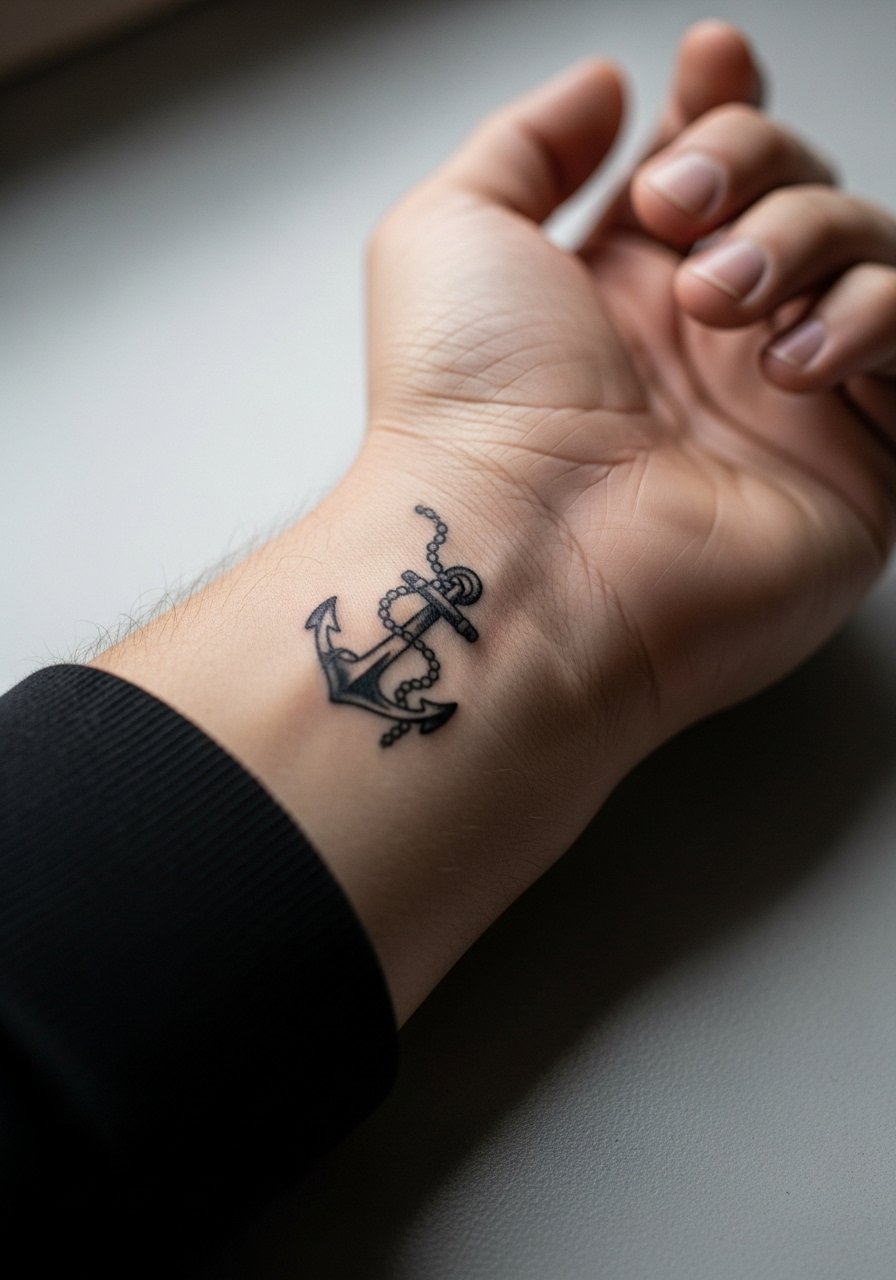
Wrist pieces read small but are very visible, so plan for stronger linework than you might want initially. The wrist endures sun and friction from watches and bracelets. A common mistake is using ultra-thin lines which soften into blur within a couple of years. Session time is under an hour and the pain is sharp but brief. For showing this off, stack with a minimalist watch or thin chain bracelet that does not rub the design.
6. Traditional Dagger Over the Clavicle

A dagger over the clavicle has instant attitude and frames necklines well. The clavicle area is bony and will sting, but sessions are usually under 90 minutes for medium pieces. Ask for a balanced mix of bold outline and negative space so the tip and handle stay readable as the skin moves. At two years the outline will anchor the form even as saturation softens. Pair with a thin chain pendant necklace to keep attention at collar level.
Studio Day Picks
The first six placements above vary from wrist to clavicle, and each asks for slightly different prep and small items to smooth the session and the first week.
-
Stencil transfer paper kit. Lets you preview line placement on skin before the needle hits, which is crucial for small clavicle and wrist designs.
-
Topical numbing cream. Applied about 45 minutes beforehand it can make rib and clavicle work far more manageable.
-
Thin protective film roll. Ideal for wrist and hand pieces where friction from daily washing can stress healing lines.
-
Fragrance-free body wash. Cleans the area gently during early showers without stripping pigment from fine work.
-
Aquaphor healing ointment. Thin layers in the first days lock in moisture for dense outlines and keep tiny script from scabbing heavy.
7. Snake Wrapped Around the Forearm

There is visual impact in a wraparound snake that reads well from multiple angles. This placement takes longer because of the curve of the arm and the need for consistent saturation. Tell your artist to keep the head and scales bold so the silhouette lasts as colors mellow. Expect a two to three hour session depending on size and a likely touch-up window at three to four years. For day-to-day styling, show the coil by wearing short sleeve cropped tees that stop above the design.
8. Small Anchor on the Ankle

Ankle tattoos are charming but sit in a high friction zone with shoes and socks. The biggest mistake is placing too much fine detail in a small area. Expect a quick session and the need to avoid tight shoes for a few days. At two years the outline will likely be the strongest element, with fills needing touch-up earlier. Wear sandals or roll jeans on session day so the artist can work without pressure on the skin.
9. Classic Pin-Up Girl on Upper Thigh
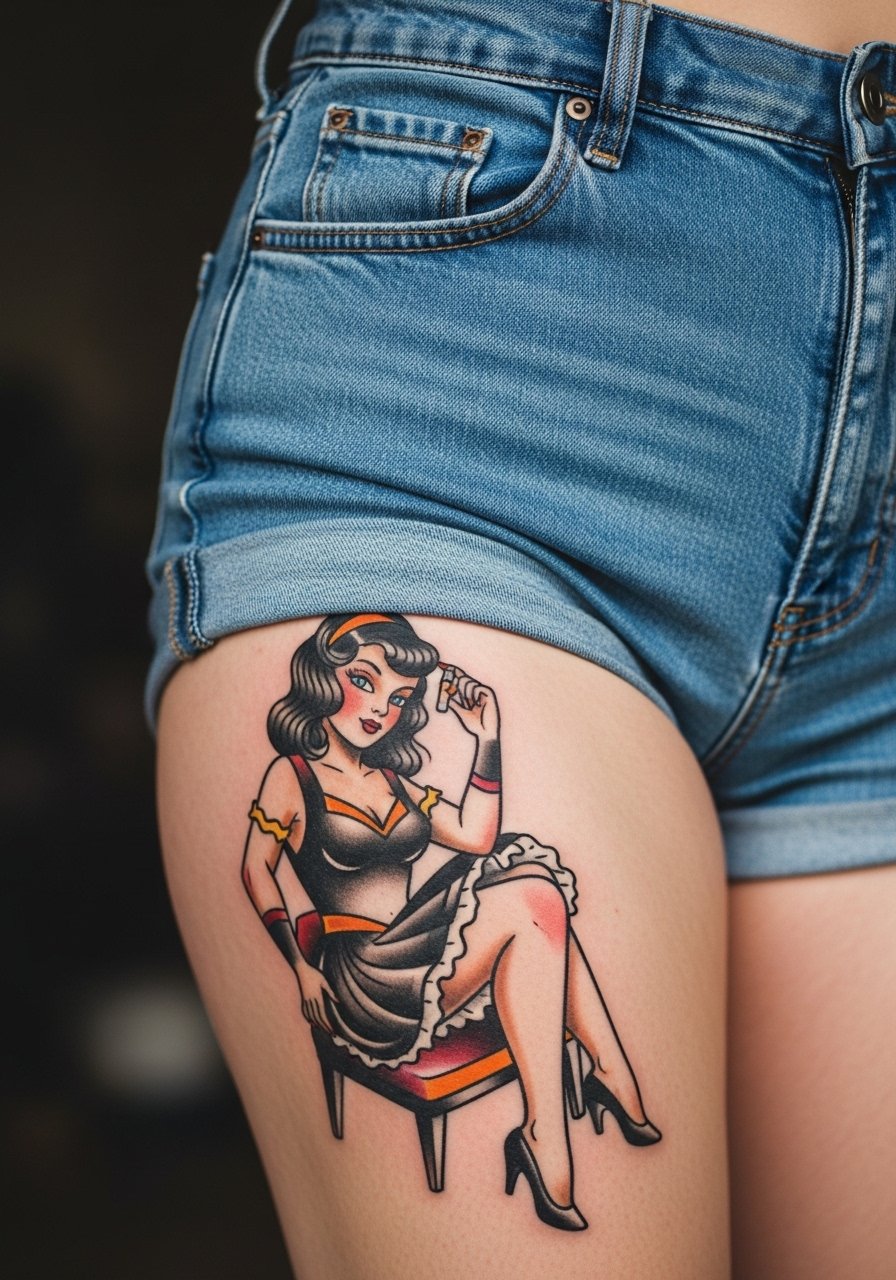
Upper thigh gives room for detail and aging is generous because the skin there does not stretch as much as the abdomen. This placement is private and ideal for bigger custom pieces. Session time runs longer and can be uncomfortable from sitting positions rather than needle pain alone. Tell the artist you want the face simplified and the outline heavier to prevent softening. For showing it off, pick high-cut shorts or a skirt and a high-waisted denim skirt.
10. Tiny Micro-Realism Eye on the Back of the Hand

Hand tattoos are polarizing and still affect some job prospects. Artists also debate whether hands are worth micro realism. The skin there gets heavy friction and regular washing, so expect rapid fading. If you want this, ask for simplified contrast and accept touch-ups every one to three years. Sessions are short but intensely painful. For visibility control, layer with a thin ring set that complements the piece without rubbing the ink.
11. Bold Script Across the Sternum
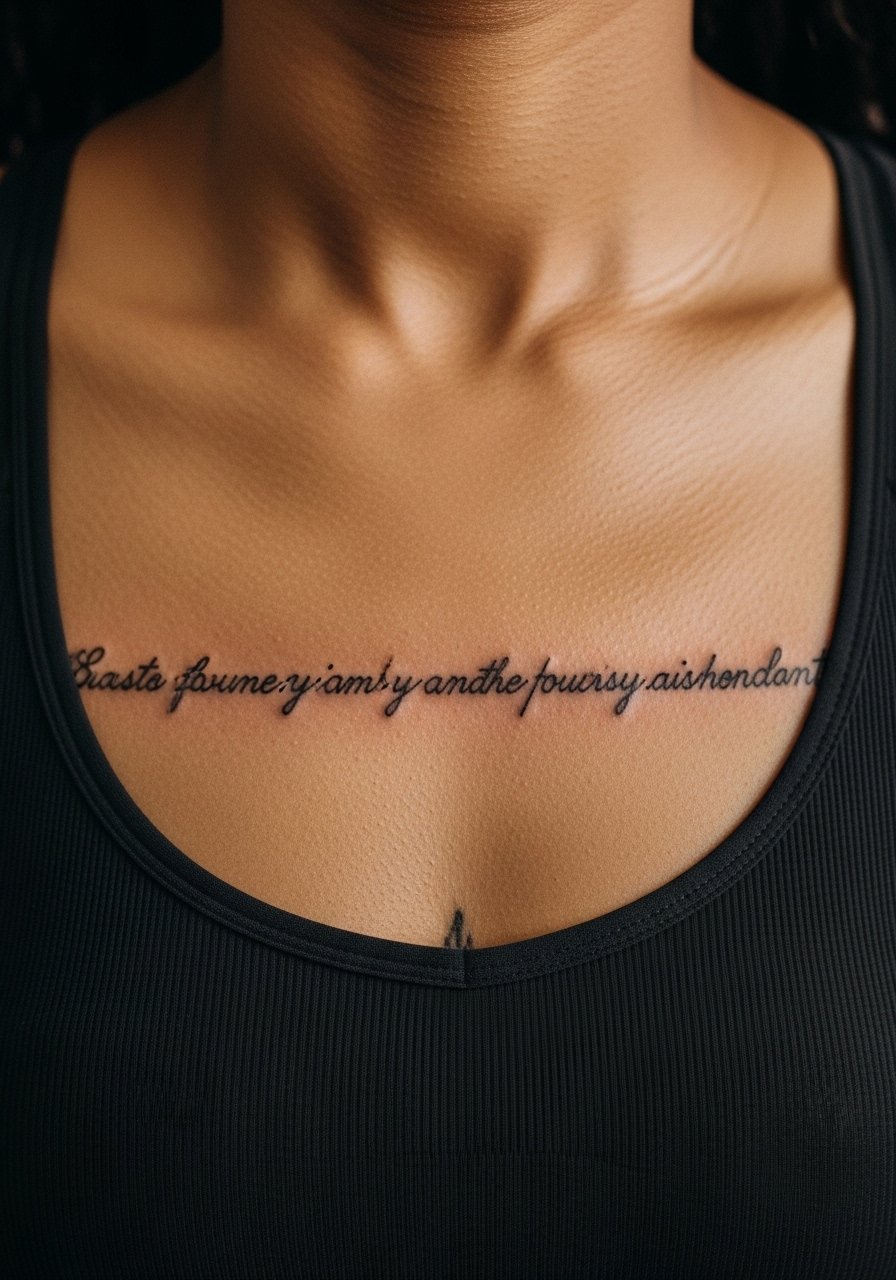
Sternum script reads intimate and bold but is technically sensitive to placement. The sternum area can be painful and the skin movement alters long thin letters. The controversy is real among artists who choose between fine script and spacing the letters wider. In consultation ask about spacing and a slightly heavier stroke to keep letters legible at year three. For the session wear a strapless piece or sports bra to give access while keeping you comfortable.
12. Old School Skull on the Shoulder Blade
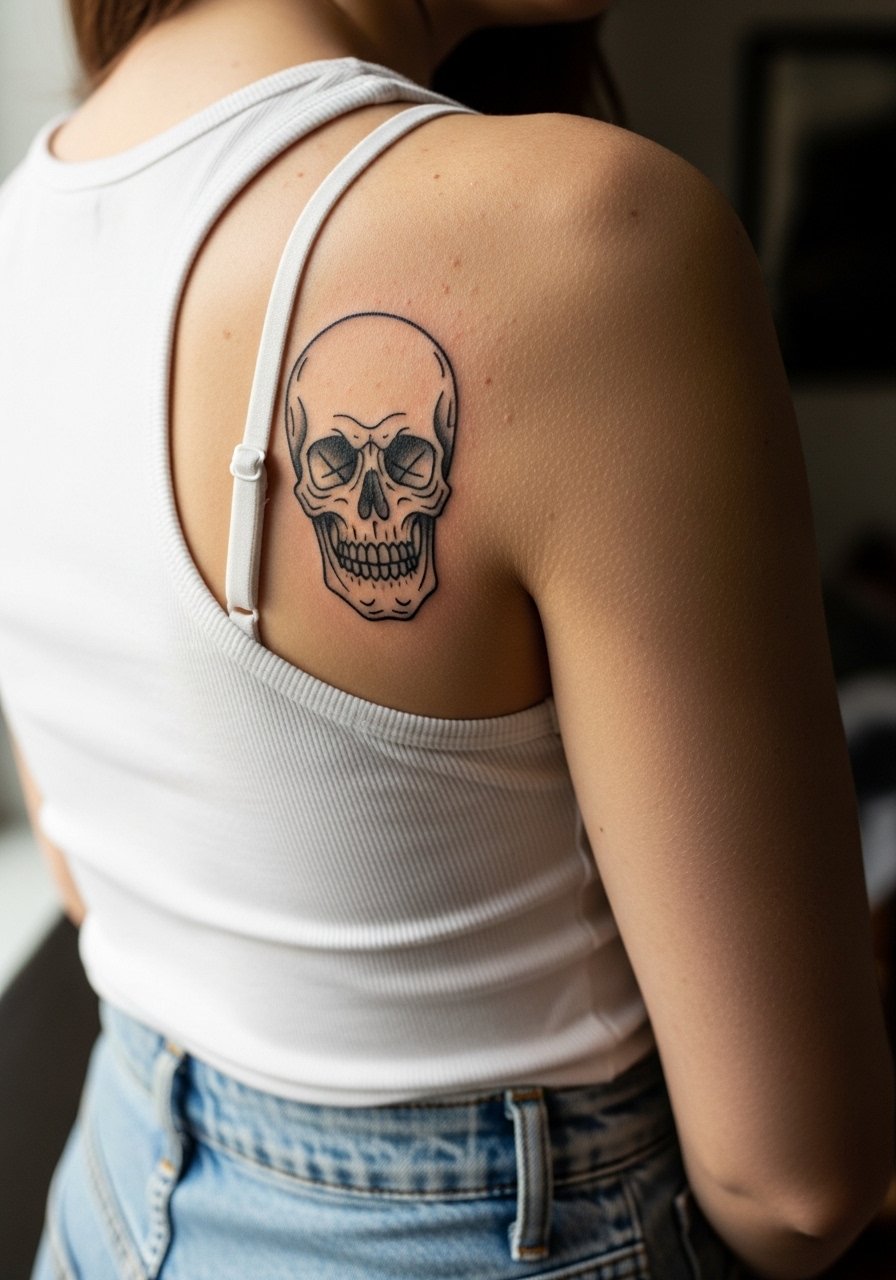
Shoulder blade canvases accept classic imagery and age predictably. This placement is less painful and the curvature helps maintain the piece shape. A common mistake is crowding the skull with too many small elements. Aim for balanced negative space and strong saturation. Sessions are usually one to two hours for medium pieces and touch-ups seldom needed until several years out. For outfits, an open-back top or halter top showcases the artwork cleanly.
13. Anchor and Rope on the Calf

Calf pieces have room to breathe and handle bolder work well. The skin is forgiving, so saturated fills hold over time. Expect a session around 60 to 90 minutes depending on size and a moderate pain level. A mistake is overcomplicating the rope with tiny cross-hatching which loses clarity later. Pair with cropped pants or a linen drawstring pant so the tattoo can peek during warm months.
14. Small Crescent Moon Behind the Ear

Behind the ear pieces are discreet and edgy. The area needs precise placement slightly below the hairline to avoid poor healing on mobile skin. Sessions are short and pain is sharp but over quickly. A common mistake is asking for detail too small to read after hair growth and sun exposure. For visibility and styling, tuck hair behind the ear or try a wide headband when you want it on show.
15. Traditional Heart with Banner on the Upper Arm
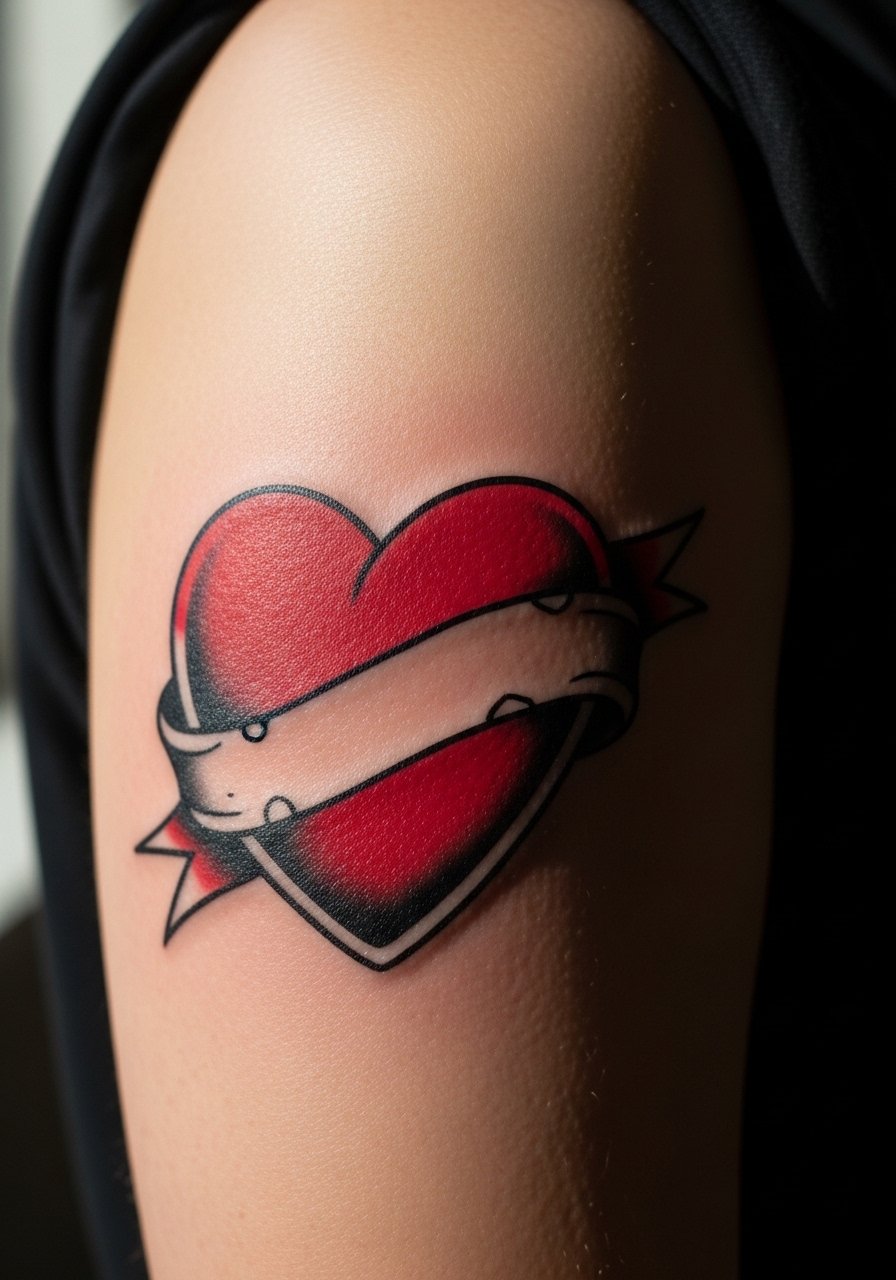
This classic ages predictably because heavy outline protects the shape. The upper arm is forgiving and low on touch-up needs if sized correctly. The session is comfortable and usually under two hours. A frequent error is compressing the banner text into too small a typeface. Ask for clean, slightly bold lettering and discuss exact words in the stencil stage. Show it off with sleeveless tops or a cotton tank.
16. Miniature Compass on the Side of the Finger
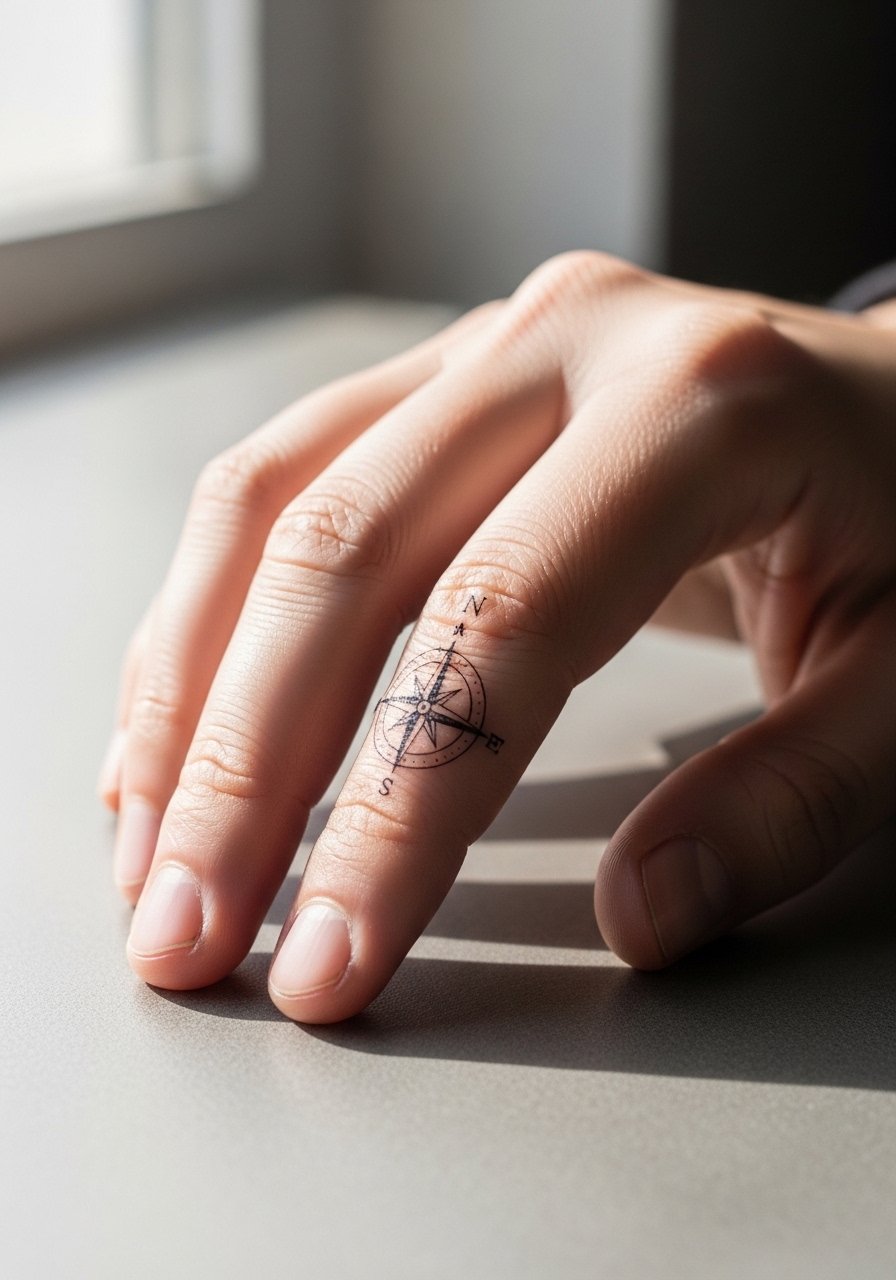
Finger tattoos face heavy wear and early fading because of constant use and washing. The biggest mistake is expecting micro detail to last. If you want a compass here, plan for simplified high-contrast linework and the reality of touch-ups every one to two years. Sessions are quick but painful. Consider a protective ring or keeping the piece on a less used finger to extend the life of the ink.
17. Scripted Word Along the Collarbone
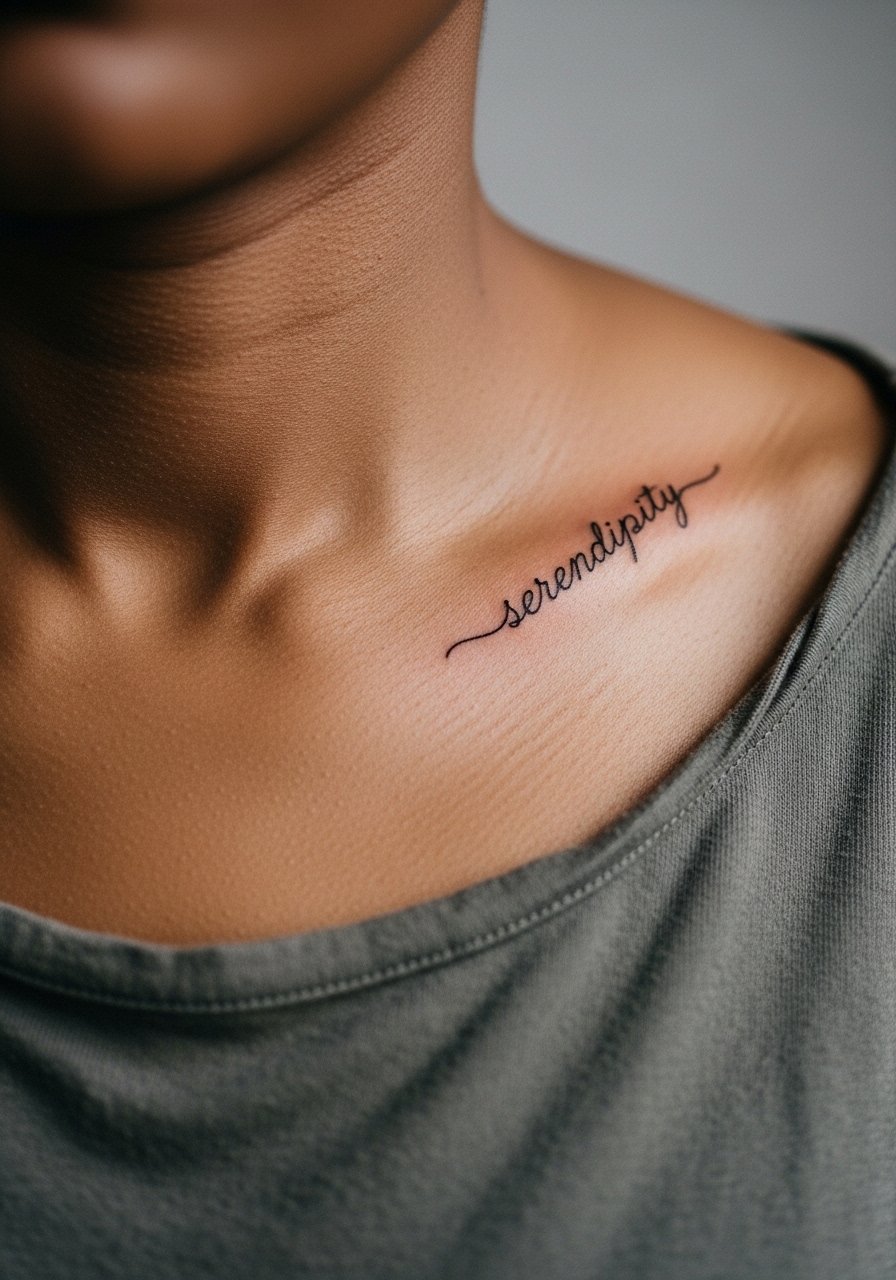
Collarbone lettering is a showpiece location and needs strong negative space so thin letters do not touch as they age. The pain is moderate and sessions are short. A common mistake is choosing a heavy cursive that blurs into black over time. Ask for clean spacing and slightly heavier primary strokes. For outfits, try an off-shoulder top to keep the word visible without overexposure.
18. Traditional Anchor on the Side Torso
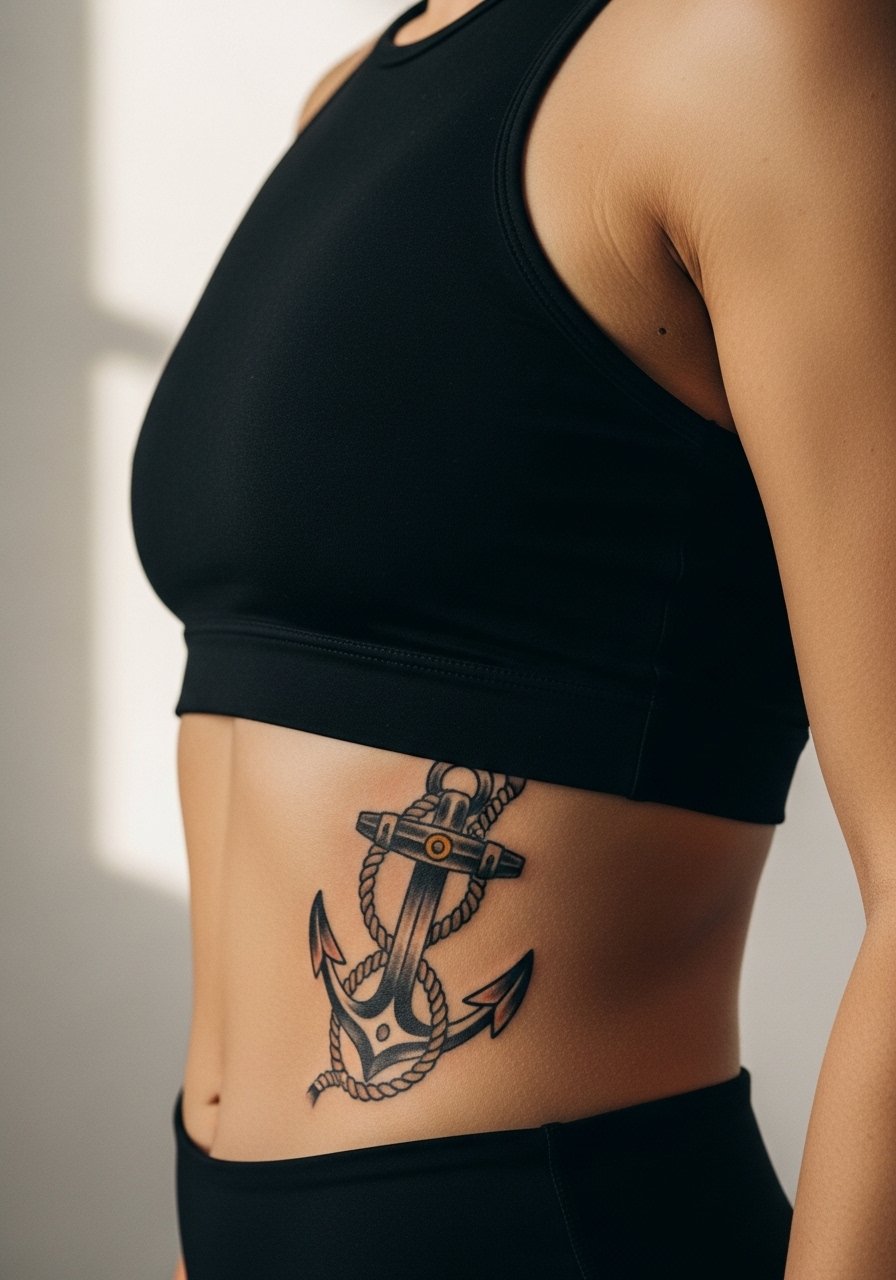
Side torso work demands respect for how skin stretches during movement and weight changes. The ribs make this painful and prone to healing challenges. One camp of artists advises larger line weight and spacing for ribs, while the other camp will still execute fine detail with careful depth. Discuss the sizing and spacing in consultation and prepare for a longer session and possible touch-up. For session comfort, wear a loose top you can lift easily.
19. Tiny Star Cluster on the Ankle

Small ankle pieces are cute but face friction from shoes. Keep stars spaced and slightly bolder than you think necessary. The session is quick and the pain is low to medium. Mistakes include packing too many dots into a tiny area which will blur. Show them off with cropped trousers or sandals and a pair of leather sandals.
20. Traditional Ship on the Back

Upper back pieces take large, uninterrupted space and age well because they avoid constant sun and friction. Sessions can be multi-hour and may be split across visits. Tell your artist you want strong outlines and simple negative space for the sails to prevent muddy shading later. Expect minimal touch-ups in the first five years for a well-saturated design. Open-back tops and dresses frame this piece perfectly with a backless dress.
21. Tiny Rose on the Side of the Finger
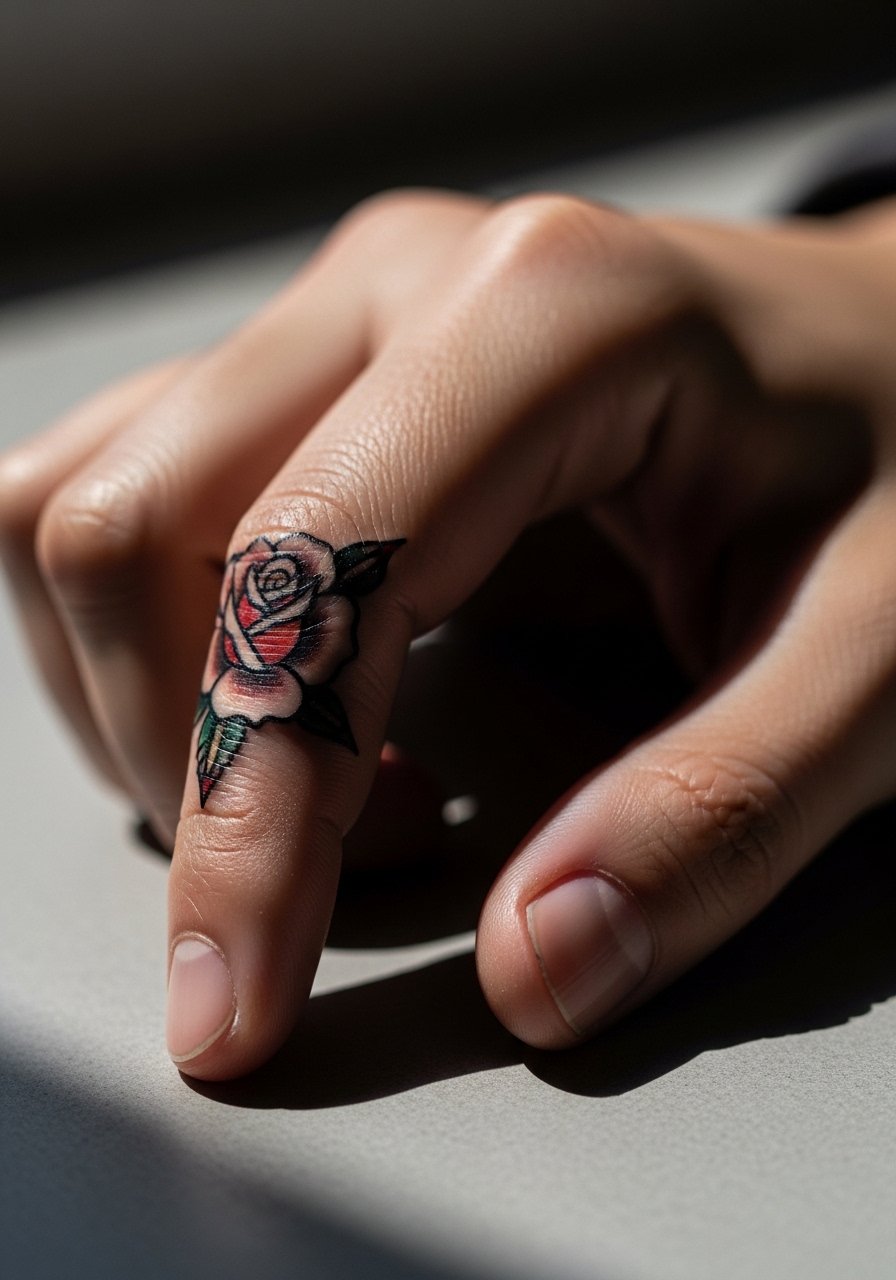
Finger roses are delicate but burn through pigment faster than arm pieces. The common mistake is expecting full color saturation here. If you go for it, prioritize thick outlines and accept short-term fading. The session is quick and the pain is sharp. For styling, a thin stackable ring set can frame the rose without rubbing the ink and keeps it visible when you want to show it.
22. Bold Star on the Back of the Neck
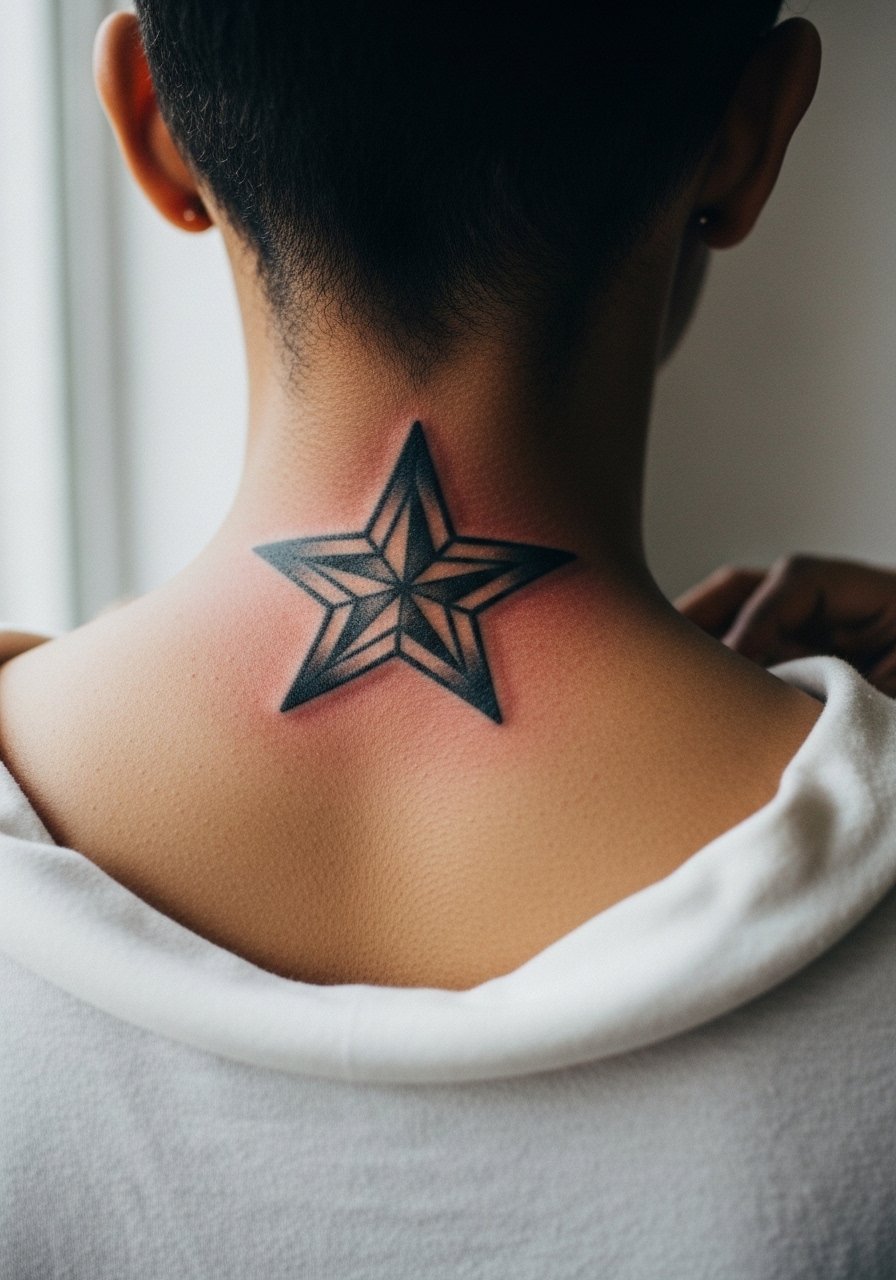
Neck tattoos are visible and can affect perceptions in some workplaces. The area accepts bolder work well if you want long-term readability. Sessions are short but painful close to bone. A mistake is trying to do micro shading in such a small, exposed spot. Keep the star graphic and bold, and plan for sun protection. For an evening out, pair with hairstyles that pull hair up to show it off.
23. Traditional Sparrow on the Sternum Edge

This area combines visibility with sensitivity. The sternum edge moves with breath and can be painful to tattoo. Some artists prefer simplifying wings for this spot rather than detailed feathering. Sessions are moderate in length and touch-ups may be needed sooner than back pieces. For showing it off, a low-scoop top or a strapless bandeau works without revealing the whole chest.
24. Tiny Chain Link Bracelet Tattoo Around the Wrist

Bracelet tattoos are subtle but must avoid too-fine links that merge. Tell your artist to space links slightly and use solid anchor points. The wrist sees frequent motion and washing so expect fading sooner than arm pieces. Sessions are short and pain is sharp near bone. Pair with thin bracelets that sit above or below the ink to avoid rubbing the fresh work and to frame the piece when healed.
25. Crescent Moon and Stars on the Inner Thigh

Inner thigh tattoos are private and heal differently from outer placements. The skin can be softer and less exposed to sun which helps longevity. Sessions are moderate and the area can be tender when sitting. Avoid tiny clusters of stars too close together or they will merge as the skin settles. For the session wear loose shorts or a wrap skirt so the artist can access the space comfortably.
26. Bold Lightning Bolt on the Calf
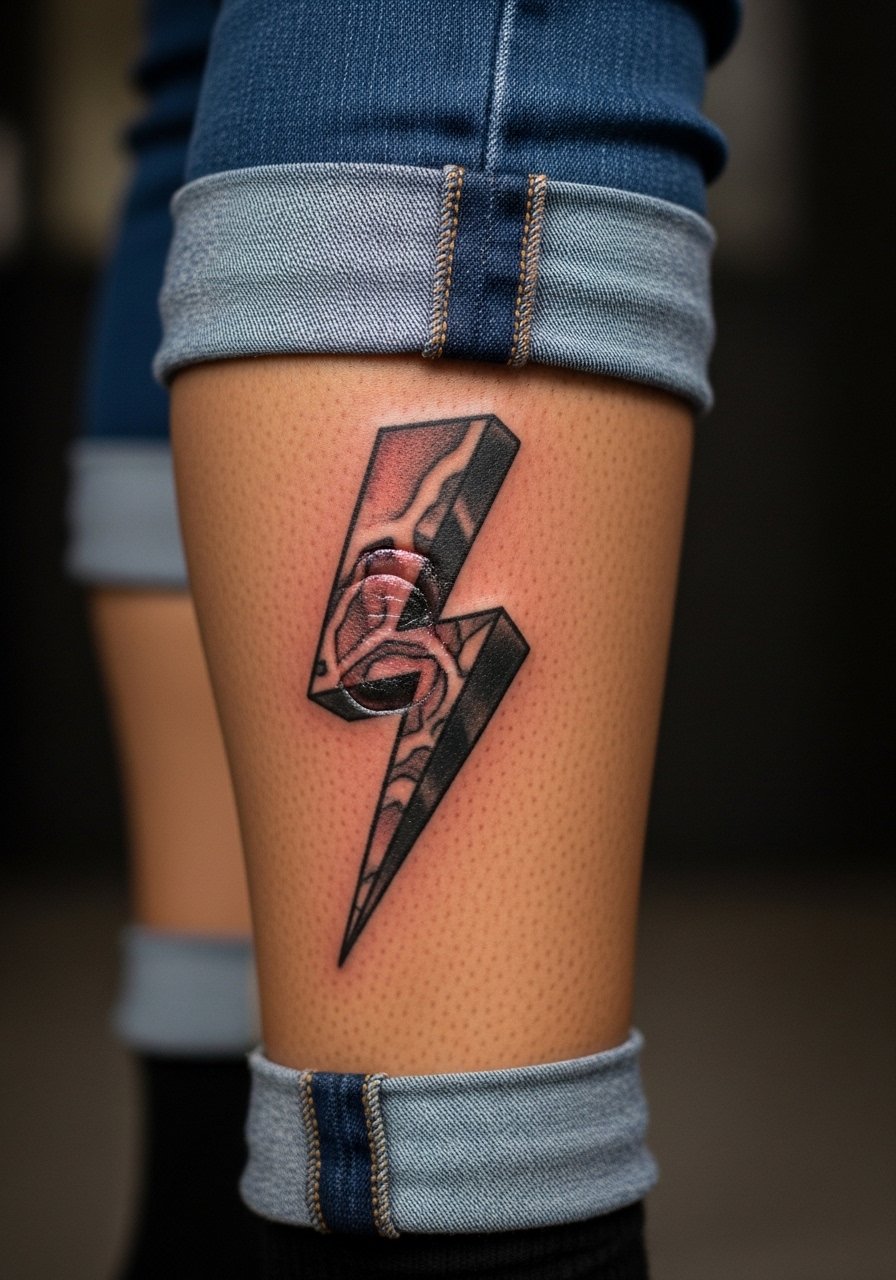
A single bold lightning bolt is striking and low maintenance on the calf. The area tolerates bold outlines and fills and rarely needs early touch-ups if sized correctly. Session is quick and pain is moderate. The main mistake is shrinking the bolt so small it reads like a dot in motion blur. Show it off with cropped trousers and ankle boots or a mid-calf boot.
27. Tiny Scripted Date on the Rib Edge

Dates on the rib edge are intimate and personal but subject to the same debate as other rib script. One camp says keep the letters bold and spaced. The other camp will deliver fine script with careful depth. The session will be painful and touch-ups are common for thin lettering. When you book, ask to preview the stencil while standing and moving so you see how it sits on the curve of the ribs.
Frequently Asked Questions
Q: Will fine line tattoos like the inner forearm arrow or ribcage script blur faster than traditional pieces?
A: From what I have seen, fine line work tends to lose crispness sooner than classic traditional work. The fix is to give the lines room, use slightly heavier primary strokes, and pick placements that avoid constant friction. Expect a touch-up option sooner for the most delicate pieces.
Q: How should I dress to make the session for a sternum or rib piece easier?
A: Wear a fitted sports bra or a cropped top you can lift easily so the artist has access without you feeling exposed. A loose zip hoodie layered over it makes parking the area simple before and after the session.
Q: Are hand and finger tattoos worth it if I want longevity?
A: They will always need more maintenance than arm pieces because of washing and friction. If longevity is the priority, consider moving the design to the wrist or a lower friction finger and plan for touch-ups every one to three years.
Q: How do I find an artist who understands traditional baddie aesthetics without naming specific artists?
A: Use discovery paths like local shop directories, convention listings, and hashtag searches to narrow portfolios. Look for portfolios with healed photos and consistent linework in the traditional genre. Bring printed references to your consult and ask about healed photos of similar placements.
Q: If I want to show off a collarbone or clavicle tattoo, what jewelry and outfits work best?
A: Simple pieces like thin chain necklaces and off-shoulder tops frame the area without competing. For more dramatic moments, open-neck dresses or wide-neck shirts that reveal the collarbone area highlight the tattoo cleanly.
