
Fine line octopus work is trending online, but the reality is messy unless you match style to placement and skin type. I keep hearing about tiny wrist pieces fading fast, watercolor bleeding after a summer, and dark skin photos losing contrast. This list skips recycled captions and shows practical octopus options that age better, what to ask your artist, and how to wear each piece so it reads the way you expect in a year.
1. Single-Needle Swirling Octopus on the Inner Wrist
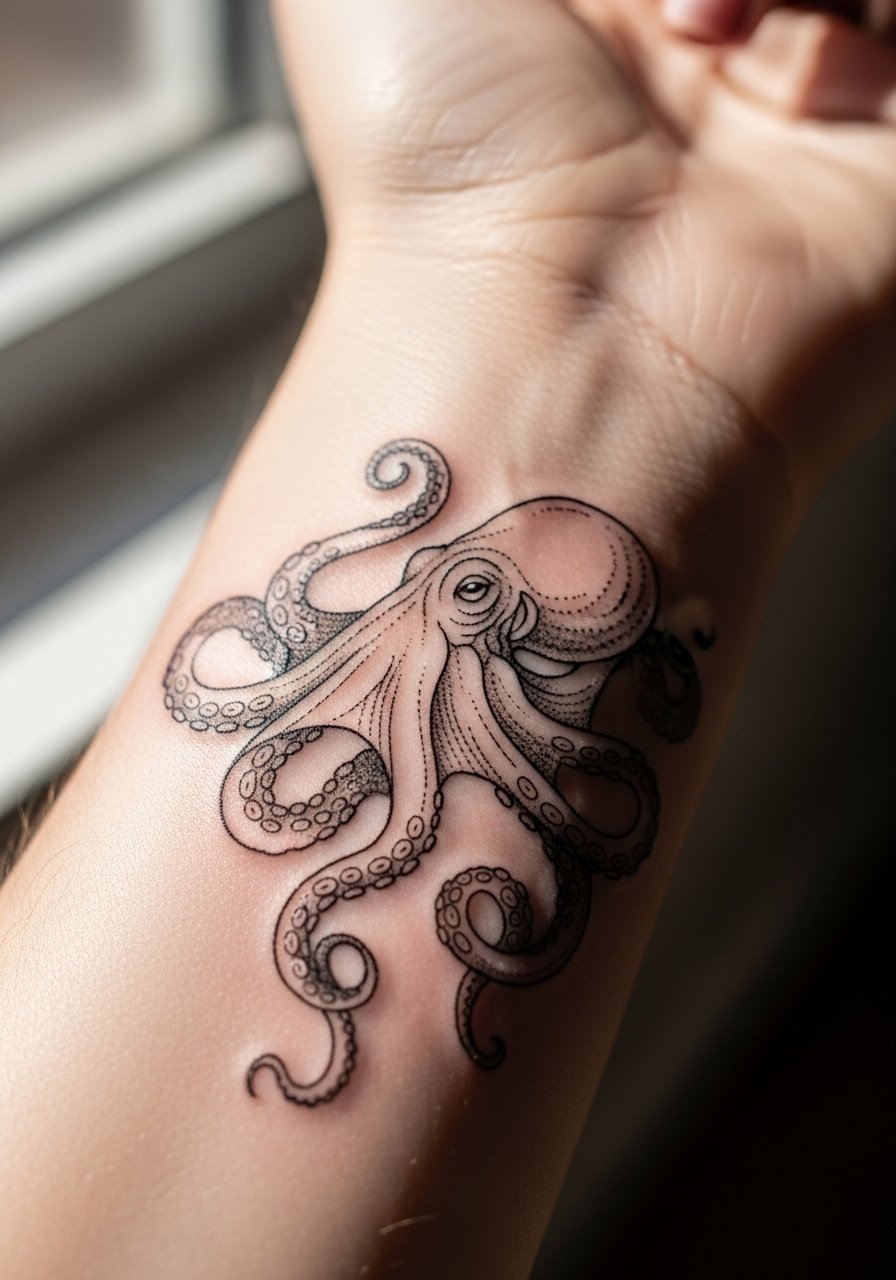
I've seen this style on people who want detail without bulk, and it reads very graceful when placed away from constant friction. Tell your artist you want single-needle suckers with slightly increased spacing between arms so the linework does not merge. Common mistakes are making the arms too dense or too small, which leaves the piece looking like a smudge after heavy use. Expect a one-hour session and a likely touch-up at year one on high-motion wrists. For showing it off, pair the tattoo with a slim leather watch or a cuff bracelet set opposite the ink, and wear a sleeveless tank during the session for clear access.
2. Neo-Traditional Octopus Clutching an Anchor on the Outer Forearm
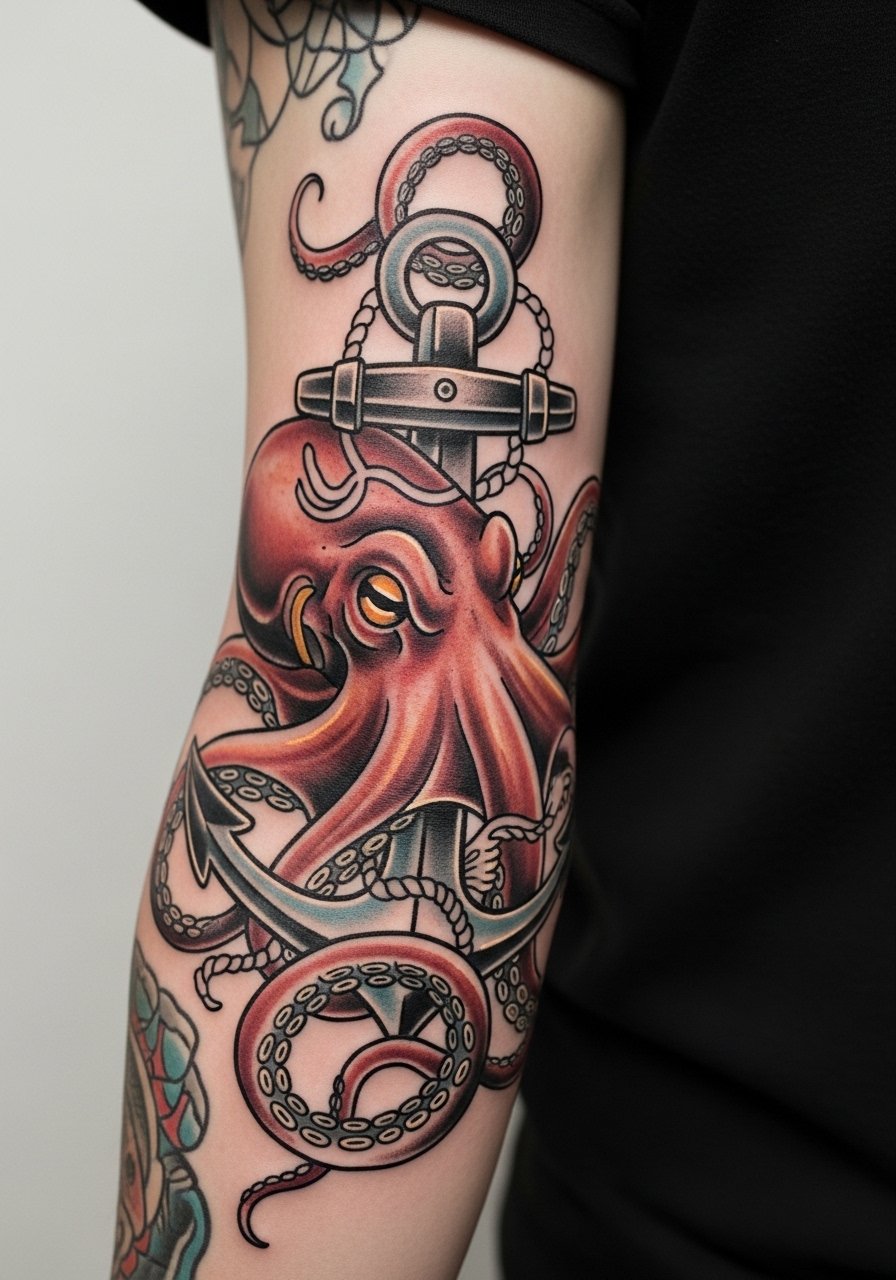
There is something about saturated color with thick outlines that holds up if you want longevity and presence. Start this conversation with references showing the exact color palette and outline weight you prefer, and ask the artist to avoid tiny color stipples which fade first. This placement is a 3 out of 10 on most pain charts and usually takes two sessions for clean saturation. The common aging problem is low saturation in fleshy areas, so demand solid black outlines at the edge of color fields. Roll the sleeve up and wear a rolled cuff chambray shirt to show off the work after it heals.
3. Micro-Realism Octopus Eye Behind the Ear

Fair warning, behind-the-ear pieces need a steady hand and the right framing. When booking, ask for a micro-realism sample that shows contrast on darker skin, and request stipple shading rather than thin gray wash if you want longevity. The session is short, often under an hour, but the area sees frequent rubbing from hair and collars so plan for a six-month touch-up on some skin tones. A common mistake is copying portfolio photos without test transfers on your skin tone. For the appointment, pin your hair up so the artist has clear access, and expect light tenderness for a few days.
4. Watercolor Octopus Flowing Across the Shoulder Blade
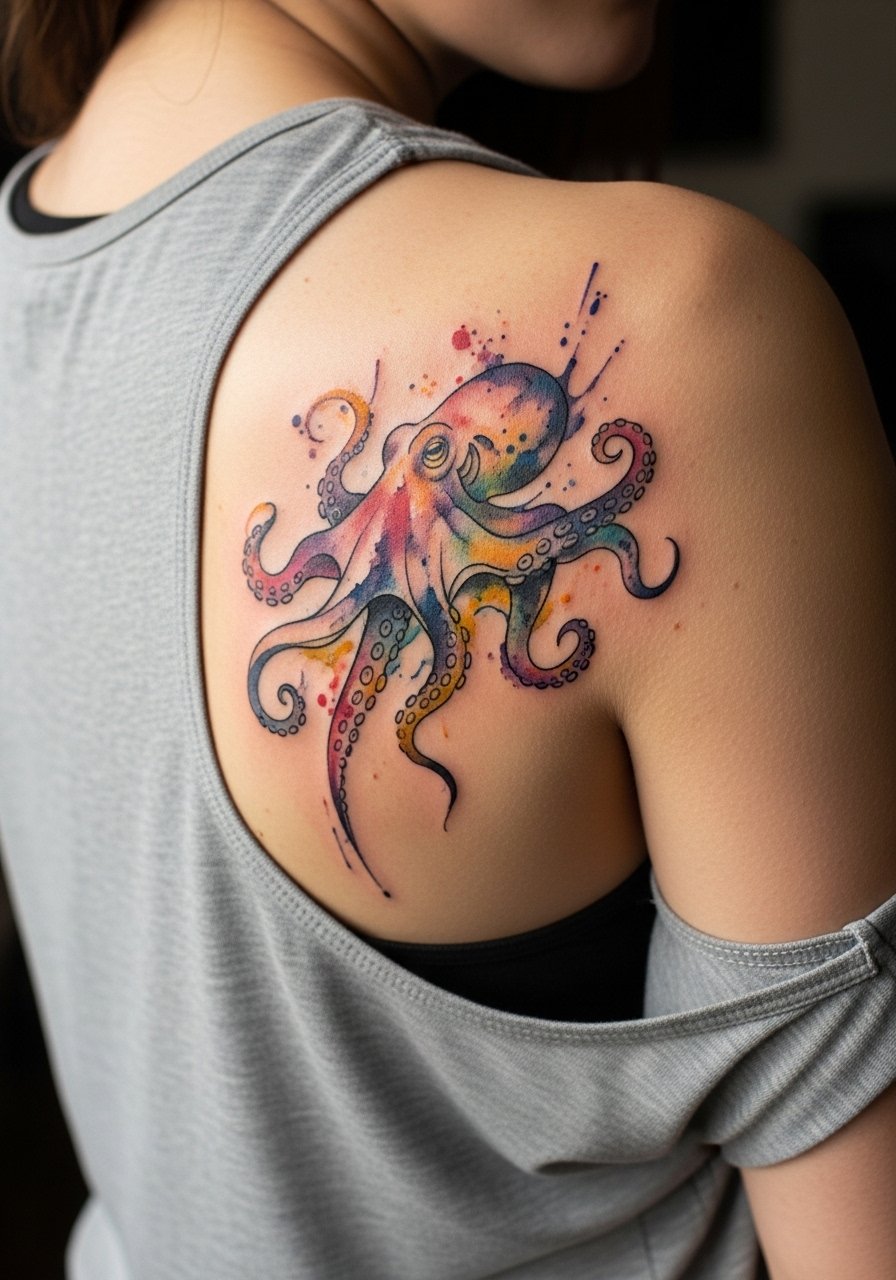
Most watercolor octopus pieces look painterly fresh, but they demand placement away from sun and friction. I recommend this for shoulder blades because clothing slides less there and you can protect the area in summer. Ask the artist to anchor the washes with thin black linework so the color has a boundary to age into, and expect two sessions for layering. The mistake is trusting vivid washes without considering touch-ups in year two. For showing it off, an off shoulder tee frames the sweep and a chain pendant necklace keeps the focus away from competing chest jewelry.
5. Blackwork Geometric Octopus Mandala on the Upper Thigh
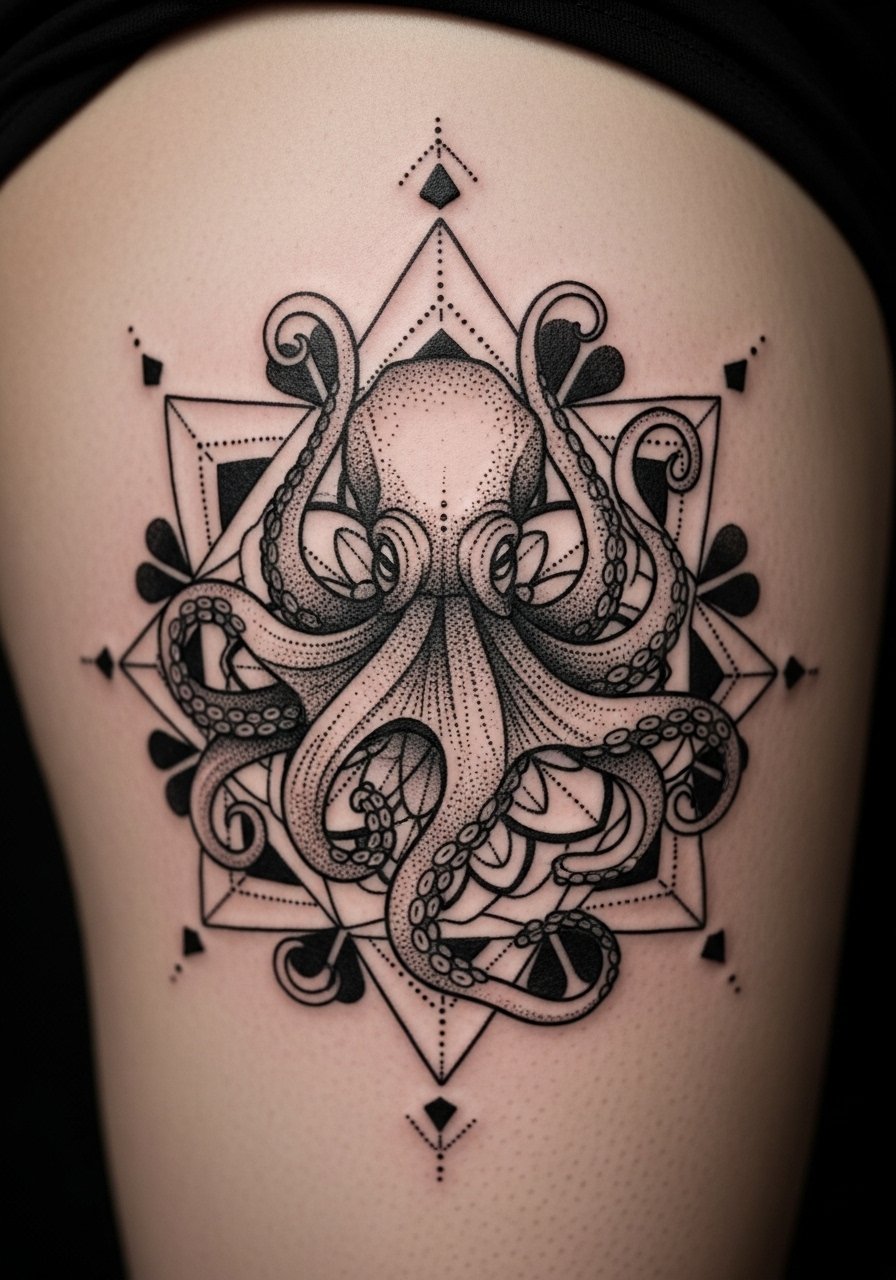
The upper thigh is perfect for big blackwork because the skin tolerates saturation and the area avoids constant sun. Artists often advise three short sessions to build solid fill and crisp edges. The common mistake is compressing too much geometry into a small space, which causes lines to merge after a year. For session day wear, pull on tailored swim shorts or loose athletic shorts so the artist can roll the leg up without pressure. This piece ages into a bold graphic statement if you leave room between pattern repeats.
6. Traditional American Octopus with Anchor on the Calf
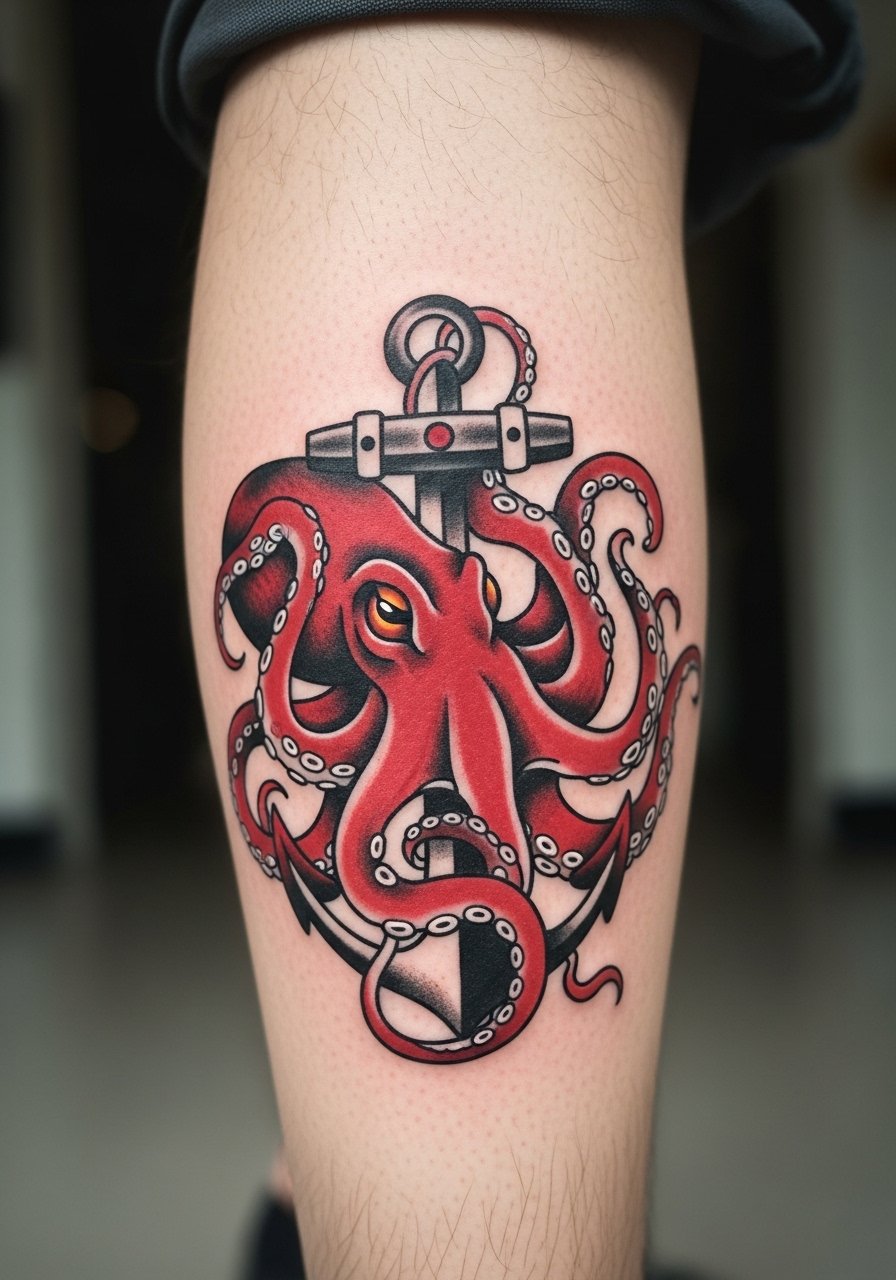
Calf tattoos heal reliably and present well in summer shorts, but the common novice mistake is undersizing this motif. Ask for the anchor to read at arm's length and for strong outlines so the design keeps structure as it softens. Pain is low on the calf and you can usually finish in a single long session. For showing off the work, rolled slim jeans and a vintage leather anklet pair well, and wear loose joggers the day of the session so the leg can be elevated comfortably afterward.
Studio Day Picks
The small wrist and finger pieces above need different prep than the larger color pieces, so a few items make the session and first week smoother.
-
CeraVe Healing Ointment. Lightweight, non-greasy moisturizing for delicate single-needle work that avoids clogging tiny channels during the initial days.
-
Indie Butter travel-size tattoo balm. Thinner than some heavy balms, useful on guest-spot sessions when you need a breathable layer for color work.
-
Tea tree balm travel tin. Breathable option that many use in humid climates to reduce itching without heavy occlusion on large shoulder or thigh pieces.
-
Lush-style tattoo balm. Natural alternatives sometimes cause less irritation for sensitive skin, handy for folks who react to petroleum blends.
-
Aquaphor Healing Ointment. A thin layer for the first couple of days can lock moisture in on dense blackwork and help prevent premature crusting on saturation-heavy calf and thigh tattoos.
7. Ignorant-Style Blocky Arms on Knuckles or Back of Hand
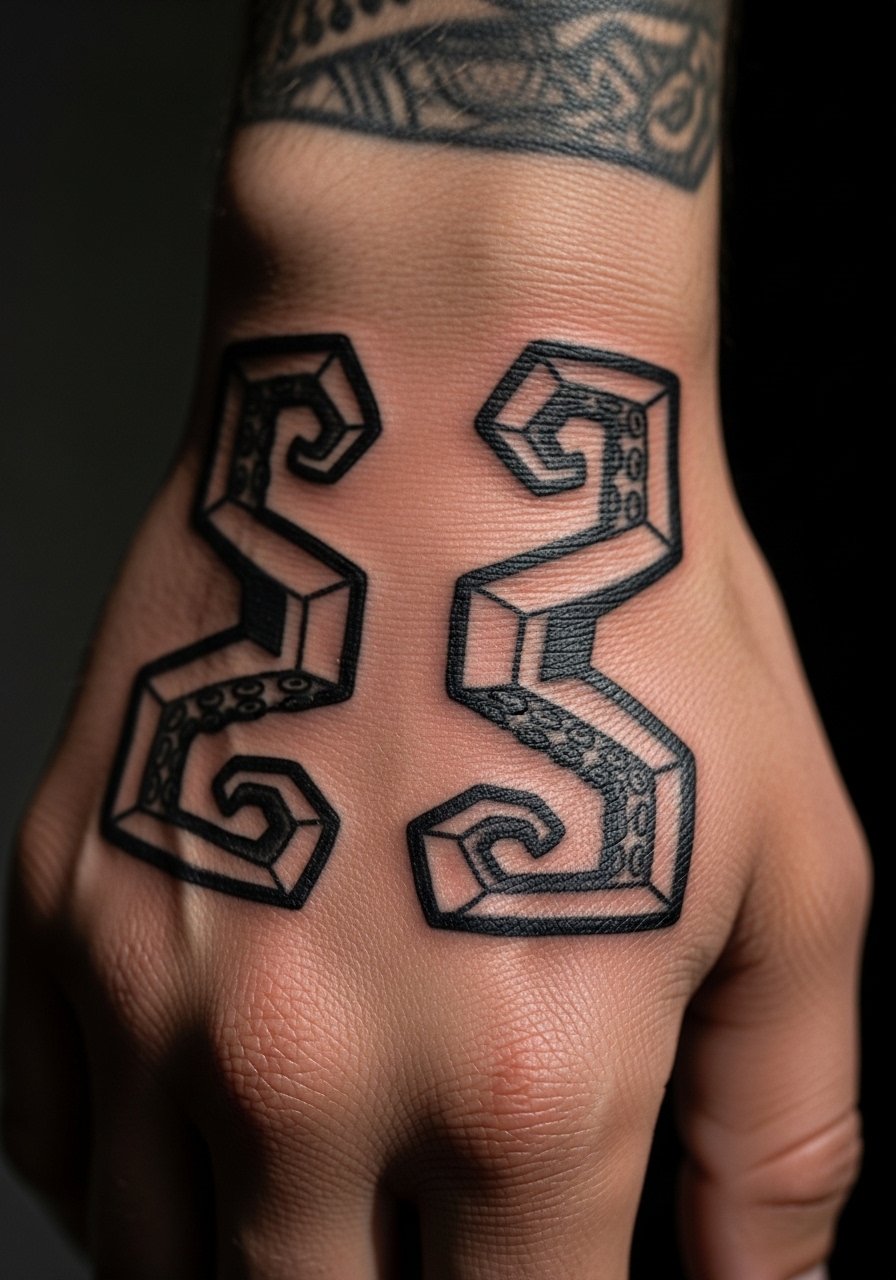
Hand pieces are practical for punk-forward looks but they age differently than arm work. The biggest benefit is immediate visual impact, and the cost and session time are low. Tell your artist you want thicker stroke widths and less tiny interior detail so the piece holds up under frequent washing. Expect fading within a year and plan a touch-up in that window. Hand tattoos also have job implications in some industries, so weigh placement against career considerations. During the session, go for pain tolerance and leisure time for aftercare, and pair the piece with minimal rings so it remains the focal point.
8. Single-Needle Camouflaging Octopus in Kelp on the Inner Bicep
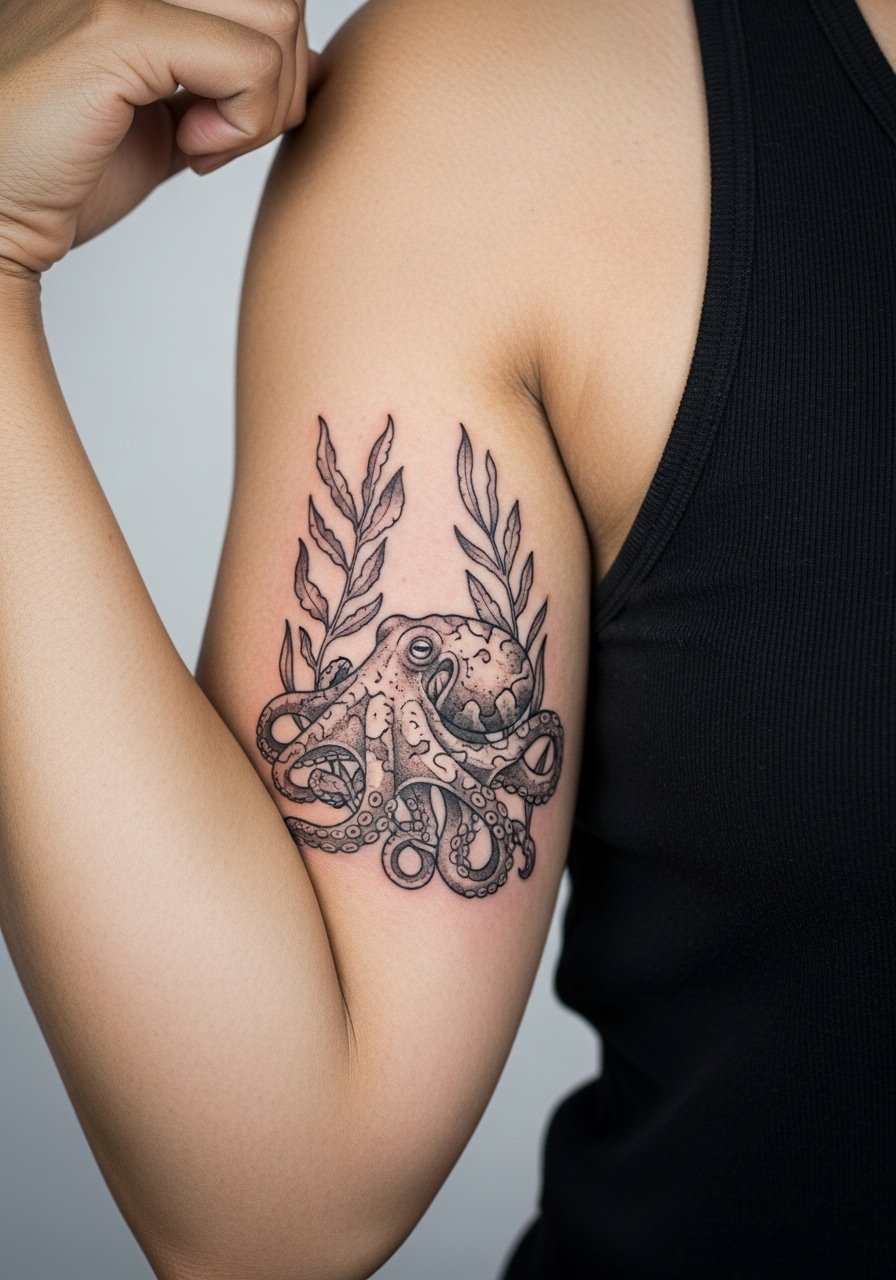
Inner biceps give single-needle work a private canvas that still peeks out in sleeveless looks. I recommend stipple shading for contrast and slightly increased spacing so the kelp texture does not swallow the arms. The inner bicep is an unusual stretch zone, so ask how the design would move when your arm is flexed and extended. Sessions usually take one to two hours. A common mistake is copying a tightly packed reference, which usually blurs after repeated bending. For session comfort, wear a loose tank top and bring a jacket for aftercare comfort.
9. Ornamental Dotwork Octopus Tentacles Along the Spine
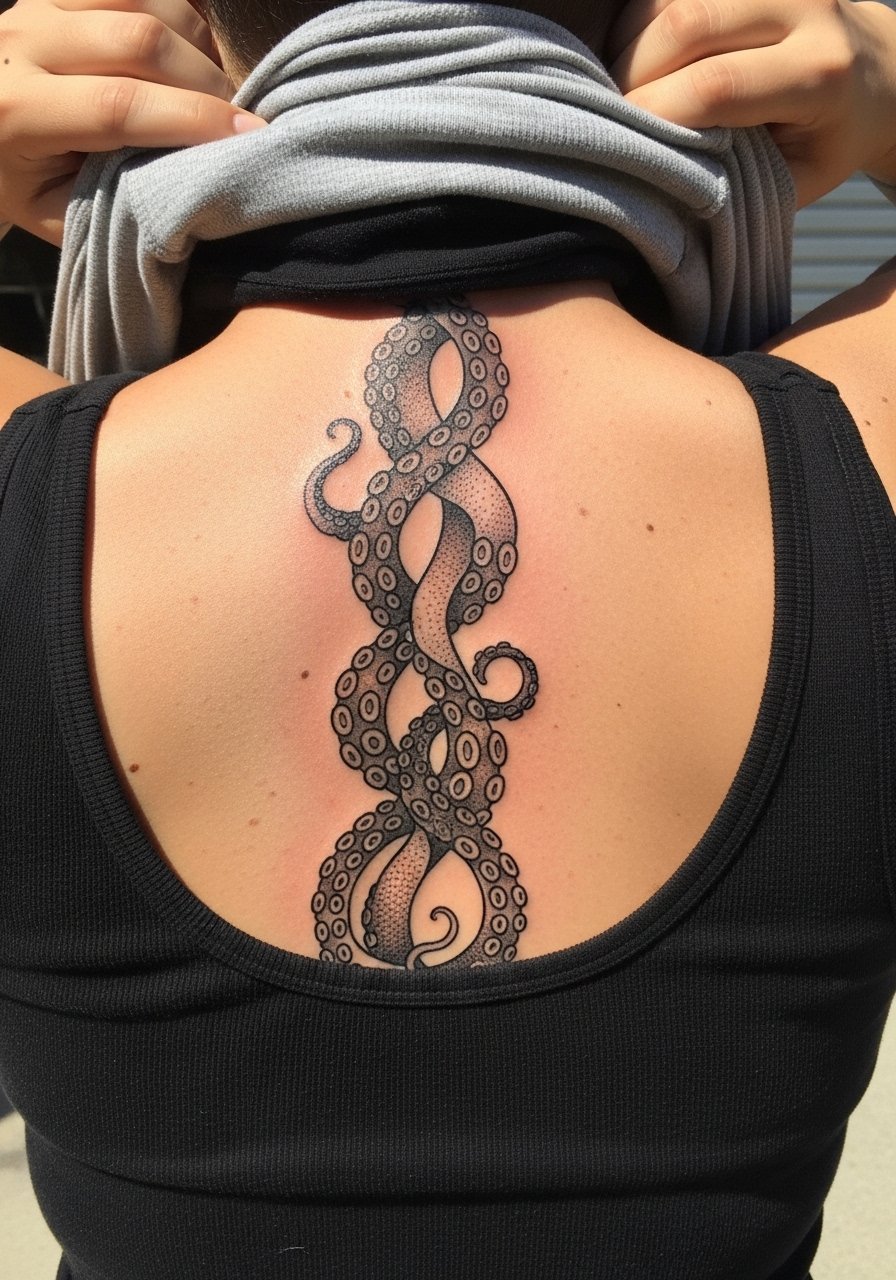
Spine pieces let dotwork breathe because the long vertical space avoids crowding. Expect multiple sessions if you want high-contrast stipple and crisp negative space. The mistake many people make is asking for too small a pattern on such a long axis, which creates repetition that reads as gray from a distance. Pain on the spine can be higher, so plan short sittings with breaks. For showing the vertical sweep, open-back tops or halter styles frame the work without overwhelming it. Discuss how the dot density changes from six months to five years with your artist so you get the right spacing up front.
10. Black and Gray Realistic Giant Octopus Across the Ribcage

Fair warning, ribs are a high-pain zone but they reward you with dramatic canvas size. Most realistic Pacific octopus pieces need three sessions to layer texture and deep gray shading. Artists split on fine-needle work here. One camp says the skin stretch blurs thin lines within two years. The other camp argues that experienced depth control and spacing keep the detail intact. Ask which camp your artist belongs to and request a test transfer before booking. Expect considerable tenderness during healing and plan for sunscreen once fully healed to protect grayscale depth.
11. Minimalist Octopus Silhouette Near the Collarbone

Collarbone work reads elegantly with minimal shapes, and it is a forgiving spot for first-timers. Keep the silhouette simple and ask for slightly thicker outer lines so contours stay clear as the skin shifts. This area is a 4 out of 10 on pain scales and usually done in a single short session. The most common mistake is undersizing the silhouette which vanishes under necklaces. Pair the piece with a v neck henley and a thin chain necklace to keep the collarbone visible without competing with the artwork.
12. Neo-Traditional Octopus and Nautilus Shell on the Upper Arm
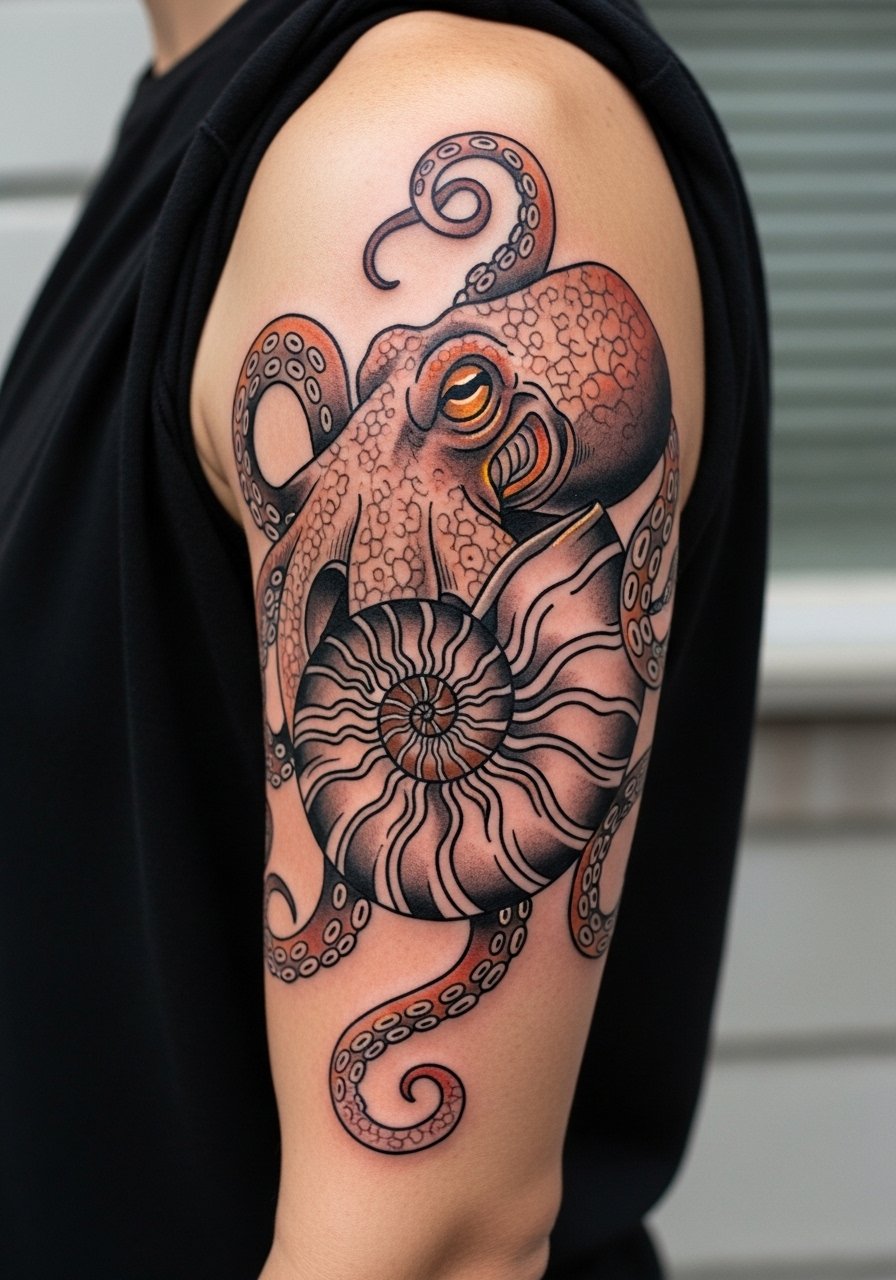
Upper arms are ideal for collector sleeves and pieces that will expand into larger work. I recommend making the shell geometry slightly larger than you think so the spiral reads clearly when the sleeve grows. Bring reference images that show the exact color saturation and ask for a color test patch if you have darker skin. Sessions usually span two to three sittings when integrating color. Avoid the mistake of over-detailing the inner shell face, which can muddle in five years. Off-shoulder tops highlight upper-arm color work, so wear a sleeveless muscle tank during the session and afterward for easy display.
13. Hand-Palm Side Webbing Reveal Tattoo

Hidden webbing pieces are a conversation starter that feel private until you spread your fingers. The downside is that constant washing and movement push these tattoos to fade quicker. Tell the artist you want thicker outlines and minimal interior detail so the graphic survives daily use. Sessions are short but expect frequent touch-ups, often within a year. The real mistake is assuming finger webbing will last like an arm piece. For the appointment, skip rings and wear a short-sleeve top so the artist can see your hand position clearly.
14. Micro-Realism Close-Up of Suckers on a Finger or Thumb
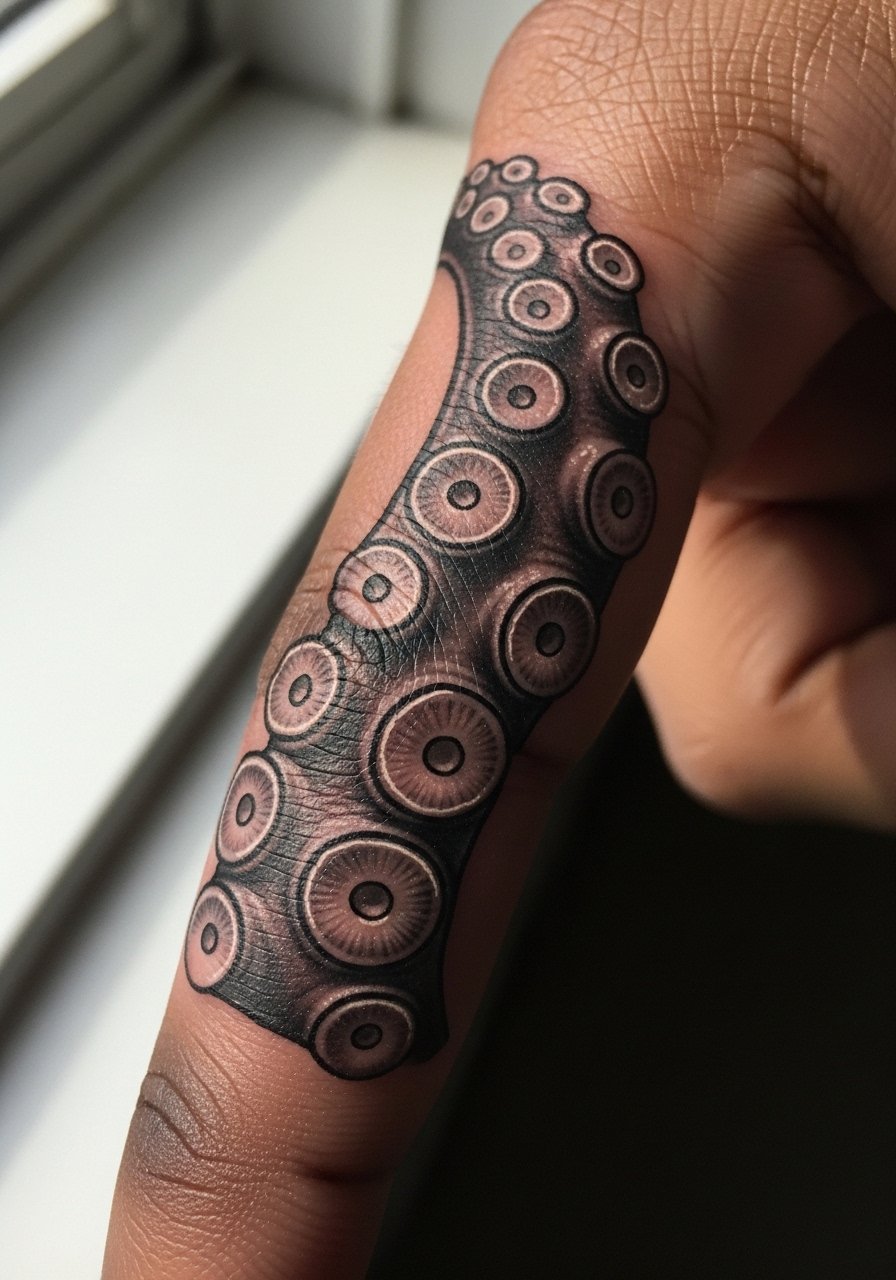
Tiny studies of suckers can be arresting when executed with contrast and crisp stippling. They are best on fingers or along the edge of the thumb where viewers can see the detail up close. The key instruction is to ask for high-contrast shading and a small area of negative space so the suckers do not flatten as they heal. Pain is sharp and brief and sessions often last under an hour. This type of micro realism needs careful aftercare and a realistic expectation of touch-ups at six to twelve months.
15. Geometric Octopus Sleeve Blueprint

Planning a sleeve is more about spacing and future growth than one good session. My observation is that sleeves that leave breathing room between geometric repeats age far better. On the consultation, map out where tentacles will cross joints and ask for thicker anchor lines at elbows and wrists. Build the sleeve in planned increments, with each session focusing on a visual anchor so it never looks overcrowded. Expect multiple sessions over one to two years. For daily wear, rolled-up linen shirts in neutral tones keep the sleeve visible when you want it to be.
16. Regeneration-Themed Octopus Sleeve for Personal Recovery

Octopus regeneration motifs work as memorial or recovery pieces because the idea of regrowth is concrete and adaptable. If this is personal, tell the artist you want tentacle forms that subtly incorporate symbols for each milestone or person rather than overt text. The typical mistake is packing the sleeve with identical repeat symbols, which reduces readability over time. Sessions vary widely depending on coverage, and you should plan a year or more for completion. This design benefits from layered geometry and negative space that let each arm tell a different part of the story as the sleeve expands.
17. Octopus Versus Squid Clarification Full-Arm Study
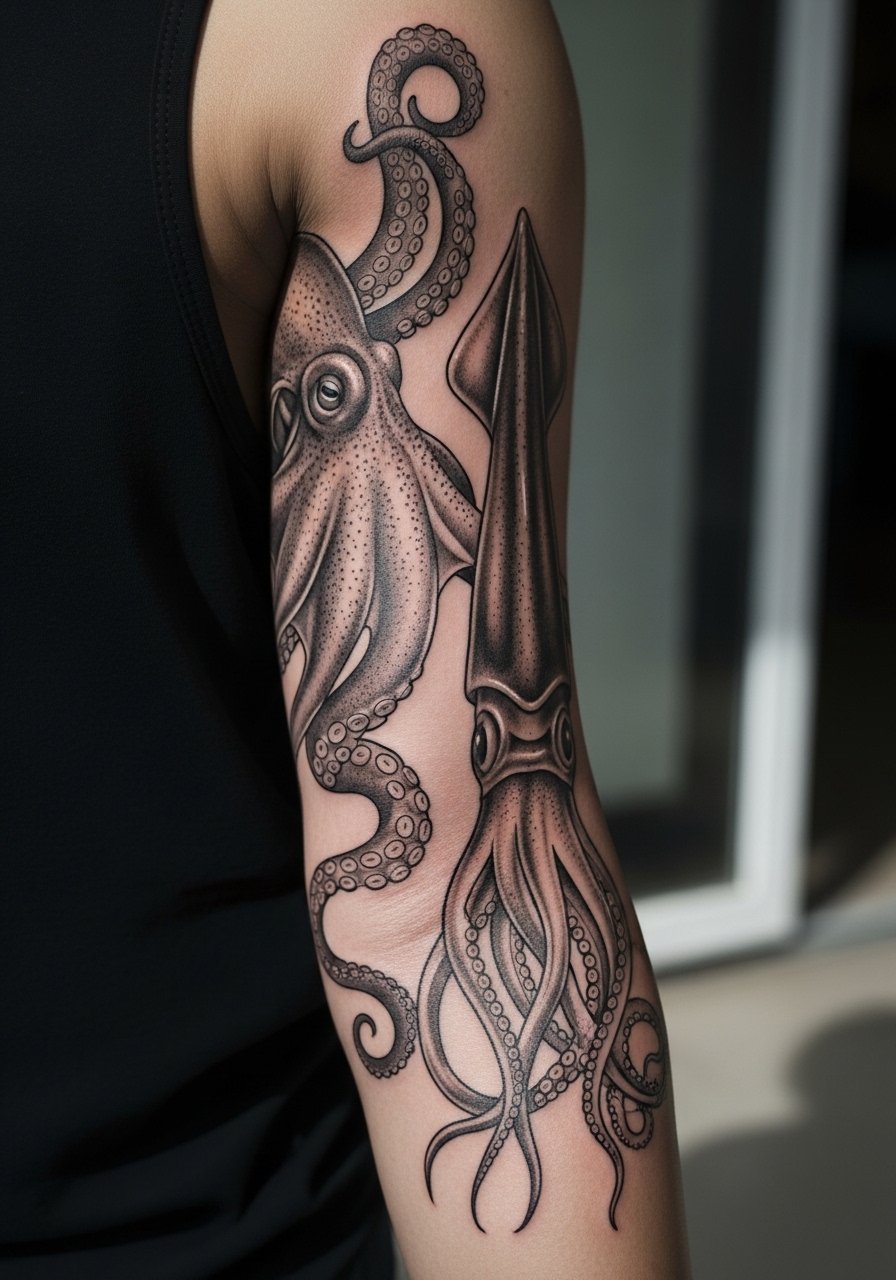
Anatomy matters if you care about biological accuracy. Octopus arms have suckers along their length while squid have two longer tentacles with different tip structures. Bring clear references and tell your artist which traits are essential so the final reads as intended. This full-arm study is a commitment and usually takes multiple sessions. The common mistake is mixing both anatomies in a single silhouette, creating ambiguous imagery. Use this piece to teach observers the differences by placing labeled negative-space cues or subtle patterning in the background.
18. Hidden Ankle Constellation Octopus
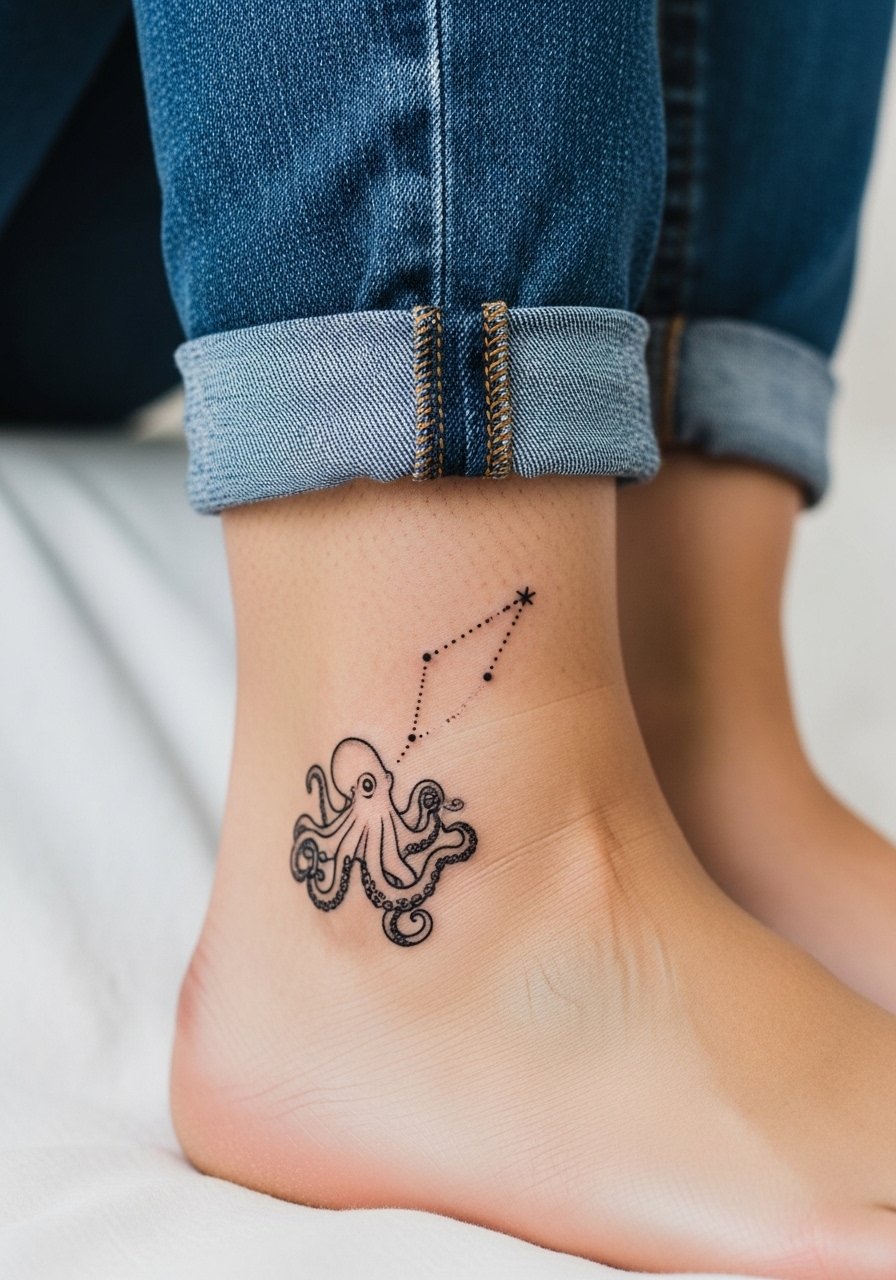
Ankle work is seasonally visible and pairs well with small, sharp compositions. The ankle is a higher-friction spot, so thicker outlines and simple shapes work best. The session is short but the area tolerates less dense shading, so avoid expecting large gradients to hold. A common mistake is placing too much tiny dotwork that disappears after a few months. For showing the piece off, roll your jeans and wear boat shoe socks or low-cut sandals to make it visible without forcing constant exposure.
19. Sternum Octopus with Botanical Accents

Sternum pieces are intimate and require considerate design so the form works with natural curves. When you consult, request that the artist map the design against your movement and breathing to prevent unwanted distortion. Sessions can be intense due to sensitivity, and healing benefits from a fitted top during recovery. A mistake I often see is over-detailing in the immediate center, which loses definition as the area settles. If you plan to show the piece, a strapless dress or bandeau will frame it cleanly.
20. Outer Thigh Octopus Wrap for Swim Season
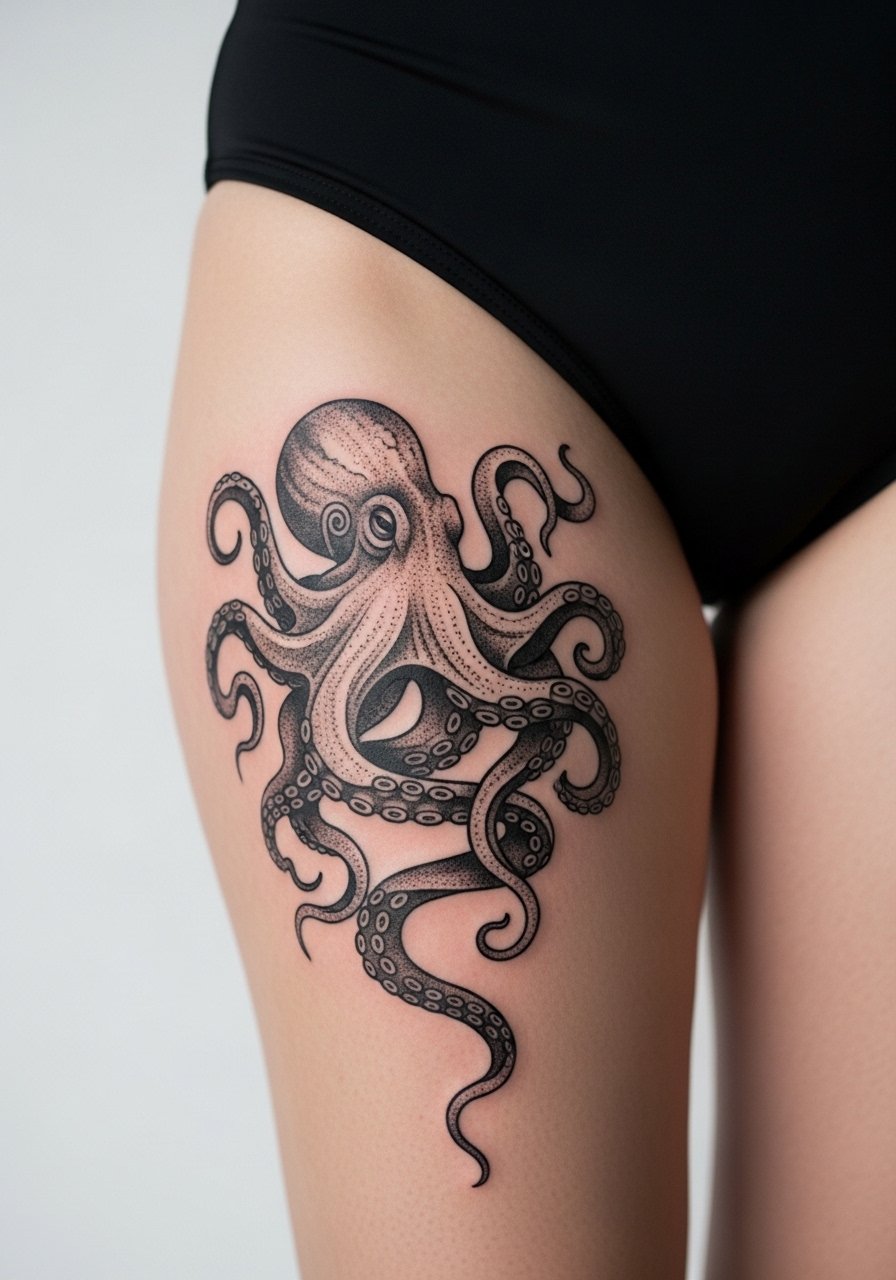
Thigh placements are excellent for seasonal show-off tattoos and tolerate heavy blackwork and detail. Artists like the outer thigh because it gives room for scale without high friction. The common misstep is placing the wrap too low where bikini lines will cover most of it. Ask for the highest point of the design to align with your swimwear choices if you want it visible in summer. For the session, wear high-waisted swim trunks or loose shorts so the artist can work on a stable surface.
21. Collarbone-to-Shoulder Octopus Wrap for Layered Jewelry
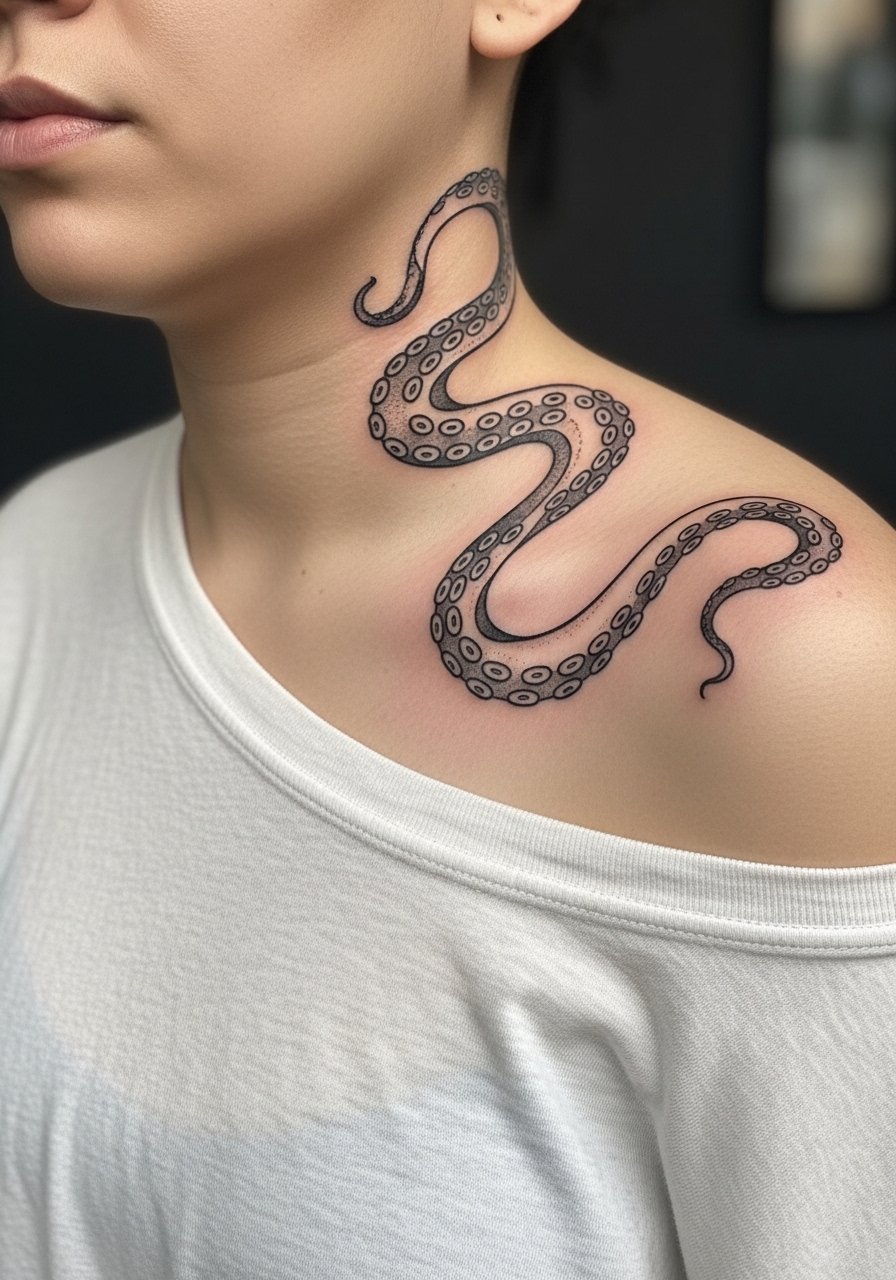
There's a careful balance between nervous collarbone skin and the visible appeal of a wrap that plays with jewelry. Start with a consultation that includes photos of you wearing necklaces so the artist can place tentacle anchors around chains. Pain here is moderate and sessions are manageable in length. A frequent error is letting the tentacle cross where pendant chains sit, which creates visual competition. To highlight the piece, layer thin chains or a simple pendant and wear a thin chain necklace that sits above the artwork rather than across it.
Frequently Asked Questions
Q: Will single-needle octopus work on my dark skin tone without losing detail?
A: It depends on contrast and the artist's approach. From what I've seen, single-needle work can look excellent on darker skin if the artist uses stronger anchor lines and stipple shading to create contrast. Ask for a test transfer on your skin and examine it in daylight before committing.
Q: Do watercolor octopus tattoos require different aftercare than blackwork pieces?
A: The general aftercare principles are similar, but watercolor relies more on preserving color saturation. That means minimizing sun exposure and planning touch-ups in year two for color refresh. The heavier blackwork pieces can sometimes tolerate longer intervals between touch-ups.
Q: How often should I expect touch-ups for hand, finger, and webbing octopus tattoos?
A: Expect touch-ups more frequently for hands and fingers, often within six to twelve months for fine detail. The skin there experiences constant friction and washing, so thicker line weight at the outset and a planned touch-up timeline keep the design readable.
Q: Artists disagree on Saniderm versus dry healing. Which camp should I choose after an octopus session?
A: Both camps make reasonable points. The Saniderm side likes faster closure and less mess, while dry-healing supporters worry about trapping moisture and potential irritation. Ask your artist where they have seen better results for the specific style and placement you chose, and follow their experience for that studio.
Q: How do I find an artist who specializes in octopus work without naming specific shops?
A: Use style searches and local filters. Try hashtags like #finelineoctopus or #blackworkoctopus on Instagram, search "octopus" plus your city on booking apps, and check guest-spot listings with "octopus" as a keyword. Community forums and convention portfolios also help you find artists experienced with the anatomy and shading you want.
