
Fine line vintage lockets have been everywhere on saved boards, but what you wear and where you place the piece matter as much as the drawing. The tattoos that still look intentional after two to five years are the ones that started with the right line weight, spacing, and placement. Read on for 27 vintage heart locket tattoo ideas, what to ask for at your consult, and how certain placements change the way a locket ages.
1. Fine Line Locket with Keyhole on the Wrist
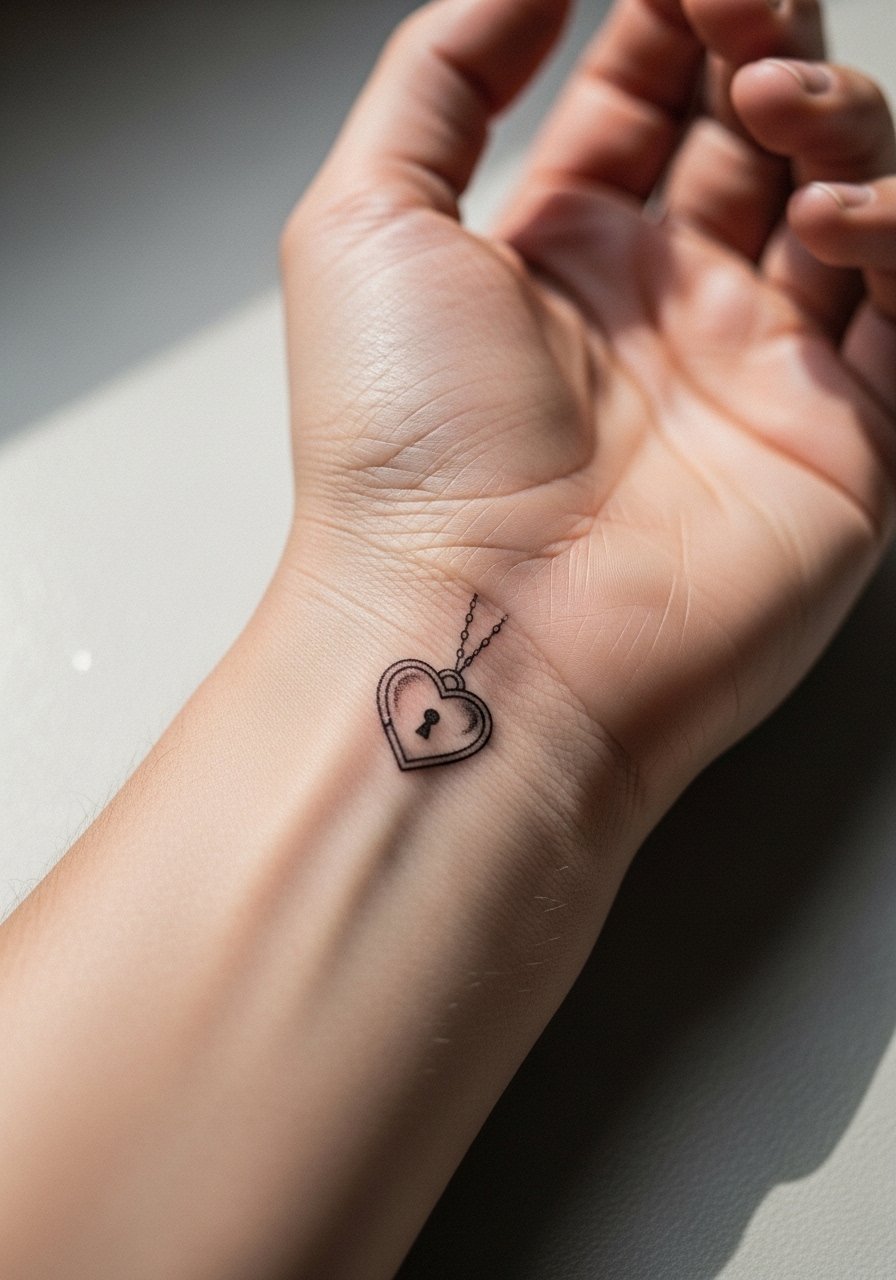
A tiny wrist locket reads delicate and spare, and I usually recommend this version for someone after subtle symbolism who plans for future touch-ups. Tell your artist you want slightly heavier contour than a micro-fine outline so the wrist movement does not cause rapid fading. Expect a low to medium pain level on the inner wrist and a single short session. A common mistake is asking for ultra-fine detail too small for the wrist. Over time the keyhole will soften, so plan a touch-up around year two to three. For showing this off, thin chain bracelets pair well and keep the wrist feeling jewelry-like during healing. Wear a thin gold chain bracelet to echo the locket without crowding the skin.
2. Micro-Realism Portrait Inside a Heart Locket on the Inner Forearm

This micro-realism locket is a choice for memorial work that reads private and detailed. The inner forearm gives enough flat canvas for a 2-3 centimeter portrait, so ask your artist for a grayscale photo reference at the same scale. Expect moderate pain and a two-session plan if the portrait needs layering. A frequent mistake is condensing too much tiny detail into a micro locket. Healed at six months the portrait will remain readable if the lines are placed slightly bolder than true micro line. In two to five years shading can soften, but a careful touch-up restores contrast. Pair this with rolled linen shirts when you want to show it off. For the session wear a linen button down blouse so your artist has clear arm access.
3. Neo-Traditional Open Locket with Filigree on the Shoulder
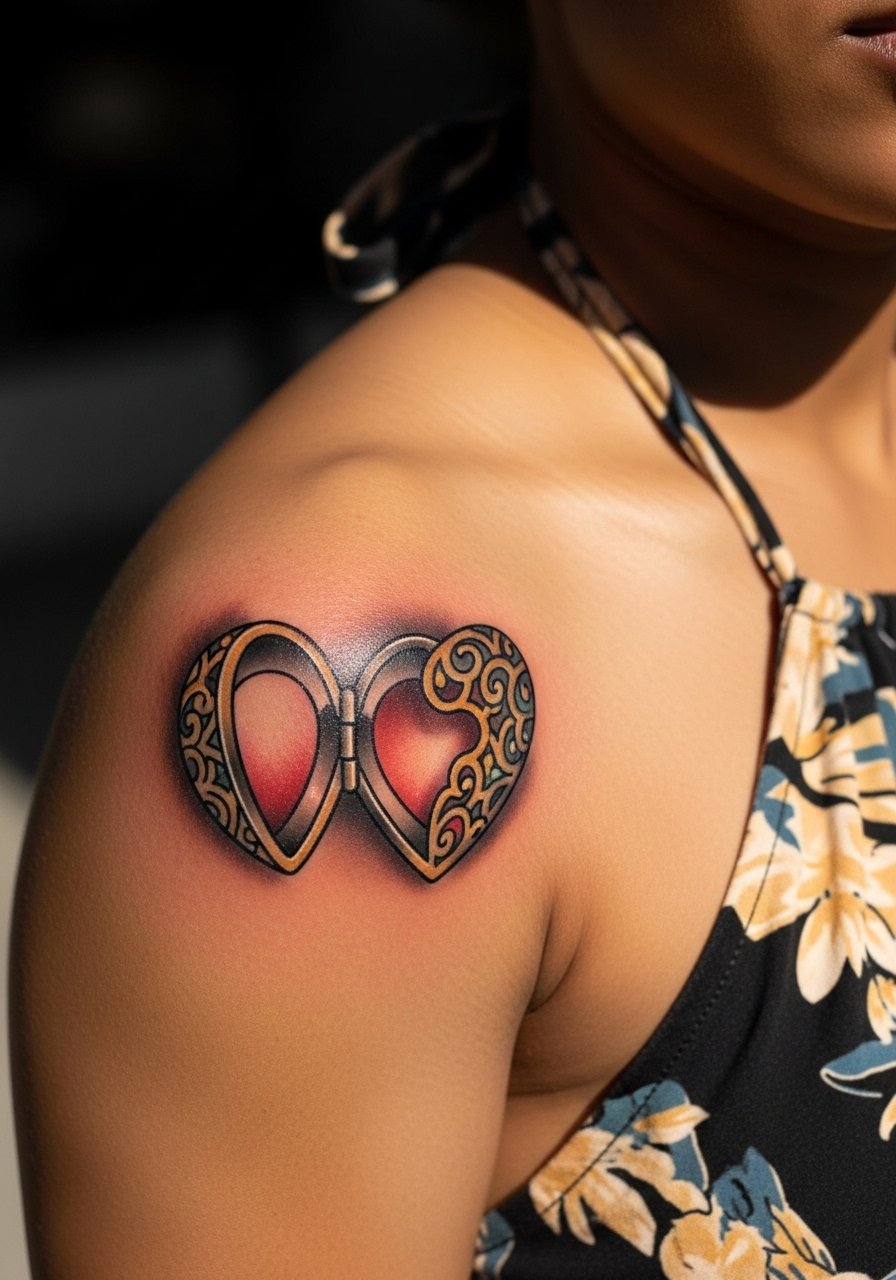
There is something heirloom-like about a neo-traditional open locket on the shoulder. The rounded shoulder area takes filigree well, and I recommend medium size so the details have room to breathe. Tell the artist you want warm shading rather than flat color to keep an antique feel. Pain is low to medium and sessions usually finish in one to two sittings. A common version that ages poorly squeezes too many filigree curls into a small space. Over time, well-spaced filigree softens into tonal richness while cramped filigree merges. For showing this placement, wear a halter tank top so the design sits against bare skin without competing patterns.
4. Black and Gray Victorian Locket at the Collarbone
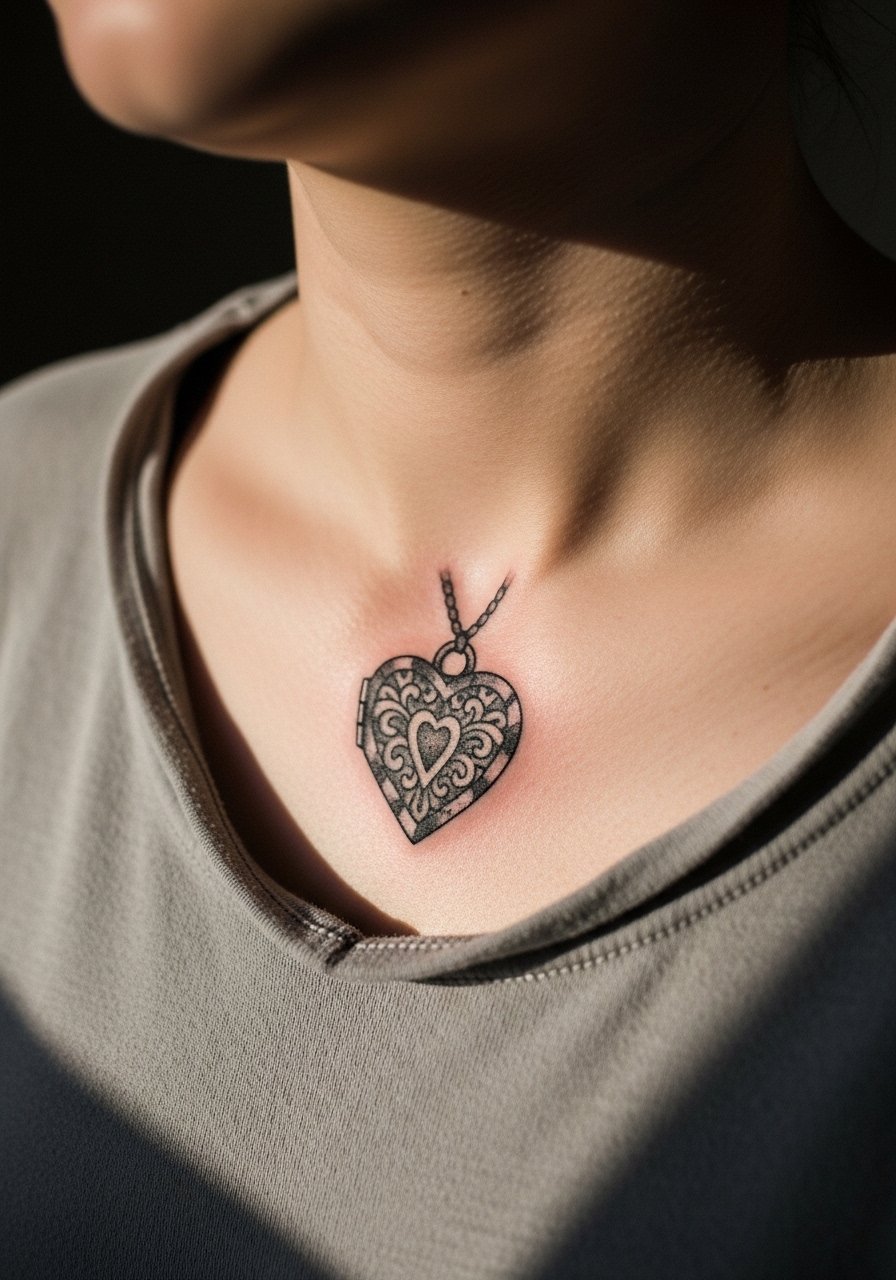
The collarbone is classic for Victorian lockets because the surface keeps ornate detail readable. Expect low to moderate pain and a single session for a small to medium piece. Ask your artist for fine stipple shading to get depth without heavy color. One mistake is placing overly dense shading too close to the bone, which can read muddy as it heals. At two years well-executed black and gray remains elegant and ages predictably. For evenings out, pair it with an off shoulder blouse or a delicate pendant that sits above the locket for a jewelry-like effect.
5. Minimalist Outline Heart Locket on the Ankle
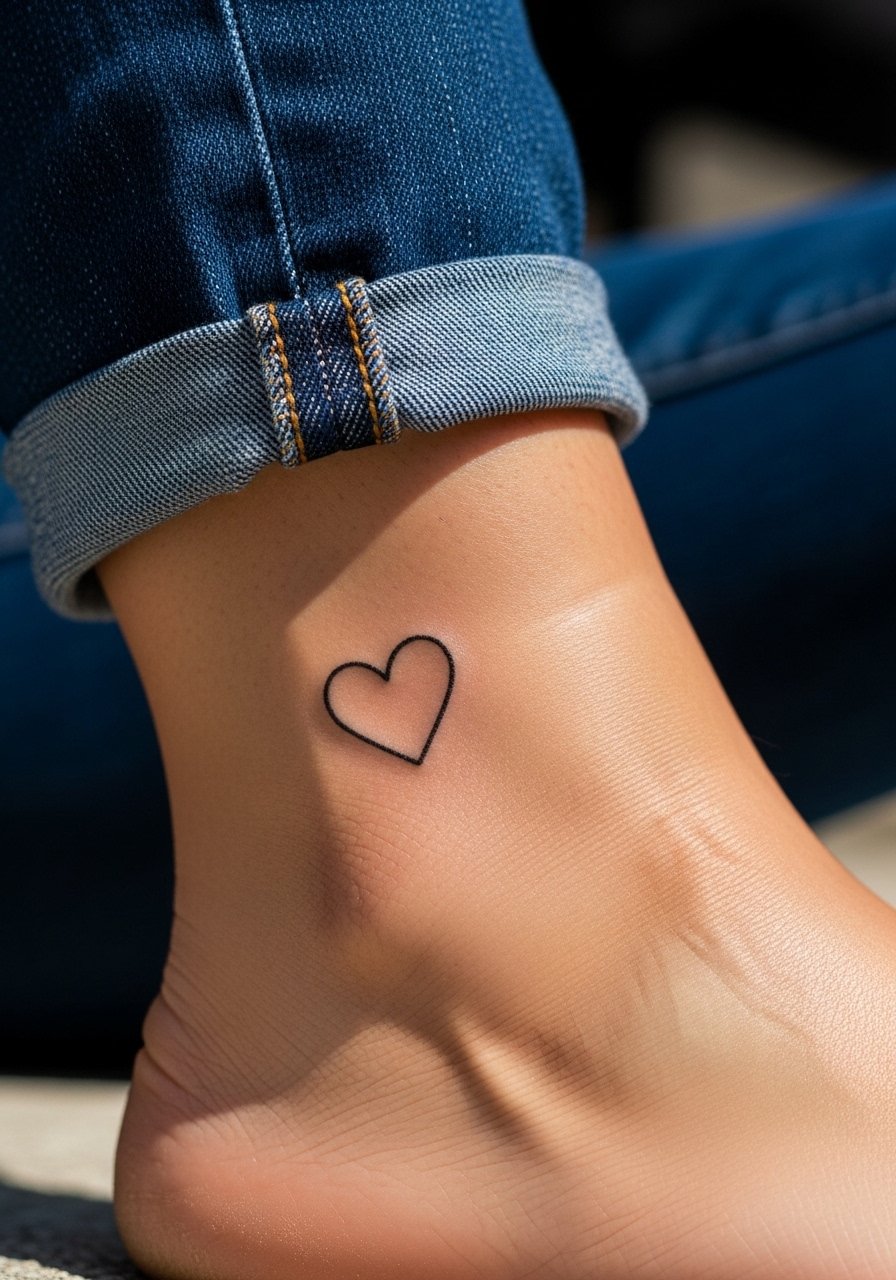
Ankle lockets are a gentle entry point for first-timers and are ideal when you want a micro look. The biggest mistake is asking for too much interior detail in a very small footprint. Pain is low and one short session usually does it. Fine line here can fade faster because the ankle gets a lot of friction from socks and shoes, so expect touch-ups in a couple of years. To show it off wear strappy flat sandals or cropped pants. For the session, roll your jeans and bring sandals so the artist can position your ankle without stretching fabric. Try a pair of strappy flat sandals for clear visibility.
6. Traditional Heart Locket with Chain Illusion on the Outer Forearm
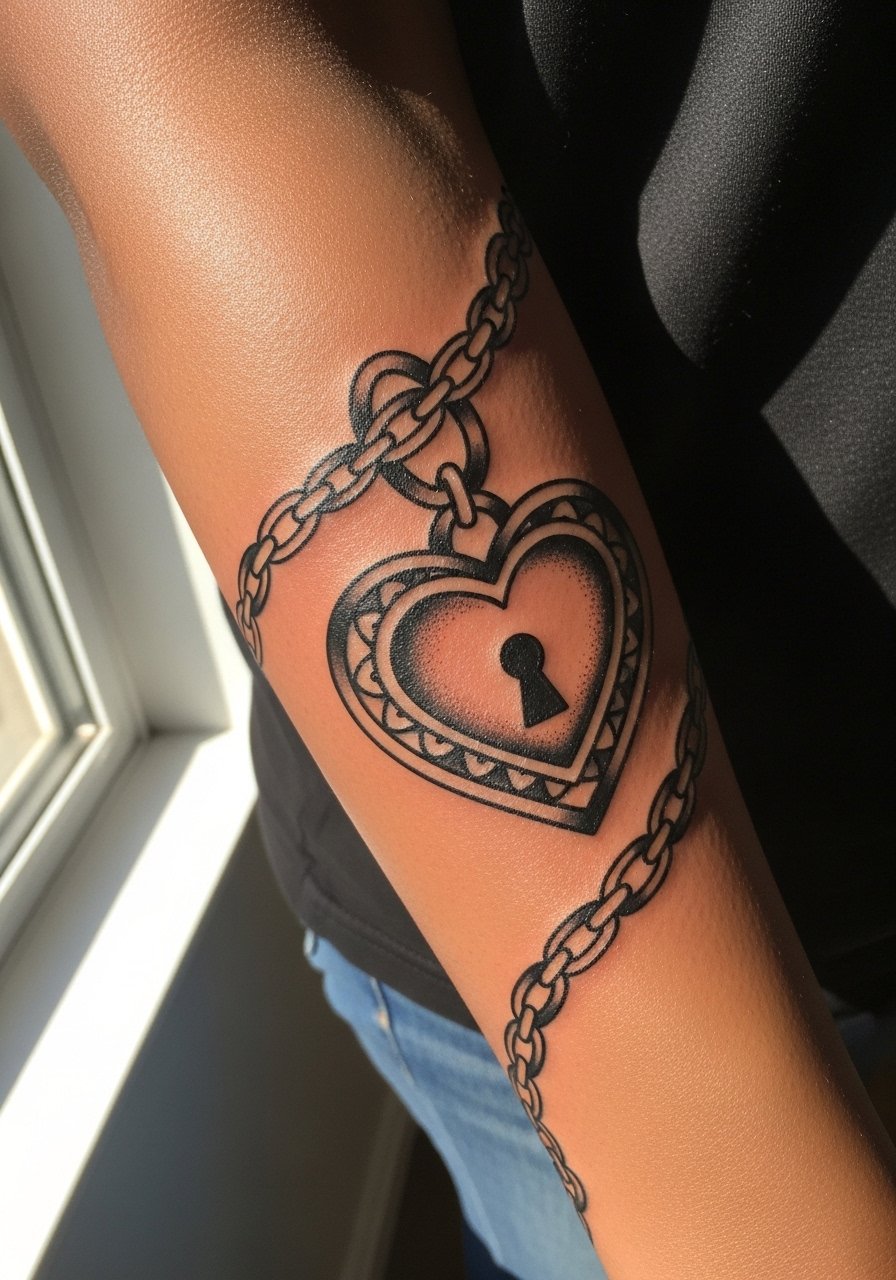
Bold traditional linework holds up on high-movement areas like the outer forearm, and the chain illusion can wrap around contours without losing form. Expect mild discomfort and a single medium-length session. Tell the artist you want saturated black outlines with minimal color fill to age cleanly. A common error is adding tiny ornate filigree to a traditional piece that was meant to read graphic. At five years the bold lines will likely remain readable even as color softens. Pair this design with rolled sleeves and a neutral fitted tank when you want the piece to read like classic flash.
Studio Day Picks
The wrist through forearm pieces above heal differently from collarbone or shoulder work, so a few targeted items smooth the session and the first week.
-
Stencil transfer paper kit. Lets you preview line placement on skin before the needle starts, which matters for small wrist and collarbone lockets.
-
Topical numbing cream. Applied as directed before short wrist sessions eases sensitivity without changing the artist's linework.
-
Thin protective film roll. Useful for ankle and hand pieces that rub against clothing during the first few days.
-
Fragrance-free gentle body wash. Cleanses healing areas without irritating fine line work on inner forearm and collarbone.
-
Aquaphor healing ointment. A thin layer in the first days locks in moisture for delicate linework and helps prevent scabbing that obscures tiny details.
7. Ornamental Filigree Frame Over the Upper Chest
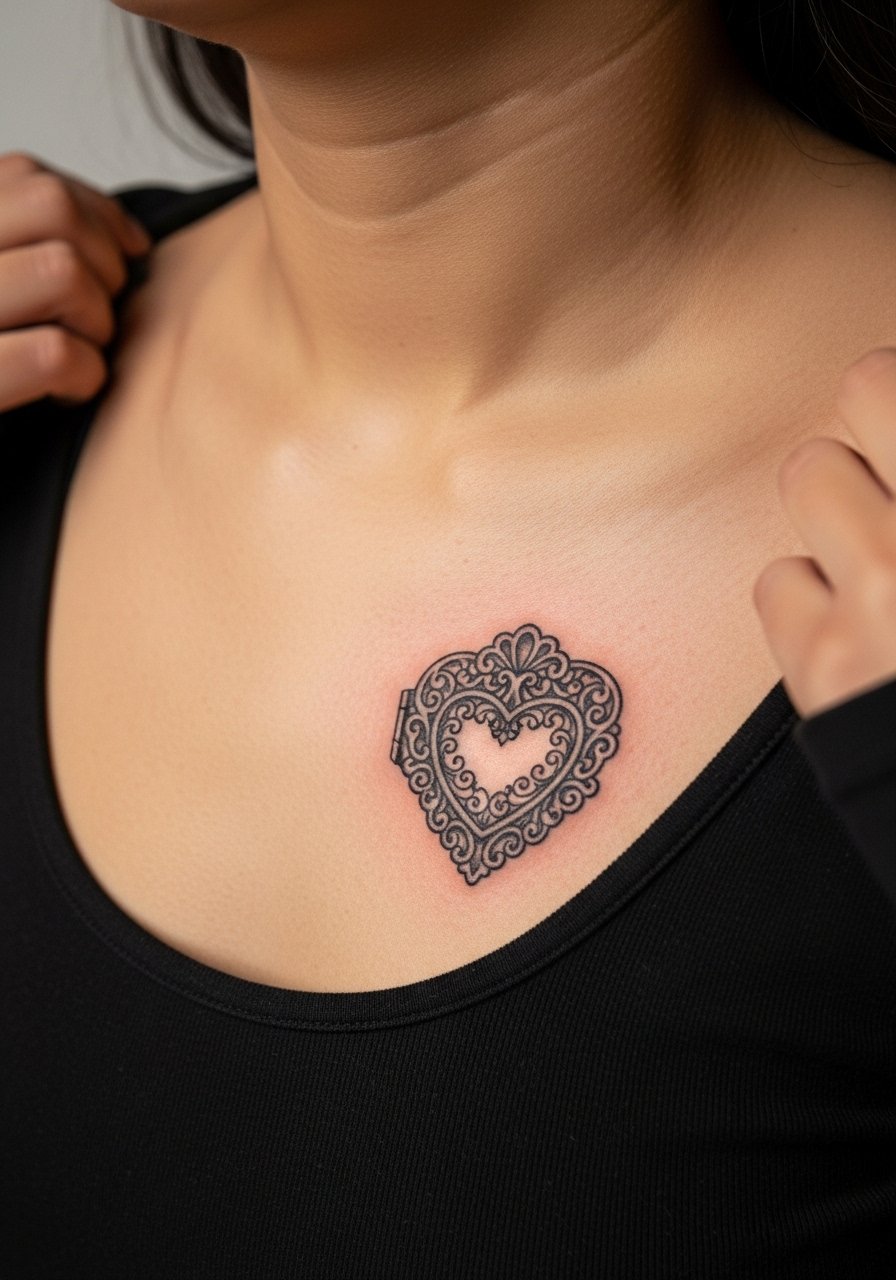
An ornamental filigree frame across the upper chest reads like antique jewelry when sized to the sternum line. Expect moderate pain if the piece crosses the sternum, and plan for two sessions when the filigree is extensive. In consultation, ask for spacing in the pattern to prevent merge over time. A mistake is trying to condense a large frame into too small a width. Over five years well-spaced filigree keeps texture while cramped pattern becomes blurry. For show-off looks, use a cream silk top or lace camisole that reveals the area without exposing more than necessary. Try an cream silk top for evenings where the design should sit like a pendant.
8. Heart Locket with Lock of Hair Illusion on the Inner Bicep
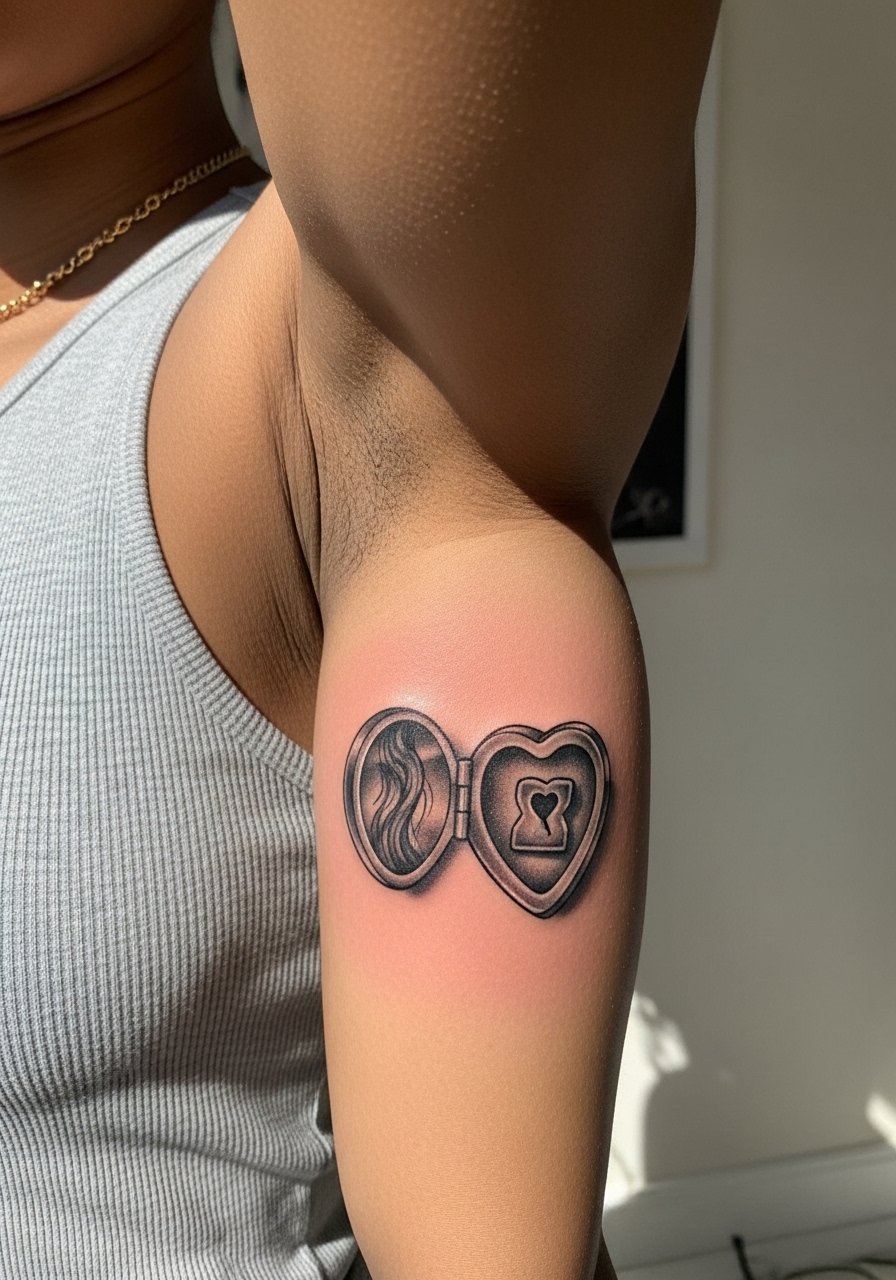
Inner bicep lockets are intimate and photograph well, but they come with higher sensitivity during the session. Expect a 6 to 7 out of 10 pain rating and two sessions if you want layered texture. Tell the artist you want soft shaded texture for the hair illusion rather than hard lines. One common mistake is asking for a fine, single-hair depiction that vanishes as it heals. At two years the texture reads as a soft keepsake rather than a crisp line. Note that inner bicep work needs an artist who is practiced in micro realism. For the appointment, wear a tank top so the arm can be positioned easily.
9. Open Locket with Tiny Key on the Opposite Wrist (Matching Set)
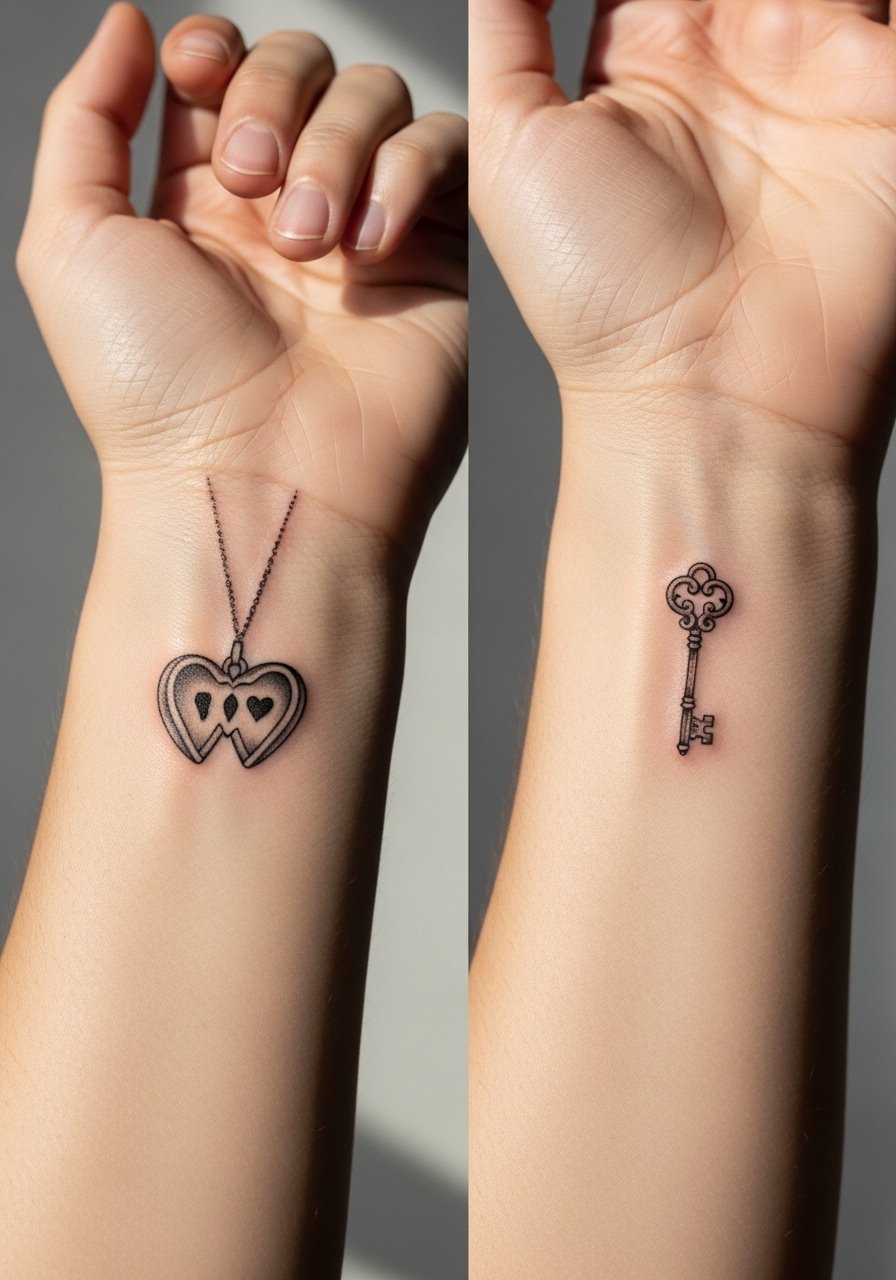
Matching locket-and-key sets solve scale problems by keeping each piece small and readable. If you are getting a pair, book both sessions near each other so the line weight matches. Pain is low on the wrists but expect more sensitivity on the inner side. A mistake is scaling the key too thin compared with the locket, which creates imbalance. Over time wrists experience more abrasion so both pieces will likely need touch-ups at year two to three. For showing these off, pair the wrist locket with a dainty cuff bracelet on the opposite hand. Consider a dainty cuff bracelet to balance the set.
10. Colorful Decorative Heart Locket on the Thigh
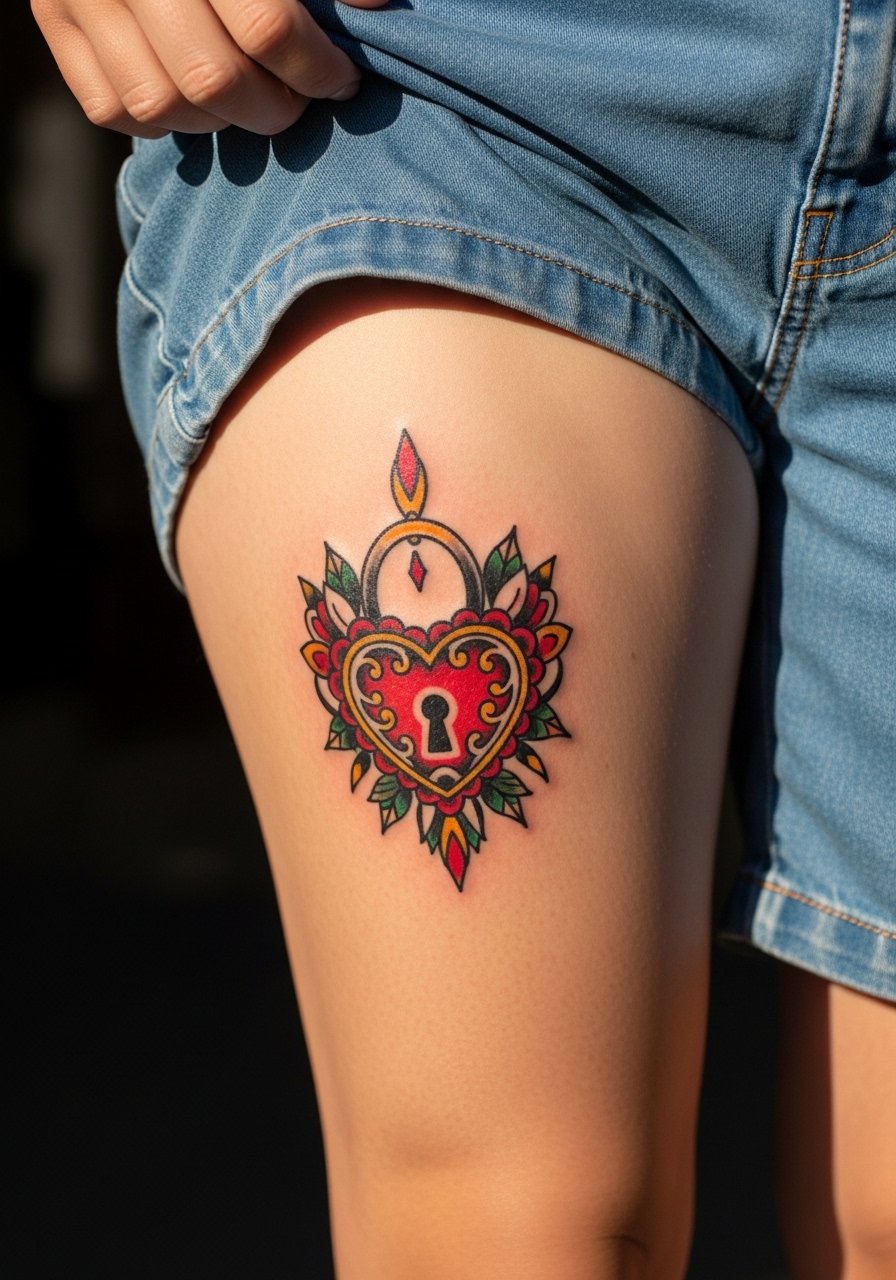
Thigh placements handle larger, colorful lockets well because the skin holds saturation across a wider surface. Expect low to moderate pain and two sessions for full color layering. Ask for bold outlines with saturated but warm fills so the vintage jewel effect stays vivid longer. The color vs black-and-gray debate applies here. One camp favors color for pop and personality. The other camp warns that bright pigments can fade unevenly. I recommend deeper reds and muted gold tones for longevity. For summer outfits, high-waisted shorts or skirts with slits frame the thigh piece. Try loose cotton shorts for casual showing.
11. Micro Lockets as Matching Finger Tattoos

Finger lockets read intimate but they carry heavy longevity trade-offs. The skin on fingers regenerates quickly and friction is constant. Expect a short but painful session and frequent touch-ups, sometimes yearly. A common mistake is treating finger work like any other small piece. In reality you should plan for fading and potential blurring. If longevity is a priority, slightly bolder contours and minimal interior shading help. Keep in mind that hand tattoos can affect job considerations in some fields, so decide accordingly.
12. Gothic Blackwork Locket on the Ribcage

Ribcage lockets look striking in dense blackwork but the area moves with breathing and weight change. Fair warning, the ribcage rates high on most pain scales, so expect an intense session and plan breaks. Artists are split on fine line there. One camp says the skin stretch blurs lines within two years. The other camp argues that with correct needle depth and spacing, fine line can settle well. Ask your artist which approach they use and why. A common mistake is asking for extremely delicate filigree on the ribs without allowances for skin movement. For memorial lockets, denser tonal work tends to age better here.
13. Tiny Locket Necklace Illusion on the Chest Center

Center-chest lockets mimic pendant necklaces and photograph like jewelry. Pain is moderate and one session usually covers a small, well-defined piece. Ask for a subtler chain illusion that sits lightly on the skin to avoid looking literal. A common mistake is adding too many interior highlights that need color to read. Over a few years the black and gray highlights keep the pendant effect without risking uneven color fade. When showing off, a bandeau or fitted sports bra keeps the look like a necklace without exposing more than intended. Consider a lace camisole for layered styling.
14. Victorian Lockets with Roman Numeral Dates on the Upper Arm

Adding dates in Roman numerals inside a locket creates a quiet memorial cue that reads like jewelry. The outer upper arm is low on movement and ages predictably. Tell the artist the exact numerals you want so the spacing sits well inside the locket. Expect low to moderate pain and a single session for a medium piece. A mistake is cramming long dates into a small lock. Over time the numerals deepened with the shading will remain legible if the lettering is slightly bolder than micro script. For casual show-off, short sleeves and neutral tanks frame the arm without distraction.
15. Skeletal Key Companion Across the Rib to Locket Pair
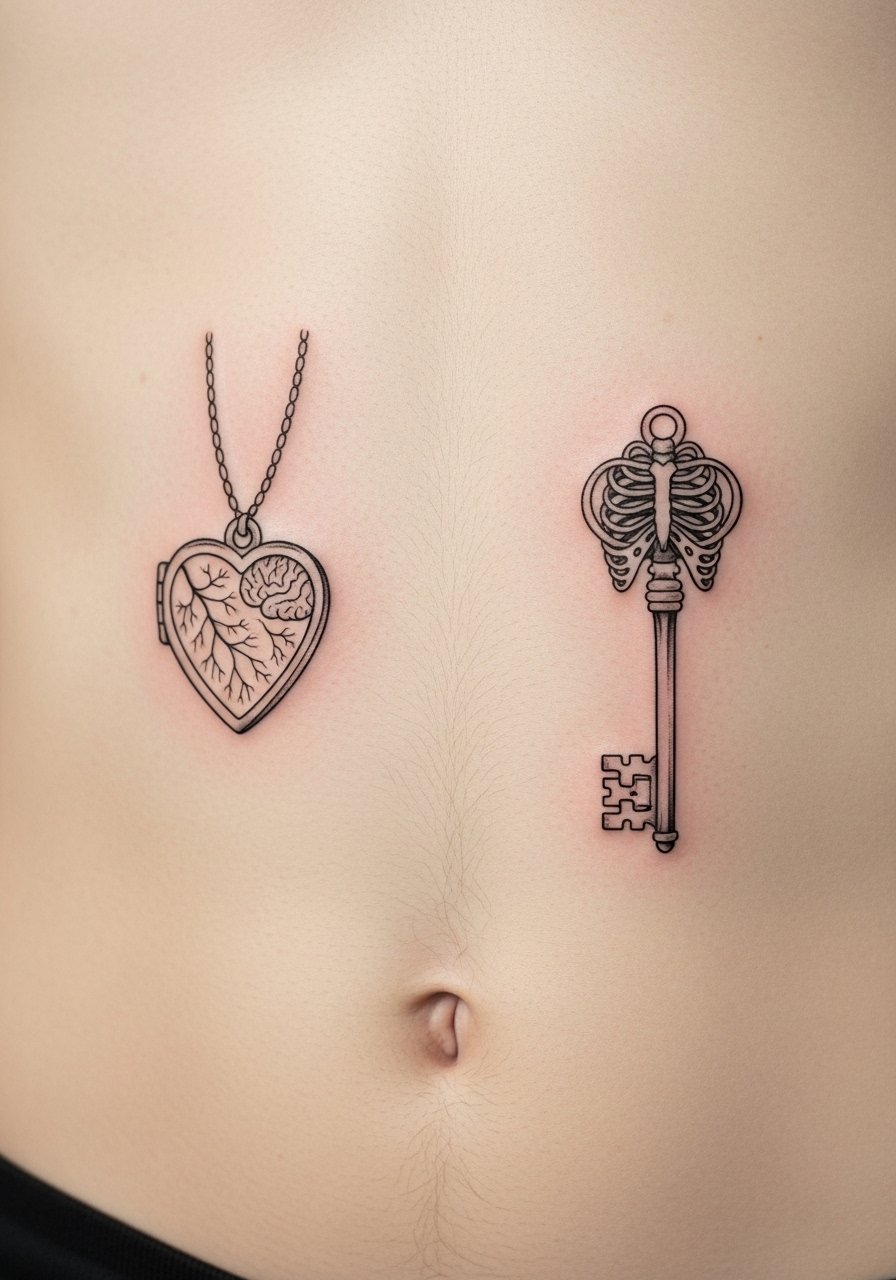
Couples and close friends opt for key-and-locket pairs to keep each piece discrete. When mapping a key across the rib and a locket on the opposite chest, balance scale carefully so neither overwhelms. The rib pain is high while the chest is lower, so consider splitting the sessions. A mistake is mismatched line weights between the two pieces. Ask your artist to mirror linework. Over time the key on the rib may need a touch-up sooner because of movement. Plan consults together so both pieces harmonize.
16. Minimal Locket Tattoo Behind the Ear with Neck Framing
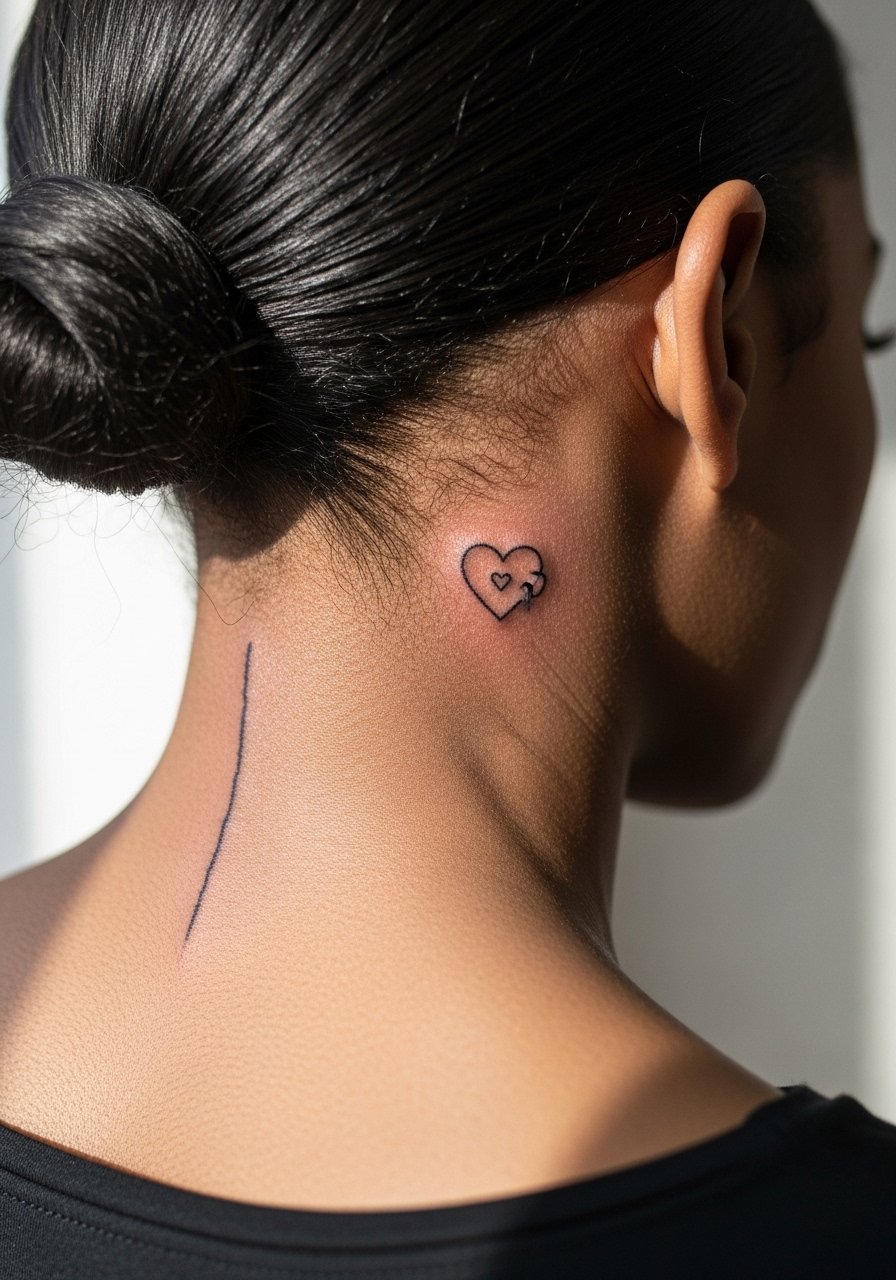
Behind-the-ear lockets are whisper-quiet and work as small personal marks. The area is sensitive and requires an artist skilled in small placements. Expect short but sharp pain and a very quick session. Keep the design minimal. One mistake is requesting too much interior shading in a tiny behind-the-ear piece. Also consider hairline coverage over time. This placement should be treated as a delicate accent rather than a detailed keepsake.
17. Ornate Locket on the Upper Back with Chain Wrap Detail

Upper back lockets let artists expand filigree motifs and run chain illusions onto the shoulder. Sessions are moderate in length and pain is typically low. During consultation, ask about how the chain will sit with movement so it keeps the 3D suggested curve. A mistake is failing to visualize how straps and clothing will hide parts of the chain. Over five years the larger elements maintain shape well as long as the lines are not squeezed too tightly. For the session wear a loose tank top that you can pull aside for shoulder access.
18. Tiny Locket on the Calf with Decorative Border
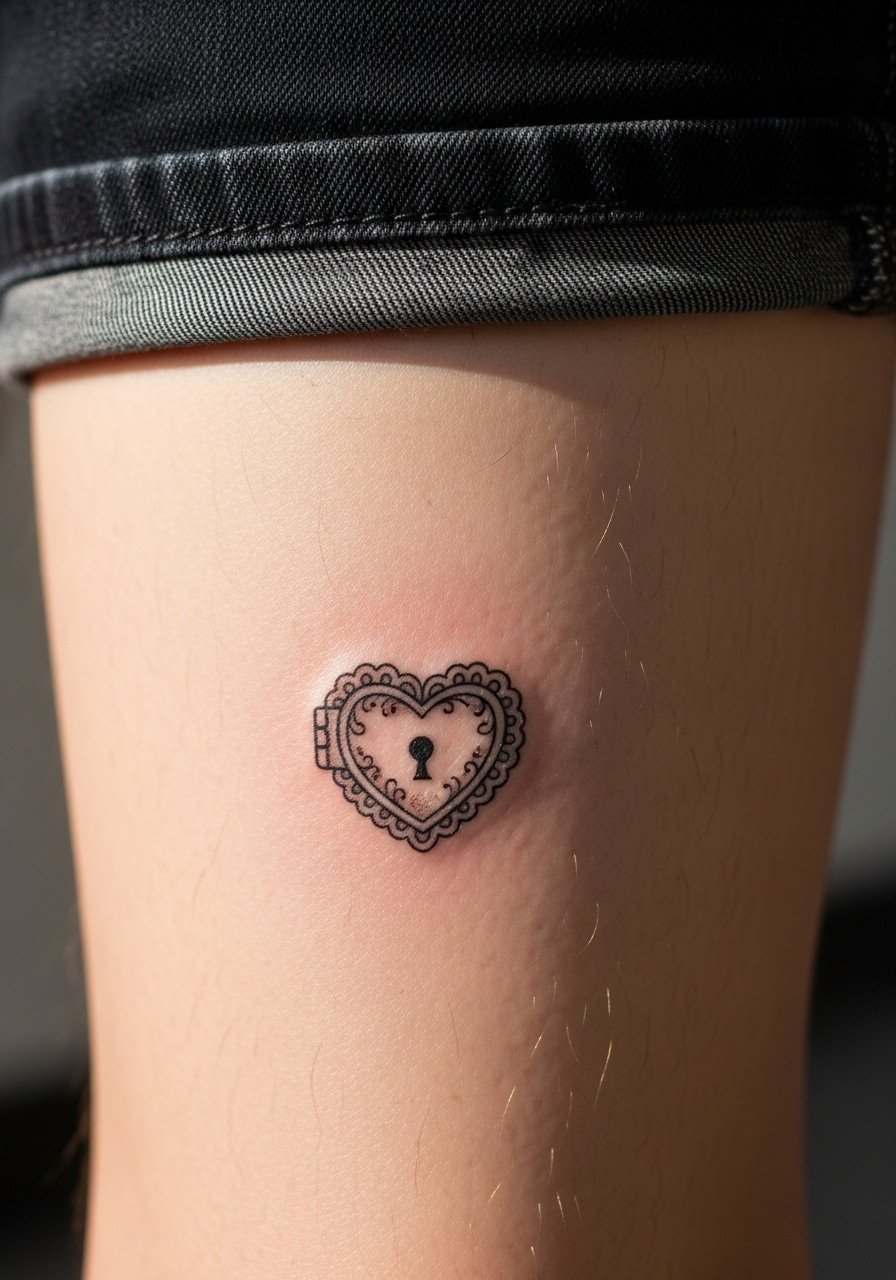
Calf placements are forgiving for small decorative lockets because the area rarely sees the same abrasion as hands and wrists. Pain is low to moderate and one session will usually suffice. Tell the artist you want a clean border and ask how it sits with muscle movement. A common mistake is undersizing a decorative border which then loses definition as the skin ages. At two years the piece should still read crisp if the linework was given enough negative space. For summer styling, a gold ankle chain can finish the look when wearing sandals. Try a gold ankle chain for a coordinated leg aesthetic.
19. Micro-Realistic Locket with Botanical Accent on the Shoulder Blade
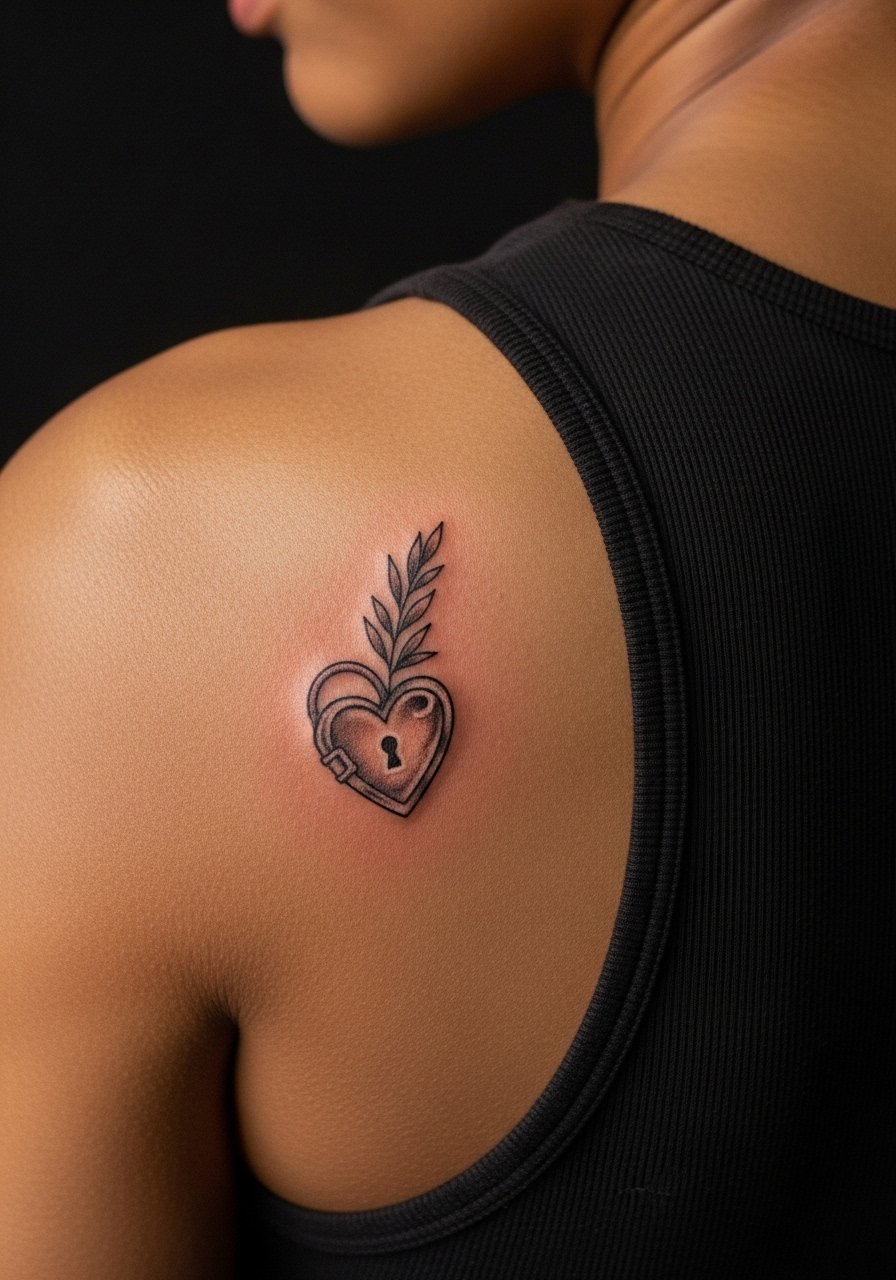
Shoulder blade lockets handle small realism plus a botanical flourish elegantly. Pain is medium and arm mobility can make positioning tricky, so expect slightly longer session time. Ask the artist for soft stipple shading for the botanical elements to avoid overworking the area. A mistake is compressing too much realism into a tiny shoulder blade piece. Over time the botanical accents merge slightly but keep shape if spaced properly. For showing, fitted tanks or halter tops complement the placement without covering more than needed.
20. Antique Locket with Mirror Illusion on the Sternum Edge
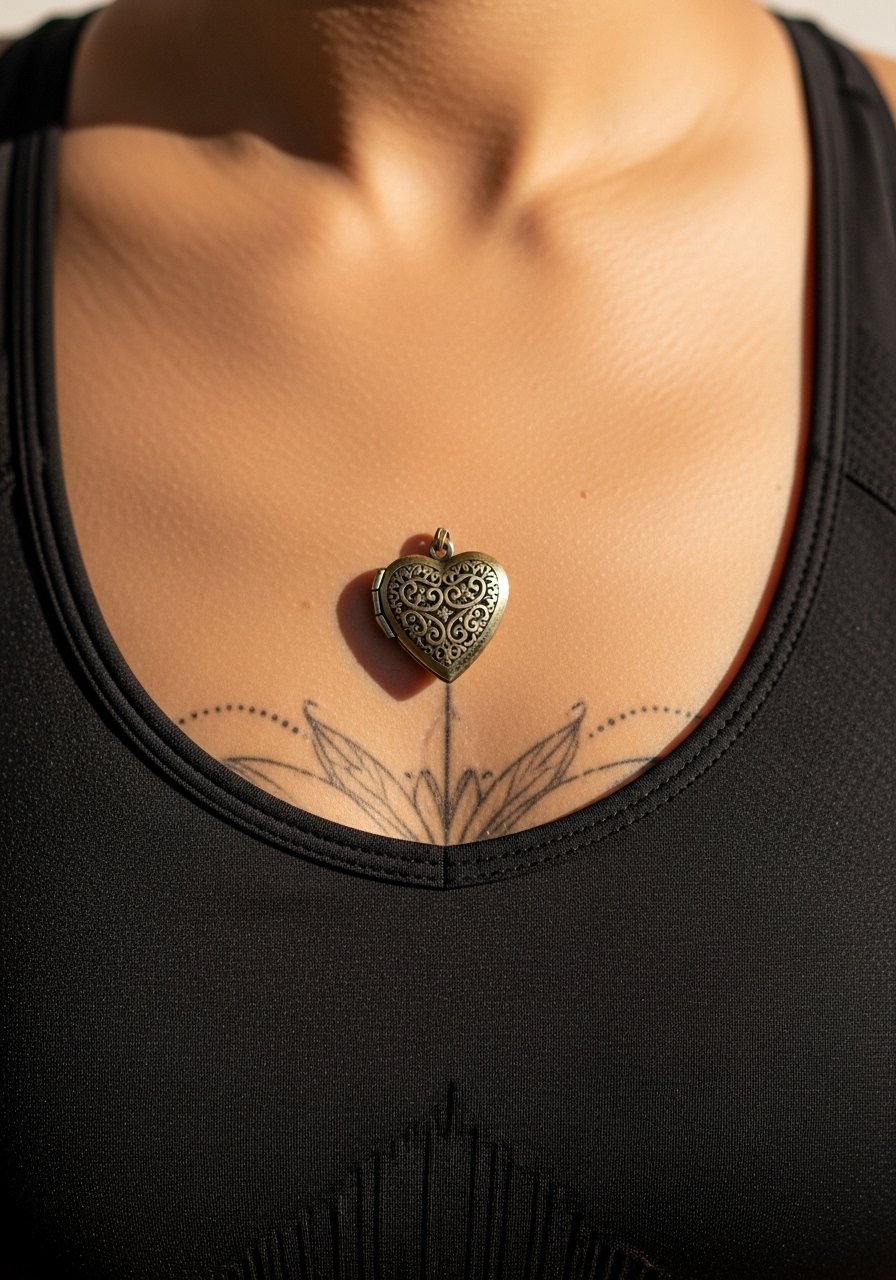
Sternum-edge lockets feel guarded and jewelry-like. The sternum area can be painful and sensitive, so expect a higher discomfort level. Ask your artist for subtle highlights rather than heavy white ink which fades oddly. A mistake is asking for extensive white highlights that lose contrast as skin tone changes. Over time the tonal contrast will settle into a soft gleam if the initial contrast was right. For appointments wear a strapless or fitted sports bra to give clean access and modest coverage.
21. Chain-Wrapped Locket That Follows the Collarbone Curve
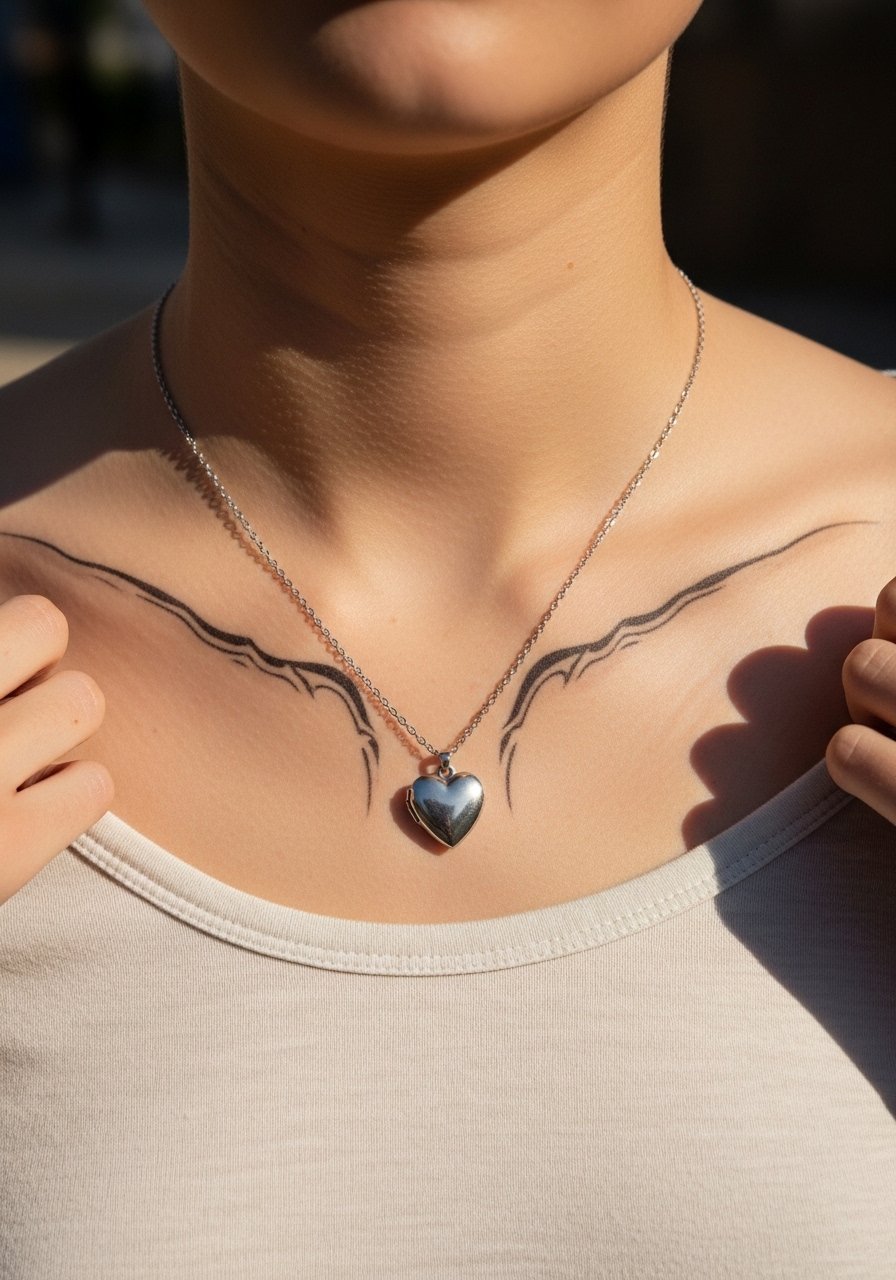
A chain that hugs the collarbone can make a small locket read larger and more intentional. Pain is low and a single session often does the trick for medium-sized pieces. During consult ask how the chain will curve with your bone structure so the illusion does not look flat. A common mistake is placing the chain too tight to the locket which reads awkwardly on movement. Over time the collarbone area ages predictably and the chain illusion keeps its shape if spacing is respected. Off-shoulder tops frame this design well for a jewelry-like look. Try an off shoulder blouse when you want the chain to sit visibly.
22. Simplified Masculine Locket on the Outer Bicep

For a more masculine approach keep filigree minimal and linework strong. The outer bicep is a comfortable spot with low abrasion, and pain is mild. Tell the artist you want a compact design that reads bold rather than ornate. A mistake is overfeminizing a design intended to be straightforward. Over five years stronger contour holds its presence better than fussy detail. Short sleeves and fitted tanks display the bicep without busy prints.
23. Tiny Open Locket with Script Inside on the Rib Edge
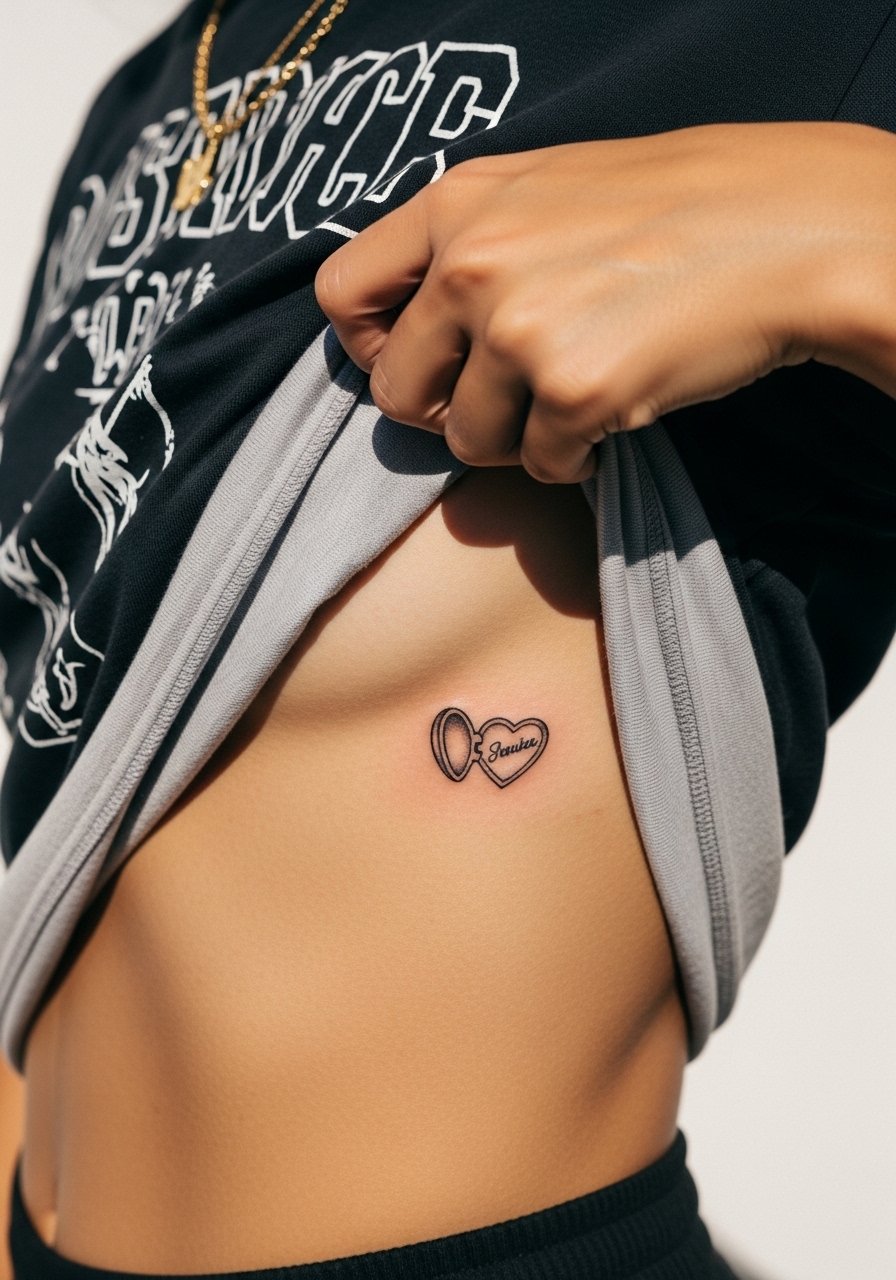
Placing a small script inside a micro locket near the rib edge creates a private message that peaks out with certain outfits. The ribs are sensitive, and expect a harder session. The controversy over fine line on ribs applies here too. Some artists will avoid ultra-fine script there because of skin stretch. The other camp argues spacing and needle depth can make fine script last. Ask the artist which approach they prefer. A common mistake is picking a long phrase. Keep it to one short word for best legibility over time.
24. Antique Cameo-Style Locket on the Thigh Inner Quadrant
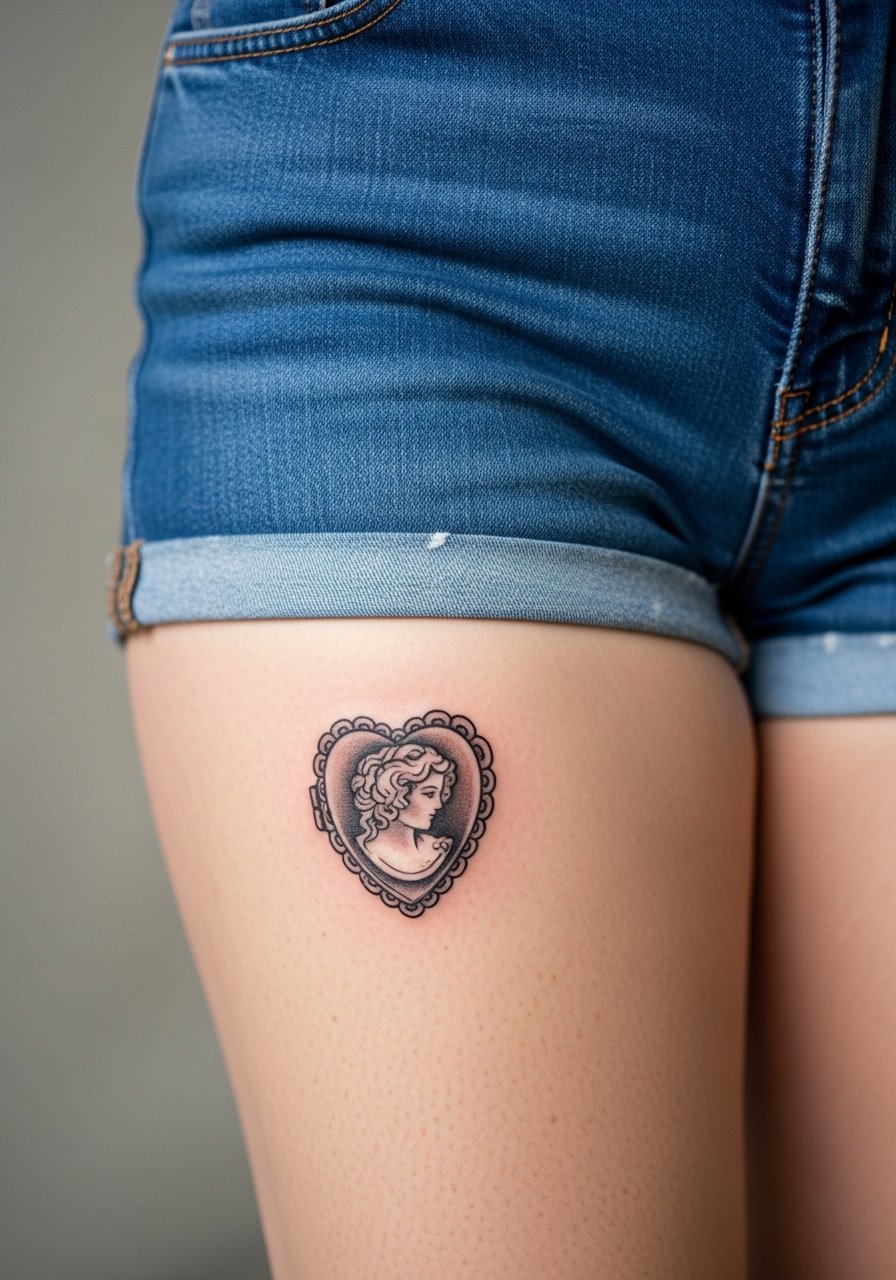
A cameo-style locket translates well on the thigh because the area allows larger, portrait-like negative space. Pain is low and sessions can include color or black and gray. Ask your artist how the cameo will read from different distances so the face remains suggestive rather than literal. Mistakes include over-defining tiny facial features which blur. Over time the cameo keeps a vintage silhouette if the face is kept stylized. For beach or summer looks try high-waisted shorts or skirts with slits to show the piece.
25. Simplified Black Locket Over the Heart Area

If you want a locket that reads intimate and understated, a simplified black version over the chest edge works well. The chest has moderate pain and a single session often suffices for small blackwork. Ask for strong contour with minimal internal detail to keep it readable over years. A mistake is requesting intricate ornamentation that competes with the chest contours. Over time the black silhouette ages reliably. For showing off, a cream silk top or wide-neck shirt keeps the piece framed without excess skin exposure.
26. Ornate Lockets That Curve with the Hip Line
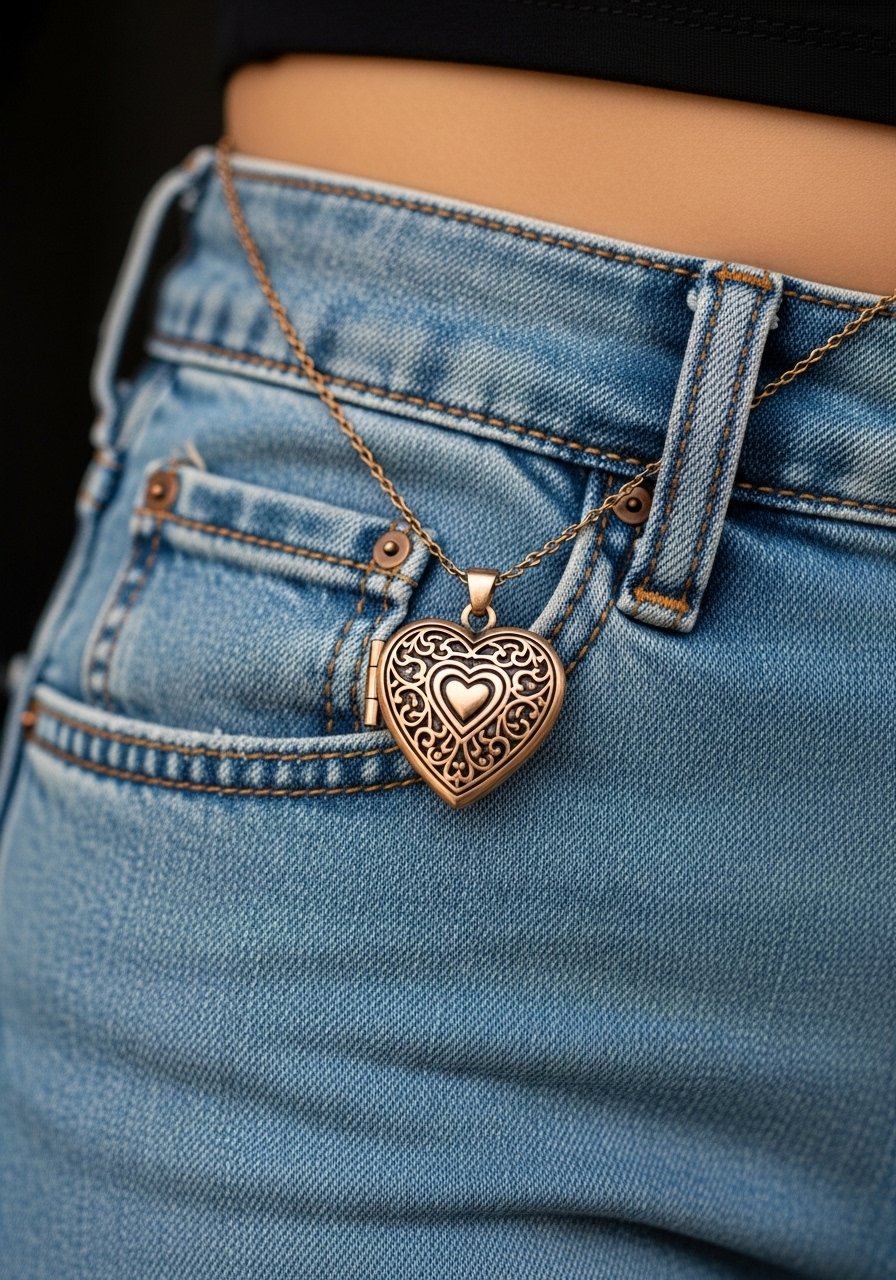
Hip lockets can be very private and work like pendants that sit at waist level. The hip is a medium pain area and can require a careful session as clothing rub can affect healing. Ask the artist to design the filigree so the pattern follows the hip curve for a natural look. A mistake is placing heavy detail where jeans will constantly rub. Over a few years the hip holds larger work well, but small fine details can fade. For the session plan to wear high-cut shorts or jeans you can lower slightly. Consider high-waisted pieces for styling.
27. Micro-Filigree Locket on the Inner Ankle
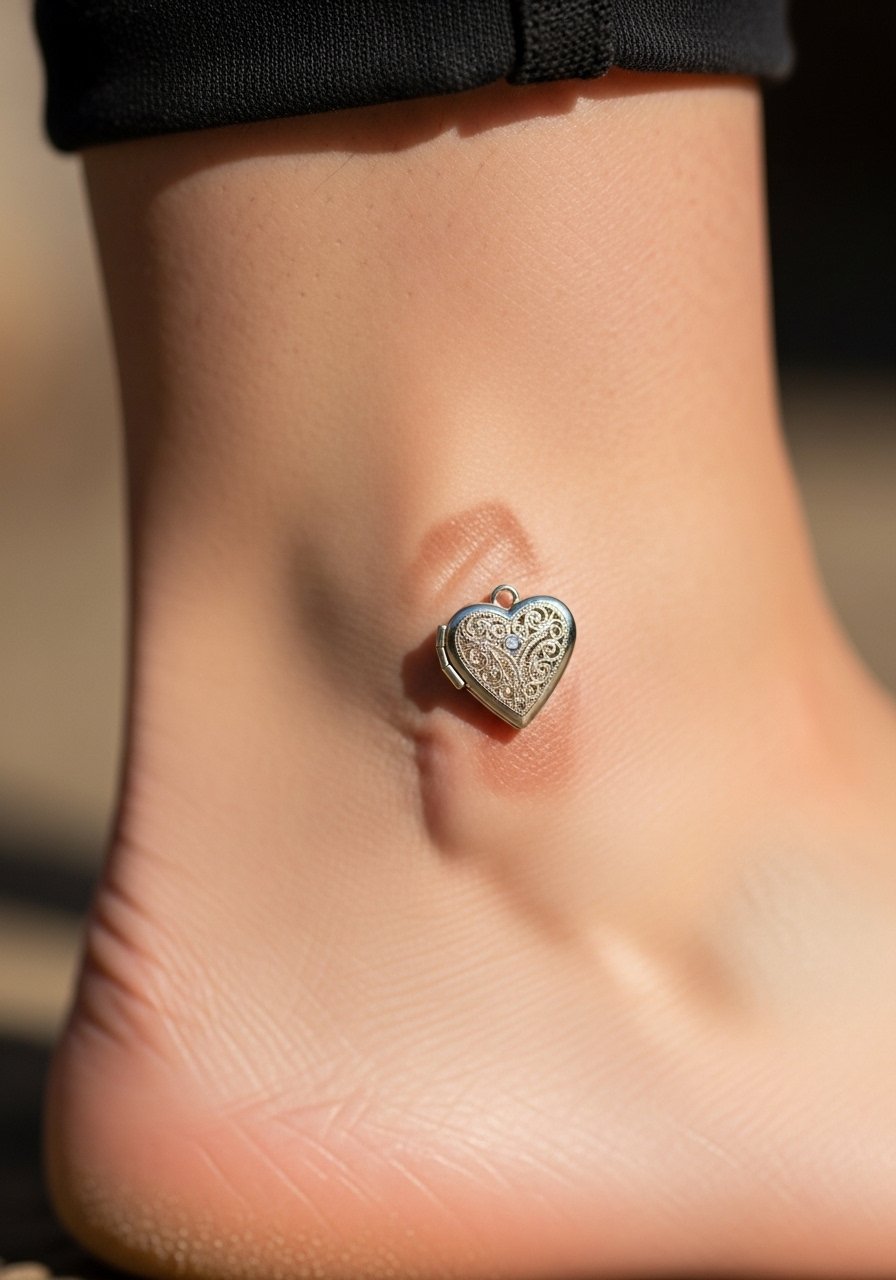
The inner ankle is discreet and pairs nicely with delicate filigree when kept small. Pain is low and healing is straightforward if you keep shoes and socks from rubbing. The biggest mistake is over-detailing; the ankle needs negative space to maintain clarity. Expect to book touch-ups earlier than on larger body areas because of daily friction. For show-off outfits, cropped ankle pants and thin ankle bracelets work well. Try a thin ankle bracelet to frame the tattoo without hiding it.
Frequently Asked Questions
Q: Will a fine line vintage heart locket on the wrist blur faster than a bold locket on the forearm?
A: Yes, fine line on the wrist faces more friction and movement than the forearm. From what I have seen, choosing slightly stronger contour and planning a touch-up around year two or three gives you the delicate look initially and the longevity you want later.
Q: For a memorial locket with a portrait, where should I place it so the detail stays readable?
A: Inner forearm or thigh are good bets because they offer flat surfaces and less constant abrasion. Tell your artist you want the portrait sized and sketched at actual scale during consult so you both agree on legibility before inking.
Q: Should I pick color or black and gray for a vintage locket that I want to keep looking old-world?
A: Artists split this one. Color brings jewel-like pop that looks fresh early and can fade unevenly. Black and gray tends to age into a subtle, heirloom look. If color is important, opt for deeper, muted pigments and expect a possible color refresh in a few years.
Q: If I want a matching key-and-locket set, how should I coordinate scale and line weight?
A: Book the sessions close together and bring both references to the consult. Ask the artist to match line weight and spacing so one does not look heavier than the other. That planning keeps the set balanced as it ages.
Q: What clothing should I choose for a collarbone locket session to give the artist proper access and keep modesty?
A: A wide-neck shirt you can pull aside or a strapless layer works best. For showing the healed piece, off-shoulder blouses or cream silk tops frame collarbone lockets without exposing more than necessary. Here is a cream silk top that lets the area breathe while you get work done.
Q: How often do ankle and finger lockets need touch-ups compared with thigh or upper arm pieces?
A: Ankle and finger work usually require touch-ups sooner because of friction and skin regeneration. Thigh and upper arm pieces often hold saturation longer. In my experience planning a touch-up window for hands and ankles around year one to two is realistic.
Q: Are there career or visibility concerns I should think about for hand or neck locket placements?
A: Yes, hand and neck placements remain visible and can affect certain job paths. If that is a concern, choose a placement that can be covered by clothing easily, or pick a time when you can manage visibility while job situations evolve.
