
Fine line roses are everywhere on saved boards, and the ones that still look clean after five years are often not the filigree pieces you think. Heavier linework and well-spaced petals resist merging, while tiny detail in high-friction spots asks for touch-ups sooner. Read these 17 stencil ideas with notes on where they hold up, what to tell your artist, and how to wear them so the rose actually gets seen.
1. Classic Blackwork Stemmed Rose on Inner Forearm

This is a go-to for people who want vintage energy without fuss. I suggest asking the artist for slightly heavier outer linework and open negative space between petals. That spacing keeps the petals readable at two and five years healed, and it reduces blowout risk on this thin-skinned area. Expect a moderate pain level and one session under two hours for a medium-size piece. Common mistake is asking for ultra-fine petals that age into a grey wash. For showing it off, roll sleeves and pair the piece with a loose button-down shirt so the rose sits in clear view without crowding.
2. Micro Rose on the Wrist with Single Line Stem

Tiny wrist roses read delicate but carry a high friction penalty from washing and bracelets. Tell your artist you want a single solid outline with no interior micro detail, and ask about touch-up timelines because tiny work often needs a light refill at year two. Pain is low to moderate, session is very short. The main mistake is packing too many dots inside the bloom, which disappear quickly. Style this with a thin chain bracelet that frames the wrist without rubbing the tattoo, and remove it during heavy hand work the first two weeks.
3. American Traditional Rose on Upper Arm
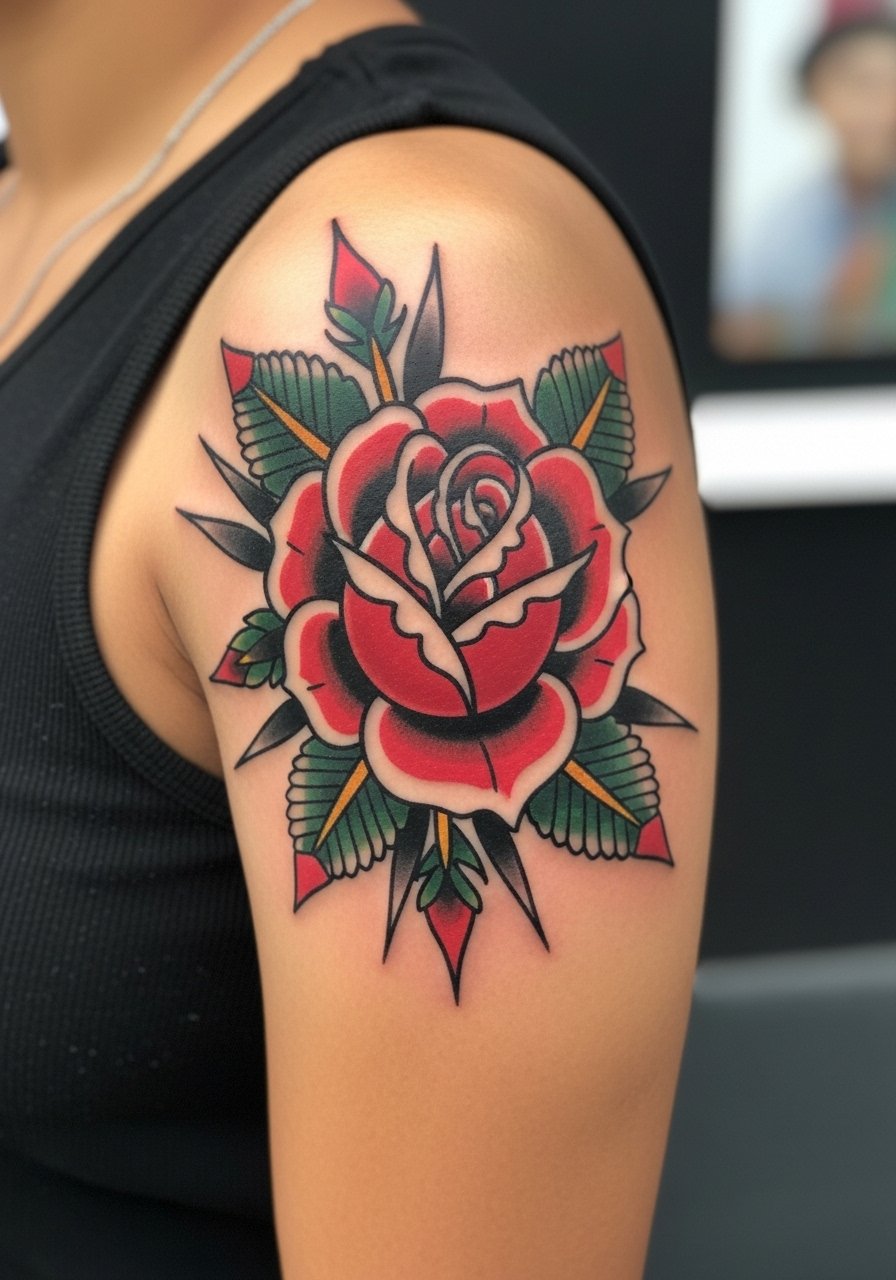
Classic saturation and bold linework are the elements that age best for traditional roses. Ask the artist for saturated black outlines and dense color fills rather than tiny gradients. This placement tolerates saturation well and the skin texture helps color keep. Sessions are usually one to two hours depending on size, and touch-ups happen in year three to five for color refresh. Beware the common request to shrink the flash down too small. For evenings or warm months, pair this with a loose tank top so the rose sits visible without sun overexposure.
4. Ribcage Drift Rose with Stipple Shading
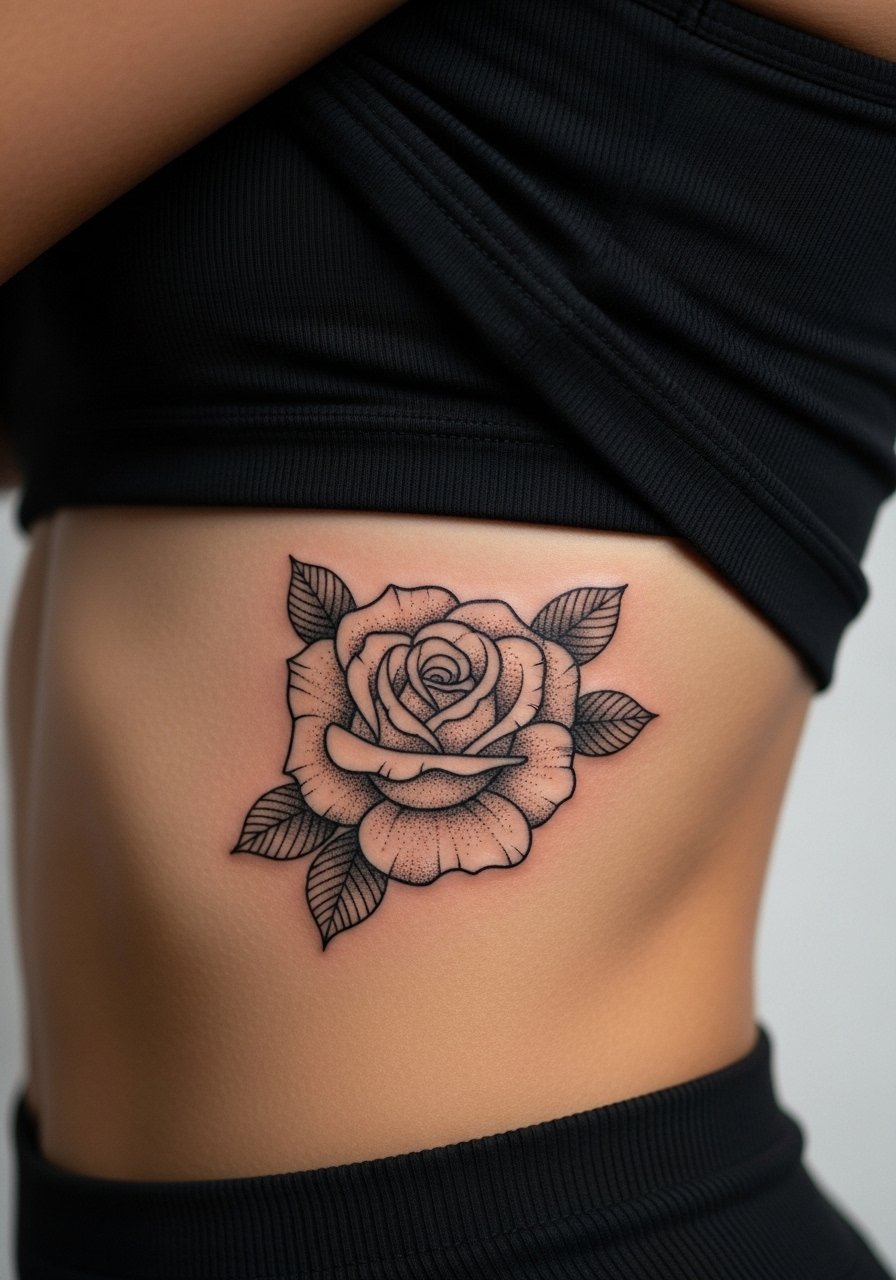
Fair warning about ribs, the area moves and stretches, and that affects fine line stability. Artists split into two camps here. One camp argues the skin will blur fine line within two years. The other camp says correct needle depth and spacing let fine line hold up on ribs. Name the debate in your consultation and ask which camp your artist falls into. This piece pairs best with stipple shading to give texture without relying on tiny lines. Pain ranges higher on ribs, sessions may require breaks, and expect a touch-up window at year two to three if you chose finer lines.
5. Dead Rose and Coffin Motif on Calf

A slightly macabre take, the dead rose works on the calf because the skin there tolerates heavier contrast. Tell your artist you want flattened petals and high contrast black to emphasize the "wilt" without relying on tiny lines that age poorly. Session time is moderate and pain is low to moderate. A typical mistake is soft grey fills that fade unevenly on the lower leg. For showing it off in warmer months, cuff jeans and pair with a loose drawstring linen pant that can be rolled without rubbing the area during healing.
6. Rosary Rose Script Near Collarbone
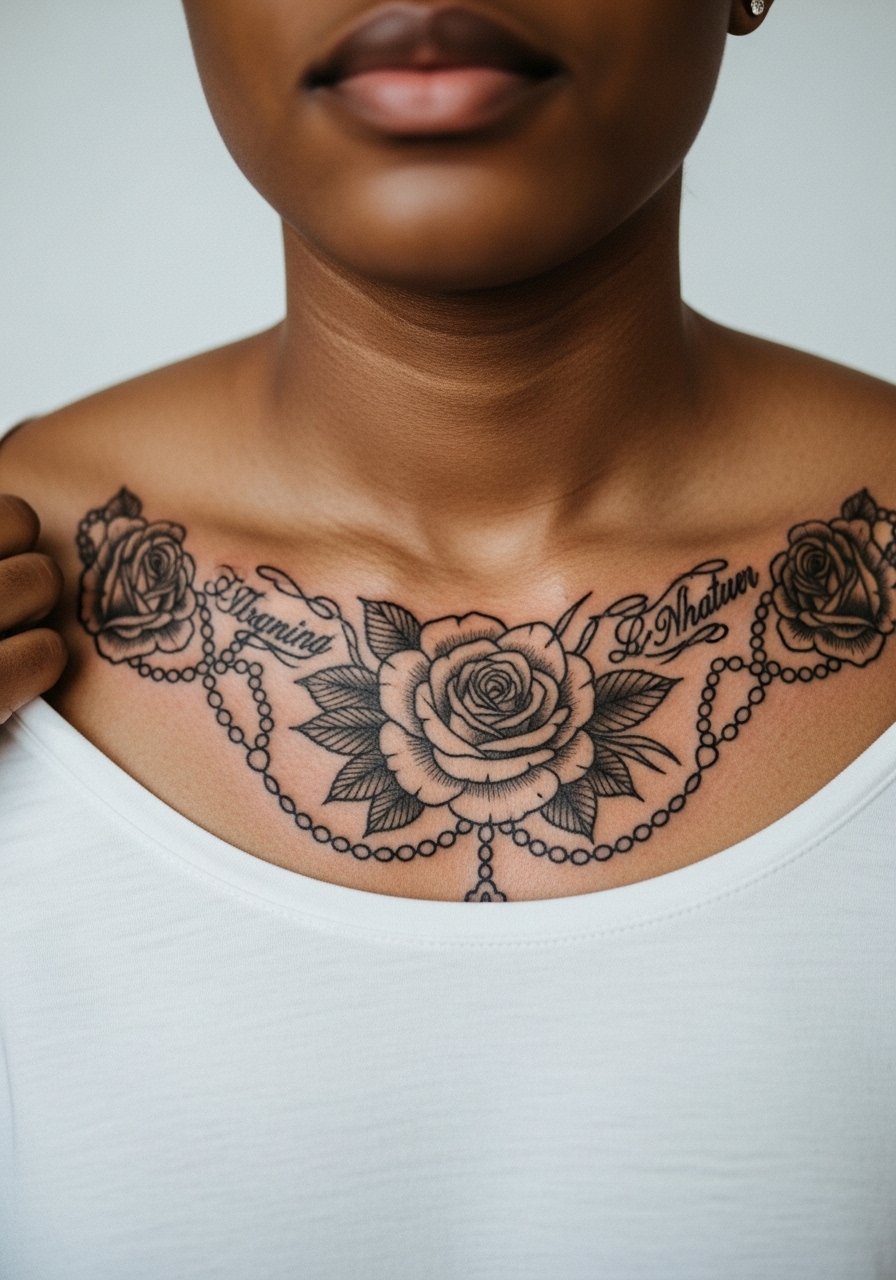
Faith-inflected roses need clear consultation about symbolism and font choice for the script. Ask for lettering that sits outside the petal edges so the type does not blur into the floral detail over time. Collarbone pieces can feel sharp during session and often need a short break. Blending a delicate rosary chain into the stem gives visual movement, and stipple shading keeps depth without heavy saturation. For show-off looks, wear open-back midi dresses or wide-neck tops that reveal the collarbone without overexposing skin to the sun.
Studio Day Picks
These items help with the small-area and chest work above, and they smooth session day or the first week for the forearm, wrist, and collarbone pieces.
- Stencil transfer paper kit. Lets you preview linework placement on skin before committing, which is useful for wrist and forearm pieces that look bigger in real life.
- Topical numbing cream. Applied as directed before a collarbone or rib session it makes higher-pain areas more manageable.
- Thin protective film roll. Keeps small wrist and finger tattoos cleaner during the first week when friction and washing are highest.
- Fragrance-free body wash. Gentle cleansers prevent irritation on delicate linework, especially around collarbone and forearm pieces.
- Aquaphor healing ointment. Thin layers for the first few days help retain moisture and support fine line healing without clogging.
7. Geometric Rose with Dot Work on Shoulder Blade

Geometric additions frame a vintage rose nicely and shoulder blades take detail well because the skin is firmer. Tell your artist to space dots and lines so they do not become a single mass at year three. This placement is low pain, and sessions can be broken into detailing windows if you want dense dot work. A common error is cramming geometry too tightly against the bloom. For outfits, wear a loose button-down shirt you can pull aside to expose the shoulder blade cleanly during styling or while getting tattooed.
8. Wrist Band Rose Chain
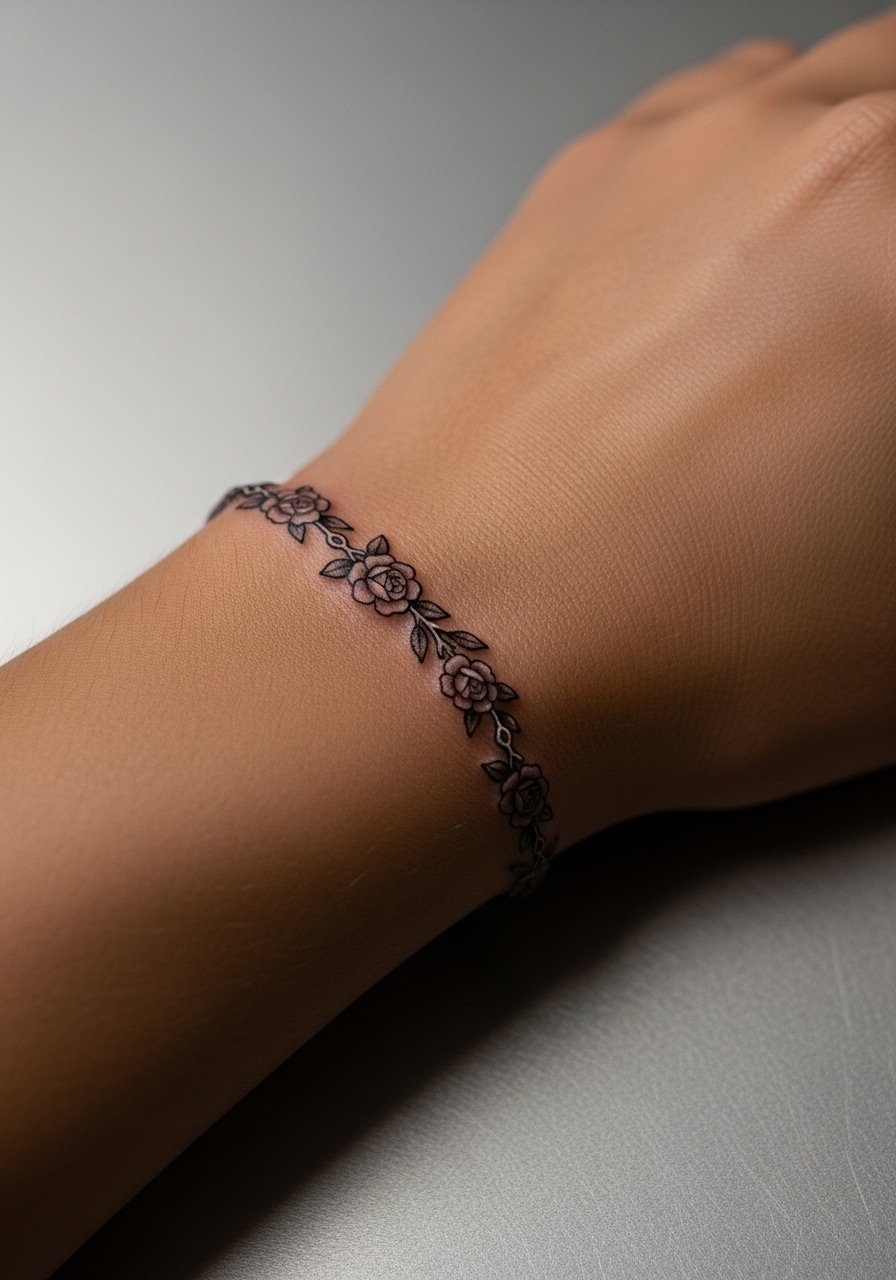
A wrist band of tiny roses reads like jewelry but it competes with bracelets physically. Ask for slightly larger blooms with negative space between them so the band stays readable after frequent hand washing. Pain is low and session time is short. People often underestimate the rubbing from watches and bands. During the session and the first week, wear a racerback tank so the artist can clearly see and work the wrist without tight cuffs.
9. Ankle Vintage Rose with Leaf Accent
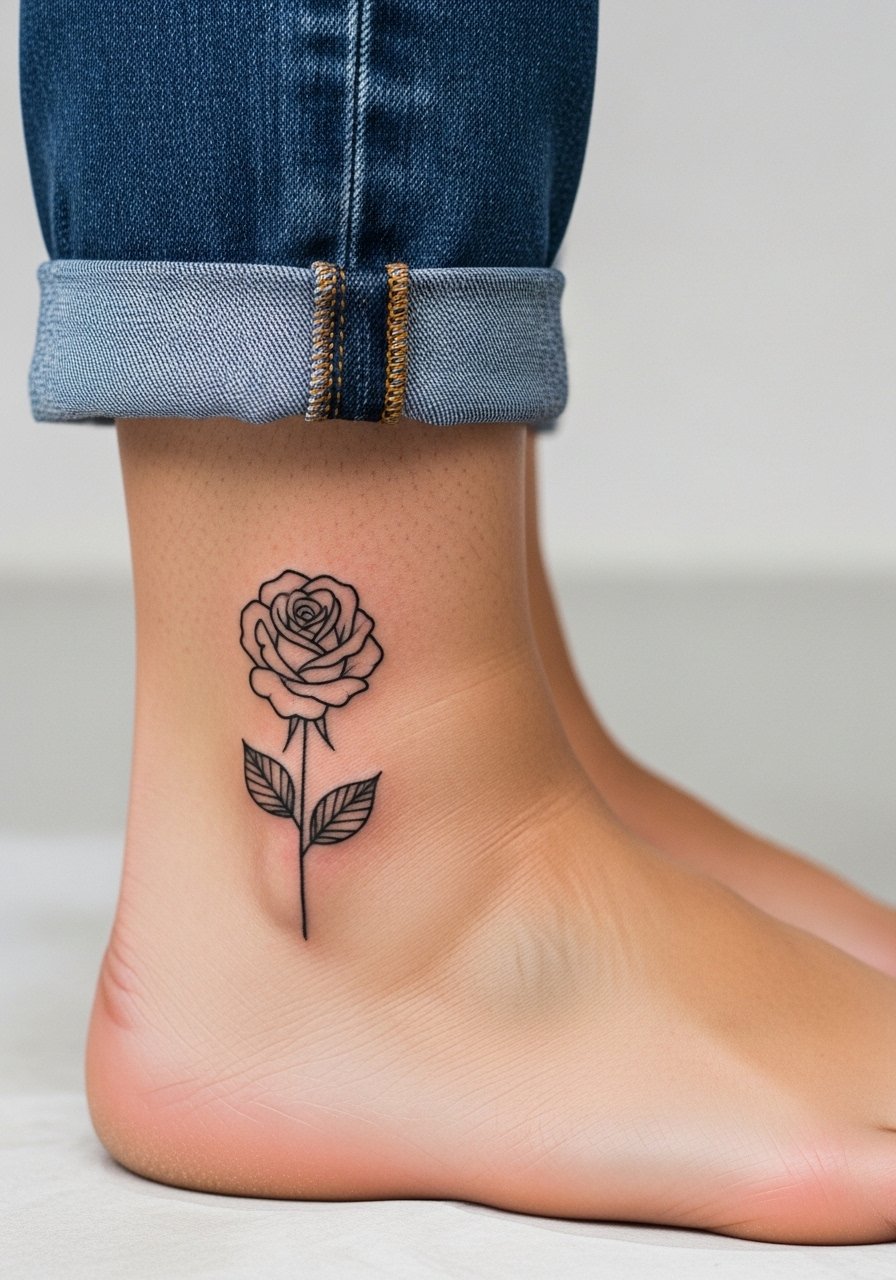
The ankle tolerates small motifs but suffers from shoe friction. Order the stencil slightly higher on the ankle so it does not hit the shoe line directly. Pain is moderate, thanks to thinner skin and less padding. A common mistake is asking for tiny leaves that fade into blur at year two. During healing, keep footwear loose and use sandals where possible. For showing it off, roll jeans or slip into sandals and consider a minimalist ankle chain once fully healed to frame the piece.
10. Tiny Finger Rose Beside Knuckle
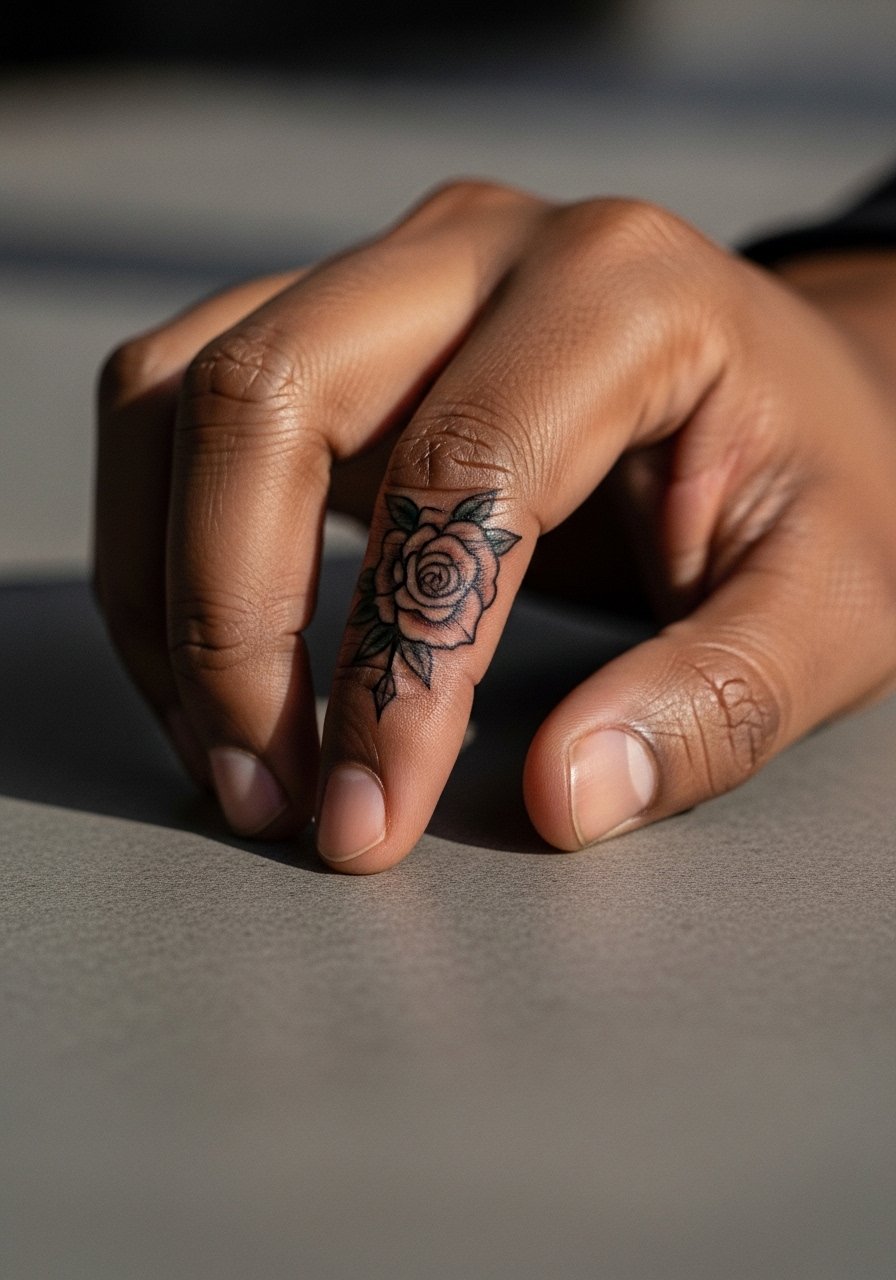
Finger tattoos age differently because the epidermis regenerates frequently and there is constant moisture and wash contact. Tell your artist you accept likely touch-ups at year one or two. Keep the design simplified, avoid interior shading, and expect a quick, sharp sting during the session. The mistake is requesting dense shading where the skin cannot hold it. For wearing during the appointment, remove rings and bring a small cloth pouch to keep the area clean. After healed, a thin stackable ring can complement the placement without crowding the art.
11. Bouquet Cluster for Upper Thigh
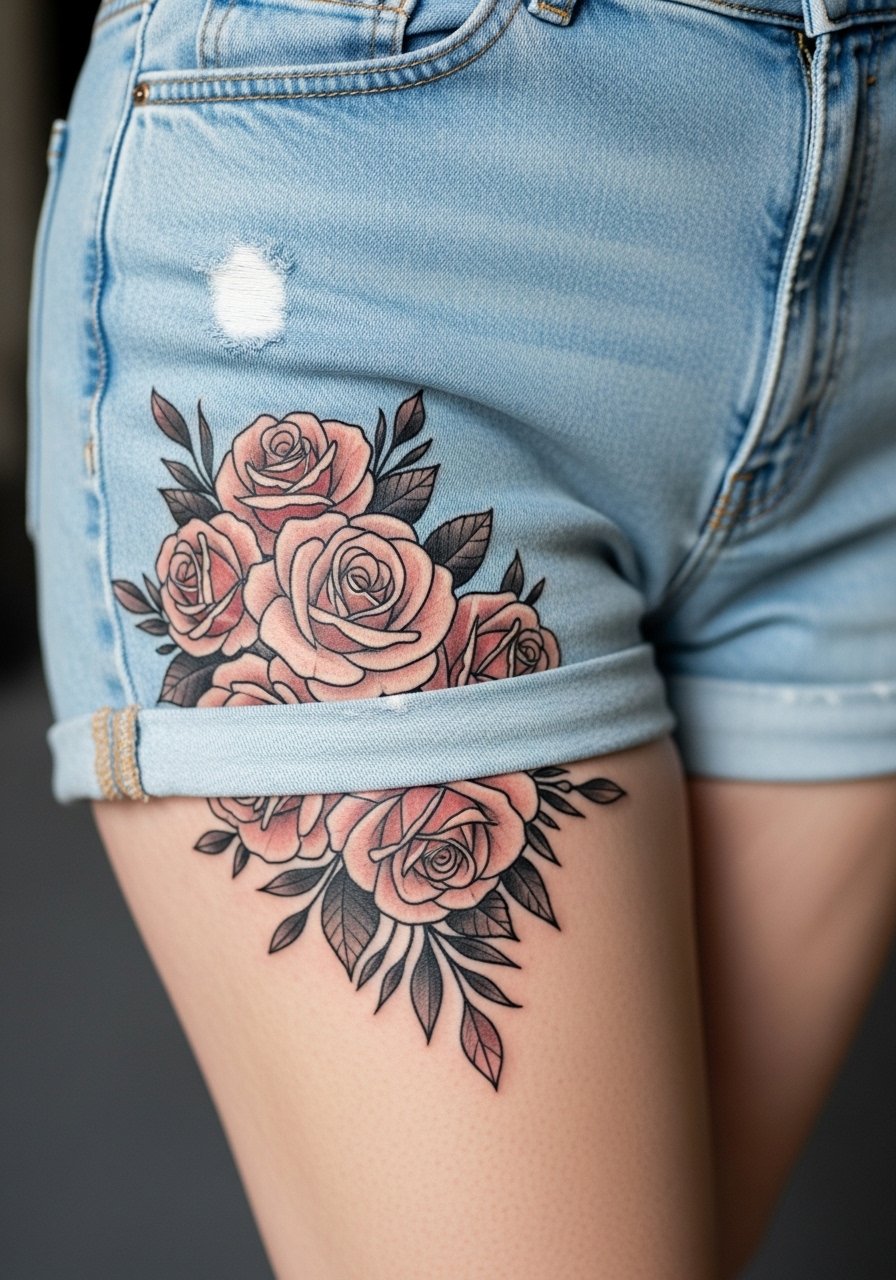
Thigh skin holds detail well and can accept slightly denser compositions than wrist or ankle. Ask for petals with clear negative space and avoid micro realism that relies on tiny stippling too close together. Sessions may run longer because you can cover more area in comfort. A common error is choosing heavy black fills that feel overwhelming on lighter clothing. For the studio, wear high-waisted shorts you can shift for access and that keep pressure off the area during travel home.
12. Minimalist Line Rose Behind the Ear
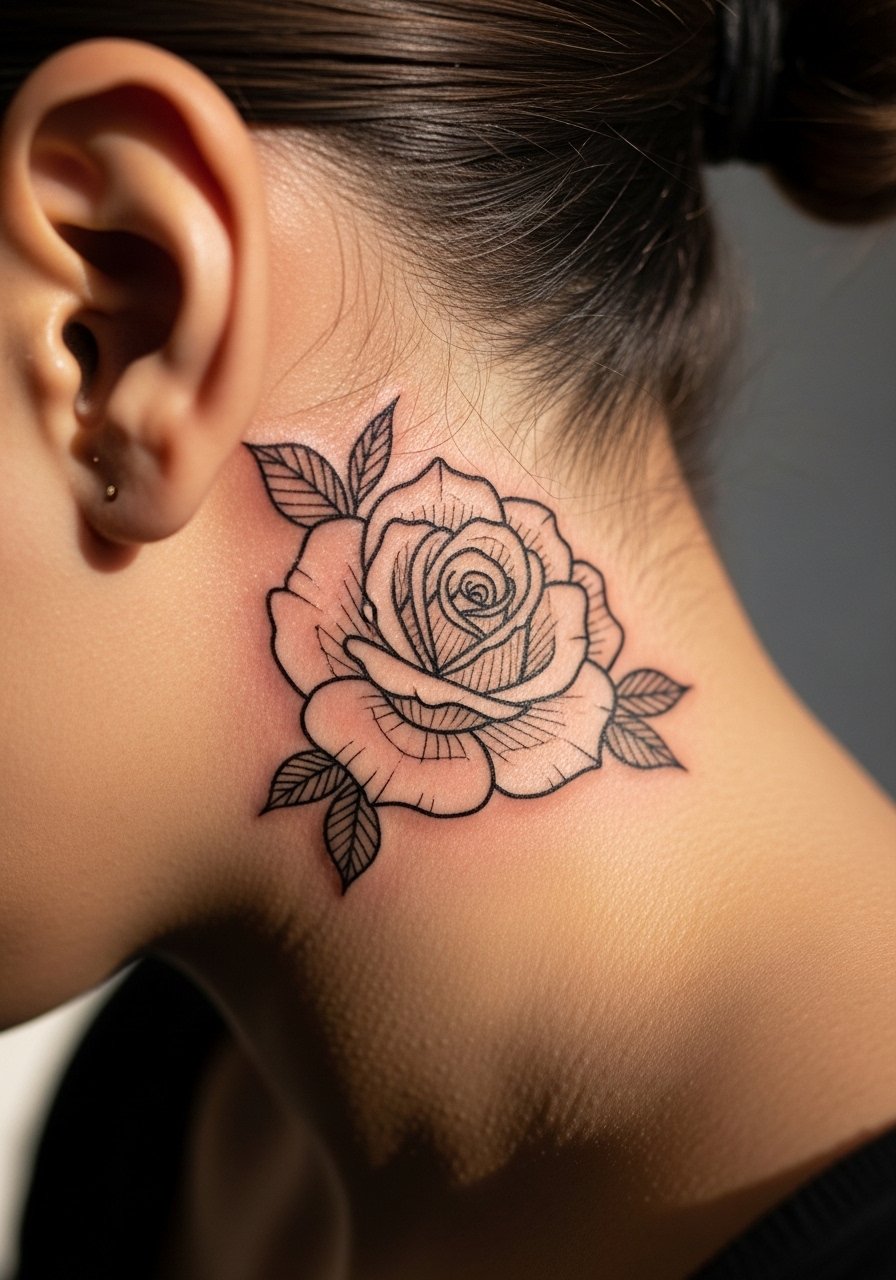
Behind-the-ear pieces are intimate and require careful placement under the hairline. Use the phrasing "on the skin just behind the ear, below the hairline" in your consultation to ensure correct stencil positioning. Pain is low to moderate. The real risk is choosing ultra-fine detail that the area cannot hold. If you plan to show it, sweep hair behind the ear or pair with a thin chain pendant necklace to draw attention without removing hair coverage during cooler months.
13. Sleeve Starter Rose Cluster for Forearm Wrap
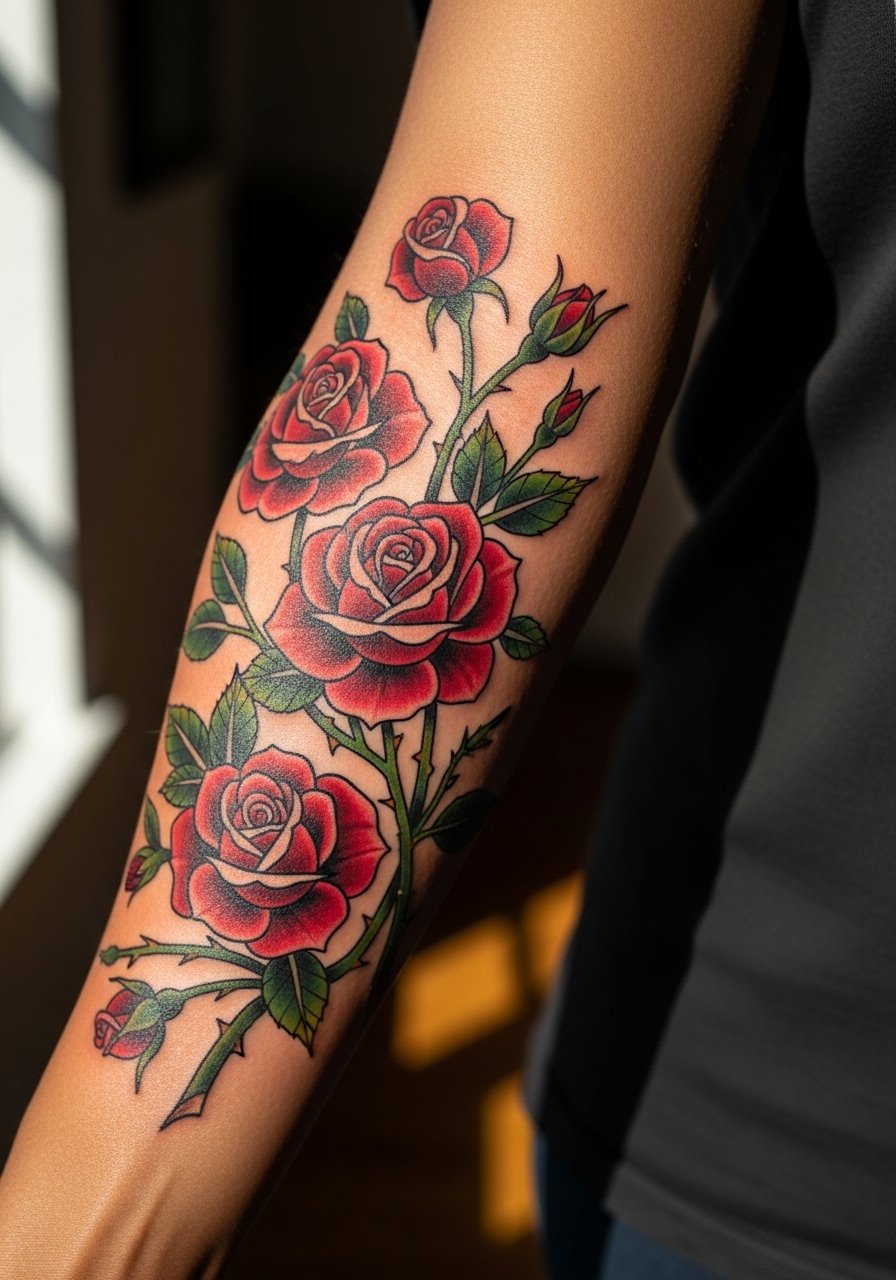
As a sleeve starter, place primary blooms with breathing room and reserve dense filler for later sessions. Tell your artist you want bold anchors and lighter secondary elements so future expansion does not overcrowd the main roses. Forearm skin handles saturation, and the area is visible enough that wearing rolled sleeves displays the work. A common mistake is cramming filler into the wrist area early, which ages into visual noise. For styling, roll sleeves and try a loose drawstring linen pant to keep attention on the arm without seasonal layering.
14. Vintage Rose with Banner Script on Sternum
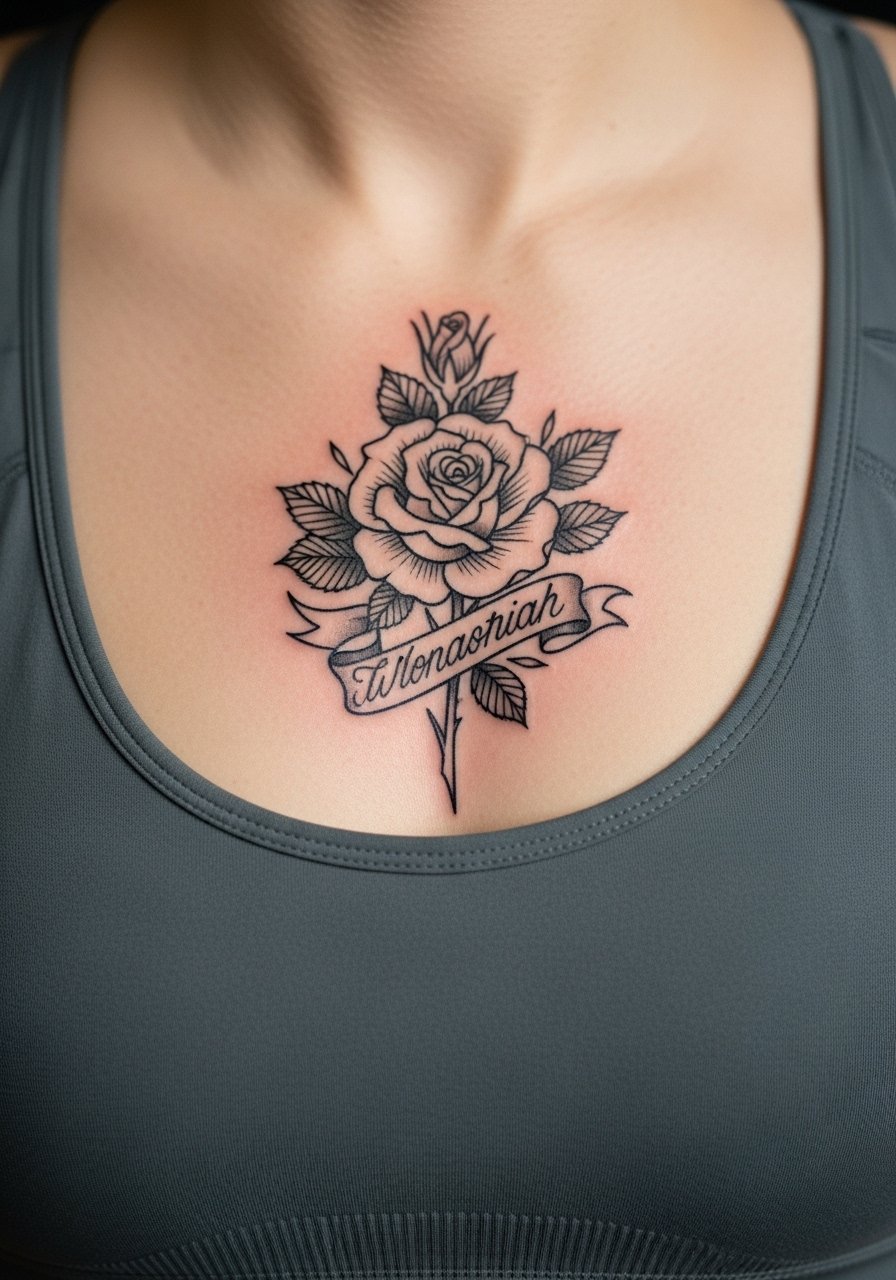
Sternum pieces require a wardrobe plan for the session and modesty. Request the script be placed outside the central petal cluster so movement does not smudge the letters over time. Pain is higher and sessions can be interrupted for comfort. The frequent mistake is asking for too many tiny flourishes in the banner. For the appointment, wear a fitted sports bra that you can easily lift or remove while keeping coverage, and plan gentle sleep positions for the first week.
15. Watercolor-Adapted Vintage Rose on Back of Shoulder
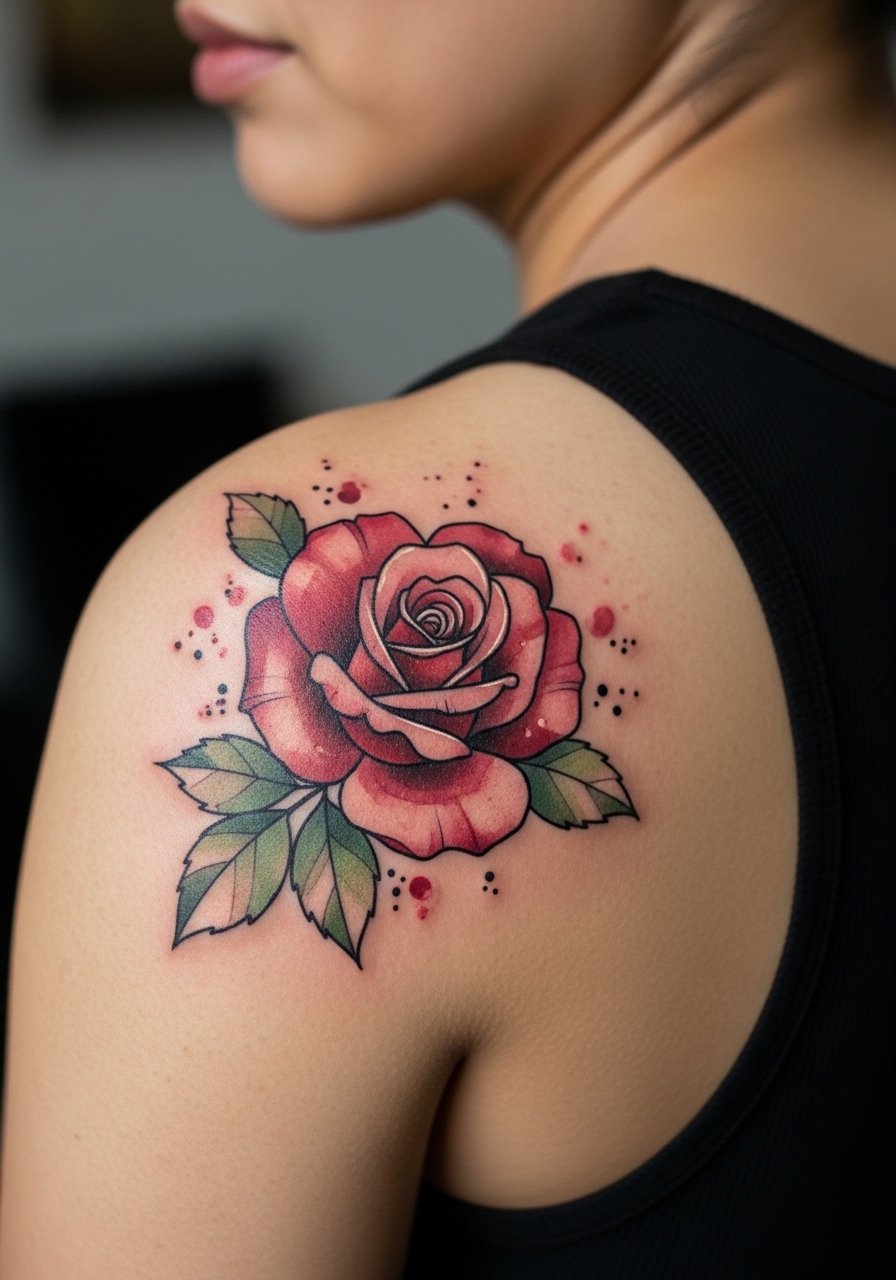
Watercolor approaches can look lovely, but pure watercolor washes tend to disperse and fade over time. Ask for a structured outline or stipple anchors to protect the softer color so the piece keeps form years later. The back of shoulder has moderate pain and accepts color well. Sessions may split into color and detail days. A common error is expecting vivid pastel washes to last without touch-ups. For styling, a strappy tank top shows the back shoulder without constant sun exposure.
16. Single Stem Rose Along Collar of Upper Back
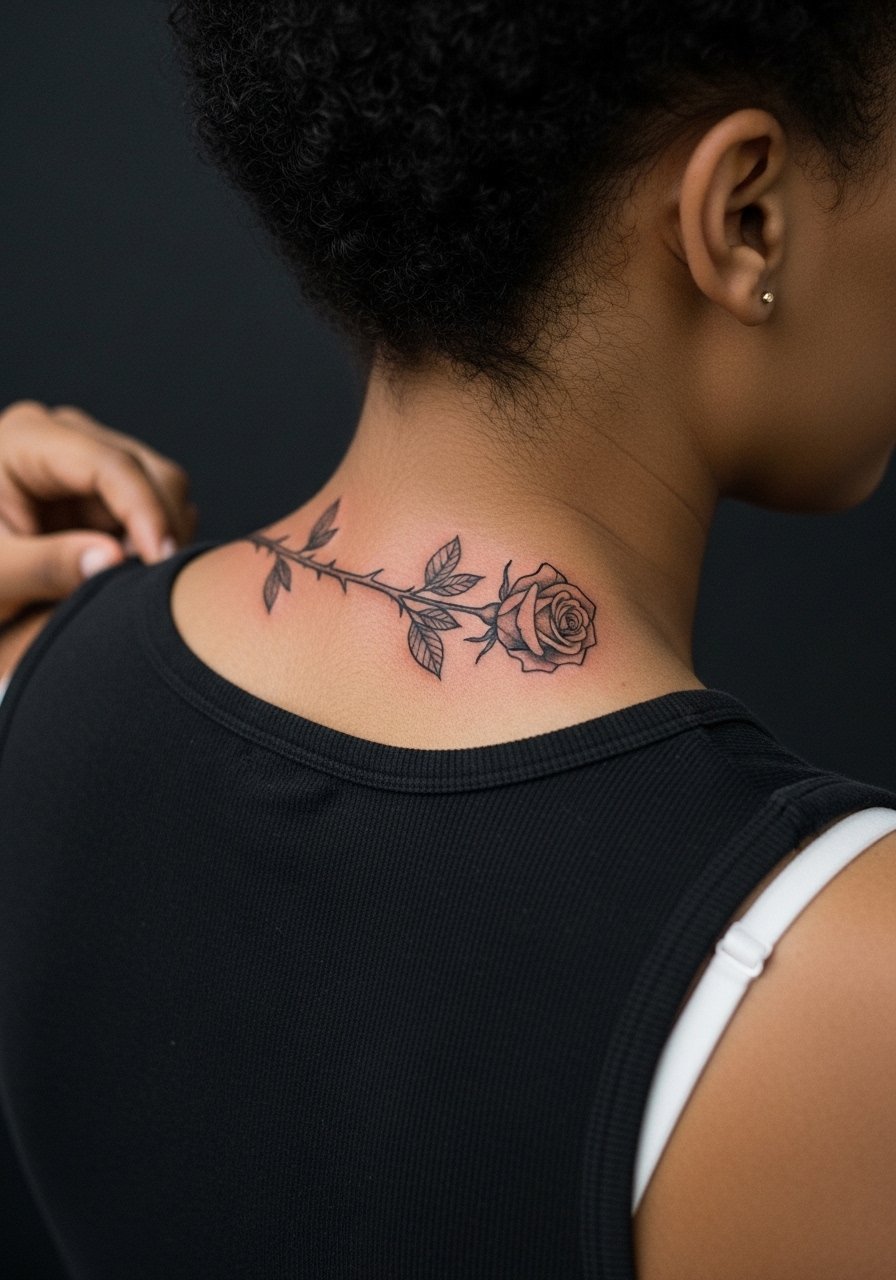
A vertical stem along the upper back collar reads like a pendant when wearing cross-back or open-back tops. Ask for slightly bolder outer lines on the stem and leaves to resist blur from shoulder movement. Pain is moderate and sessions are quick if kept narrow. The mistake is adding too much small detail that disappears on movement. For evening wear, try an open-back midi dress that frames the stem without exposing more skin to UV.
17. Blackwork Pocket Rose Near the Ankle Bone
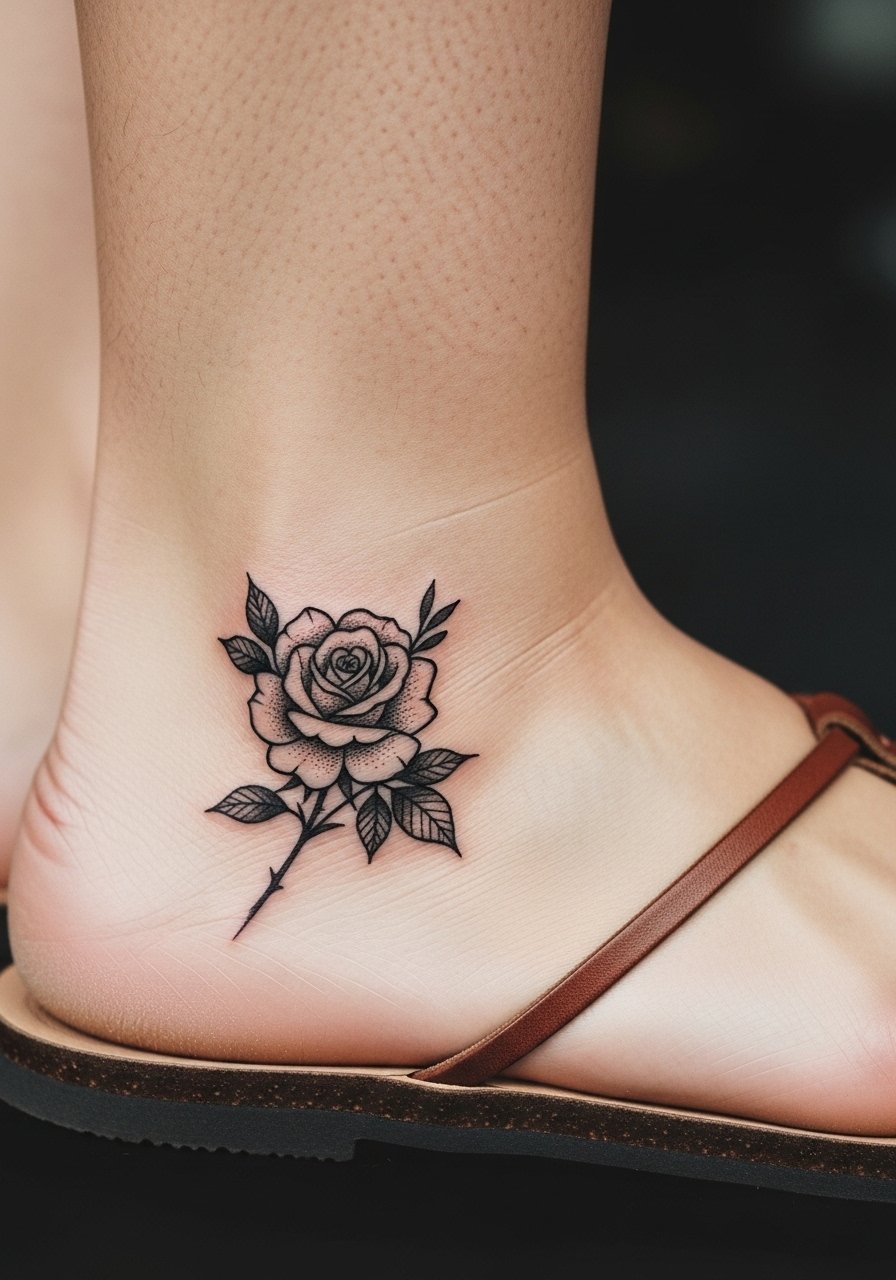
A pocket rose near the ankle bone looks intentional and sits away from shoe rub if placed wisely. Ask your artist to position it slightly above the shoe line and to use bold outerwork with minimal interior shading. Pain is moderate because of thin tissue and proximity to bone. The common mistake is placing the design too low where shoes scrape it during every step. For display, pair with low sandals and a minimalist ankle chain once fully healed so the rose reads like curated jewelry.
Frequently Asked Questions
Q: Will fine line vintage roses blur faster than bold blackwork?
A: From what I have seen, fine line tattoos tend to lose crispness sooner, especially in high-friction spots like wrists and fingers. Bold blackwork and slightly heavier outlines often age into readable shapes more reliably, and that makes them a safer bet if longevity is your priority.
Q: How should I prepare wardrobe-wise for a collarbone or sternum rose session?
A: Wear clothing that gives the artist clean access while keeping you comfortable, such as a wide-neck shirt or a fitted sports bra you can lift. A loose button-down shirt or a fitted sports bra both work depending on whether the piece is upper chest or sternum.
Q: If I want a rose sleeve, how do I make sure the main blooms stay readable years later?
A: Start with bold anchor blooms spaced with negative areas and keep filler to a lighter hand. Tell your artist you want room for expansion so future sessions add depth without crowding the main roses. Anchors with heavier outer linework help maintain shape as the piece ages.
Q: Are there placements you would avoid for ultra-detailed vintage roses?
A: I would steer clear of fingers, palms, and the inner wrist for ultra-detailed micro realism. Those zones regenerate or rub constantly and small details are the first to go. If you want detail, pick the thigh, upper arm, or shoulder blade instead.
Q: How soon should I expect a touch-up for a small wrist or finger rose?
A: Expect a possible light touch-up around year one to two for very small work, especially on fingers and wrists. The timing depends on your skin, sun exposure, and daily wear, so plan accordingly.
