
The tattoos that still read clean after five years are often the ones that looked a little plain on day one, not the hyper-detailed snapshots that light up social feeds. Heavy outlines, saturated fills, and smart placement resist blur and fade in ways delicate work does not. If you want a vintage half sleeve that holds its look, think about line weight, where the arm flexes, and how you will show it off once it heals.
1. Sailor Jerry Anchor with Swallow and Rose on Outer Forearm
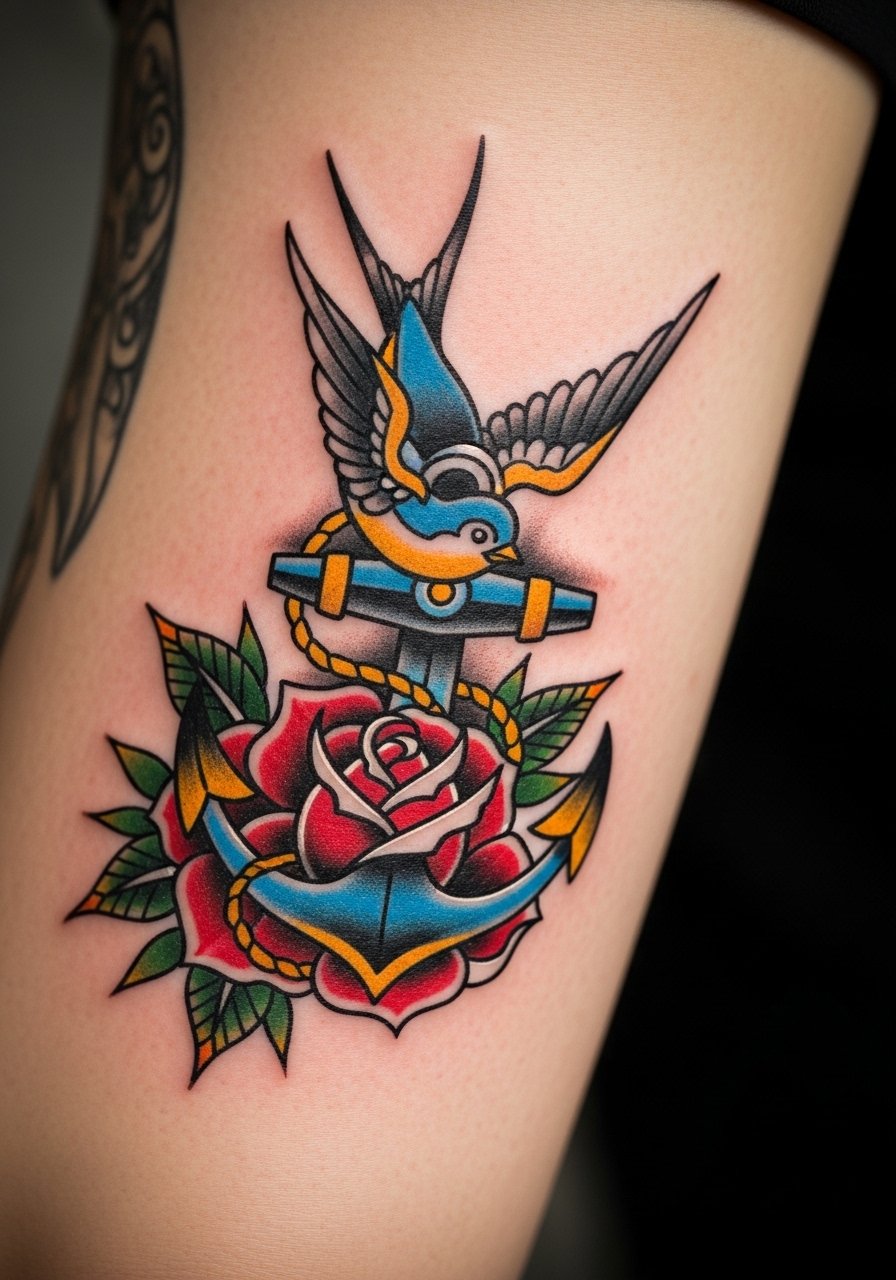
I recommend this classic for guys who want a visible half sleeve that ages into clarity. Tell your artist you want heavier outlines, around one-quarter inch, and saturated red fills so the rose keeps shape as the piece heals. A common mistake is asking for tiny details inside the rose petals, which blur on hairy forearms; choosing broader petals keeps the motif readable at year two and five. Expect two to three sessions and a moderate wrist-to-elbow soreness during the second session when the comp passes the elbow crease. For showing it off, roll sleeves and wear a rolled sleeve henley in navy or charcoal so the primaries pop without clashing.
2. Neo-Traditional Skull with Banner and Dagger on Upper Arm
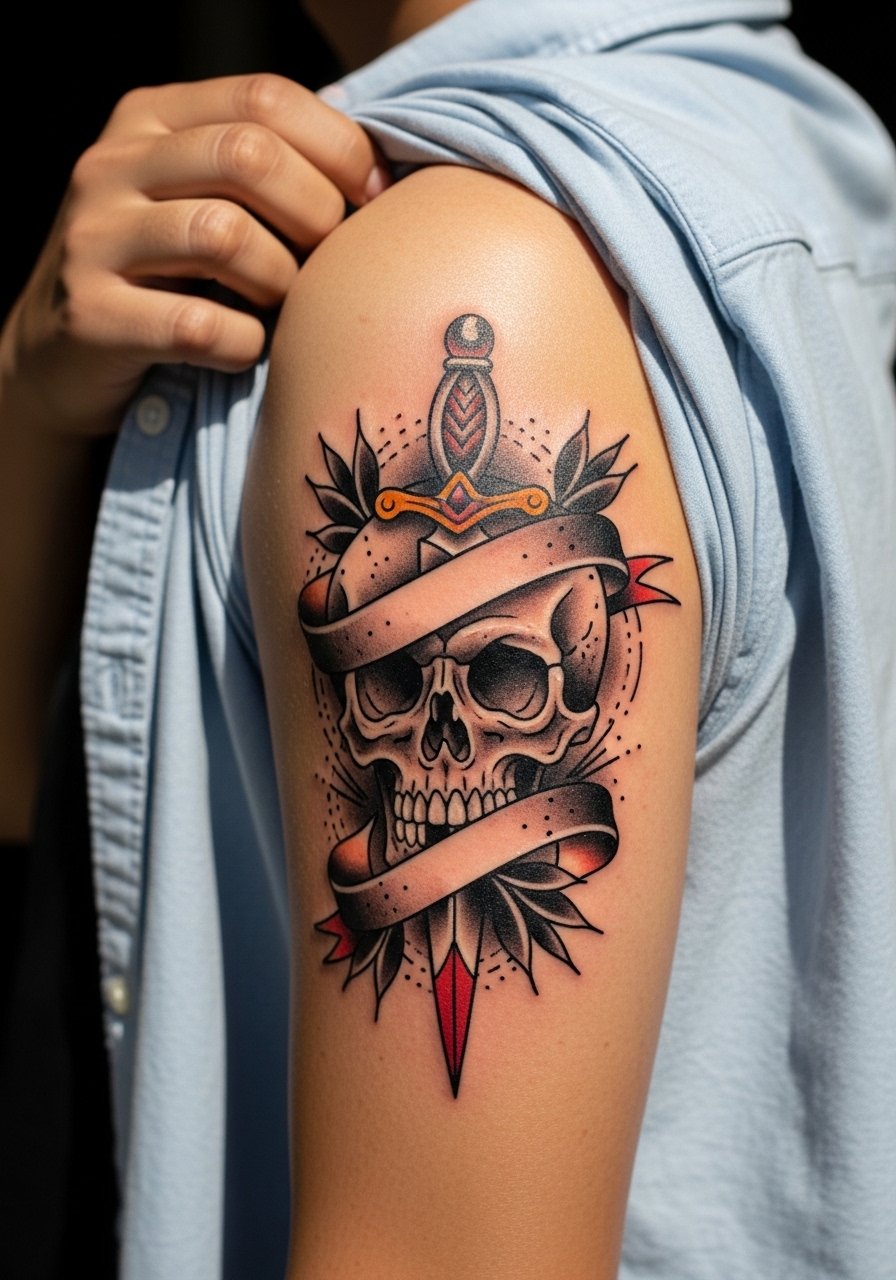
This design reads masculine and tells a story without tiny, fragile detail. In consultation, ask for bold outlines plus color accents rather than full microrealism. The upper arm placement reduces stretch when you bulk up, which makes it a better choice than forearm work if weight fluctuation is a concern. Artists split on color here; one camp prefers full color saturation for longevity, the other favors black and gray for dark skin tones. If you want to avoid midterm touch-ups, plan three sessions and request a touch-up at the six- to nine-month mark. For session comfort, wear a loose button-down shirt you can pull aside easily.
3. Classic Pin-Up Girl Framed on Inner Bicep
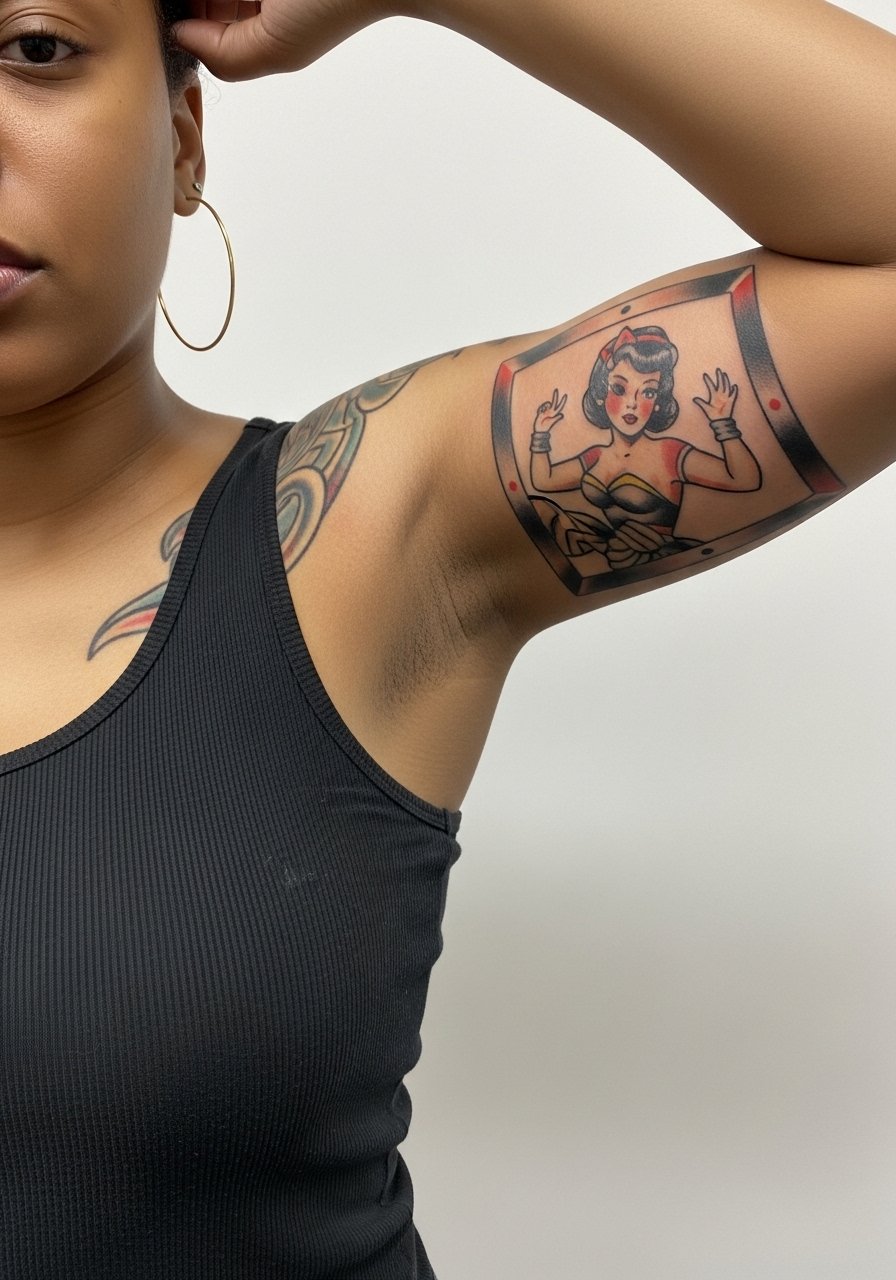
The inner bicep offers intimacy and a wrap that works with pin-up curves, but it can be a high-pain zone and tricky to photograph. When you brief your artist, specify moderate spacing between features and avoid tiny facial details that lose definition after a year. A mistake is compressing the whole scene into a small inner-bicep patch; give the pin-up room to breathe and plan 2 to 4 hours per session. The armpit area can move a lot during healing, so expect touch-ups by year two. For the session wear, bring a tank top you can lift without rubbing the fresh ink. Hand off questions about pain tolerance honestly and ask whether they recommend numbing for longer sits.
4. Old School Ship and Compass Rose on Forearm
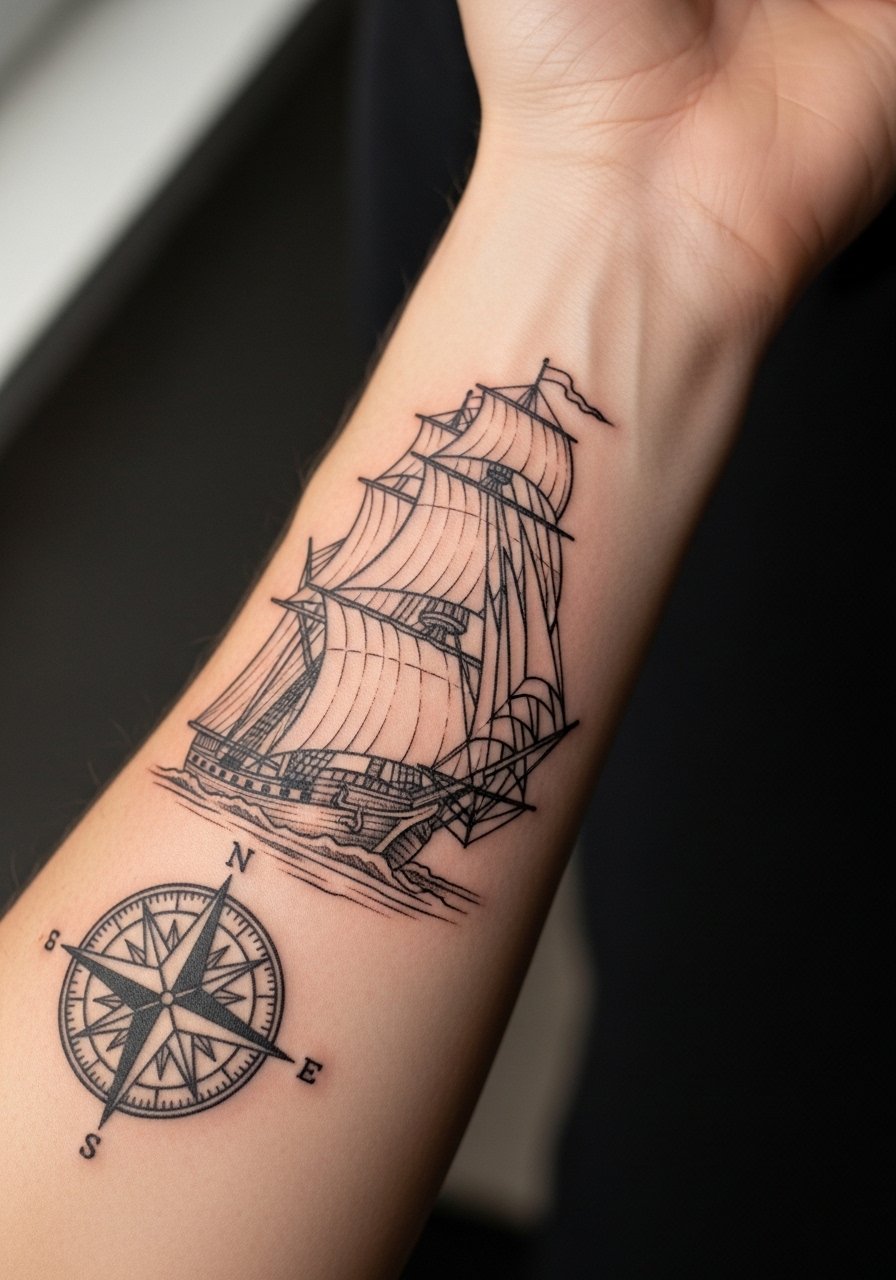
This maritime combo is a natural half sleeve pick for guys who travel or want navigation imagery. Tell your artist to use negative space around the compass so a watch or bracelet does not sit directly over dense ink. Small compass ticks and delicate rigging often blur; specify thicker rig lines and simpler sails to keep the silhouette distinct at two and five years. Forearm sessions are less painful than inner arm work, though the area near the elbow crease will sting more. Plan for two to three sessions and a touch-up at year one if you swim a lot in summer. For show-off wear, a rolled denim shirt or a navy henley frames the ship without stealing attention.
5. Heart with “Mom” Banner and Swallow on Inner Forearm
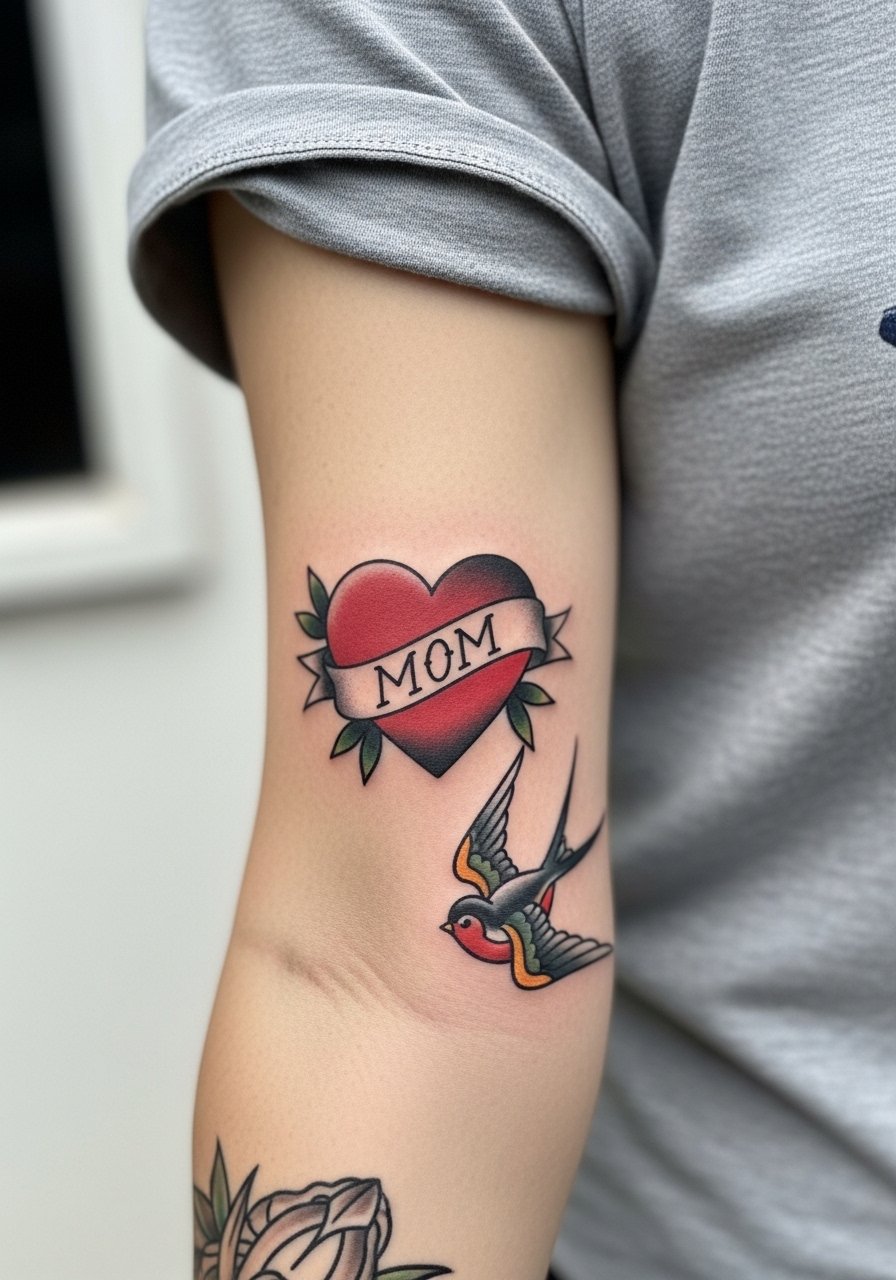
Sentimental flash like a heart and banner stays readable if the banner text is bold and not tiny script. During consultation, ask for block lettering that sits inside a black banner rather than thin cursive, which tends to feather on thin-skinned inner arms. A common error is placing the banner too close to the wrist crease; instead center it higher for less friction during rings and watch wear. Healing here is straightforward but keep in mind inner forearms can be extra sensitive to rubbing from long sleeves in the first two weeks. For session comfort, a fitted white tee with sleeves you can roll will do the trick.
6. Panther Climbing Across the Half Sleeve
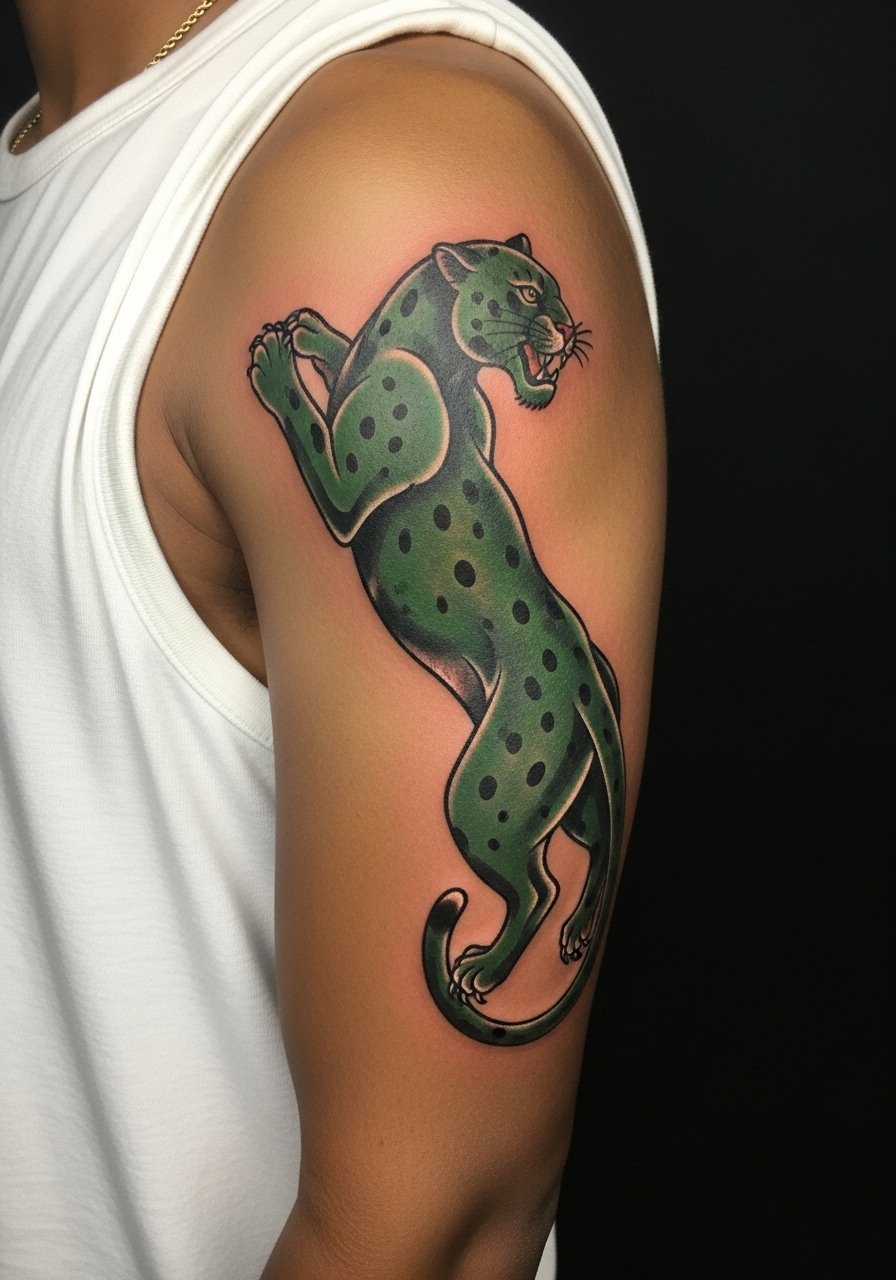
A panther works well for a wraparound half sleeve because motion reads from multiple angles. Tell your artist you want heavy blackwork for the body and restrained green shading as accents so the silhouette keeps teeth and whisker details as the years pass. The big mistake is insisting on tiny fur texture close to the edge; that texture blurs faster than solid mass. Expect four sessions for a full outer-arm flow and a touch-up around year two for saturation. Blowout risk increases near soft tissue where the arm meets the armpit, so ask the artist about needle depth there. For showing the piece, bomber jackets zipped open or a bomber jacket frame the climb without hiding the body.
Studio Day Picks
These first half-sleeve builds lean on forearm and upper-arm work, so a few session and healing items make the appointment and early week much easier.
-
Tattoo Goo Salve. A Reddit favorite for humid summer heals that claims to avoid the heavy residue you get with petroleum ointments.
-
Indie Australian balm variant. Thin and less greasy than larger-brand balms, useful if you want a light layer after the initial protective phase.
-
H2Ocean spray. An option for quick-dry sprays on forearm work where people sweat more and need a non-petroleum alternative.
-
Plain unscented lotion (CeraVe-style). A simple, absorbent lotion that people mention for keeping saturation without shine during later heal stages.
-
Aquaphor healing ointment. Useful for the initial sealing days on areas with fine line detail, applied thinly to avoid clogging.
7. Vintage Dice and Four Leaf Clover from Elbow to Wrist
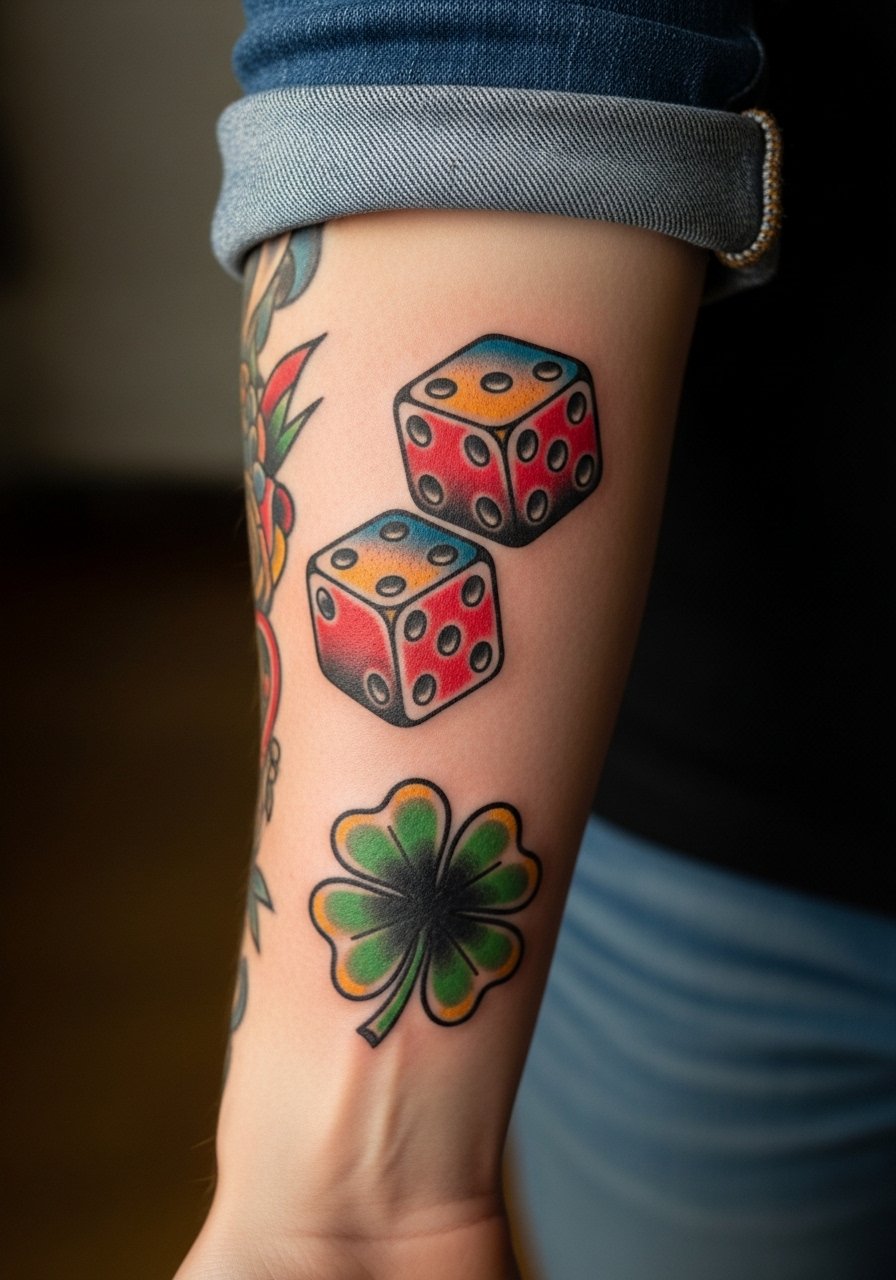
This lucky-charm combo works great when scaled so the dice faces remain readable. A common error is packing too many small symbols between elbow and wrist where movement and frequent washing create friction. Tell your artist to space elements and anchor them with thick outlines. Expect two sessions and faster fading on the wrist edge because of constant wrist motion. For session wear, short sleeves or a short sleeve tee that can be pushed up keeps the area clear without rubbing. If you type a lot at work, mention that so the artist can position the motifs away from high-friction spots.
8. Vintage Eagle with Shield and Stars on Outer Arm
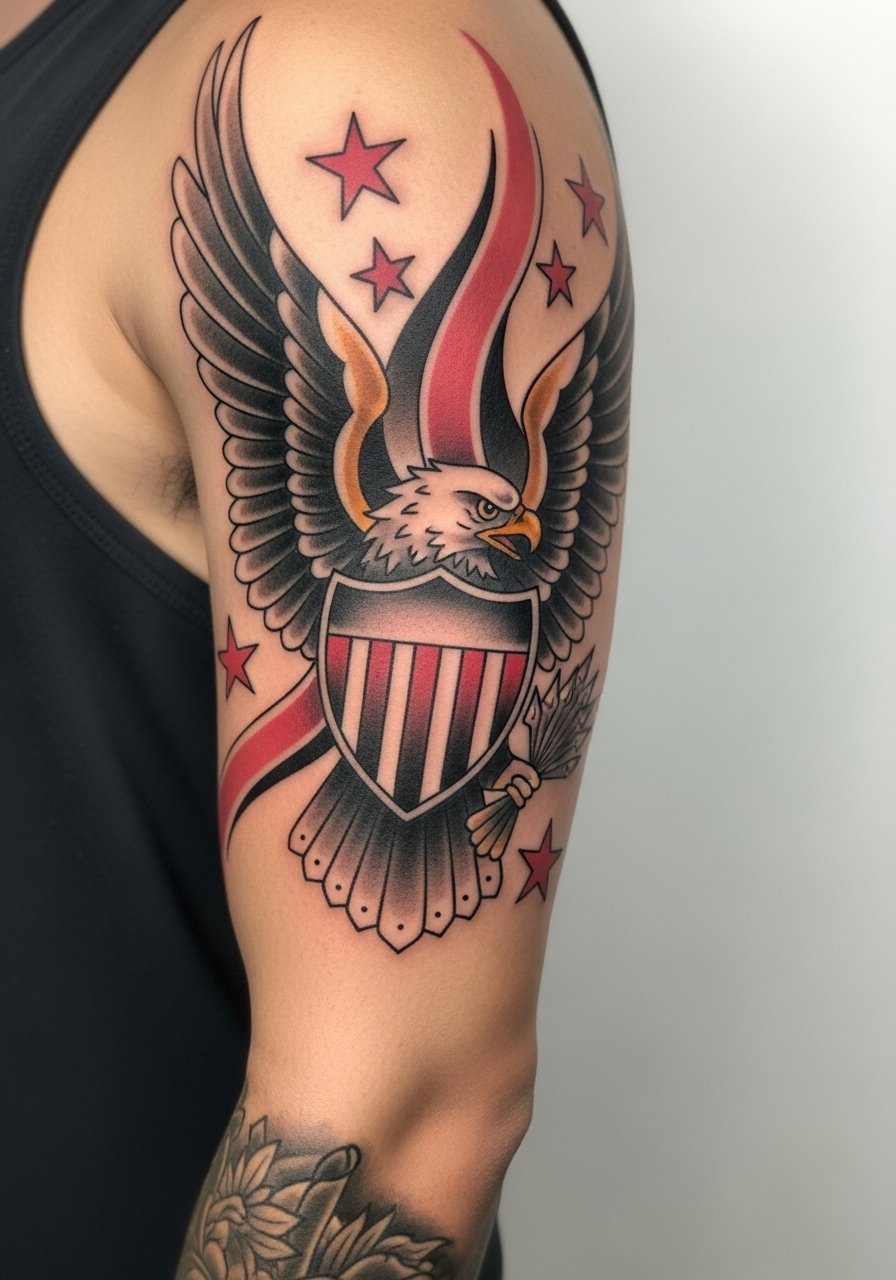
Patriotic eagles age well when the shield fields have strong contrast rather than tiny flag details. In consultation, ask for the shield blocks to be larger than you think and for stars that are solid shapes. The mistake is packing too many small stars across a curved bicep where they stretch unevenly when you flex. Upper-arm placement lowers distortion risk, though shoulder-to-elbow wrap can need a third session to blend edges. For showing it off, short sleeve polos or short sleeve polo cuts that end above the bicep keep the eagle visible and balanced.
9. Modular Flash Sheet Patchwork for a Patch-Style Half Sleeve
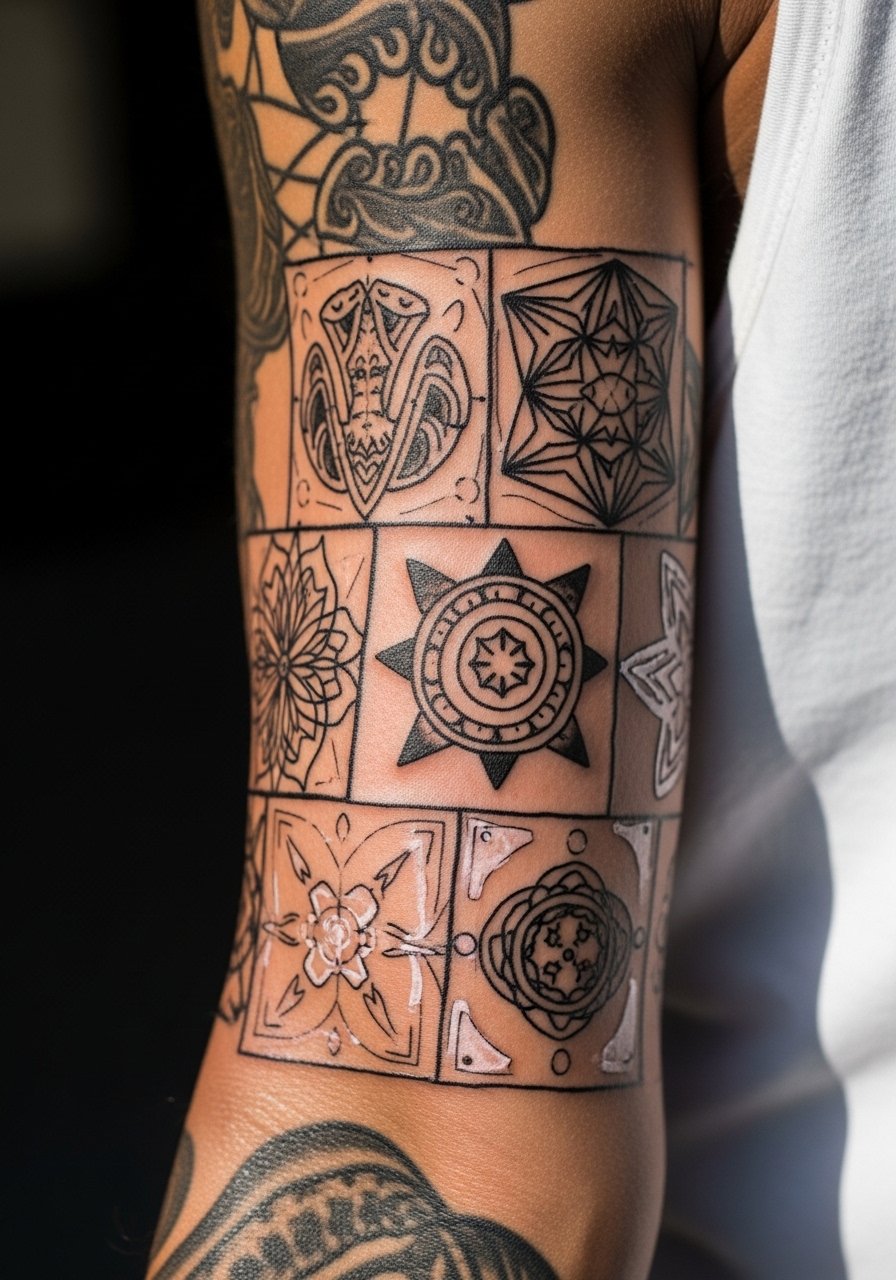
If you want to build a half sleeve over time, modular flash sheets let you thread banners, anchors, and animals in phases. Tell your artist you want consistent line weight across sessions and a shared palette so future tiles blend without a large rework. A mistake is switching artists between sessions without matching ink mixes and line thickness, which creates a patchwork that looks stitched together. This patch approach solves common guest-artist availability problems because you can book separate flash spots over months. For session wear, bring a loose tank or button-down that gives the artist room to adjust stencils without stretching the skin.
10. Black and Gray Vintage Shading for a Subtle Upper Arm Sleeve
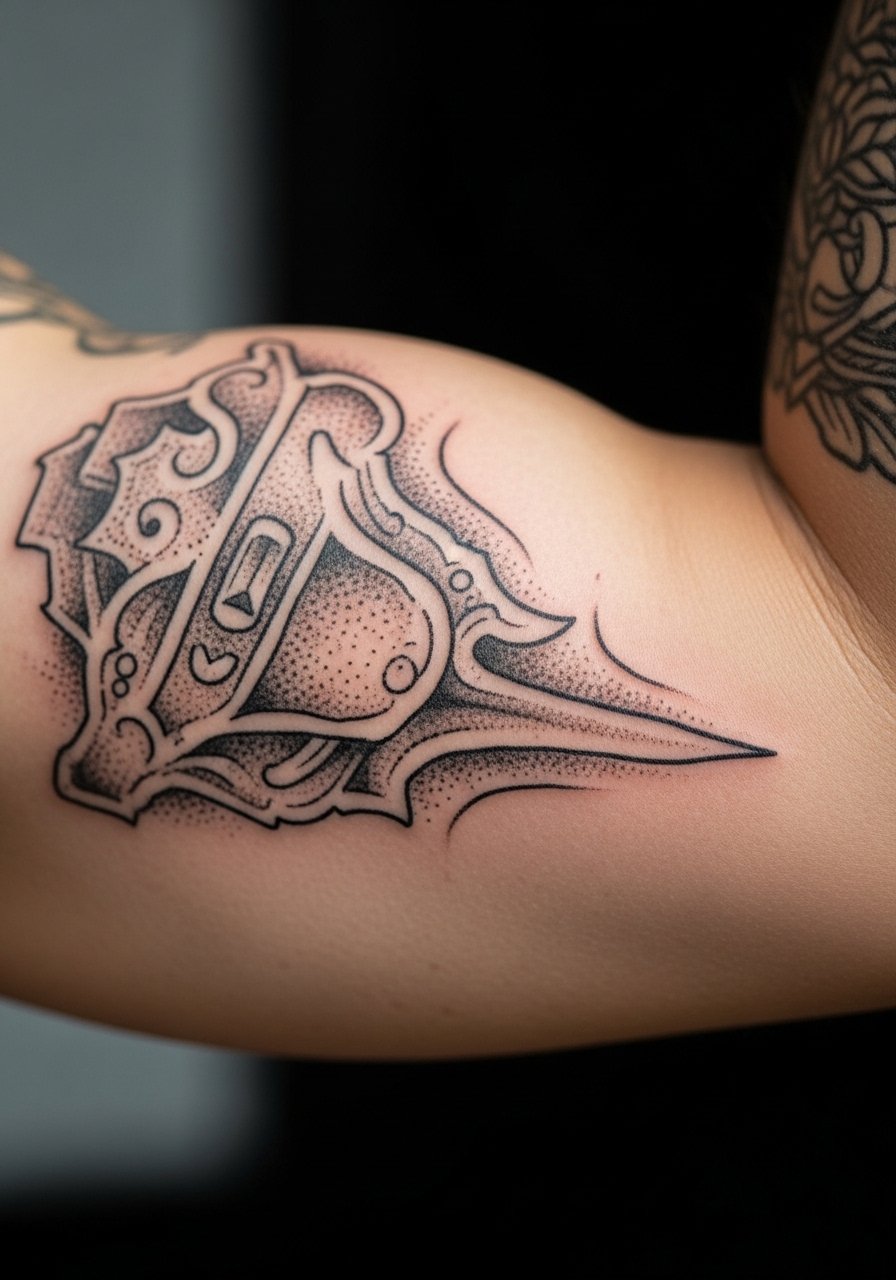
Black-and-gray vintage looks quieter over time and can hold tonal depth longer than washed-out color on tanned skin. Ask for stipple and whip shading rather than washes that sit too shallow. The error I see often is pushing color where saturation would be a better choice for contrast; on darker tones that can turn muddy. This upper-arm placement is forgiving for changes in body composition, but expect touch-ups at year three if you spend lots of time outside. For the appointment, a loose button-down you can pull aside makes positioning easier.
11. Bicep Wrap Pin-Up or Panther for Athletic Arms
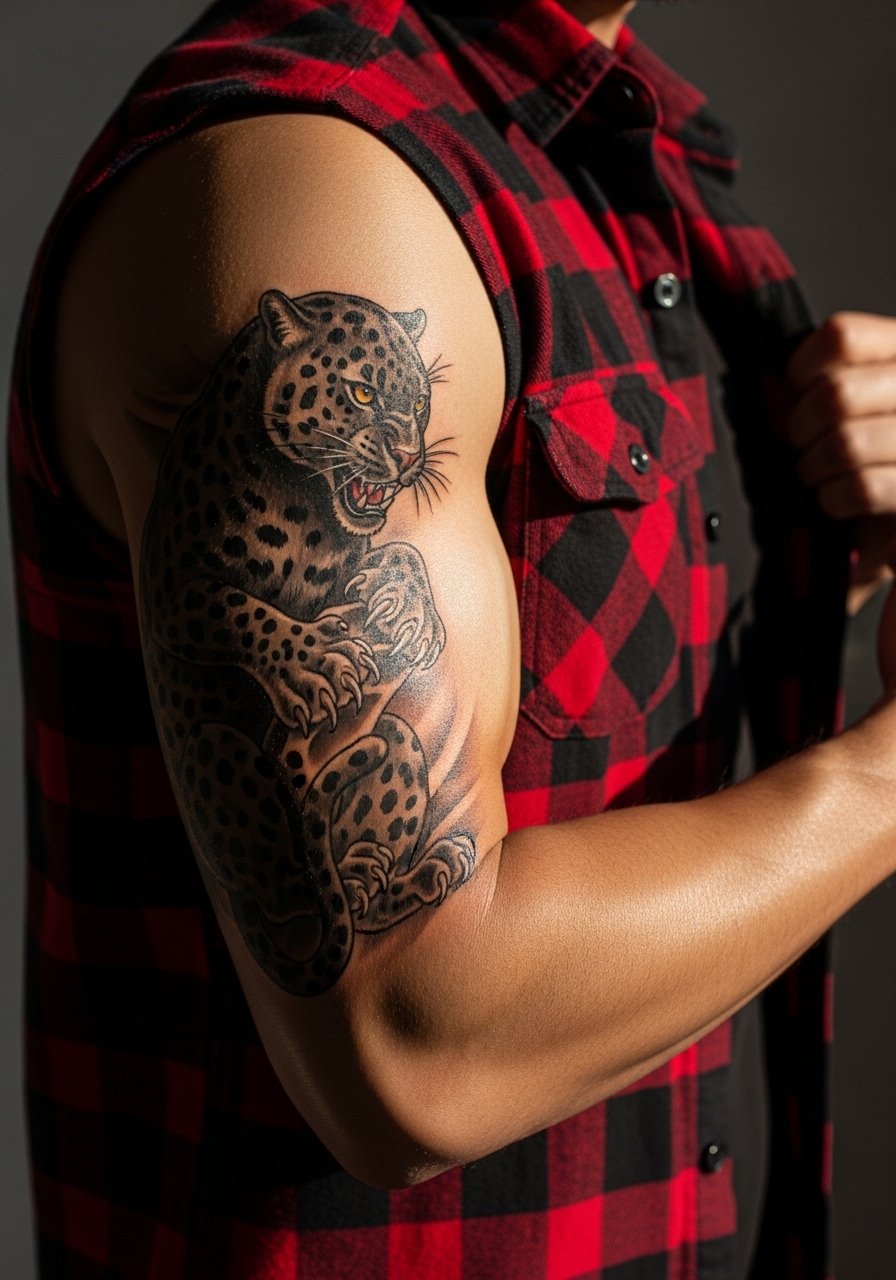
For muscular biceps, designs must account for flexing so the panther or pin-up keeps form. Ask the artist to mock flexed and relaxed stencils to check distortion. The frequent mistake is designing for the relaxed arm only, which looks skewed when you flex. If you plan to bulk, position the main focal point away from the mid-bicep peak to reduce distortion. Sessions here are intense because the artist works against a curved, muscular canvas. For showing off, a sleeveless flannel or sleeveless flannel shirt layers without covering the wrap and keeps the retro vibe.
12. Forearm Negative Space Watch Window for Anchors and Swallows
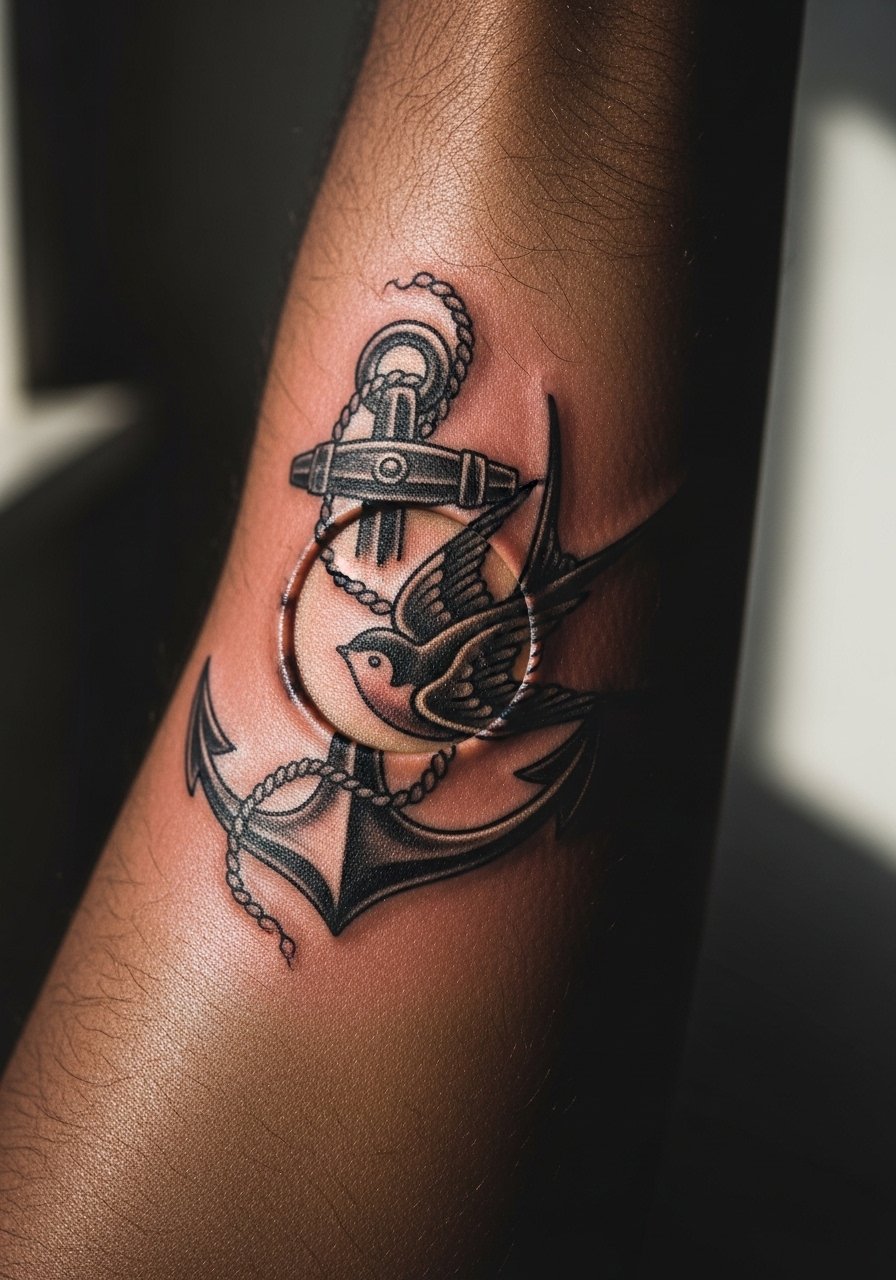
Designing negative space for a watch or cuff avoids covering the accessory and keeps the piece wearable every day. Tell the artist exactly where you wear your watch so the stencil preserves that blank zone. The mistake is assuming the watch sits in the same place when standing versus when seated; test the placement with the artist in both positions. Negative space also helps in hairy arms because it reduces busy detail that can look fuzzy over time. Forearm work heals well, but if you swim or wash hands constantly, color fades faster near the wrist. For session convenience, a navy henley shirt with sleeves you can roll gives clean access.
13. Elbow-Crested Swallows and Ropes That Age Evenly
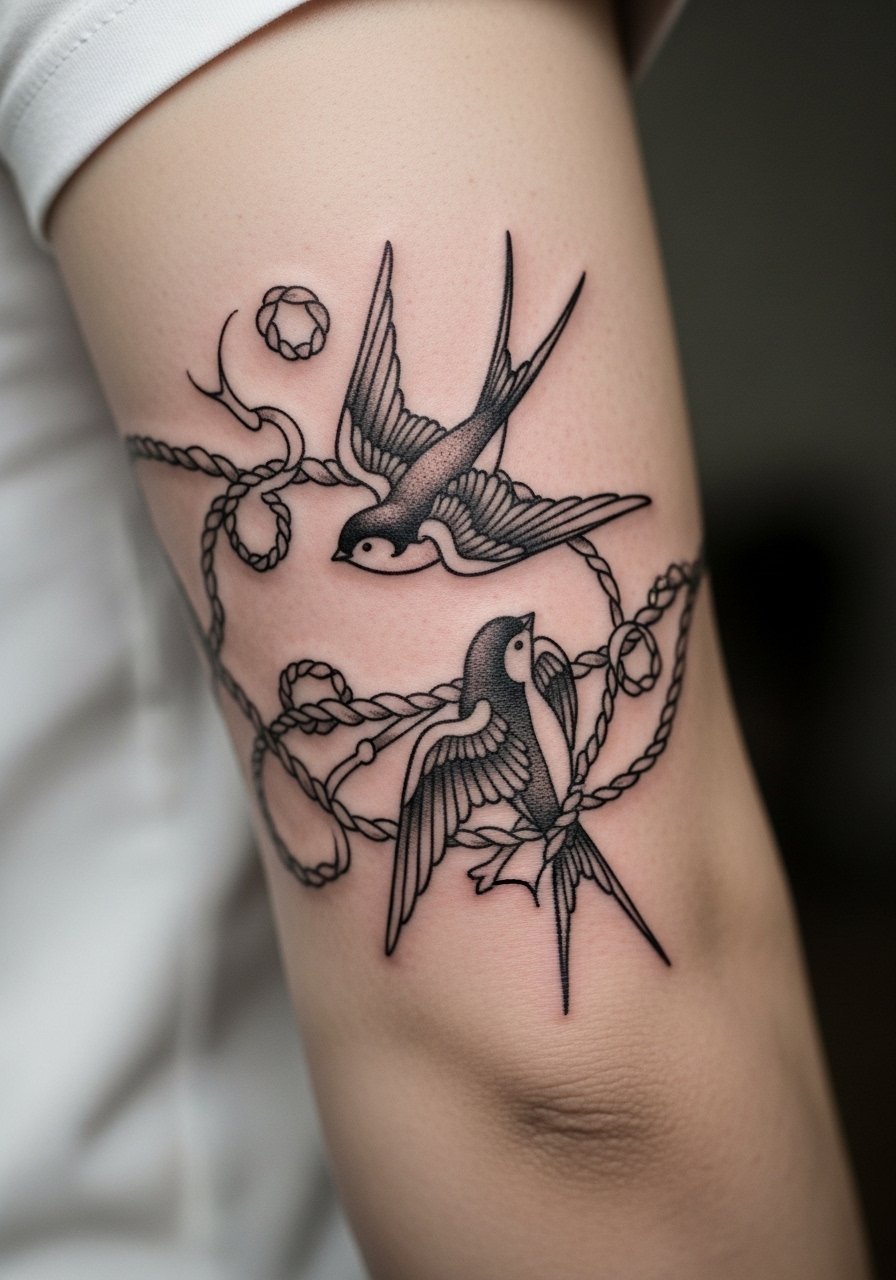
Elbow creases are notorious for distortion, but anchoring major elements like swallows outside the crease and using rope lines to bridge the bend keeps the motif coherent. When you brief the artist, request that primary forms sit on the outer arm and connection lines cross the crease with wider spacing. The error is placing small text or dots directly on the crease where motion blurs them fast. Expect that the elbow line itself may need a touch-up at year one because repeated rubbing and stretching speed fading. For appointments, a short-sleeve tee makes elbow access easy and reduces fabric friction afterward.
14. Four-Panel Memorial Banner in Vintage Script on Inner Forearm
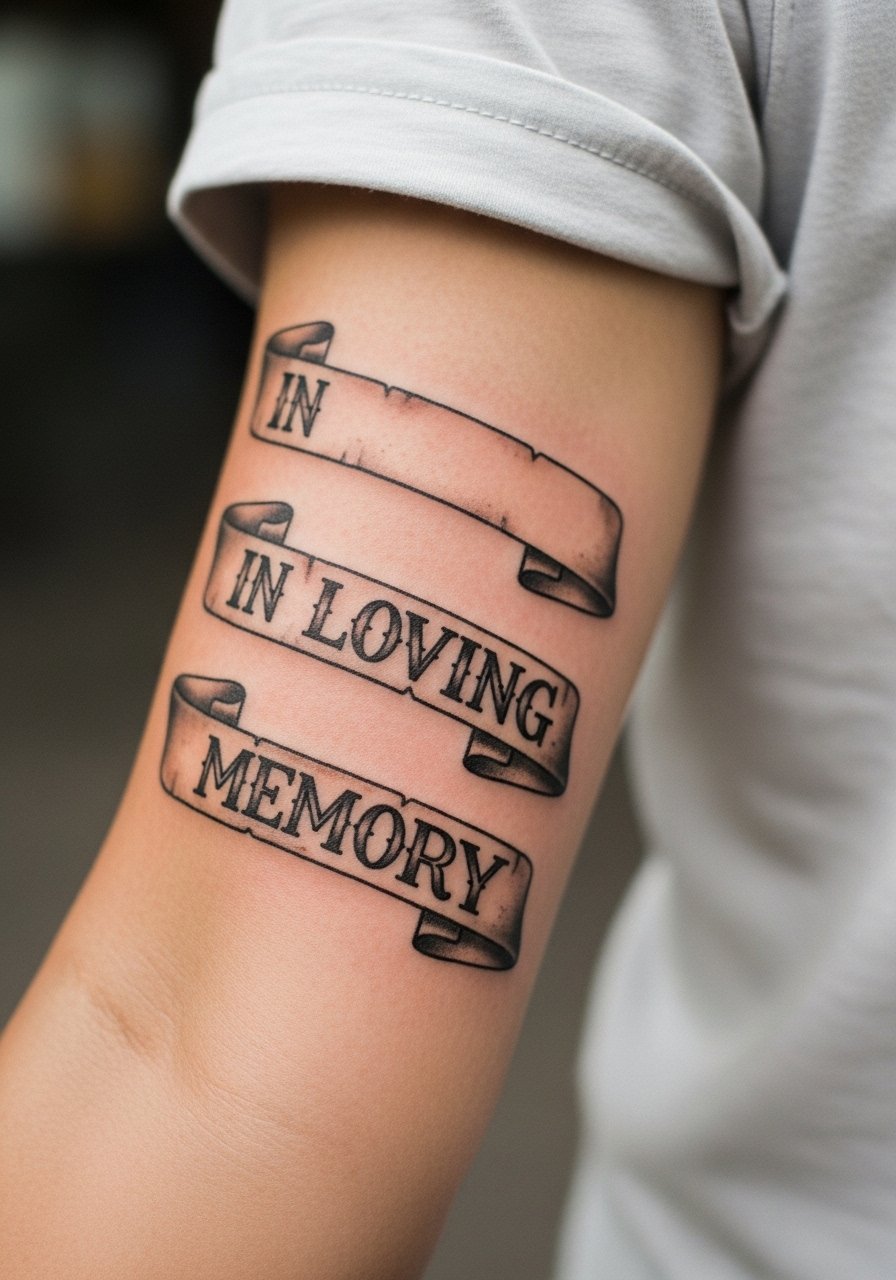
Memorial banners are common for summer memorial pieces and work well on inner forearms if the script is blocky and bold rather than filigreed. Ask the artist to stencil the exact lettering size and to mock it on the skin so you can read the words from arm angles. The common mistake is tiny cursive that becomes illegible in two years. Inner forearm is sensitive to rubbing from shirts and watches, so plan for a single-session build with a touch-up at six to nine months. For showing the tattoo, a fitted white tee or open plaid pairs cleanly. I like a fitted white tee for a crisp, high-contrast reveal.
15. Athletic-Adapted Vintage Motifs for Guys Who Bulk
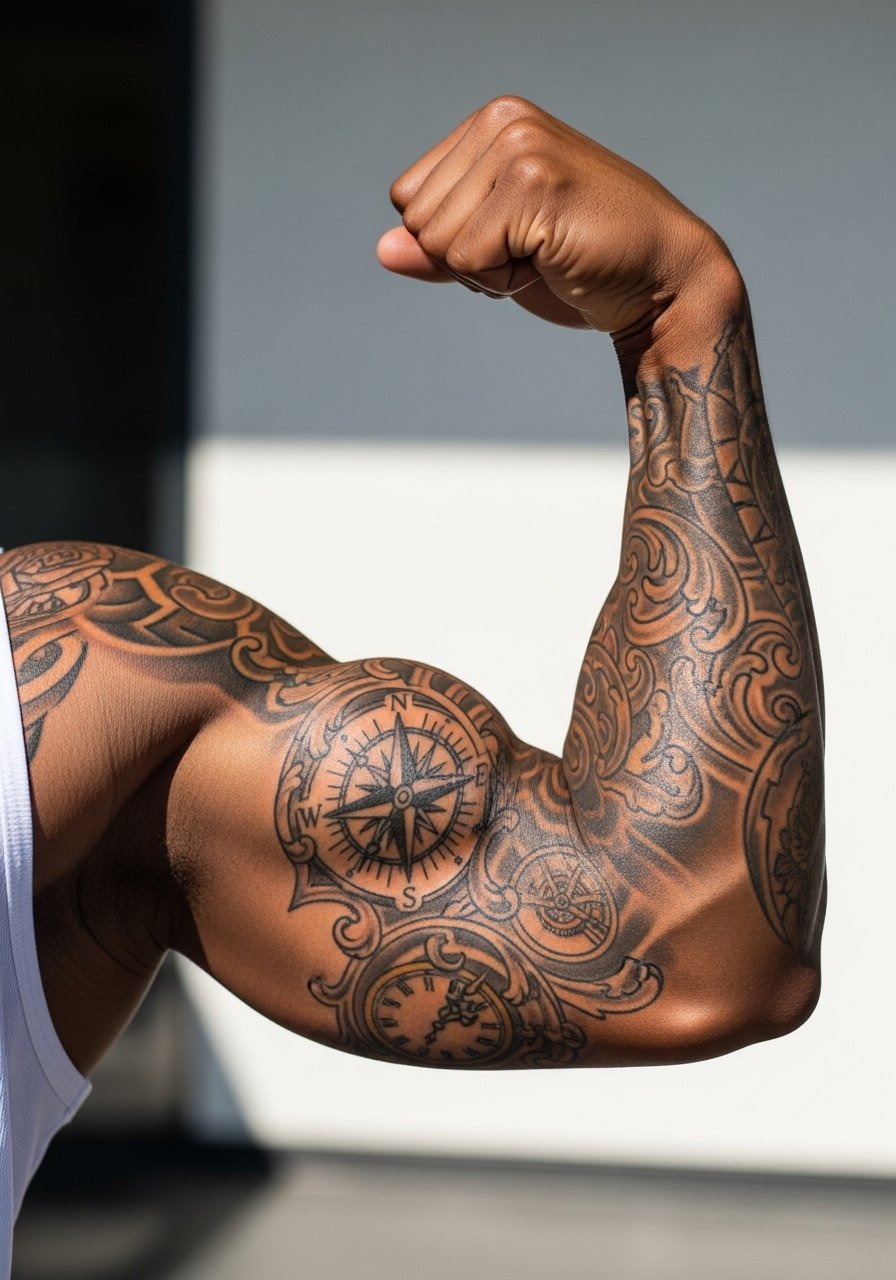
If you lift, plan your sleeve so high-movement zones avoid the heaviest detail. Tell your artist you train and how your arm looks flexed so they can place focal points on stable planes. A frequent error is mapping dense shading over flex points, which distorts with muscle growth. The right approach uses larger shapes and stronger outlines, which actually age better on athletic builds. For session wear, gym-style muscle tees or a olive muscle tee let the artist access the whole arm while avoiding fabric compression.
16. Gold-Accented Vintage for Melanated Skin
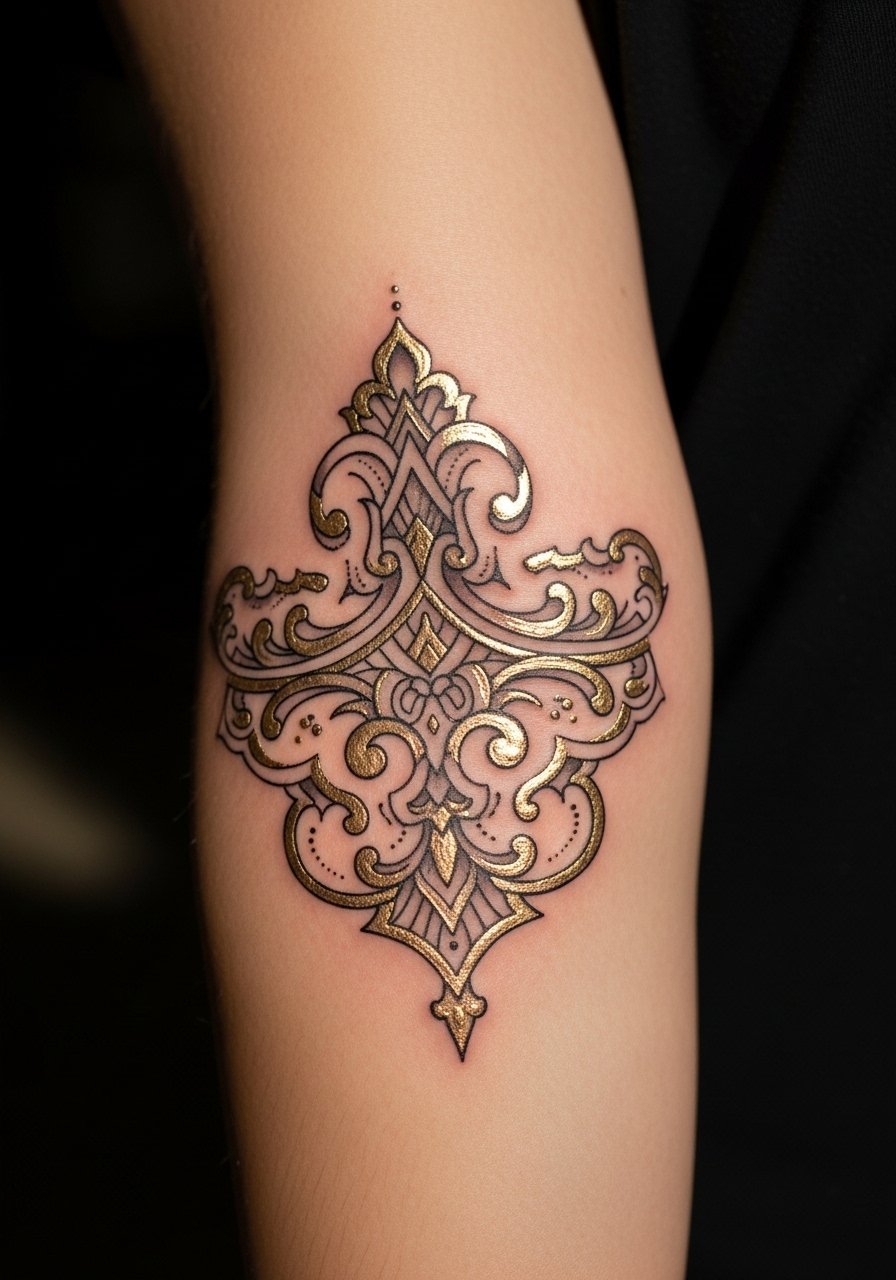
On darker skin tones, color choice matters because certain primaries can look muted after healing. Ask the artist about metallic gold or high-contrast black outlines to lift color without heavy saturation that can turn muddy. One mistake is assuming every studio stocks gold pigment that heals predictably; bring the conversation up in consultation and ask to see healed photos on similar skin. Expect a conservative approach with sample swatches if you want metallics. Placement on the outer forearm is a good testing ground before committing to a full sleeve. For show-off wear, rolled sleeves and a leather cuff complement gold accents without overwhelming the ink.
17. Patchwork Forearm with Modular Banners and Future Name Panels
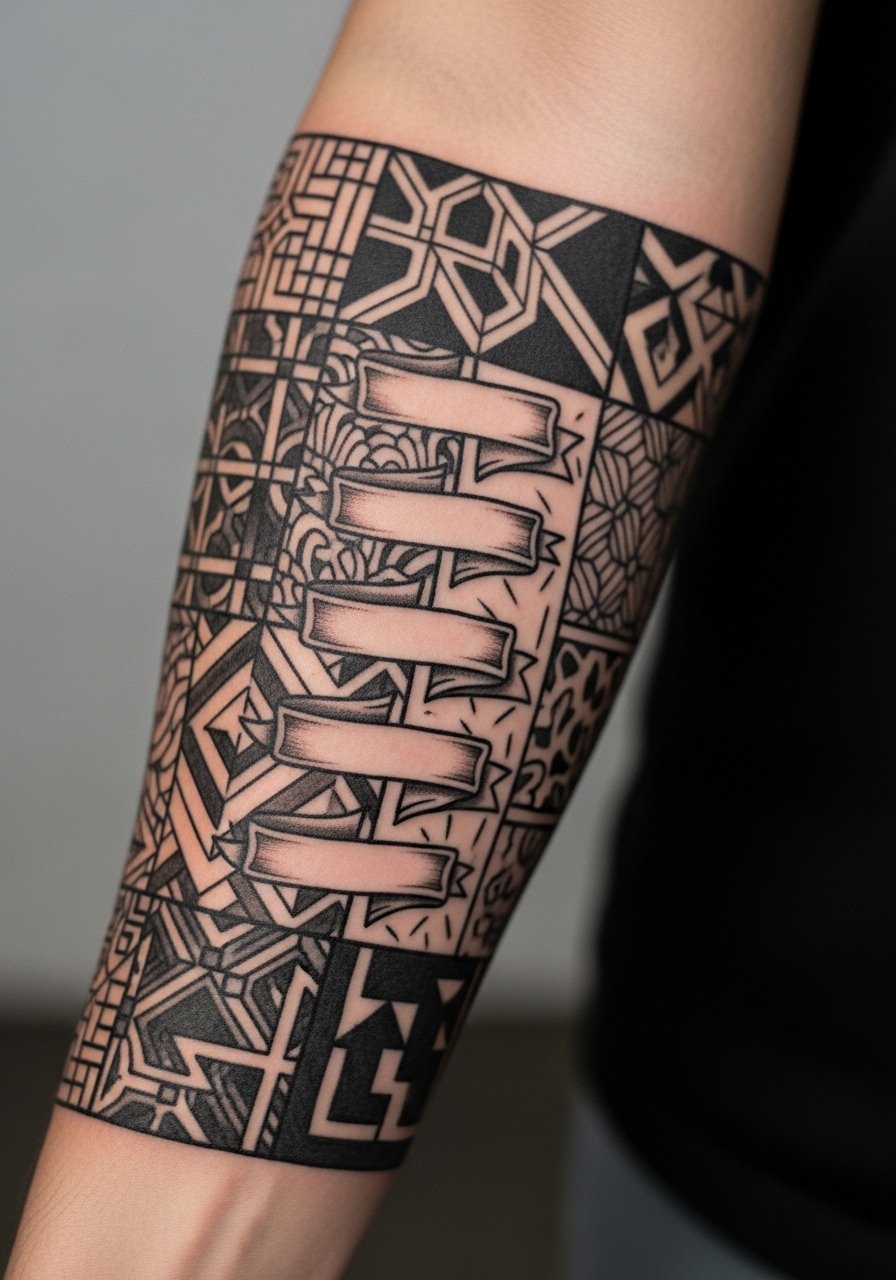
This phased build is one of the under-covered ideas people mention on forums. Plan modular banners now so you can add names later without reworking surrounding motifs. In the consult, specify consistent banner width and outline thickness to keep future insertions seamless. A common mistake is leaving mismatched negative space that forces a rebalancing session later. Phased work helps manage cost and scheduling when guest artists are scarce. For appointments, wear a loose tank so the artist can stencil multiple panels without stretching the skin.
Frequently Asked Questions
Q: Will bold traditional outlines actually last longer than fine line pieces on a half sleeve?
A: From what I've seen, thicker outlines and higher saturation tend to hold shape longer, especially on forearms and outer arms where sunlight and friction hit most. Fine line work can look incredible at first but often needs touch-ups by year two or three, depending on placement and skin type. Ask an artist how they balance needle depth and spacing for the look you want.
Q: How do I handle hairy arms for vintage traditional work so the design does not look fuzzy after a year?
A: Discuss hair management with your artist before booking. Some suggest light shaving at sessions and weekly trimming the month after healing, while others recommend laser patches for problem spots. A design with heavier outlines will hide fuzz better than one loaded with delicate detail, and you can ask for stencils that factor in hair density.
Q: Artists disagree online about Saniderm versus dry healing. Which camp is right for a half sleeve?
A: Both camps make valid points. The Saniderm camp praises reduced mess and faster initial healing, while others argue it can trap bacteria if applied poorly. For bold vintage lines, many people prefer a dry-touch approach after the first few days, but if you travel or sweat a lot, protective film can help. Ask your artist what they use and why, and plan a small follow-up window for touch-ups.
Q: If I plan to bulk up for a season, which half sleeve placements avoid distortion best?
A: Upper arm placements above the bicep peak and outer-arm panels are less likely to distort from muscle gain than inner bicep or tight forearm wraps. Tell your artist about your training cycle so they can place key elements on stable planes or use larger shapes that flex more naturally.
Q: How do I find a vintage-traditional artist for guest spots if I live outside major cities?
A: Use hashtags like #VintageTattoo and directory filters on platforms that list guest spots. Tattoodo and Booksy let you filter by style and city, and TikTok or Instagram with city + "guest spot" shows recent travel dates. Have a deposit ready and three backup options because cancellations happen.
Q: Can I mix neo-traditional big cats with classic Sailor Jerry motifs in one half sleeve?
A: Yes, you can, but plan the palette and line weight ahead so the two styles read cohesive. Ask your artist to create a combined mockup that balances neo-trad shading with traditional block color. If different artists handle sessions, ensure they match ink mixes and outline thickness to avoid a stitched look.
