
Fine line lilies are everywhere on saved boards, but the ones that still read clean a few years later often started with slightly bolder linework and smarter placement. I keep seeing fresh pieces that look fragile, then ask where they sit on the body and what line weight the artist used. Read these 27 water lily tattoo ideas with practical tweaks to help the design age gracefully and look like you planned it.
1. Fine Line Single Bloom on Inner Forearm

I've seen this piece on dozens of people who wanted a quiet, visible bloom. For longevity, ask for slightly heavier linework than the thinnest single-needle option and request clear spacing between petals so the linework does not merge over time. Expect a one-session piece with low pain, about a three to four out of ten on the forearm scale. A common mistake is asking for ultra-fine detail at two inches across. If you want that dainty look, expand the size to three inches so stipple shading can hold. For showing it off, roll up a rolled cuff chambray shirt to frame the linework.
2. Micro Water Lily Bud Behind the Ear, Subtle Placement
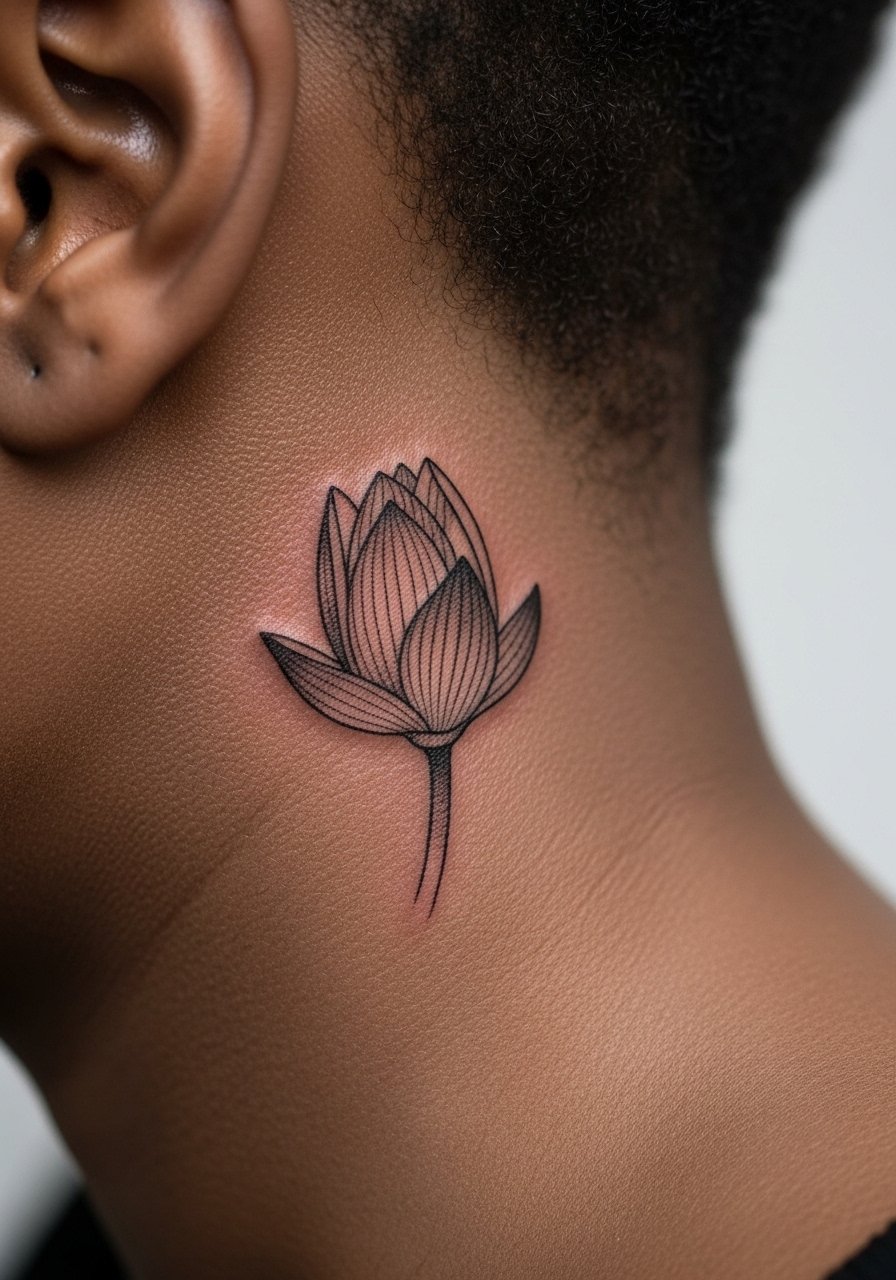
Fair warning: behind-the-ear stencils look tiny on screens and bigger on actual skin. Pain is low but the area calls for precise single-needle control. The usual mistake is shrinking the design to under one inch which risks blurring. Ask the artist to place the bud slightly larger than your photo reference so the linework can breathe. Session time is short, often a single pass under an hour. Because of the discreet placement, wear hair up during the appointment so the artist can work cleanly.
3. Realistic Black-and-Gray Bloom on the Shoulder

I've noticed micro-realism on shoulders holds up when the artist uses layered stipple shading and good saturation. This placement tolerates heavier shading without blowout, and the wider canvas lets petals show depth. Pain is mild to moderate, and sessions often run one to two hours. A common aging problem is too many tiny highlights that flatten once healed. Tell your artist you want contrast between petal edges and inner shadows so the piece reads at arm's length. For the session, a loose button-down shirt makes access easy without exposing more skin than necessary.
4. Neo-Traditional Water Lily with Koi on the Forearm

Visual impact is the selling point here, and the forearm is a natural stage for koi pairings. Expect two sessions for linework and color saturation. The big mistake is asking for crowded composition in a small area. This style benefits from bold outlines and solid saturation so the colors age into a readable piece. Pain is moderate and placement is visible, so think about how sleeves and watches will frame it. Pair with a sage green tank top to let the color work pop without clashing.
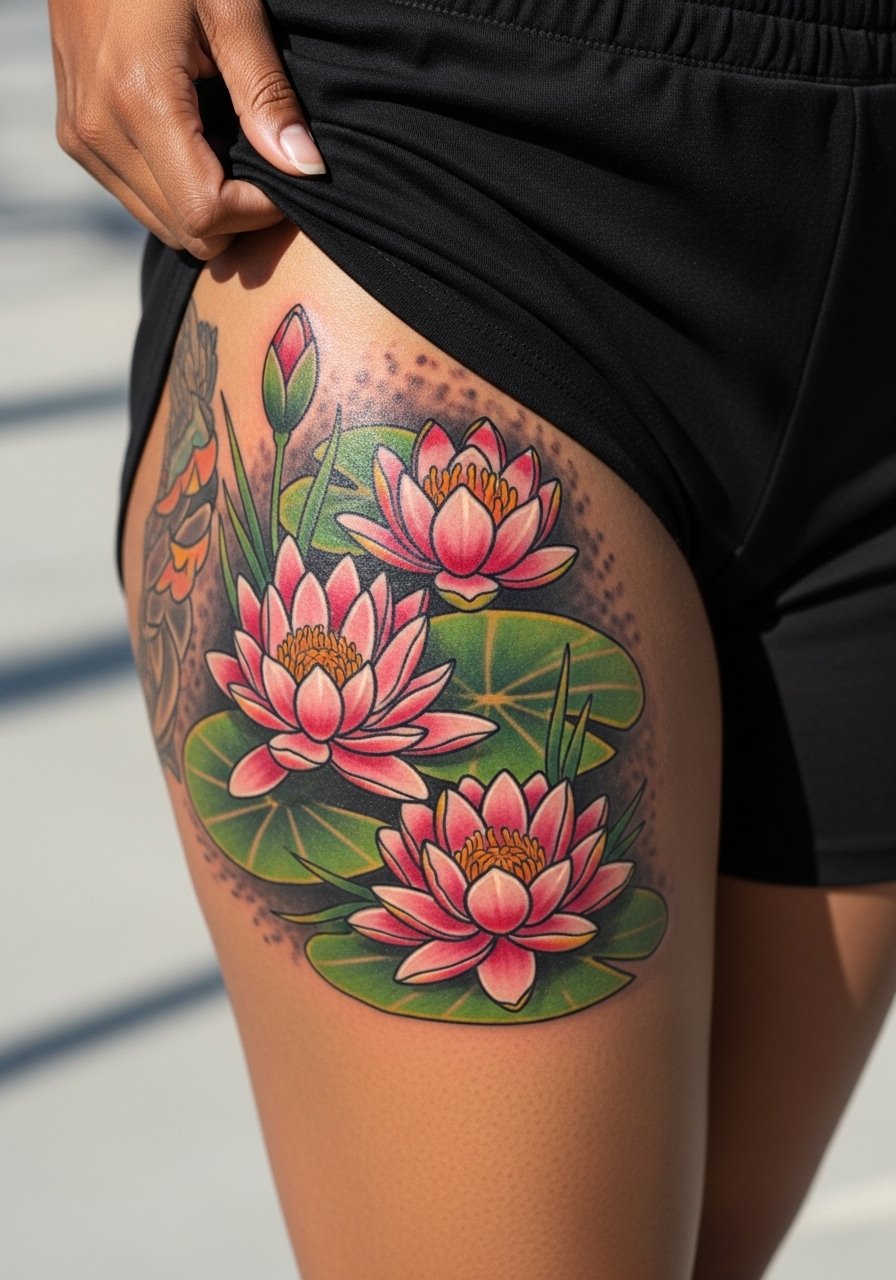
5. Stipple-Shaded Lotus Hybrid with Mandala on Upper Thigh

Most people pick this to hide larger compositions or to blend spiritual geometry with botanical curves. Pain is low to moderate and the outer thigh’s elasticity helps with shading. The consultation tip is to specify where the mandala edges should sit relative to your hip line to avoid distortion with weight changes. One under-covered idea is to plan this as a multi-year patchwork, starting with a micro-bloom and expanding into mandala layers. Session wear is simple, wear high waisted denim shorts so the artist has easy access and you stay comfortable.
6. Water Lily Cluster Cover-Up for Thigh-to-Hip
Cover-ups need bold pigments and confident composition. I've seen a lot of attempts that keep too much of the old design visible. Tell your artist the old ink elements you want hidden and expect multiple sessions for layering and saturation. This is summer healing territory, so avoid hot, sweaty weeks after the session for better color retention. For show-off nights, a flowy midi skirt frames the piece without compressing it.
Studio Day Picks
The small forearm pieces and larger thigh work above ask for different prep items. These picks smooth the appointment and early healing for the first six ideas.
- Stencil transfer paper kit. Lets you and the artist preview placement on skin before committing, which is vital for the forearm and behind-the-ear placements above.
- Topical numbing cream. Helpful for longer thigh or cover-up sessions so you can sit comfortably through color saturation.
- Thin protective film roll. Keeps small wrist and finger pieces clean during the first days of friction from clothing.
- Fragrance-free gentle body wash. Cleanses without irritating fresh linework on forearms and thighs.
- Aquaphor healing ointment. Thin layers in the initial window help protect fine line work without suffocating the needle channels.
7. Minimalist Stem-and-Leaves on the Inner Wrist

A wrist lily is highly visible and tends to fade faster than forearm pieces due to constant hand washing and friction. The aging lead here is important. Expect a touch-up at year one to maintain crisp petal edges. The frequent mistake is picking the thinnest lines and tiny size. Ask for 1.5mm minimum line weight and plan for a six to twelve month touch-up. For showing it off, pair with a thin leather cuff bracelet on the opposite wrist so the tattoo reads without being crowded.
8. Watercolor Splash on Ribcage, Painterly Look

Pain warning: ribs are commonly an eight out of ten. This style looks gorgeous fresh but some older watercolor pieces fade into muted patches. Artists split on technique for ribs. One camp favors dry healing for color retention, the other pushes protective film for cleanliness. The result depends on your skin, the artist's layering, and how careful you are in the first two weeks. If you plan this, schedule outside peak summer months and be prepared for two sessions to rebuild saturation. Wear a fitted sports bra to the appointment so the artist can access the side without exposing more than necessary.
9. Blackwork Silhouette on the Collarbone

There is something about stark black silhouettes that holds up on darker skin tones when compared to subtle gray washes. Expect two sessions for saturation and edge crispness in this area. A common mistake is placing dense black too close to the neckline where fabric rubs. If you want longevity, ask the artist to shape the silhouette so it sits away from high-friction spots. For evening looks, a v neck black tee in matte fabric keeps the silhouette readable.
10. Micro-Realism Collarbone Bloom with High Contrast

A micro-realism lily here benefits from stark contrast rather than subtle gray fades. On medium and dark skin tones, ask for deeper midtones and sparing white highlights so the texture reads in photos. Pain is moderate and sessions run up to two hours for refined shading. A frequent mistake is overusing pale highlights that vanish on darker complexions. Choose reference photos of healed work and tell your artist you want visual depth that reads at arm's length. For showing it off, a wrap style top frames the area without glare.
11. Black-and-Gray Bloom on the Shoulder Blade

Personal observation lead: I've seen collectors favor shoulder blade micro-realism because it ages into a soft, photographic texture. Blowout risk is low here due to thicker skin and fewer movement folds. The piece commonly needs two sessions for layered shading. Tell your artist you want stipple shading for petal texture and deeper shadows at the petal base to prevent flattening. For session comfort, wear a loose tank top you can move aside easily.
12. Japanese-Style Lily with Wave Motif on Upper Arm
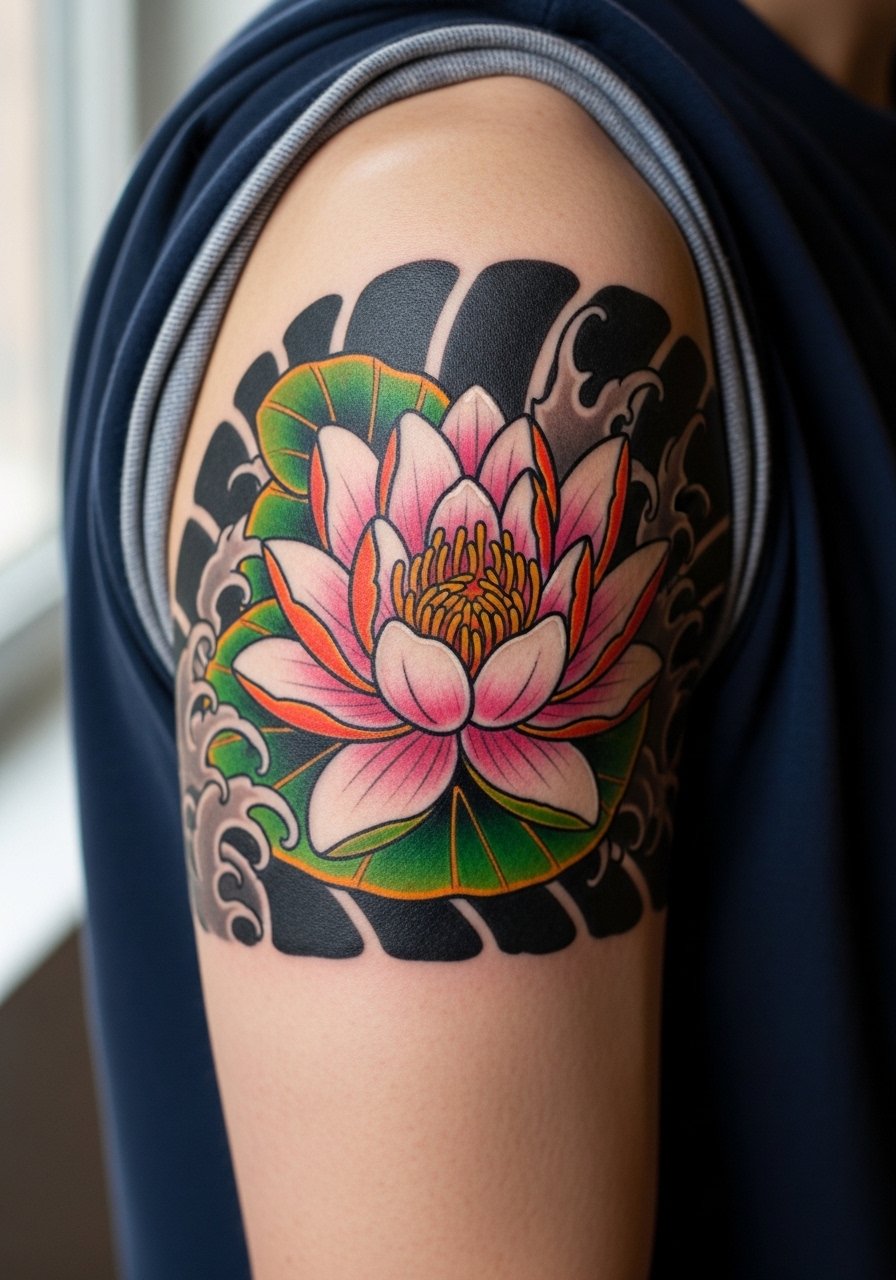
Visual impact lead: The combination of curved petals and dynamic waves gives movement across the arm and works well when building into a sleeve. Expect three to five sessions if you plan full color and background waves. The error I see is shrinking the composition too much and losing the wave motion. For longevity, ask for heavier outlines in the waves and solid saturation in the petals. Wear a loose button-down shirt so the artist can work without fabric tugging at the area.
13. Negative Space Water Lily in a Blackwork Sleeve

Consultation lead: Negative space designs look striking but require precise placement so the exposed skin ages evenly with the surrounding black. Artists often use this to create the illusion of a pond surface using skin as highlight. The common mistake is underestimating maintenance. Solid black fields may need a refresh in seven to ten years, but the negative space lily can remain clear if the surrounding saturation stays uniform. For showing it off, a rolled cuff chambray shirt provides contrast without crowding the arm.
14. Small Ankle Bloom, Travel-Friendly Placement

Aging/healing lead: ankle pieces are seasonal show-offs but they suffer from sweat and rubbing in summer. Fine line ankle lilies often blur faster than those on the forearm. If you're set on ankle placement, ask for slightly bolder outlines and plan dry healing when you know you'll be active. Session time is short, often under an hour, but plan for a touch-up at year one. Pair this with strappy flat sandals in warm months to highlight the placement.
15. Micro Bud on the Finger or Knuckle

Mistake lead: Finger tattoos often disappoint because of high friction and shallow skin. If you choose this, accept a higher chance of fading and prepare for touch-ups. Many artists recommend simplified silhouettes or single-line stems for durability. Pain is sharp but brief and sessions are fast. For appointment day, remove rings and avoid lotions on that hand so the artist gets a clean surface.
16. Spine-Aligned Lily for Yoga Practitioners

Unique idea lead: Placing a lily along the spine ties visually to posture and yoga practice. The inner back takes shading well but requires an artist experienced with vertical compositions. Pain ranges six to eight depending on proximity to the spine. A common error is misplacing the centerline so it reads off-kilter when you move. During consultation, mark the exact vertebrae reference and discuss how it aligns with clothing like open-back tops. For session wear, bring a open-back yoga top so you stay comfortable and the artist can work cleanly.
17. Bioluminescent-Style UV Ink Accent on Inner Thigh

Controversy lead: UV inks are an under-covered trick for nights out, but some artists caution that not all clinics use stable pigments. One camp loves the subtle glow for club lighting and private shows. The other camp warns about faster fading and limited touch-up options. If you want UV accents, ask about longevity and test a small swatch first. Inner thigh is a forgiving canvas for color but needs careful aftercare to avoid friction during healing. Wear shorts or loose bottoms to the appointment.
18. Water Lily with Koi on the Calf

Visual impact lead: Calf placements let you build a vertical narrative and they tolerate bold color. Expect one to two sessions depending on size. A common mistake is compressing detail into a small patch; this style needs room for background waves. Pain is moderate and the calf is forgiving for regeneration compared with ankle or foot placements. For show-off outfits, choose loose jogger pants or shorts so the piece reads without constriction.
19. Water Lily as Negative Space on a Black Chest Panel
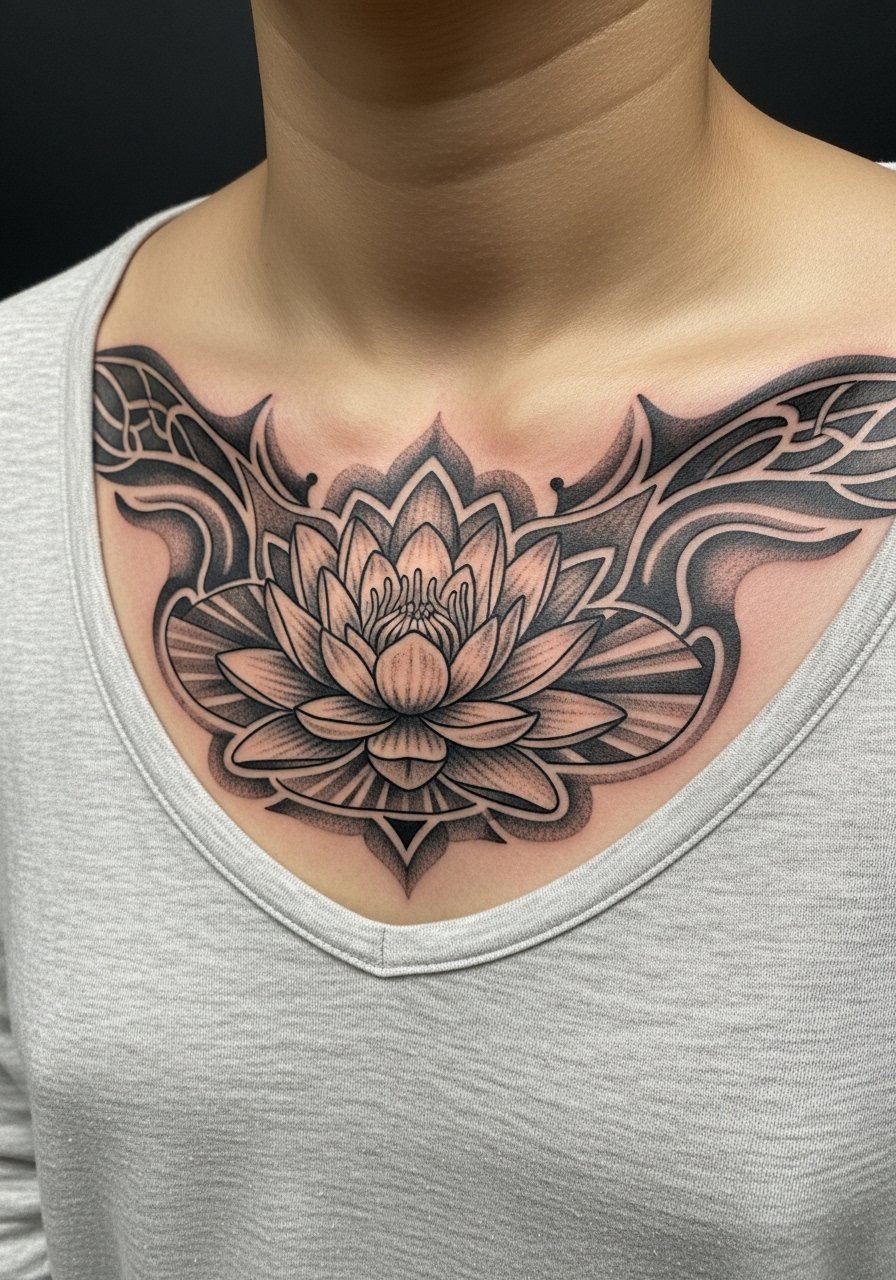
Mistake lead: Large black panels require planning for future touch-ups but negative space creates a striking focal point. The chest sees a lot of movement from breathing, so discuss how the lily sits relative to ribs and sternum. Some people want the lily flush with the sternum line which can shift with body changes. Professionals recommend placing the focal point slightly off-center for durability. For the appointment, a wide-neck shirt is a practical choice so you show just the needed skin.
20. Small Sternum Lily, Fine Line Symmetry
Pain warning lead: Sternum is sensitive and can feel intense during the session. The biggest error is asking for dense detail in a narrow zone. If you want symmetry, use simple petal shapes and avoid tiny script nearby. Artists split on using numbing for sternum work. Tell your artist your pain tolerance and discuss breaks. For session wear, a fitted sports bra provides coverage and easy access.
21. Scaled Patchwork Lilies Building Into a Sleeve

Personal observation lead: Starting micro and scaling up over years is a smart approach if you want a sleeve without committing to one sitting. The advantage is you can test line weights and color choices in smaller pieces first. The common mistake is inconsistent linework across different artists. To avoid that, keep a visual guide and discuss how future pieces will connect. Schedule touch-ups as you add pieces so saturation and linework remain cohesive. Wear a loose button-down shirt during sessions for easy arm access.
22. Water Lily with Mandala Halo on the Upper Arm

Aging/healing lead: Ornamental work with tight mandala elements needs spacing to avoid lines merging over time. Many people cram too many rings of dots into a small radius. Ask for increased spacing between mandala tiers so stipple shading has room. Pain is moderate and sessions range longer for dot work. For the appointment, a loose tank top gives the artist access and keeps you comfortable.
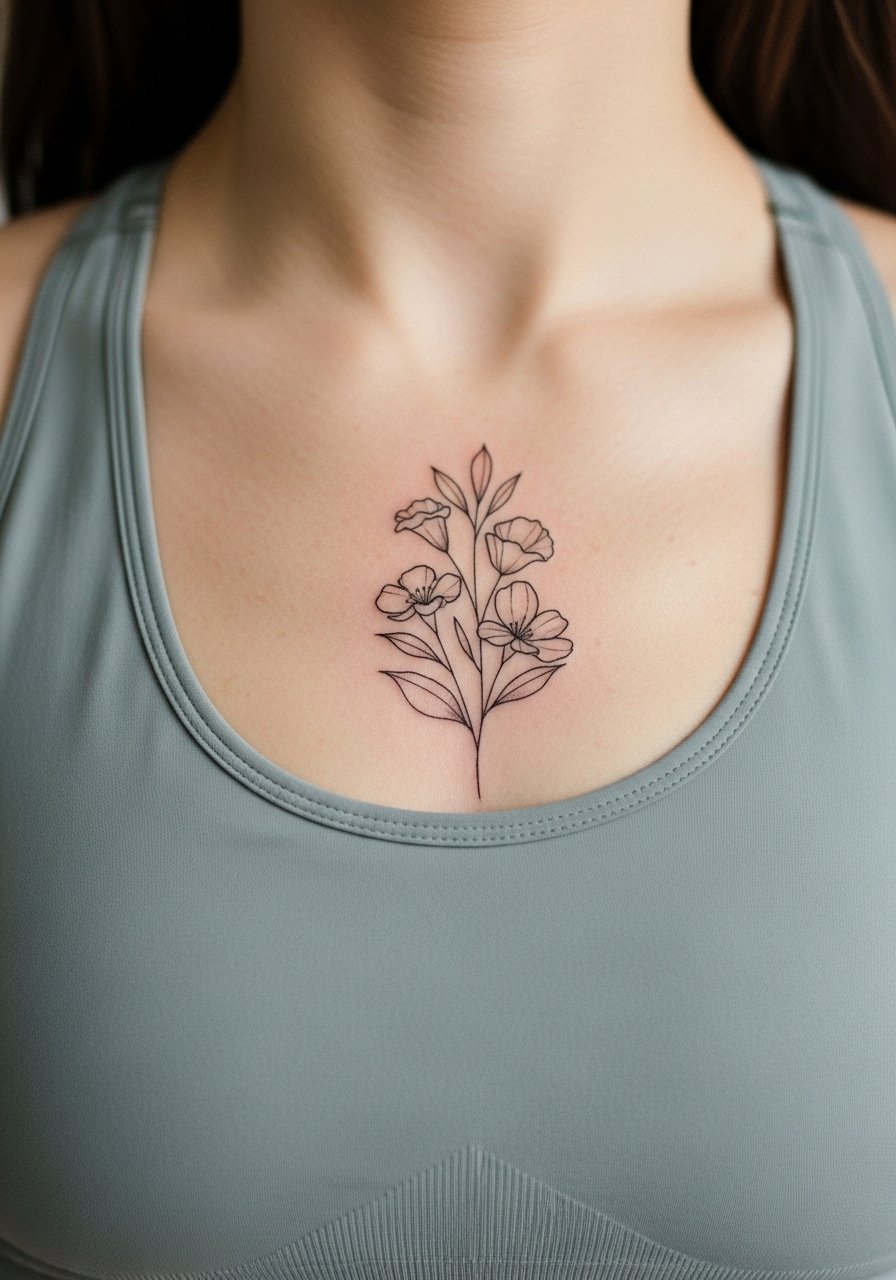
23. Tiny Bloom Below the Clavicle, Subtle Script Pairing

Consultation lead: Pairing a tiny lily with a short word requires attention to spacing so the text does not compete with petals. The common error is letting script sit too close to the bloom. If you want both, increase the negative space and use a thinner text weight than the flower outline. Pain is low to moderate and session time is brief. For showing it off, a silk camisole sits nicely above the mark without covering it.
24. Thigh Cluster That Doubles as a Cover-Up

Mistake lead: Cover-ups often fail when artists try to preserve parts of the old piece. Be explicit about which elements you want hidden and accept darker, denser layers. Thigh flesh tolerates saturation and holds color well, but plan multiple sessions and allow time between passes. During consultation, bring photos of the old ink so the artist can plan pigment layering. For the session, wear loose jogger pants you can slide down without rubbing the fresh area.
25. Inline Floral Band Around the Wrist

Mistake lead: Bands look neat but they endure constant motion and washing which can break tiny details. The common fix is to increase line weight slightly and keep motifs spaced so they remain legible. Expect a one-session piece that may need a touch-up after heavy wear. For styling, stack a minimalist cuff bracelet on the opposite wrist to balance the visual weight.
26. Inner Bicep Micro-Realism for a Hidden Bloom

Pain warning lead: Inner bicep sessions are more painful than they look, often a six out of ten. The area can blur if the linework is too fine and the skin stretches with arm movement. A good approach is medium line weight with layered shading to keep texture over time. For session wear, bring a loose tank top so the artist can access the area without discomfort.
27. Spine-of-Petals Vertical Composition for Back Center

Decision-pressure lead: Back center pieces read differently when you stand versus when you arch, so get in position during stencil approval. This composition is best for people comfortable with larger sessions and with plans for future expansion across the back. Pain varies along the spine and sessions are long. Avoid packing too much micro-detail in the center line. Instead, ask for clearer petal separations and a plan for adjacent fills if you expand later. For session comfort, bring a loose open-back top to change into without trouble.
Frequently Asked Questions
Q: Will a fine line water lily on my wrist blur faster than one on my forearm?
A: Yes, wrists face more friction and frequent washing which speeds fading. In my experience, asking for slightly heavier linework and planning a touch-up at six to twelve months makes a big difference. Also consider placement slightly higher on the inner forearm if you want the same visual without the daily wear.
Q: Is Saniderm or dry healing better for thigh and ribcage lilies?
A: Artists are split into two camps. One camp prefers Saniderm for protection in the first 24 to 48 hours. The other camp argues dry healing avoids trapped moisture, especially in warm, high-friction areas like thighs. The best path depends on your skin, climate, and the artist's recommended aftercare. Ask the studio where they have seen the best long-term color retention for similar placements.
Q: How should I prep clothing for a sternum or ribcage session?
A: Wear a fitted sports bra or a cropped top you can shift so the artist only exposes the tattoo zone. Bring sweat-wicking layers and loose bottoms so you can stay comfortable between passes. The right clothing reduces repositioning and makes the session smoother for both of you.
Q: Can UV-reactive ink be used safely for accents on a water lily?
A: It can, but it depends on the pigment and the artist's experience. Some artists use UV accents sparingly to avoid rapid fading or unpredictable color shifts. If you want UV details, request a small test spot and clear guidance on touch-up options.
Q: How often should I expect touch-ups for a micro-realism water lily on the shoulder blade?
A: From what I've seen, well-saturated micro-realism on the shoulder blade can hold for several years before a subtle touch-up is needed. Plan for a possible refresher at year three to five depending on sun exposure and how much you sweat during workouts.
Q: Is there a big difference in how lilies read on darker skin tones?
A: Yes, contrast choices matter. On darker skin tones, deeper midtones and sparing white highlights help texture read in photos. Blackwork silhouettes and strong saturation often read cleaner than pale gray washes. Discuss contrast strategies with an artist experienced in multi-tone work.
Q: If I want a cover-up on the thigh, what should I tell the artist in consultation?
A: Be specific about which elements of the old piece you want fully hidden and which you accept as blended. Bring clear photos of the old tattoo and of the desired style. Expect multiple sessions and agree on a staging plan so saturation and composition evolve predictably.
