
The watercolor stencils that hold up best are often the ones pared back to essentials, not the crowded painterly pieces people pin for likes. A small, simple stencil gives the artist breathing room to place color without saturating fragile linework. If you want designs that look intentional at year one and comfortable at year five, start with shapes that translate cleanly from paper to skin. The first idea below shows how a tiny stencil can do big visual work.
1. Mini Watercolor Poppy on the Wrist
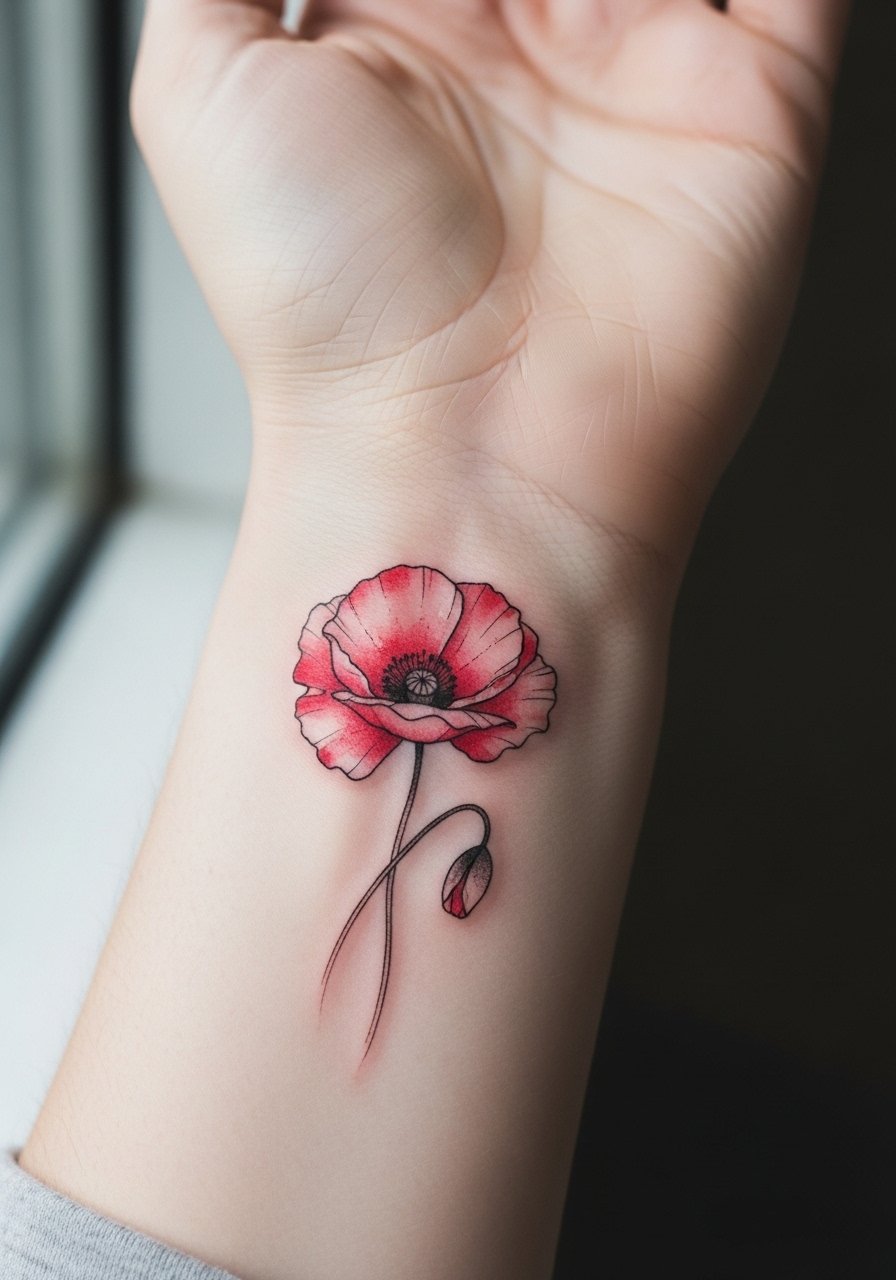
I've seen these tiny poppies look fresh for years when artists keep the stencil simple. Tell your artist you want the watercolor as a soft wash around a single, confident outline. Common mistakes are overfilling the wrist with color and compressing the stencil, which leads to color migration and faster fading. Expect a quick thirty to forty five minute session and moderate wrist sensitivity. For showing it off, rolled-up sleeves or a racerback tank top work well because they keep the forearm visible without crowding the wrist.
2. Loose Bloom Forearm Band
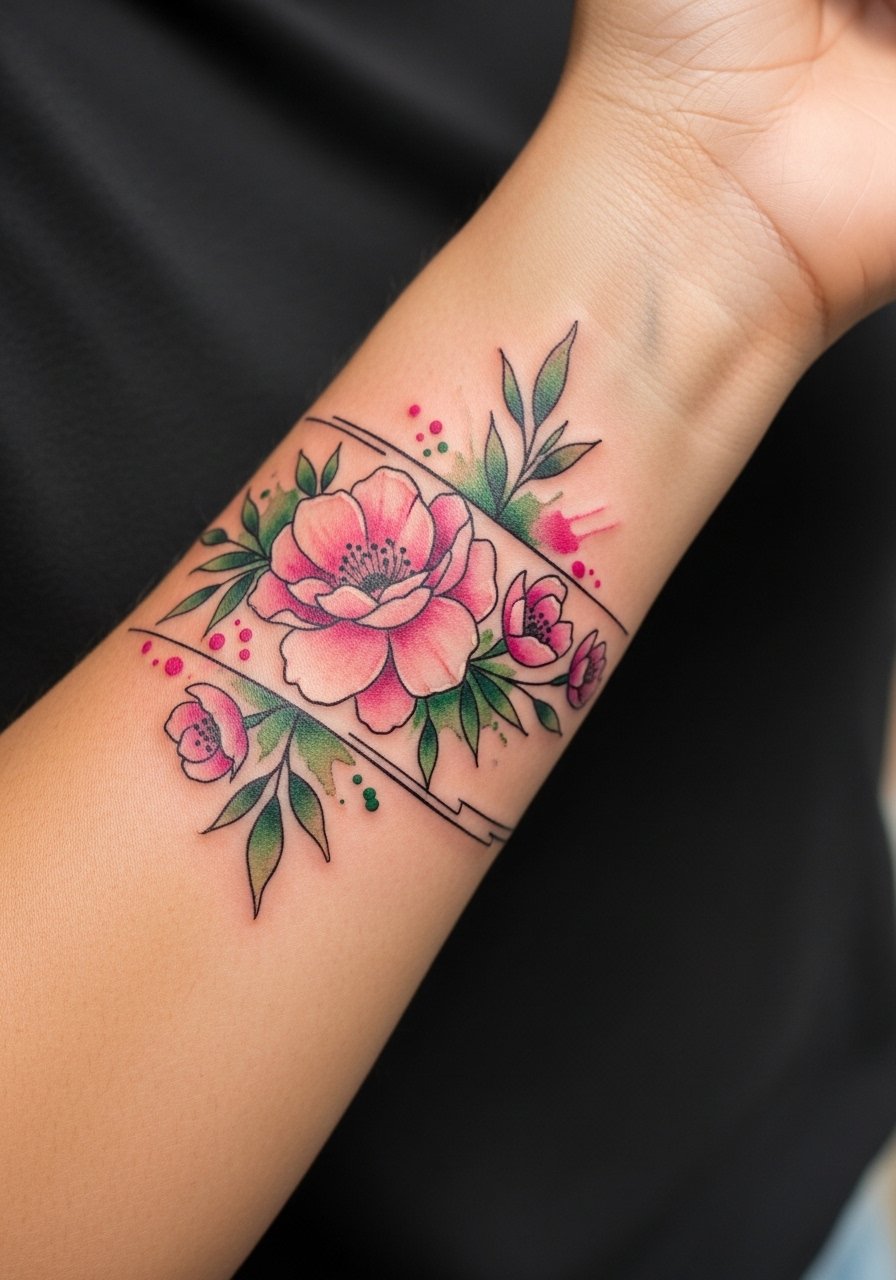
Personal observation tells me forearm bands look best when the stencil follows the arm's curve instead of forcing symmetry. Ask for a stencil wrap that maps to muscle direction. A common aging issue is tight packing of petals, which causes overlapping color after two to three years. This piece usually takes around an hour for an experienced artist and is low to moderate on pain. For outfits that highlight the band, try a rolled-up linen shirt or a sleeve pushed just above the band to let the wash breathe.
3. Tiny Constellation on the Ankle
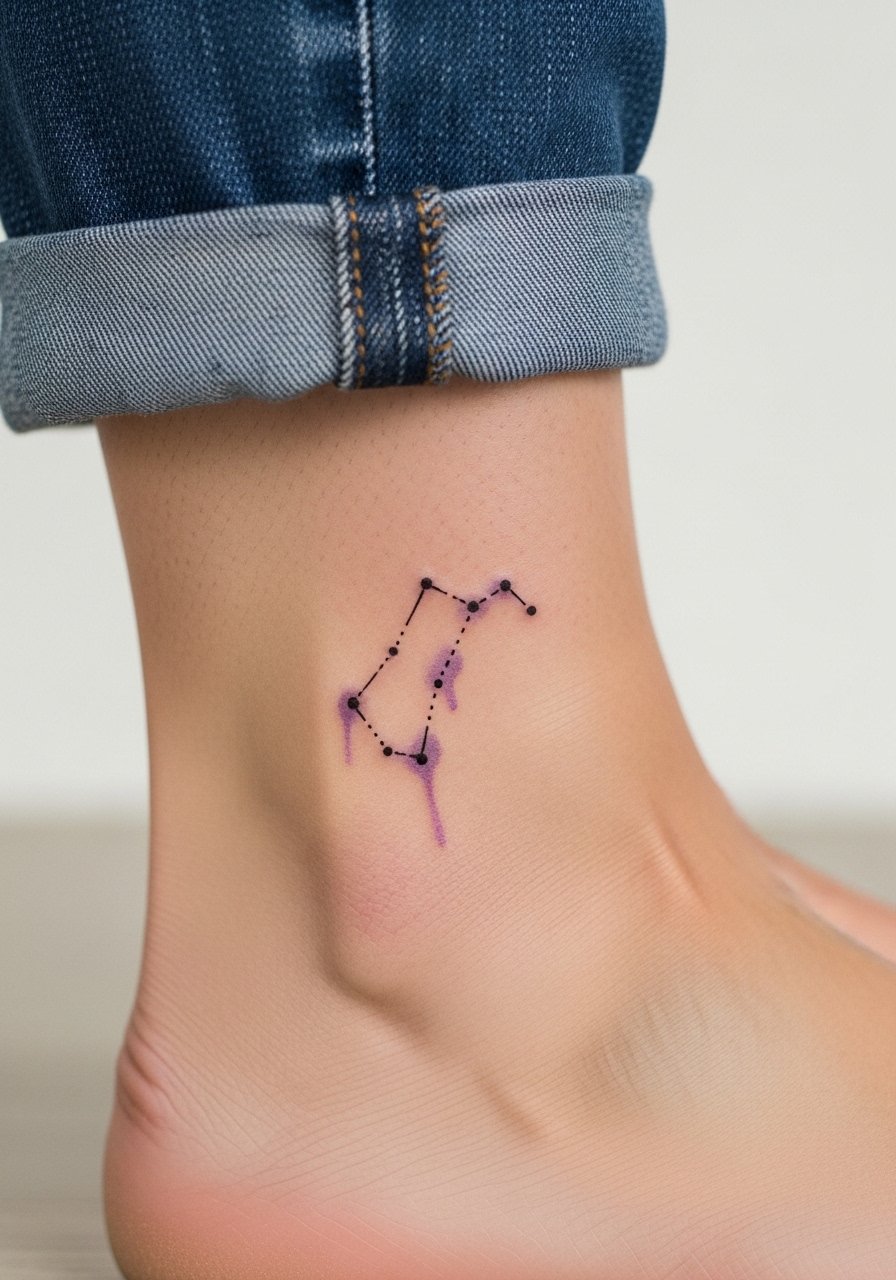
Fair warning, ankle work gets friction from shoes and socks, which eats color faster than open placements. The stencil should be tiny and spaced so the dots remain separate when skin shifts. During consultation, say you want negative space between each star dot to avoid merging. Sessions are brief but expect touch-ups sooner than for upper-arm pieces. For showing it off, sandals or minimal leather sandals keep ankles visible without rubbing the area.
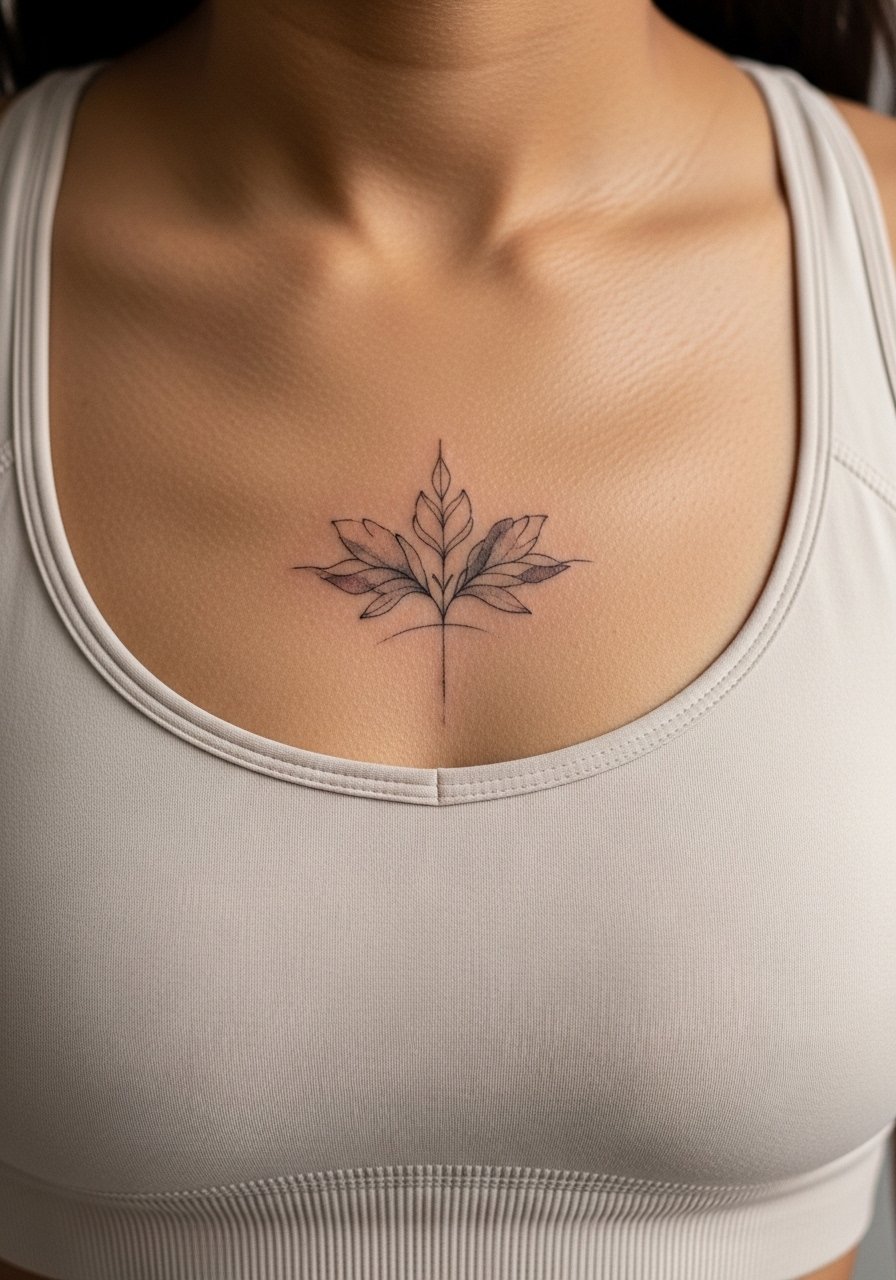
4. Collarbone Watercolor Script Accent
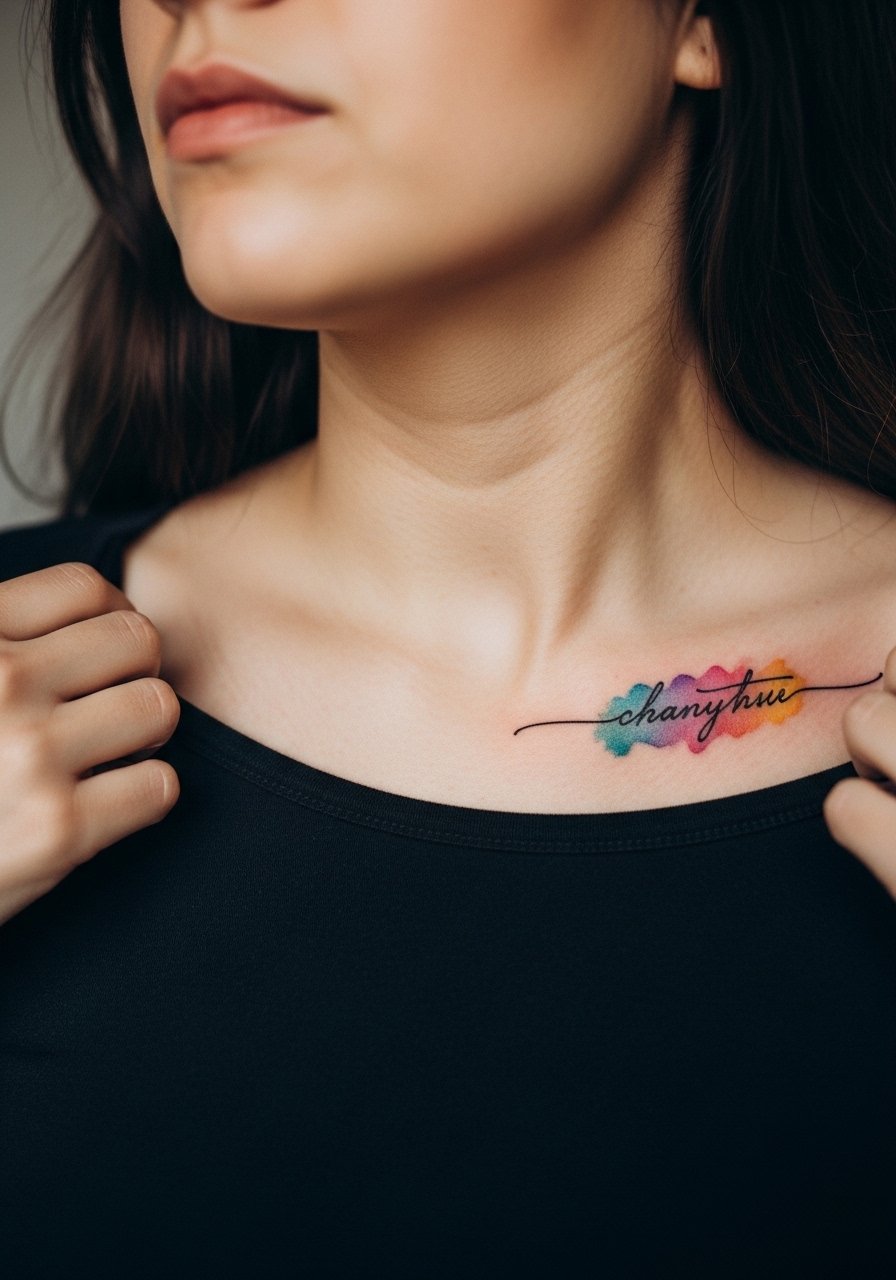
When you sit with an artist for collarbone pieces, ask for a light wash that sits beneath the script rather than smothering it. The biggest mistake is pushing too much pigment close to bone where touch-ups look patchy. Expect a sensitive session and short breaks if the collarbone feels exposed. For session comfort, wear a wide-neck shirt you can pull aside easily. For dressing up, a thin chain or open-neck blouse frames the area without competing.
5. Watercolor Wave on the Shoulder

Visual impact is immediate with shoulder washes when the stencil respects muscle shape. Tell your artist you want the wash to read from the front and the back so the curve stays coherent when you move. A typical session is forty five minutes and pain is low to moderate. The most common error is oversaturating the shoulder, which leads to patchy fading in sunsplashed summers. For show-off outfits, a loose tank top keeps the shoulder visible and protects the area until healed.
6. Watercolor Mini Bouquet on the Hand
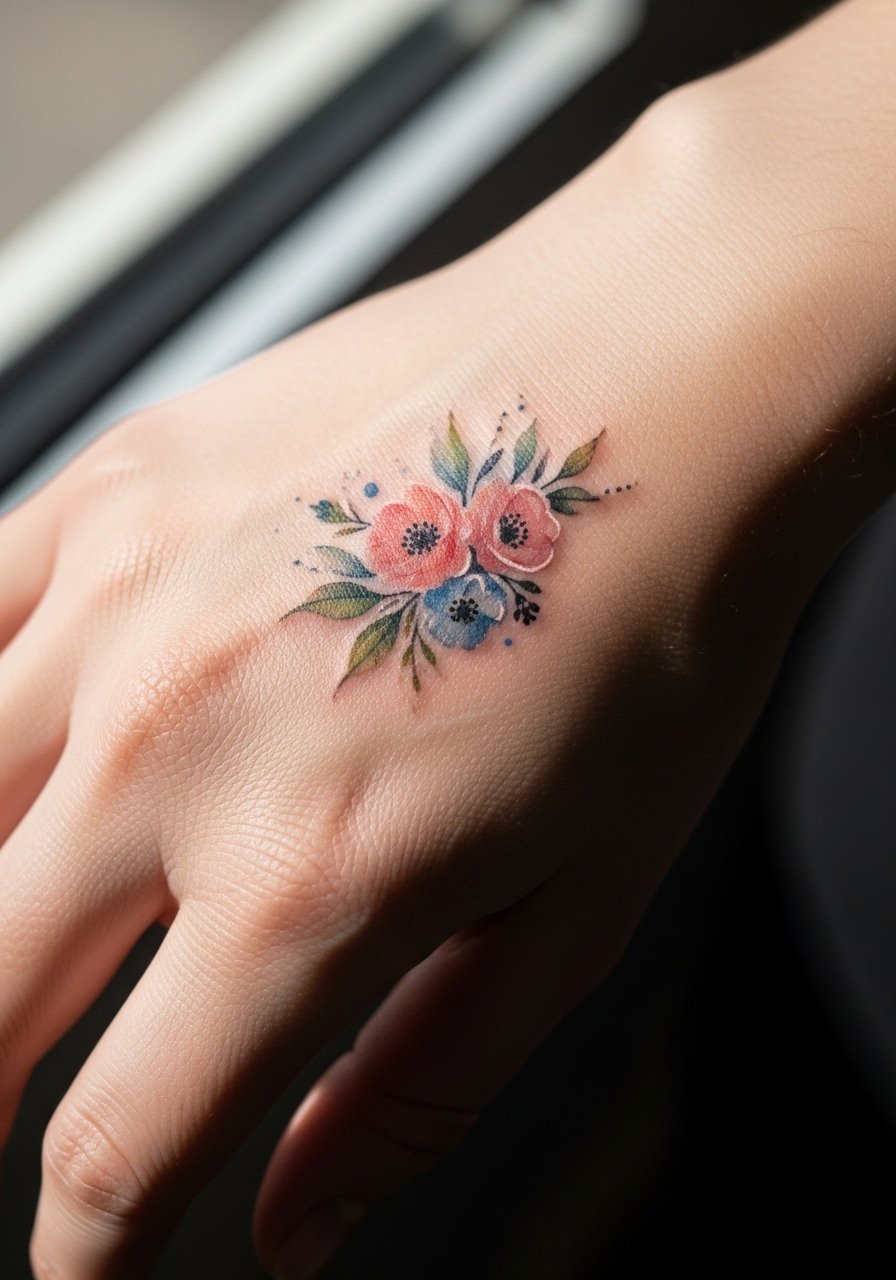
Controversy is alive around hand tattoos and professional consequences, so think through career implications before committing. From a technique view, hands blur faster due to constant washing and friction. One camp says hands are fine if placed and shaded conservatively. The other camp warns most hand pieces need annual touch-ups. For the session, prepare for a higher pain level and plan to wear gloves if your job requires it right after. Pair the piece with thin rings and a thin chain bracelet to balance attention without crowding the paint.
Studio Day Picks
Those small wrist and hand stencils above need different prep than shoulder and forearm work, so a few targeted items make session day and the first week easier.
-
Stencil transfer paper kit. Lets you preview how a mini stencil sits on curved areas like wrists and ankles before the needle hits skin.
-
Topical numbing cream. Apply per directions to take the edge off for short, sensitive spots such as the hand or collarbone.
-
Thin protective film roll. Good for covering hand and finger pieces during the first days when friction from daily tasks is highest.
-
Fragrance-free gentle body wash. Cleans healing washes on the forearm and shoulder without stripping the faint watercolor pigment.
-
Aquaphor healing ointment. Thin application in the first 48 hours helps lock in moisture for delicate linework on wrists and hands.
7. Brushstroke Cat on the Outer Calf
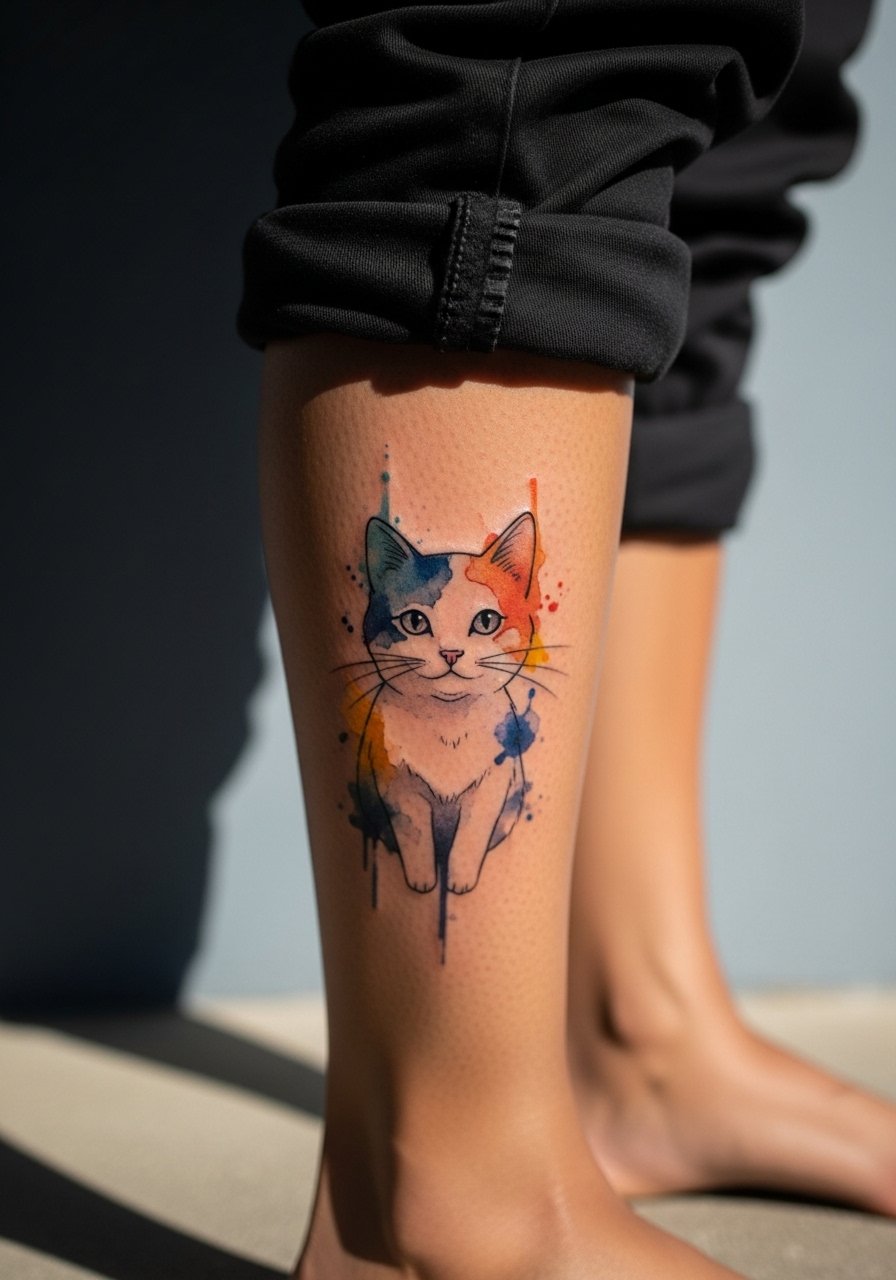
There's something about calf placements that lets watercolor feel casual and intentional. In consultation, ask for the stencil to be slightly elongated to read along the muscle when standing. Common mistakes include crowding small features into a narrow calf band, which blurs after a year. Pain is low and sessions run forty five to sixty minutes for color layering. For easy showing, pair this with a pair of denim shorts or a midi skirt with a side slit.
8. Inner Bicep Watercolor Sprig
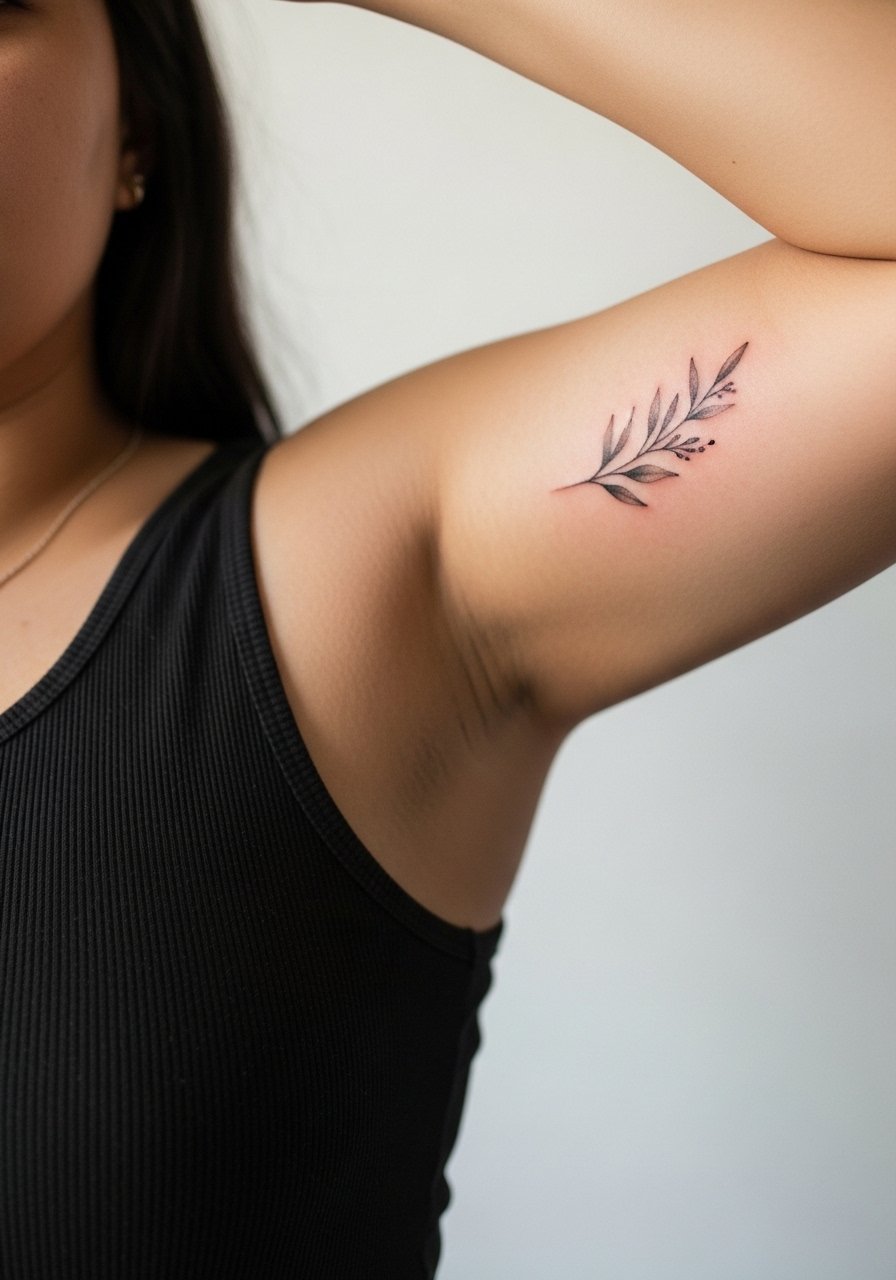
The inner bicep is a sensitive placement and demand for specialized technique is higher. Artists split into two camps on inner-arm fine work. One group says the skin stretch and sweat cause lines to blur within two years. The other group argues that proper depth and spacing makes it hold. Ask the artist which camp they fall into and to show healed photos of similar pieces. Sessions are moderate in length and can be more tender. For the appointment, a tank top you can shift is essential.
9. Thigh Watercolor Crescent
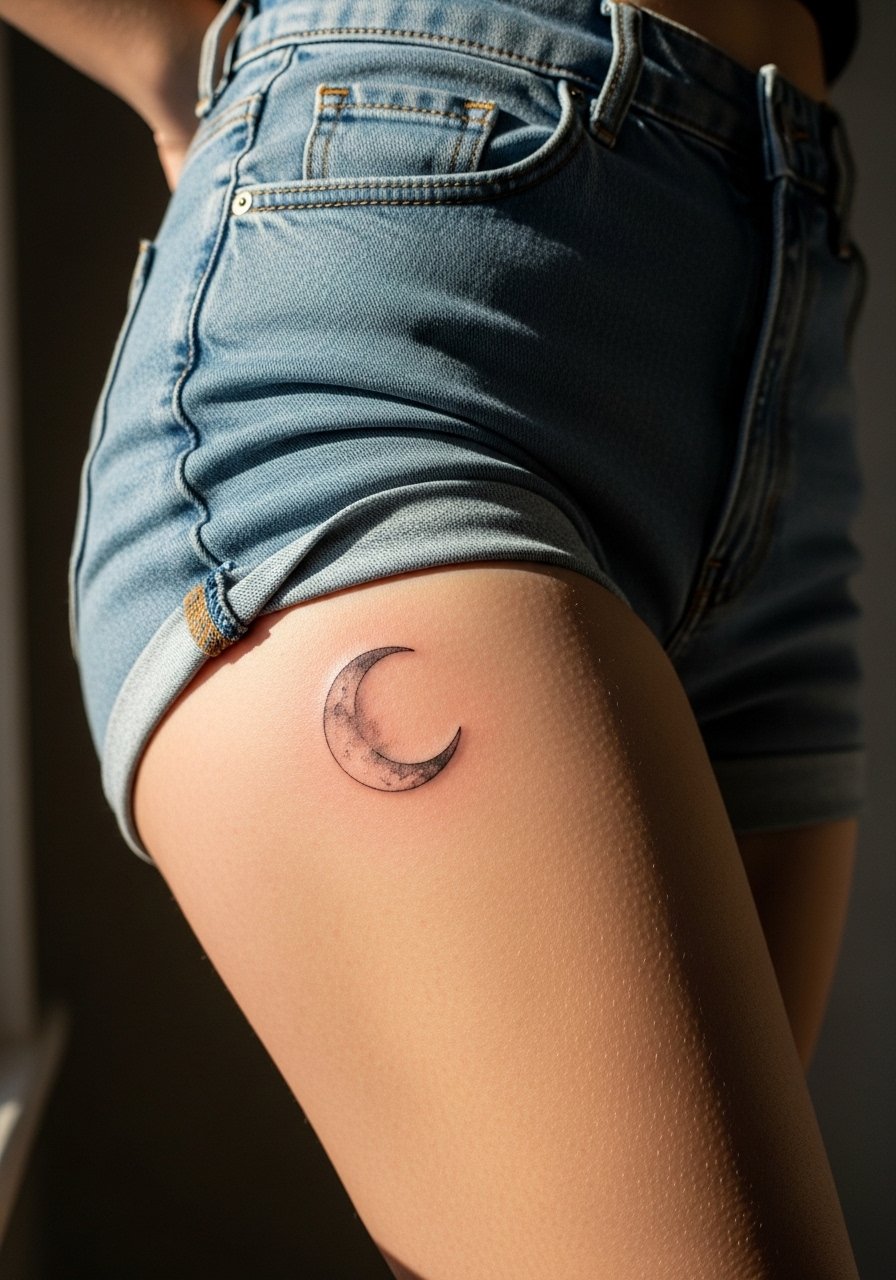
When you choose a thigh stencil, remember it's a forgiving canvas for larger washes. Tell your artist you want negative space around the crescent to prevent color from pooling. A common mistake is trying to cram too many small details into the thigh, which then read as a single smudge after healing. Sessions vary from forty five minutes to two hours depending on size. For the session wear, pull on high-waisted shorts so the artist can access the area without you feeling exposed.
10. Sternum Watercolor Accent
Fair warning, sternum sessions are intense and highly sensitive. The stencil should be conservative with balanced negative space to help the pigment settle evenly. A common mistake is over-saturating right at the sternum where touch-ups look patchy. Ask for reference healed photos from the artist. For session wear, a fitted sports bra or bandeau that exposes only the area is best so the artist has access without full exposure. Plan on breaks and a longer session for larger washes.
11. Back of Neck Watercolor Accent
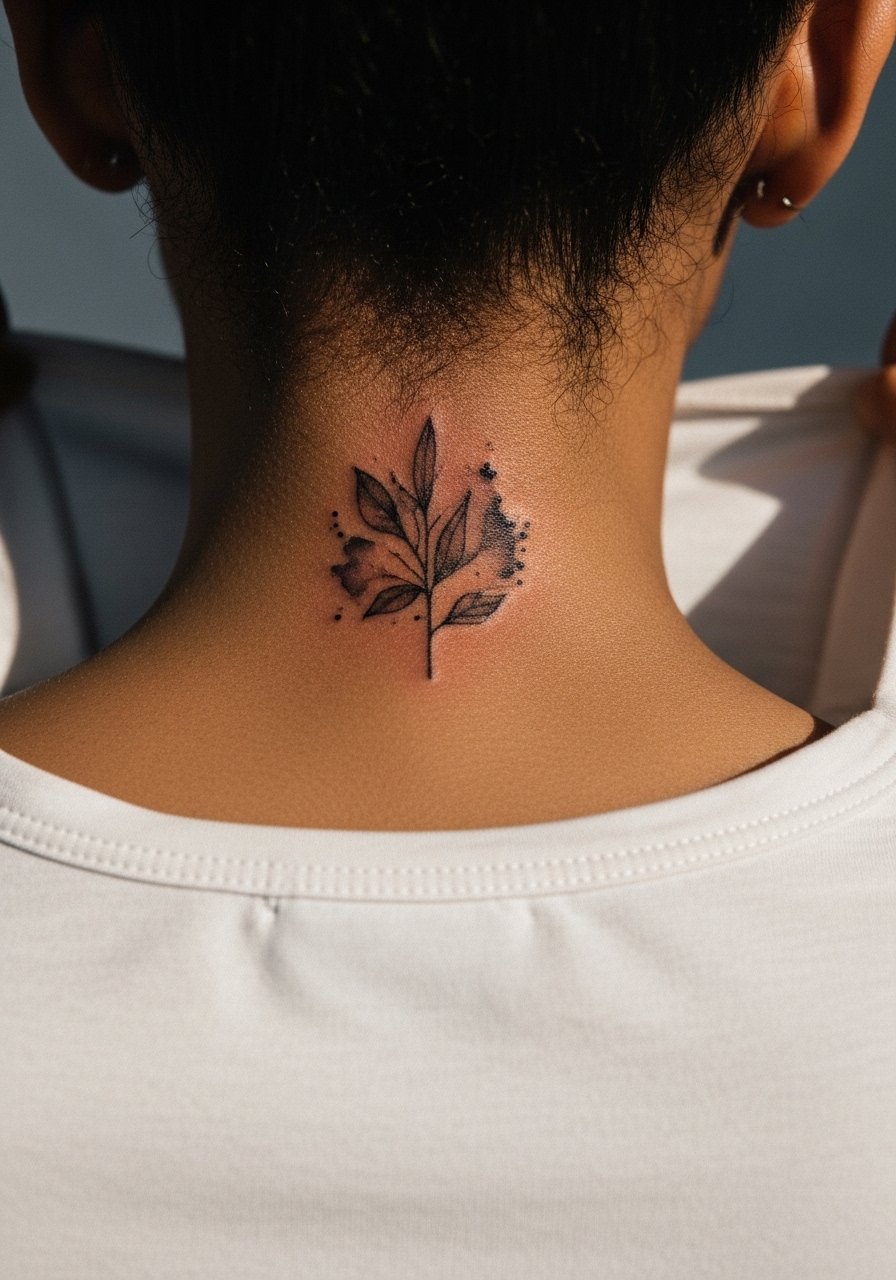
Decision-pressure moments happen when the stencil goes on the neck. If you're nervous about career visibility, place the stencil low on the hairline or behind the shirt collar. The neck heals with more movement stress, so ask the artist for a slightly bolder outline to protect the wash. Sessions are short but sensitive. For the appointment wear a wide-neck shirt you can shift for access. Show-off outfits like collared tops hide or reveal the piece on demand.
12. Dotwork Watercolor Finger Accent
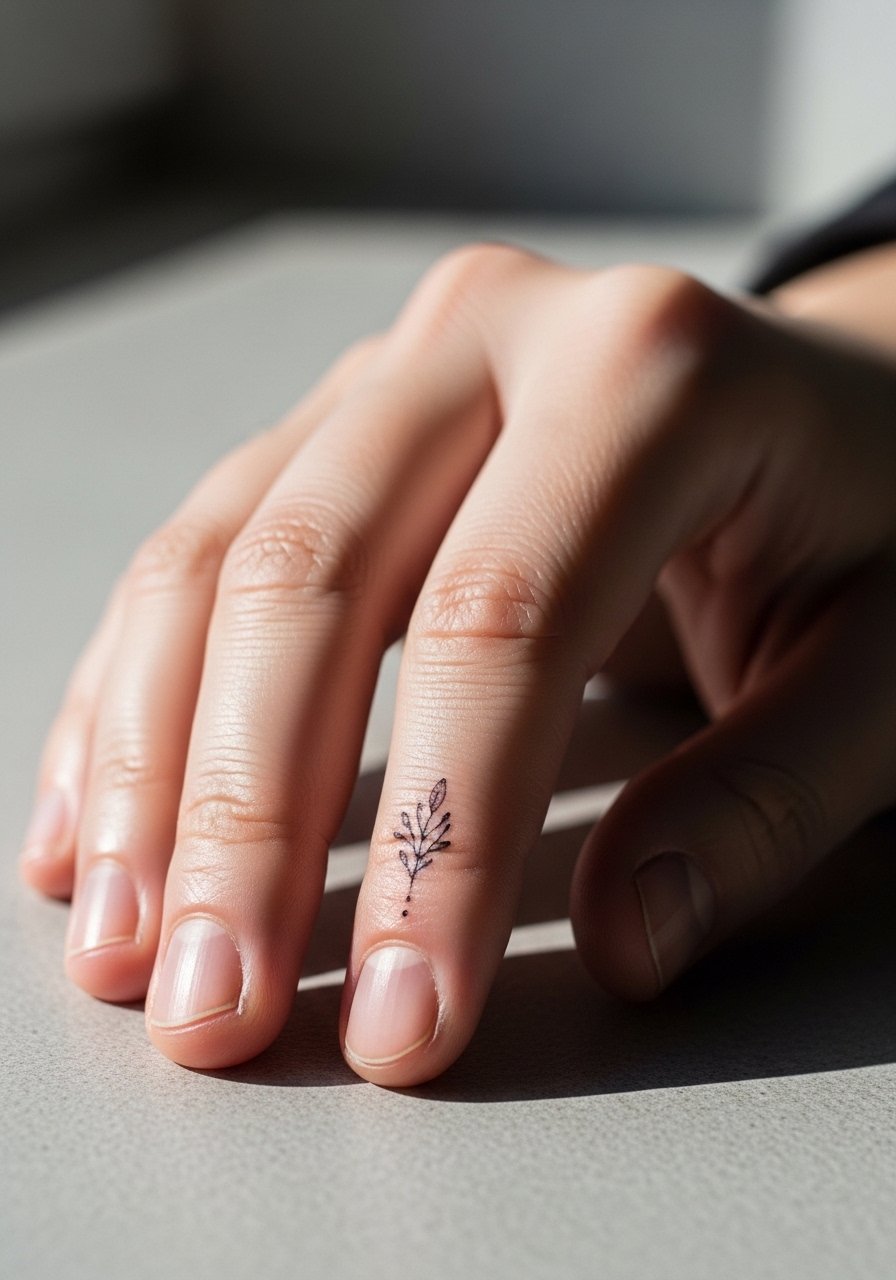
Finger stencils are a different animal because of constant washing and friction. The best approach is a tiny stencil with clear negative space between elements. The common mistake is requesting dense color on a fingertip, which almost always fades fast. Expect short sessions but frequent touch-ups. For subtle styling, try stacking with a thin minimalist ring that frames the finger without rubbing the ink.
13. Watercolor Ribcage Petal Cluster
Most ribcage watercolor pieces reveal an important aging truth. Artists split into two camps on ribs. One says fine line and watercolor on ribs blur quickly due to stretch and movement. The other says with deeper placement and spacing, they can last. The honest advice is to ask for healed pictures and to expect touch-ups sooner than on the forearm. Sessions are longer and painful for many people. For the appointment, wear a cropped athletic top you can easily lift to expose just the stencil area.
14. Lower Back Subtle Wash
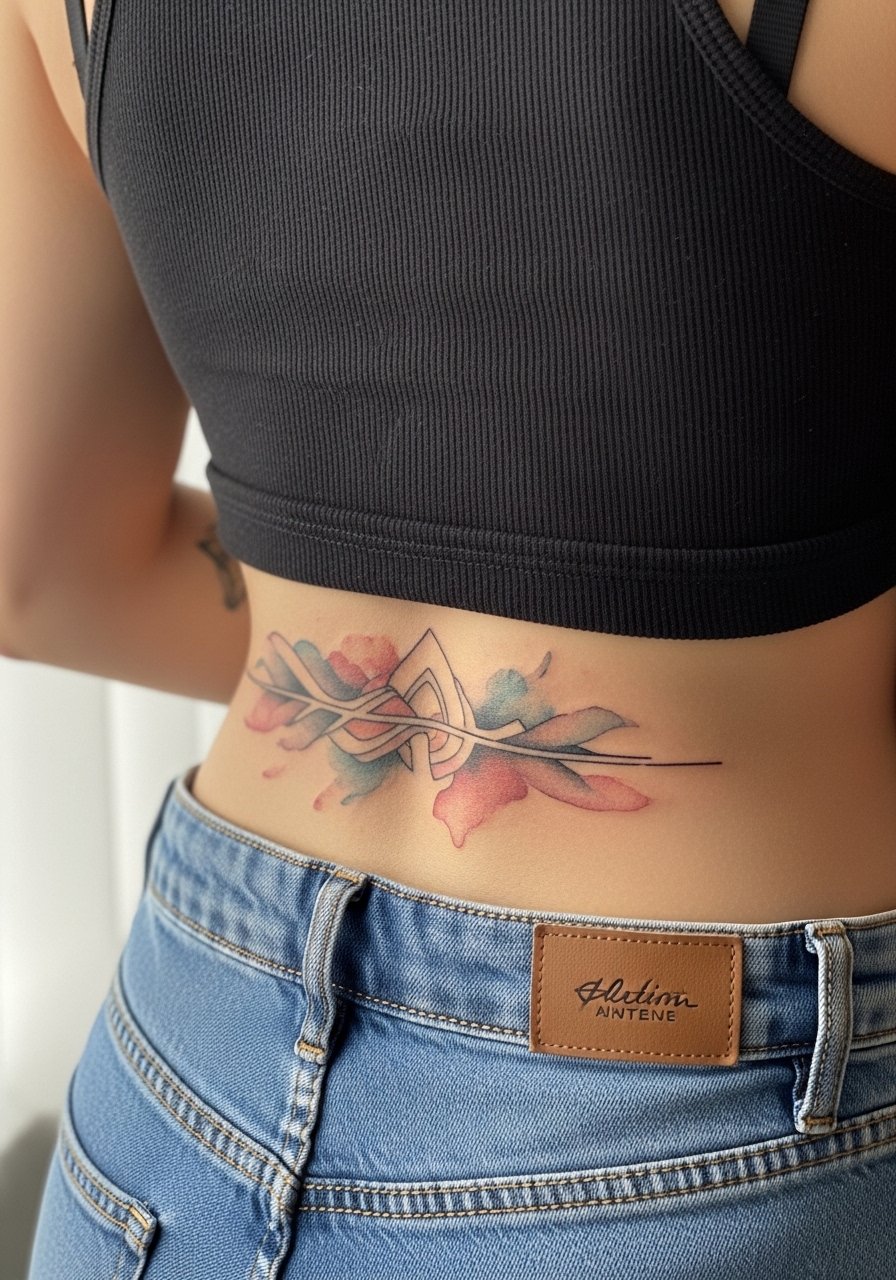
Lower back washes age relatively predictably if the stencil is given room. A common mistake is packing multiple tiny motifs into a narrow strip which merges after a few years. Ask your artist to map the stencil to your spine curve so the wash flows with movement. Sessions run about an hour and pain is moderate. For showing it off, choose a low-rise skirt or jeans or a crop top that leaves a sliver of lower back visible.
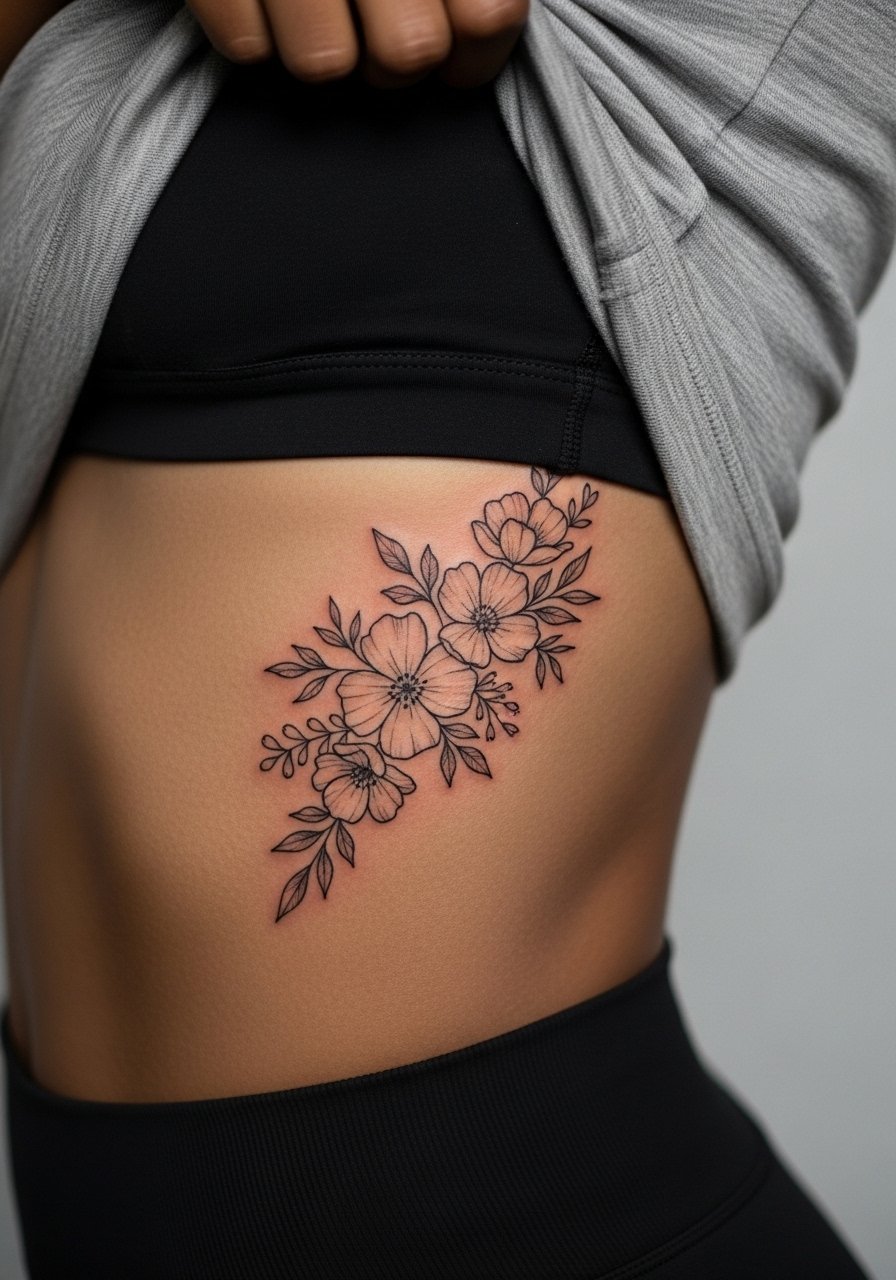
15. Hip Bloom with Hidden Wash
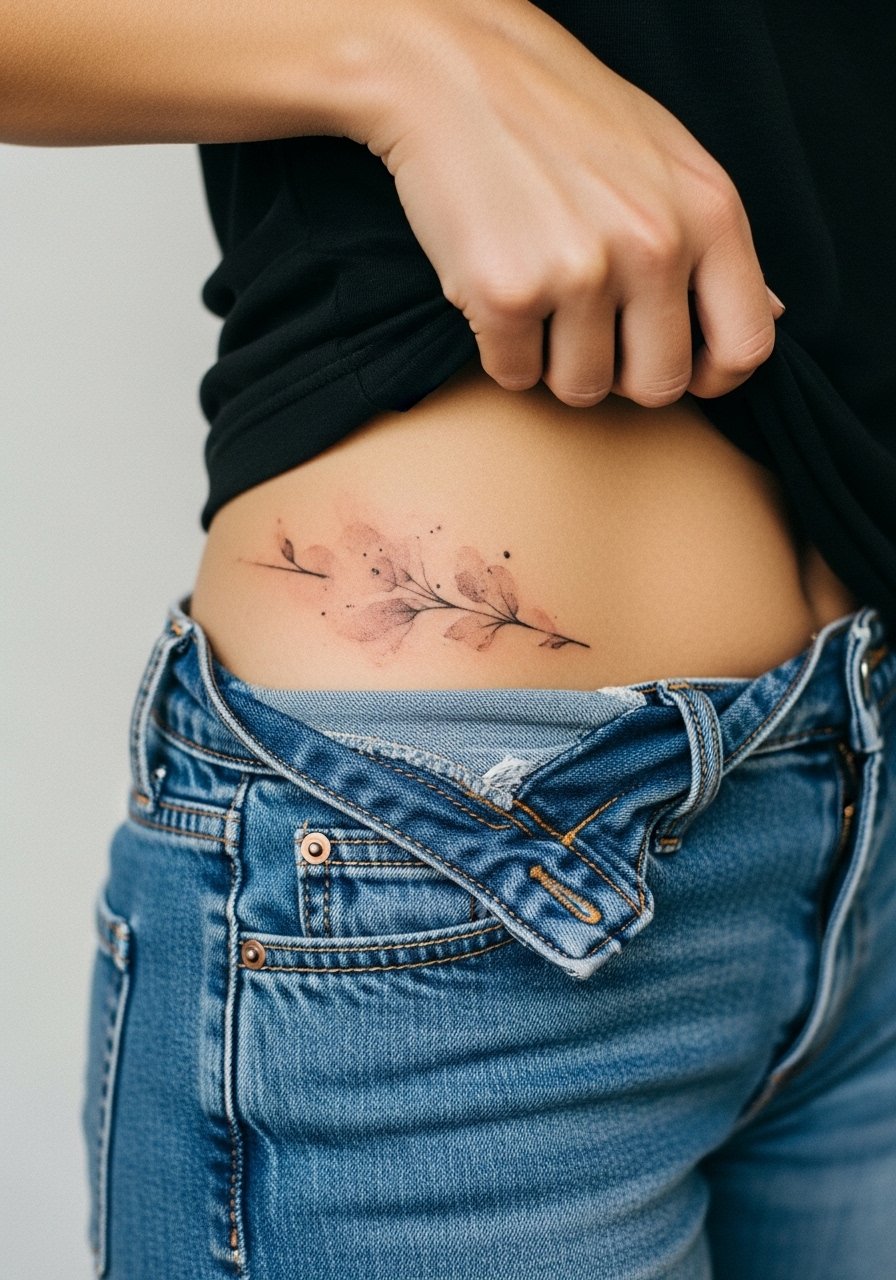
When you get a hip stencil, you have room for softer gradients that still read at a distance. Ask the artist for a stencil that keeps heavier pigment away from seams where clothing will rub. A common failure is putting saturated color where waistbands hit, which leads to uneven fade. Sessions are moderate and can be more comfortable than ribs. For the appointment, wear high-waisted denim or a skirt that you can shift without fully undressing.
16. Spine Line Watercolor Trail
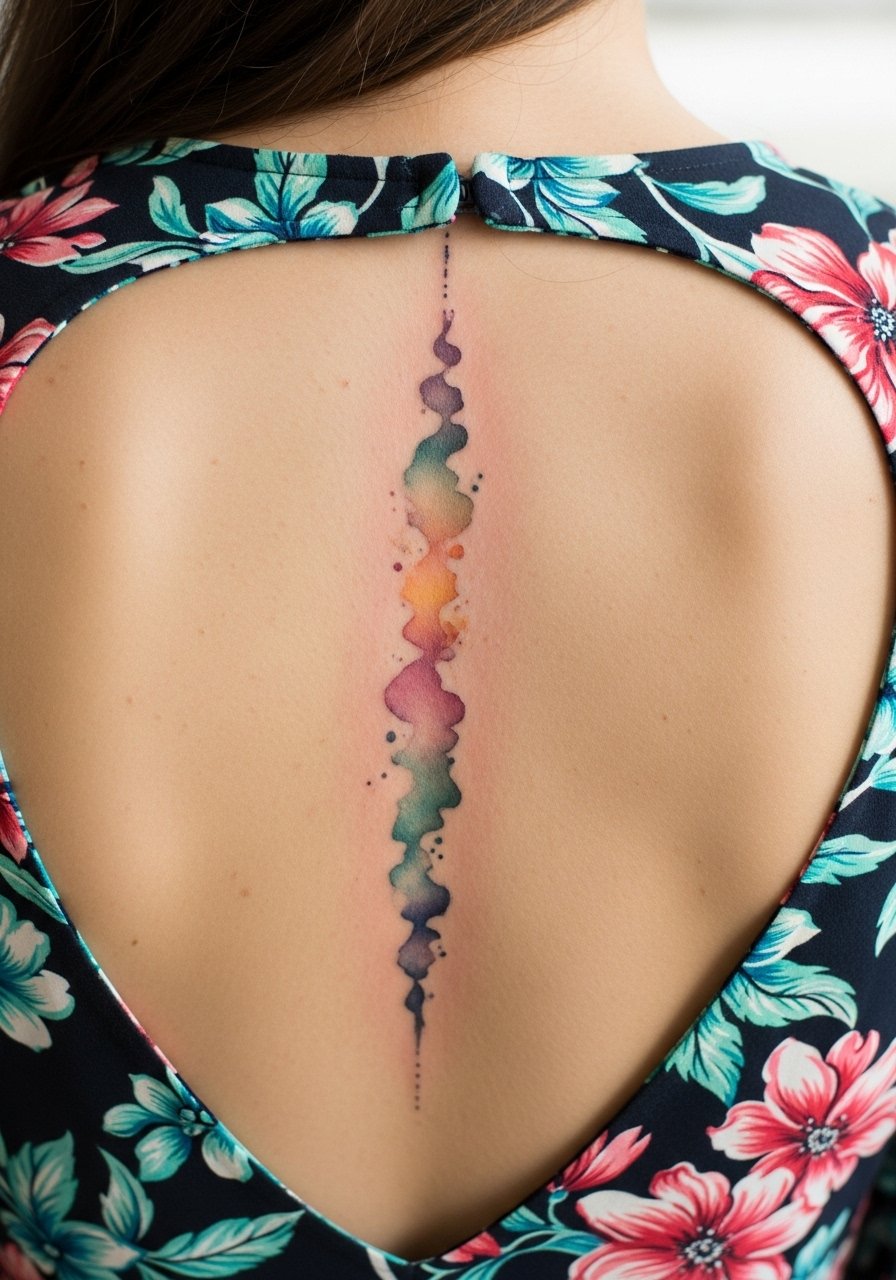
This placement reads beautifully with vertical washes because movement emphasizes the line. Tell the artist you want spacing between each pigment patch so the trail does not blur into a single bar. The main mistake is compressing too many small marks along the spine. Sessions can be longer and you may need to shift positions. For show-offs, open-back dresses or halter tops let the trail speak without crowding. Consider a loose open-back dress for evenings when you want it visible.
17. Upper Arm Sailboat Wash
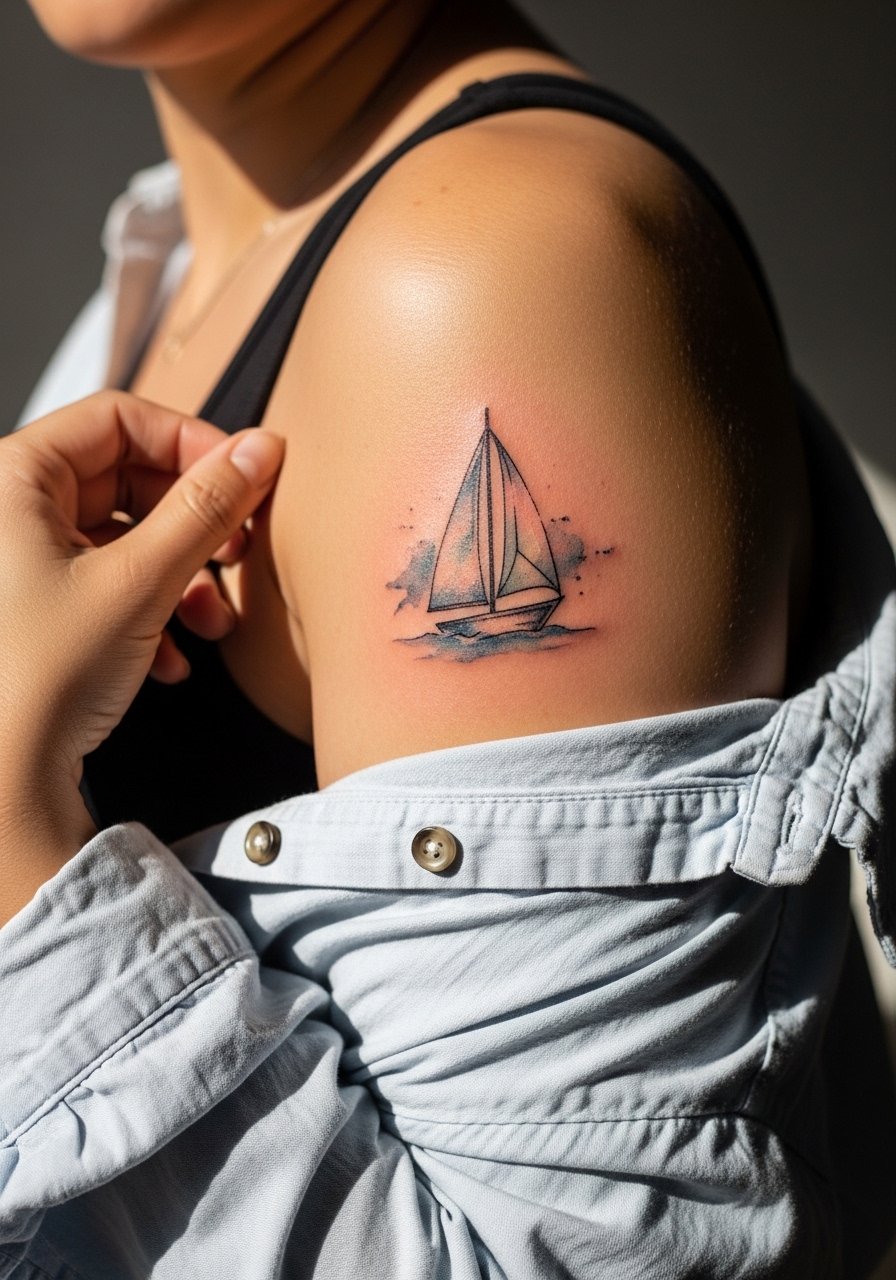
Personal observation is that upper arms are forgiving for watercolor experiments. Ask for a stencil that places the boat slightly rotated so it reads naturally on the round of the arm. The common error is cramming horizon details too tight, which merge over time. Sessions are comfortable and often under an hour. For the appointment, wear a loose button-down shirt you can pull aside so the artist has clean access.
18. Ankle Chain Watercolor Motif
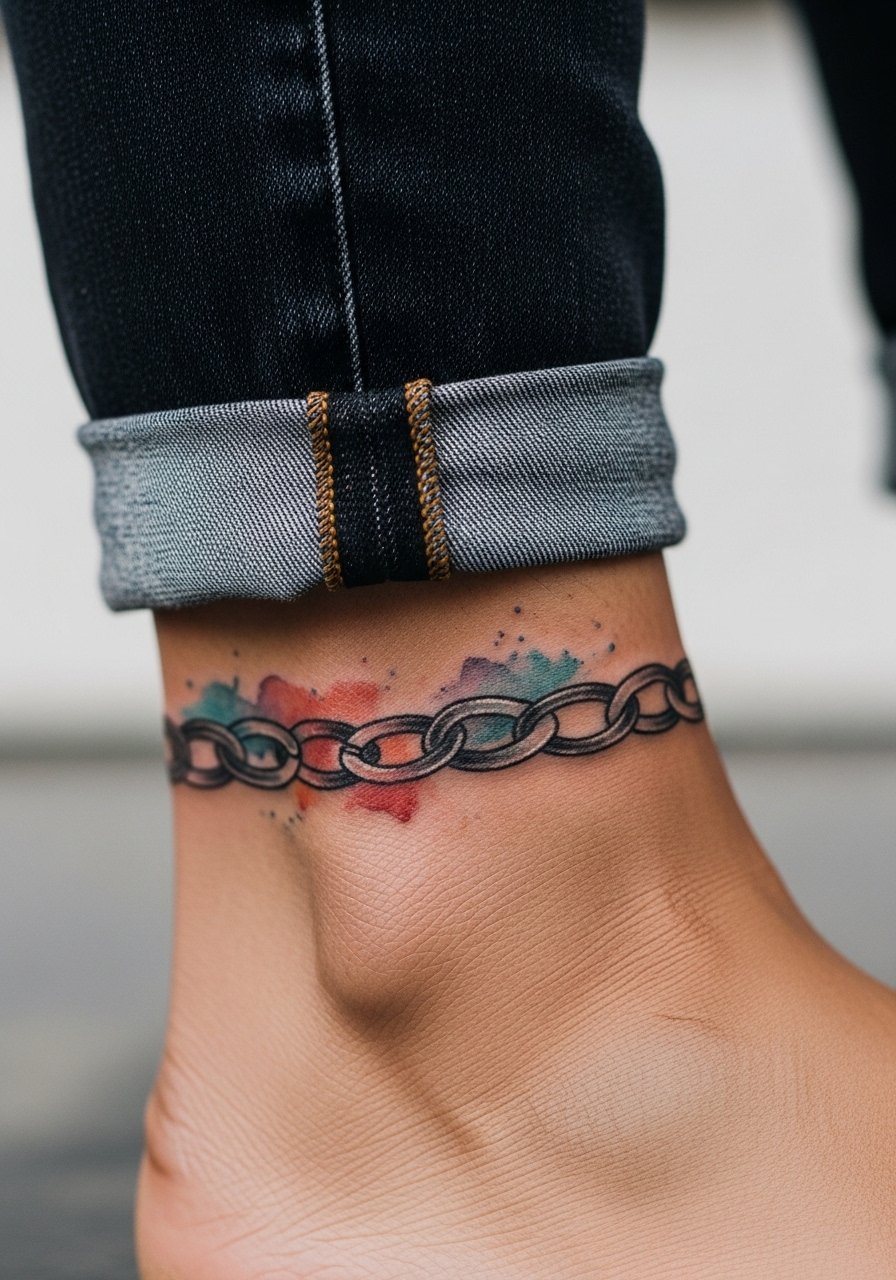
Visual impact works well with ankle chains if the stencil keeps links airy. The ankle sees friction from shoes and daily movement, so spacing is crucial. Ask for slightly bolder spacing between links to prevent merging. Sessions are brief but expect touch-ups earlier than for upper-arm work. For showing it off, sandals or rolled jeans work best. A pair of casual sandals keeps the area open while minimizing rubbing.
19. Subtle Watercolor Ear-Behind Accent
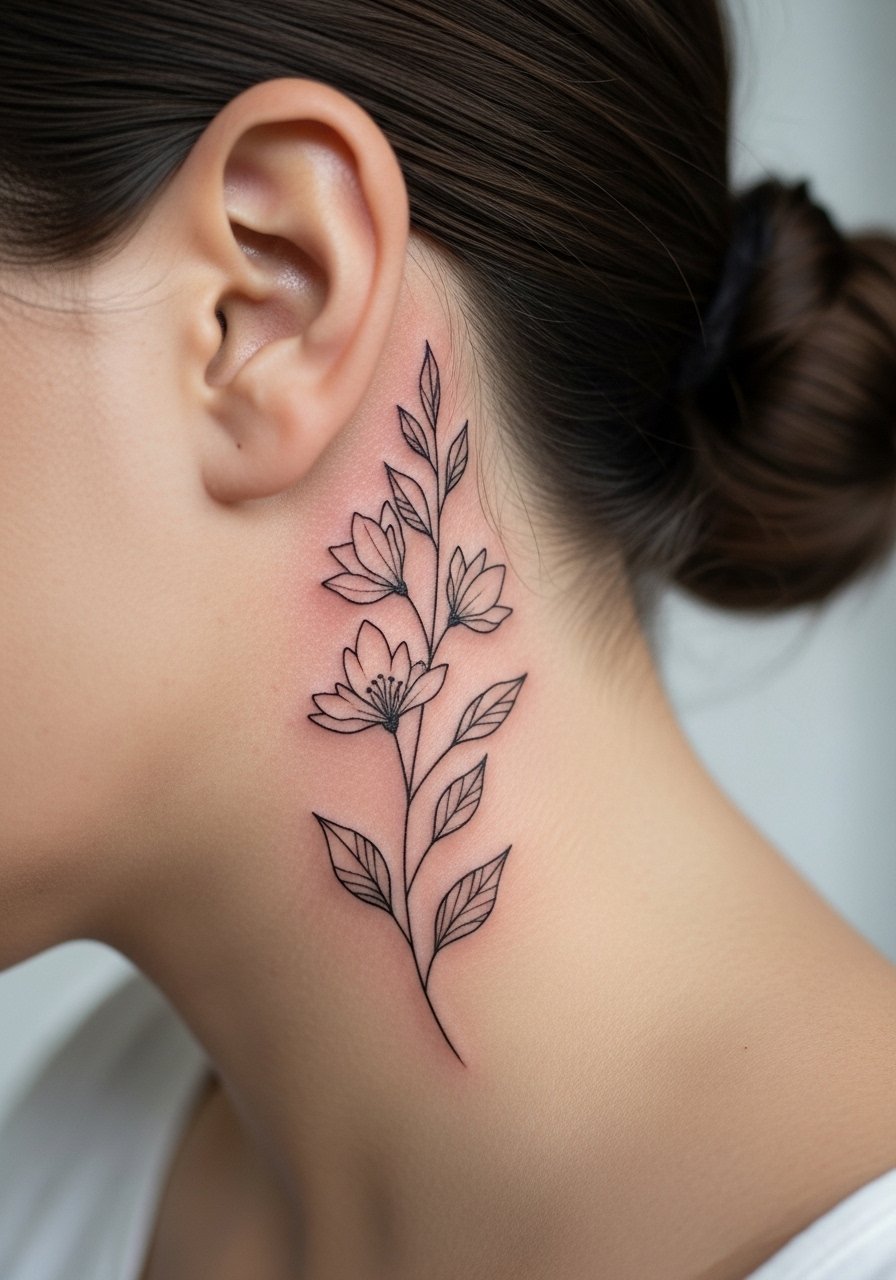
Behind-the-ear stencils are small and easy to hide, but placement demands subtlety. Never ask for a heavy wash there because the area is compact and shows migration quickly. Two camps exist on this placement too. One camp prefers signal-only dots and thin washes. The other will take slightly larger stencils and accept earlier touch-ups. Ask to see healed work from the artist. For the appointment, wear your hair up so the artist can access the area without fuss.
20. Watercolor Palm-Side Wrist Accent

Aging and friction matter here because the palm-side wrist rubs often against phones and keyboards. A practical stencil keeps the pigment centered away from creases. The common mistake is extending the wash into high-movement zones where it can fragment. Sessions are short and sensitivity is moderate. For the session, wear a loose long-sleeve that can be rolled up easily so the area is accessible without getting clothes in the way.
21. Watercolor Pine Cone on the Calf
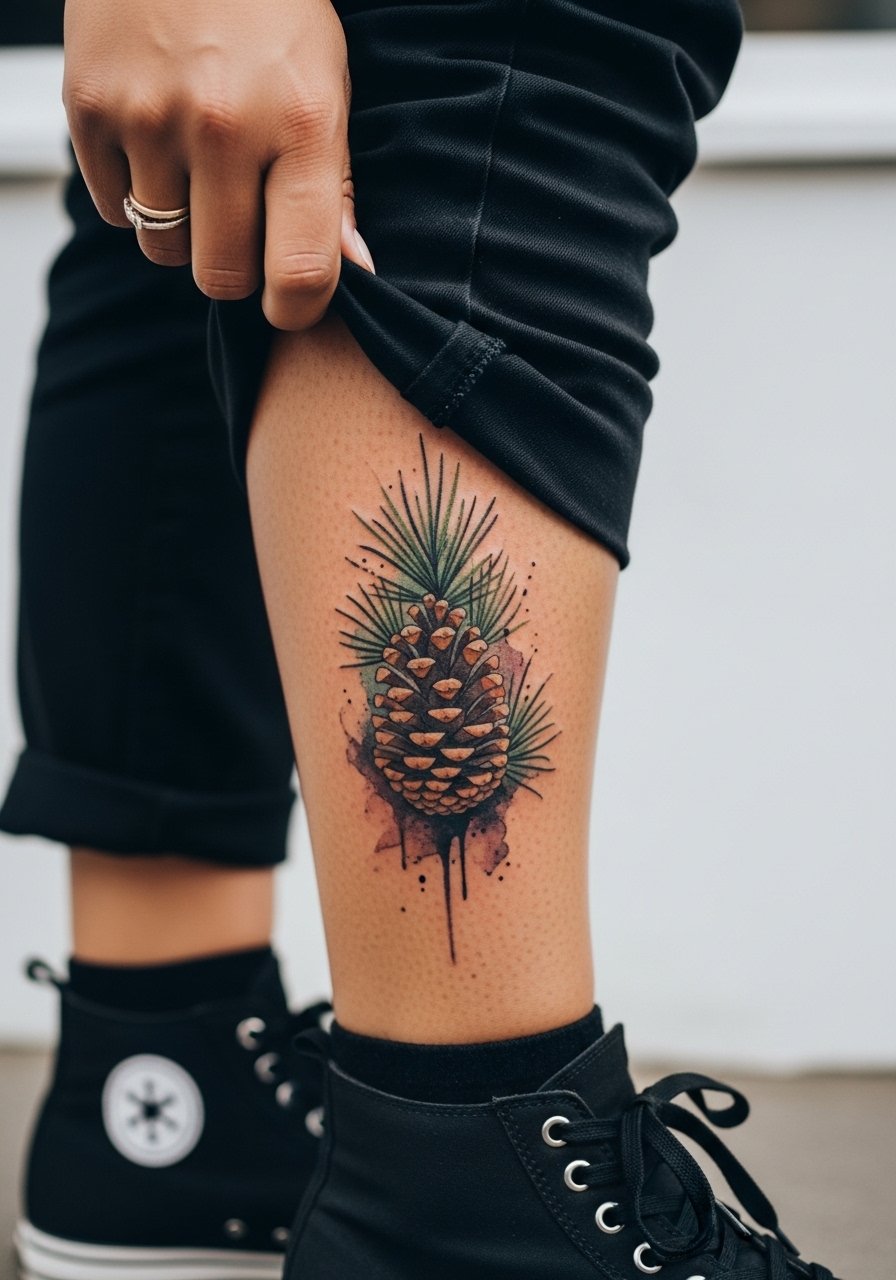
There's something satisfying about botanical motifs on the calf because they move with the leg. Tell your artist you want intentional spacing between scales so dot work and wash remain legible over time. The usual mistake is over-detailing the cone pattern which later reads as noise. Sessions are low pain and take about forty five minutes. Pair the tattoo with a midi skirt and boots to let the calf peek through in cooler months.
22. Watercolor Script with Soft Wash on the Forearm
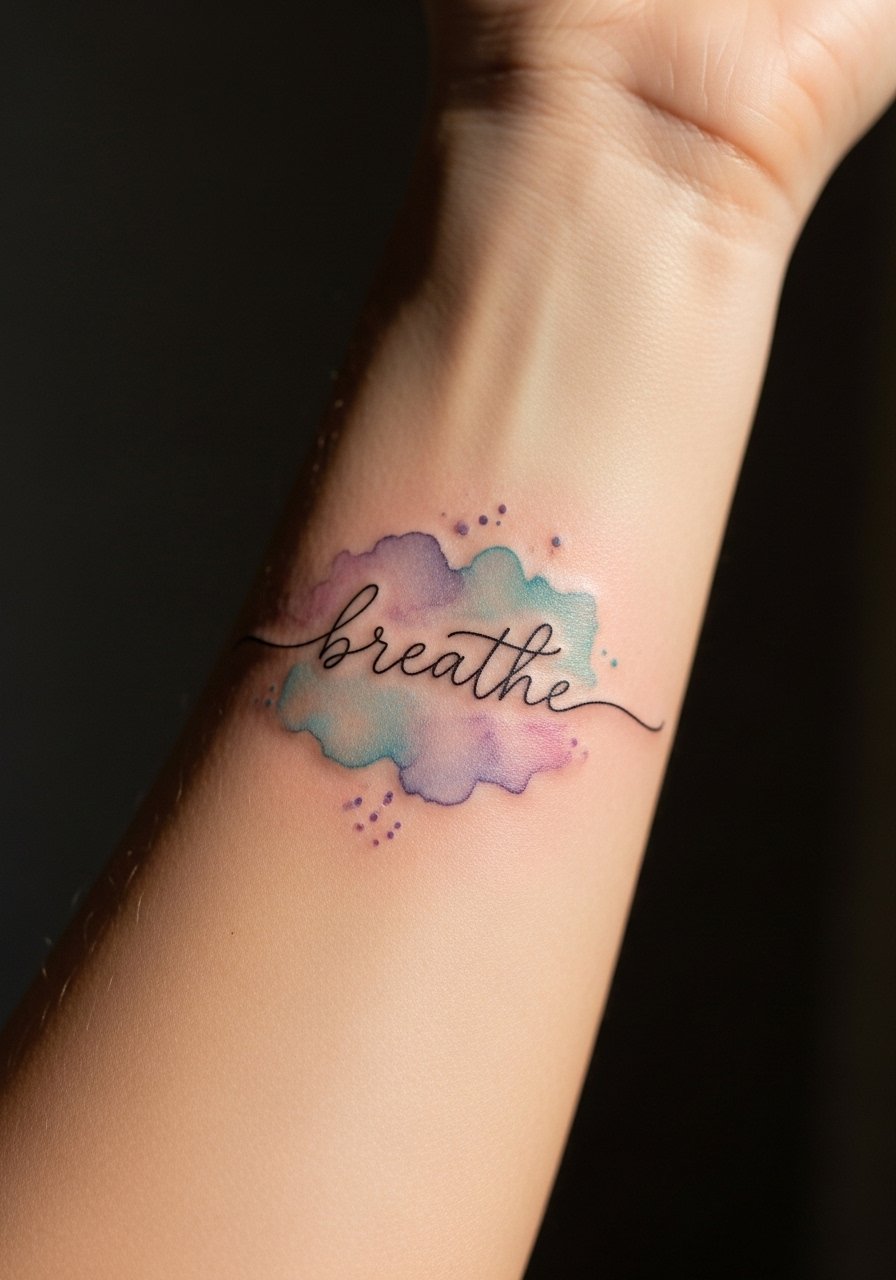
When combining script and watercolor, placement and stencil scale matter. Tell the artist you want the wash to sit beneath the letters so the script remains readable as it ages. A common problem is letting pigment sit on top of thin letters which obscures the text at 2 to 3 years. Sessions are moderate in length and the forearm is low to moderate on pain. For show-offs, rolled sleeves or a lightweight bracelet keep attention where you want it.
23. Watercolor Pocket Flower on the Chest
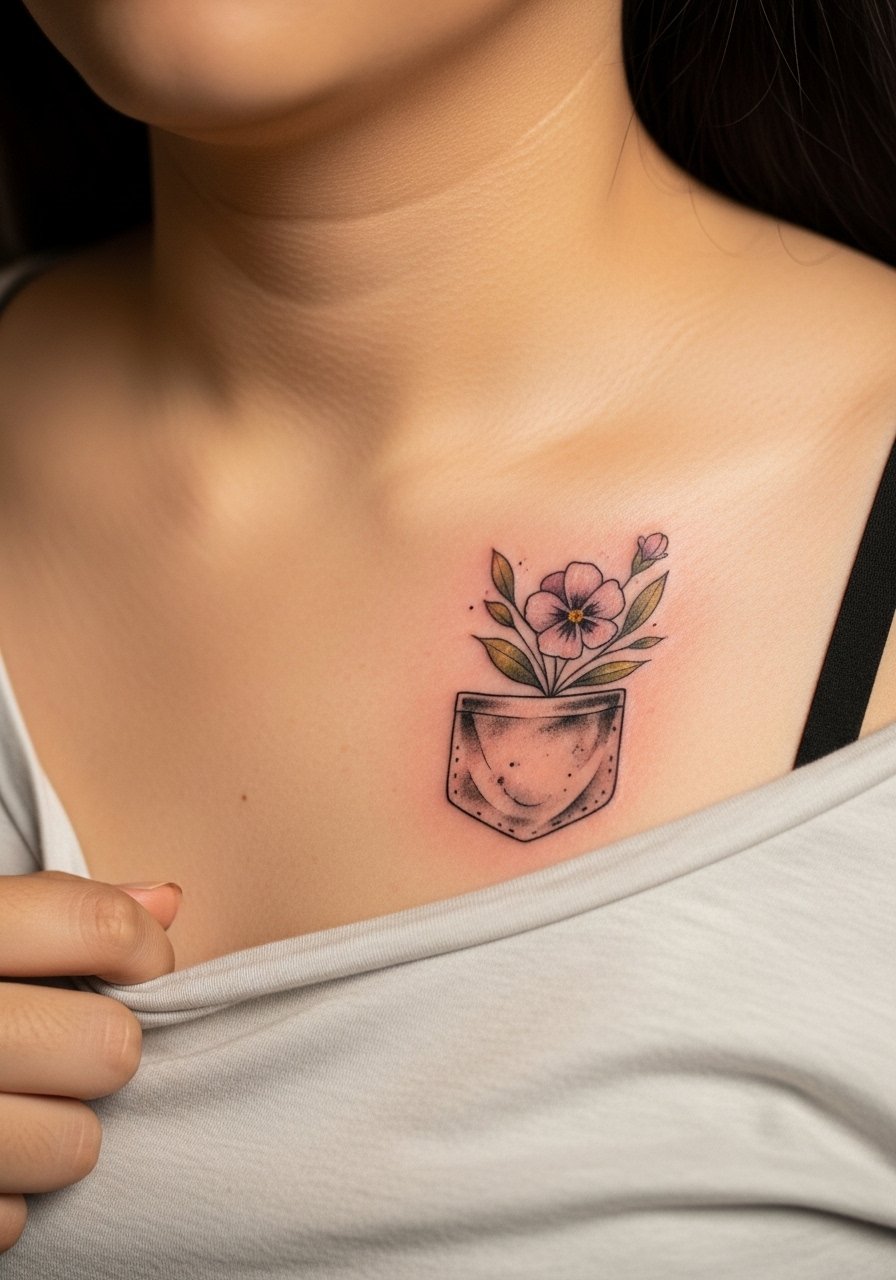
A chest stencil near the pocket reads elegantly when the wash respects bone structure. The main mistake is over-saturating directly on the clavicle where touch-ups look uneven. Ask your artist to show healed photos of similar placements. Sessions can be sensitive and you should wear a wide-neck shirt for access. For evenings out, a lightweight blouse with a scooped neckline pairs well without exposing the entire chest.
24. Small Watercolor Moon Behind the Ear Lobe
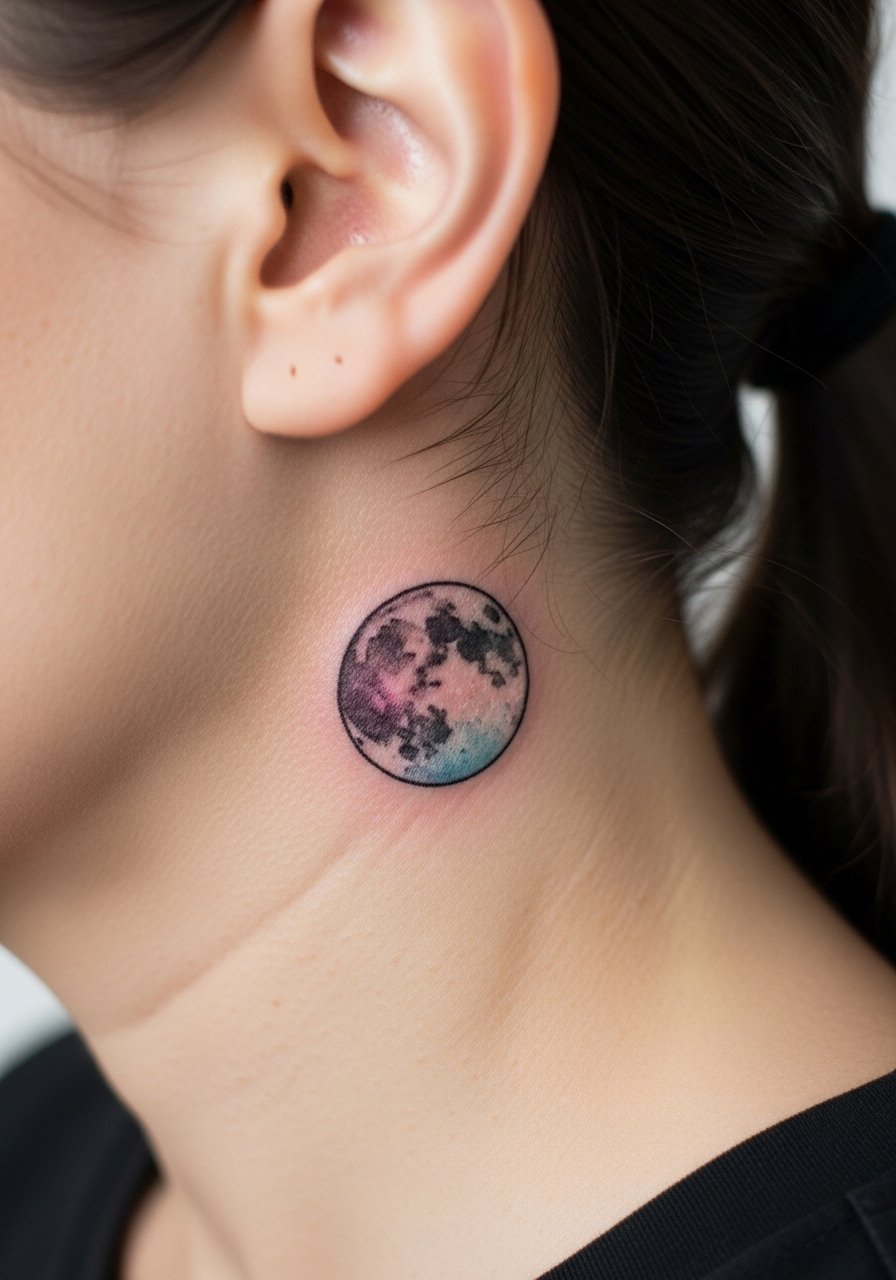
This placement benefits from extreme simplicity in stencil design. The common error is asking for gradient detail too close to hairline which can blur during healing. Ask for a focused wash with clean negative space. Sessions are short and sensitive. Wear hair up so the artist can work cleanly. Small jewelry like a thin hoop earring complements the spot without competing.
25. Watercolor Feather on the Rib Edge
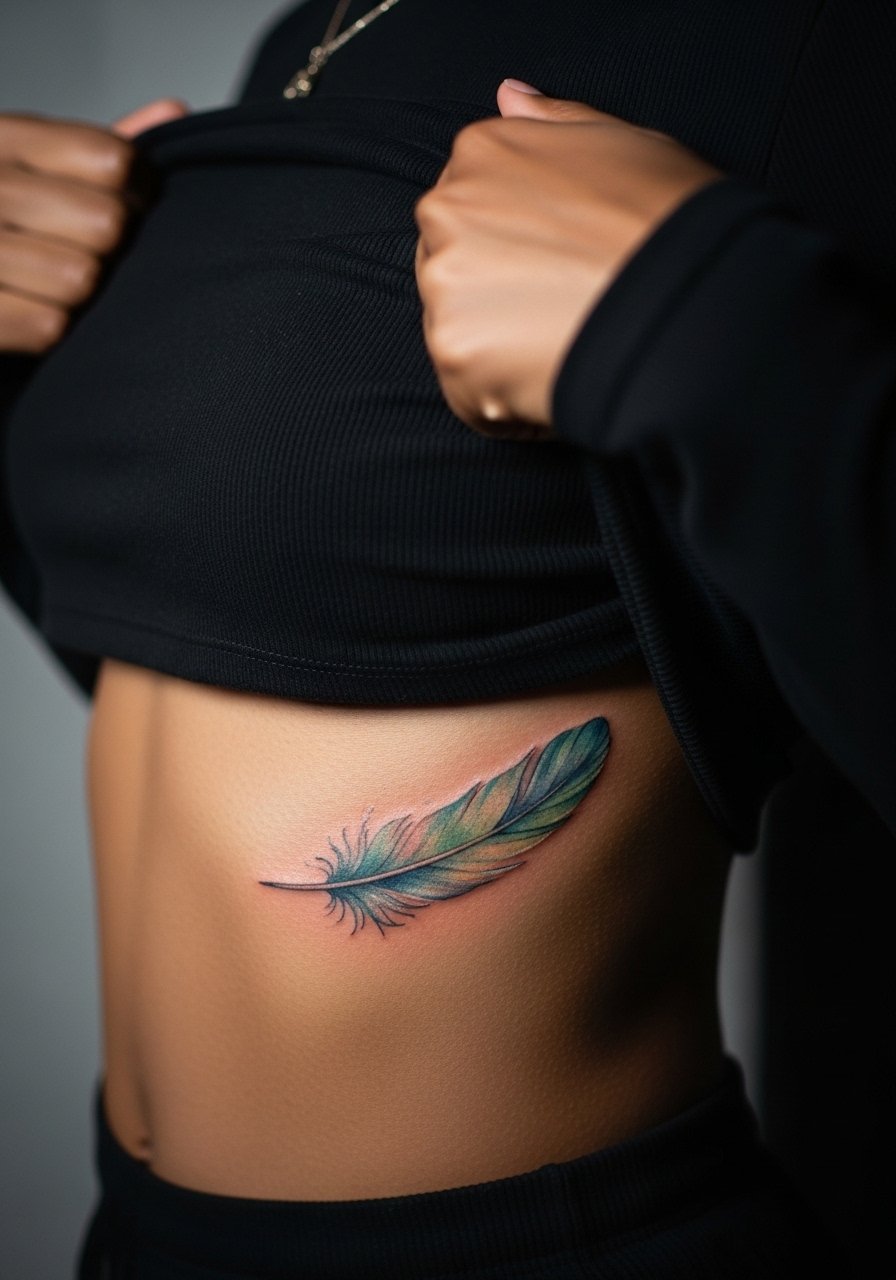
Aging on ribs is tricky because skin moves with breathing. The safe stencil keeps lines slightly bolder and color washes minimal to avoid early blurring. The two camps on ribs appear again. One camp avoids fine, dense watercolor here. The other will do it sparingly with clear spacing. Ask the artist how often they touch up rib work and to show healed examples. Expect a more painful session and plan clothing accordingly.
26. Tiny Watercolor Compass on the Upper Arm
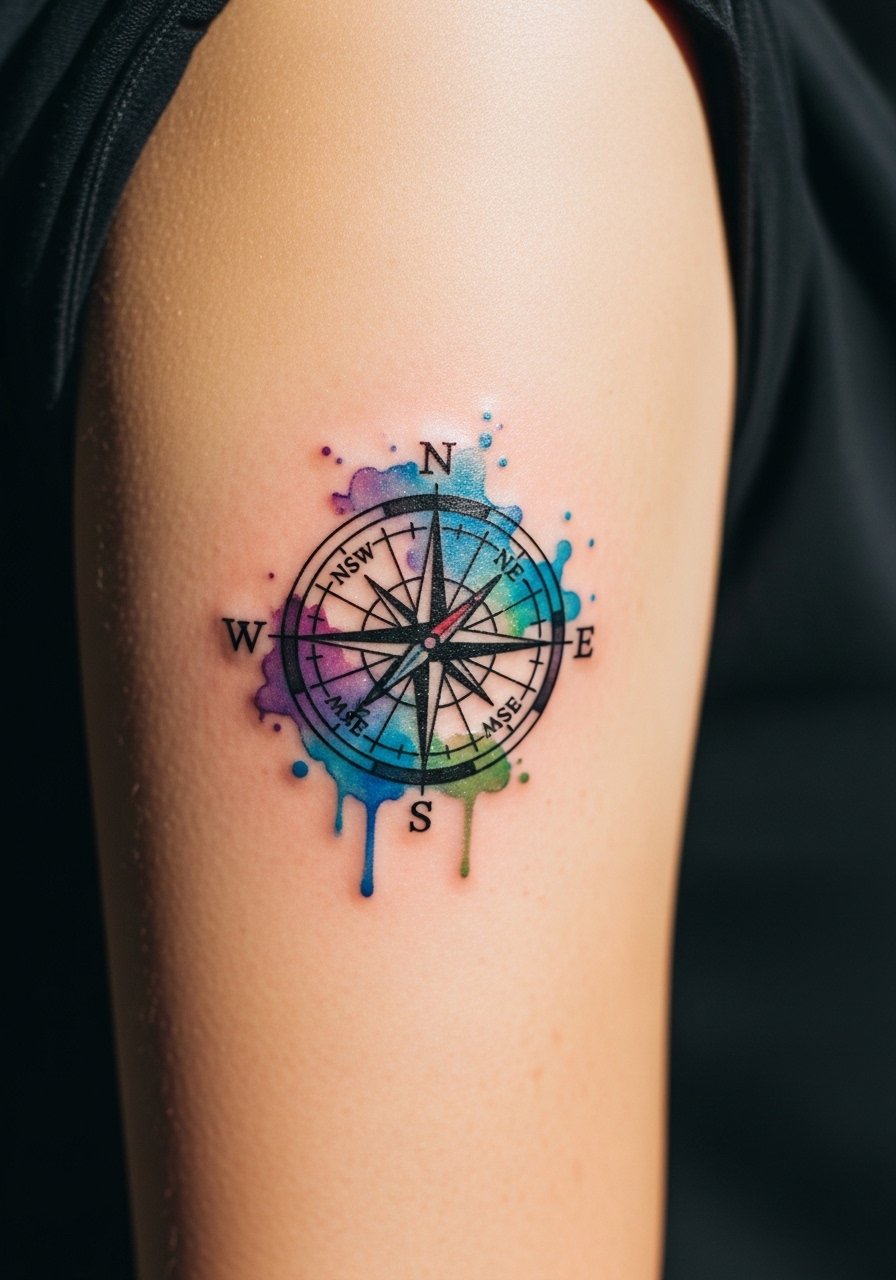
For geometric-themed watercolor, the key is a simple stencil that keeps the compass points open. The common mistake is crowding directional ticks into a compact circle which then looks muddy. Sessions are short and usually comfortable. For the session, wear a short-sleeve tee you can easily roll so the artist has clear access. For styling, a layered bracelet keeps attention near the upper arm without choking the design.
27. Watercolor Splash Behind the Ear With Tiny Script
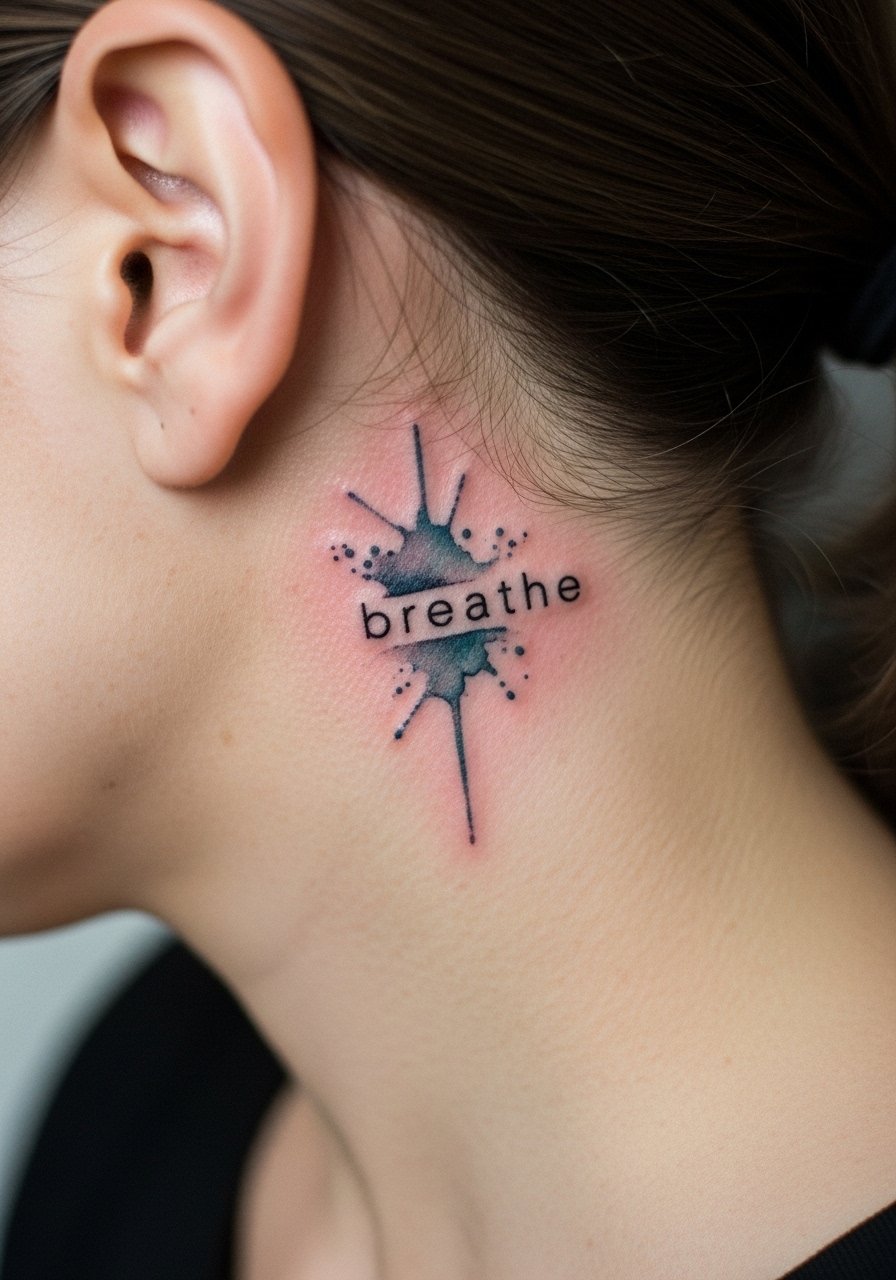
Consultation advice is to confirm the exact text placement because generators and artists need to match script spacing to the splash. The most common mistake is putting script into the splash area where color obscures legibility. Ask for the word in minimalist lowercase and for the wash to sit underneath. Sessions are short and sensitive. Wear hair up for access and consider a tiny stud to frame the spot without distracting from the script.
Frequently Asked Questions
Q: Will watercolor-style tattoos need more frequent touch-ups than traditional saturated pieces?
A: In my experience, watercolor washes typically need touch-ups sooner because they rely on softer saturation and negative space. Traditional saturated work often holds color longer. Plan on checking in at year two to three for many watercolor pieces, and ask your artist for healed photos of similar work so you have a realistic expectation.
Q: Do fine line watercolor stencils work on ribs or should I pick a different placement?
A: It depends. Some artists avoid fine line watercolor on ribs because skin movement can blur lines. Other artists do conservative stencils with clear spacing and get good results. Ask your artist which approach they use and to show healed pieces from that exact placement before you book.
Q: What should I wear to a session for a sternum or chest watercolor stencil?
A: Wear a fitted sports bra or a wide-neck shirt you can pull aside so the artist can access only the area. This keeps you comfortable and reduces the need to undress in the studio. A fitted sports bra often works best for chest and sternum sessions.
Q: How do hand and finger watercolor stencils hold up over time?
A: Hands and fingers see the most wear from washing, friction, and sunlight, so expect faster fading and more touch-ups. Tiny, simple stencils with open negative space fare better, but be prepared for maintenance and to avoid dense color in high-contact spots.
Q: Can I get a watercolor stencil if I work in a conservative field?
A: Yes, but placement matters. Choose hidden locations like the upper thigh, inner bicep, or ribcage if you need to keep it private. For a visible spot, consider size and how often you can conceal it with clothing. Search local shop directories or convention guest lists to find artists who do discreet client work if privacy is a priority.
