
Fine line wine glass tattoos are everywhere on saved boards, but the reality for many comes fast: a wrist stem that blurs into a smudge, small outlines quoted at higher minimums, and forearm designs that warp after weight change. I’ve seen these problems enough to know what to ask for in consultation and which placements actually hold up. Flip through these 17 wine glass tattoo inspo picks and you’ll get ideas that balance trend appeal with long-term wear.
1. Fine line wine glass with a dripping stem on the wrist
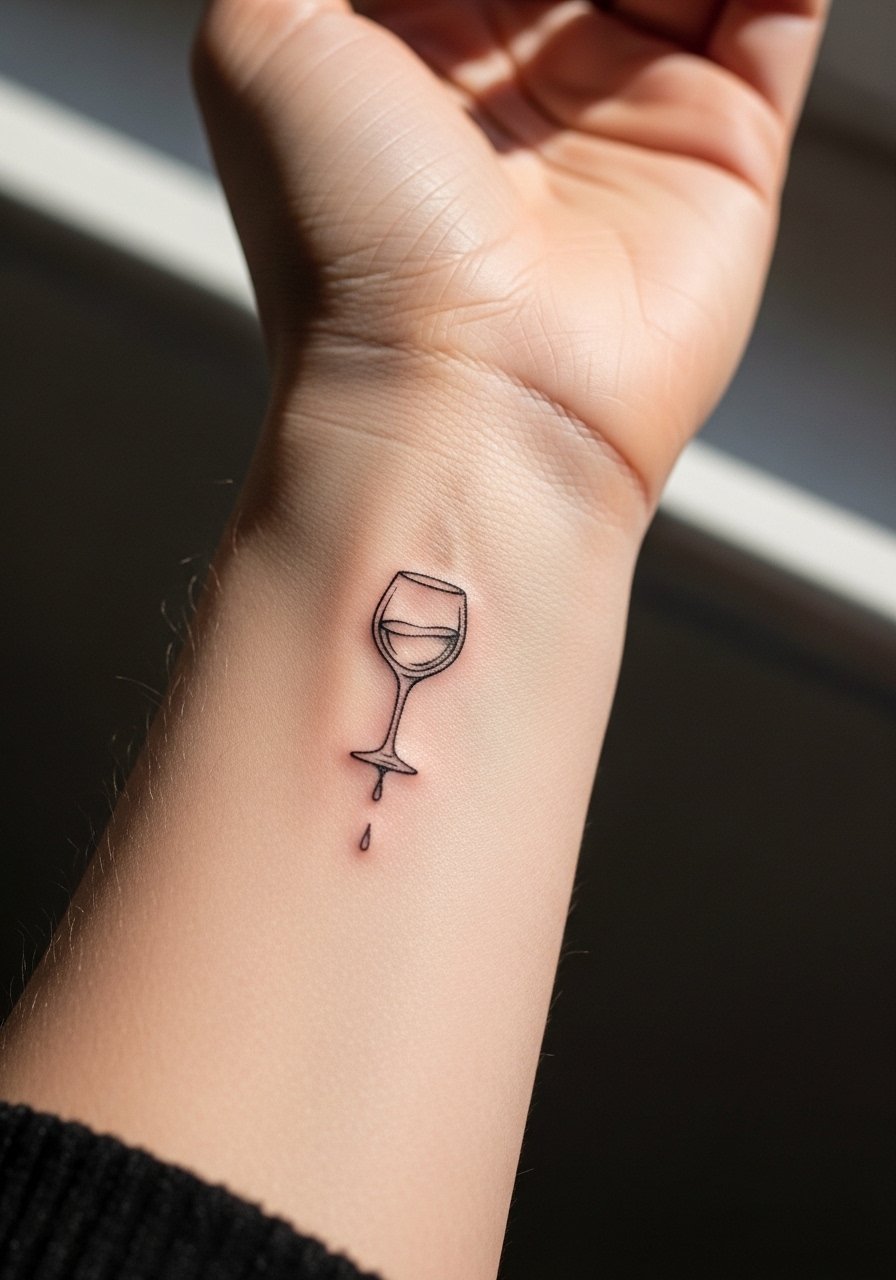
This is the go-to tiny piece for people who like delicate detail. I tell folks to ask the artist for slightly heavier linework than a single-needle micro outline so the stem reads at year two. Expect low pain and a single short session. Common mistakes are going too small or asking for hairline strokes that vanish into the wrist creases. For showing it off, stack a thin silver bangle set on the opposite wrist and choose a sleeveless top for session day so the artist has clear access. Plan for a touch-up check around year two if you notice softening.
2. Minimalist wine glass silhouette outline at the ankle
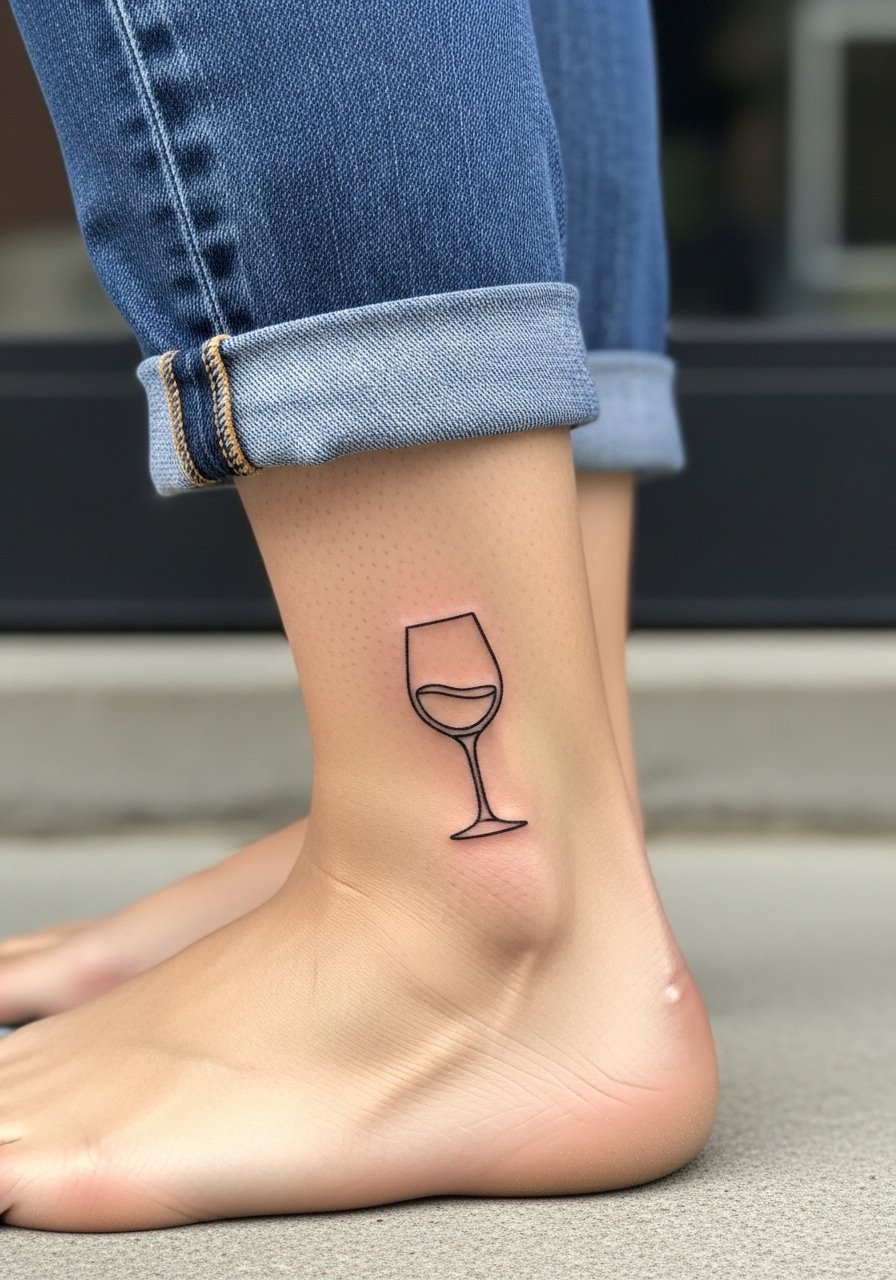
Ankle placements read as very subtle and work well as a first small tattoo. Pain is low to moderate when the ankle bone shows through. Size should stay micro so it fits under straps and socks. The main summer caveat is sweat and sand, which can irritate healing in the first week. For footwear that frames the piece, a pair of strappy flat sandals and cropped pants keep attention on the ankle. During the session wear loose joggers or shorts so the artist can prop your leg without fabric pulling at the area.
3. Micro-realism single wine drop on the inner bicep
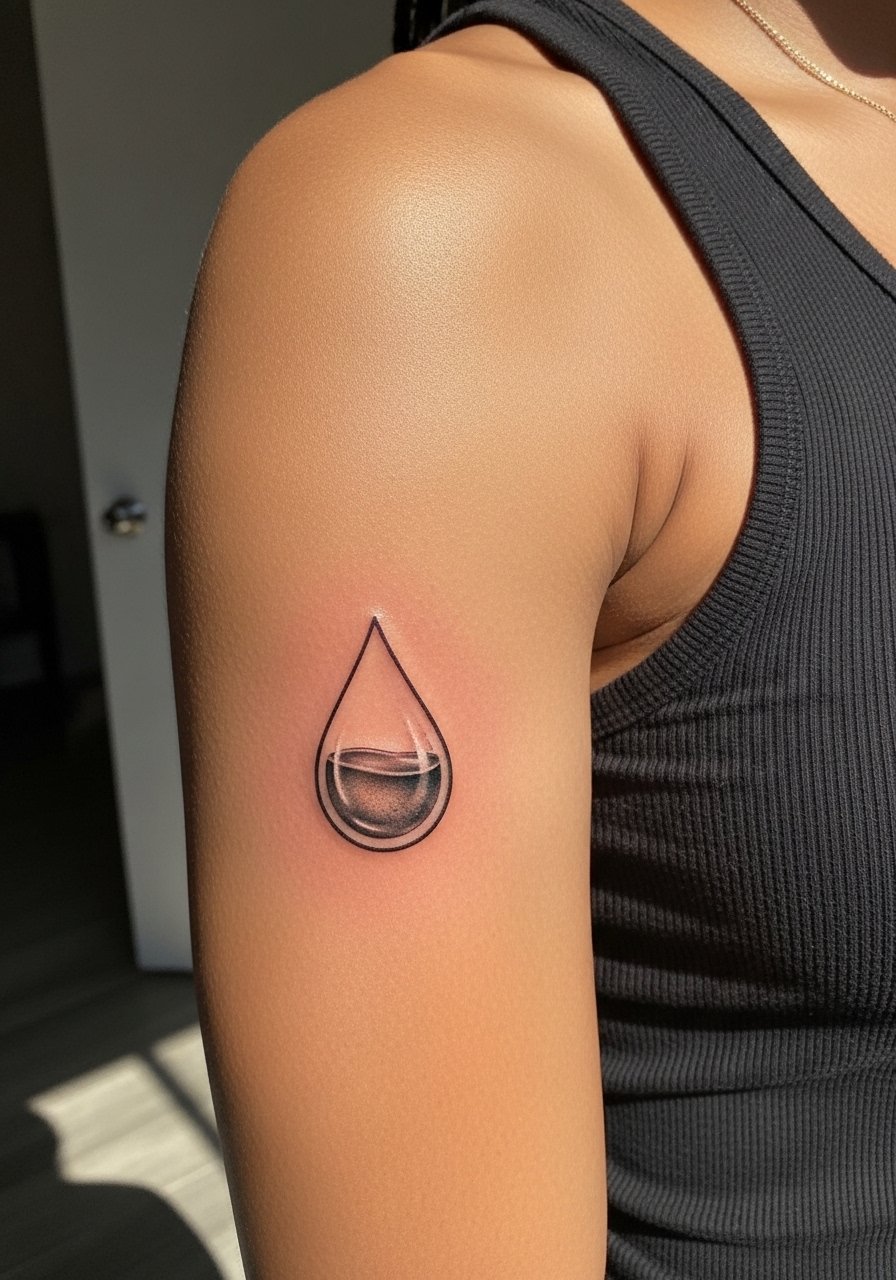
Micro-realism is a collector move. On the inner bicep this design shows off texture and tiny reflections, but it needs an artist who specializes in small realism. The bicep gives a canvas that stays relatively stable unless you undergo major body changes. Expect a 1-2 hour session and a sensitive sting from the inner arm. Common faults are overworking contrast so the drop looks flat after healing. Ask for a healed mockup during consultation and discuss realistic touch-up timing. This placement rarely blows out if the ink is placed at the correct depth, so avoid requests for ultra-thin stippling that lives too superficially.
4. Watercolor wine glass splash on the shoulder blade
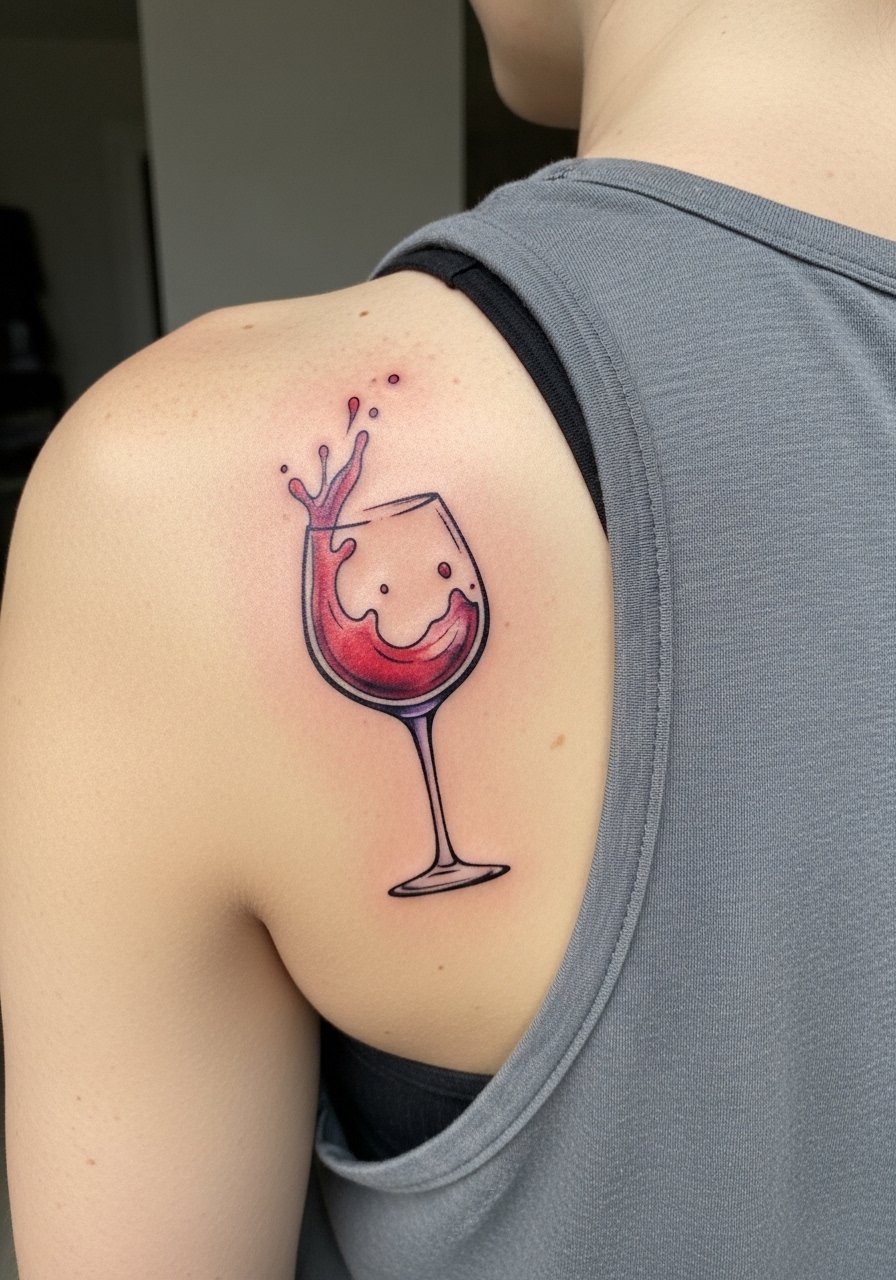
Watercolor pours feel like small paintings on skin. Shoulder blade work gives room for movement and larger, painterly splashes that age more gracefully than tiny watercolor spots. Pain is moderate and sessions often span two sittings for color layering. A common mistake is pushing too many colors into a small area, which leads to muddy healing. For placement testing, try a temporary sticker in the exact size and wear it for a week to see how the shoulder blade interacts with shirts and bags. If you travel to warm beaches in summer, be strict about sun protection in the first two months so the reds and purples stay lively.
5. Neo-traditional wine glass with a grape cluster on the outer forearm
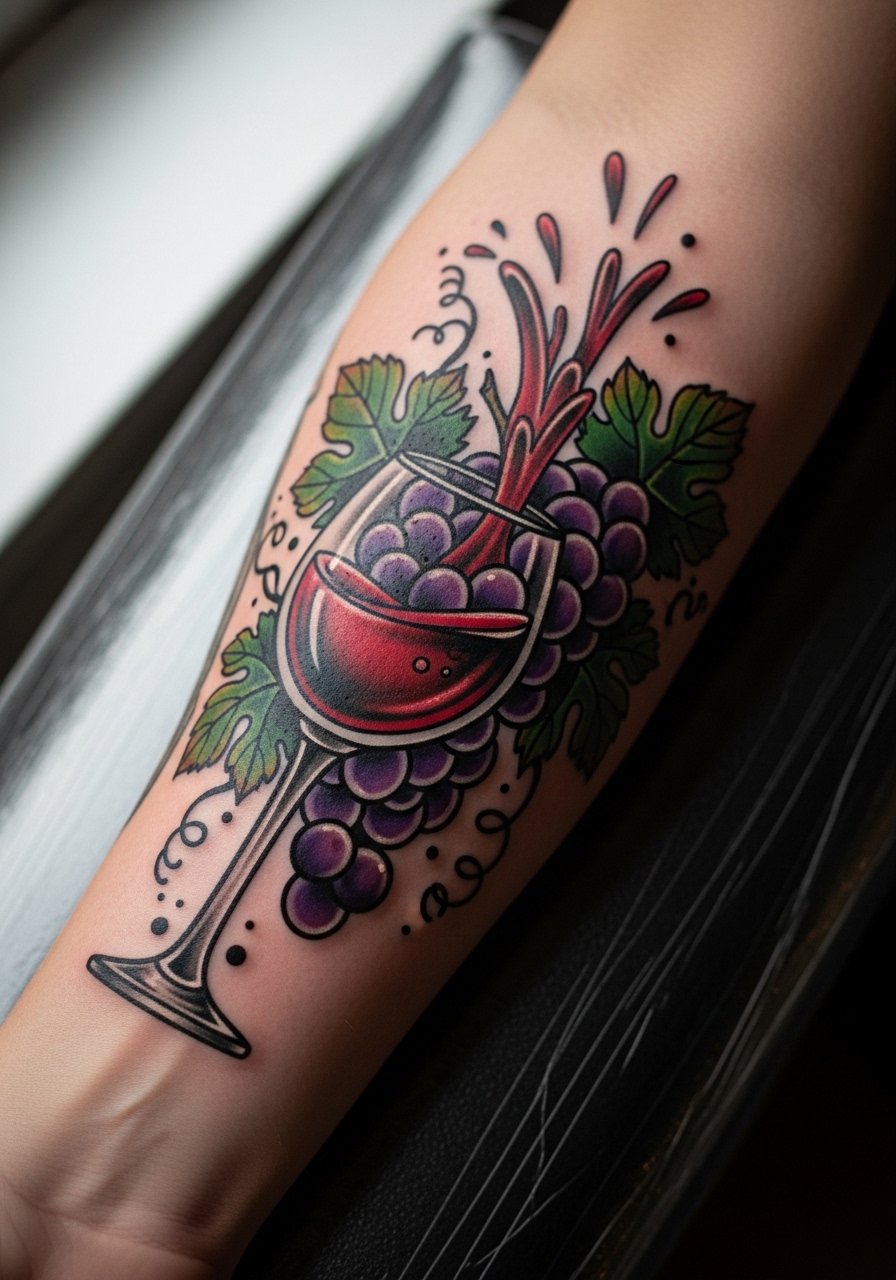
If you want vintage flair that still photographs well, neo-traditional gives you saturation and classic contours. Outer forearm placement reads bold without being huge. This style takes 2-3 sessions depending on size and color work. A mistake I see is asking for tiny neo-traditional motifs that lose their characteristic saturation when reduced. For everyday outfits, a fitted short sleeve tee frames the art while a leather cuff bracelet on the opposite arm gives a vintage edge. During consult, request portfolio examples of healed color on similar skin tones so you know how the grapes will hold.
6. Blackwork wine glass with geometric facets on the collarbone
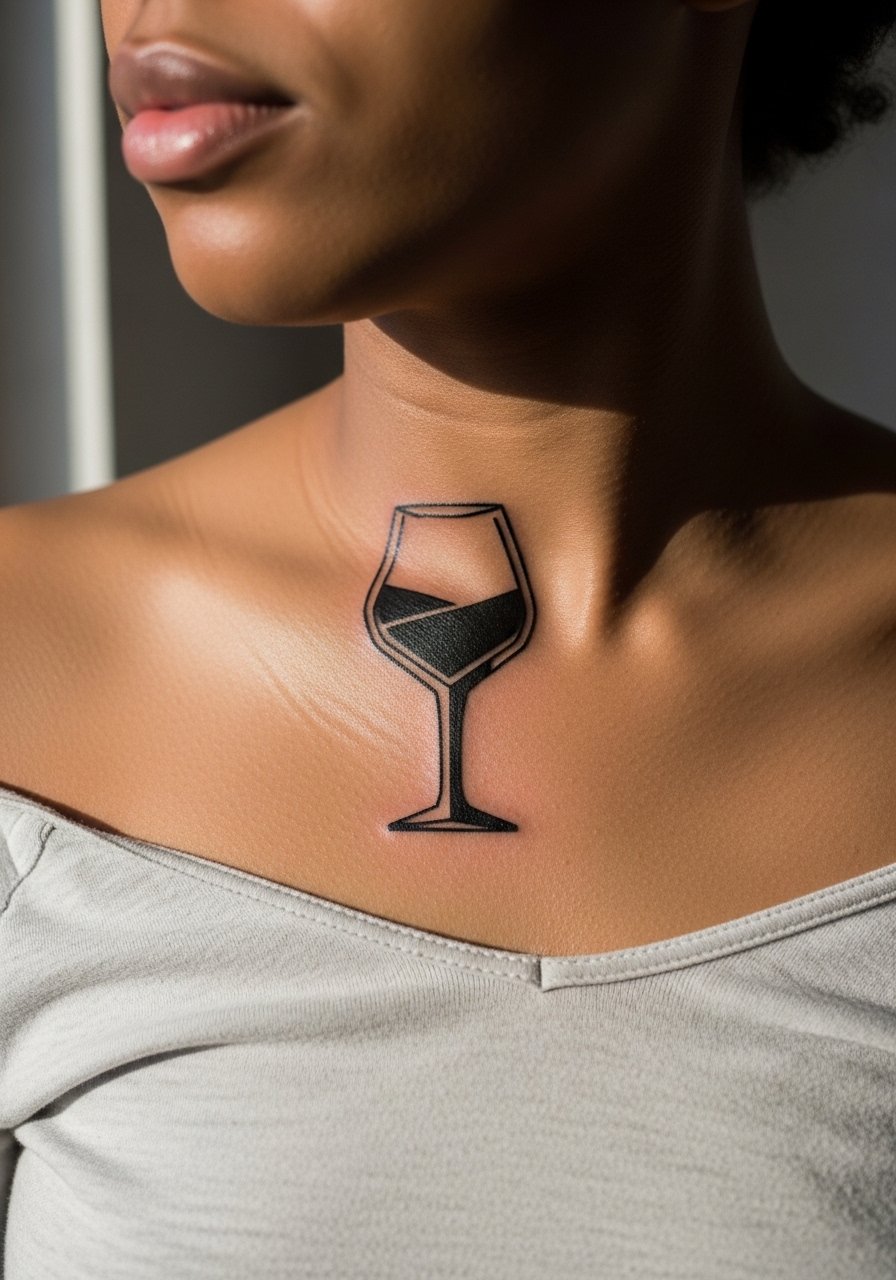
Blackwork is forgiving for contrast and suits collarbone placement well. Expect a single session for a 2-3 inch piece and noticeable discomfort because collarbone sits close to bone. The design ages well on varied skin tones because the high-contrast fills maintain their shape. If you want to show it off, pair it with an off shoulder top for nights out. Artists debate fine line there versus solid black, so ask where yours stands on spacing and fill before booking. A too-small geometric pattern can merge in a few years, so plan for breathing room in the facets.
Pre-Session Essentials
The wrist, ankle, and collarbone pieces above need different prep than large back or thigh work, so a few small items make a session and the first week smoother.
-
Tattoo Goo. A thinner balm that many people prefer for early moisture control on fine line wrist pieces without leaving a greasy film.
-
Fridgee balm. An indie balm favored for thin applications that help prevent dry cracking on delicate lines.
-
Australian tea tree salve. Useful for color spots that risk irritation during hot weather healing, especially for shoulder blade pours.
-
Fragrance free gentle body wash. Keeps the healing area clean without irritating the linework on ankle and wrist pieces.
-
Aquaphor healing ointment. A thin initial layer can help fine line pieces settle during the first few days without excessive clogging when used sparingly.
7. Ornamental wine glass with vine filigree on the ribcage
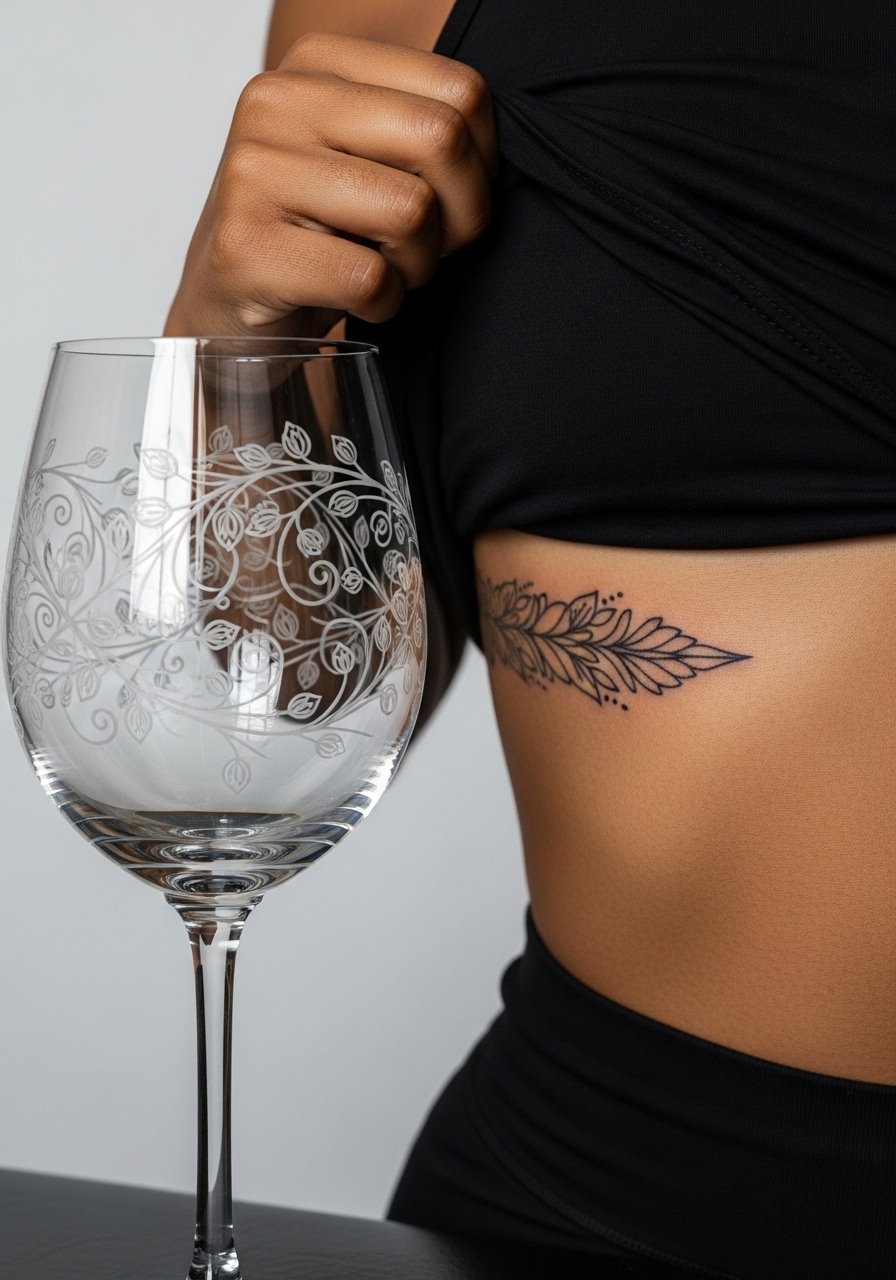
Ribcage work draws attention for its intimacy and space for detail. Expect moderate to high pain and two sessions if you want fine filigree and shading. Artists split on fine line on ribs. One camp says the constant expansion and compression blurs tiny lines quickly. The other camp argues that with proper spacing and correct needle depth, fine line can hold. Ask your artist which side they fall on and whether they would scale the vines to allow for future touch-ups. For sessions, wear a cropped top you can lift so only the side is exposed. Remember that weight changes can distort long vertical motifs, so test placement with a temporary decal first.
8. Traditional wine glass toast sketch on the calf
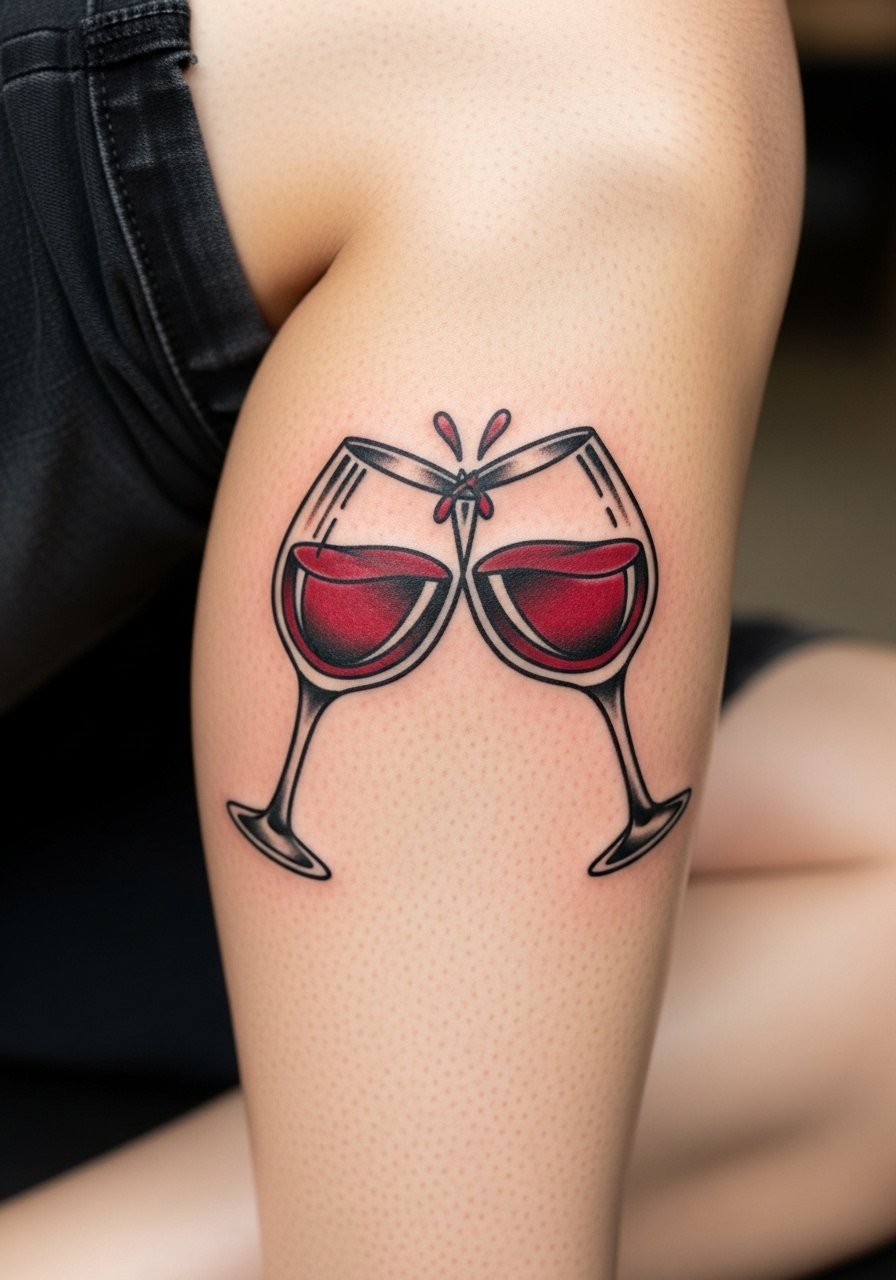
Calf pieces age well and are easy to conceal, which makes them a popular spot for bold traditional sketches. Pain is low to moderate and a single session can handle a 3-inch classic toast motif. The common regret is choosing a fratty sketch without personalization. If you want the traditional look without the cliche, ask for modified line weights or small ornamental additions. For wardrobe pairing, rolled-up bootcut jeans or summer shorts put the calf on display. Expect strong saturation retention because the calf does not get constant sun or skin stretch like the inner thigh.
9. Ignorant style chunky wine glass on the thigh
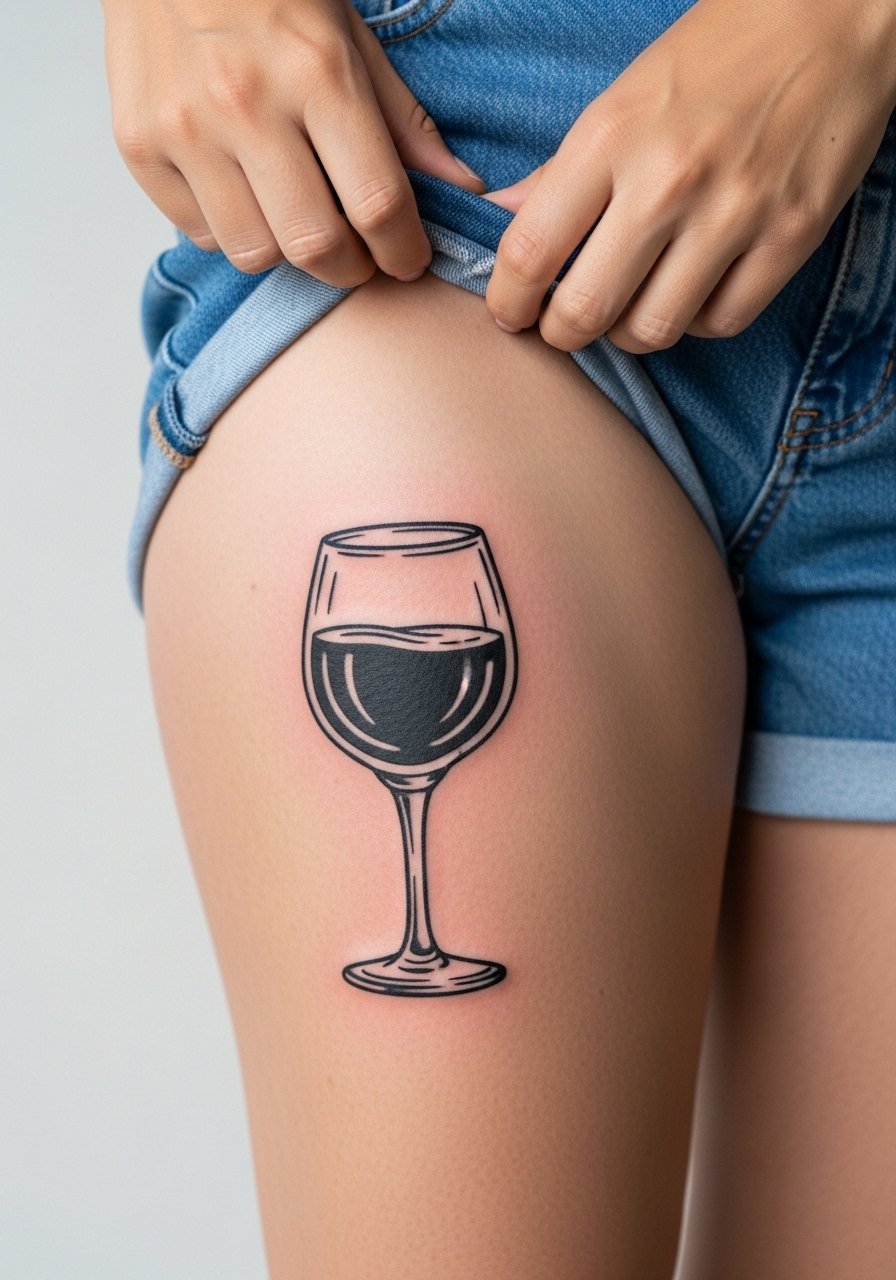
Ignorant style gives a humorous, low-fi vibe that reads purposely rough. The thigh lets you go medium to large without visibility concerns. Pain is moderate and one session often suffices. Common mistakes include asking for tiny ignorant motifs that lose their intended humor when reduced. This placement stretches with weight change and pregnancy, so consider the potential for distortion before committing to a long vertical glass. Summer show-offs like high-waisted shorts or skirts pair well with this placement and a high waisted shorts option on dress days.
10. Fine line wine glass with cork details on the neck side
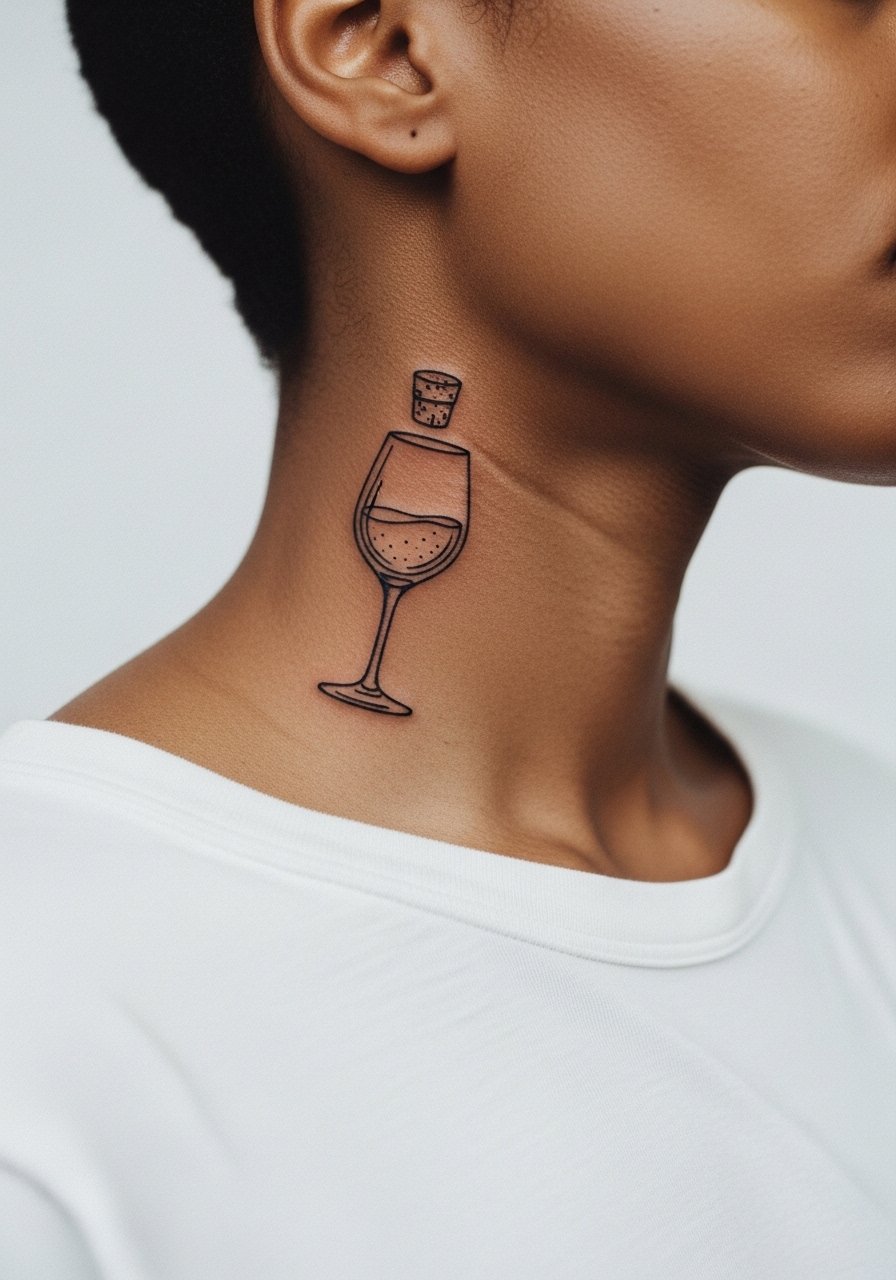
A neck-side tiny wine glass is a subtle ritual nod for many. Expect higher sensitivity because the neck is thin-skinned. The biggest error is requesting hairline lines that skim the top layer of skin, which can blur. When you consult, ask for slightly more spacing around cork details and a test stencil in the exact scale you want. Professionally minded people sometimes prefer collarbone placements because neck visibility can affect interviews. If you book neck work, choose a wide-neck top for the session so the artist can access the area cleanly.
11. Negative space wine glass on the fingers for a ring-like effect
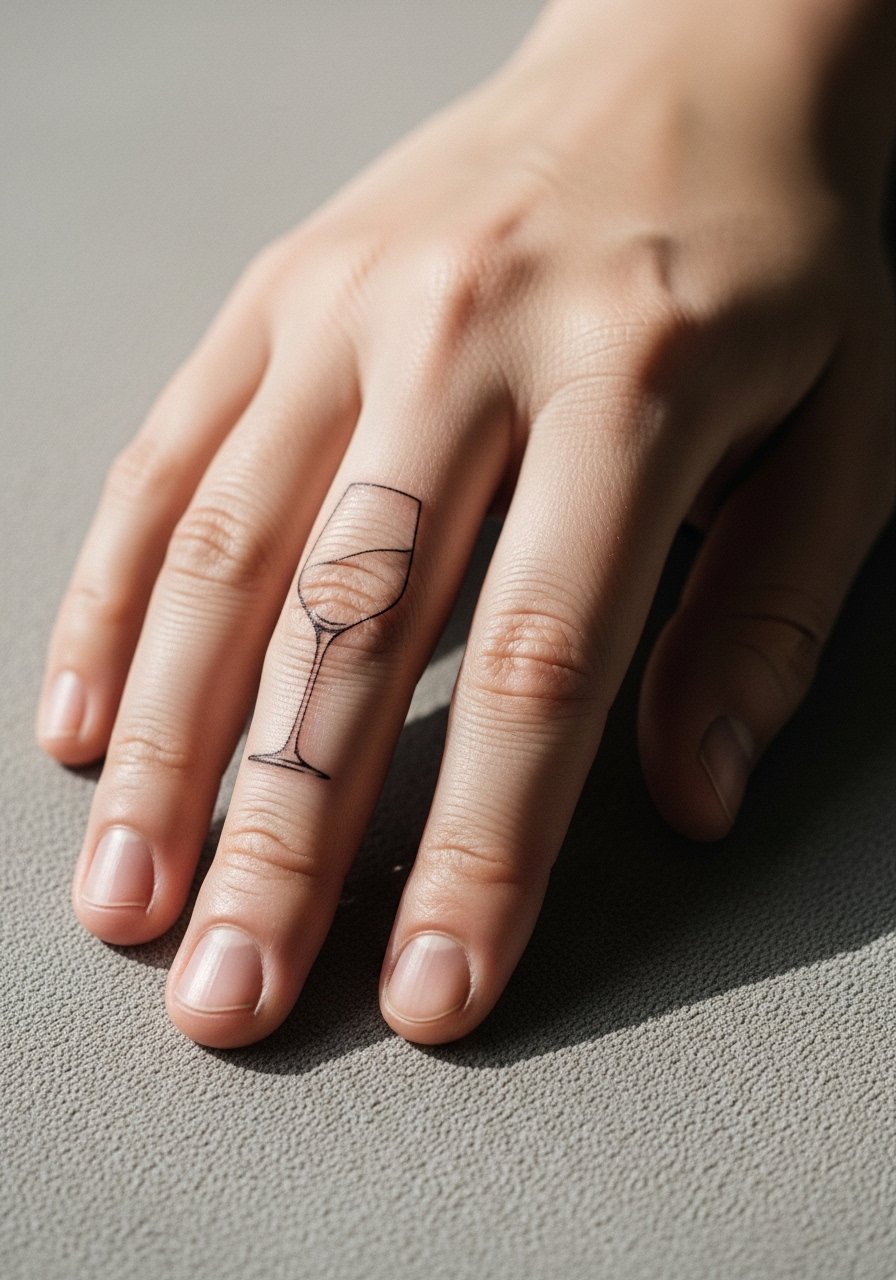
Finger tattoos read intimate and will fade faster than other placements because of constant washing and friction. Using negative space to suggest a glass gives a clever ring-like effect while keeping linework minimal. Expect sharp discomfort and a quick session. The real mistake is going too tiny and expecting long-term crispness. If you want this effect, prepare for annual touch-ups and discuss spacing with the artist. Finger work also risks more blowout, so ask about needle depth and whether the studio recommends protective film during the first 48 hours.
12. Minimalist wine glass outline on the inner forearm
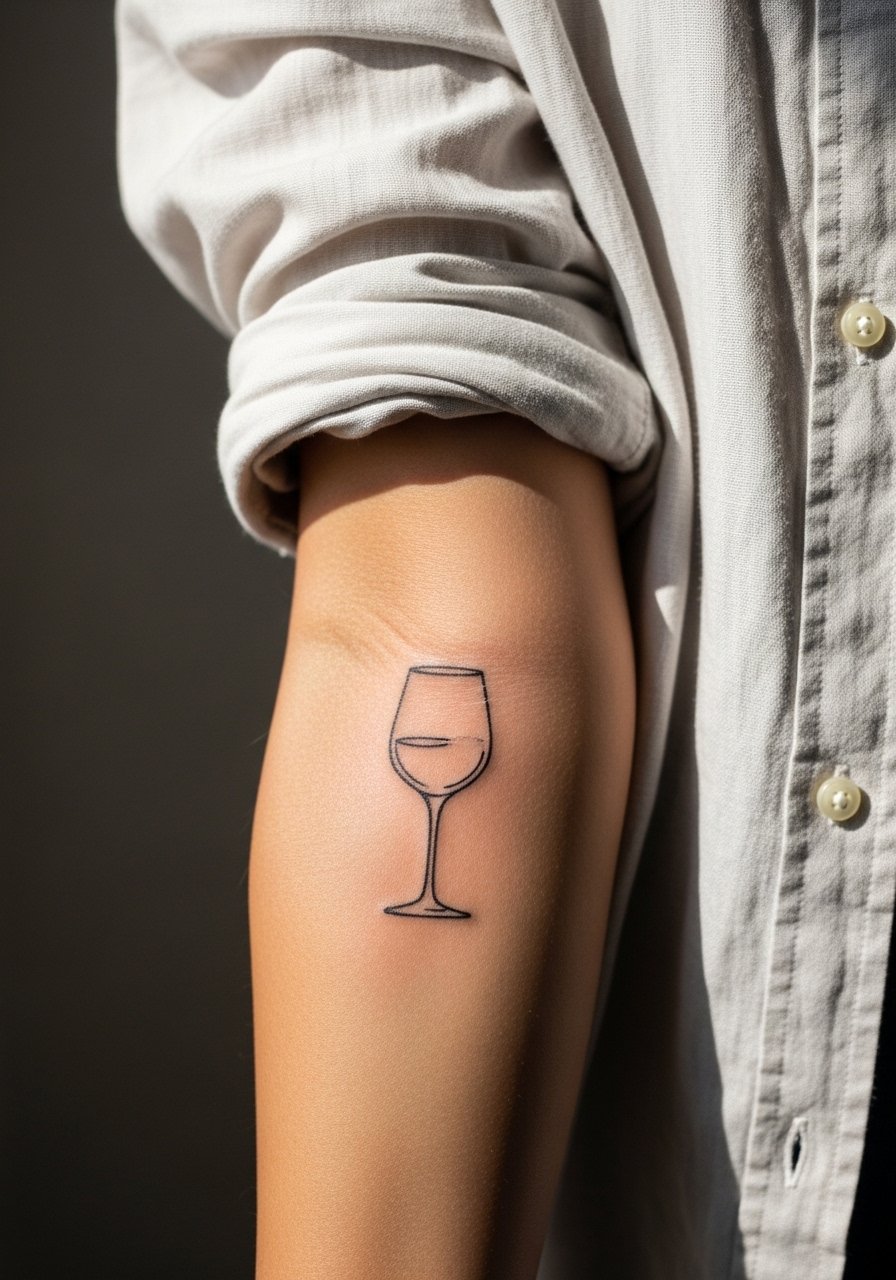
Inner forearm outlines sit between subtle and visible. Pain is low and sessions are short, making this a popular first wine glass tattoo idea. The biggest aging issue is going too dense with tiny cross-hatching which fills in over time. In consult, bring reference images that show exact line weight and ask for healed photos on similar skin tones. For styling, roll the sleeves of a linen button down shirt to showcase the tattoo while keeping an everyday look. Session wear should be a loose short sleeve so your arm can lay flat.
13. Wine glass paired with a constellation map of a wine region on the outer forearm
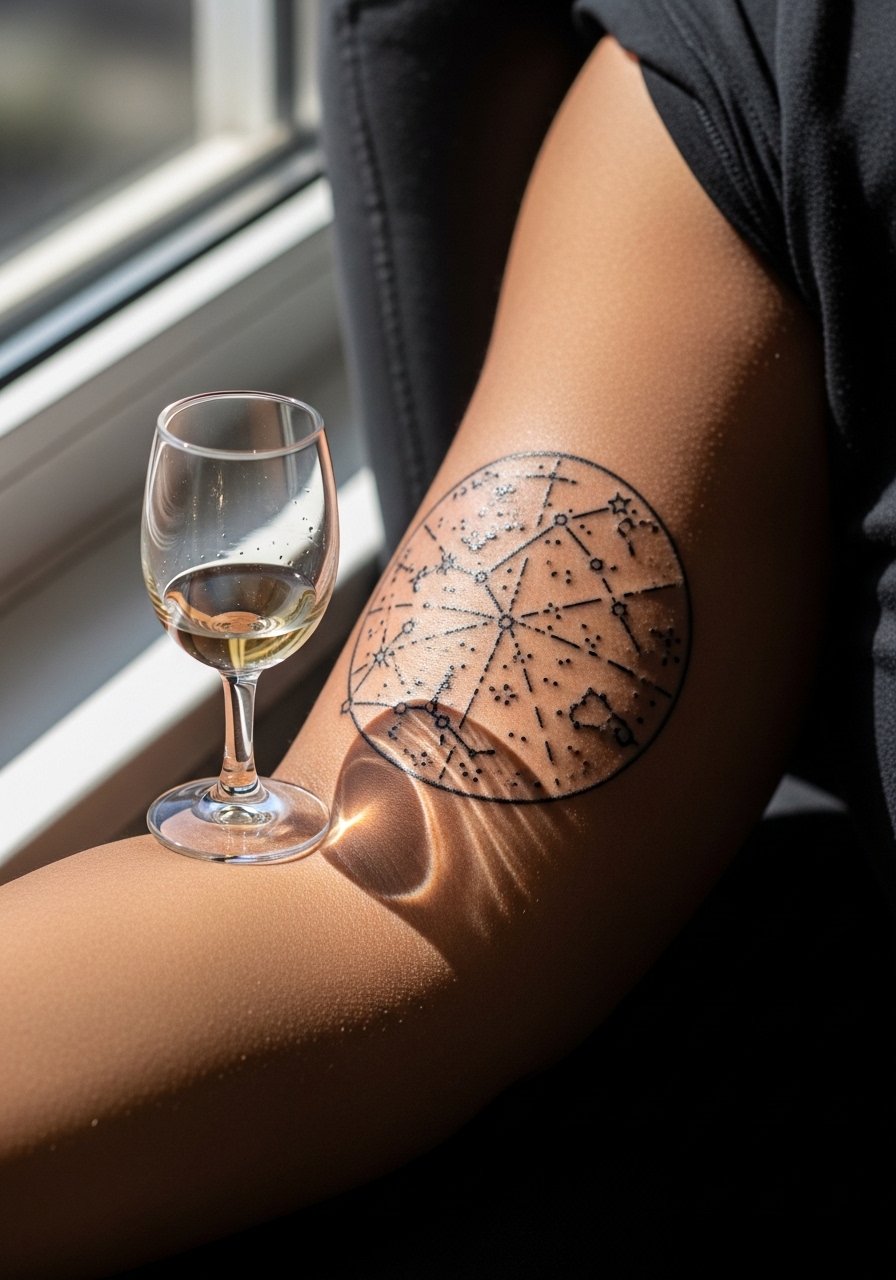
Pairing motifs turns a simple glass into a personal map. Outer forearm placement gives space for a small constellation and a glass motif without crowding. Discuss scale with your artist so both elements breathe. This design does well as part of a patchwork sleeve later because the outer forearm integrates easily. For a vintage vibe, wear a fitted short sleeve tee with rolled sleeves to frame the art. Touch-ups are rarely urgent here unless you spend a lot of time in strong sun.
14. Wine corkage 1:1 scale on the forearm as a literal size reference
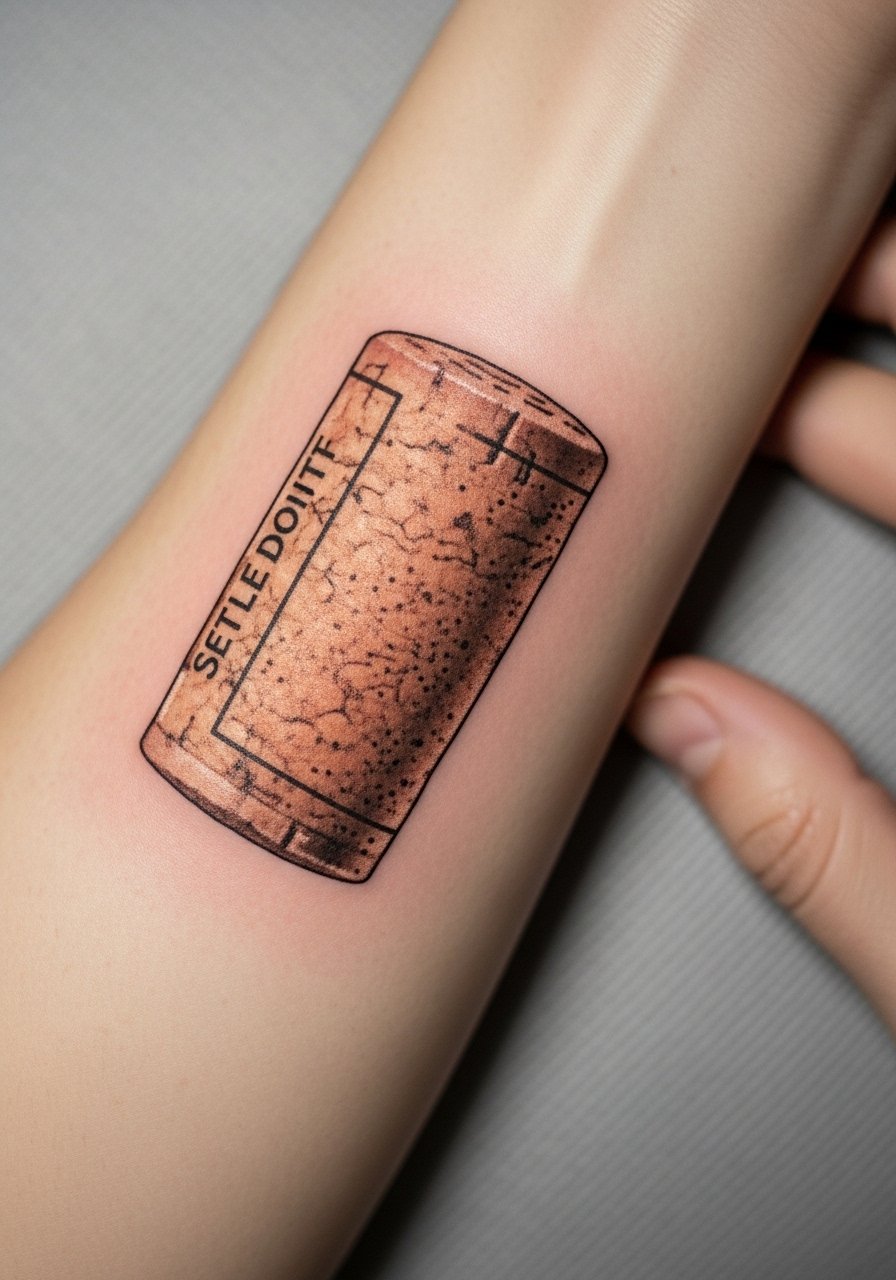
A playful idea is to tattoo a cork at true life scale as a physical reference. Forearm placement reads literal and can be an icebreaker. The trick is agreeing on exact scaling during consult so the cork does not read too small or too large in photos. Expect 1-2 hours for realistic texture touches and a reasonable chance of needing a small touch-up if you want sharp surface grain over time. This concept is low risk for blowout on the forearm if the artist spaces the grain and avoids hairline stippling.
15. Wine glass evolution series on the thigh, empty to full
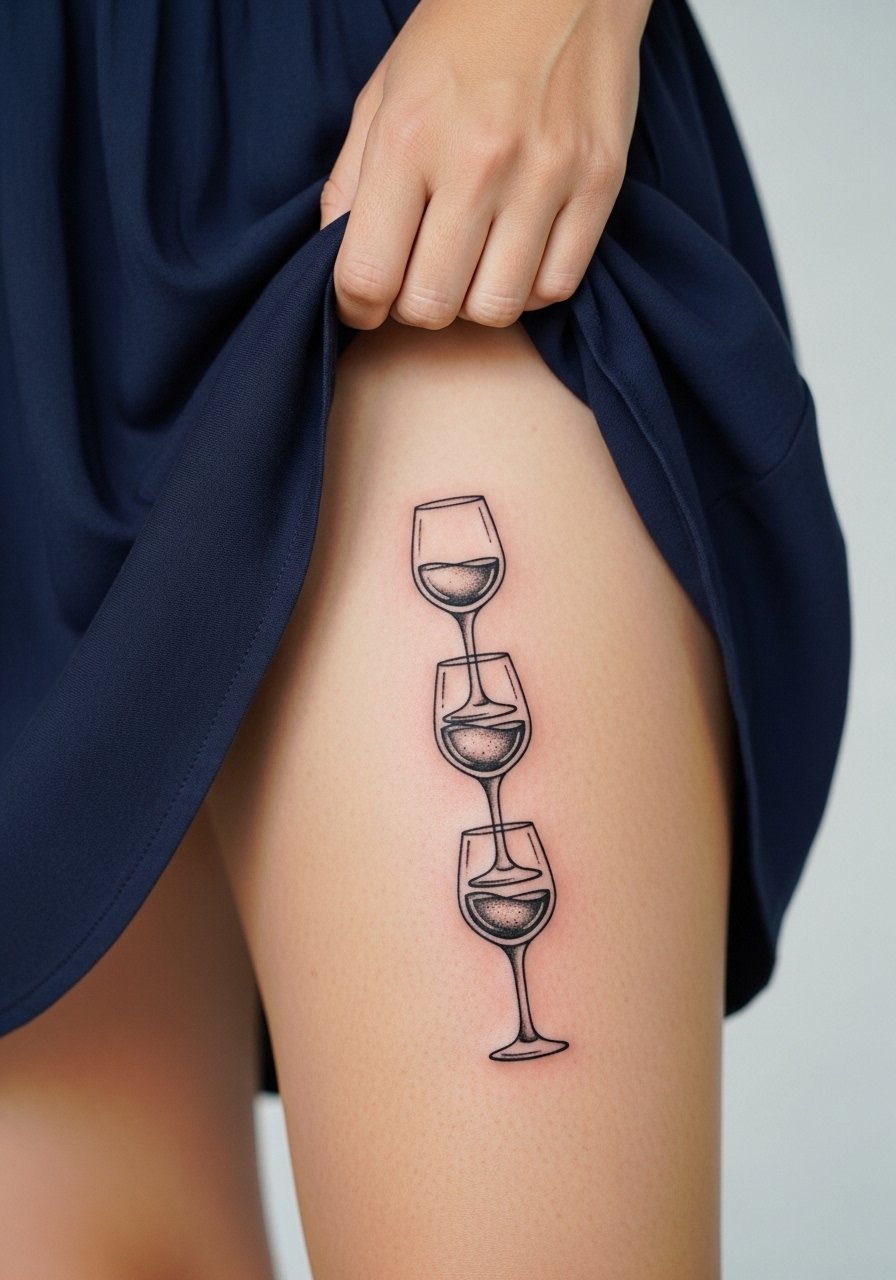
A timeline series along the thigh works well because the area tolerates larger, evolving artwork. Pain is moderate and sessions can be split. The common oversight is placing them too close so overlapping healing affects the look. Ask for even spacing and consider slight scale changes so each stage reads distinct at year three. For summer showing, pair with a flowy mini skirt and expect the design to be private by default. Thigh pieces stretch more with weight fluctuation, so think about future body changes.
16. Micro wine drop near the inner bicep or sternum accent
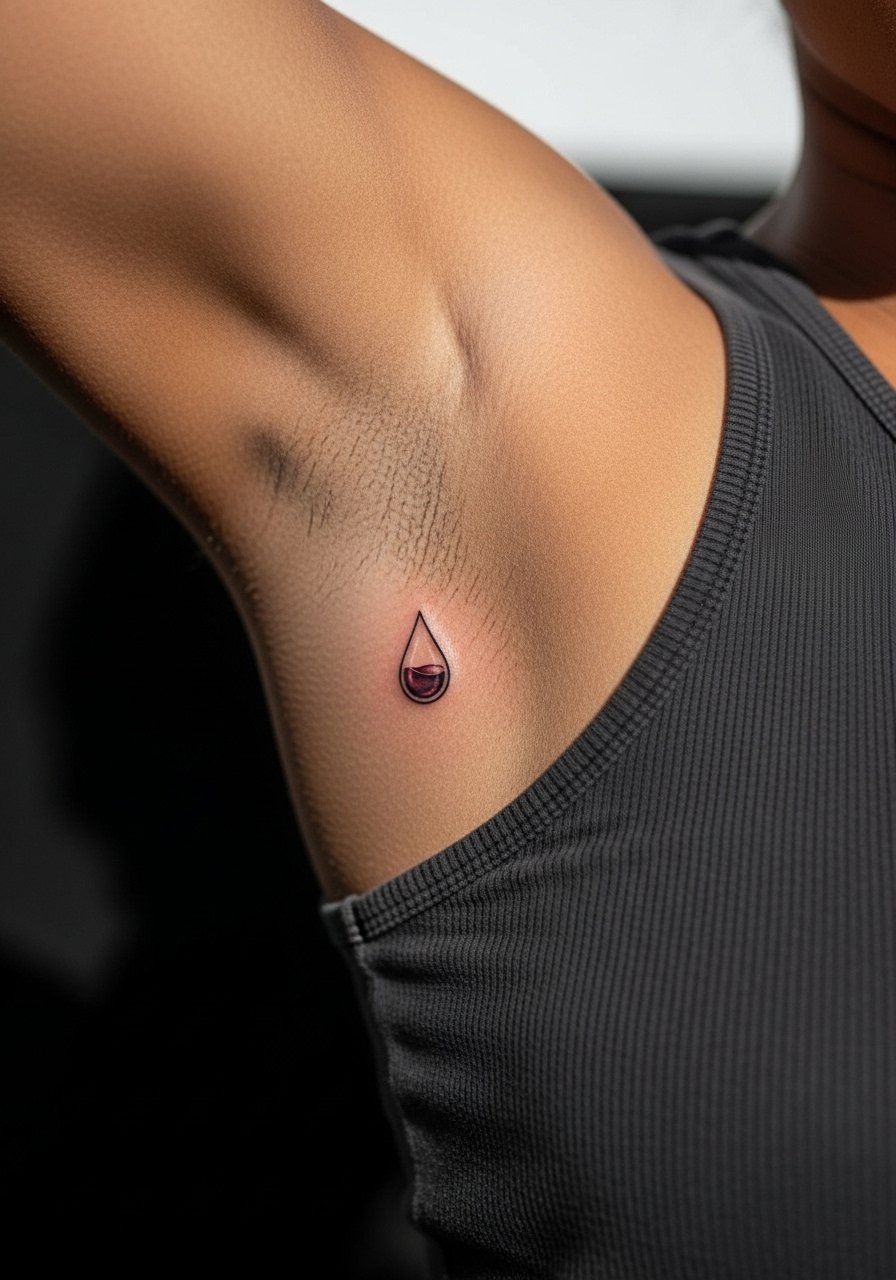
A tiny drop can act as punctuation to an existing collection or stand alone as a minimalist mark. Inner bicep or sternum adjacency makes it intimate and gives options for later expansion. Micro-realism needs crisp contrast and the right ink saturation to survive the first years. The common mistake is expecting a micro drop to behave like a larger realistic piece. Discuss realistic expectations and ask for healed photos of similar micro pieces. Session time is short but concentration required is high for the tiny details.
17. Blackwork geometric wine glass for high-contrast collarbone placement
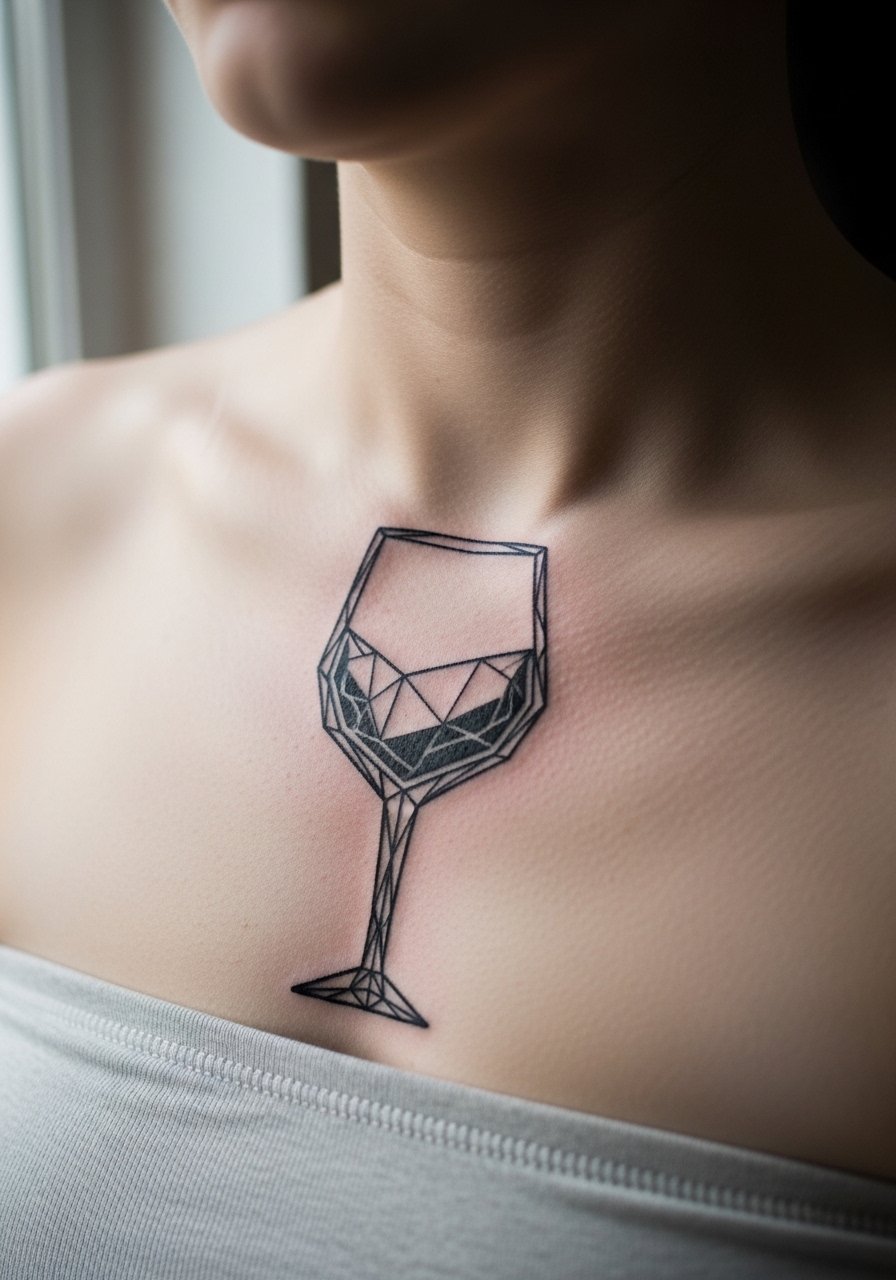
Returning to collarbone with a geometric blackwork design gives a bold, modern silhouette. This placement is visible and can make an immediate impact. Expect discomfort over bone and a single session for a medium-sized piece. The advantage of solid blackwork is longevity and photo clarity across skin tones. For showing it off, a strapless bra under an open top helps stage the piece without exposing more than you want. Ask the artist about spacing so negative spaces remain crisp rather than filling in during healing.
Frequently Asked Questions
Q: Why do fine line wrist tattoos blur faster than other placements?
A: Wrist skin takes a beating from sun exposure, constant washing, and friction from bracelets. Fine line work sits close to the surface. Ask your artist to use slightly heavier linework or plan a touch-up at year two. Also protect the area from sun and avoid tight bracelets during the first month.
Q: Should I use protective film or dry healing for a watercolor shoulder blade piece?
A: Artists and healers split into two camps. One group prefers protective film for faster, cleaner initial healing. The other camp favors dry healing so scabs can form and fall naturally. Both approaches can work. Tell your artist which method they prefer and follow their specific timeline because aftercare technique matters more than generic rules.
Q: Will blackwork geometric designs show up well on darker skin tones?
A: High-contrast blackwork tends to read best across a range of skin tones because solid fills maintain shape. For geometric work, ask to see healed examples on similar skin and request bolder separations between facets so negative space remains visible in photos.
Q: How should I dress for a ribcage ornamental session to make the experience easier?
A: Wear a cropped athletic top or sports bra you can lift so only the ribcage side shows. Loose bottoms let you get comfortable on the table. Avoid tight fabrics that press on the area after the session.
Q: What is a realistic touch-up timeline for fine line versus blackwork?
A: Fine line pieces commonly need attention at year two to three, depending on placement and sun exposure. Blackwork generally holds longer and might only need a touch-up in five years or later. Expect touch-ups to be quicker than the original session, but factor them into long-term care plans.
Q: How can I find a guest artist or a budget-friendly spot for a small wine glass outline?
A: Search community channels like convention calendars and forum threads for guest spots, and use booking apps that list guest artists in your city. Many people find good small work with visiting artists or apprentices who run lower minimums. Ask the studio about portfolio photos of healed small pieces before booking.
