
Fine line color is everywhere on feeds, and the pieces that still read crisp after five years are not always the ones that looked hottest fresh. Placement, stencil spacing, and how color is saturated matter more than the filter. Below are 17 stencil-ready colorful templates that balance immediate impact with realistic aging, plus exactly what to say in a consult so your stencil becomes a tattoo you still like years from now.
1. Painterly Watercolor Hibiscus on Upper Arm
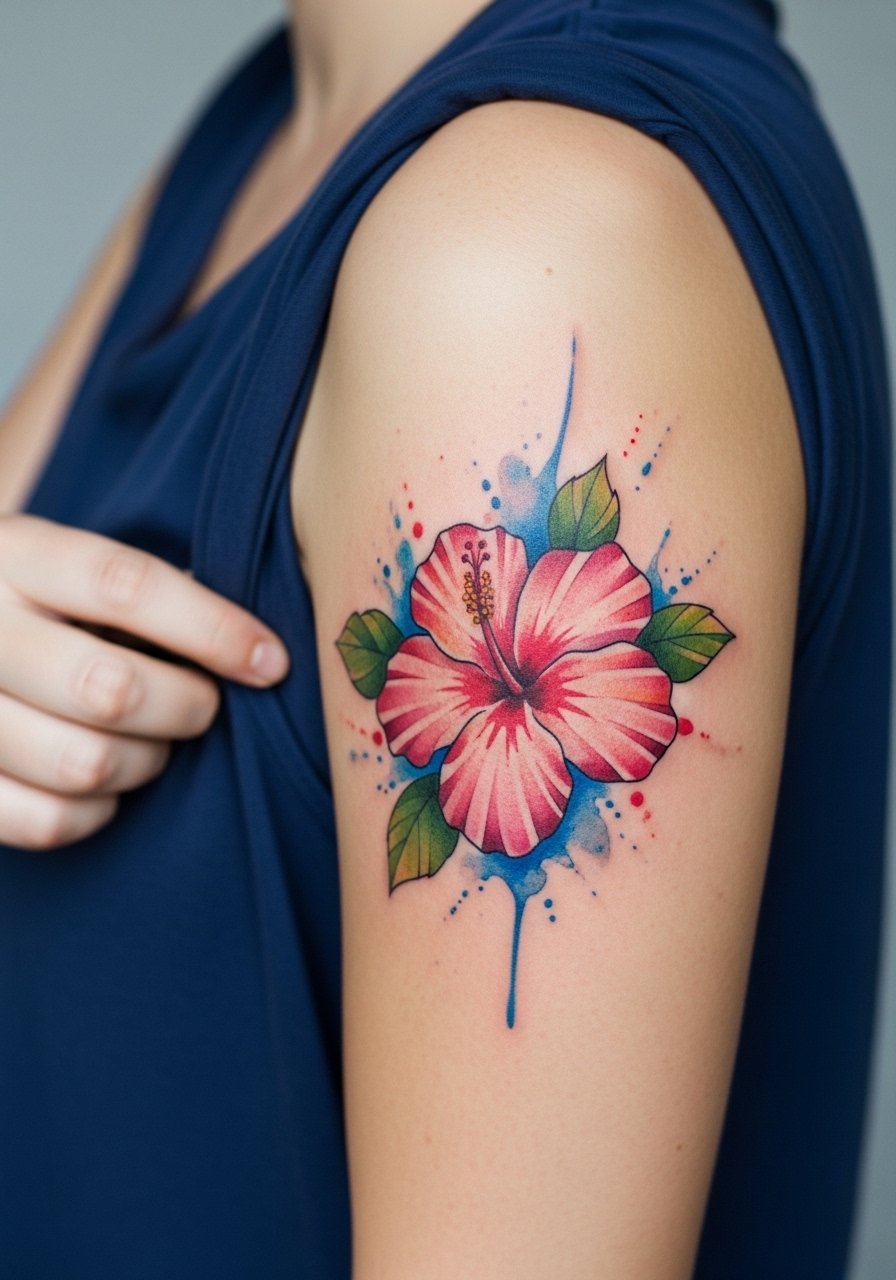
A painterly hibiscus stencil works when the artist plans for saturation loss. Ask for slightly denser initial color in the center and softer washes at the edges so the petal shapes keep reading as they fade. Most mistakes come from trying to reproduce a photo exactly at tiny scale. For an upper arm piece the session is moderate in length and the pain level is tolerable. At six months the washes will even out. At two years expect gentle softening. For showing it off, pair the placement with a loose tank top that keeps the shoulder visible without rubbing during healing.
2. Micro-Realism Goldfish on Inner Forearm
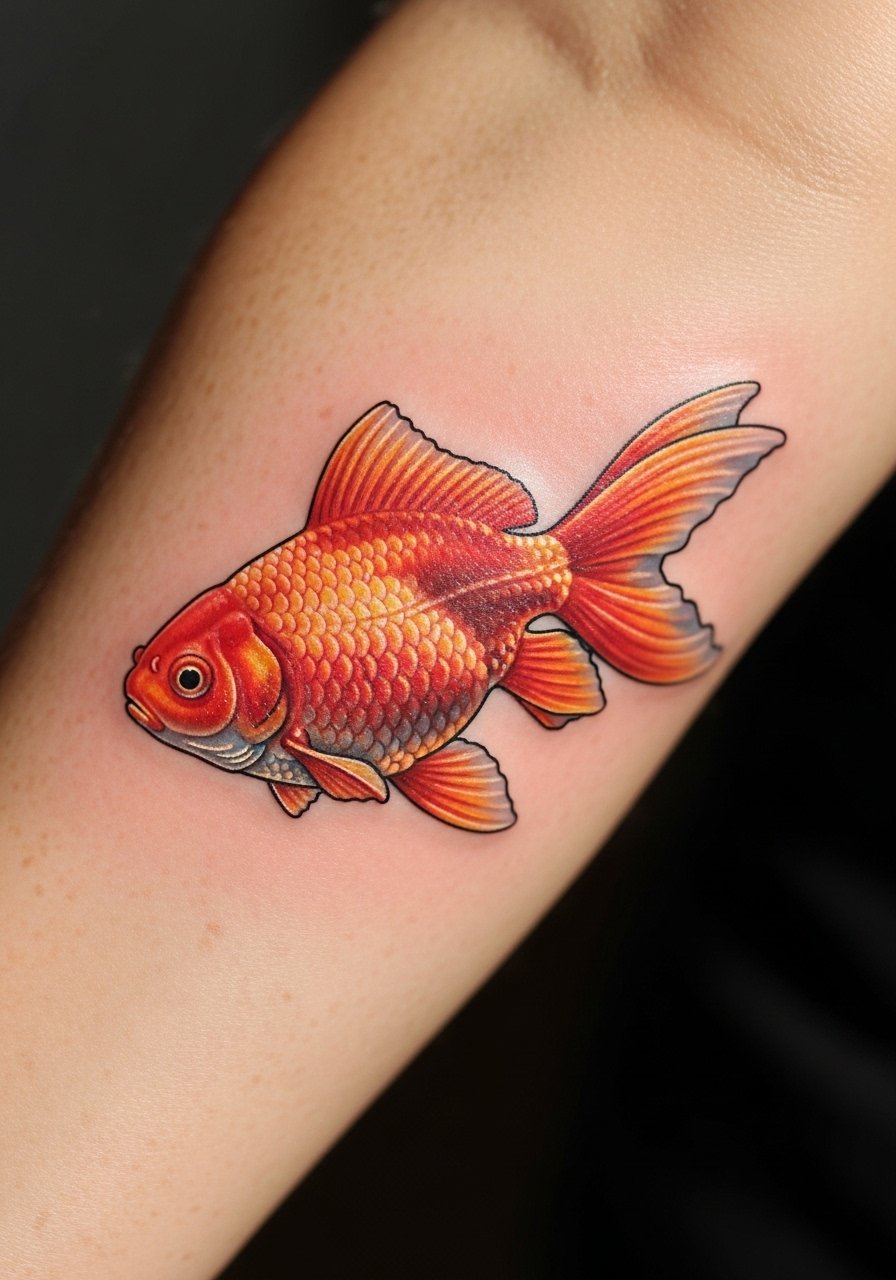
This stencil template favors micro-realism with strong color contrast between the fish and surrounding negative space. Fair warning, the inner forearm shows detail well but sun exposure will flatten color over time. Tell your artist you want a mix of saturated core color and slightly thicker linework around the silhouette to protect definition. The session feels steady and manageable for most people. A common error is asking for everything tiny. Scale up the key features for longevity. Expect a touch-up in year two or three if you want the colors to pop years later.
3. Bold Traditional Rose on Wrist
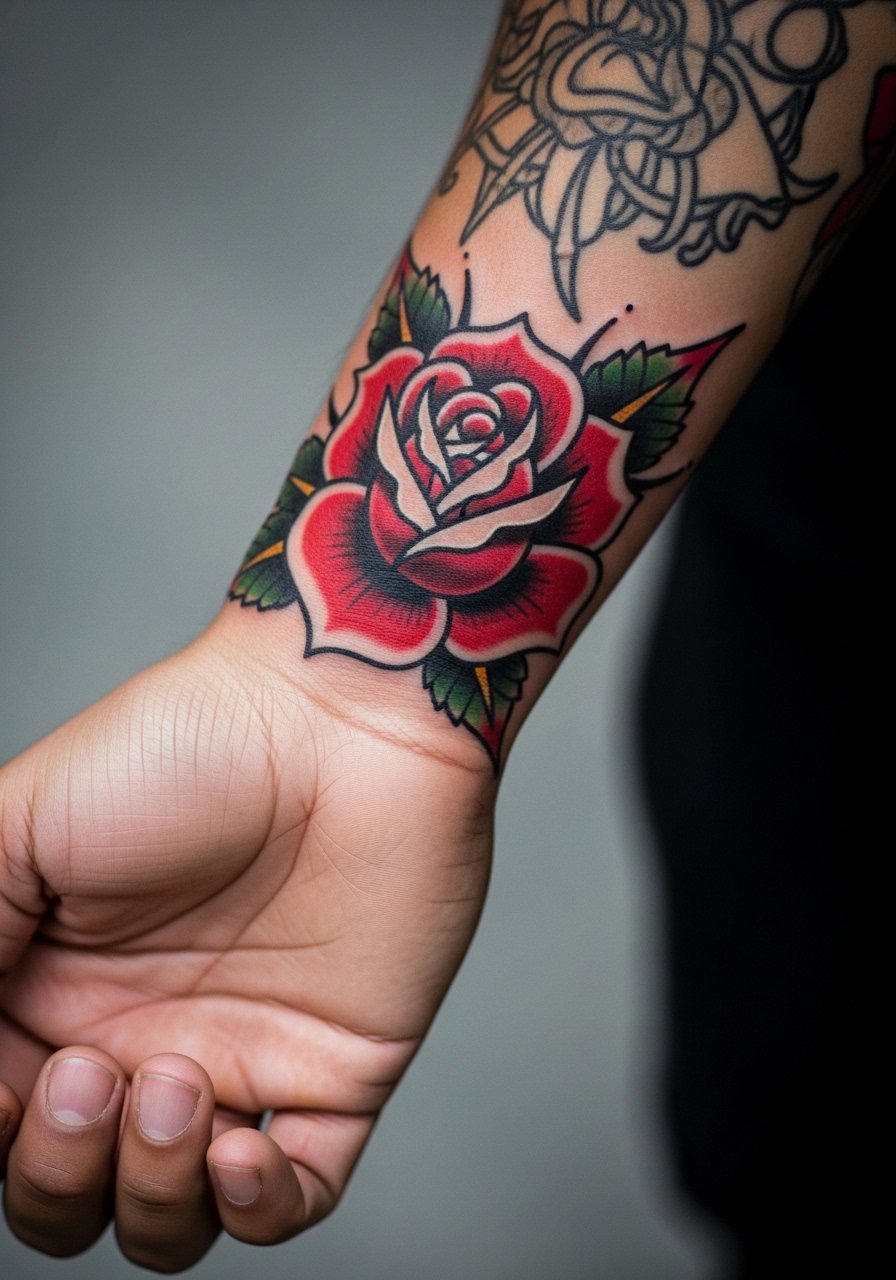
Traditional saturation holds up well on small wrist pieces when outlines are given breathing room. The wrist is high friction from sleeves and watches, so tell your artist to avoid ultra-thin outlines near the bone. That mistake causes early blurring. The pain is short but sharp. Expect the color to look almost unchanged at six months and slightly softened at two years. During the session wear a loose button-down shirt you can pull aside for access and then roll up sleeves for showing off.
4. Geometric Mandala with Jewel Tones on Sternum
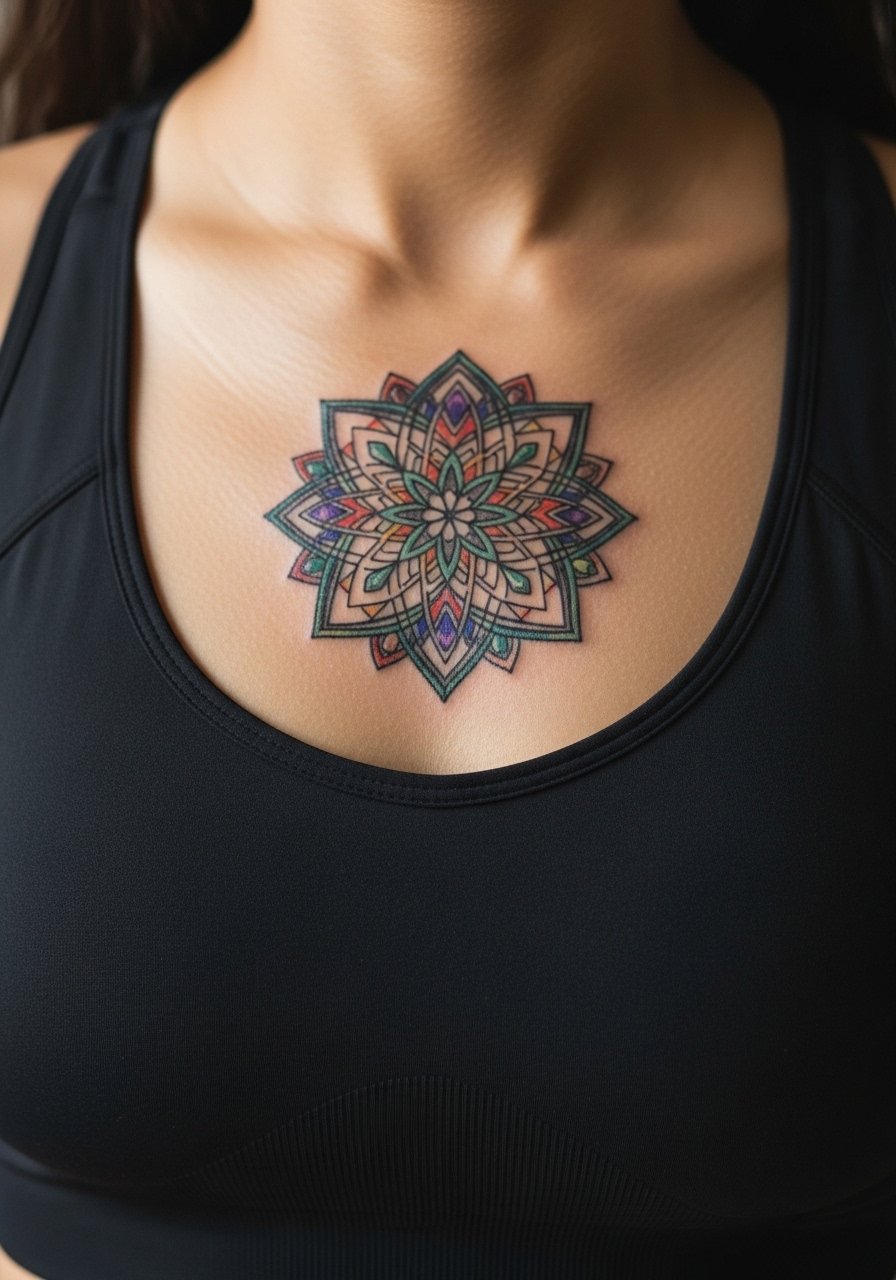
Sternum stencils need spacing to prevent dense dots from merging as the skin moves. Artists split into two camps on dense mandalas here. One camp says the skin stretches and close detail blurs within two years. The other camp says careful needle depth and spacing keep the pattern readable. Ask where your artist stands and request wider negative space in the densest zones. The session can be intense for pain, and the healing window requires care because clothing friction is constant. Pair this piece with strapless tops for evenings out so the mandala can be shown without rubbing.
5. Neon Splash Script on Collarbone
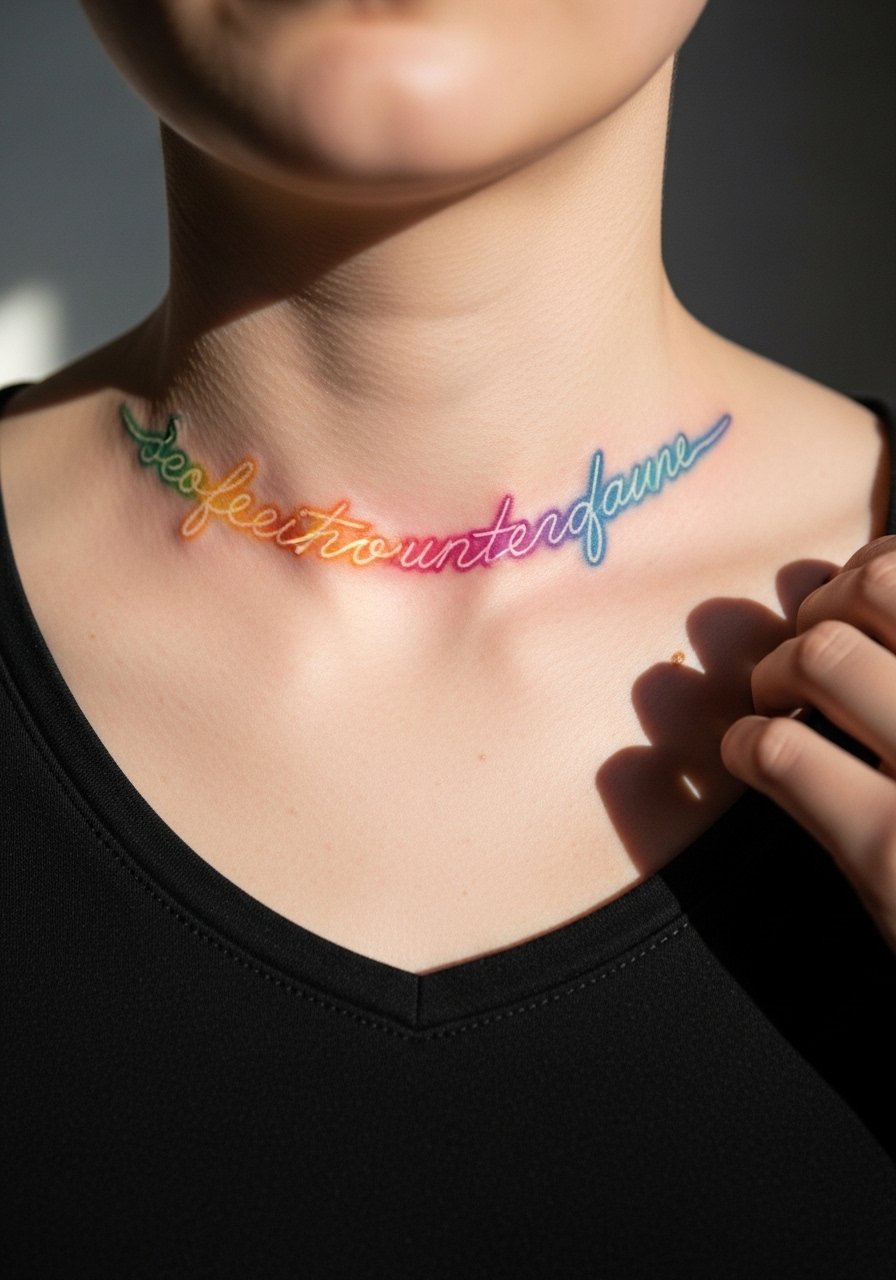
Thin script with neon-style backing reads best when the stencil leaves room between letters and the color wash. A common mistake is packing letters too close together and then adding bright washes that muddy the shapes. During consultation ask for single-line lettering with color dropped behind rather than inside the letters. Collarbone sessions feel sharp when over bone. For showing the work, wear wide-neck blouses that let the line sit near the neckline without tugging.
6. Botanical Sleeve Flash Cluster on Outer Forearm
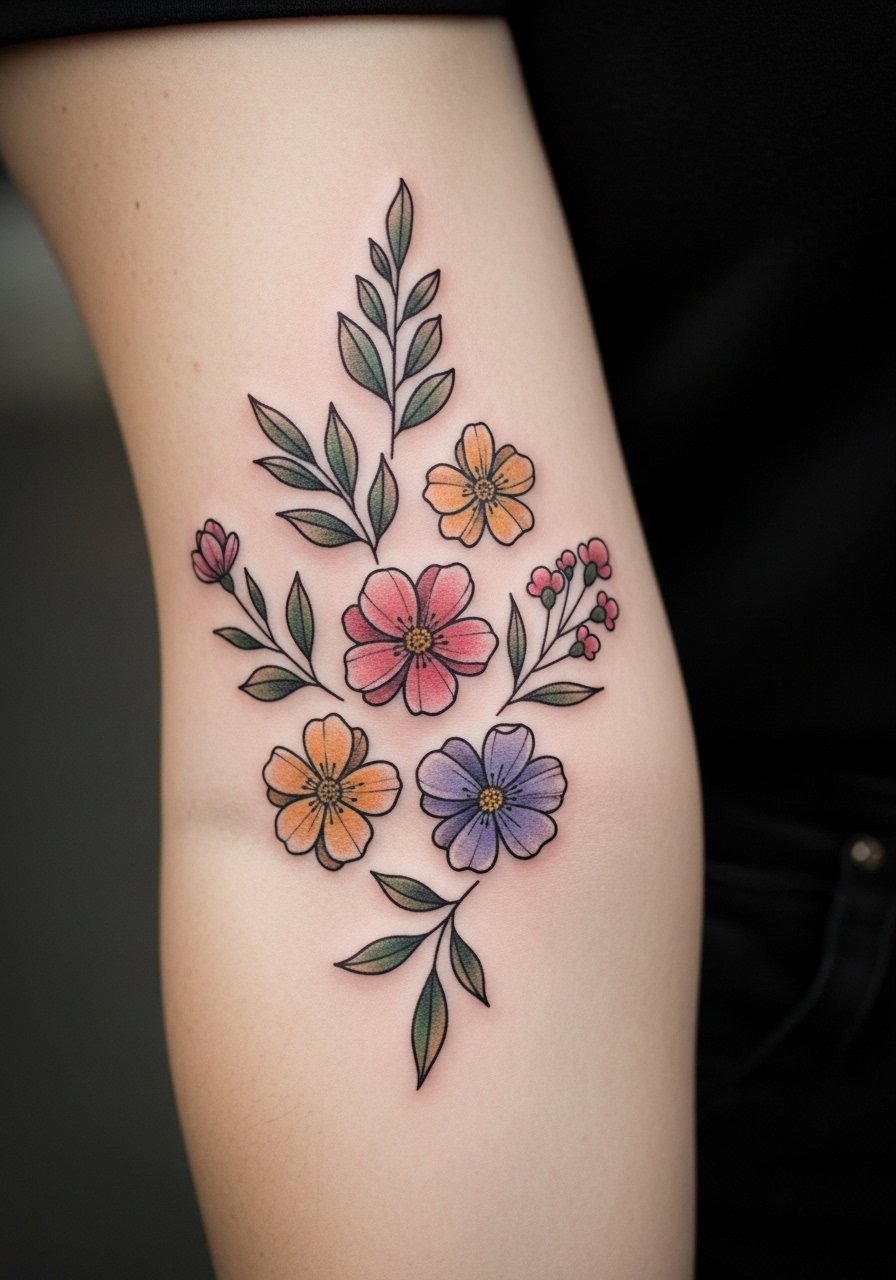
A flash cluster stencil is a great session-friendly alternative to a full custom sleeve. I recommend this if you want variety across a single session. Tell the artist you prefer bold stems and softer interior color so each motif survives long term. The outer forearm tolerates color and shows detail well. Mistakes happen when people demand ultra-fine interior details in tiny petals. Expect minor softening at year two and a touch-up on the most exposed pieces at year three. For the chair day wear a long-sleeve you can roll so the area is accessible but protected before and after.
Studio Day Picks
The upper-arm florals and collarbone script above need different prep than the wrist and forearm pieces. These five items smooth session logistics and protect fine color during the first week.
-
Stencil transfer paper kit. Lets you preview placement on skin before the needle starts, especially useful for the script and mandala placements above.
-
Low-sensitivity topical cream. Applied per the product instructions it can ease shoulder and sternum sessions while keeping the artist's work visible.
-
Thin protective film roll. Helps protect high-friction areas like the wrist and collarbone during the first days of healing.
-
Fragrance-free gentle body wash. Cleanses healing tattoos without stripping saturated color on the forearm cluster.
-
Aquaphor healing ointment. Thin layers in the initial days lock in moisture for small colorful pieces without suffocating the skin.
7. Celestial Constellation Wrap on Ankle
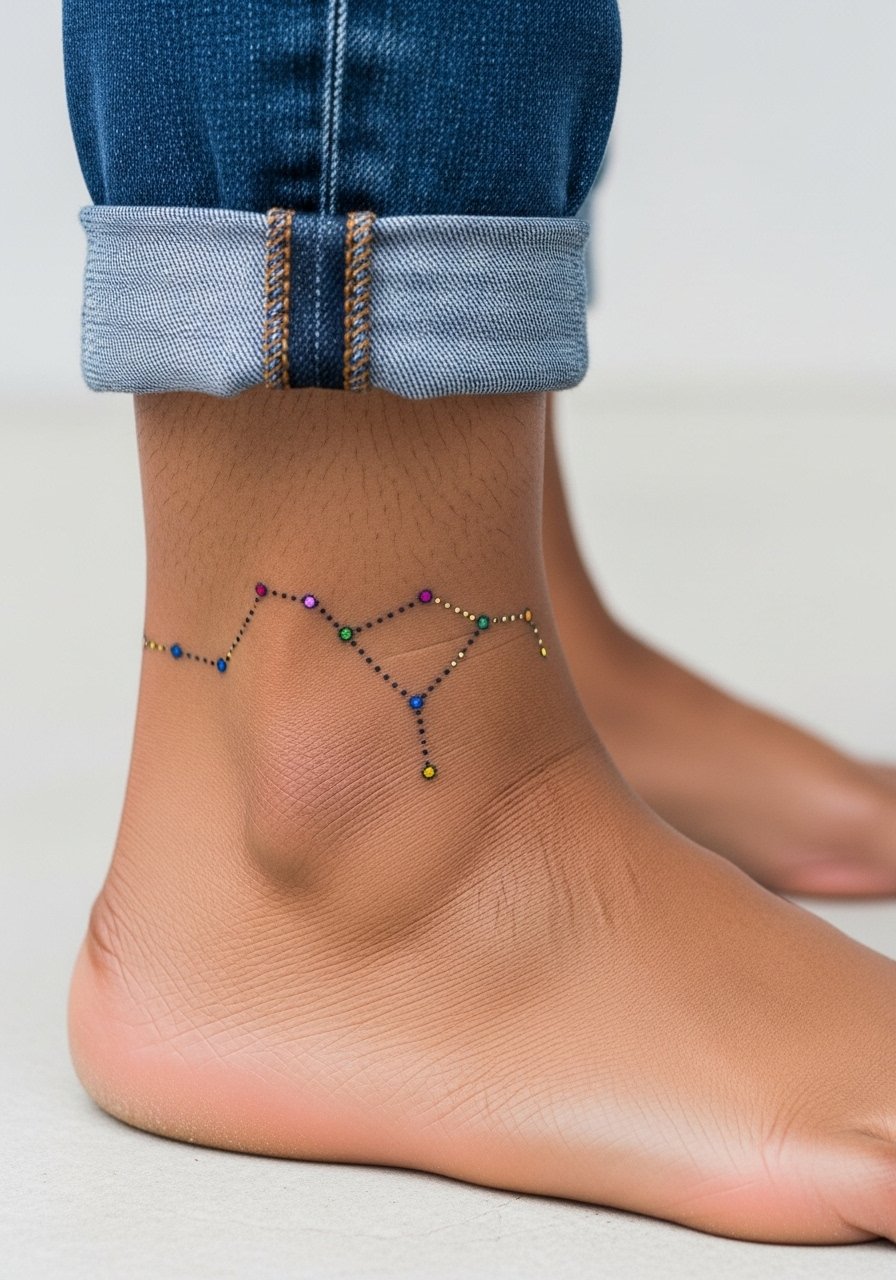
Ankle wraps look delicate but wear from shoes and socks shortens their crispness. Ask your artist for slightly bolder anchor dots and a bit of negative space so tiny star clusters do not blur. The session is short. Pain is localized but mild. The biggest mistake is requesting ultra-fine dots without considering daily friction. For easy showing pair the ankle with sandals that keep the area visible without constant rubbing.
8. Tropical Sleeve Flash on Upper Arm and Shoulder
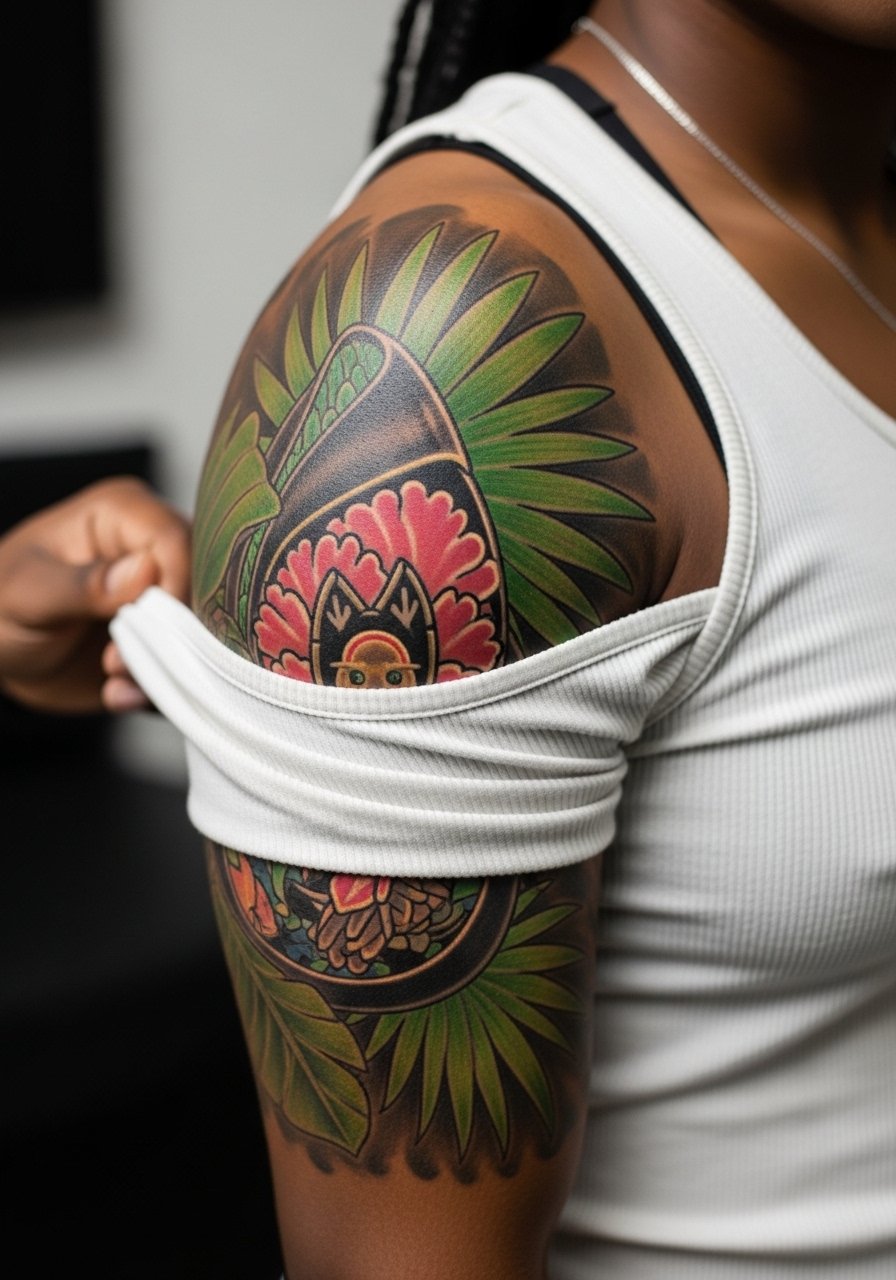
A sleeve built from flash pieces works when scale and saturation are coordinated across designs. In consultation ask the artist to map the stencil so colors do not fight at edges. The shoulder takes color well, but the top of the arm can lose fine detail if elements are jammed. Sessions here run medium to long. Expect natural softening and plan for a full hue refresh in three to five years if you want saturated brightness.
9. Pastel Neo-Traditional Fox on Thigh
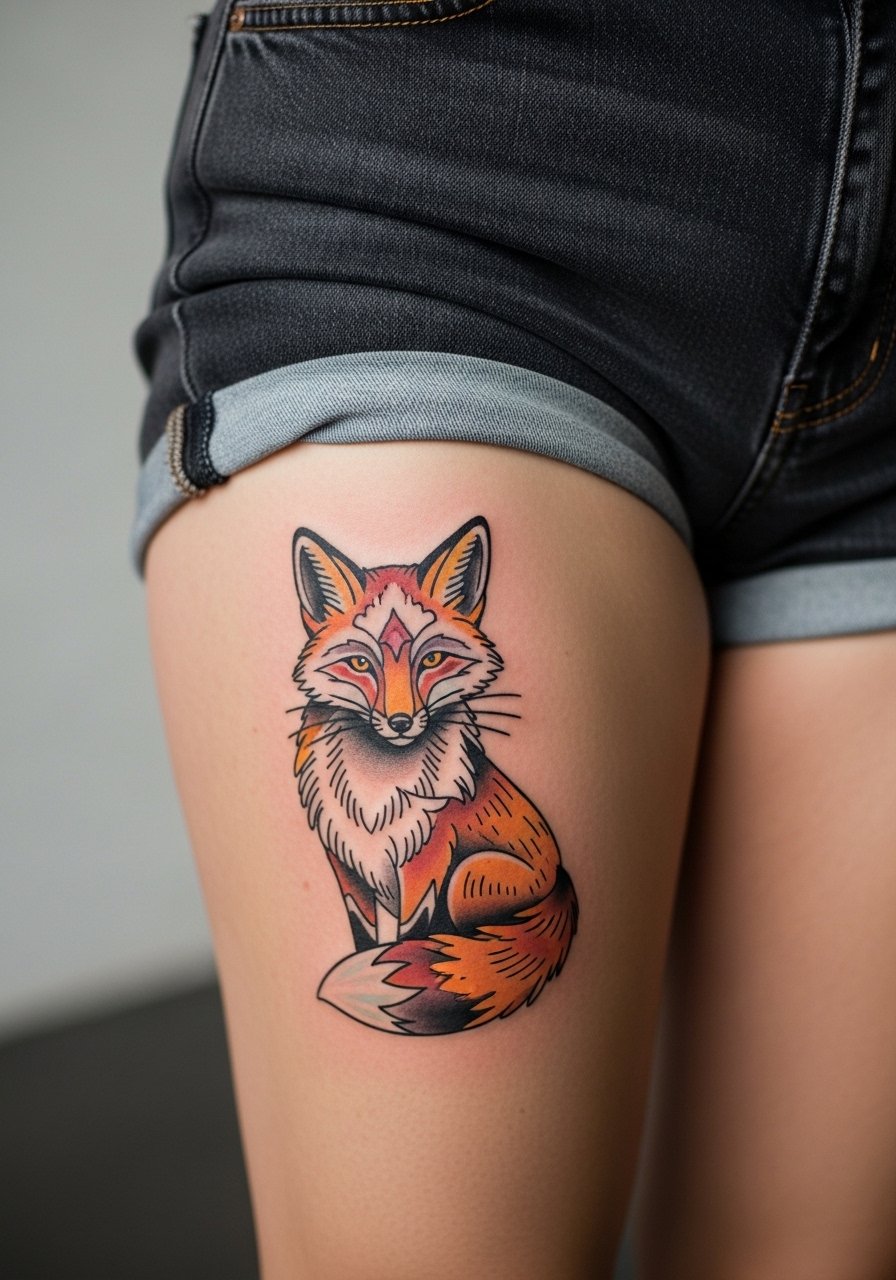
Thigh placement allows for scale that keeps detail readable. Neo-traditional stencils benefit from bold outlines that hold the pastel fills over time. Common mistakes include asking for pastel washes without contrast. During the consult request higher contrast shadows so the pastel does not disappear. The session is lengthy but tolerable for most. For the session wear high-waisted shorts you can move slightly to expose the outer thigh without irritation.
10. Color-Blocked Geometric on Calf
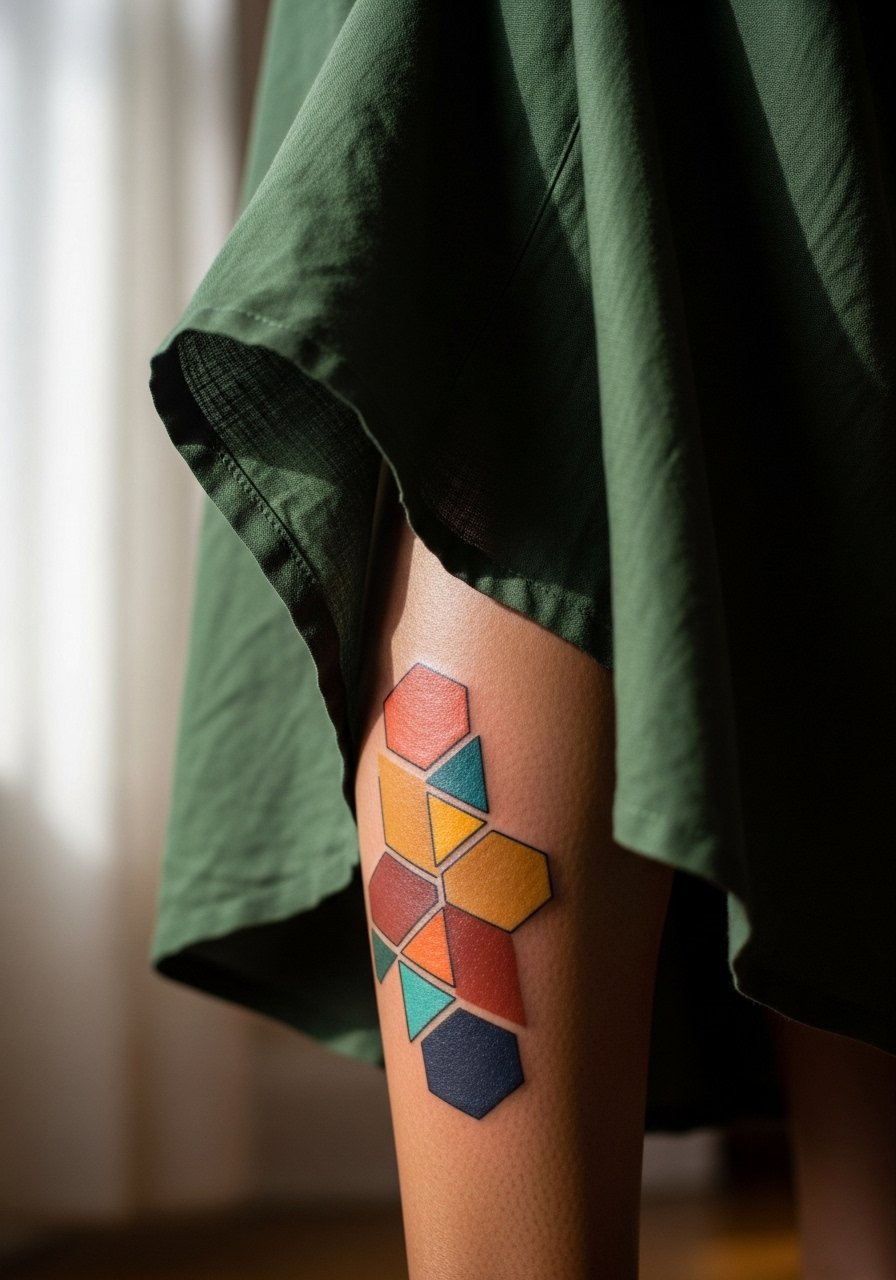
Color-block geometry needs solid saturation to avoid patchy healing. The calf tolerates heavy saturation well and the larger surface helps the shapes stay distinct. A frequent error is compressing many small blocks into a tiny area. Ask for bigger blocks and clear separations so lines do not merge. Session time is moderate. Over the first two years colors will mellow but shape should remain clear.
11. Vibrant Script Banner on Ribcage
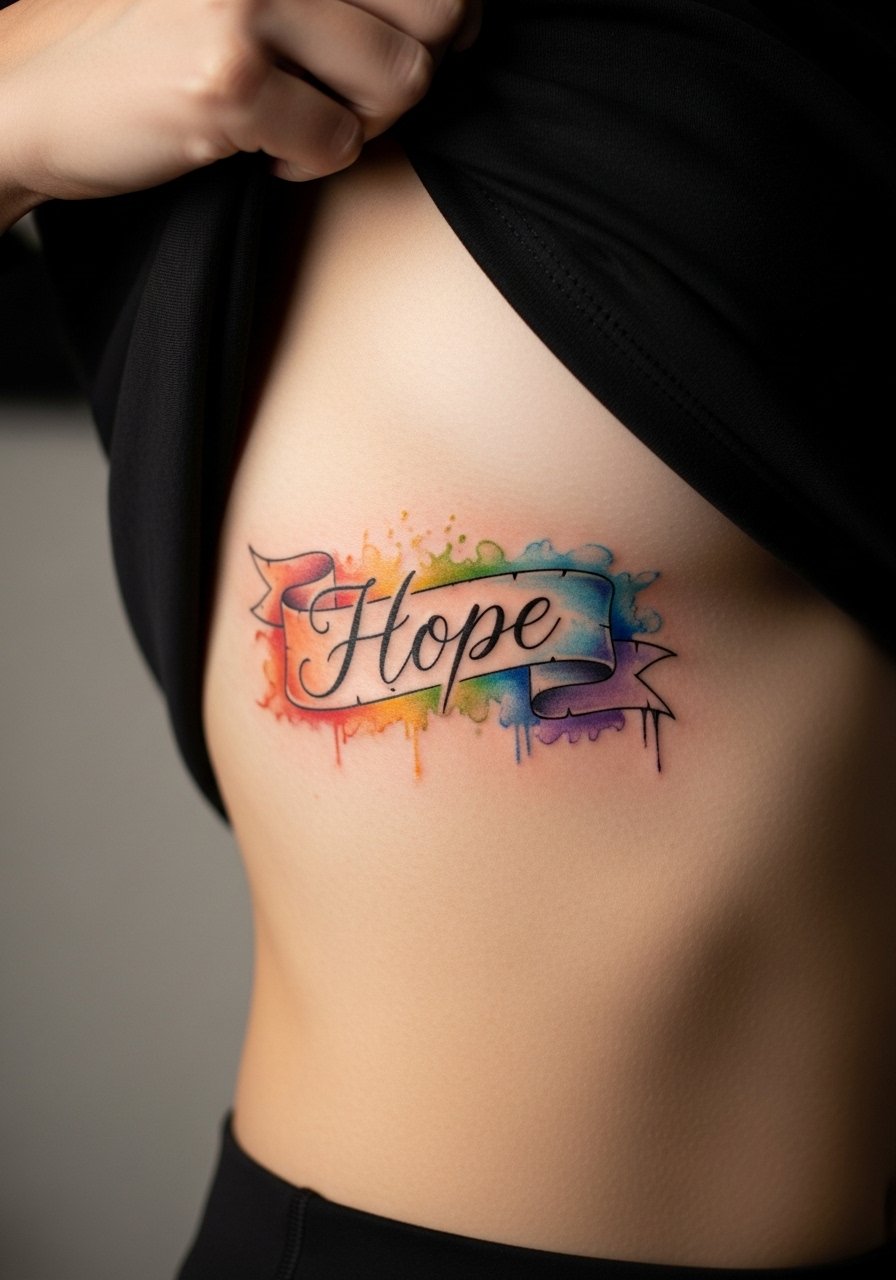
Ribcage stencils look dramatic but the spot moves with breathing. Artists divide into two camps on fine script here. One camp warns that tight lettering blurs with movement. The other camp says with the right spacing and needle depth script can last. Ask your artist about spacing and request a test transfer while you breathe to check rhythm. The pain is high for many. Expect the color to read strong at six months and require touch for crisp script at three years. For the session wear a cropped athletic top so the artist can access the area cleanly.
12. Rainbow Minimalist Finger Stamps
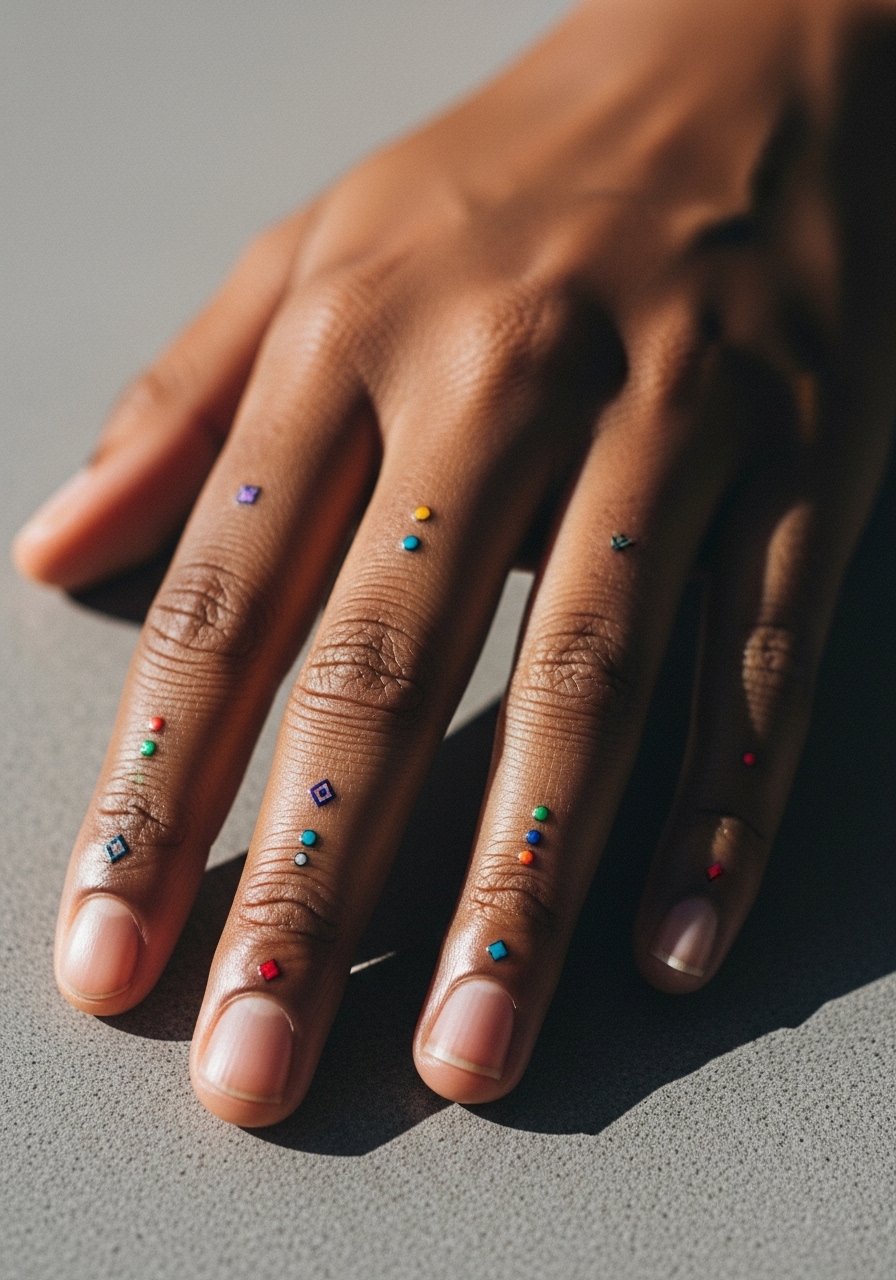
Finger tattoos take a lot of washing and friction. For colorful finger stamps, tell the artist you want denser centers and simpler shapes to withstand daily wear. The common mistake is requesting micro shading that disappears fast. Expect heavy fading and possible touch-ups yearly to keep clarity. Session time is short but healing can be tricky. Hand tattoos still affect some workplaces, so consider visibility before committing.
13. Watercolor Phoenix on Back Shoulder Blade
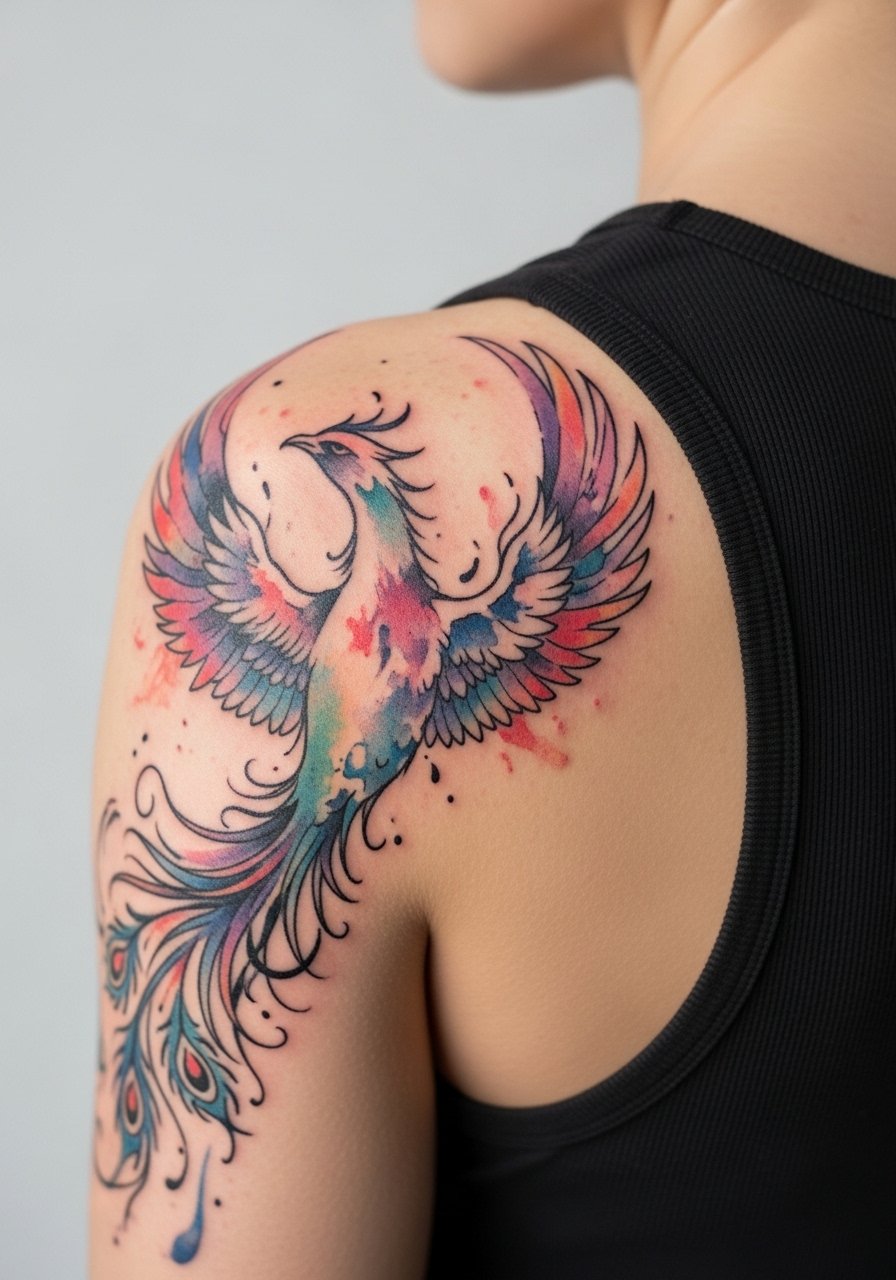
A phoenix with watercolor washes looks striking at large scale. When placed on the shoulder blade, the stencil should include a few anchor outlines so the shape survives washout. The common mistake is zero outlines and all wash. That approach can turn into a faded blur after sun exposure. Sessions are long and healing requires avoiding tight straps. For showing it off pick tops with open backs or a slip dress that keeps the blade visible without constant fabric friction.
14. Candy-Colored Micro Tattoo Cluster Behind Ear
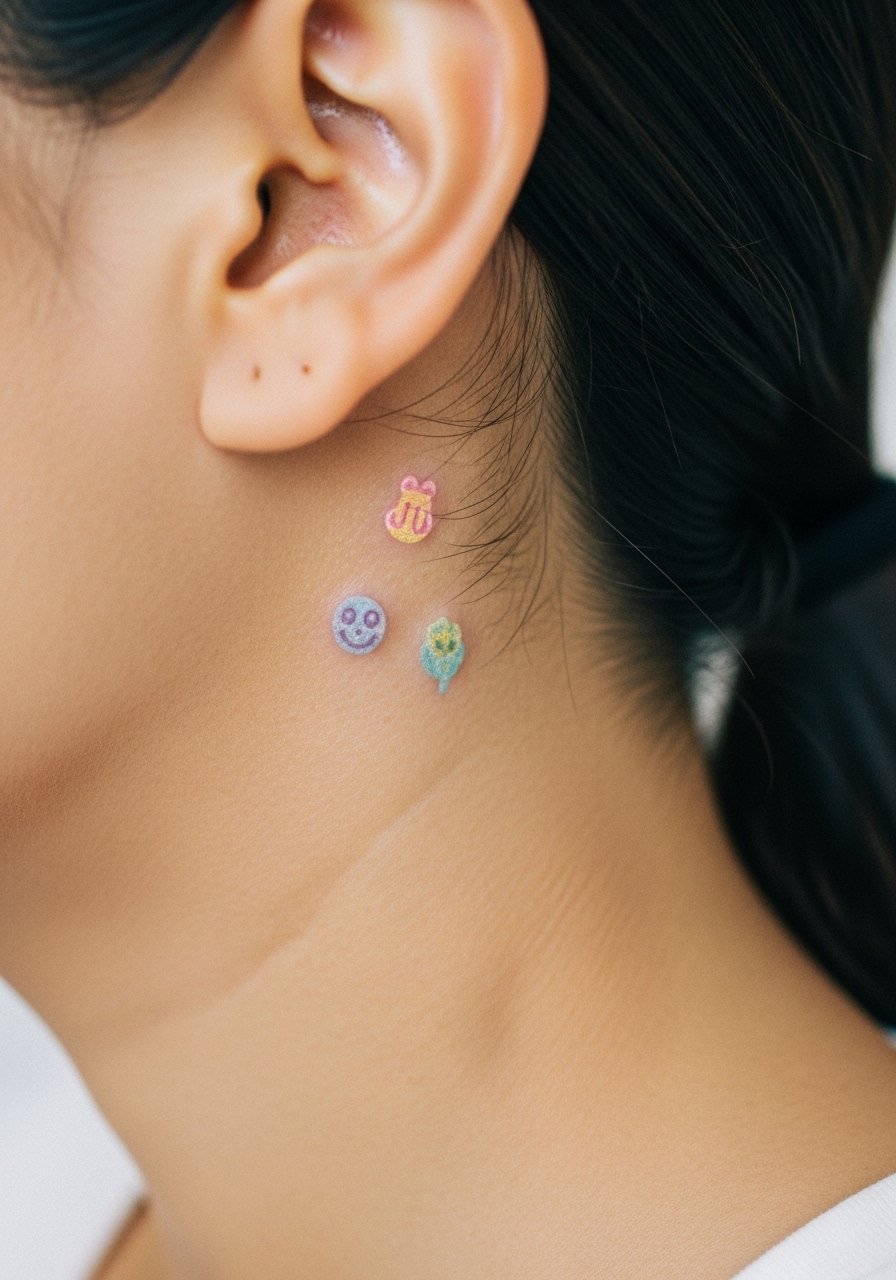
Behind-the-ear stencils are discreet and charming when planned small. The skin there is thin and movement plus hair rubbing causes fading. Ask for stronger silhouette lines and slightly larger motifs so they do not lose shape. Sessions are quick but placement is sensitive. This area sometimes requires specialized technique. Mention any workplace considerations since visibility increases when hair is up.
15. Tropical Palm Silhouette on Lower Back
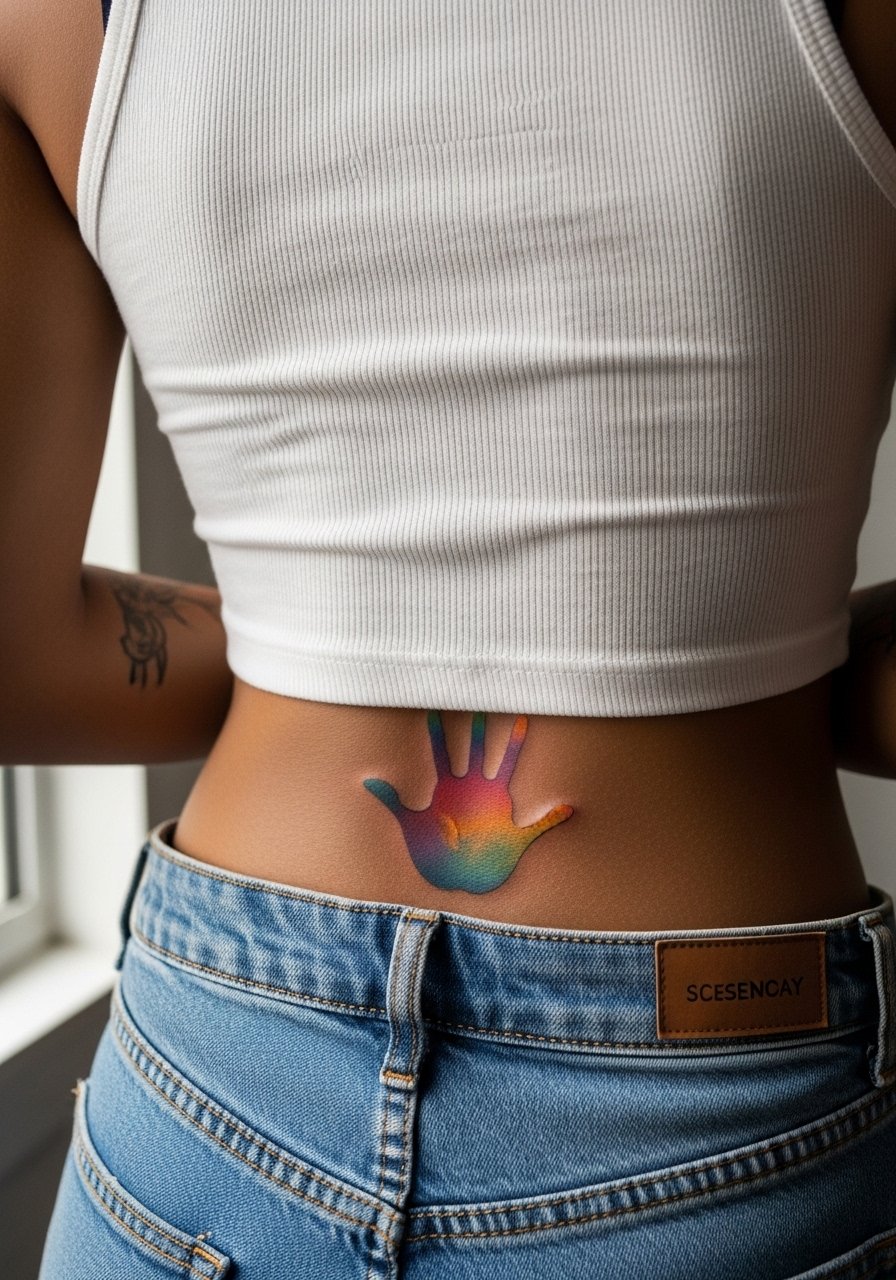
Lower back stencils let you use horizontal composition to great effect. Keep the silhouette bold and the interior washes simple to avoid muddying. A common mistake is over-detailing small internal fronds. The session is medium in length. Over years the piece stays tucked and protected from sun, which helps color longevity. For showing this placement, high-waisted bottoms keep the artwork visible while protecting edges during the day.
16. Ombre Script Wrap on Wrist and Hand
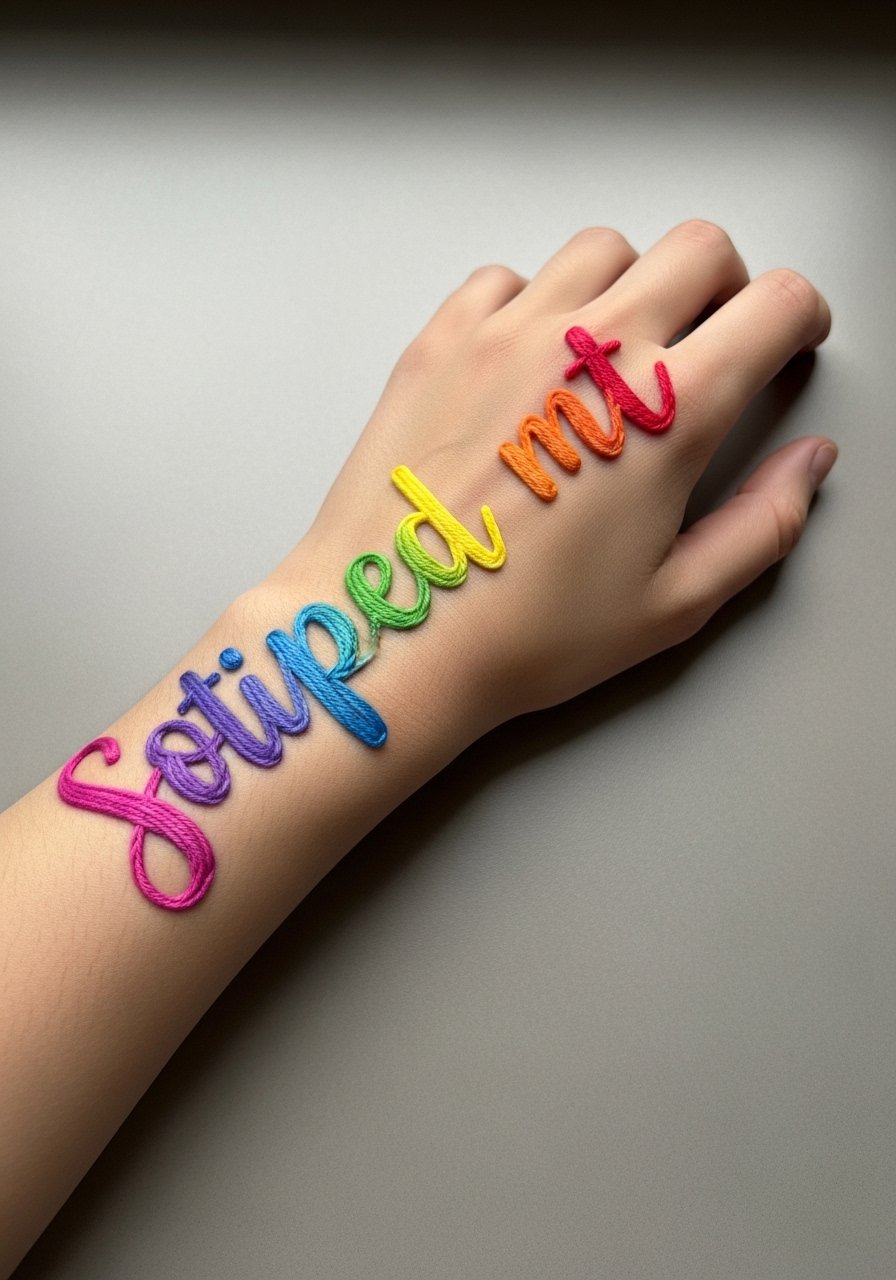
Wrapping script from wrist to hand must account for constant movement and washing. Ask the artist to keep the letters slightly thicker at joints so they do not blur into each other. The wrist area fades faster than the forearm because of friction. Plan on a touch-up in two to three years for crisp gradients. For the session wear a racerback tank or a sleeve you can move so the artist has access without tugging the area.
17. Neon Floral Ring Around the Thumb
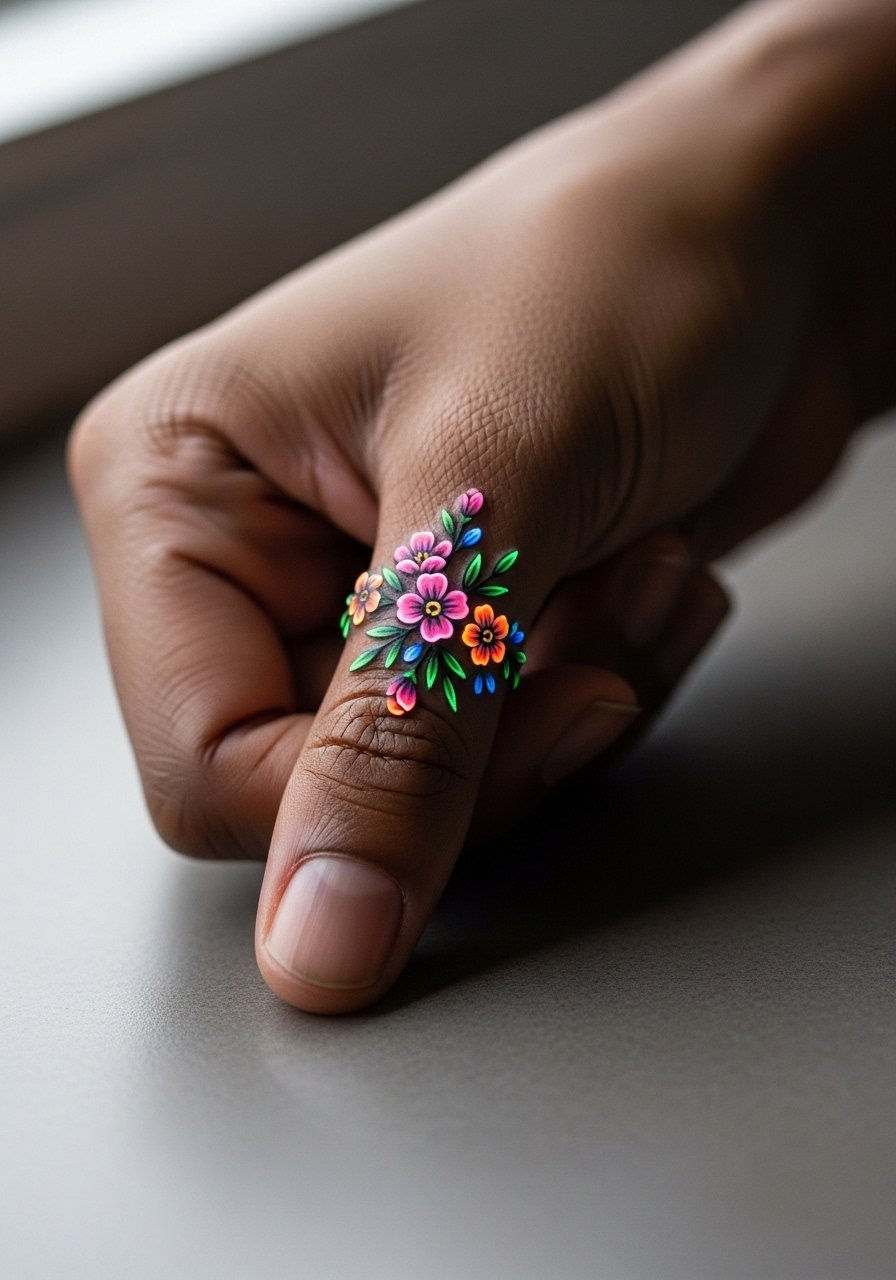
Thumb rings are high friction and often need more boldness than people expect. Request stronger outlines and compact color fields so the motif survives hand use. A real mistake is treating thumb rings like jewelry and asking for lace-thin detail. Expect the fastest fading compared with other hand placements and plan for touch-ups. The session is short but the healing is high maintenance.
Frequently Asked Questions
Q: How long before colorful watercolor stencils need a touch-up on the shoulder blade?
A: From what I have seen, watercolor pieces on the shoulder blade usually show meaningful softening by year three. If you keep sun exposure low and plan a touch-up in year two to three the piece can retain its intended look.
Q: Will pastel fills survive well on the thigh or do they disappear faster than expected?
A: Thigh placement preserves pastel fills better than wrists or ankles. The skin there is forgiving and less exposed to daily friction. Ask for contrast in shadows during your consult so pastels stay legible as they mellow.
Q: Should I be concerned about getting a mandala on the sternum given the debates about fine line there?
A: Yes, artists are split on this. One camp says dense fine line blurs with stretch and movement. The other camp points to technique and spacing as the solution. Your best move is to ask the artist for a test transfer while breathing and for added negative space in the densest sections.
Q: Do finger and thumb color tattoos require different aftercare than forearm pieces?
A: They require more attention because of washing and friction. Keep the area protected and be prepared for earlier fading. For hands avoid heavy scrubbing and consider planning for periodic touch-ups.
Q: What should I wear to a rib or sternum session to make the stencil placement easier?
A: A fitted sports bra or a cropped athletic top that you can lift slightly works well. That gives the artist clean access while keeping exposure minimal and comfortable.
Q: Can small neon colors hold up on dark skin tones as well as on lighter tones?
A: Bright pigments can read beautifully on darker skin when applied with proper saturation and contrast. Discuss pigment choices with your artist and ask for slightly denser application in the first session to account for natural light absorption.
