
Fine line deer skull tattoos are everywhere on saved boards, and the pieces that get the most likes are not always the ones that hold up. I've sat in consultations at five shops across Brooklyn and seen the same pattern. Placement and spacing matter more than how intricate the skull gets, and the sections below jump straight into designs that balance fragile linework with real-world wear.
1. Minimal Deer Skull on Inner Forearm
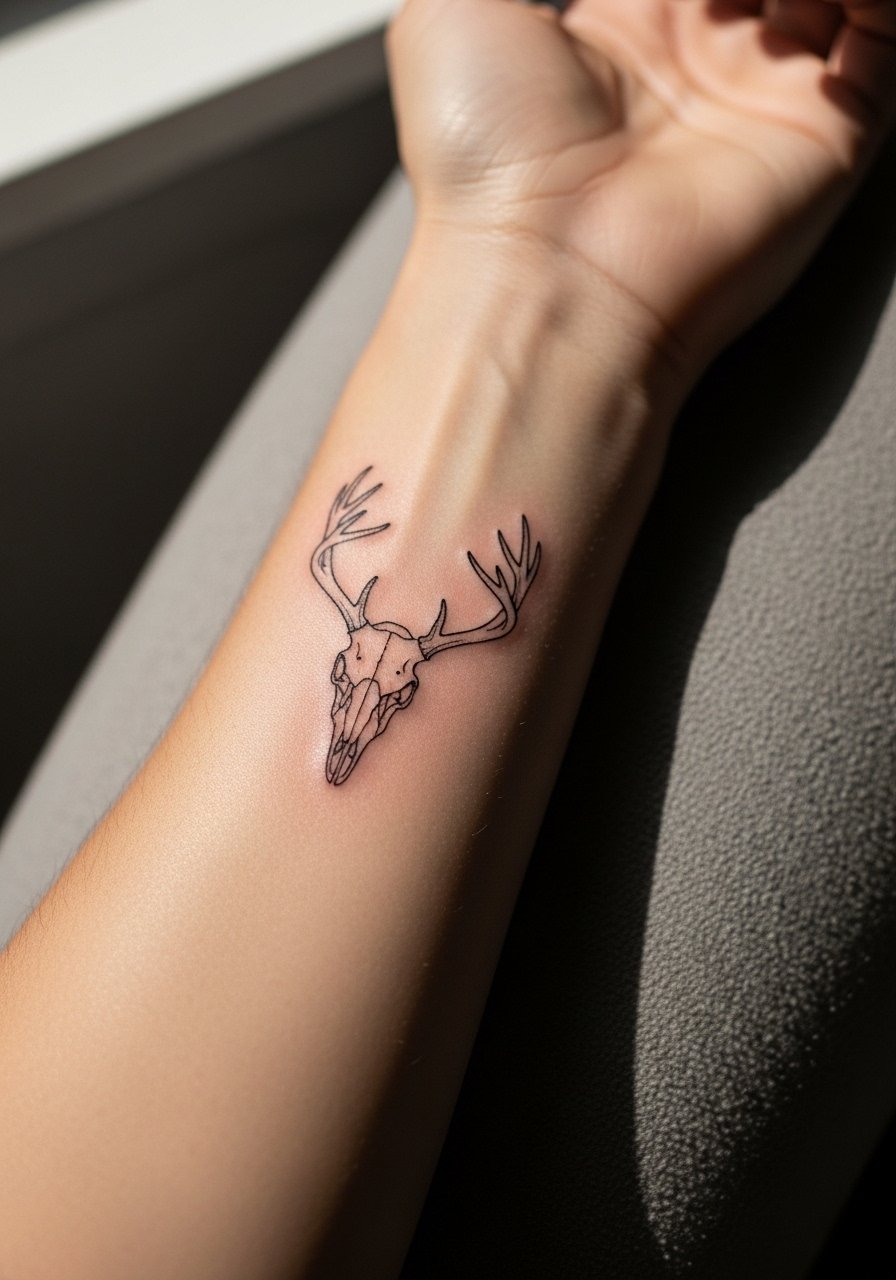
I recommend the inner forearm when you want a clean, elongated deer skull that reads for years. Tell your artist you want single-needle linework with slightly increased spacing between antler lines to avoid early merging. Most mistakes come from packing lines too close together, which looks crisp at first and then softens into a blur by year three. Expect a low to moderate pain level and a single short session. For showing it off, roll sleeves or wear a loose linen button-down that frames the forearm without covering the piece.
2. Micro Deer Skull on Finger
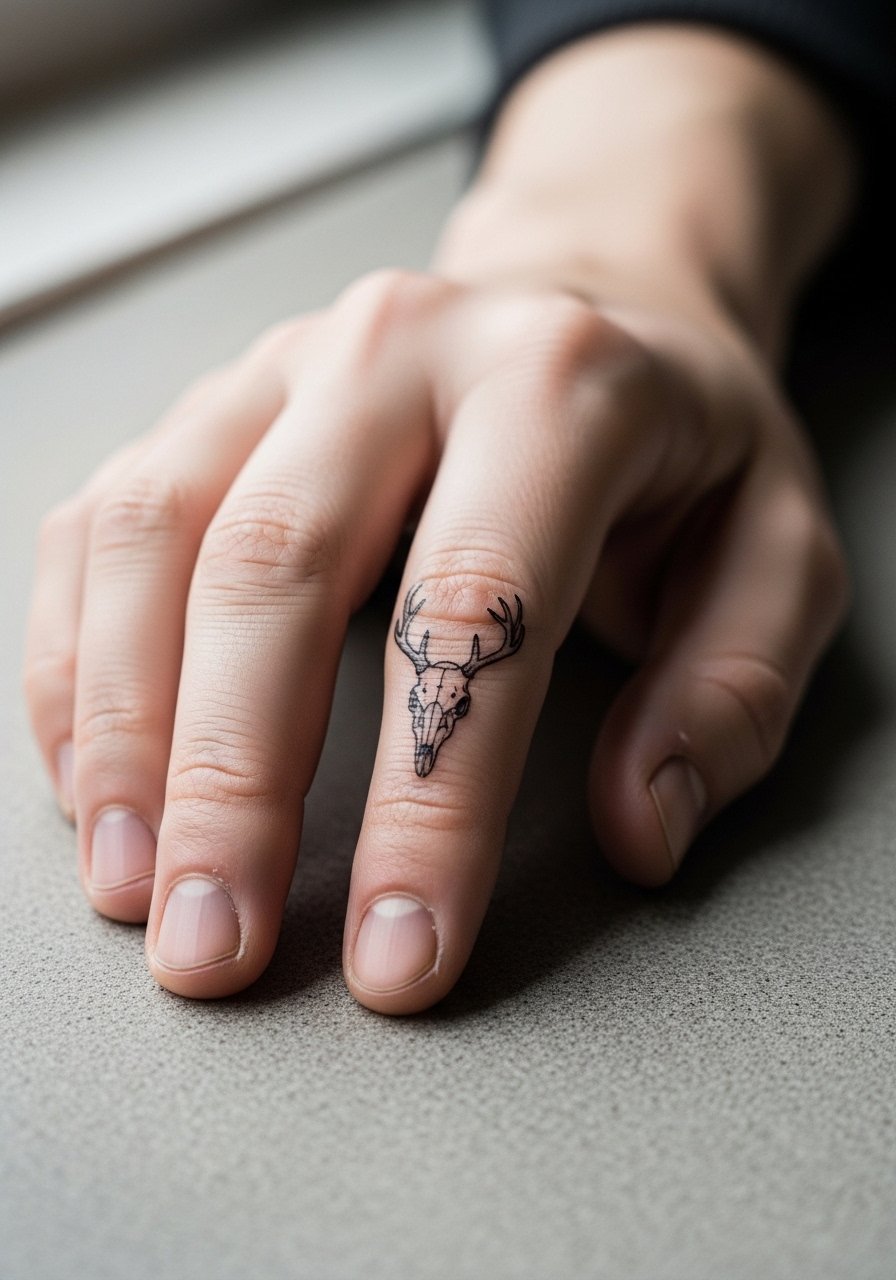
Finger placements are intimate and fast to tattoo but high maintenance. I usually tell people the biggest mistake is choosing extreme micro detail for a zone that sees constant washing and friction. Expect touch-ups at year one or two for lines to remain crisp. The session itself is quick and sharp rather than long and dull. Hand and finger work can affect some jobs, so weigh career fit. For longevity, ask the artist about slightly bolder primary contours and lighter internal details to protect the silhouette.
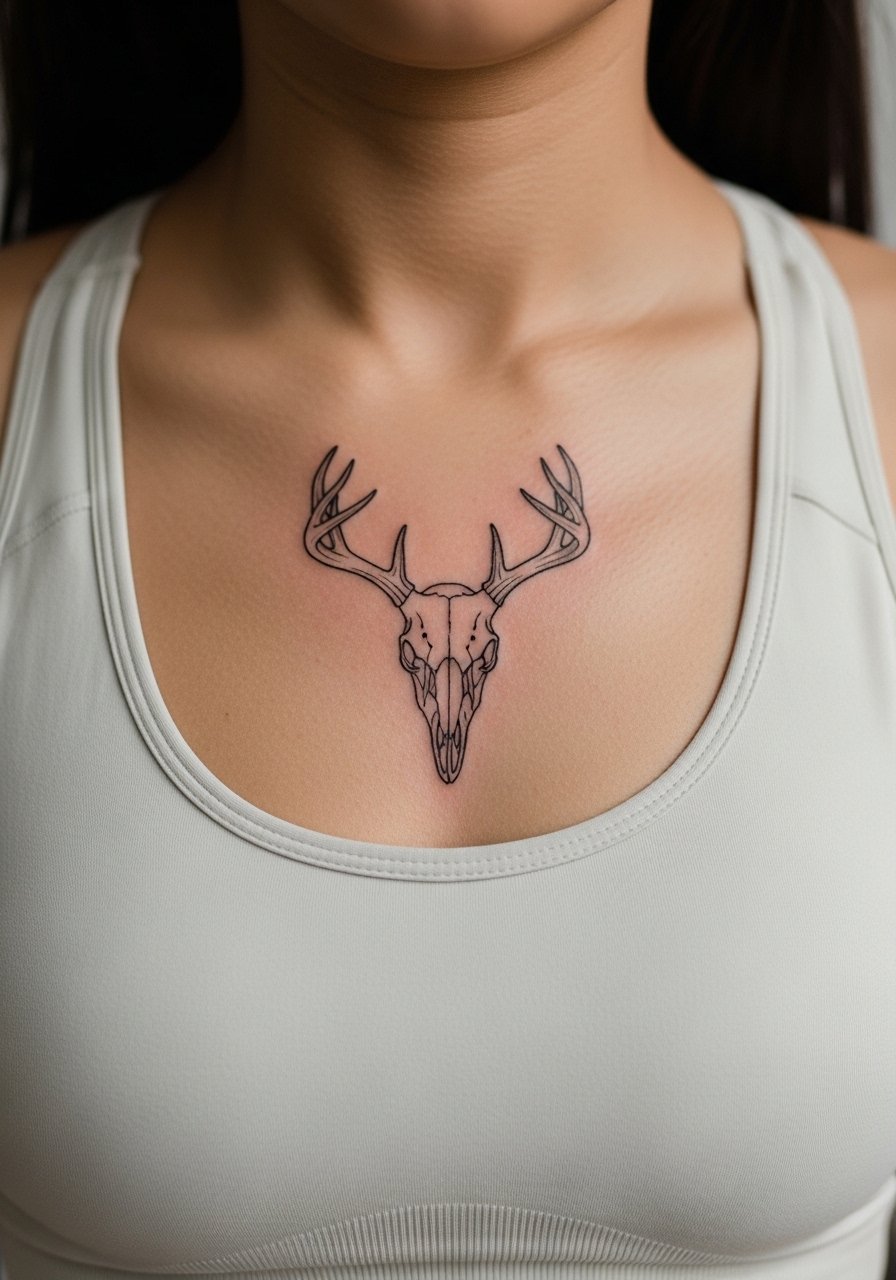
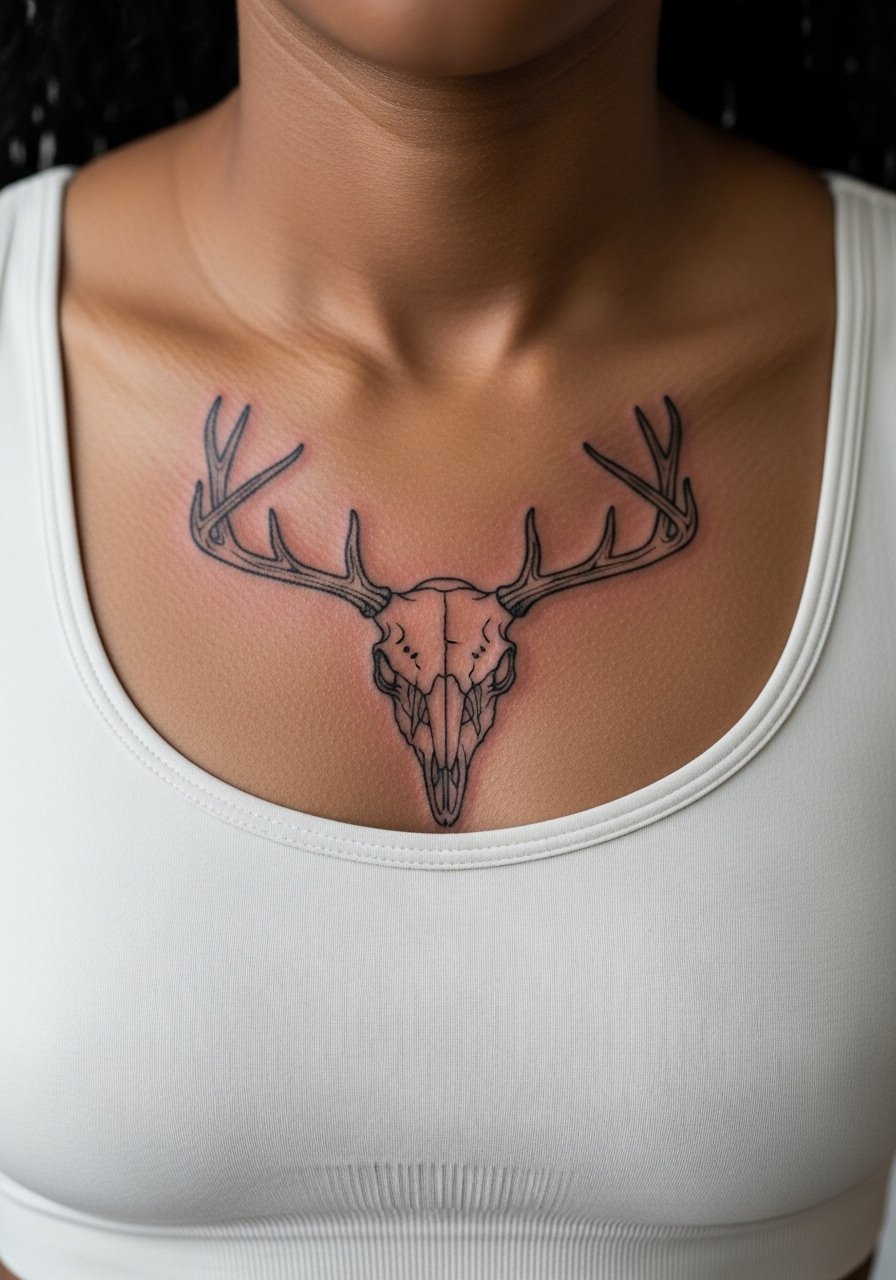
3. Paired Collarbone Deer Skull
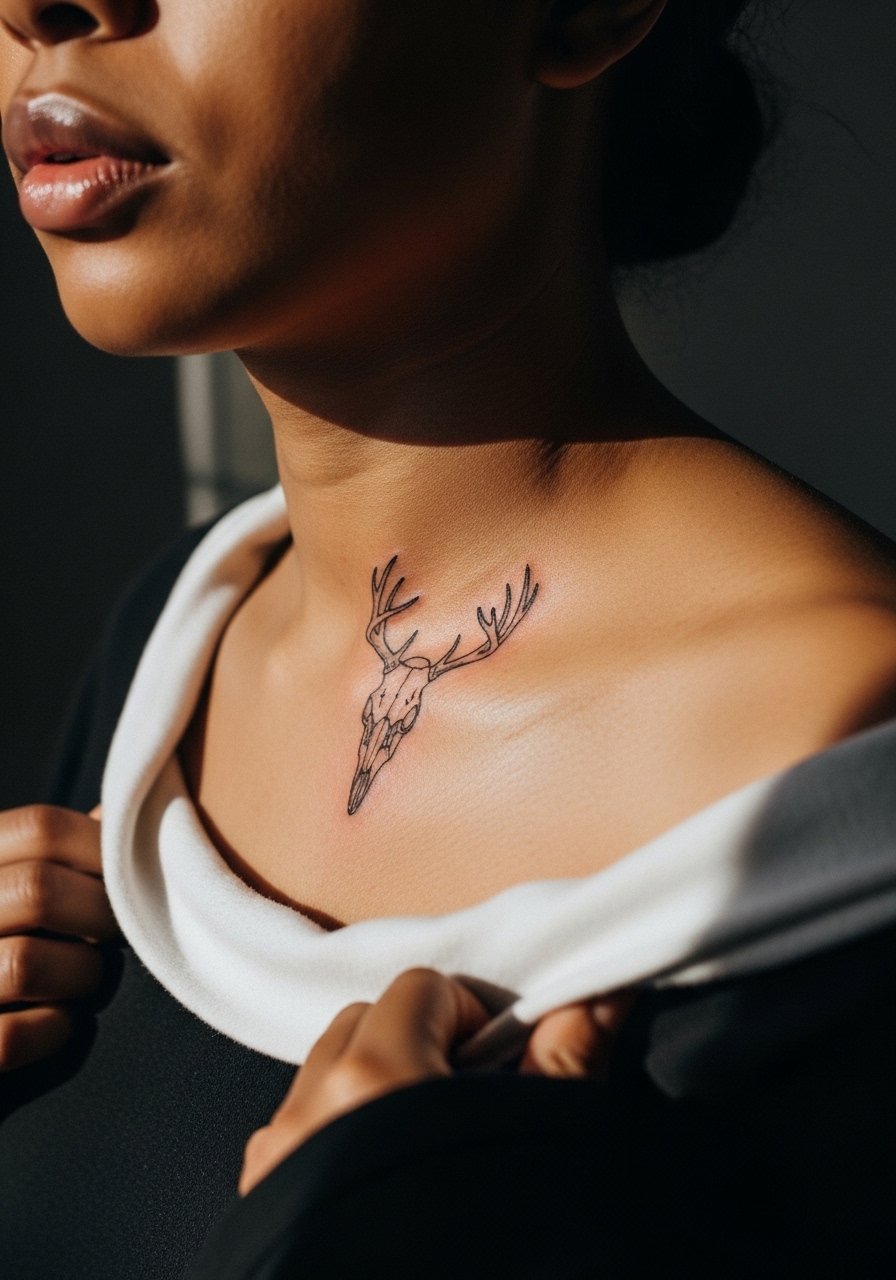
The collarbone sits where clothing and movement meet, so spacing matters more than tiny filigree. Tell your artist you want the antlers to curve away from the collar so the piece breathes with normal movement. This placement can be shown off with open-neck blouses or framed by a thin chain. Expect a moderate pain hit when the needle crosses bone and a single medium-length session. One common mistake is requesting ultra-fine shading close to the clavicle; that tends to blur sooner than clean contour lines.
4. Constellation-Embedded Skull on Wrist
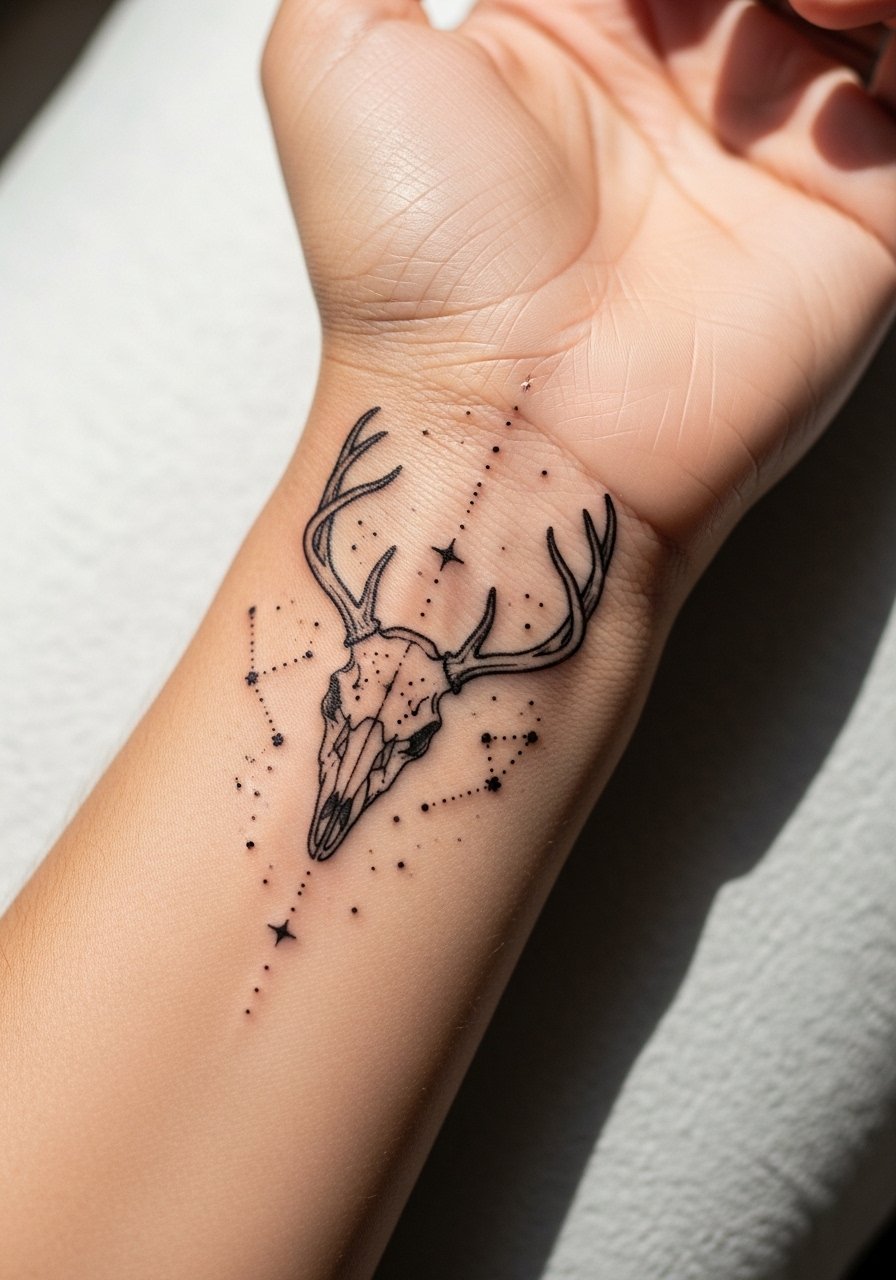
Wrist pieces are highly visible and contact-heavy. For this design combine the deer skull with small stipple stars and keep dots at least a few millimeters from thin lines. A common error is packing the wrist with too many micro elements, which increases blowout risk. The session is relatively brief but the area heals with constant movement, so expect a touch-up window around year one. For wearing after the session, a minimalist watch or thin bracelet keeps attention on the wrist without crowding the linework.
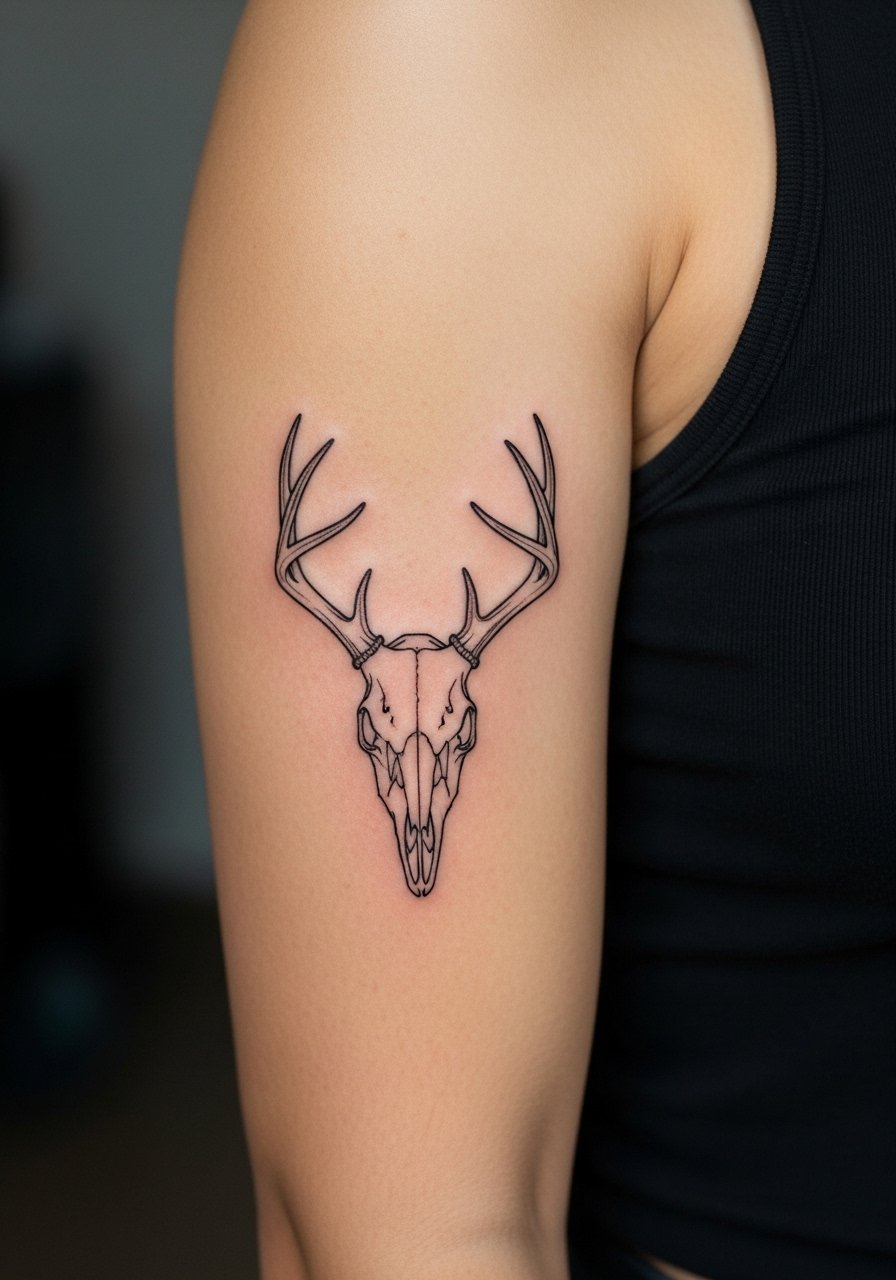
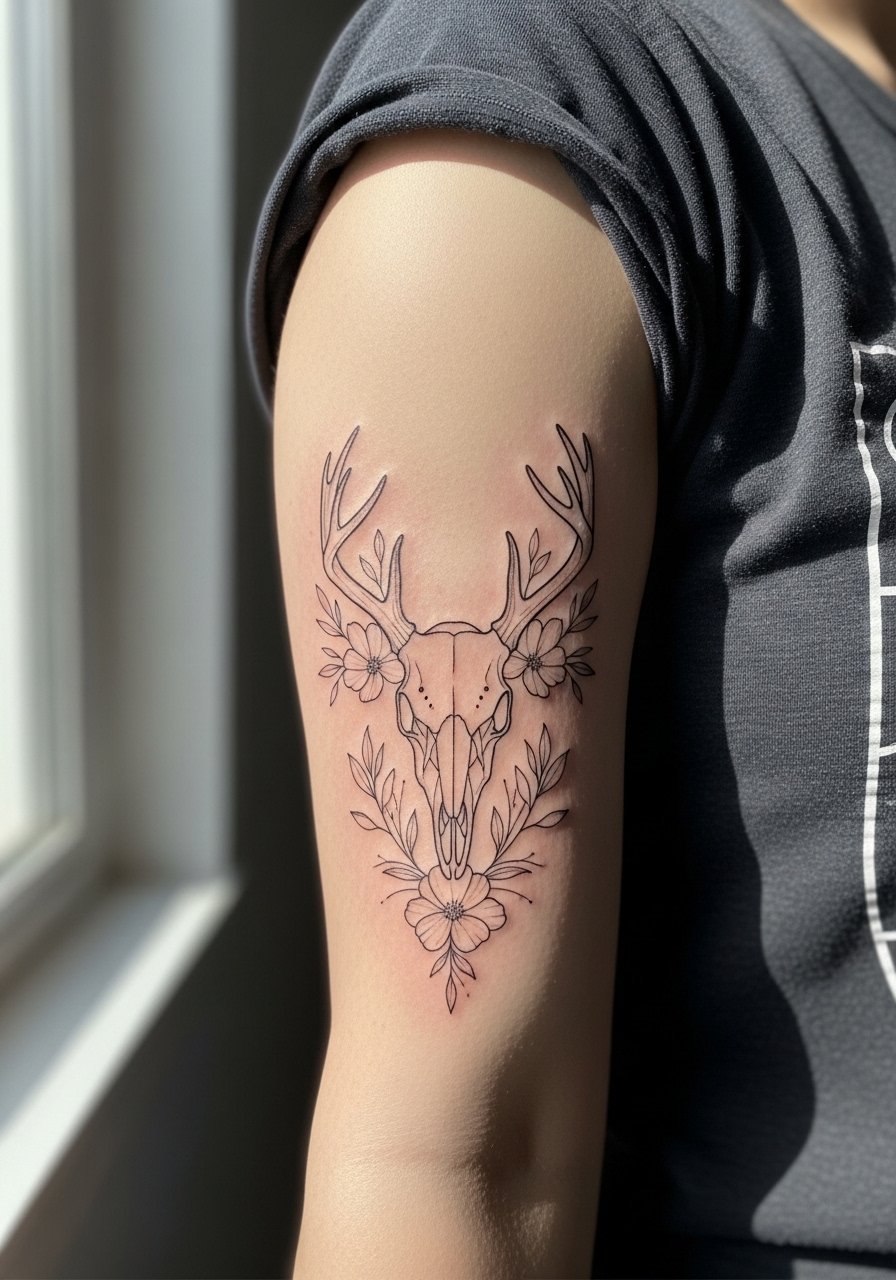
5. Geometric Deer Skull on Upper Arm
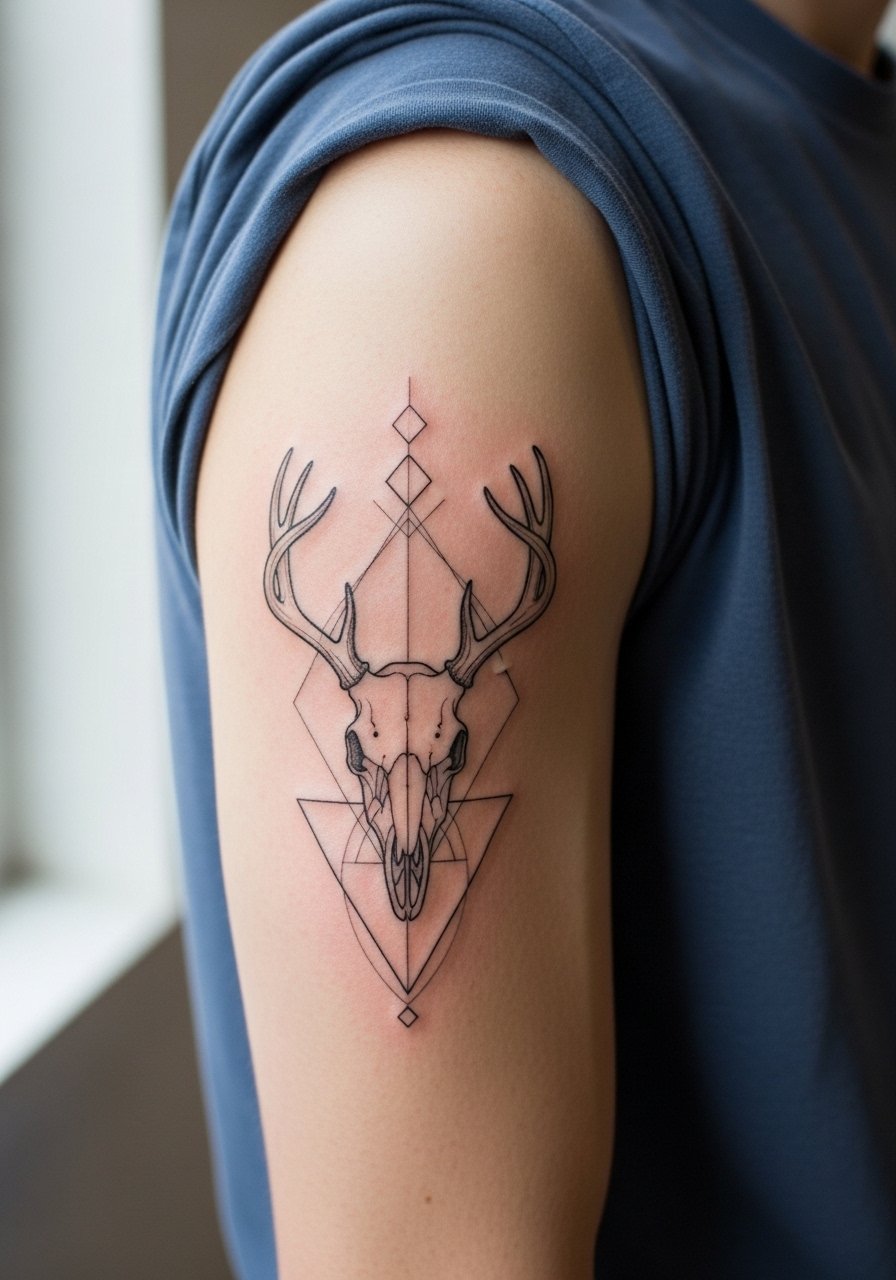
The upper arm holds detail well because of thicker flesh and lower friction. I suggest using linework anchors where geometry meets antlers so the eyes of the skull stay crisp over time. The worst mistake is crowding geometry into the same scale as the skull itself. Expect a moderate session time and low risk of blowout in this area. If you want to show it, rolled sleeves or a short-sleeve linen tee frames the piece without competing.
6. Ribcage Deer Skull with Floral Fill
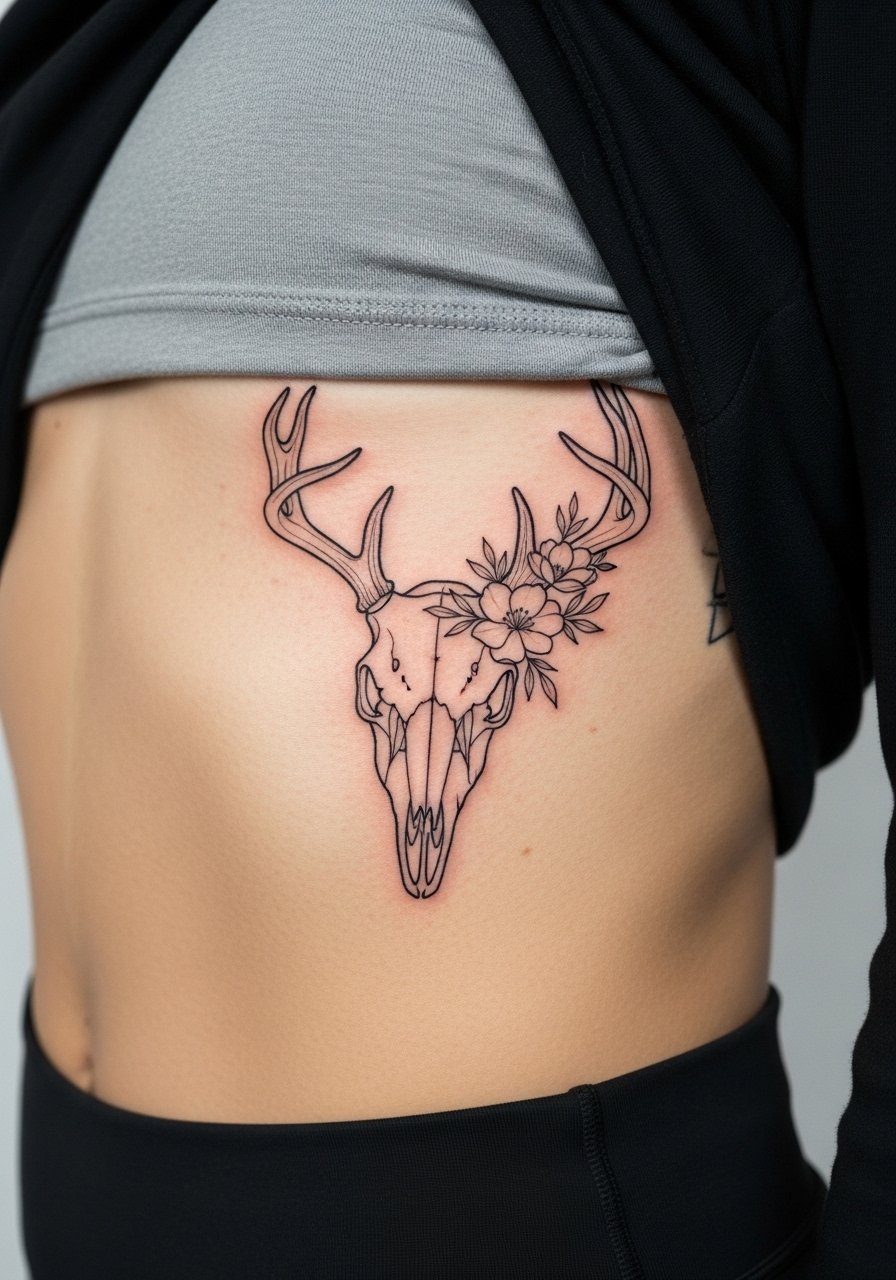
Fair warning: the ribcage is higher on most pain scales, and the skin stretch there makes fine line tricky. Artists split on this one. One camp argues the skin moves and the lines blur within two years. The other camp says with proper depth and increased spacing it settles fine. Ask your artist which side they fall on and what their healed photos look like. For sessions expect longer sittings and strategic breaks. If you want to sit comfortably, wear loose high-waisted pants and bring a soft wrap top you can adjust during the appointment.
Studio Day Picks
The small, visible pieces above like the wrist, finger, and collarbone need different prep from larger arm work. A few small items smooth out the session and the first week.
-
Stencil transfer paper kit. Lets you preview the placement on tricky areas like the wrist and finger before the needle touches skin.
-
Topical numbing cream. Applied per instructions it takes the edge off higher-pain zones such as the ribs without dulling needed sensation for linework.
-
Thin protective film roll. Useful for finger and wrist pieces that rub during daily tasks while the initial barrier is critical.
-
Fragrance-free gentle body wash. Cleanses without irritating delicate single-needle channels on small fine line pieces.
-
Aquaphor healing ointment. A thin layer helps lock in moisture during the earliest days for tight linework without clogging pores.
7. Thigh Deer Skull with Vine Accents
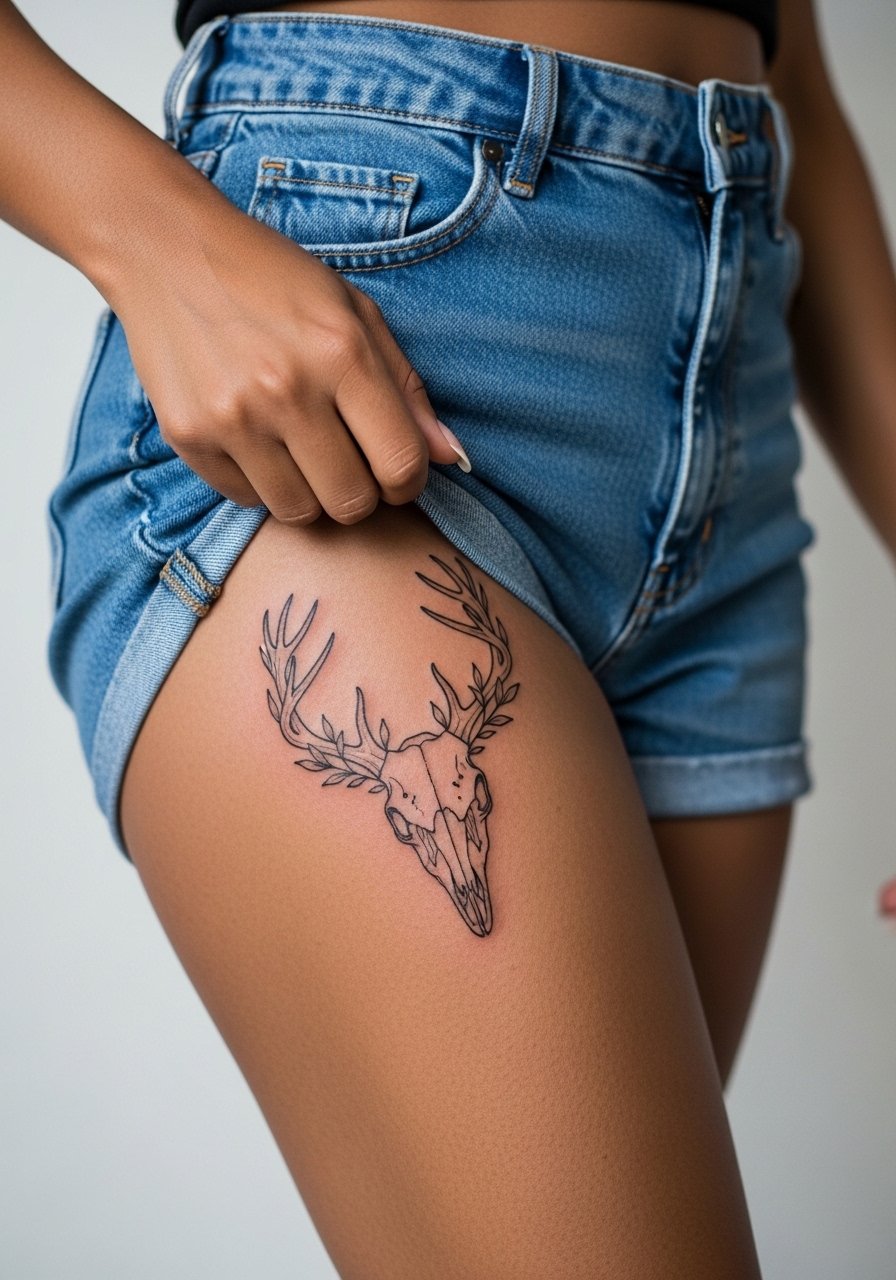
The thigh gives room to expand the skull into longer vines and flowing antlers without crowding. I tell clients to bring references showing exact line weight and vine scale so the artist avoids making the vines too dense. This placement heals well and hides easily from friction during exercise. For the session wear loose shorts or a drawstring linen pant so the artist can roll the leg up without pressure.
8. Sternum Centerpiece Deer Skull
Sternum work reads bold because of the central placement but it is sensitive and moves with breathing. There is debate among artists over how fine the lines should be here. One group says tiny single-needle details stay elegant if the piece is given negative space. Another group warns that the sternum's motion will soften micro lines faster than on the arm. If you pick this, expect longer sessions and plan for a calm breathing rhythm. Wear a strapless or zip-front top on the day so you can expose the area without fuss.
9. Tiny Ankle Deer Skull
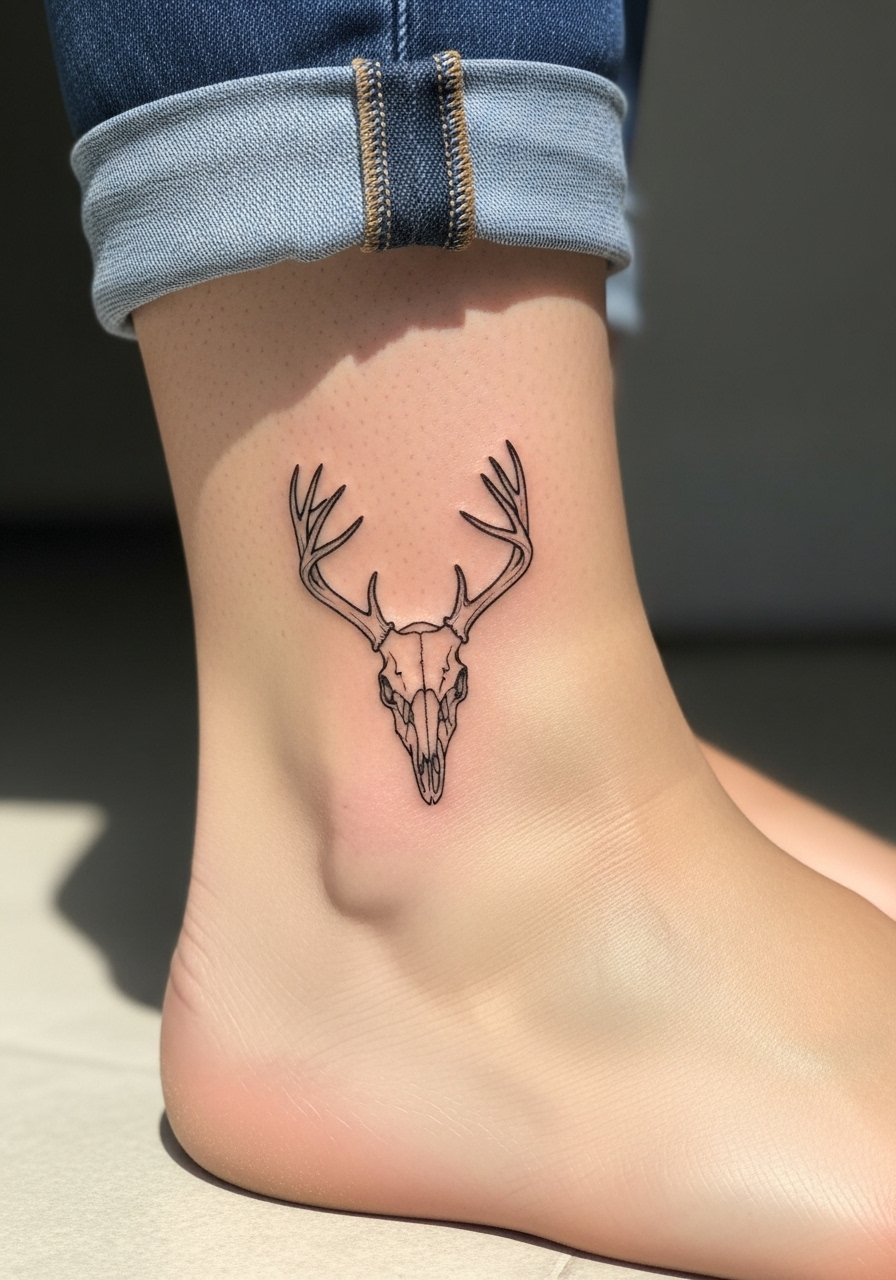
Ankle tattoos are compact and visible but face a lot of wear from socks and shoes. The typical mistake is placing a highly detailed skull in a very small zone. I recommend stronger outer contours and open interior space for the skull to maintain legibility. The session is short and the pain moderate. For showing it off, sandals or rolled jeans work well. Try a minimal leather anklet to frame the piece without rubbing the ink.
10. Back-of-Neck Mini Deer Skull
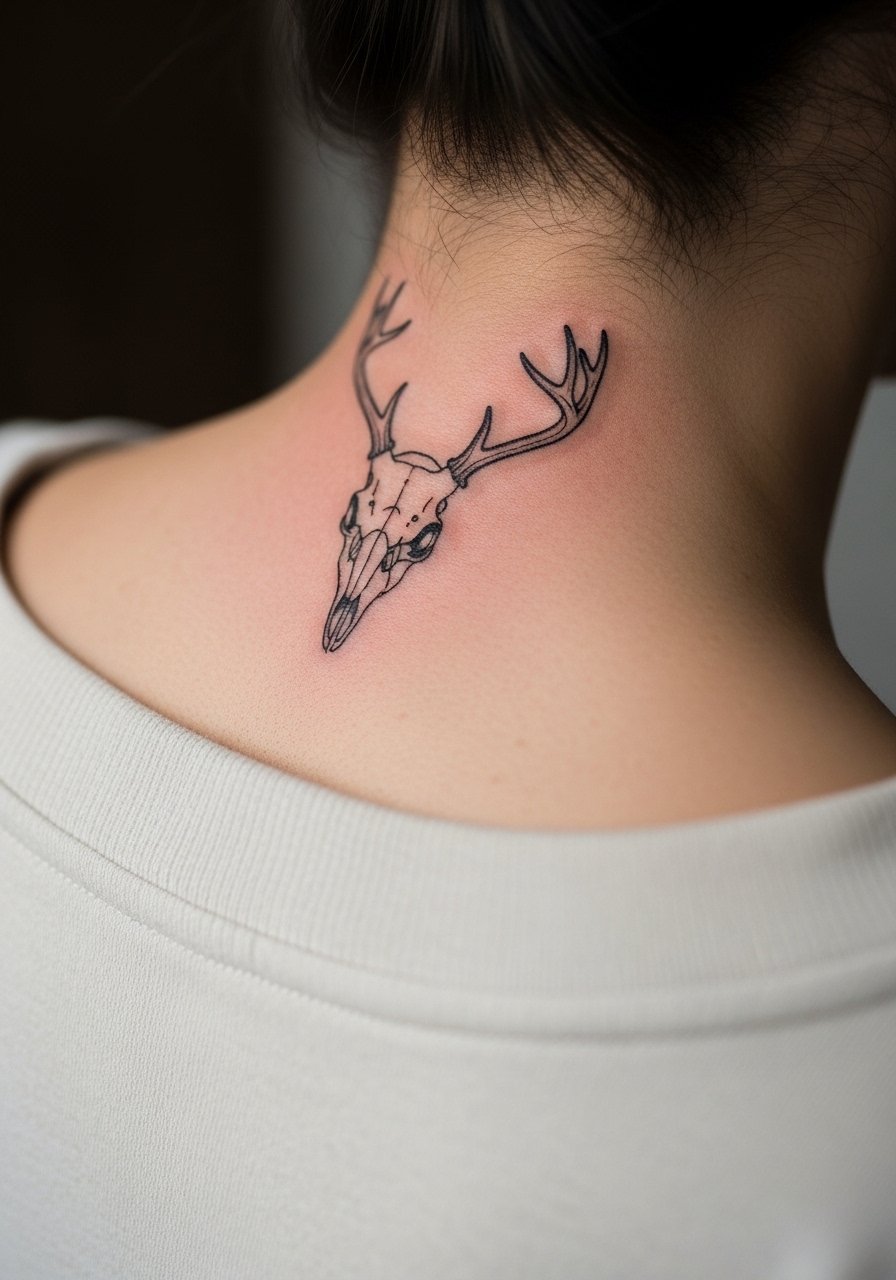
The nape is discreet and shows only when you want it to. The main mistake is scaling too small then expecting visible detail later. Ask for a slightly larger scale than your initial instinct. Sessions are quick but the area can be finicky during healing due to shirt collars. Bring loose tops and consider a wide-neck sweater for the trip home. Neck pieces may still affect professional impressions in some fields, so plan accordingly.
11. Shoulder Blade Deer Skull with Dot Work
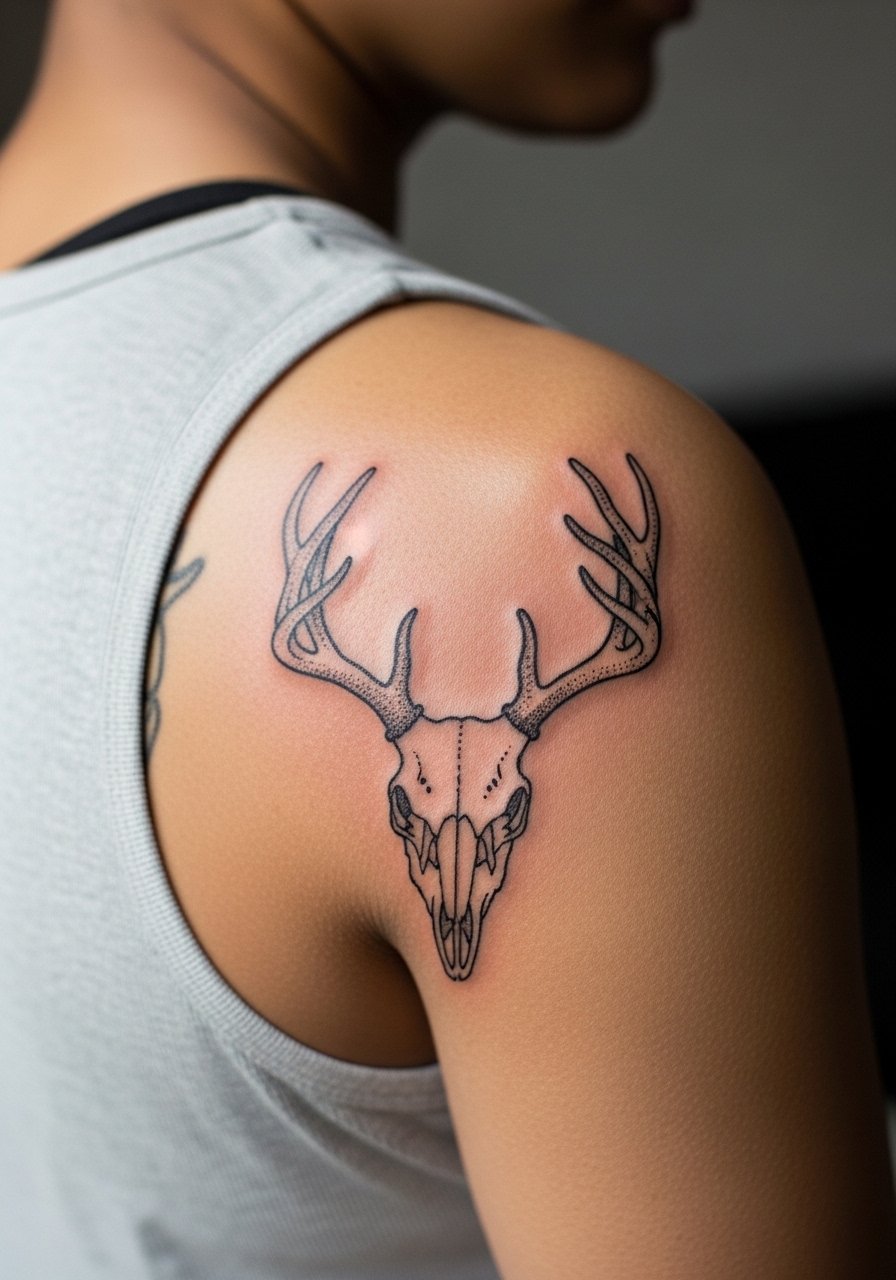
The shoulder blade is ideal for stipple shading because it provides a flat canvas with low friction. During consultation, specify stipple density and ask to see healed examples for similar skin tone. Over-shading too close to fine lines is a common error, so keep stippling as a background texture rather than a crutch. Sessions are moderate in length and relatively comfortable. For evenings out, an open-back dress highlights the area without obscuring the linework.
12. Hip Deer Skull with Lace Detail
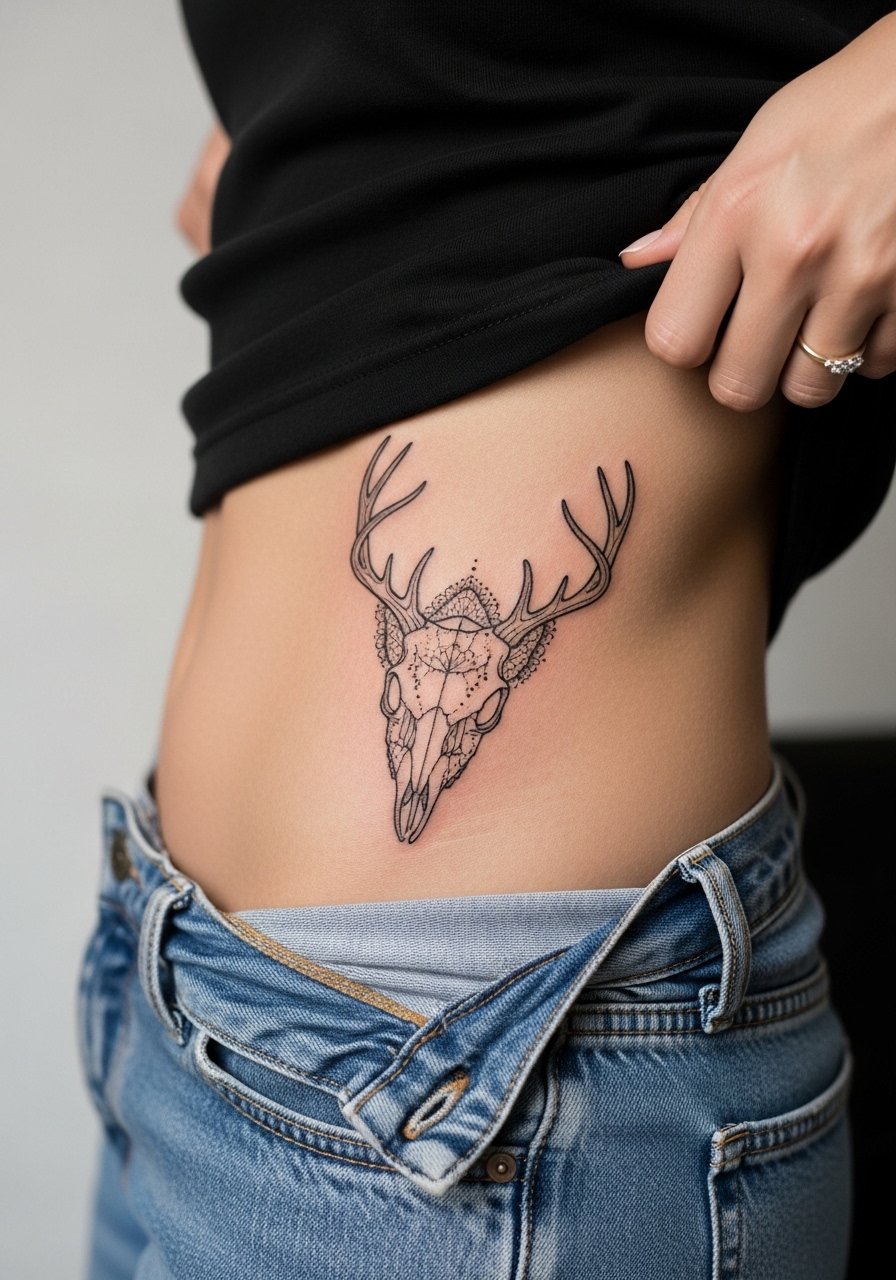
Hip tattoos sit where clothing often rubs, so spacing and scale need to account for fabric pressure. The usual mistake is requesting too many tiny lace loops that will merge under waistband friction. Expect moderate pain and a session that may require repositioning for comfort. For the appointment wear high-waisted bottoms that you can shift slightly, such as a pair of high-waisted denim shorts. Intimate placements like this are personal, so think about when you want to reveal the work.
13. Calf Deer Skull in Micro-Realism
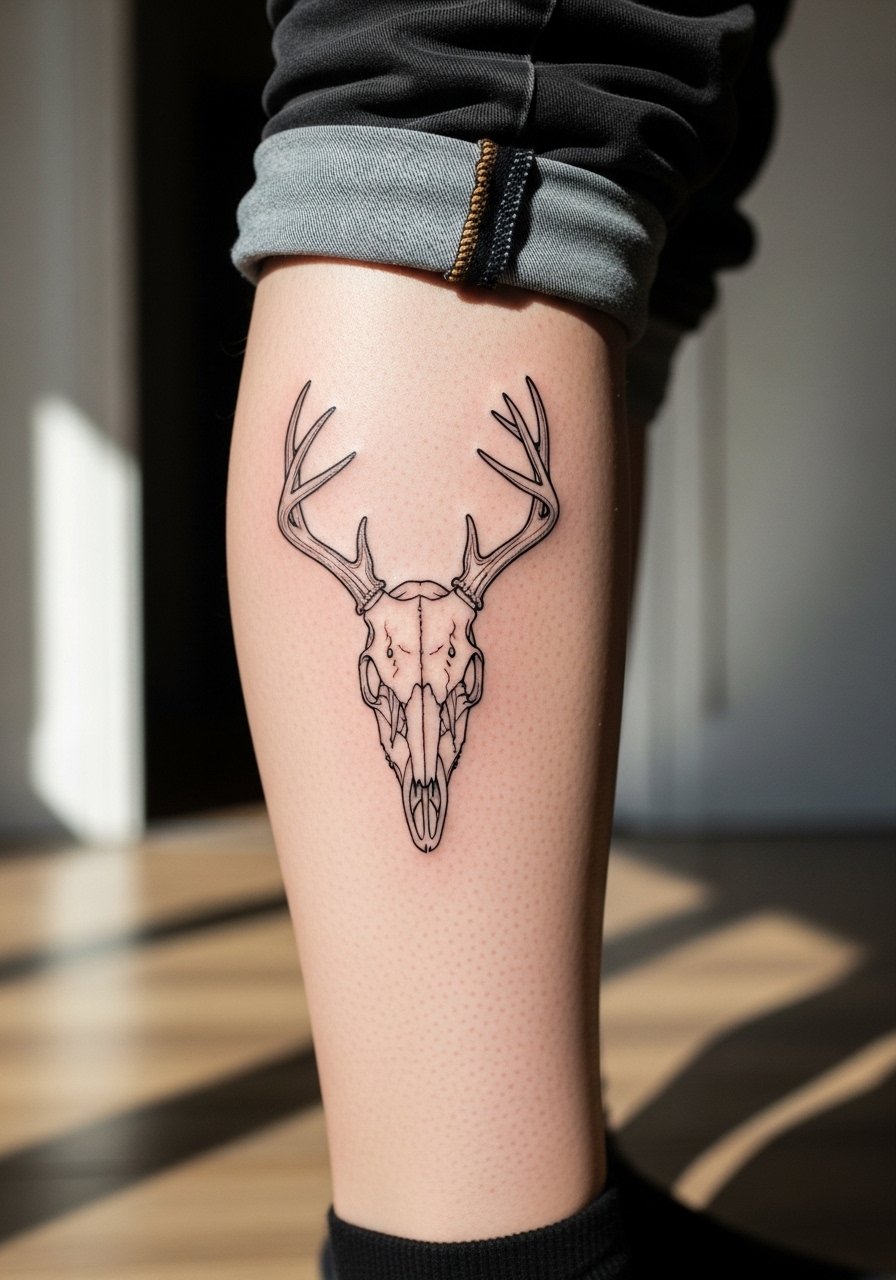
The calf has room for tight micro-realism because the flesh supports fine saturation well. I tell clients to bring clear photo references showing exact shadowing and texture. A common mistake is blending micro shading with single-needle linework without clear separation, which softens the skull's definition. Sessions are comfortable and may be done in one longer appointment. For the day of, wear loose joggers or shorts and consider a pair of slide sandals that do not press on the fresh ink.
14. Side-Hand Deer Skull Accent
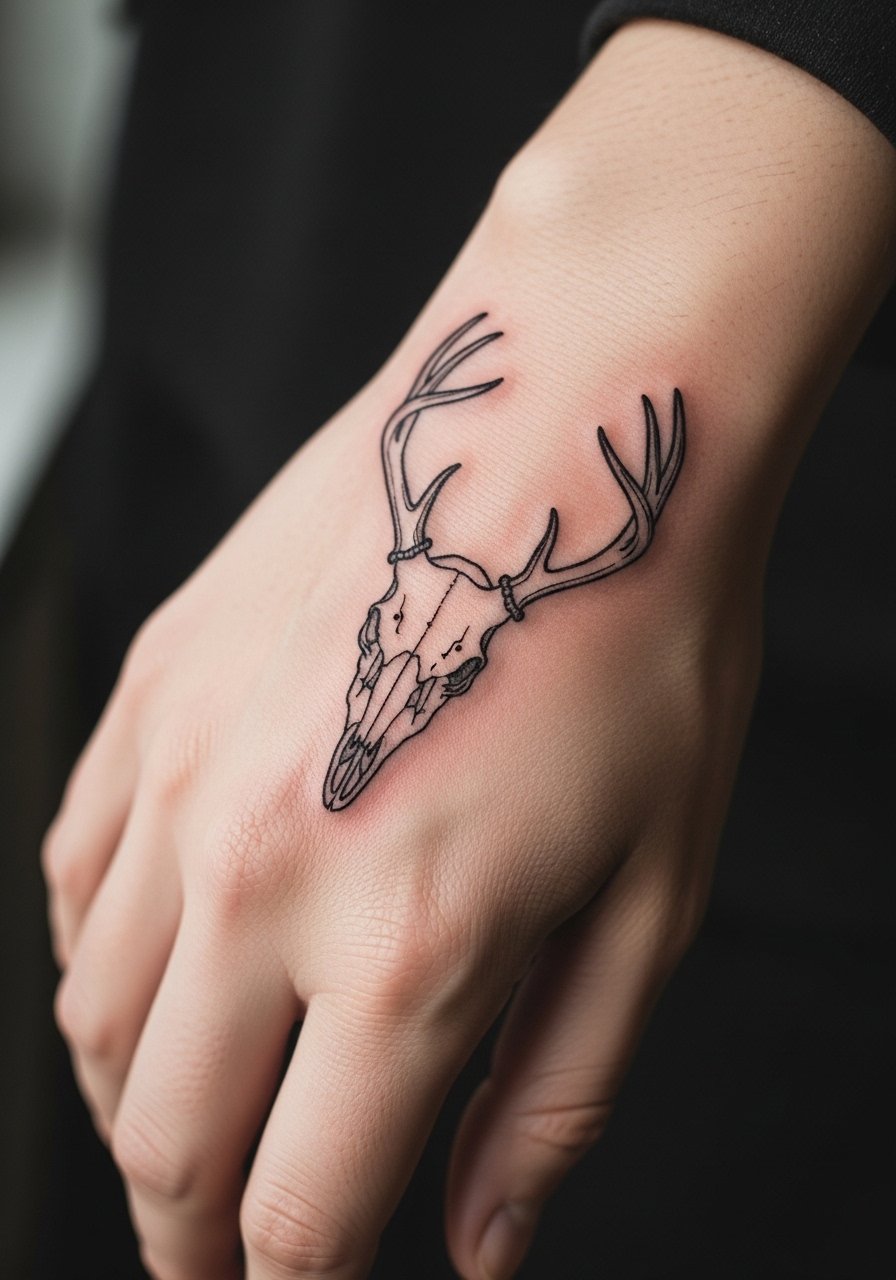
Hand placements show immediately but age differently than arm pieces. The biggest error is asking for the finest possible detail on skin that will see daily washing and sun. Expect frequent touch-ups and consider line reinforcement in primary contours to hold the form. Sessions are sharp and relatively quick. Hand tattoos still affect hiring in some industries, so think about career implications before committing.
15. Full-Back Center Deer Skull with Mandala
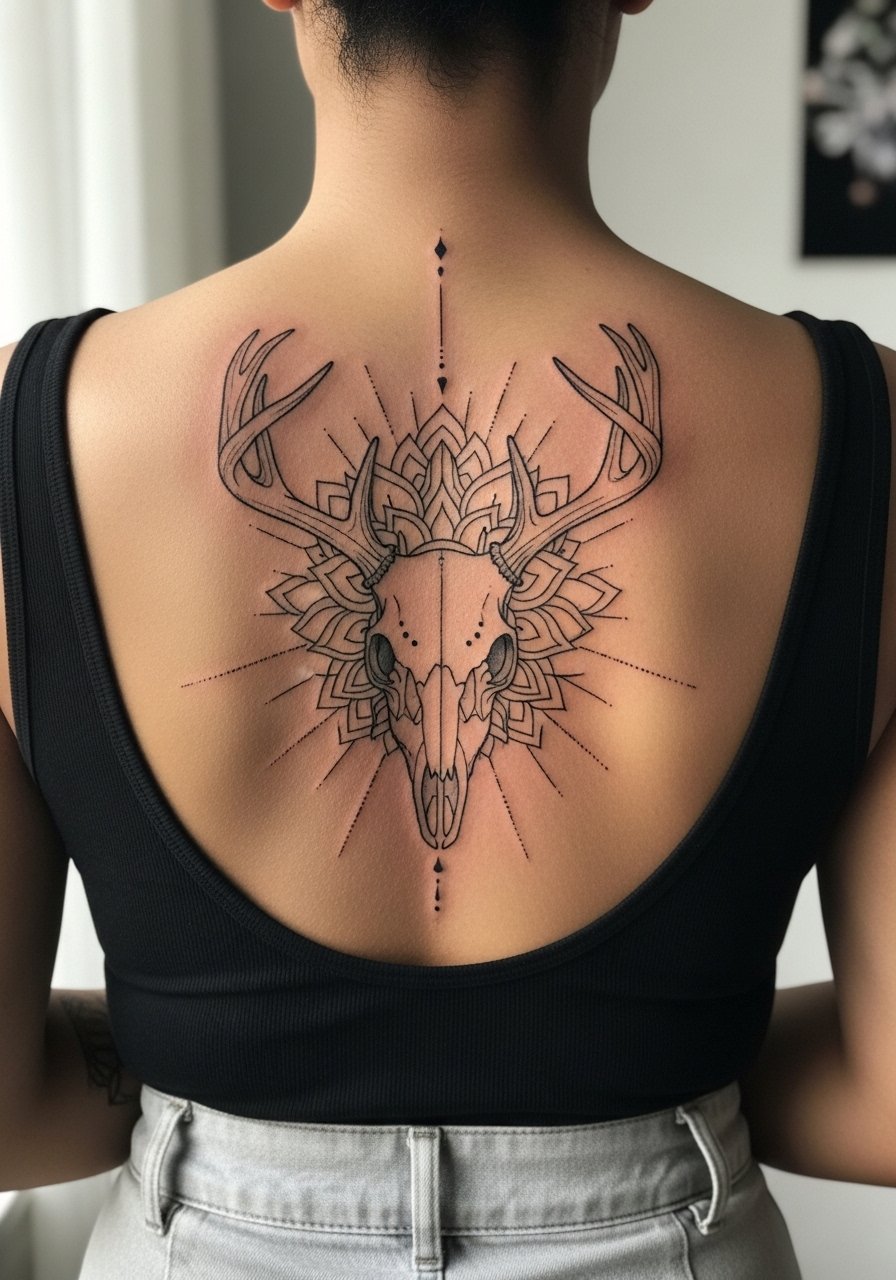
A back canvas lets you combine skull detail with mandala geometry and larger negative space to protect fine lines. This is where cultural origins matter. The mandala pattern traces to sacred traditions, so many clients choose stylized interpretations rather than direct replicas. The session can span multiple sittings and needs an artist experienced with large-format linework and consistent saturation. For travel days wear a loose button-up shirt you can remove without bending the back.
16. Inner Bicep Deer Skull with Dot Work
The inner bicep is a sensitive zone and the skin there moves with flexing, so spacing and depth are crucial. Artists disagree about how fine to go on the inner arm. One view says lighter single-needle lines preserve delicacy. Another view warns that the area can blur faster and prefers slightly bolder primary lines. Expect a moderately painful session and plan for a touch-up at year two if you keep fine interior detail. For comfort during the appointment, wear a loose tank top you can lift without tugging.
17. Sleeve Anchor Deer Skull with Linework Florals
Using a deer skull as the anchor for a sleeve gives cohesion to disparate motifs. When planning, bring photos that show how you want the skull to sit among florals so the piece reads from a distance. The common mistake is starting with too many small elements which creates visual clutter once the arm moves. Expect multiple sessions and a gradual build of saturation. For showing off, rolled sleeves or a short-sleeve linen shirt work well.
18. Lower Back Deer Skull Trim

Lower back tattoos sit in a zone that stretches with movement and body changes, so scale and negative space are crucial. The mistake I see is compressing too much detail into a small lower back piece. Sessions are moderate and healing can be affected by sitting or tight waistbands. Wear loose bottoms to the appointment, and avoid low-rise belts for the first weeks. The lower back is a private display area for many, so place it where clothing will reveal it intentionally.
19. Sternum-to-Rib Transition Skull
This transitional placement crosses surfaces that move differently, so design must respect both zones. Artists are split into two camps about crossing the sternum into ribs. One camp warns that rib movement will soften ultra-fine work in under two years. The other camp says careful spacing and slightly heavier primary lines can keep the piece readable long term. Expect longer sessions and plan for breaks. For the day, a zip-front or fitted sports bra helps with access and modesty.
20. Ear-Adjacent Tiny Deer Skull
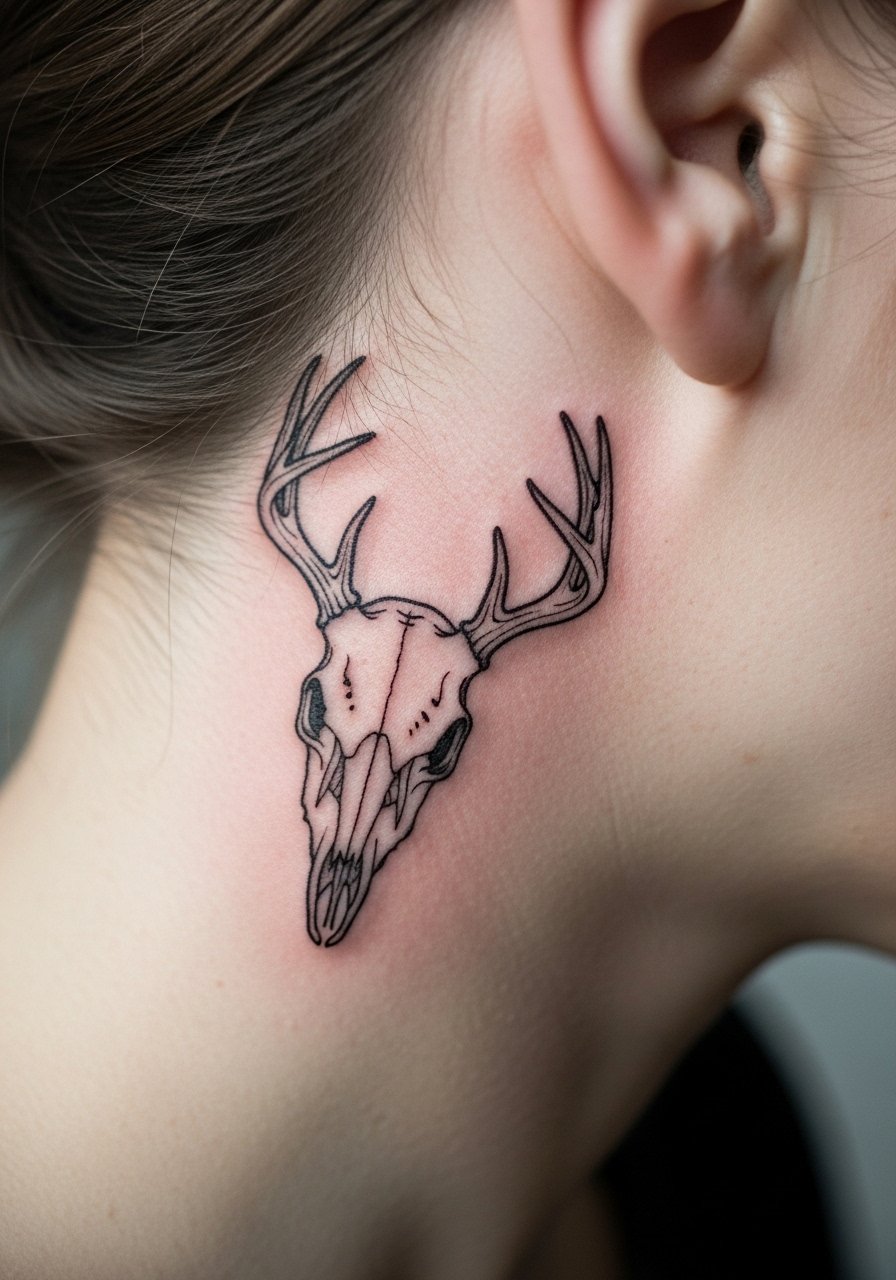
Behind-ear placements are subtle and only show when hair is tucked. The usual mistake is asking for textural detail that the small zone cannot hold. Keep the skull simplified and focus on silhouette. Sessions are short and the area heals with low friction if you avoid tight collars. For the appointment wear hair up or an easy ponytail and think about how it will read when you let hair down.
21. Petite Chest Deer Skull Beside the Heart
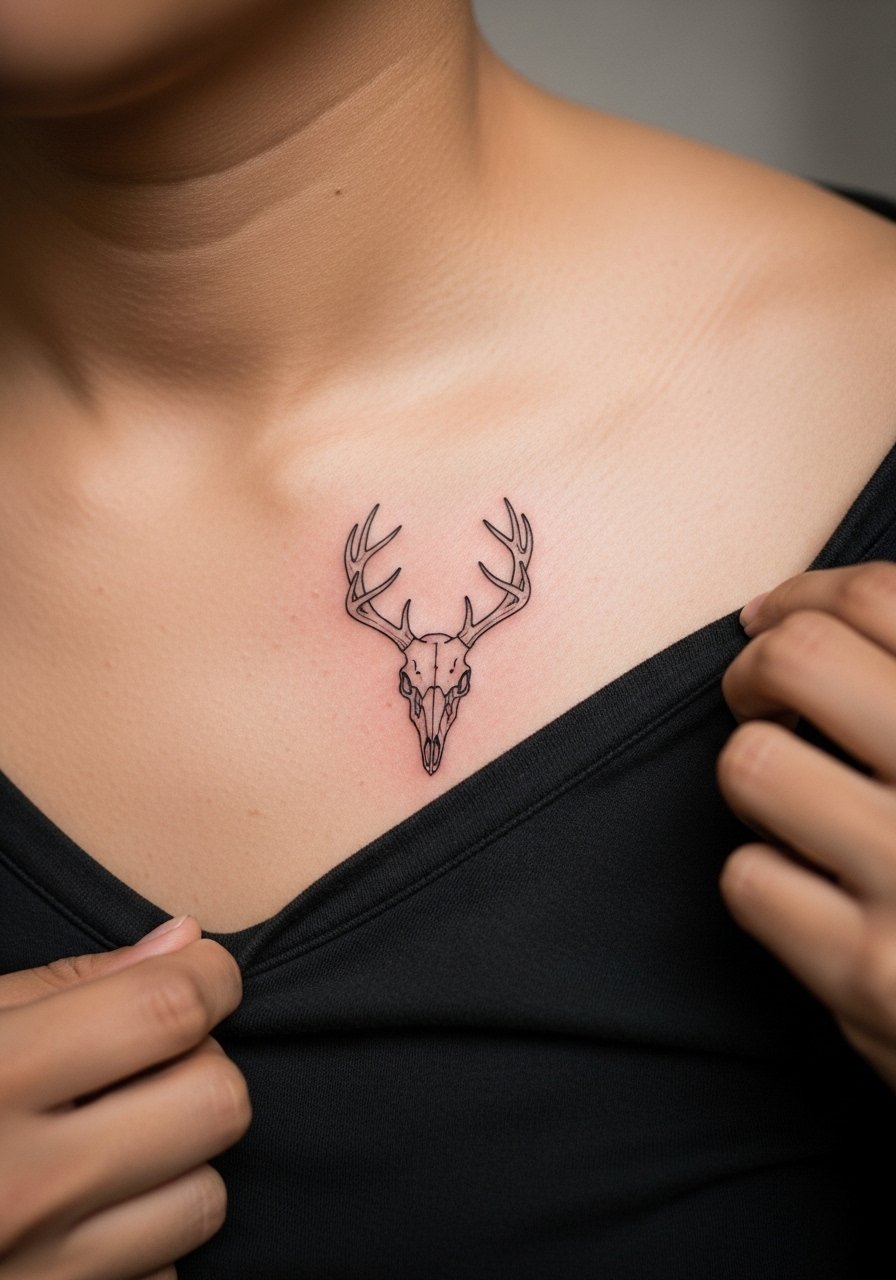
A tiny chest placement near the heart reads intimate and deliberate but it moves with breathing. Keep the skull minimalist and prioritize outer contour strength. The common mistake is asking for dense interior shading which will soften quickly on chest skin. Expect moderate pain and a session that rewards gentle breathing. For showing the piece, a thin chain pendant necklace sits above the work without competing.
Frequently Asked Questions
Q: Will fine line deer skulls blur faster on the ribs and sternum than on the arm?
A: It depends on the spacing and depth used. From what I've seen, ribs and sternum are higher movement zones, so very tight single-needle detail can soften sooner. Ask your artist whether they plan to increase line spacing or reinforce primary contours to help the design age.
Q: How should I dress to the appointment for a sternum or ribcage deer skull?
A: Wear something easy to adjust that still provides modesty, like a fitted sports bra or a zip-front top. A fitted sports bra lets the artist access the area without you getting cold and keeps fabric from rubbing on fresh ink.
Q: If I want a deer skull sleeve anchor, how many sessions should I expect?
A: Plan for multiple sessions spaced out over weeks. Building clean linework and gradual saturation for connected motifs usually means at least two to four sessions depending on size and shading.
Q: Are there placements I should avoid if I want the sharpest long-term linework?
A: High-friction areas like fingers, sides of the hand, and areas under constant clothing pressure are more likely to need touch-ups. Upper outer arm, calf, and shoulder blade tend to preserve linework better.
Q: Do dot work and stipple shading affect longevity differently than single-needle lines?
A: Yes. Stipple and dot work can hold up well when used as background texture, because the points of pigment are separate. Very dense stippling close to single-needle lines can cause visual merging over time, so ask for breathing room between textures.
Q: How do I find an artist for a fine line deer skull without relying on an Instagram handle?
A: Look at local shop portfolios, search tattoo directories and forums, and use specific hashtags in your location. In-person consults at reputable shops and community boards give a stronger sense of healed work than a single photo.
