
The tattoos that still look sharp a decade later are rarely the ones that looked the crispiest on day one. Bold outlines and saturated color age into clean shapes, while overworked tiny details tend to blur. Longevity comes down to placement, scale, and realistic touch-up planning. Expect pain, sun exposure, and friction to shorten the life of delicate pieces, so pick the right motif and placement before the stencil goes on.
1. Classic Anchor on Outer Forearm
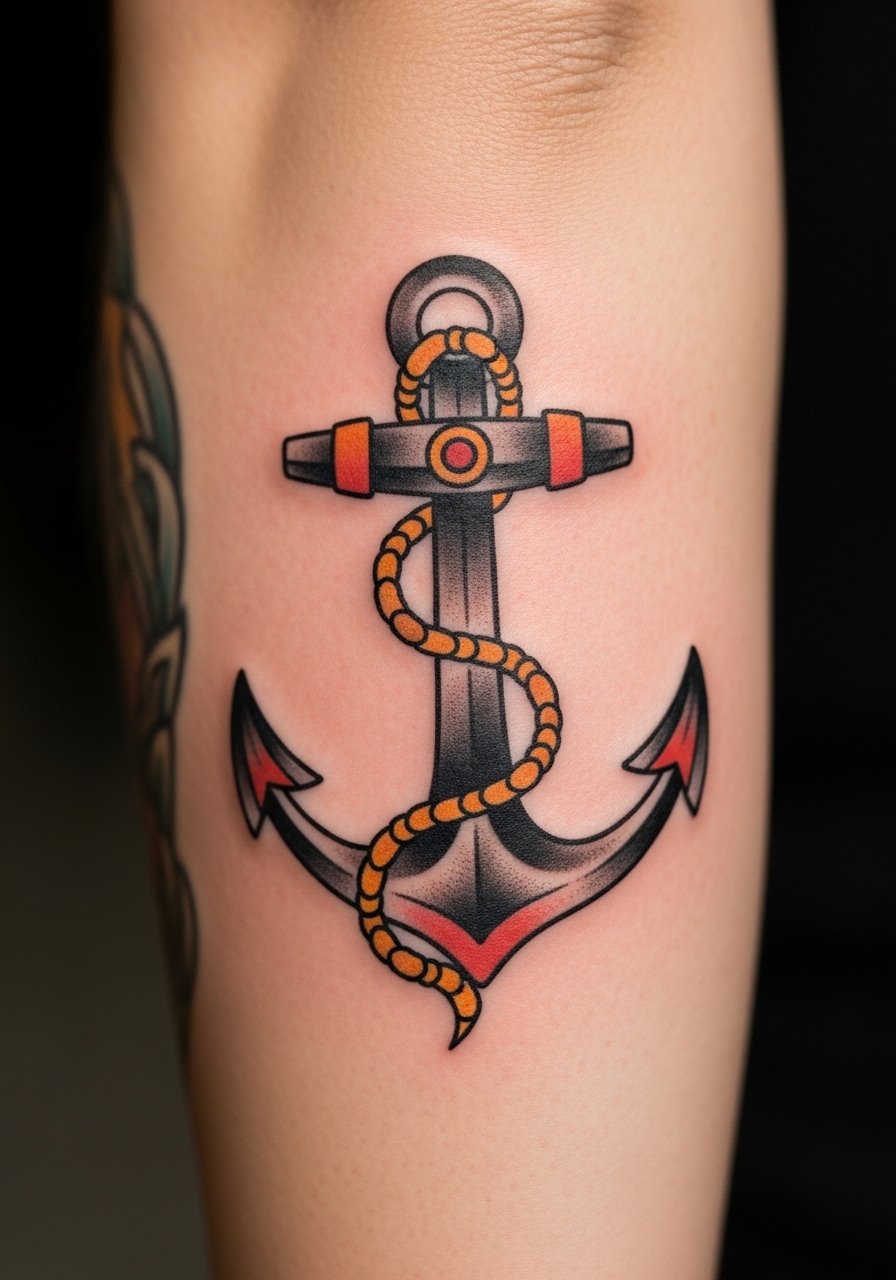
This is the bread-and-butter old school piece that reads at a glance from across a room. I recommend it for anyone who wants a design that stays legible through sun exposure and daily wear. Tell your artist you want thick, even linework and solid saturation so the anchor keeps its silhouette at year five. Common mistakes include making the anchor too small and using fine line details that lose definition. Pain on the outer forearm is mild, and a typical session runs 45 to 90 minutes. For showing it off, roll up sleeves and wear a loose button-down shirt that frames the piece without hiding it.
2. Bold Traditional Rose on Upper Arm
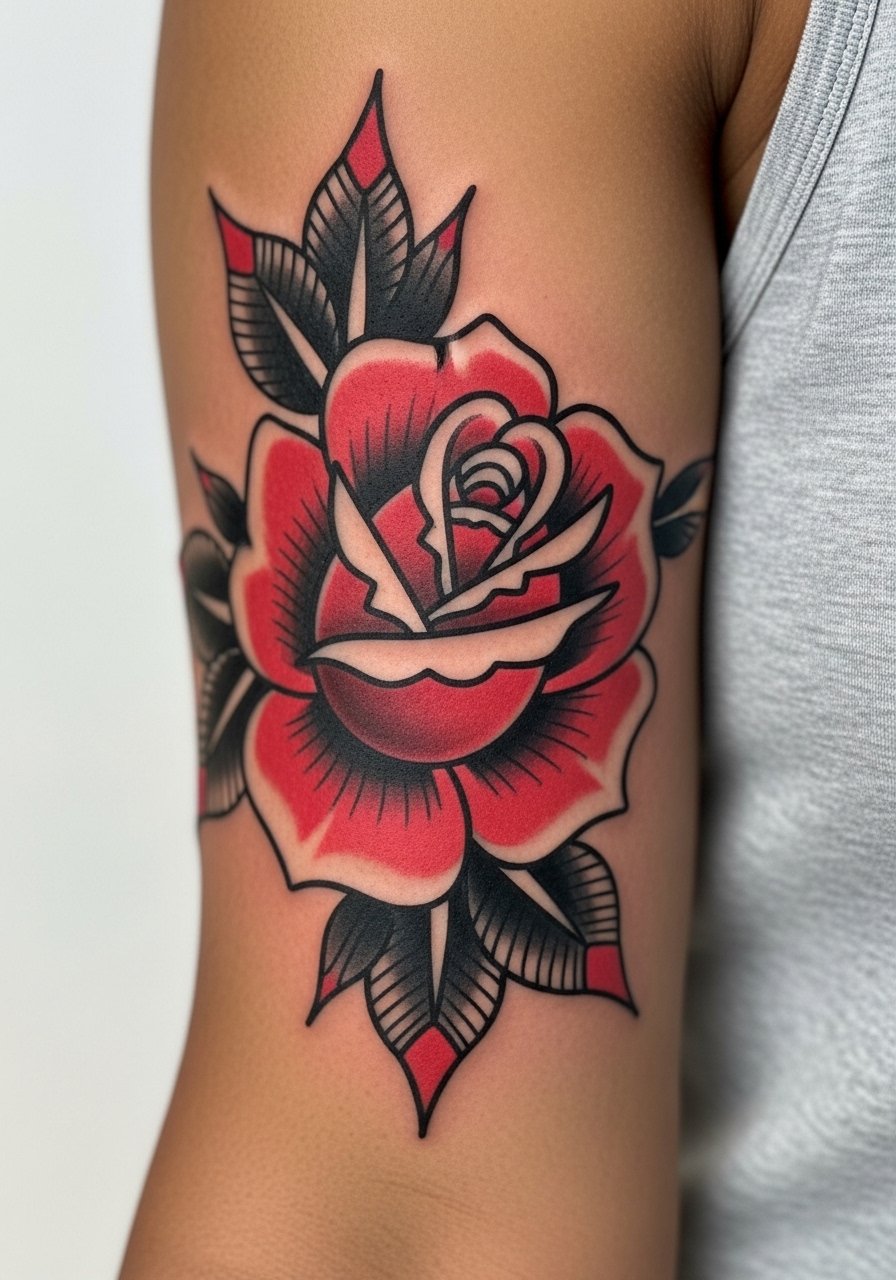
A full-shoulder or upper-arm rose is classic for a reason. It ages well because the petals are blocky, not tiny shaded filigree that blurs. In consultation, ask for slightly wider petal spacing so the color can sit without merging with adjacent fills. The biggest mistake is over-detailing the center with tiny stipple shading. Expect moderate pain and a one- to two-hour session for a medium-sized rose. If you want a subtle spin, add a short banner with a single word. This placement pairs with sleeves that you can roll up for casual wear.
3. Sailor Swallow with Banner on Upper Chest
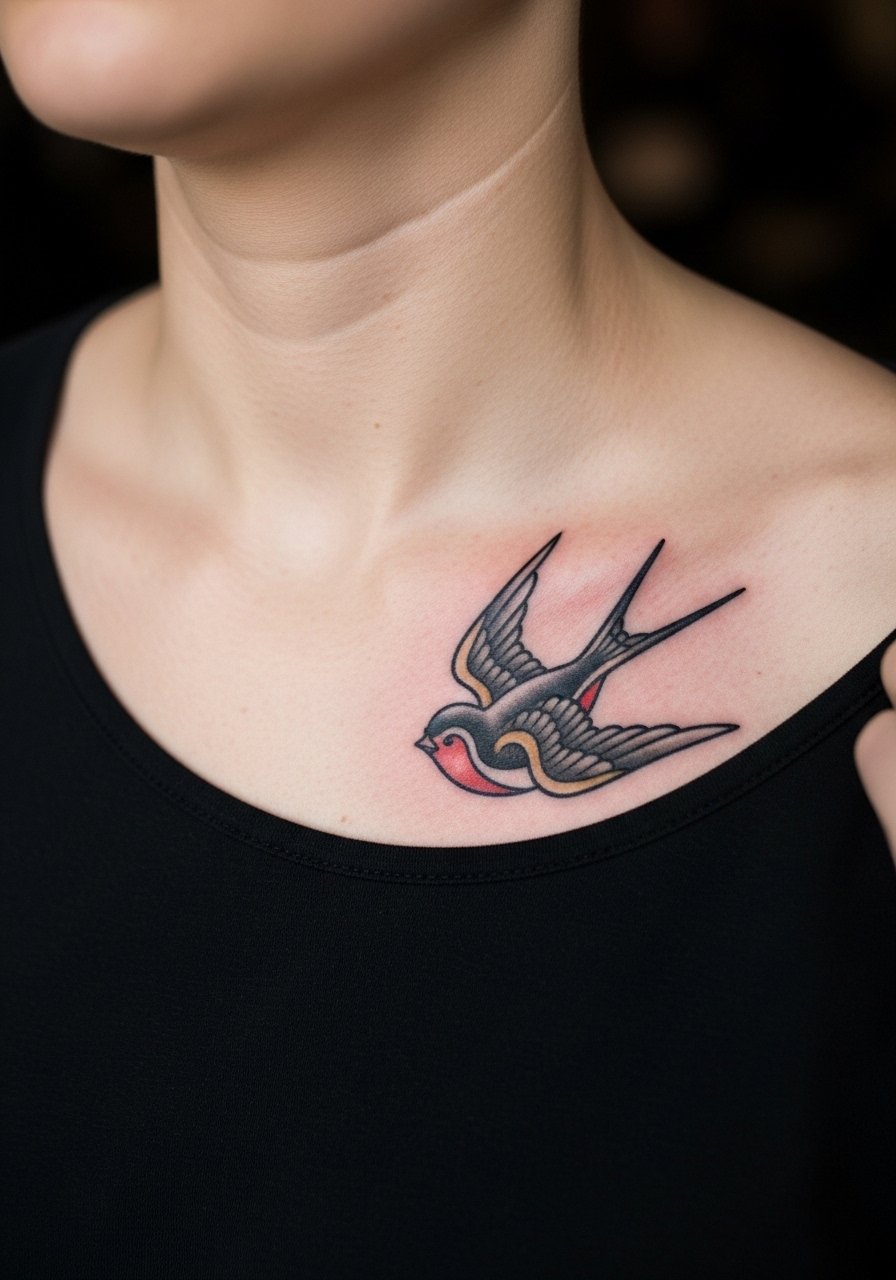
Swallows look great on the upper chest where movement gives them life. Be explicit in the consultation about banner size and lettering so the script does not sit in the throat of the swallow and blur over time. The chest takes longer to heal than the arm because of torso movement. One camp warns that chest pieces are fussy around the collarbone due to stretching with weight change. The other camp says proper depth and spacing avoid that problem. Ask the artist where they land. For the session, wear a wide-neck shirt you can pull aside easily.
4. Dagger Through Rose on Outer Thigh
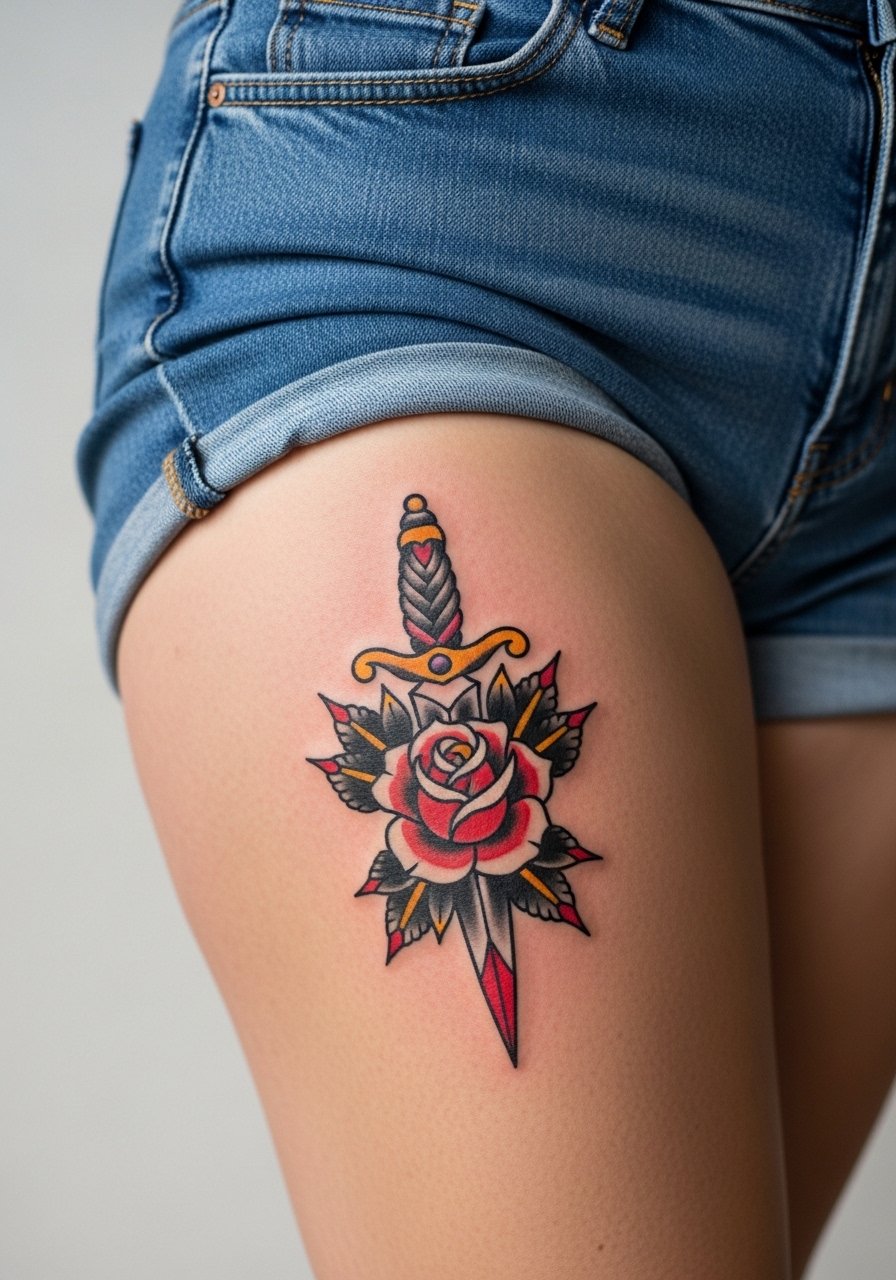
The thigh offers forgiving canvas and less sun exposure, which helps sharp motifs like daggers keep their edge. I suggest slightly larger proportions for the blade and a bold handle so linework does not merge with the rose petals over time. Common mistakes include packing too much tiny script into the banner, which becomes unreadable. Expect a moderate pain session and a comfortable chair time of one to two hours. For the appointment, slip into high-waisted shorts you can adjust without discomfort.
5. Nautical Ship on Calf
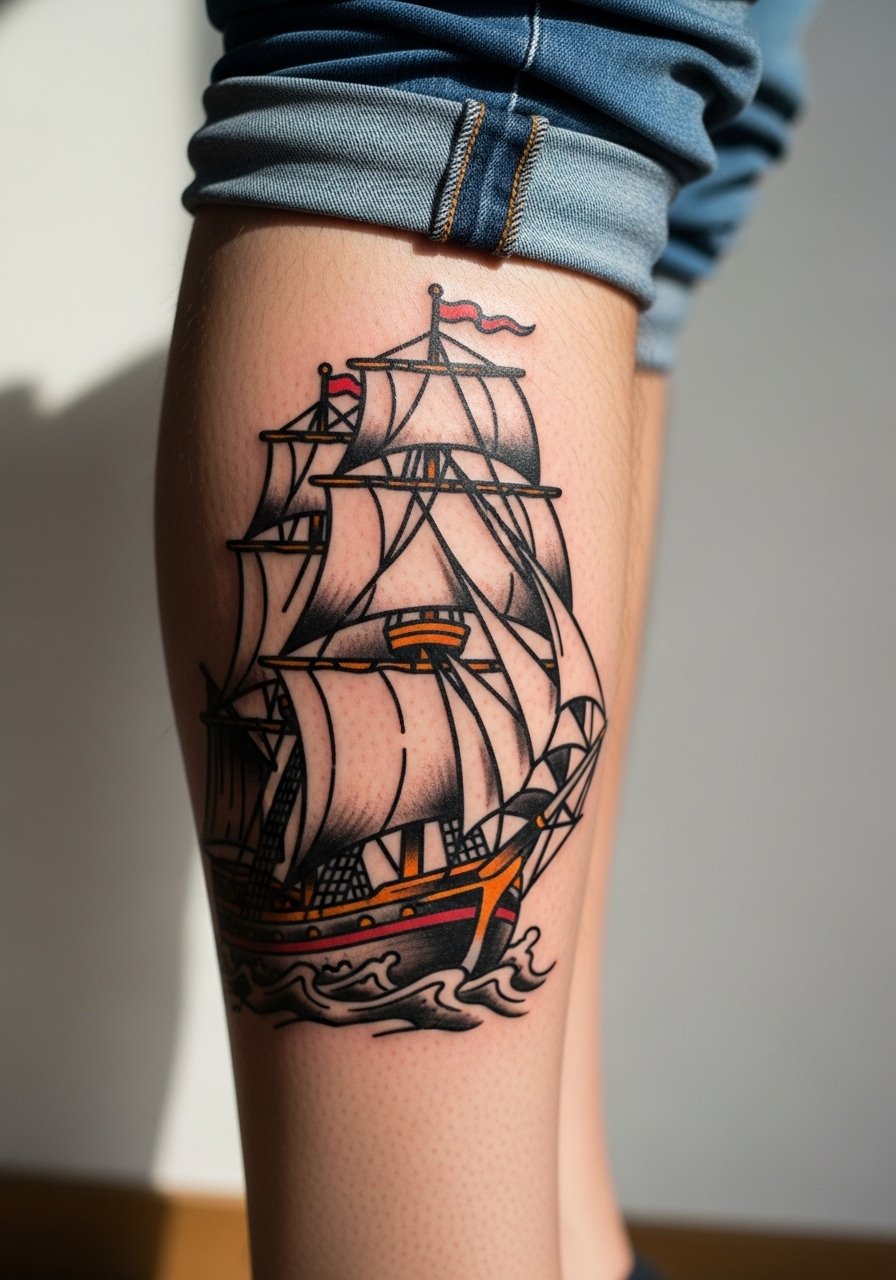
A classic ship composes well on the calf because the vertical form echoes the mast and hull. Tell your artist to plan for bold horizon lines and large sails rather than tiny waves. The calf tolerates touch-ups easily and usually needs a single session of 90 to 150 minutes for a medium piece. A common error is cramming detail into the sails, which softens into gray areas after a few years. Pair this with rolled jeans and a pair of ankle boots so the art sits in frame when you walk.
6. Panther Head on Shoulder Blade
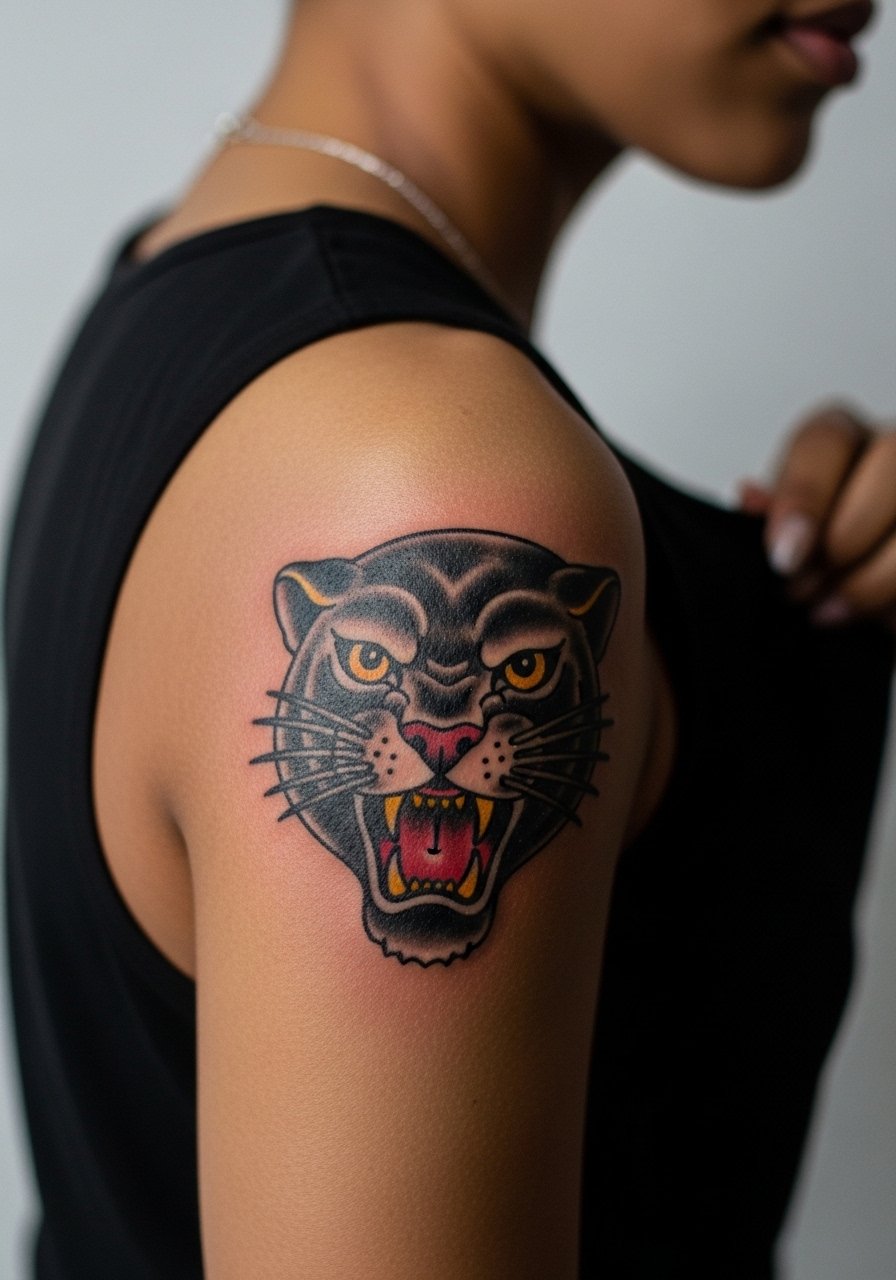
A bold panther reads well on the shoulder blade and benefits from strong contrast and saturated black. Ask for extra spacing around the whiskers and jaw so those features do not bleed into shaded fills. The shoulder blade can be a twitchy spot during the session depending on how you sit, so expect a one- to two-hour appointment and moderate pain. One pitfall is tiny dot shading in facial details that turns into a muddy patch. For style, a tank top shows the full silhouette without competing with neckline features.
Studio Day Picks
The forearm, calf, and shoulder pieces above have different prep and first-week needs, so a few targeted items make the session and healing window easier.
-
Stencil transfer paper kit. Lets you preview placement on skin so the panther and anchor line up with muscle flow.
-
Topical numbing cream. Applied before the appointment for calf or thigh work eases the edge without affecting visible linework.
-
Thin protective film roll. Useful for forearm and shoulder pieces that rub against clothing during the first few days.
-
Fragrance-free body wash. Cleans healing skin without stripping pigments from bold traditional fills.
-
Aquaphor healing ointment. Thin layer for initial skin recovery helps keep saturated color from scabbing heavily on high-coverage pieces.
7. Traditional Pin-Up Bust on Ribcage
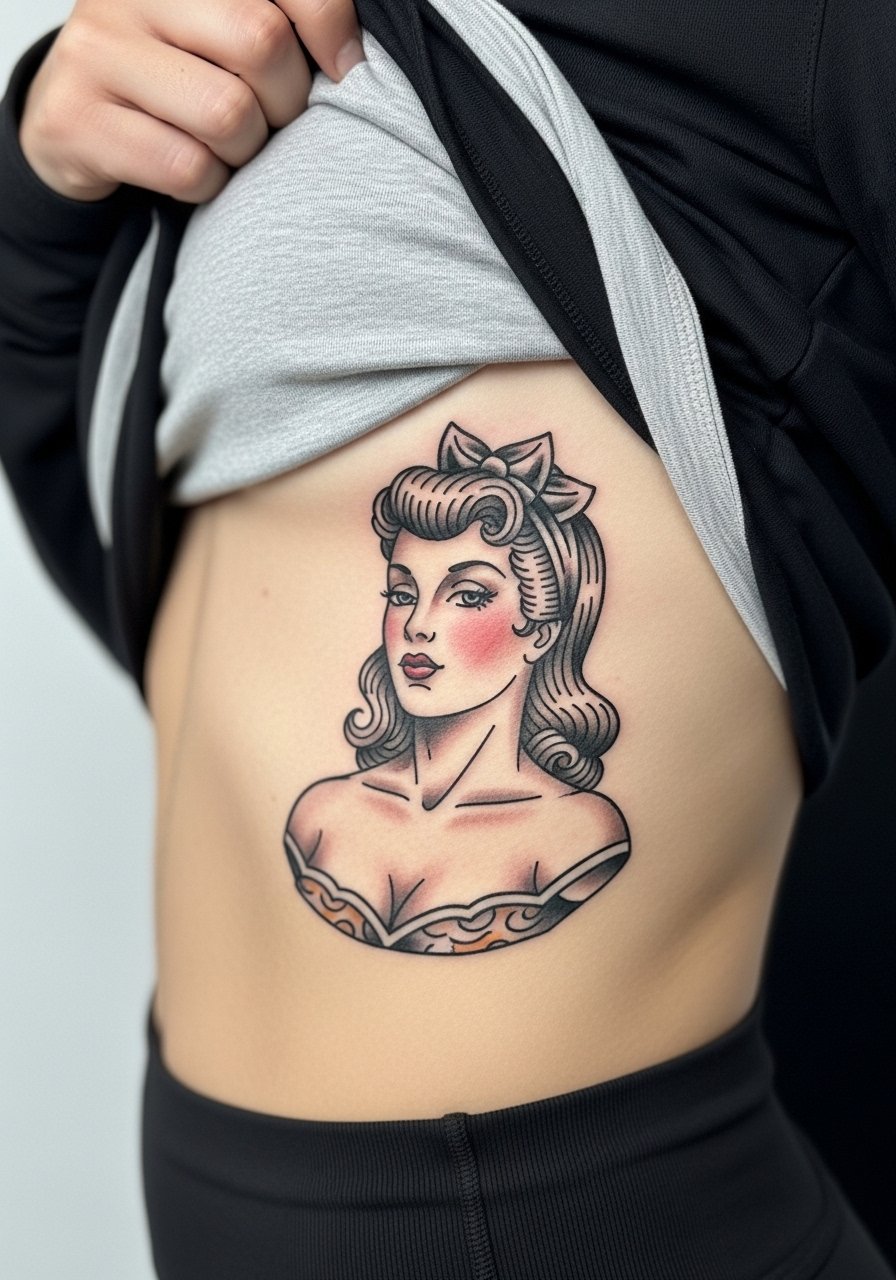
Ribcage pieces carry more pain and movement, so scale matters. Artists are split on fine detail here. One camp says dense detail blurs because the skin stretches and shifts. The other camp says with deliberate spacing and confident needle depth, ribs can hold surprising detail. If you want a pin-up, ask for bolder outlines and simplified shading to avoid future loss of facial features. Sessions can be long and stop-start because of comfort, and touch-ups at year two are common for highly detailed rib work. For modest access during the appointment, wear a cropped athletic top.
8. Pair of Swallows on the Collarbone
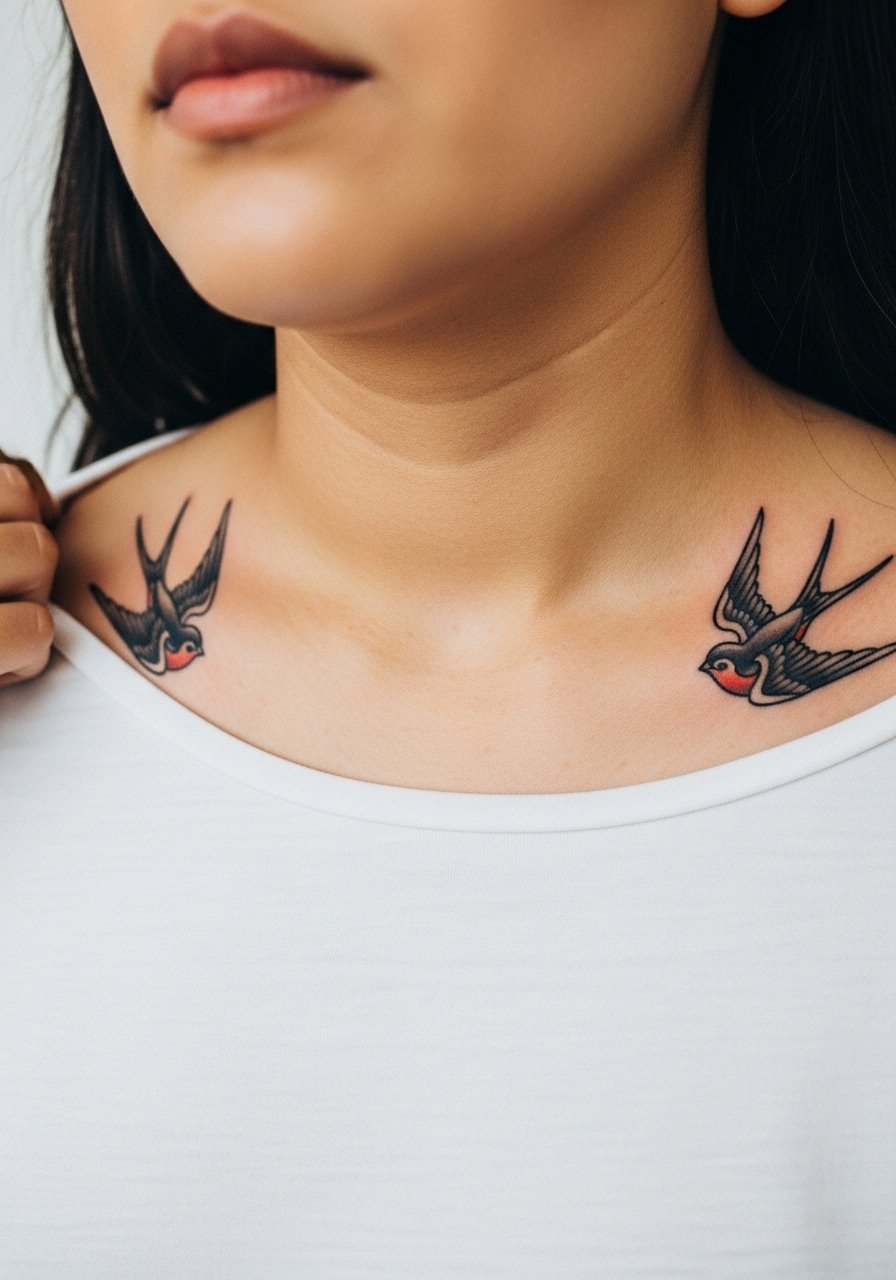
Collarbone swallows are iconic and ideal for symmetry lovers. Tell your artist you want mirrored spacing and to avoid tiny feather detail that will gray into the surrounding skin. The collarbone is somewhere between mild and moderate on the pain scale, and a pair usually fits into a single session under 90 minutes. A real mistake is centering both birds too close to the neckline where clothing friction will wear the pigment faster. For evenings out, an open-back midi dress or wide-neck top frames the birds without covering the art.
9. Nautical Star on Ankle

Ankle stars are small statements that age depending on edge thickness and foot friction. Ask your artist for slightly thicker star points so the geometry survives constant movement and shoe rubbing. The ankle has higher friction from socks and shoes, so expect touch-ups sooner than on the calf. Pain is moderate because of thinner tissue. For showing the piece, sandals or sneakers with the pant leg rolled work well, and I recommend trying a pair of ankle sandals that keep the tattoo visible.
10. Classic Skull and Rose on Upper Bicep

The upper bicep is forgiving and keeps contrast for motifs that mix black and color. For this combo, request strong black saturation in the skull and bold red fills in the rose. A mistake is adding too much tiny cross-hatching inside the skull, which softens into gray after a few years. Expect a one- to two-hour session and mild to moderate pain. This placement responds well to rolled sleeves or short-sleeve tees when you want to show off the composition.
11. Mermaid on Lower Back
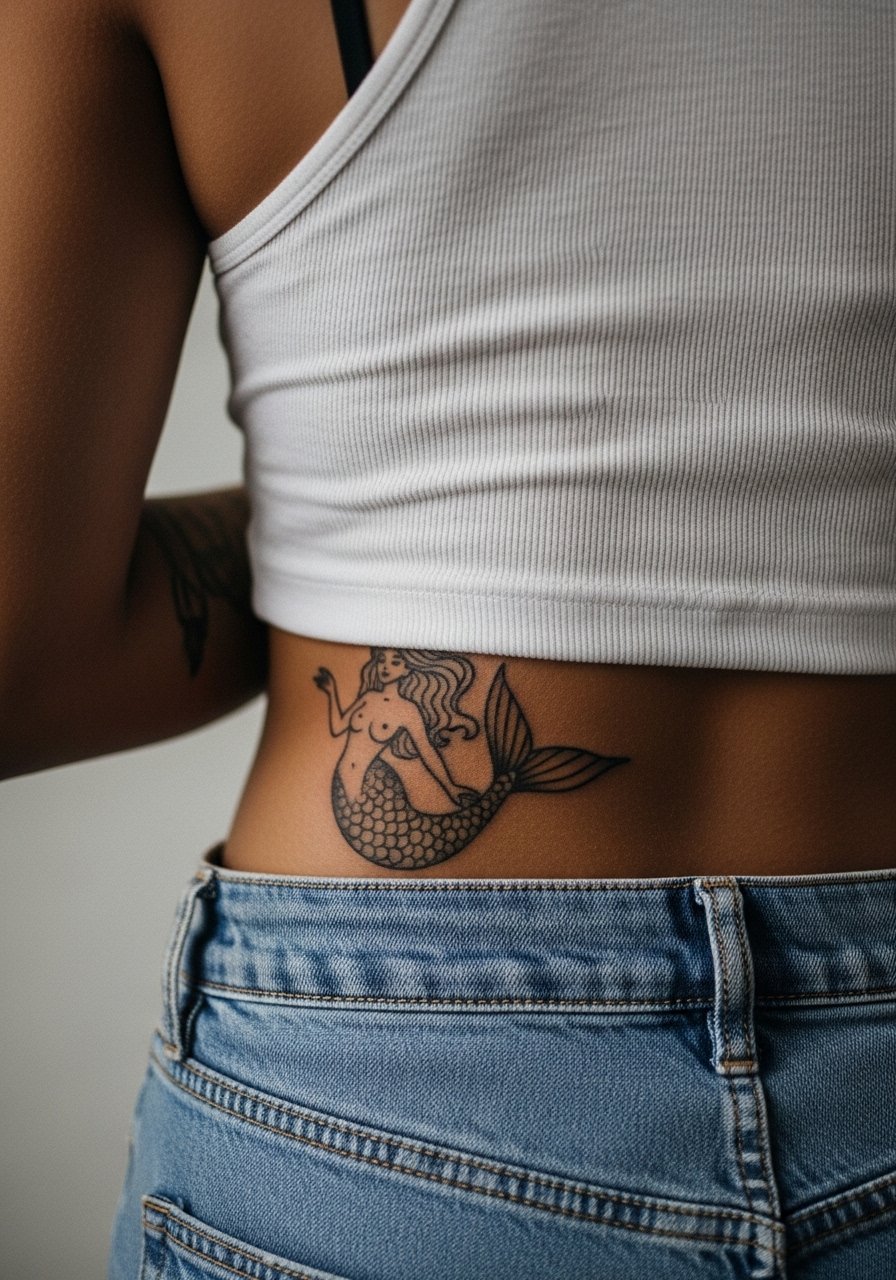
Lower back pieces handle wide scenes well because the canvas is relatively flat and protected from sun. Request broad areas of flat color and limit tiny stipple shading so the tail and hair maintain definition over time. The lower back can be finicky during healing because clothing waistlines sit nearby, so plan wardrobe that avoids constant friction. Sessions vary by size, commonly one to three hours. Many people like to pair this area with low-rise or high-waisted bottoms that either reveal or hide the art depending on the occasion.
12. Compass and Rope on Inner Forearm
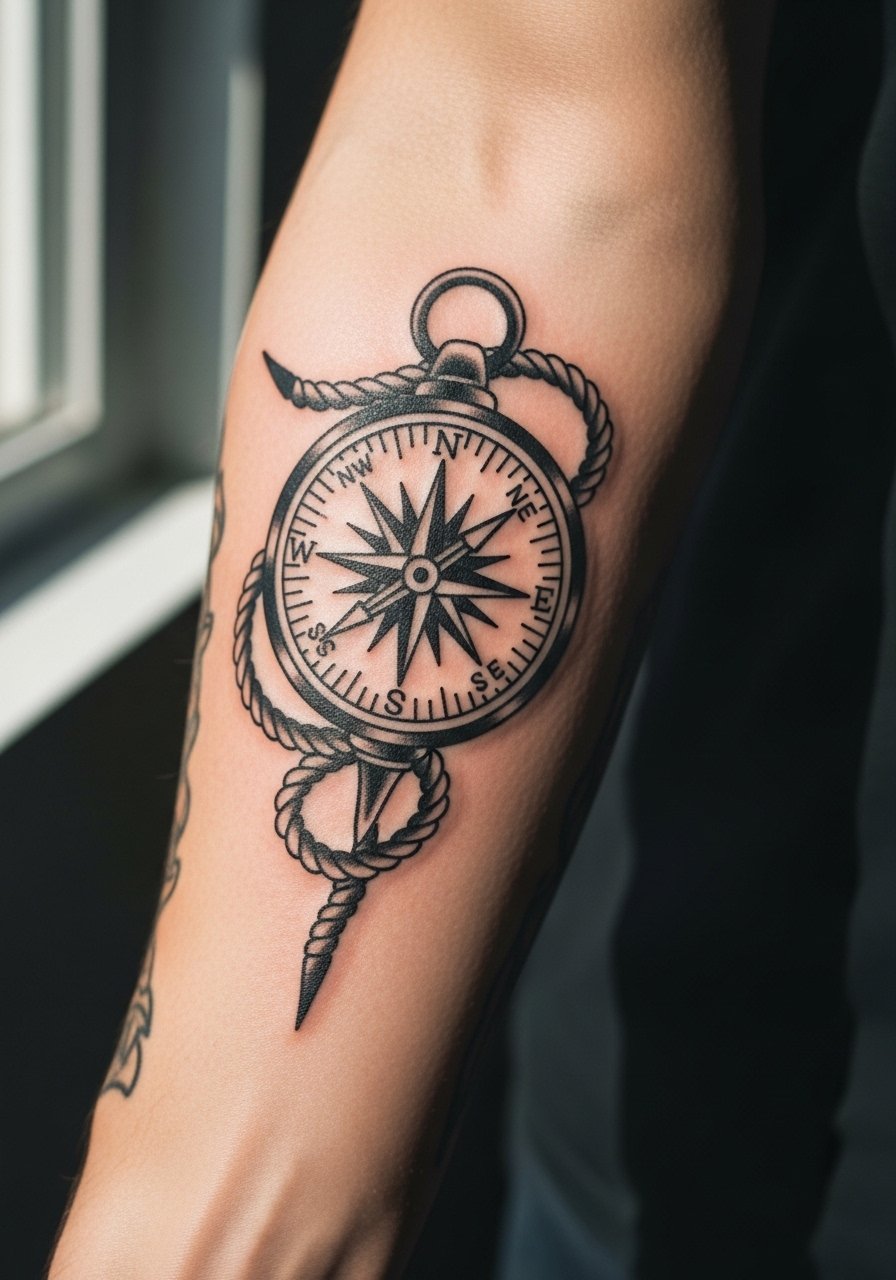
The inner forearm is excellent for designs that need readable detail because the skin there is stable and rarely stretched. Ask for clear, open negative space around the compass face so numerals or points do not blur. A common mistake is cramming too many tiny marks into the compass dial. Expect one to two hours and light to moderate pain. This placement pairs well with rolled sleeves and a minimalist watch, like a minimalist watch that frames the art without crowding the wrist.
13. Heart with Banner on Sternum
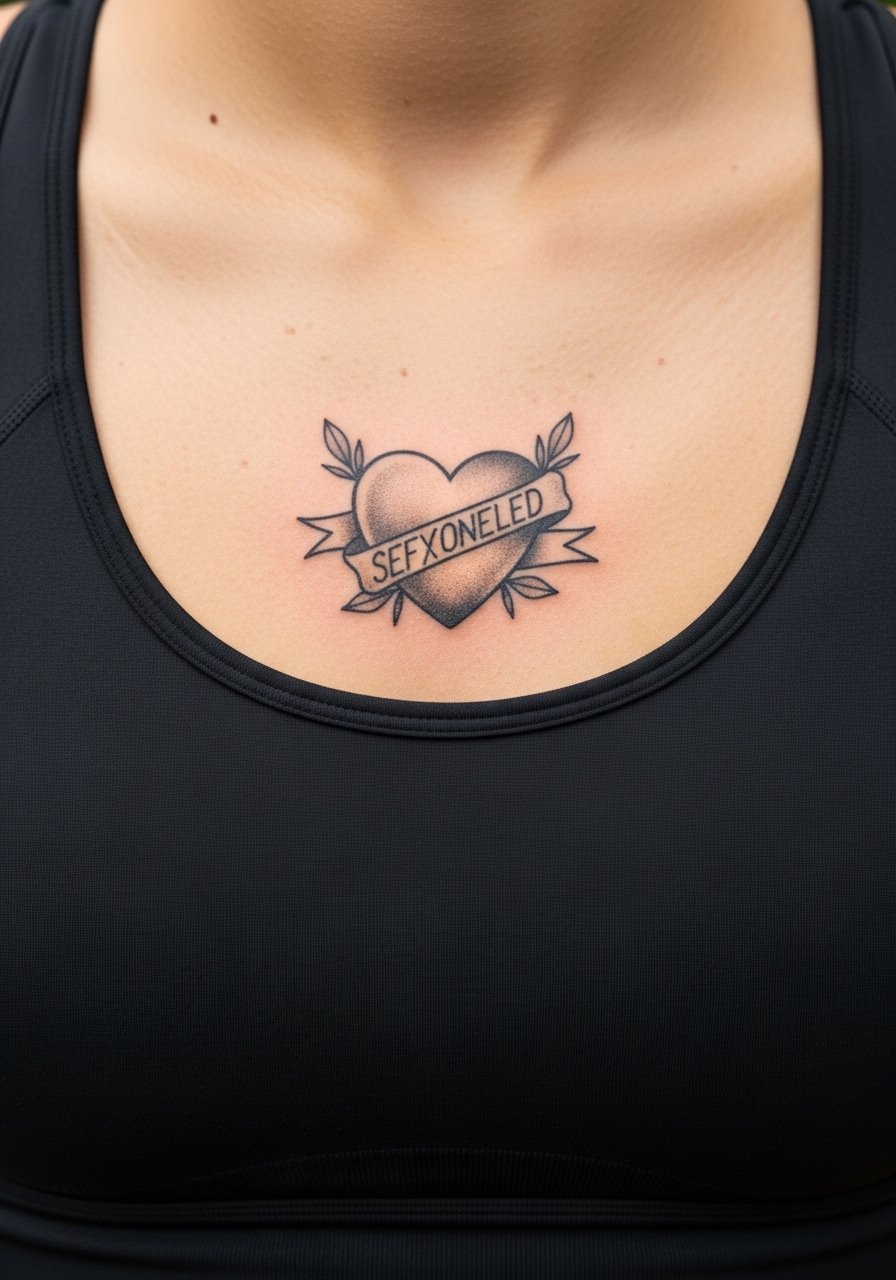
Sternum pieces demand careful conversation about scale and anchor points. The center chest moves with breathing and creates a unique wear pattern. Some artists worry about lettering on the sternum because thin script can fragment. The safer route is bold letters in a short phrase. Pain is higher here, and sessions can be stop-start. For access, a fitted sports bra or bandeau is the easiest way to expose just the sternum area during the appointment. Expect touch-ups sooner if you favor delicate script.
14. Lighthouse Scene on Outer Calf
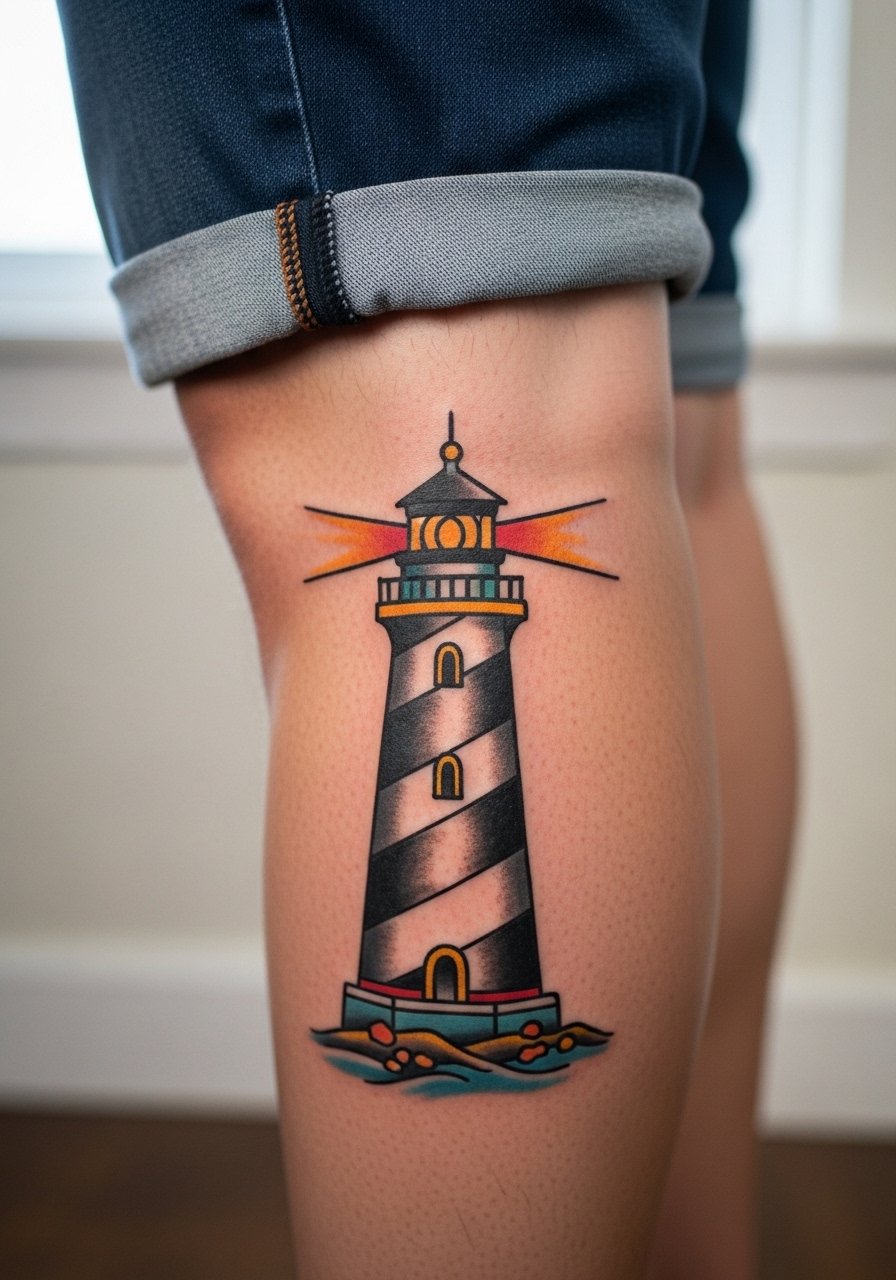
Lighthouses make striking vertical compositions that suit the calf. Request clear separation between the light beam and background wash to avoid the beam turning into a gray blur later. The calf tolerates pigment well and usually ages with minimal distortion. Sessions often last 90 minutes for a medium scene. A mistake is using soft watercolor-like fills inside the beam for a style that should be bold. For casual display, wear shorts or loose drawstring linen pants that can roll up without irritating the site.
15. Sparrow on the Wrist
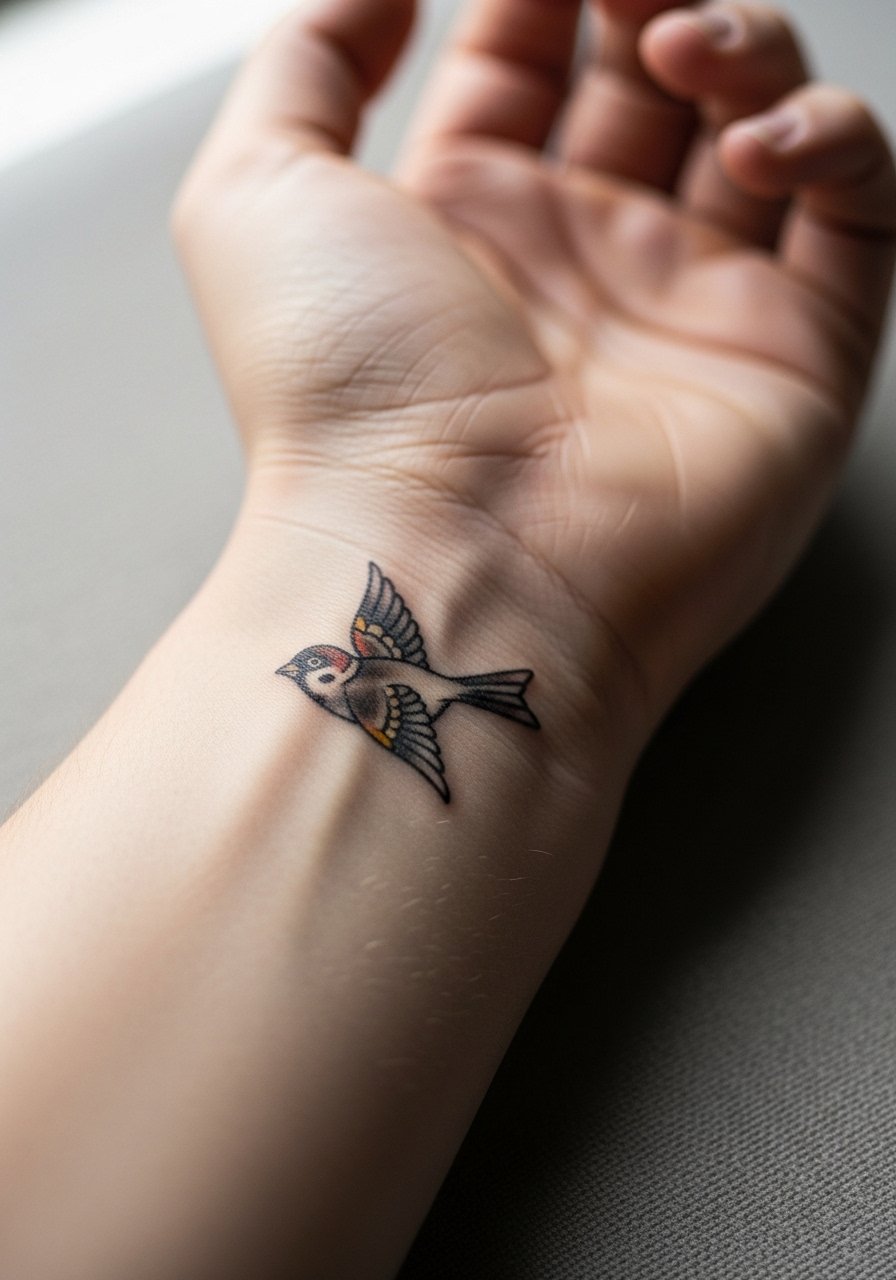
Wrist sparrows read well but live in a high-motion and high-wash zone, so scale and outline thickness matter. Ask for a slightly thicker outline and minimal internal detail to keep the shape readable after daily handwashing. One camp argues wrist pieces fade fast because of constant washing and sun. The other says durable linework and touch-ups fix the issue. Plan for touch-ups at year one or two. For showing the wrist, a thin chain bracelet works well, and a thin chain pendant necklace can balance the look without covering the art.
16. Snake Wrapped Dagger on Inner Bicep
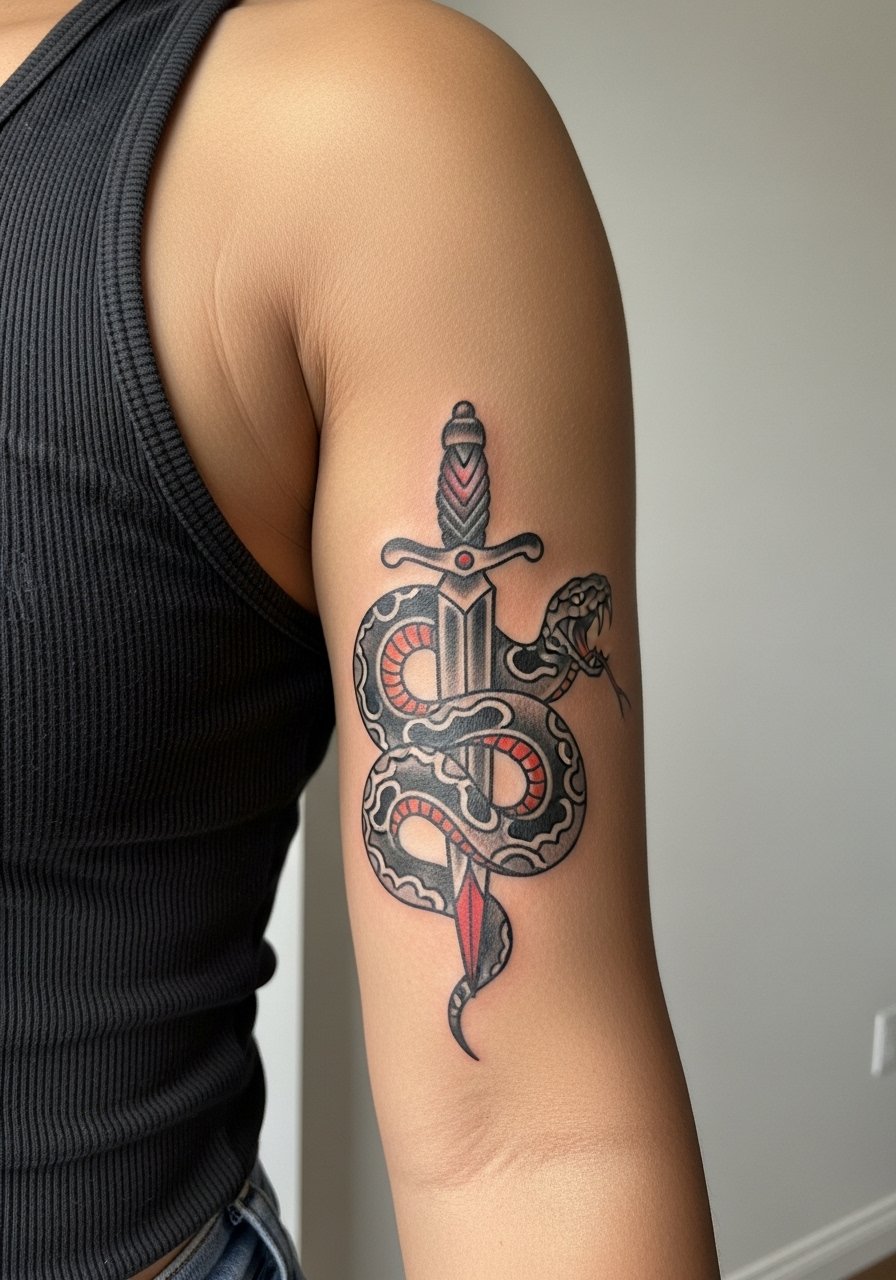
The inner bicep can be tender and subject to rubbing during daily movement. For a snake-and-dagger, ask for clear negative space between the coils and dagger so outlines remain distinct. A common mistake is layering stipple and thin shading in the same small area, which turns into a muddy tone. Sessions can be uncomfortable because of the skin's sensitivity, so expect breaks and a slightly longer appointment. The inner bicep benefits from a relaxed sleeve or tank during the session.
17. Anchor and Rose Sleeve Accent on Upper Arm

Mixing a small anchor and rose into a partial sleeve is a way to get classic motifs with cohesion. Tell your artist you want consistent line weight across elements so the sleeve reads as a single piece rather than a collage. The mistake I see is matching flash pieces with wildly different line thicknesses. Expect multiple shorter sessions rather than one long marathon to maintain saturation and healing quality. Sleeves age predictably if you avoid tiny filler details and keep color blocks broad.
18. Mermaid Thigh Panel
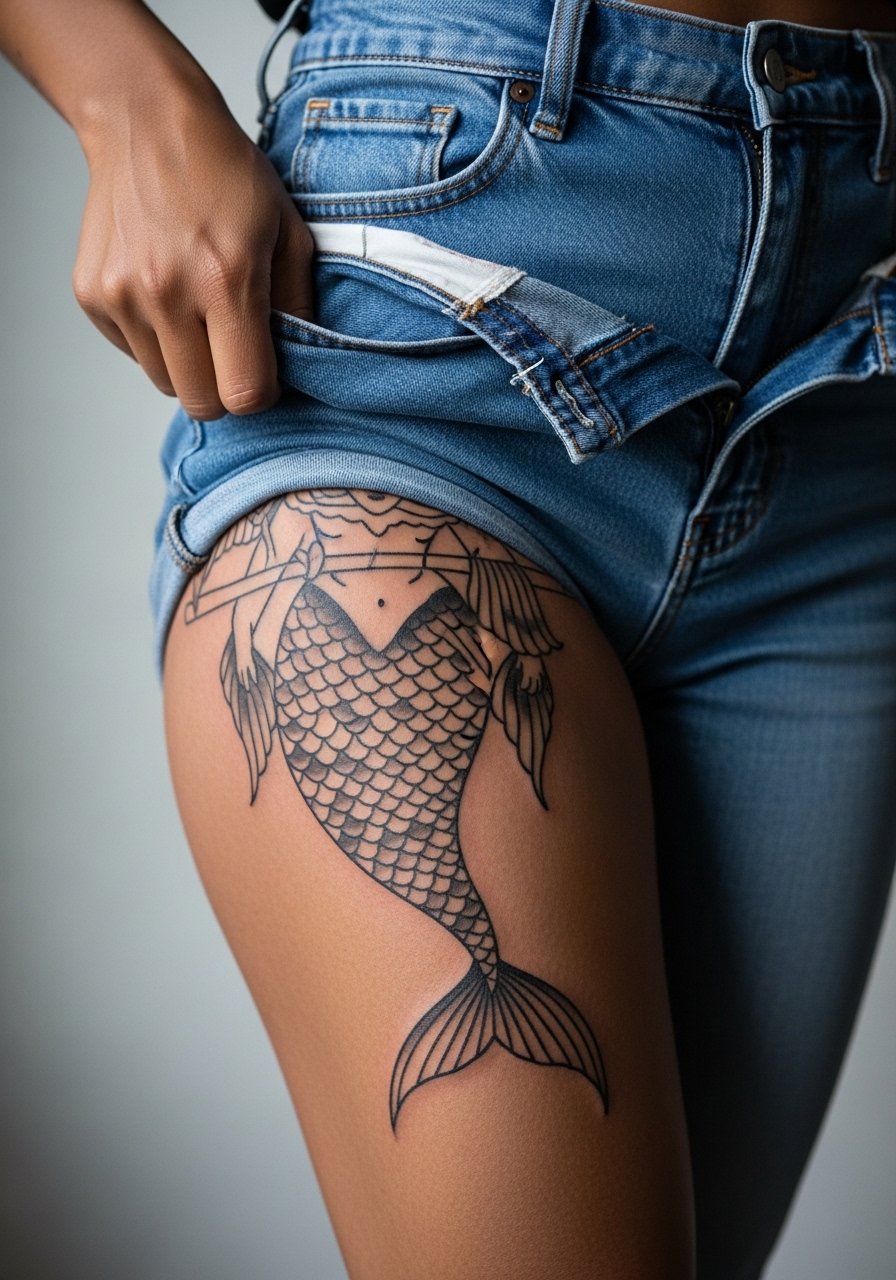
A thigh panel holds up because the area is less exposed to sun and friction. For mermaid work, suggest bold hair shapes and clear tail scales rather than tiny linework that can merge. Thigh sessions are comfortable for longer sittings, though deeper shading can sting more. The common error is trying to cram tiny stars or dots into open water areas, which become indistinct. For the appointment, wear adjustable bottoms so the artist has room to work without pulling at the garment.
19. Traditional Banner Script on Upper Chest

Banner script across the upper chest makes a clear statement when executed with thick enough letterforms. Thin script on the chest can fragment as the skin moves, so request blockier lettering if longevity is the goal. The chest moves with breathing and torso changes, so expect a moderate pain and plan for a one-hour session for short phrases. Avoid overly ornate lettering for this placement unless you are committed to regular touch-ups.
20. Sailor Girl on Upper Arm
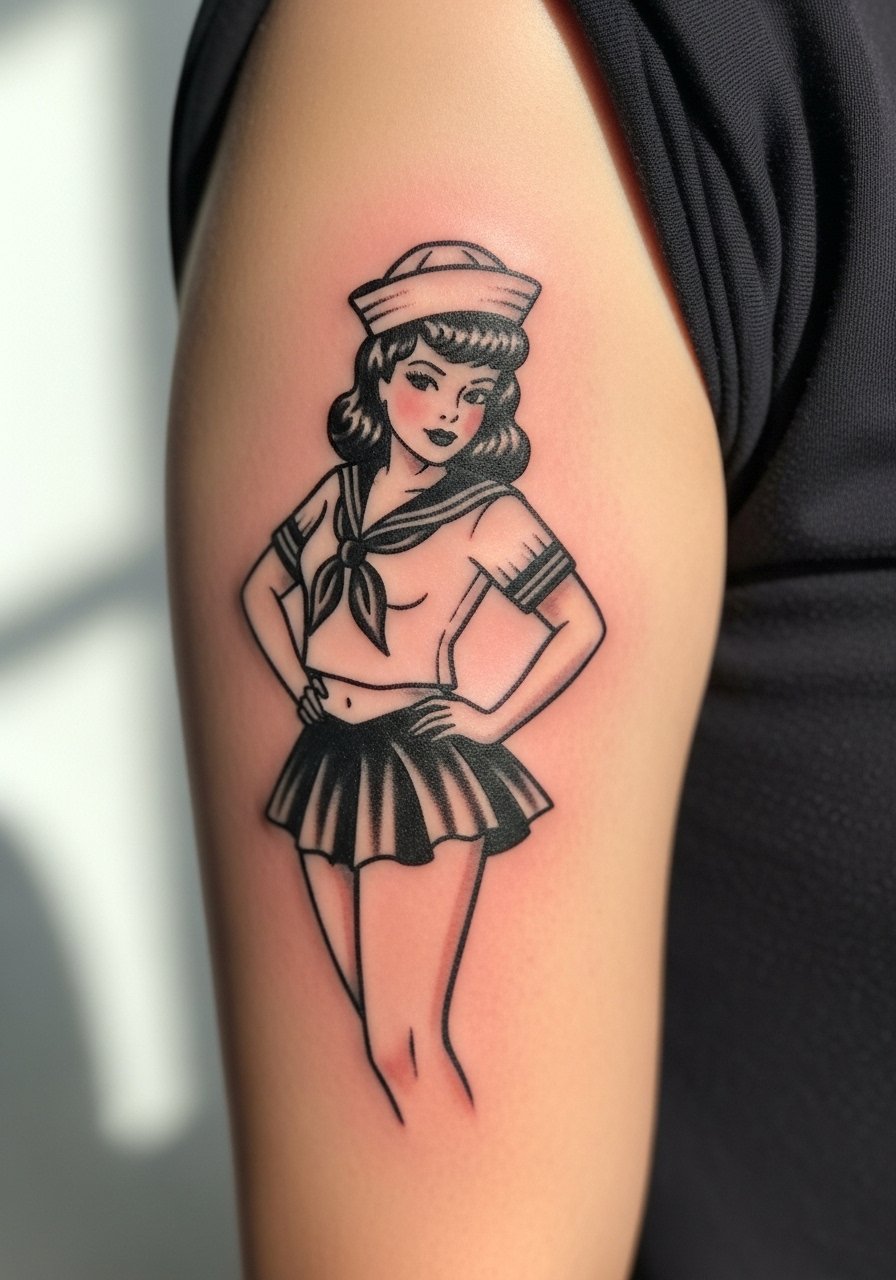
Pin-up sailor girls are a signature old school motif that ages best when features are simplified. Ask for stylized facial shapes and strong hair blocks so the face does not lose expression over time. The upper arm is an easy spot for healing and usually needs a single session of moderate length. A frequent misstep is tiny eyelash or lip detail that becomes a blur later. For wardrobe, short sleeves or rolled sleeves frame this kind of piece well.
21. Lighthouse and Compass Pair on Back of Calf
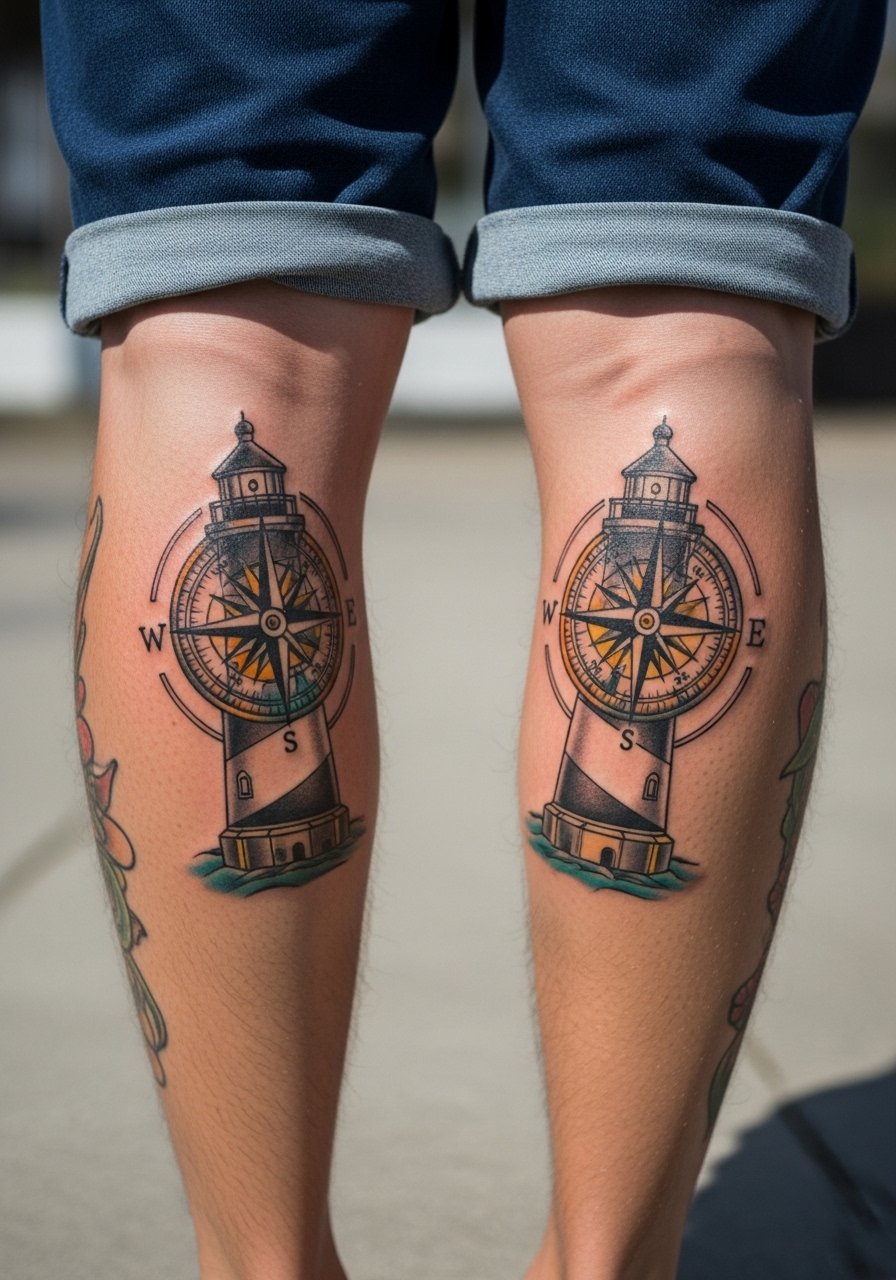
A back-of-calf pairing creates narrative flow for nautical themes and tends to age consistently because of low sun exposure. Request prominent negative space between the two motifs to maintain separation as the skin settles. Overcrowding the scene with tiny waves or dots is the common mistake that reduces readability. Sessions usually run one to two hours depending on size. For display, shorts or mid-length skirts that allow the calf to show work best.
Frequently Asked Questions
Q: How often should I expect touch-ups for old school work on hands, wrists, or fingers?
A: Hands, wrists, and fingers see the most wear from washing and friction, so plan for touch-ups sooner than on protected areas. In my experience many people need a touch-up within one to three years, depending on how bold the original linework was and how often the area is exposed to sun and soaps.
Q: Can a traditional piece with heavy saturation be covered or blended later if I want a different style?
A: Heavy saturation makes cover-ups more challenging but not impossible. Bold black fills can be worked into new compositions or partially softened with layered color. If you think you might change styles later, discuss cover-up pathways during the consultation so the artist can avoid choices that close off future options.
Q: Are ribcage and sternum tattoos practical if I do a lot of fitness or weight training?
A: These areas change with muscle development and weight shifts, which can affect how the design sits. If your routine involves frequent mass changes, ask the artist to avoid tiny facial or script detail and instead use bolder outlines and more open space. That approach holds up better through body changes.
Q: Will old school color fade faster than blackwork, and does UV protection really matter?
A: Color does fade faster in direct sun because pigments break down under UV. Blackwork tends to remain readable longer because of contrast. I have noticed UV protection is the single most consistent factor people control for longevity, so applying sunscreen after healing is important.
Q: What should I wear to a session for a sternum or ribcage piece if I want easy access and modesty?
A: Choose a fitted sports bra or a wide-neck shirt that you can adjust so the artist can reach the area without full exposure. A fitted sports bra is often the easiest option because it provides coverage while giving clear access to the sternum or ribs.
